

Introduction
CSV (comma separated values) is one of the most popular formats for datasets used in machine learning and data science. MS Excel can be used for basic manipulation of data in CSV format. We often need to execute complex SQL queries on CSV files, which is not possible with MS Excel. See this article for what is possible with Power BI.
However, before we can execute complex SQL queries on CSV files, we need to convert CSV files to data tables.
There are many methods of converting CSV data into a database table format. One of the ways is to create a new table and copy all the data from the CSV file to the table. However, copy and pasting data can be extremely cumbersome and time-consuming if the dataset is very large.
Another way is to write a script that reads the CSV data and inserts it into the corresponding data table. This method is faster than copy-pasting but it still requires a manual script. There is a better way to achieve this if you are lucky enough to use SQL Server. In SQL Server, you can simply import and convert CSV files into data tables with a few mouse clicks using SSMS (SQL Server Management Studio).
In this article, we will see how we can import CSV data into SQL server using SSMS, convert it into data tables, and execute SQL queries on the tables that we generate.
Importing a CSV file
The file that we are going to import contains 178 records of wine information. The file can be downloaded from this Github repository. I have named the file “wine.csv”, you can give it any name.
You can import a CSV file into a specific database. Let’s first create a dummy database named ‘Bar’ and try to import the CSV file into the Bar database.
In the SSMS, execute the following script to create the database:
CREATE DATABASE Bar
Now follow these steps to import CSV file into SQL Server Management Studio. This process is valid for all different types of flat files, however for the sake of this demonstration we will use a CSV file.
Step 1: Selecting the database
The first step is to go to the Object Explorer -> [Database] -> Tasks and click the “Import Flat File …” as shown in the following figure:

Once you select the “Import Flat File …” option, you will see a new window containing brief information about how to import the flat files, as shown below:
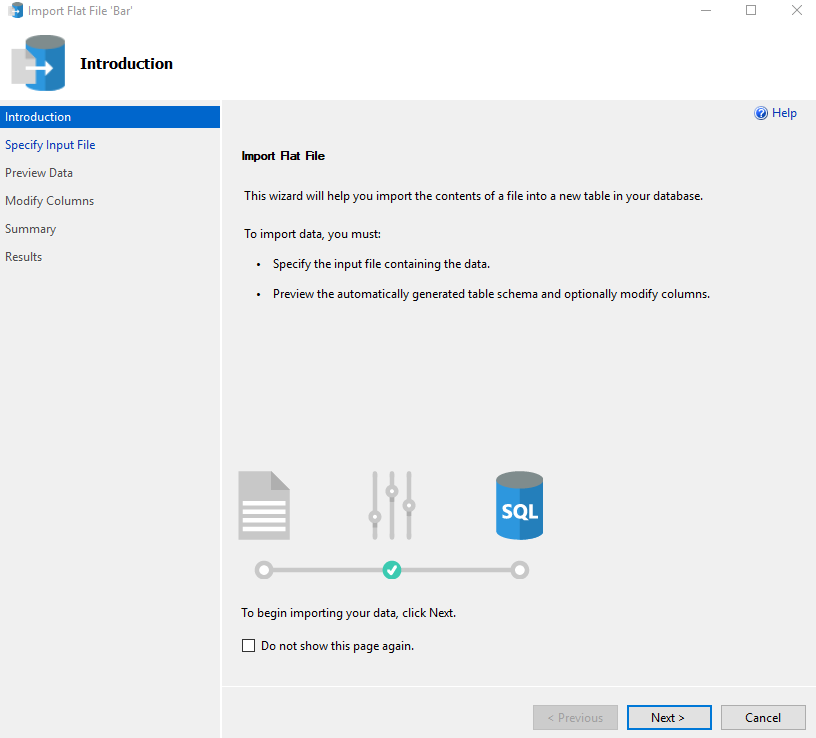
Simply click the “Next” button.
Step 2: Select the file to import
When you click the “Next” button, a window will appear, prompting you to select the file to import and to specify the corresponding table name. Select the file and enter the name that you want to give to the table that will contain data from your CSV file. I named the table as “wine” (which is the default name) as shown in the figure below:
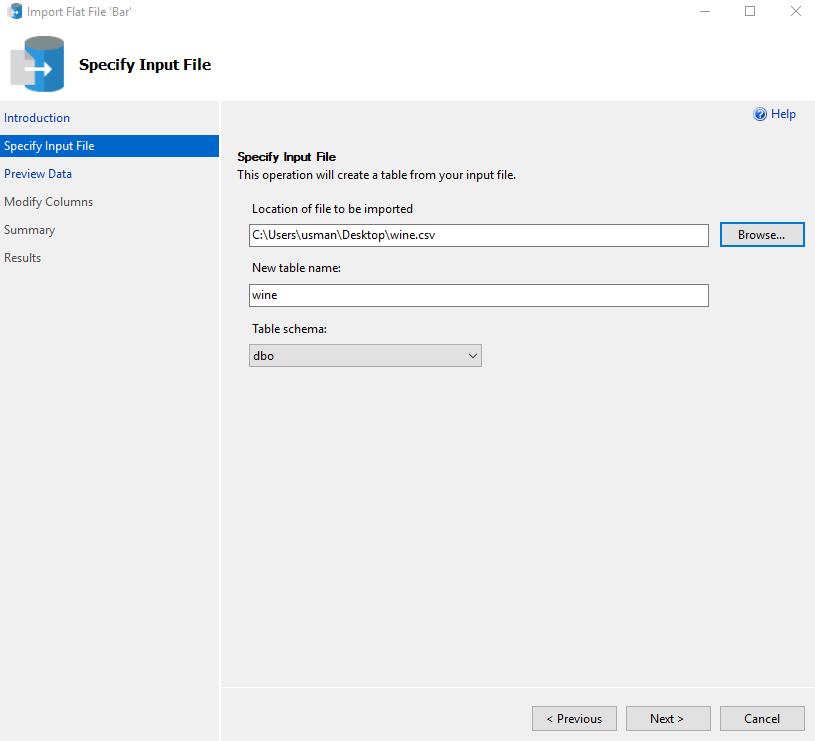
Click the “Next” button again.
If your file is already open or being used by any other application, you will see the following error:
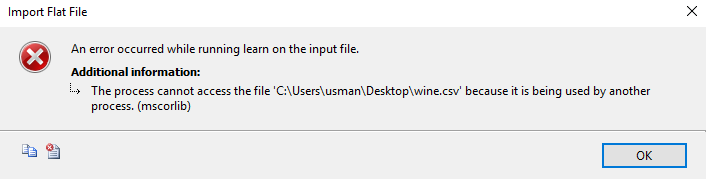
Simply close the CSV file and/or any other application that has access to the CSV file, go to the previous screen and click the “Next” button again to fix this.
Step 3: Preview the data
If your file has loaded successfully, a new window will appear containing a preview of your file, as shown in the following figure:
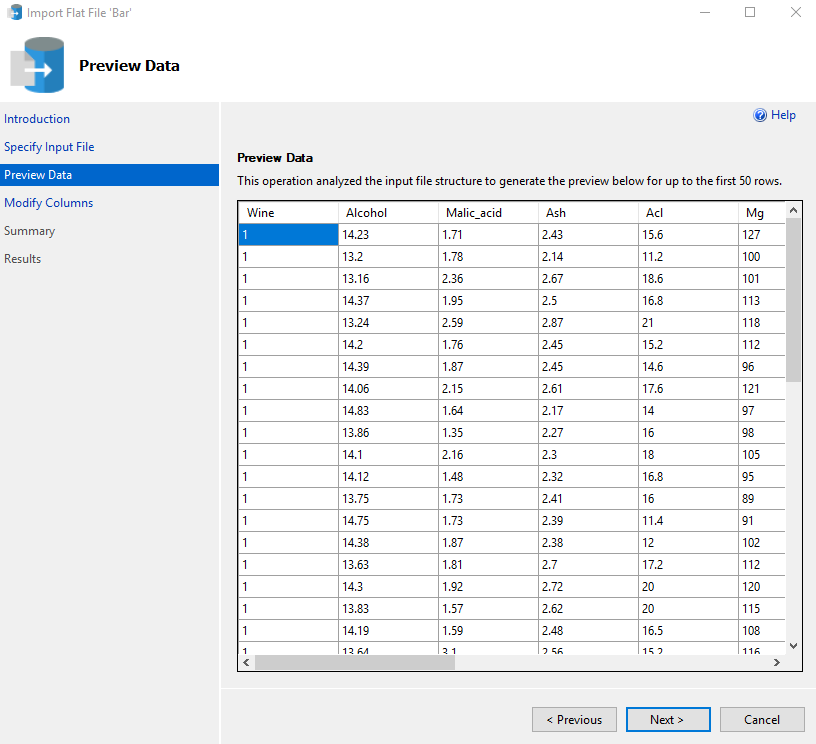
You can see that the preview contains data from our CSV file. Click the “Next” button.
Step 4: Modify columns
Once you click the “Next” button on the “Preview Data” screen, you will see the “Modify Columns” screen where you can modify the details of the columns of your table, as shown in the following screenshot:
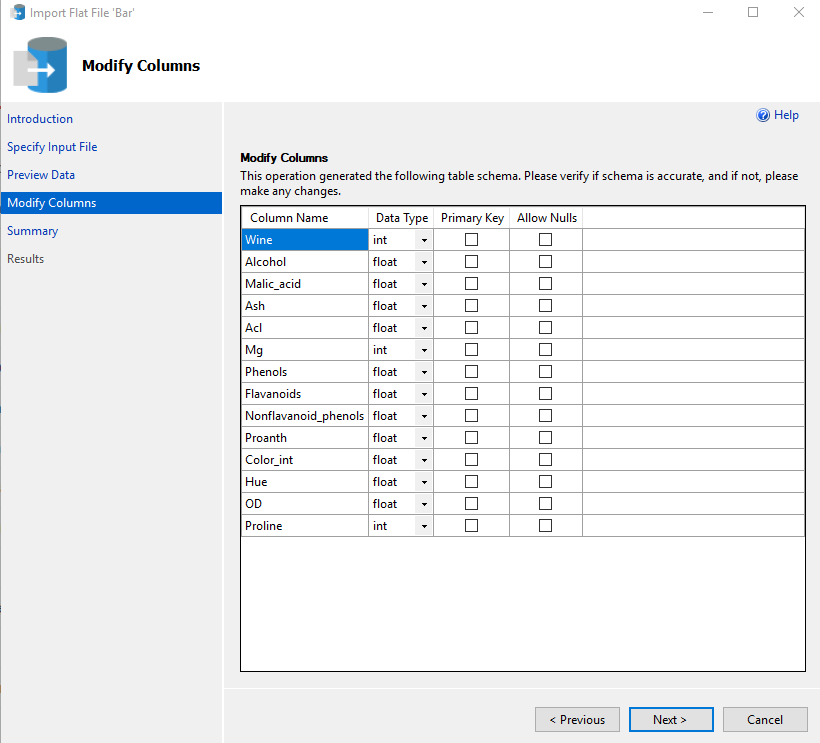
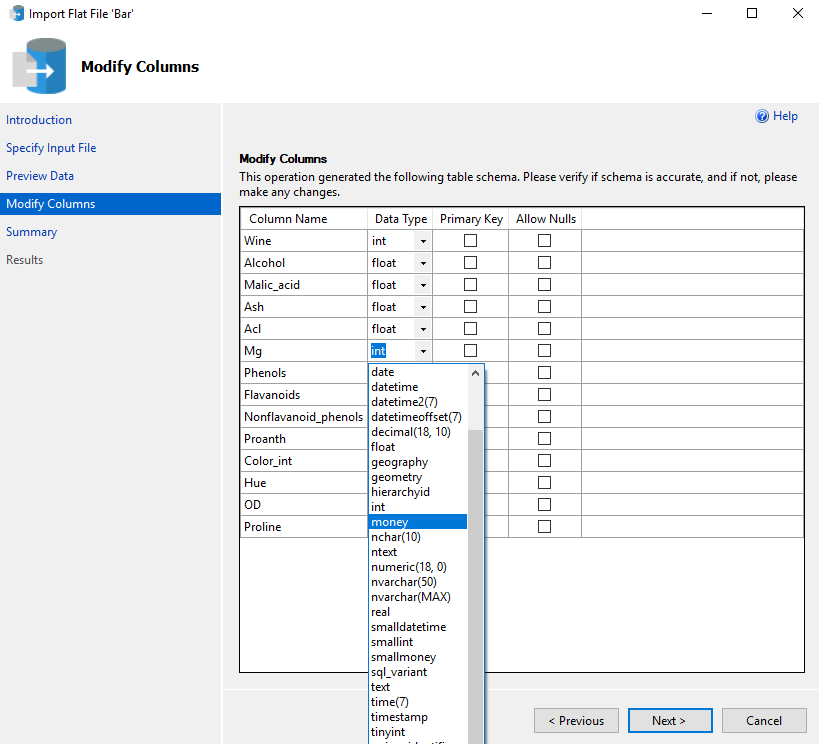
In the above figure, you can see that each column in the CSV file has been assigned a default data type. The default types should work in the most cases. However, if you want, you can change the data type by simply clicking the drop-down list in front of each column as shown below:
Furthermore, you can also set a column as the Primary key and allow Null values for any column. Once you are done with modifying the columns, click the “Next” button.
Step 5: Viewing the summary
A new window displaying the summary of the operation including the name of the Server, Database, Table and the file that is being imported will be displayed. This is shown in the following screenshot:
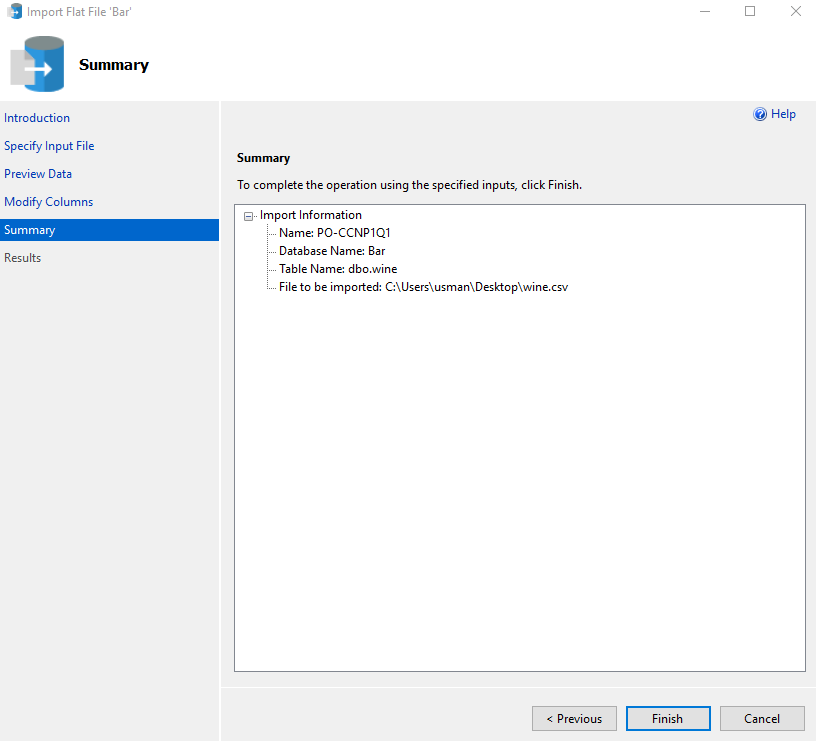
Click the “Finish” button.
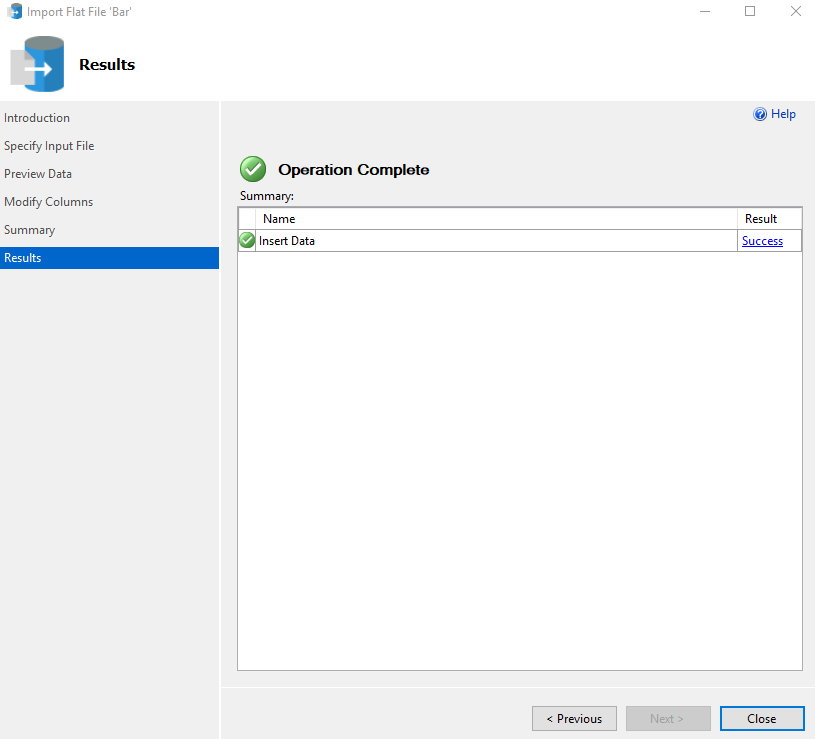
Step 6: Process completion
Depending upon the size of the file, the SQL Server will take some time to import the file. Once the file is successfully imported, without any errors, you will see the following screen:
Working with a CSV file
We have successfully imported our CSV file to our SQL Server data table. We can now execute SQL queries on this table.
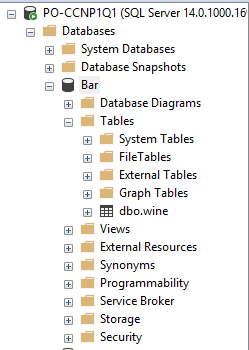
Since we imported the file into our “Bar” database in the “wine” table, the “Bar” database should contain a table named “wine”. Go to Object Explorer-> Databases -> Bar-> Tables, here you should see your data table “dbo.wine”, as shown below:
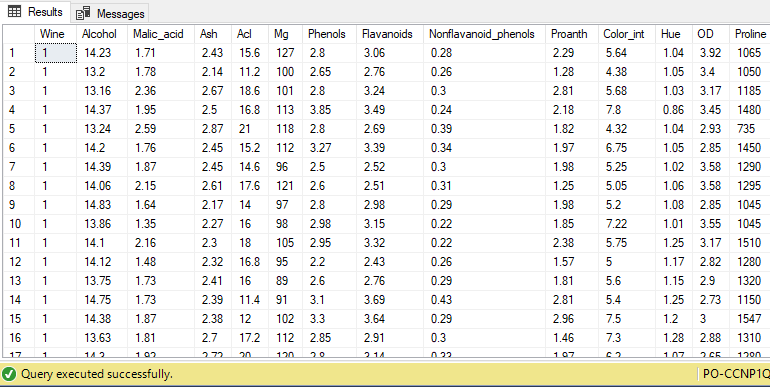
Execute the following query to SELECT all the records from the newly created “wine” table.
USE Bar
SELECT * FROM wine
The output looks like this:
Similarly, we can filter records based on the value in one more column. Let’s filter all those records where “Phenols” has a value greater than 3.5.
USE Bar
SELECT * FROM wine
WHERE Phenols > 3.5
The output looks like this:

You can see that only those records are retrieved where the value of “Phenols” column is greater than 3.5.
In short, you can perform all the operations on the imported “wine” table that you perform on any SQL table, which you create from scratch in SQL Server.
Conclusion
CSV is a very common format, especially for machine learning and data science datasets. SQL Server can be used to preprocess CSV data more effectively than MS Excel. In this article, we saw how a CSV file can be imported into SQL Server via SSMS and how basic SQL operations can be performed on the table that is created as a result of importing the CSV file.
Other great articles from Ben
| Machine Learning Services – Configuring R Services in SQL Server |
| Importing and Working with CSV Files in SQL Server |

View all posts by Ben Richardson
- Working with the SQL MIN function in SQL Server - May 12, 2022
- SQL percentage calculation examples in SQL Server - January 19, 2022
- Working with Power BI report themes - February 25, 2021