
This article explains the different methods to move tables between different filegroup of SQL databases.
We are going to learn the following scenarios:
- Moving tables with the clustered index
- Moving tables without a clustered index
We are going to move the tables by using the following methods:
- Create an index using the DROP EXISTING option as ON. This option is used when a clustered index (Primary key OR Unique Key) is defined on the table. This method is used when the table has a clustered index
- Create a new table and index on a different filegroup, copy data from the existing table and drop the old tables. This method is used when your table does not have any clustered index. This method is used when the table does not have clustered index
Environment Setup
For demonstration, I am using the Stackoverflow demo database. You can download it from this location. We want to move the largest table of the database to a different file group. To identify the top ten large tables of any database, you can run the following query.
|
1 2 3 4 5 6 7 8 9 10 11 12 13 14 15 16 17 18 19 20 |
SELECT TOP 10 Schema_name([table].schema_id) + '.' + [table].NAME AS [table name], Cast(Sum([allocationunit].used_pages * 8) / 1024.00 AS NUMERIC(36, 2)) AS [used mb], Cast(Sum([allocationunit].total_pages * 8) / 1024.00 AS NUMERIC(36, 2)) AS [allocated mb] FROM sys.tables [table] JOIN sys.indexes [index] ON [table].object_id = [index].object_id JOIN sys.partitions [partitions] ON [index].object_id = [partitions].object_id AND [index].index_id = [partitions].index_id JOIN sys.allocation_units [allocationunit] ON [partitions].partition_id = [allocationunit].container_id GROUP BY Schema_name([table].schema_id) + '.' + [table].NAME ORDER BY Sum([allocationunit].used_pages) DESC; |
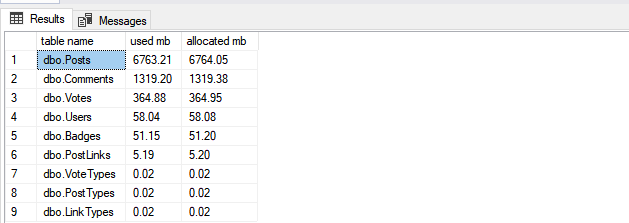
The largest table is dbo.Posts so, we will move it to the secondary filegroup.
I have created a secondary filegroup named FG_StackOverflow2010_ Posts. The data file associated with the FG_StackOverflow2010_Posts will be created in D:\StackOverflow2010_ Posts location. The file name is StackOverflow2010_Posts.ndf. The initial size will be 9032704 KB, and the Filegrowth will be 524288 KB. Run the following query to create a filegroup:
|
1 2 3 4 |
USE [master] go ALTER DATABASE [StackOverflow2010] ADD filegroup [FG_StackOverflow2010_Posts] go |
Query to create a secondary data file:
|
1 2 3 4 5 6 |
USE [master] go ALTER DATABASE [StackOverflow2010] ADD FILE ( NAME = N'StackOverflow2010_Posts', filename = N'D:\StackOverflow2010_Posts\StackOverflow2010_Posts.ndf', size = 9032704kb, filegrowth = 524288kb ) TO filegroup [FG_StackOverflow2010_Posts] go |
You can view the list of file groups and their files by running the below query:
|
1 2 3 4 5 6 7 8 9 |
USE [master] go SELECT fg.NAME AS [File Group Name], sdf.NAME AS [Data File Name], physical_name AS [Data file location], size / 128 AS [File Size in MB] FROM sys.database_files sdf INNER JOIN sys.filegroups fg ON sdf.data_space_id = fg.data_space_id |

We are transferring the table named dbo.Posts to filegroup named FG_StackOverflow2010_Posts. First, let us understand how to move the table to the secondary filegroup named by re-creating the clustered index.
Move table that has clustered index
The leaf nodes of the clustered index contain the actual data; therefore, moving the clustered index will copy the data to another filegroup. The table dbo.Posts have a clustered index named IDX_Posts_ID. This index is in the Primary filegroup. Now, we will run the create index statement with the option. The following query creates the index in FG_StackOverflow2010_Posts.
|
1 2 3 |
USE [Stackoverflow2010] go CREATE CLUSTERED INDEX idx_posts_id ON [dbo].[Posts] ([id]) WITH (drop_existing = ON); |
Now, verify the table has been moved or not. The following query provides the list of tables with their filegroup.
|
1 2 3 4 5 6 7 8 9 10 11 12 13 14 |
USE [Stackoverflow2010] go SELECT [objects].[name] AS TableName, [index].[name] AS IndexName, [filegroup].[name] AS FileGroupName FROM sys.indexes [index] INNER JOIN sys.filegroups [filegroup] ON [index].data_space_id = [filegroup].data_space_id INNER JOIN sys.all_objects [objects] ON [index].[object_id] = [objects].[object_id] WHERE [index].data_space_id = [filegroup].data_space_id AND [filegroup].NAME <> 'PRIMARY' AND [objects].type = 'U' AND [objects].NAME = 'Posts' |

Alternatively, you can view the filegroup of the table in table properties of the SQL database. Right-click on dbo.Posts 🡪 Select Properties 🡪 In the properties dialog box, click on Storage.
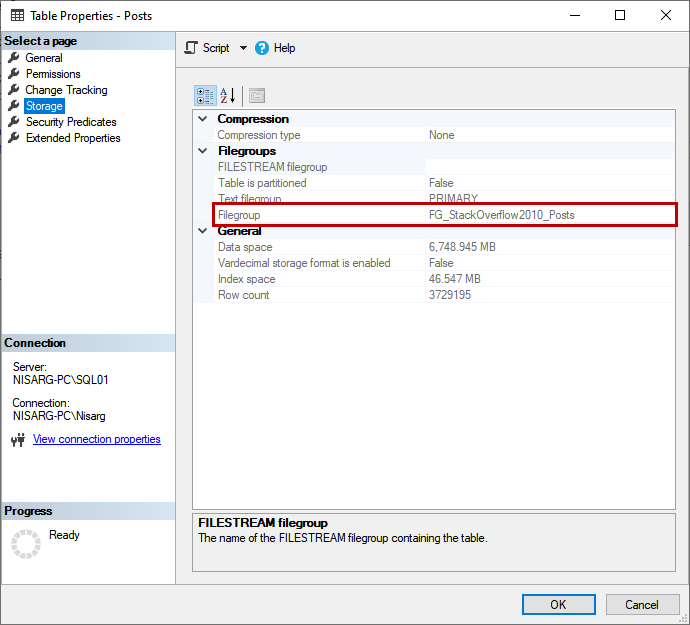
As you can see, the table has been moved to FG_StackOverflow2010_ Posts.
Move the table that has a non-clustered index
To move the table without a clustered index, we can use the following steps:
- Create a new destination table and index in the secondary filegroup using the definition of the source table. The index and table names must be different
- Use SQL Server import-export wizard to copy the data between the tables
First, Extract the definition of the table. To do that, Right-click on dbo.Posts table🡪 Select Script Table as option 🡪 Select New Query editor window.
Now, create a new table named dbo.Posts_New in FG_StackOverflow2010_ Posts filegroup using an extracted definition.
|
1 2 3 4 5 6 7 8 9 10 11 12 13 14 15 16 17 18 19 20 21 22 23 24 25 26 27 28 29 30 |
USE [StackOverflow2010] go CREATE TABLE [dbo].[posts_new] ( [id] [INT] IDENTITY(1, 1) NOT NULL, [acceptedanswerid] [INT] NULL, [answercount] [INT] NULL, [body] [NVARCHAR](max) NOT NULL, [closeddate] [DATETIME] NULL, [commentcount] [INT] NULL, [communityowneddate] [DATETIME] NULL, [creationdate] [DATETIME] NOT NULL, [favoritecount] [INT] NULL, [lastactivitydate] [DATETIME] NOT NULL, [lasteditdate] [DATETIME] NULL, [lasteditordisplayname] [NVARCHAR](40) NULL, [lasteditoruserid] [INT] NULL, [owneruserid] [INT] NULL, [parentid] [INT] NULL, [posttypeid] [INT] NOT NULL, [score] [INT] NOT NULL, [tags] [NVARCHAR](150) NULL, [title] [NVARCHAR](250) NULL, [viewcount] [INT] NOT NULL, CONSTRAINT [PK_Posts__Id_New] PRIMARY KEY NONCLUSTERED ( [id] ASC )ON [FG_StackOverflow2010_Posts] ) ON [PRIMARY] textimage_on [PRIMARY] go |
Once a table is created, launch SQL Server import export wizard. The first screen provides information about the wizard, so you can skip it.
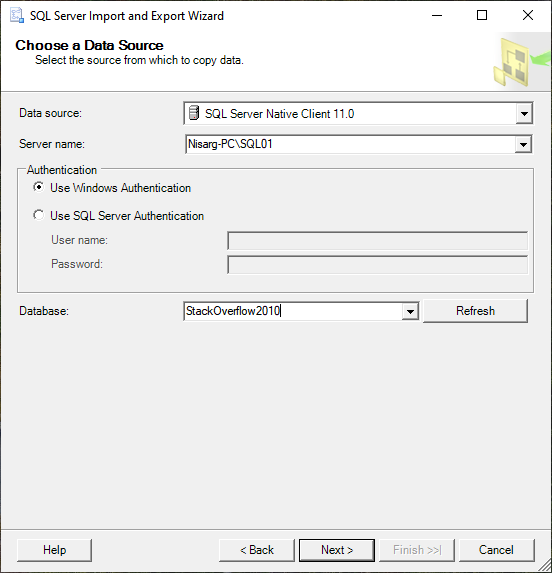
On Choose Data Source screen, specify the following options:
- Data Source: Specify the appropriate data source; I have selected SQL Server Native Client 11.0
- Server Name: Either specify (Local), or you can specify Server Name\Instance Name. I have selected Nisarg-PC\SQL01
- Authentication: Specify the authentication method. I have selected Windows Authentication
- Database: Specify the source database name. I have selected StackOverFlow2010
The selected options look like the following screenshot. Click Next.
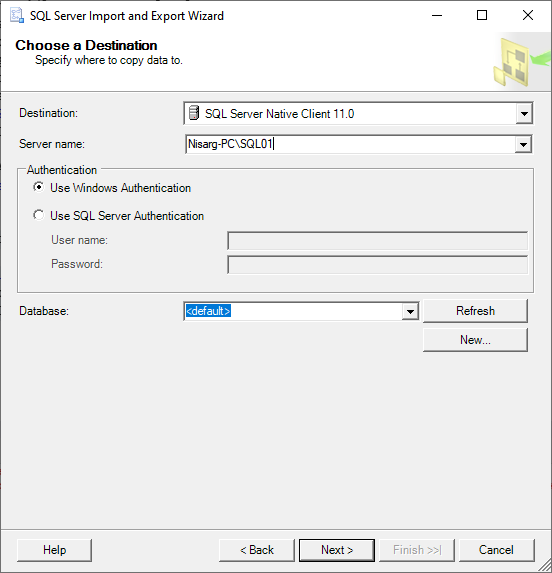
We are copying data on different tables of the same SQL Database, so on the Choose a Destination screen, I have selected the same options that I have selected in Choose the Source screen. Click Next.
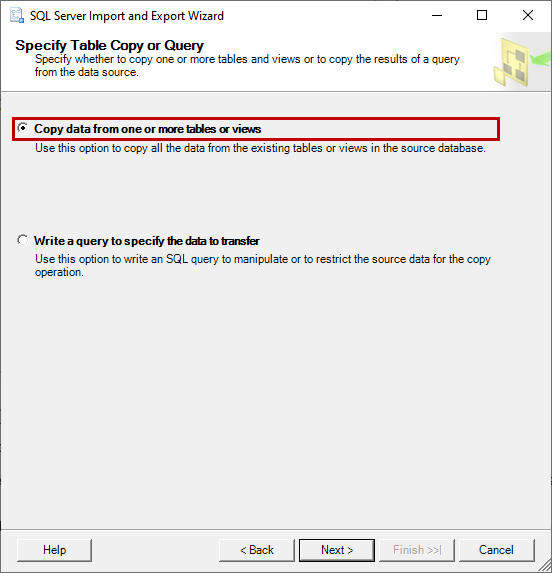
On the specified table Copy or Query screen, we can choose the following option:
- Copy data from one or more tables or views: This option is used to copy the entire data of the source table to a destination table
- Write a query to specify data to transfer: This option is used to copy the specific data from one or multiple tables
In our demo, I have selected Copy data from one or more tables or view options.
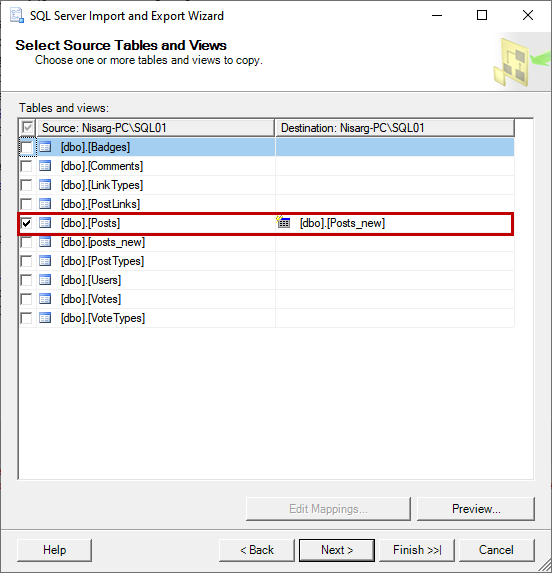
On Select Source Tables and Views screen, you can select the source and destination tables and views. We are moving dbo.Posts table; therefore, select checkbox on dbo.Posts table in Source column and select dbo.Posts_New in the destination column. Click Finish.
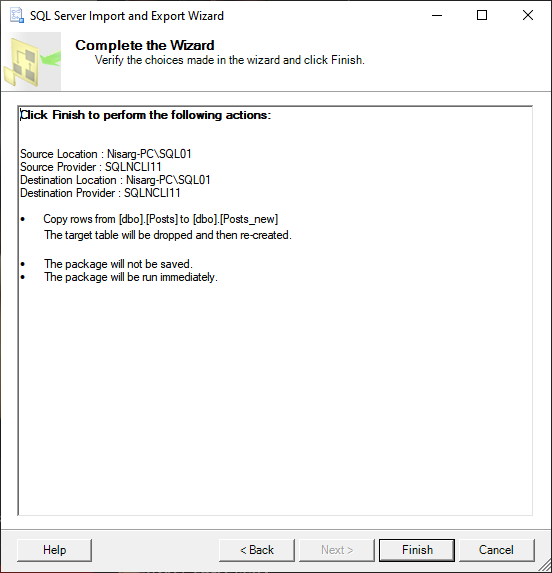
On the Complete the Wizard screen, you can see the tasks that the wizard will perform. Click on Finish.
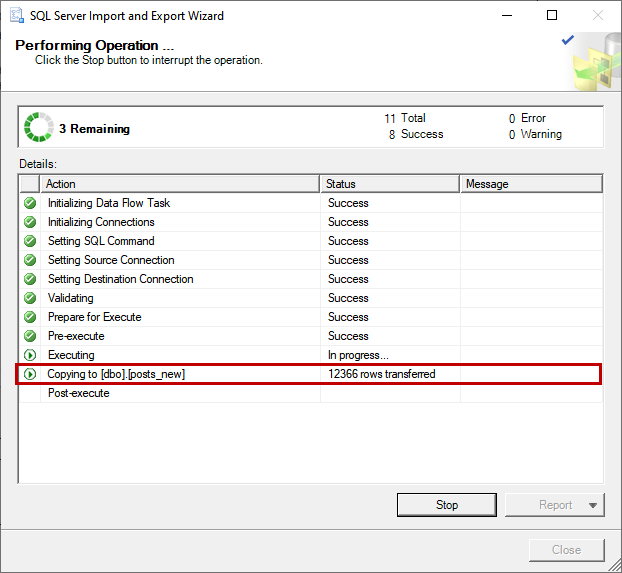
The import-export process begins.
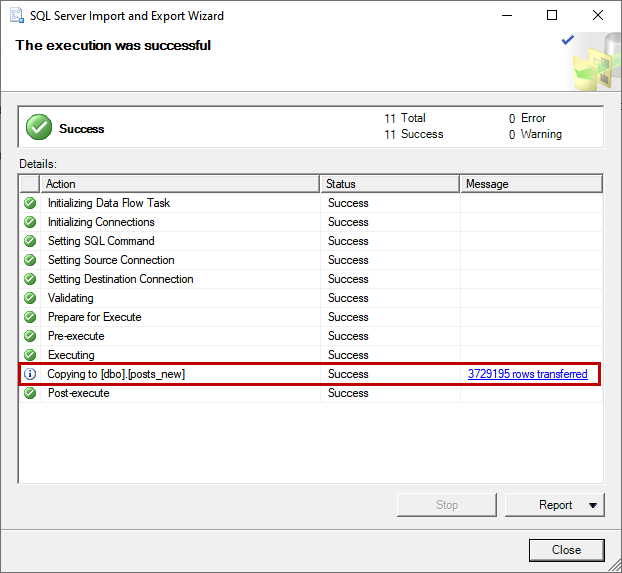
The process has been completed successfully.
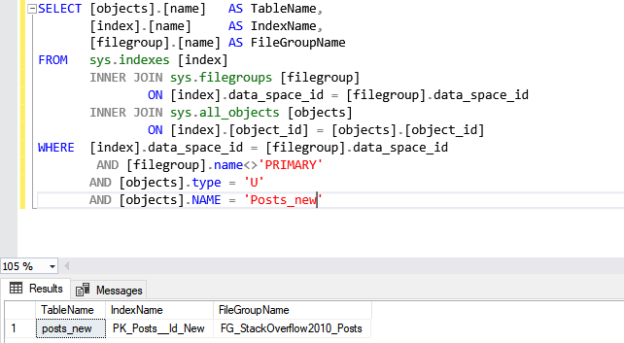
Once it is completed, let us verify that the table has been moved or not.
|
1 2 3 4 5 6 7 8 9 10 11 12 |
SELECT [objects].[name] AS TableName, [index].[name] AS IndexName, [filegroup].[name] AS FileGroupName FROM sys.indexes [index] INNER JOIN sys.filegroups [filegroup] ON [index].data_space_id = [filegroup].data_space_id INNER JOIN sys.all_objects [objects] ON [index].[object_id] = [objects].[object_id] WHERE [index].data_space_id = [filegroup].data_space_id AND [filegroup].NAME <> 'PRIMARY' AND [objects].type = 'U' AND [objects].NAME = 'Posts_new' |

Now, rename the source and destination tables and drop the source tables from the SQL Database by running the below query.
|
1 2 3 4 5 6 7 8 9 10 11 12 13 14 15 16 |
USE stackoverflow2010 go EXEC Sp_rename 'PK_Posts__id', 'PK_Posts__id_old' go EXEC Sp_rename 'PK_Posts__Id_New', 'PK_Posts__Id' go EXEC Sp_rename 'Posts', 'Posts_old' go EXEC Sp_rename 'Posts_New', 'Posts' go DROP TABLE posts_old go |
Summary
In this article, we learned how to move the table between the filegroup of the SQL database. We have learned the following methods:
- Moving tables with the clustered index. In this method, we learned how we could re-create the index with the DROP EXISTING option
- Moving tables with the non-clustered index. In this method, we learned SQL Server import-export method to copy tables

He has expertise in database design, performance tuning, backup and recovery, HA and DR setup, database migrations and upgrades. He has completed the B.Tech from Ganpat University. He can be reached on nisargupadhyay87@outlook.com
- Different ways to identify and change compatibility levels in SQL Server - July 22, 2024
- Copy SQL Databases between Windows 10 and CentOS using SQL Server data tools - October 19, 2022
- Changing the location of FILESTREAM data files in SQL Database - October 14, 2022