
In this article, I am going to explain how we can access the data from the Azure Blob Storage using Power BI. To do that, we are going to use the below tools:
- Azure BLOB Storage account: We have uploaded the source CSV file to it
- Power Query editor: To choose the data that we want to load in the Power BI report
- Power BI Desktop: To view the data imported from the CSV file
Demo Setup
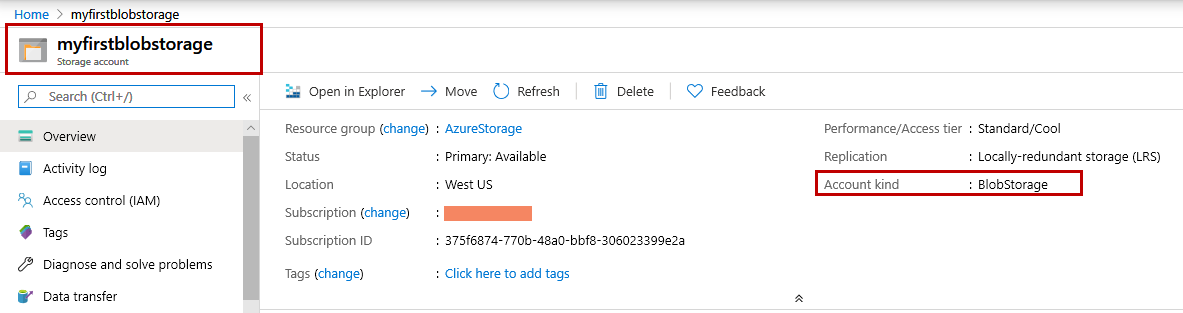
To demonstrate the process, I have created a Blob Storage account on Azure named “myfirstblobstorage”:
I have also created a container named “excelfiles” in the Azure Blob Storage account. I have uploaded a CSV (comma separated values) file named “Countryregion.csv” on the Blob Storage container. To know the process of uploading the file on Azure Blob Container, read this article.
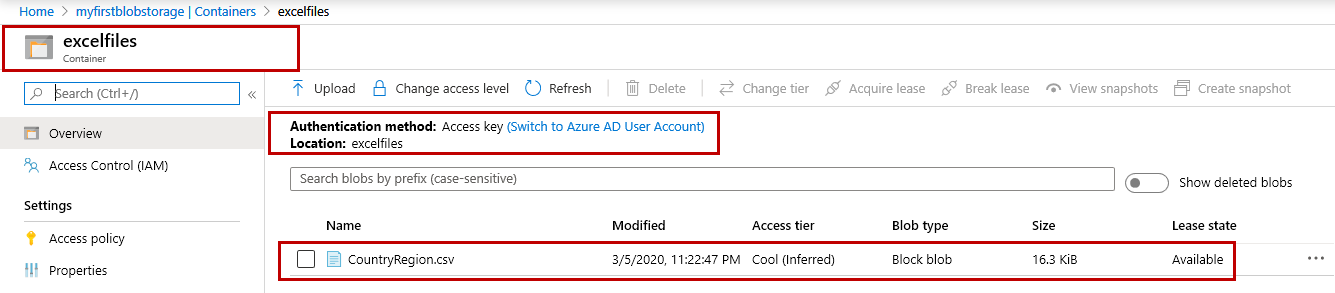
The CSV file contains the list of countries, their country codes, and create date of the record. We are going to use access keys to authenticate to the blob storage account. You can read more about accessing the blob data using the Azure portal from this article.
I am going to display the data of the CSV file in the Power BI, so I have downloaded and installed the Power BI Desktop app on my workstation. You can download and install Power BI Desktop from this location.
Connect to Azure Blob Storage
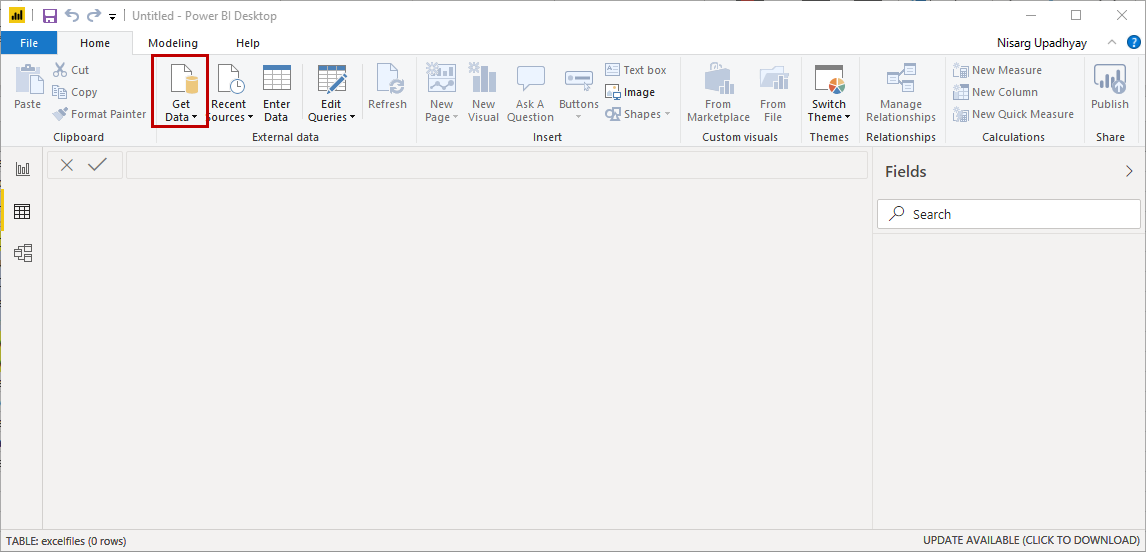
First, To import the data from the CSV file and load it into the Power BI report, we must configure the connection between Power BI and CSV file that is in Azure Blob container. To do that, first, open Power BI Desktop and click on “Get Data” from the Home ribbon:
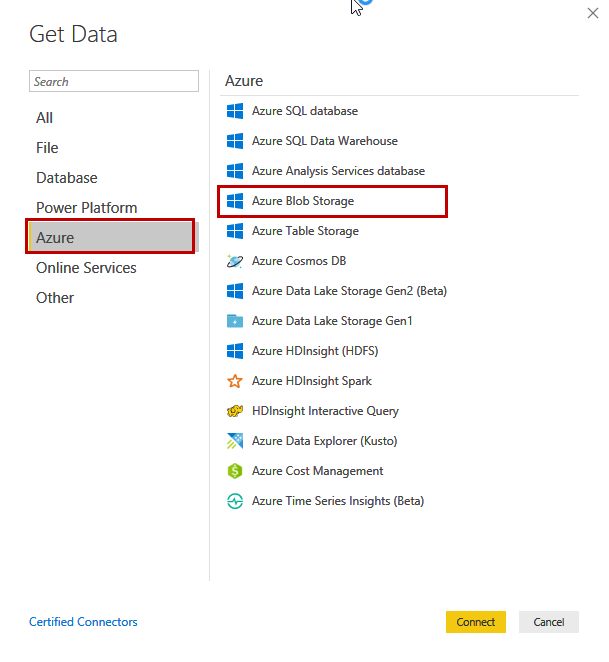
In the “Get Data” dialog box, click on Azure Select “Azure Blob Storage” and click on “Connect”:
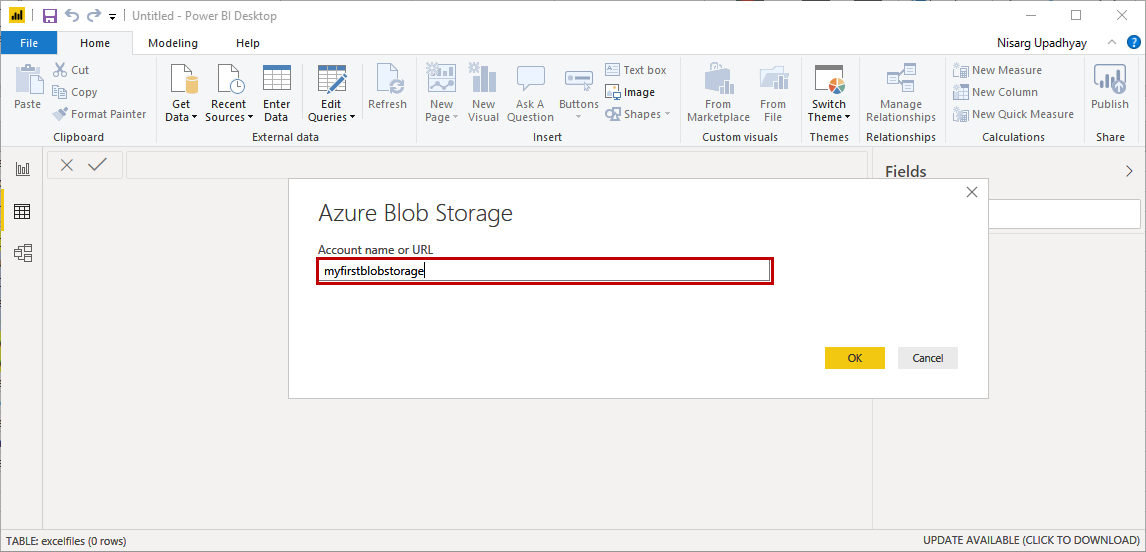
In Azure Blob storage dialog box, provide the name of Azure storage Account or the URL of the Azure storage account and click on “OK”:
Now to connect to the Azure blob from the Azure portal, we must provide an account access key. You can find this key on the “Access keys” page of the Azure blob storage account. To obtain the access key, open the home page of Azure Portal Select Azure Blob storage account (myfirstblobstorage) select “Access keys”:
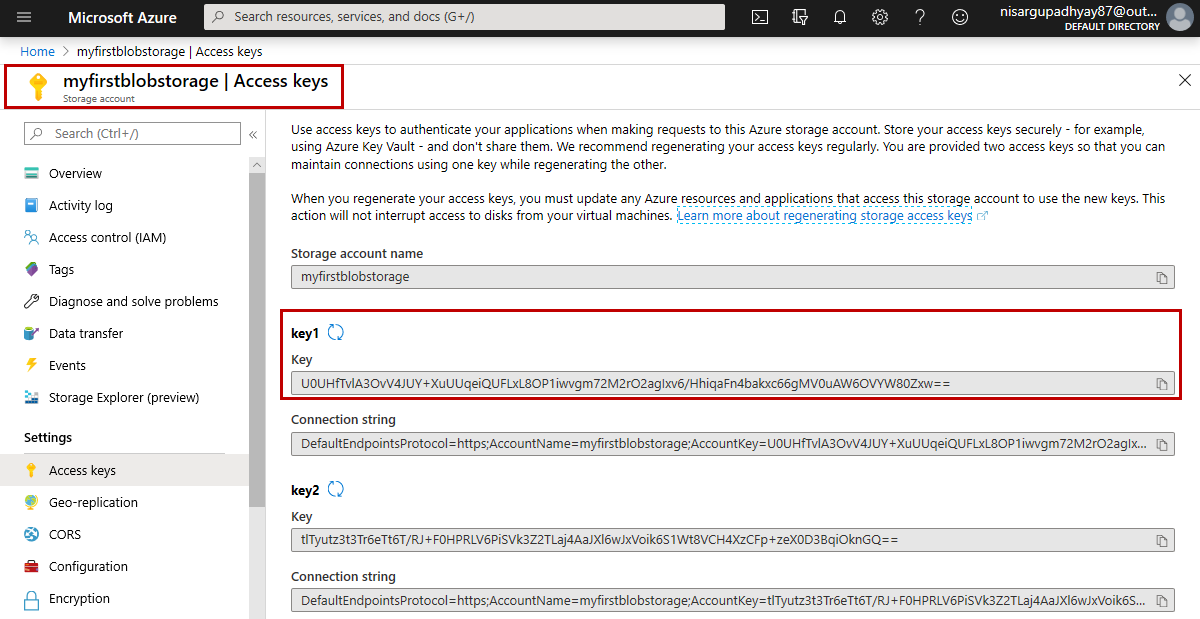
Copy the first key and paste it in the account key page of Power BI and click on connect.
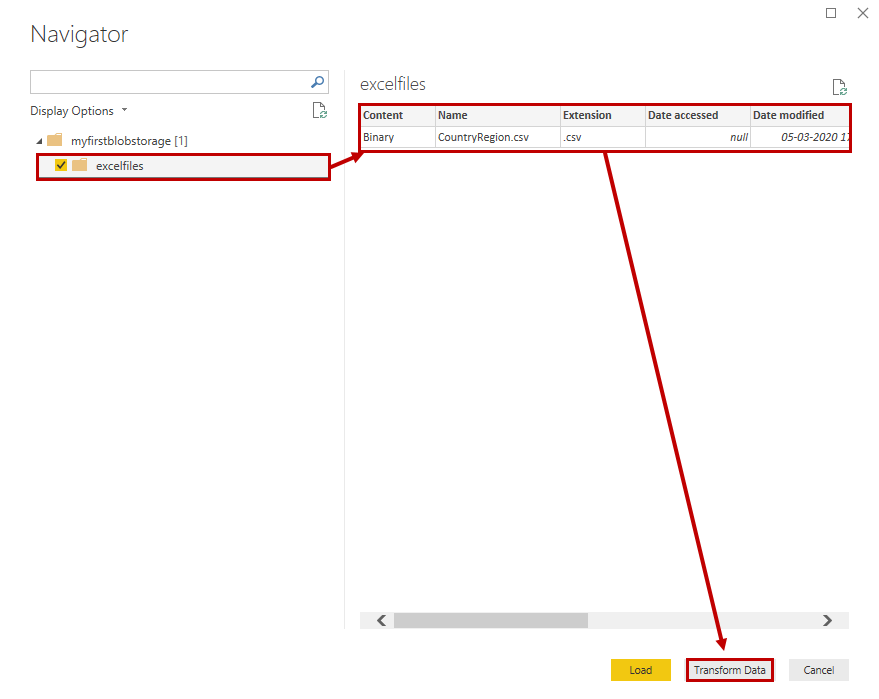
In the navigator dialog box, you can see the list of the storage accounts and the blob containers. As I mentioned, I have created a container named “excelfiles” in the “myfirstblobstorage” blob storage account. On the left pan, you can see the list of the storage accounts and the containers. In the tight pan, you can see the list of files that have been uploaded to the selected container. As I have mentioned above, we are going to import the data of the “Countryregion.csv” file in Power BI hence select the “Countryregion.csv” file. Select the “Countryregion.csv” file and click on the Transform Data button:
Format the output of the Power Query Editor
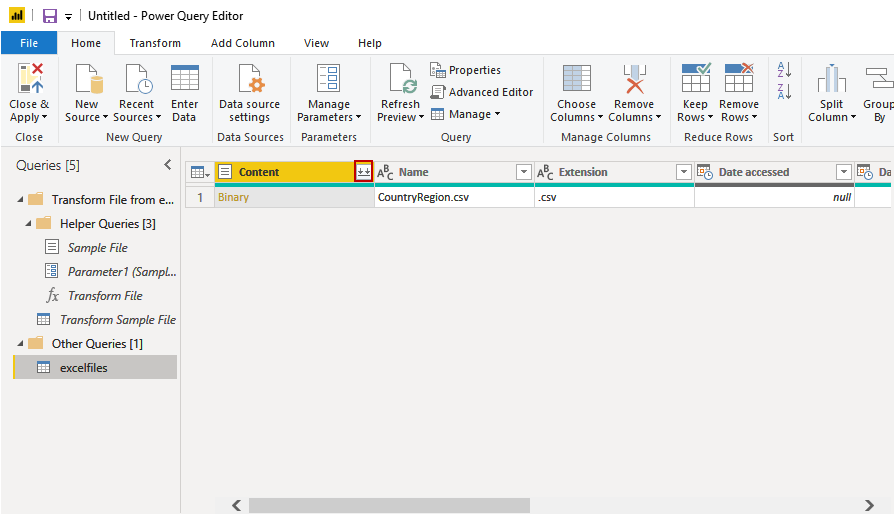
When you click on the “Transform Data” button, the Power Query editor window opens. In Power Query Editor, you can see the properties of “Countryregion.csv” file like Name, extension, Date accessed, date modified, date created, and folder path in tabular format. But we want to populate the content of the CSV file, so to import the data of CSV file, click on the “Combine Files” button. It is in the content column the grid view of the query editor window:
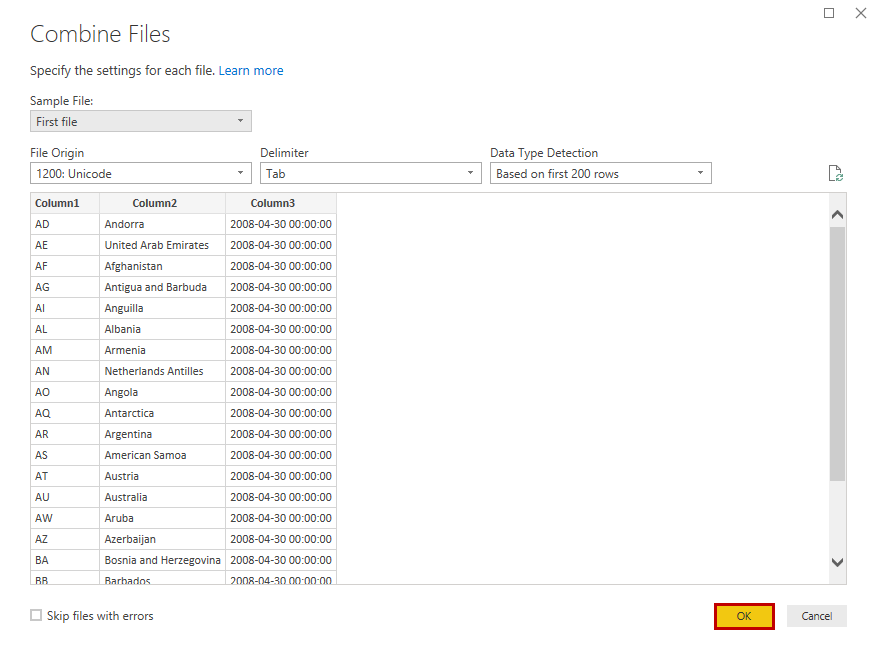
A dialog box named “combine files” opens. You can see the preview of the data within the CSV file. Click on OK:
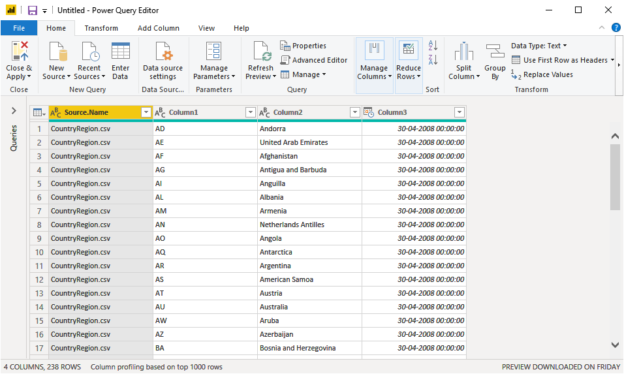
The data will be loaded in the Power Query editor. See the following image:
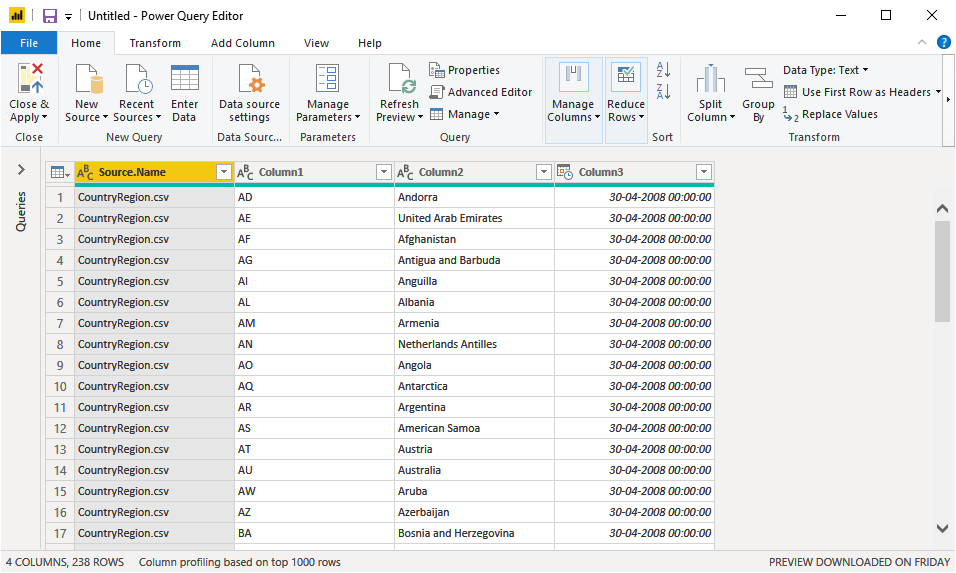
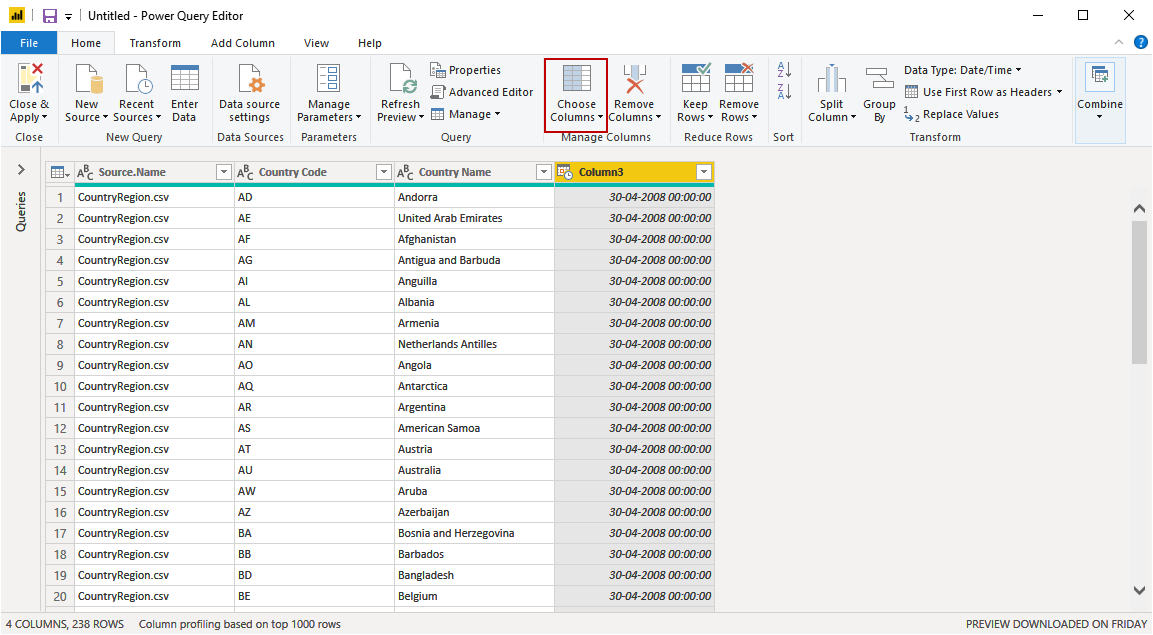
First, rename the headers of the columns for better understanding. To do that, double-click on the header and provide the desired name of the column:
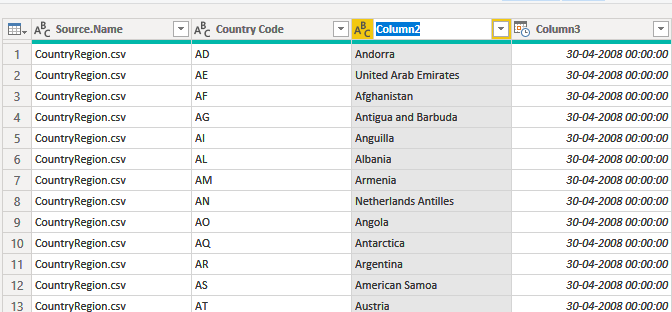
We want to load country code and country name in the Power BI report, so we must select those two columns only. In the power query editor window, we have an option to choose the specific columns. To do that, click on “Choose columns”:
We need the name of the country and country code; therefore, in Choose column dialog box, select “Country code” and “Country Name” columns and click OK:
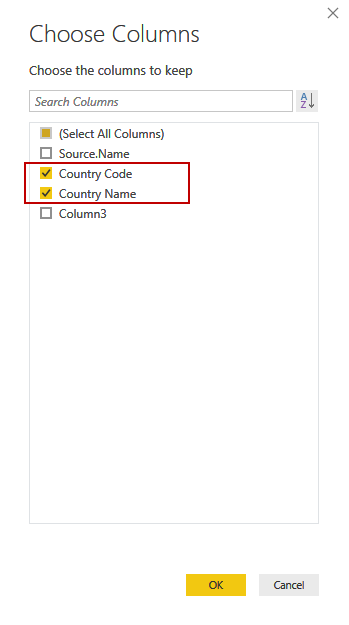
Click OK to close the dialog box:
Load data in the Power BI report
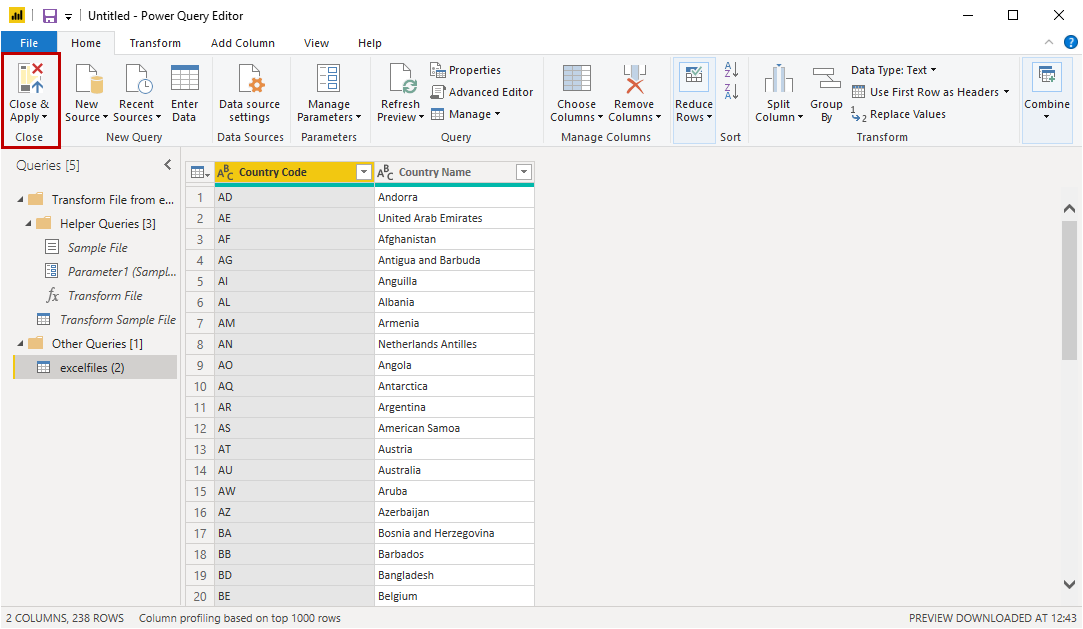
Once the required data has been extracted from the CSV file, let us load it in the Power BI report. To do that, click on the “Close & Apply” button in the Home ribbon.
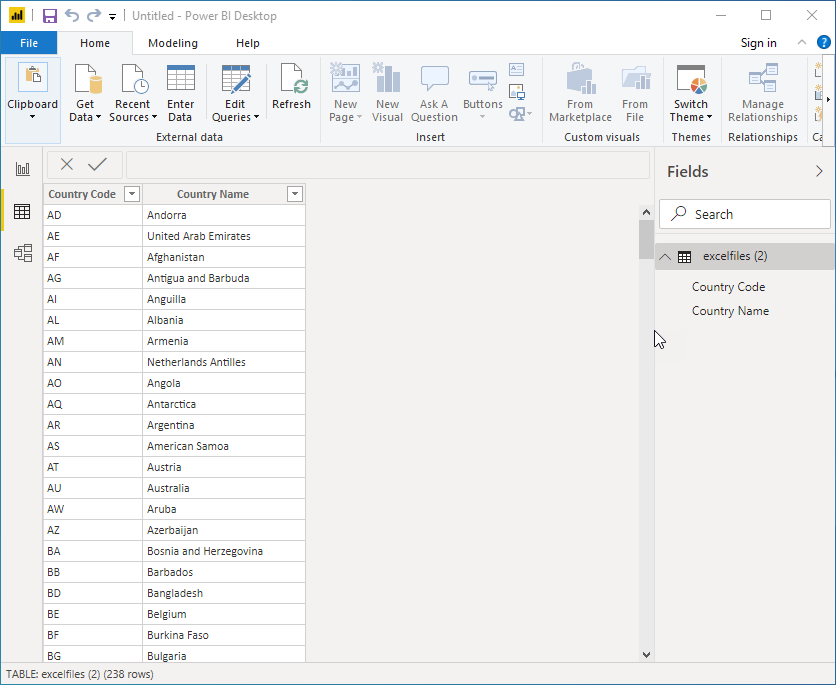
The data will be loaded in the Power BI report. See the following image:
Summary
In this article, I have explained how we can access the CSV file that is uploaded to the Azure Blob Storage account using Power BI. Sometimes, the organization does not use SQL Server Integration Services (SSIS) or SQL Server Reporting Services (SSRS) to create interactive reports. This article is useful for readers who are using Azure Blob Storage to store their excel files and use it to create Power BI reports.

He has expertise in database design, performance tuning, backup and recovery, HA and DR setup, database migrations and upgrades. He has completed the B.Tech from Ganpat University. He can be reached on nisargupadhyay87@outlook.com
- Different ways to identify and change compatibility levels in SQL Server - July 22, 2024
- Copy SQL Databases between Windows 10 and CentOS using SQL Server data tools - October 19, 2022
- Changing the location of FILESTREAM data files in SQL Database - October 14, 2022