
In this article, we will learn how to develop U-SQL jobs on Azure Data Lake Analytics to process data stored in Data Lake Storage.
Introduction
In the previous article, Getting started with Azure Data Lake Analytics, we learned about creating an Azure Data Lake Analytics account and executing a simple job that writes static data to output files in data lake storage. In actual scenarios, data is read from files stored in data lake storage, processed using logic written in U-SQL, and the output is written to the data lake storage layer. Depending on execution metrics, the AU allocation is analyzed and adjusted for future executions. In this article, we will learn how to process data stored in data lake storage as well as analyze the performance metrics of the job using the Azure Data Lake Analytics service.
Azure Data Lake Analytics Jobs
Azure lake storage may host a very modest to big data scale of data volumes. To process this data, it needs to be read by Azure Data Lake Analytics service job(s) and the processed output is generally written back to the storage layer. To simulate this process, we will create a job that reads from a file on the data lake storage account, processes it , and then write the output back in a new file.
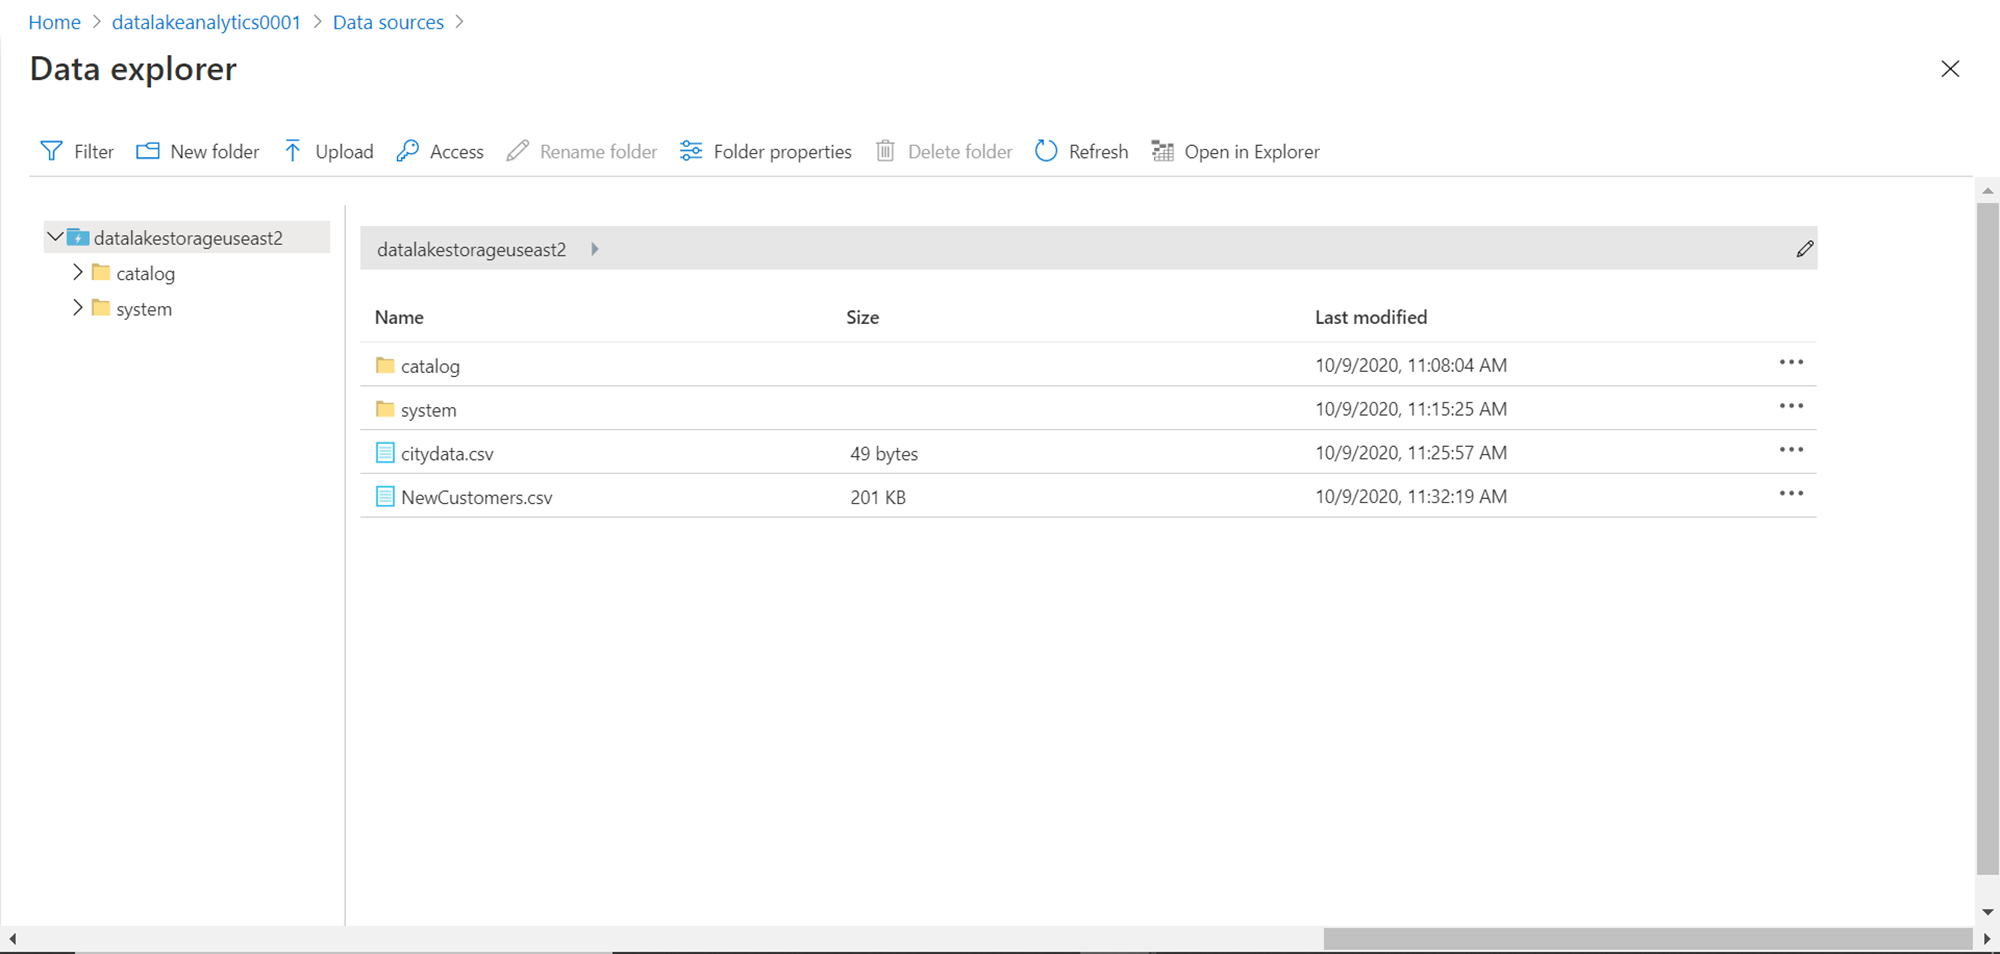
To start with, we would need the source data in a file stored on a data lake storage account as shown below. You can have any schema in the file with any small or large amount of data.
The file that is uploaded here is as shown below. It’s a CSV file. As you can see, the file does not have column headers. Instead, it has column ordinal positions as column headers and relevant values in it. It does not matter if you do not have column headers in your file.
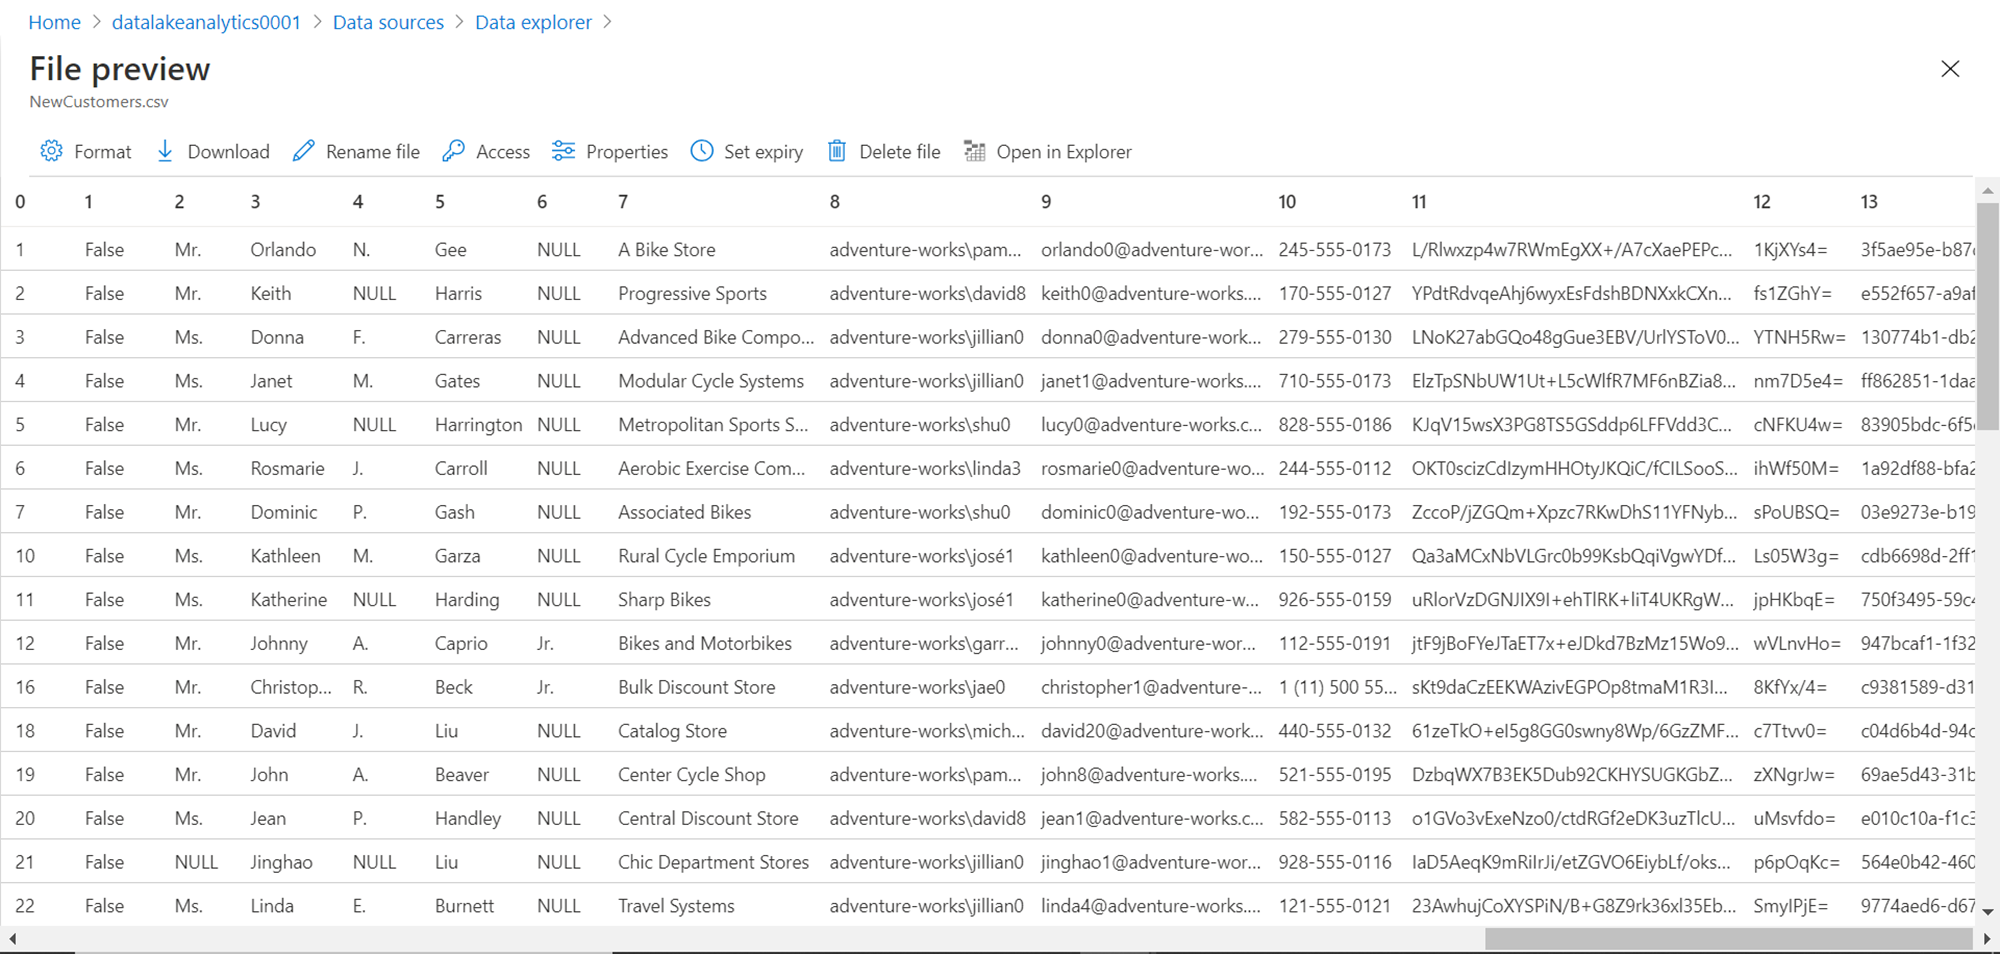
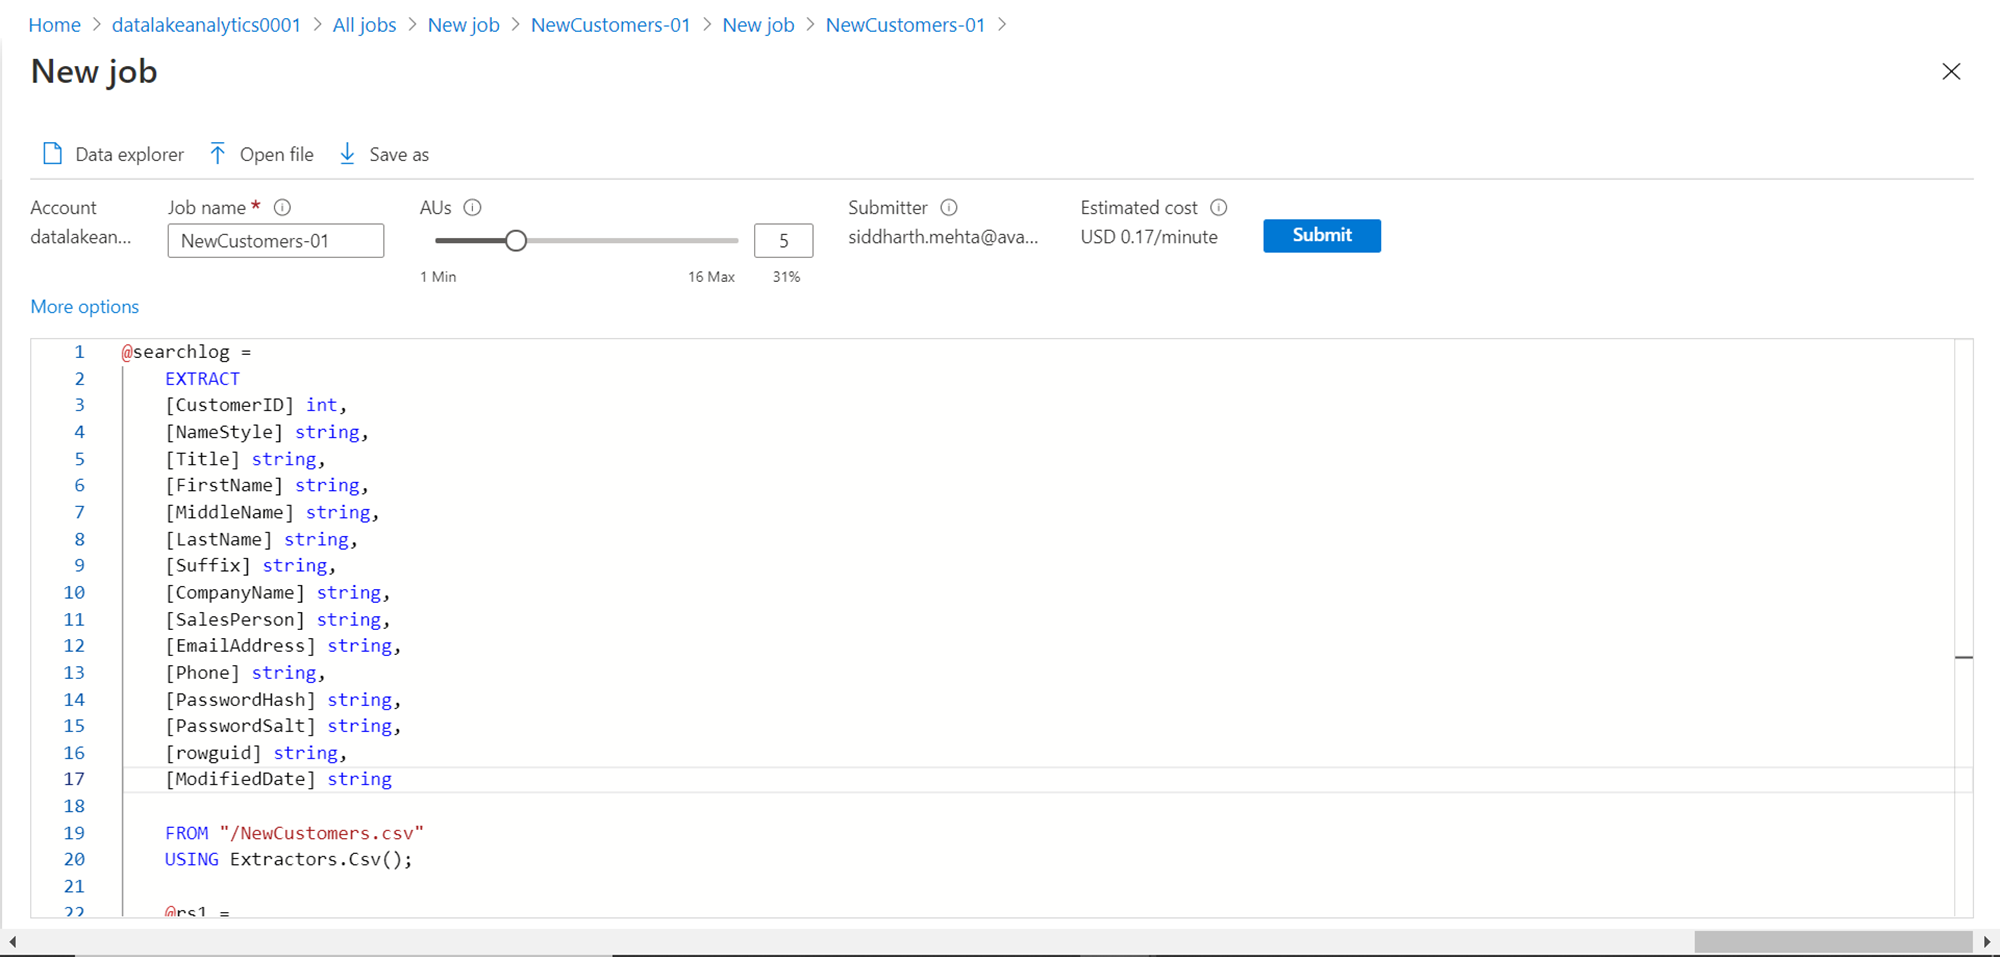
This data contains a list of customers with different attributes. Let’s say we intend to filter out data with female customers, as we intend to use this data for a specific type of marketing. Now that we have our source data in place, it’s time to create a new job to read and process this data. Navigate to the Azure Data Lake Analytics account, click on the New Job button from the menu bar. It would open the job editor screen. Type the script as shown below. Keep in view that the below script is in accordance with the schema shown above. If you are using a different type of schema or type of data file, you may need to specify the schema accordingly.
In the job script, the first thing we are doing is reading the data from the source file using the EXTRACT command. This would read the data from the source file based on the schema mentioned in the script. Here we are providing column names with the corresponding data type, and the same order would be mapped to the columns in the data file. Note that the data types typically available in SQL Server are not applicable here, for example, varchar. The supported data types here are string, int, Datetime, float etc. You can read more about EXTRACT and other such U-SQL commands from here.
In this first part of the script, we are creating a variable and assigning data from the source data file, based on the column definitions to the variable. We are also specifying to use the CSV extractor as the file is of CSV format.
In the next part, we are filtering the data held in the variable that we populated in the previous step based on a condition to filter out female customers and populating this filtered result-set into a new variable. Finally, we are writing this output to a CSV file in the data lake storage account using the CSV output specification. Though this job may look simple enough to be executed with any other frameworks but imagine executing this logic on multi-million to billions of records. This job can be executed without any infrastructure management on a very large volume of data. That is the real value delivered by Azure Data Lake Analytics service.
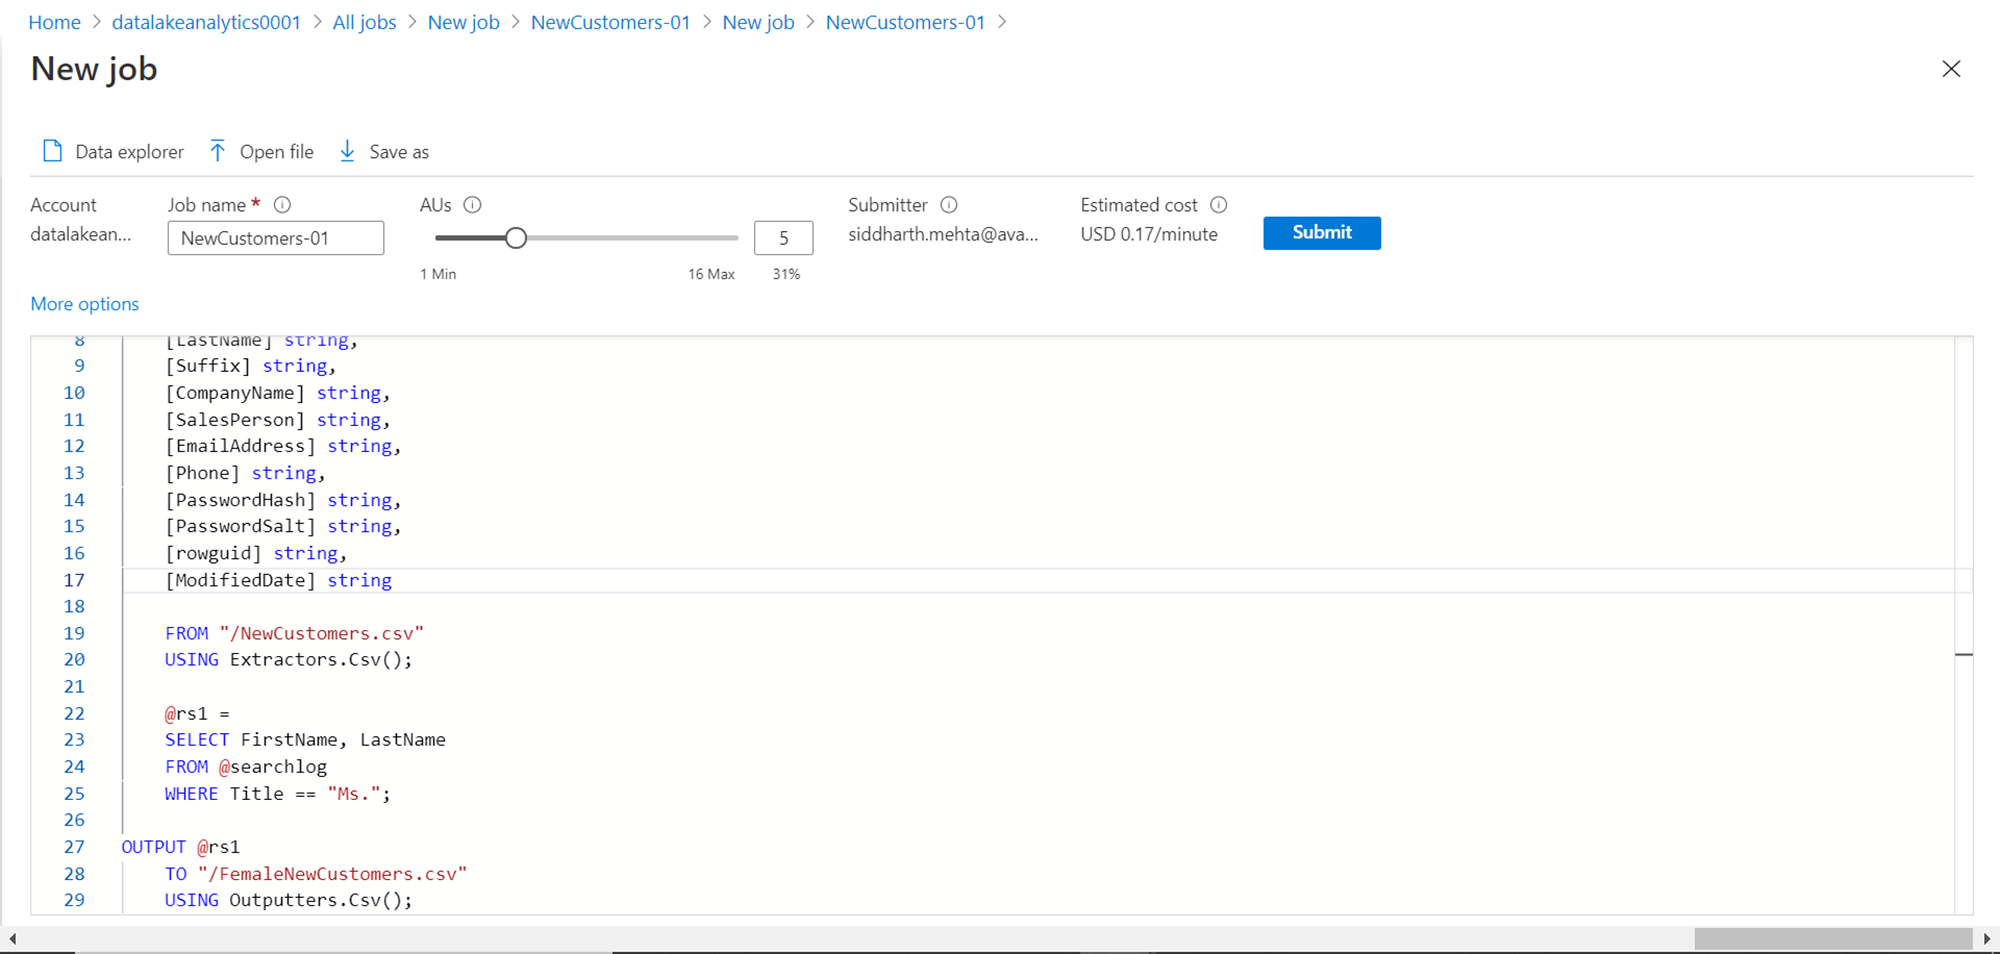
Now that our script is ready, we can submit the job for execution. Let’s say that we assume that it’s going to be a lot of data and we may need more AUs as we intend to process this data fast. Just a quick reminder here, the basic unit of processing in Azure data lake analytics is AU – Analytics Units. So, change the AU to 5 from the default value of 1 before submitting the job as shown above. Click on the Submit button to start the job execution. Once the execution starts, you would be able to see the job details as shown below.
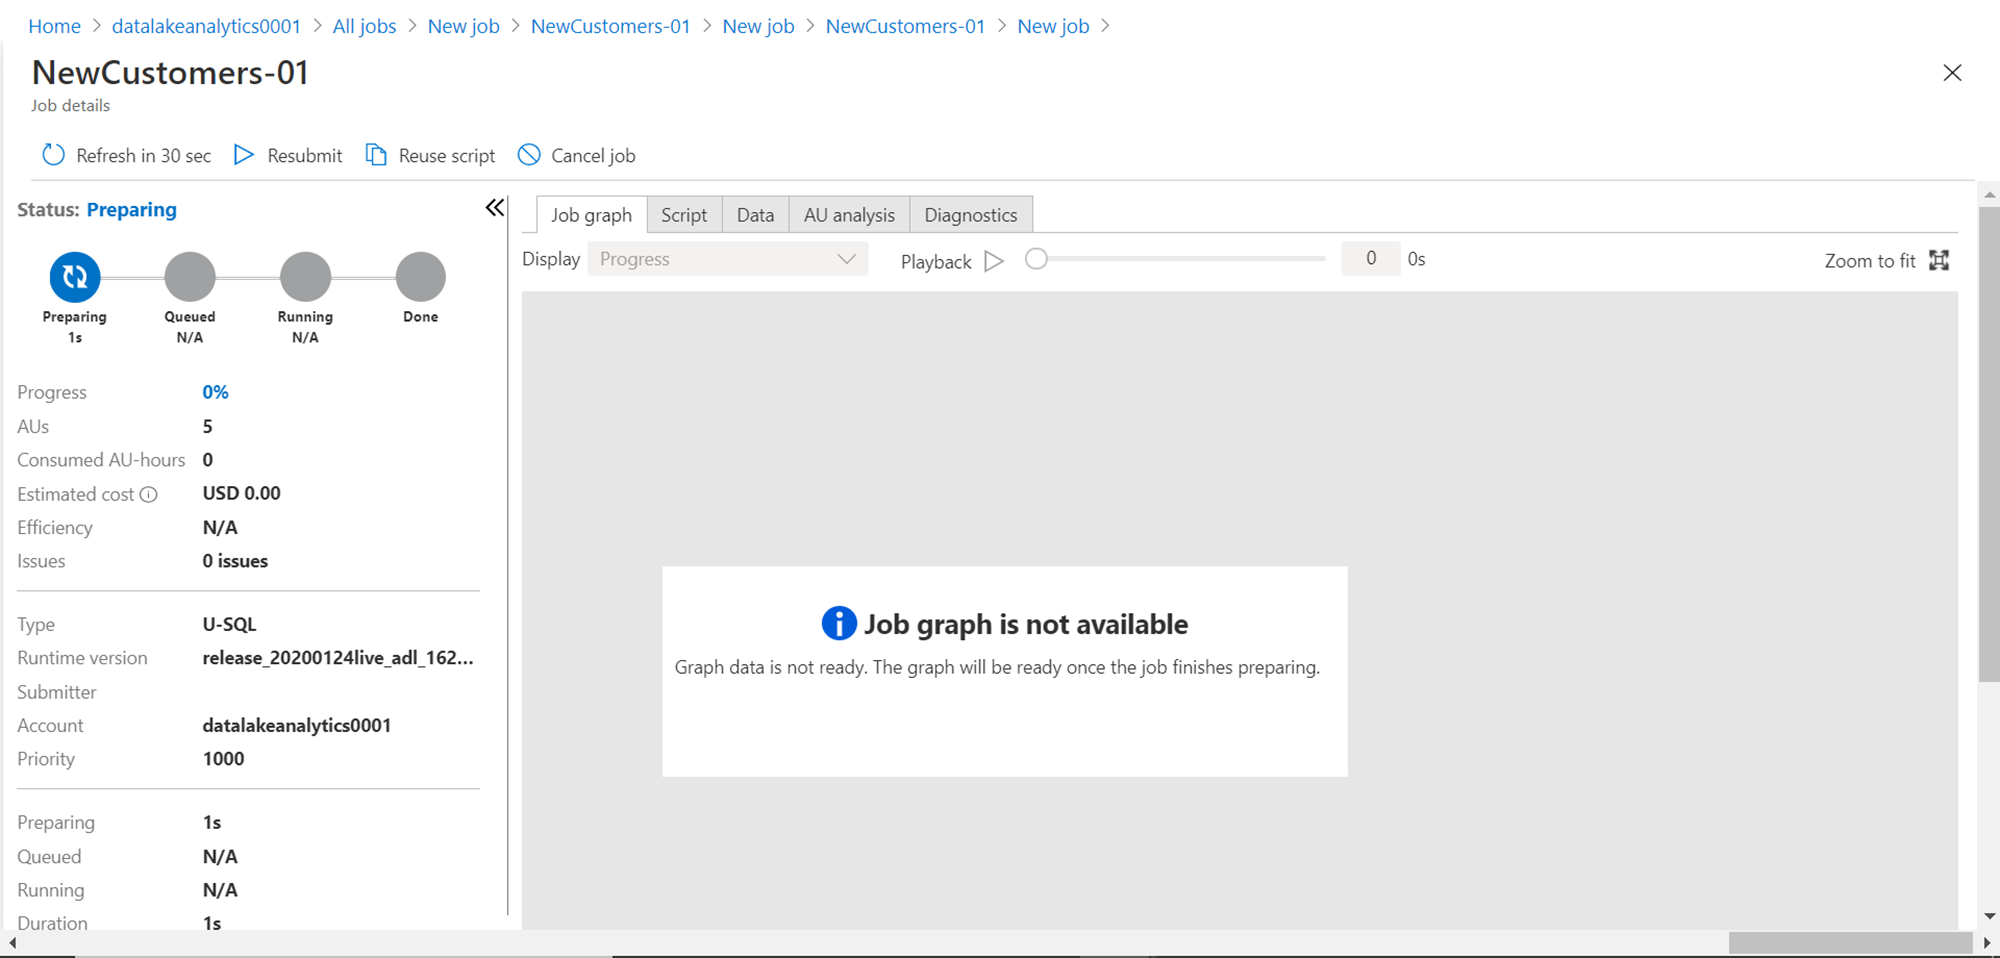
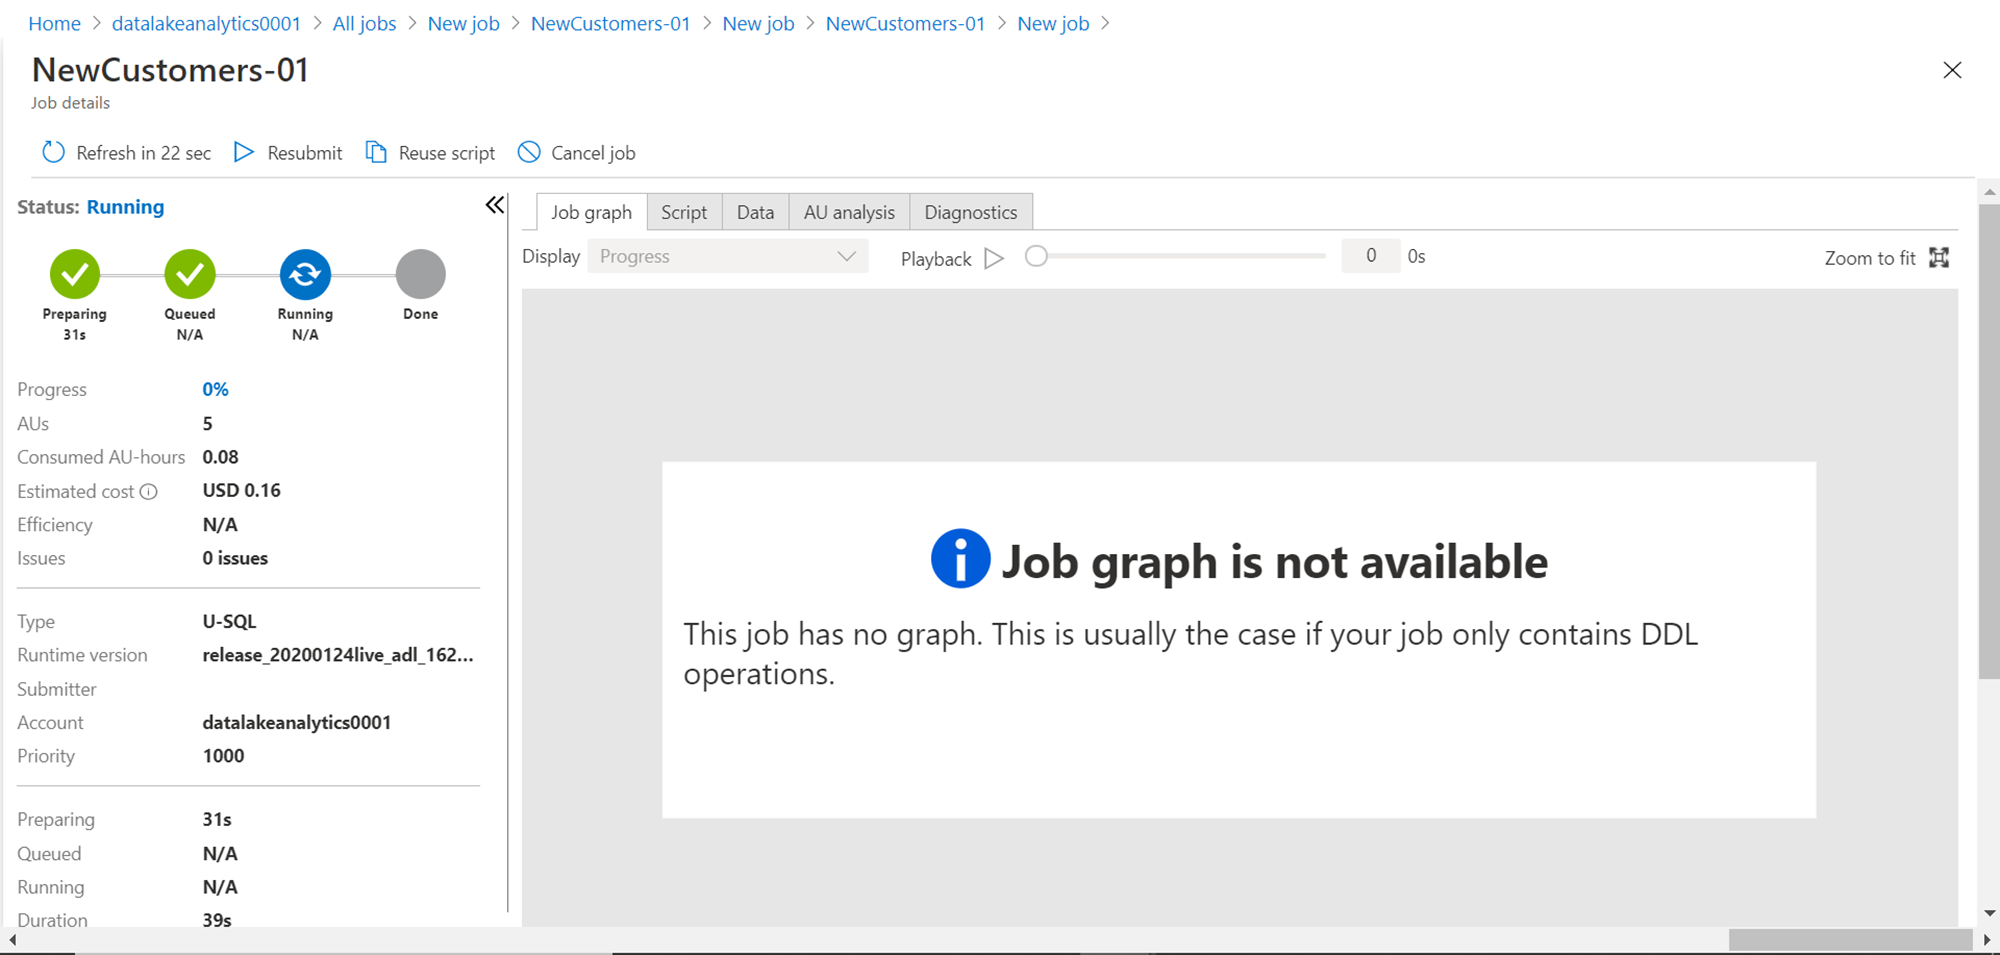
As the job is executing, you would be able to see the status of the job as shown below. To keep a check on the time spent and the cost incurred, you can check the job details as shown below. Here it shows that job is queued, 0.08 AU hrs are spent and the estimated cost to complete the job maybe $0.16.
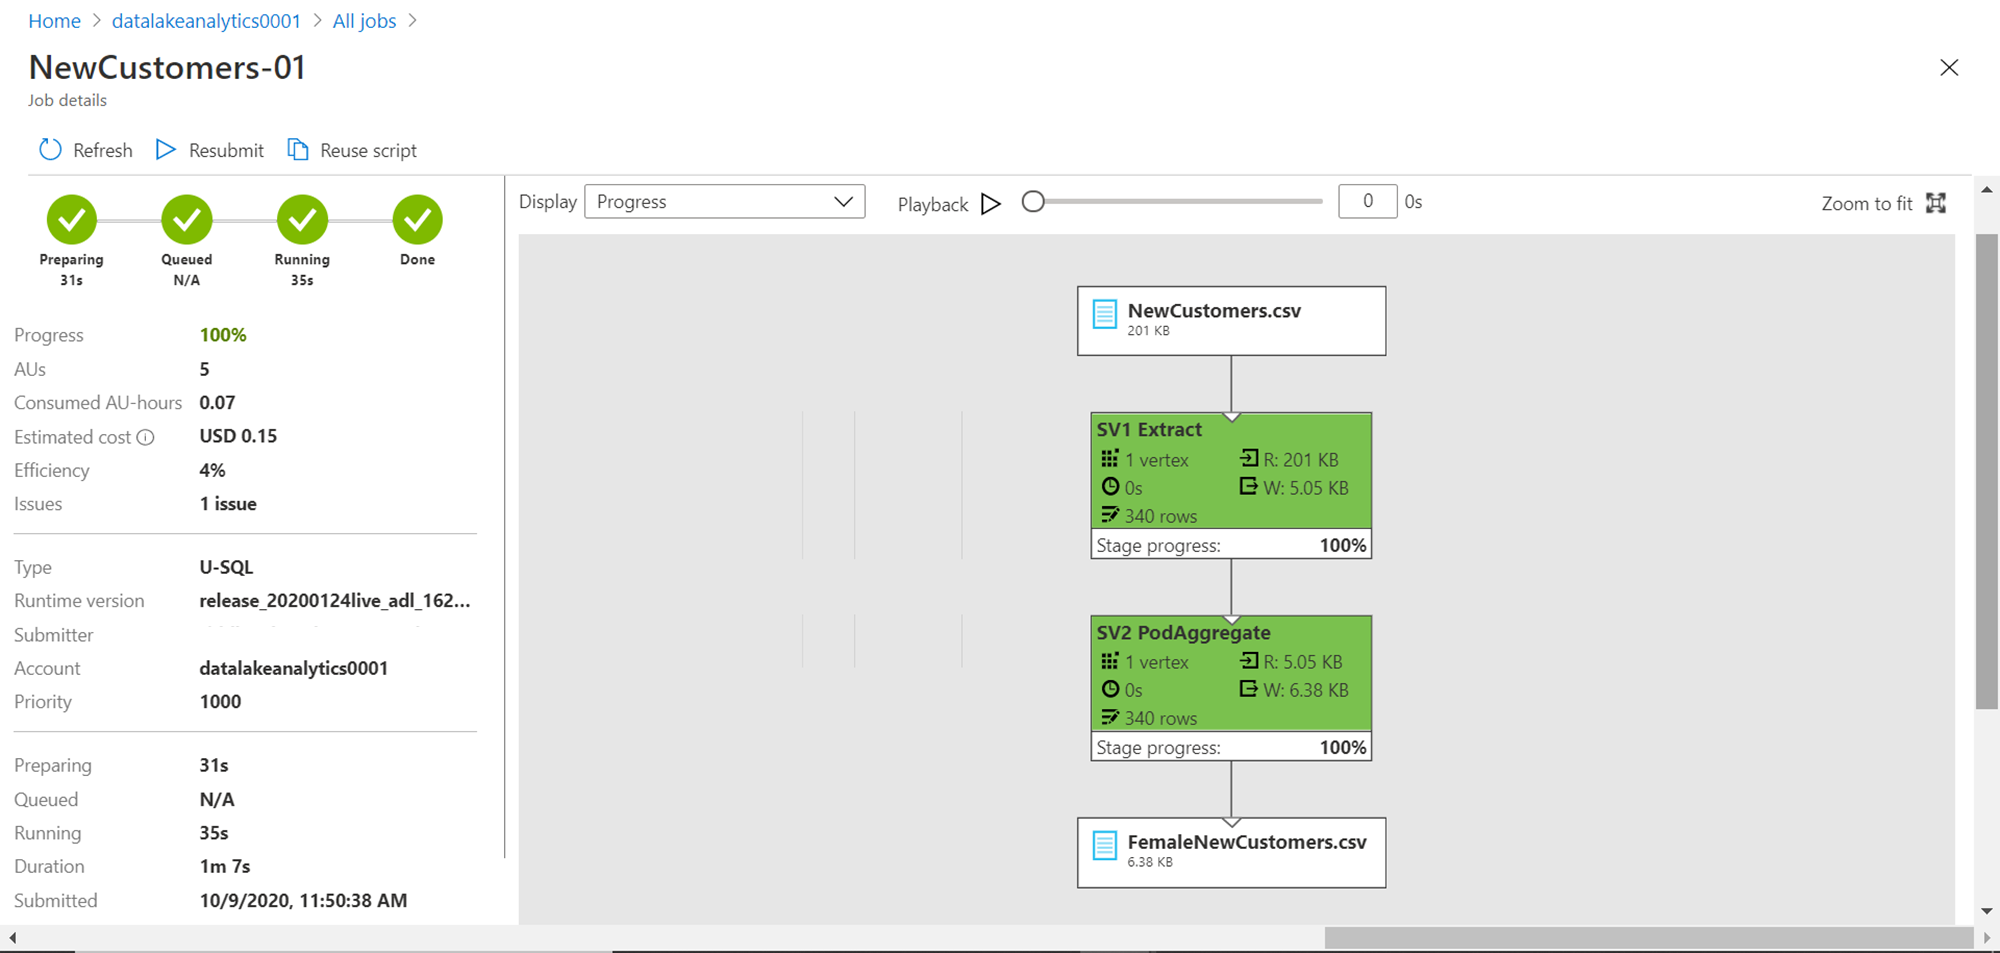
Once the job completes, you would be able to see the screen as shown below. One thing to note is that the job graph may not appear till the job is complete at times.

Once the job graph appears, it would look as shown below. Our script had two steps where we extract the data and then we filter the data. The same steps are shown in the job graph in green color with various details. For example, it shows that 340 rows were extracted from the source file, and all those rows were processed in the next step as well. And then the output is written to the output file.
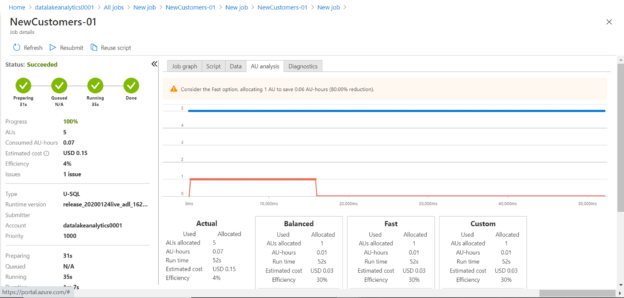
If you carefully analyze the job details, you would find that job efficiency is 4%, and it cost $0.15. Also, it flags that there is 1 issue with the job, which we will look into shortly.
Before we try to analyze the issue, let’s check the output file by clicking on the Data tab as shown below. This should the output file created by the job.
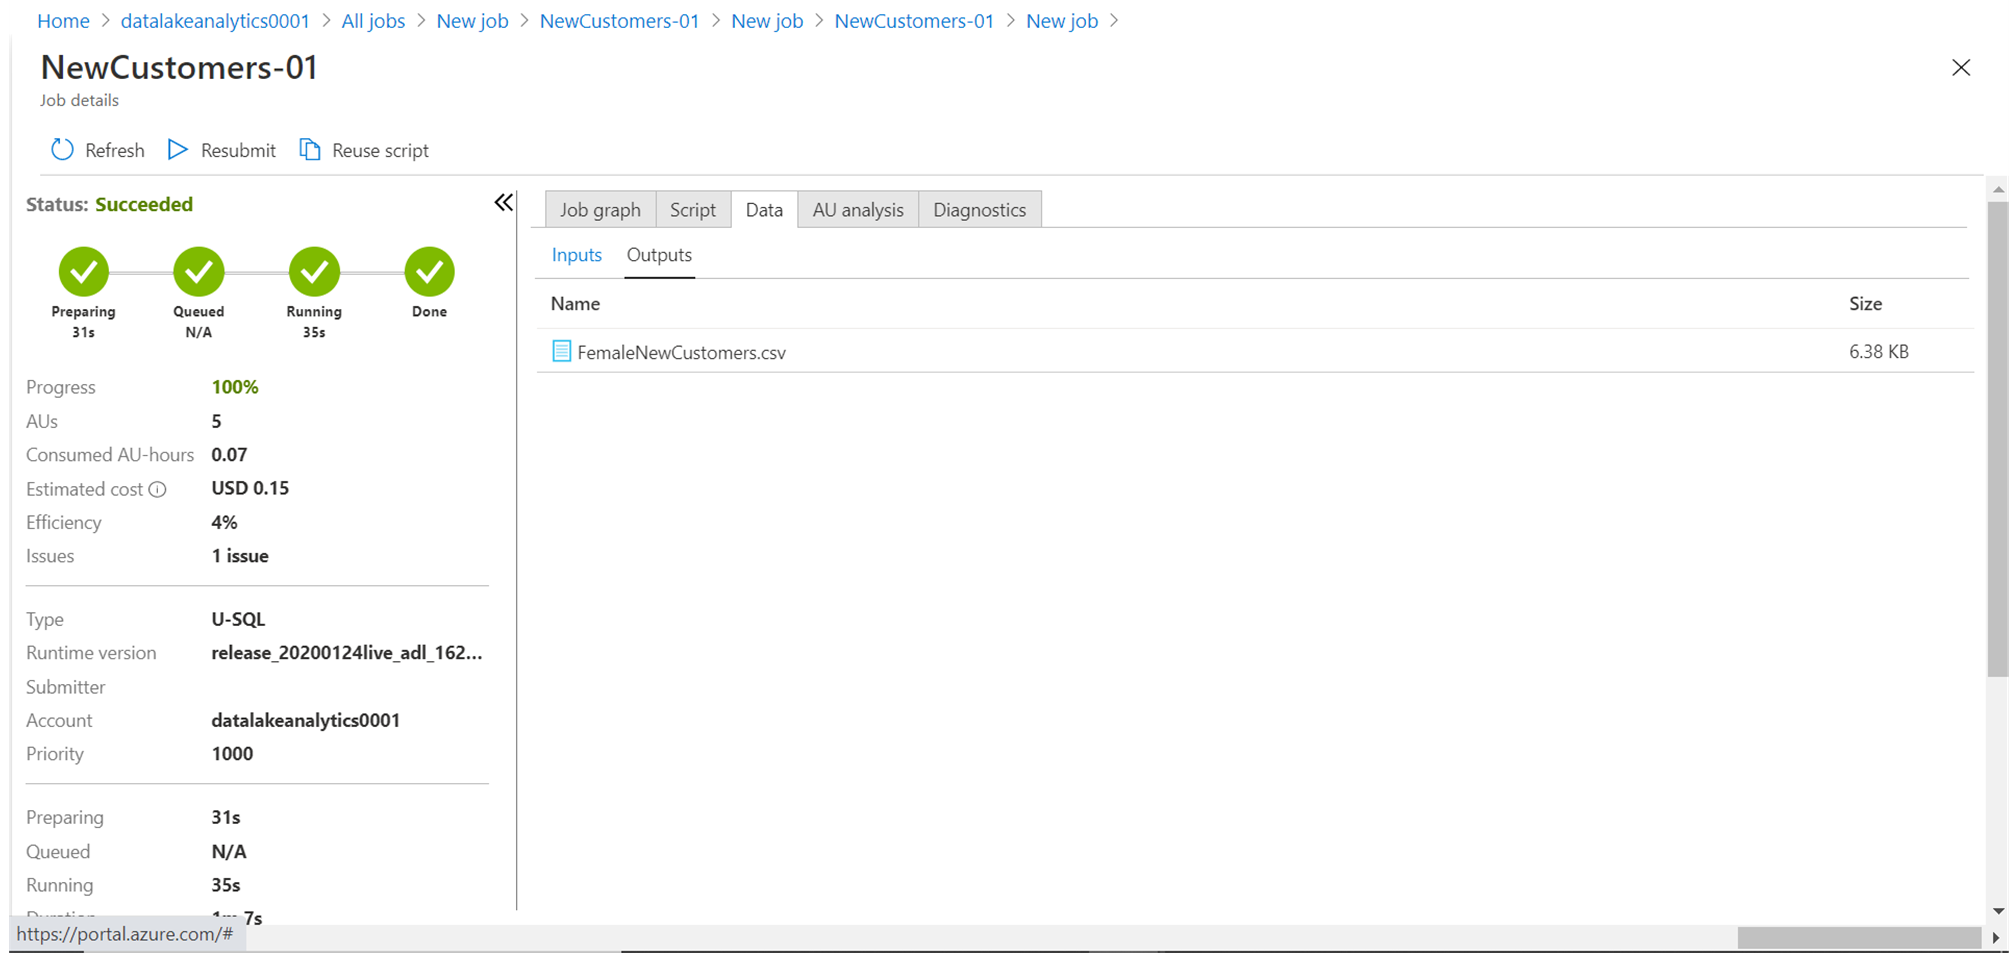
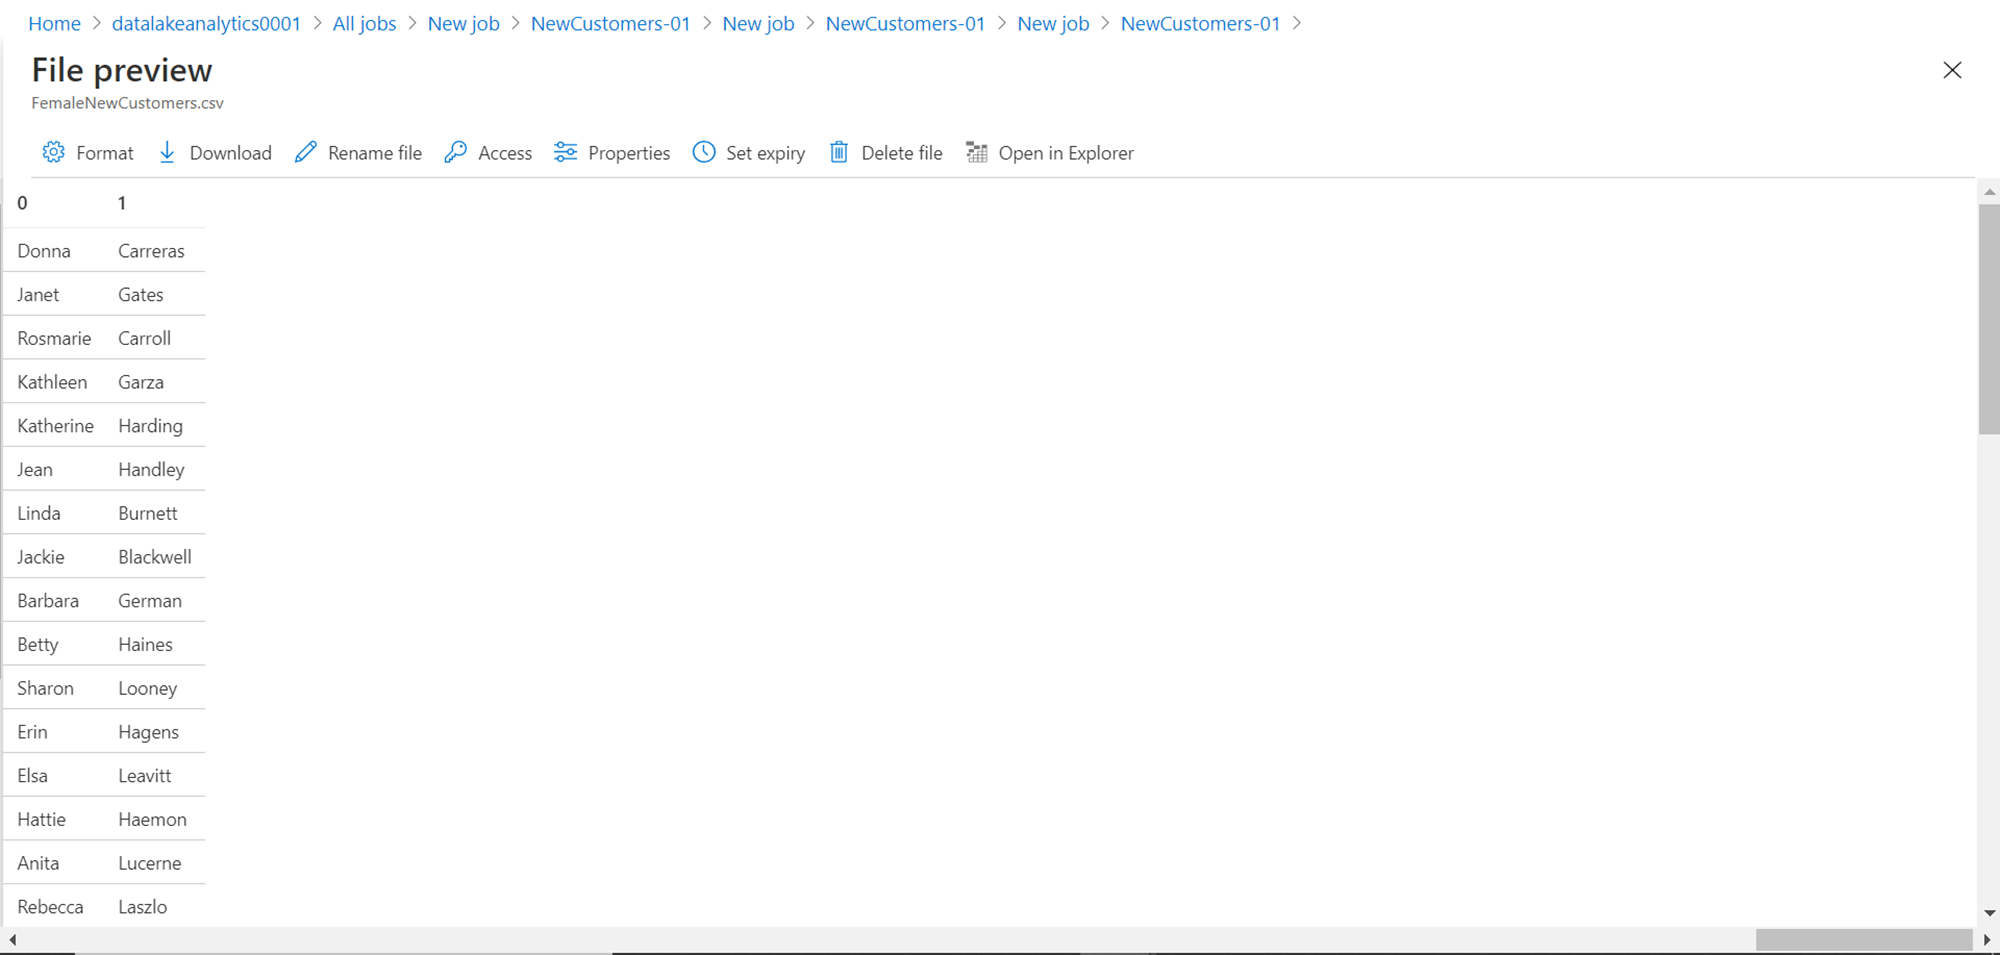
Upon opening the file, it would look as shown below. If you analyze the script that we executed in the job, we wrote only two fields to the output file, hence the same two fields are written to the file.
Performance Analysis
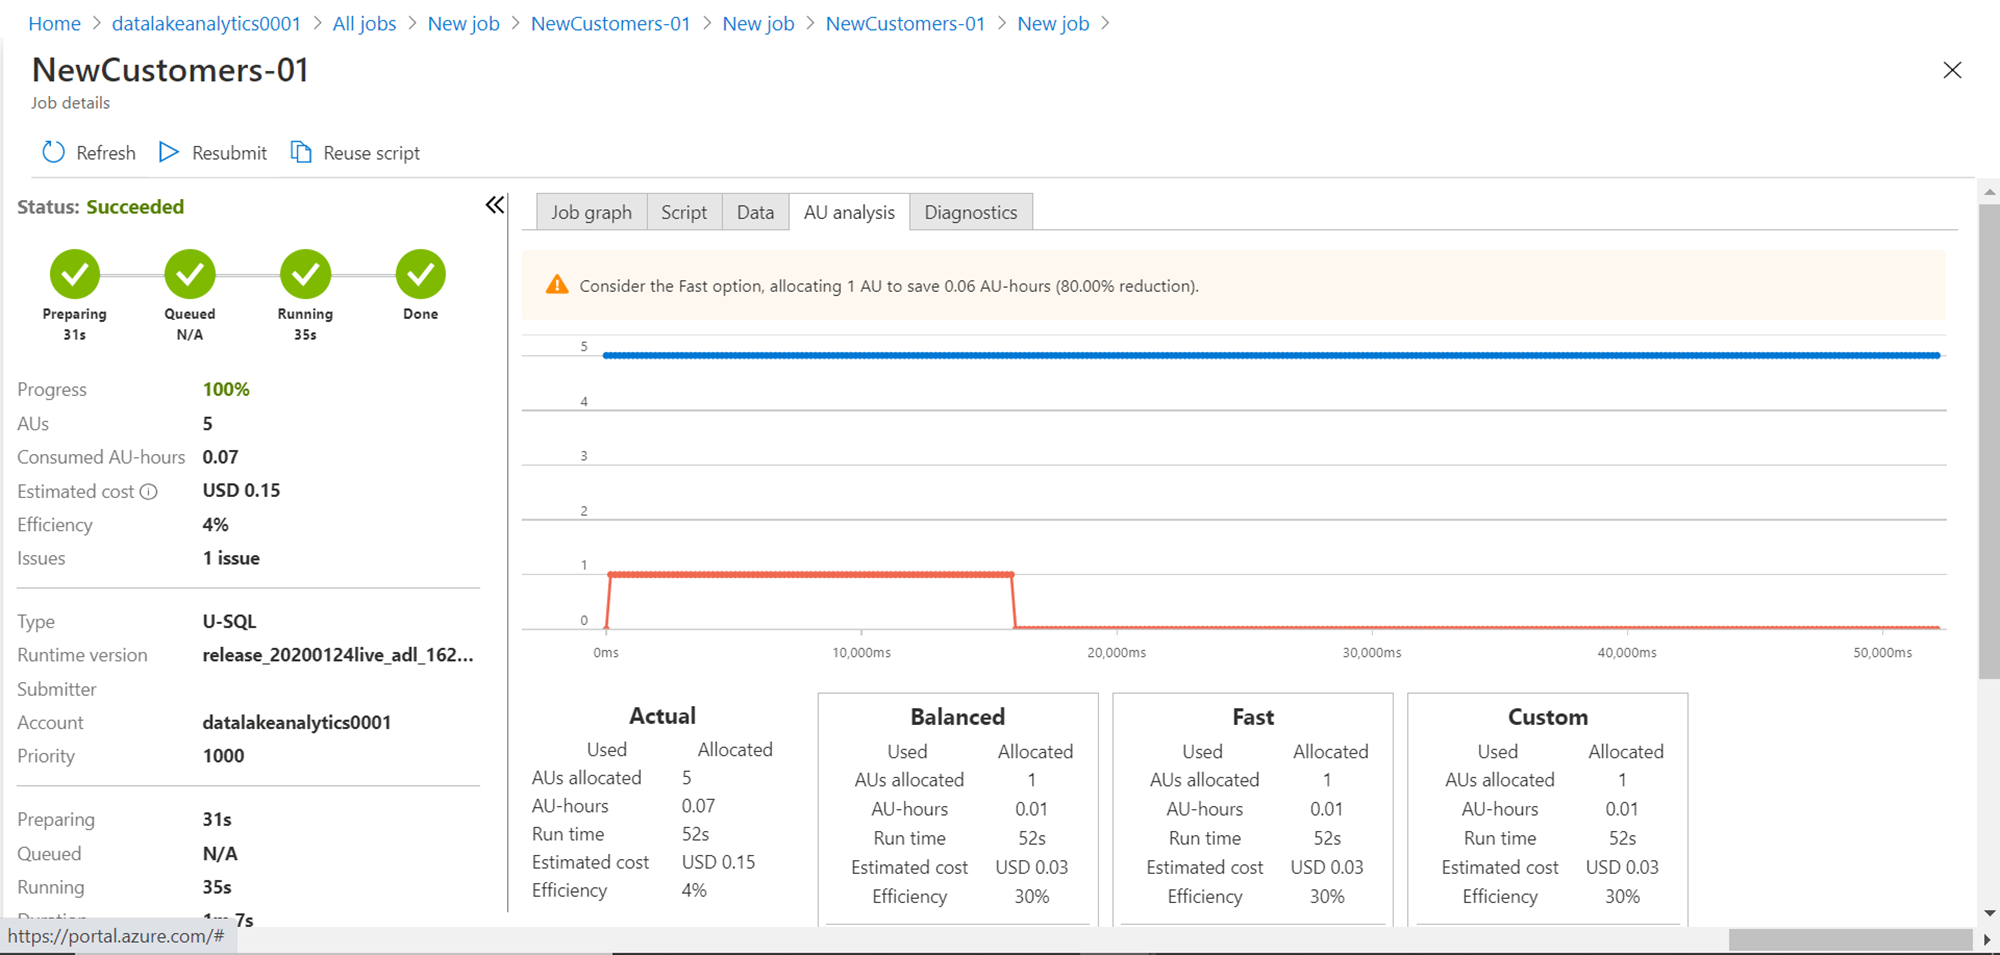
We got out desired output. Now let’s analyze the performance of the job. Click on the AU analysis tab and it would look as shown below. The warning message suggests using the Fast option to achieve an 80% cost reduction. If you analyze the graph, it’s easy to understand that we over-allocated capacity, which resulted in wasted resources, which is reflected in a lower efficiency percentage of the job.
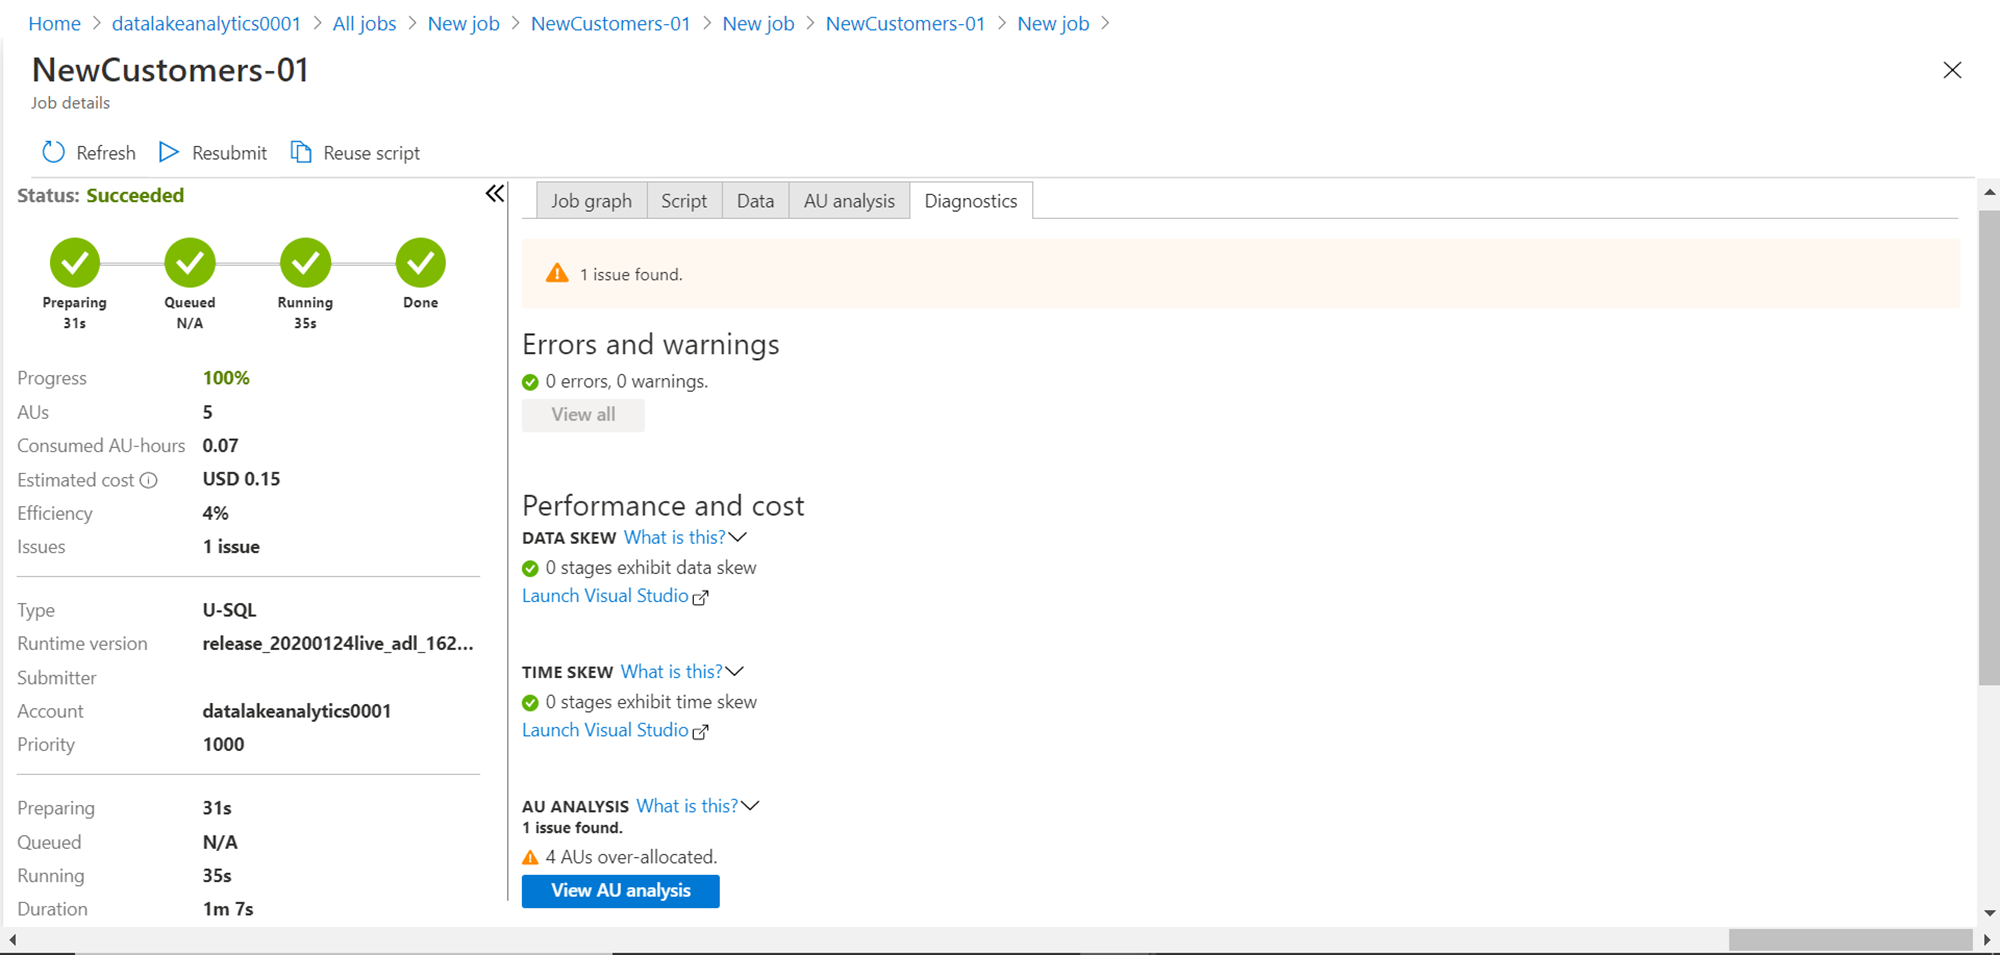
Another way to easily analyze the same issue is by navigating to the Diagnostics tab. Click on this tab and you would see a screen as shown below. At the bottom of the right-side pane, under the AU analysis section, you would clearly find that 4 AUs are over-allocated. These tabs help to analyze the performance of each step and suggest different options for faster or balanced or customized performance.
So, in this way, we can analyze data stored on a data lake storage account with Azure Data Lake Analytics service and analyze the performance of the job to fine-tune it for maximum performance and efficiency.
Conclusion
In this series, we started with a basic understanding of Azure Data Lake Analytics that we built from the first article of this series. We learned how to create a job that can read data from data lake storage, process the same and stage the output as well. We learned how to use the AU Analysis as well as Diagnostics features for analyzing the job metric to customize the job configuration for efficient cost and performance management.
Table of contents

He has worked internationally with Fortune 500 clients in various sectors and is a passionate author.
View all posts by Rahul Mehta
- Finding Duplicates in SQL - February 7, 2024
- MySQL substring uses with examples - October 14, 2023
- MySQL group_concat() function overview - March 28, 2023