
In this article, I am going to explain how to start using the AWS Toolkit for Visual Studio Code to develop serverless functions locally. Serverless applications or functions gives us the ability to develop, test and execute code in the cloud without having to worry about the underlying infrastructure. These applications are scalable which means we can easily increase or decrease the resources consumed by them. AWS Toolkit for Visual Studio Code is an extension available for Visual Studio Code using which we can directly communicate with the resources on Amazon within the code editor.
Pre-requisites to start using AWS Toolkit for Visual Studio Code
In order to get started with the AWS Toolkit for Visual Studio Code, we need to have the following installed on our local machine.
- AWS Account – You need to have a valid AWS account to get started with it. Navigate to https://console.aws.amazon.com/ to get started with Amazon Web Services
- Visual Studio Code – You need to download and install Visual Studio Code in your machine. VS Code is available for Windows, Linux, and Mac
- Code Development SDK – You need to install the relevant SDK that you are going to use to code your application. This can be either .NET SDK, Node JS SDK or the Python SDK
- AWS SAM CLI – This is a command line utility from Amazon that enables us to develop and test our serverless applications locally. Although it is not mandatory for the toolkit, but still it is recommended to install it on the local machine
- Docker – This is also not mandatory for the toolkit, but if you want to test your serverless application locally using the SAM CLI, then it is necessary to have docker installed
Installing the AWS Toolkit
Let us now go ahead and install the AWS Toolkit for Visual Studio Code. Once you have the Visual Studio Code installed on your machine, open it, and click on the Extensions icon available in the left pane of the editor:
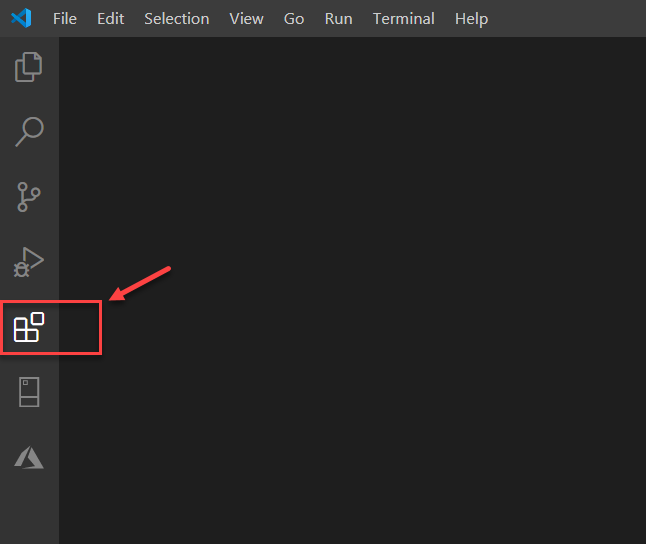
Figure 1 – Extensions for Visual Studio Code
The Extension pane opens up. On the search box, search for “AWS Toolkit” and hit Enter. The very first item on the list will be the AWS Toolkit extension. Select it and click on Install button:
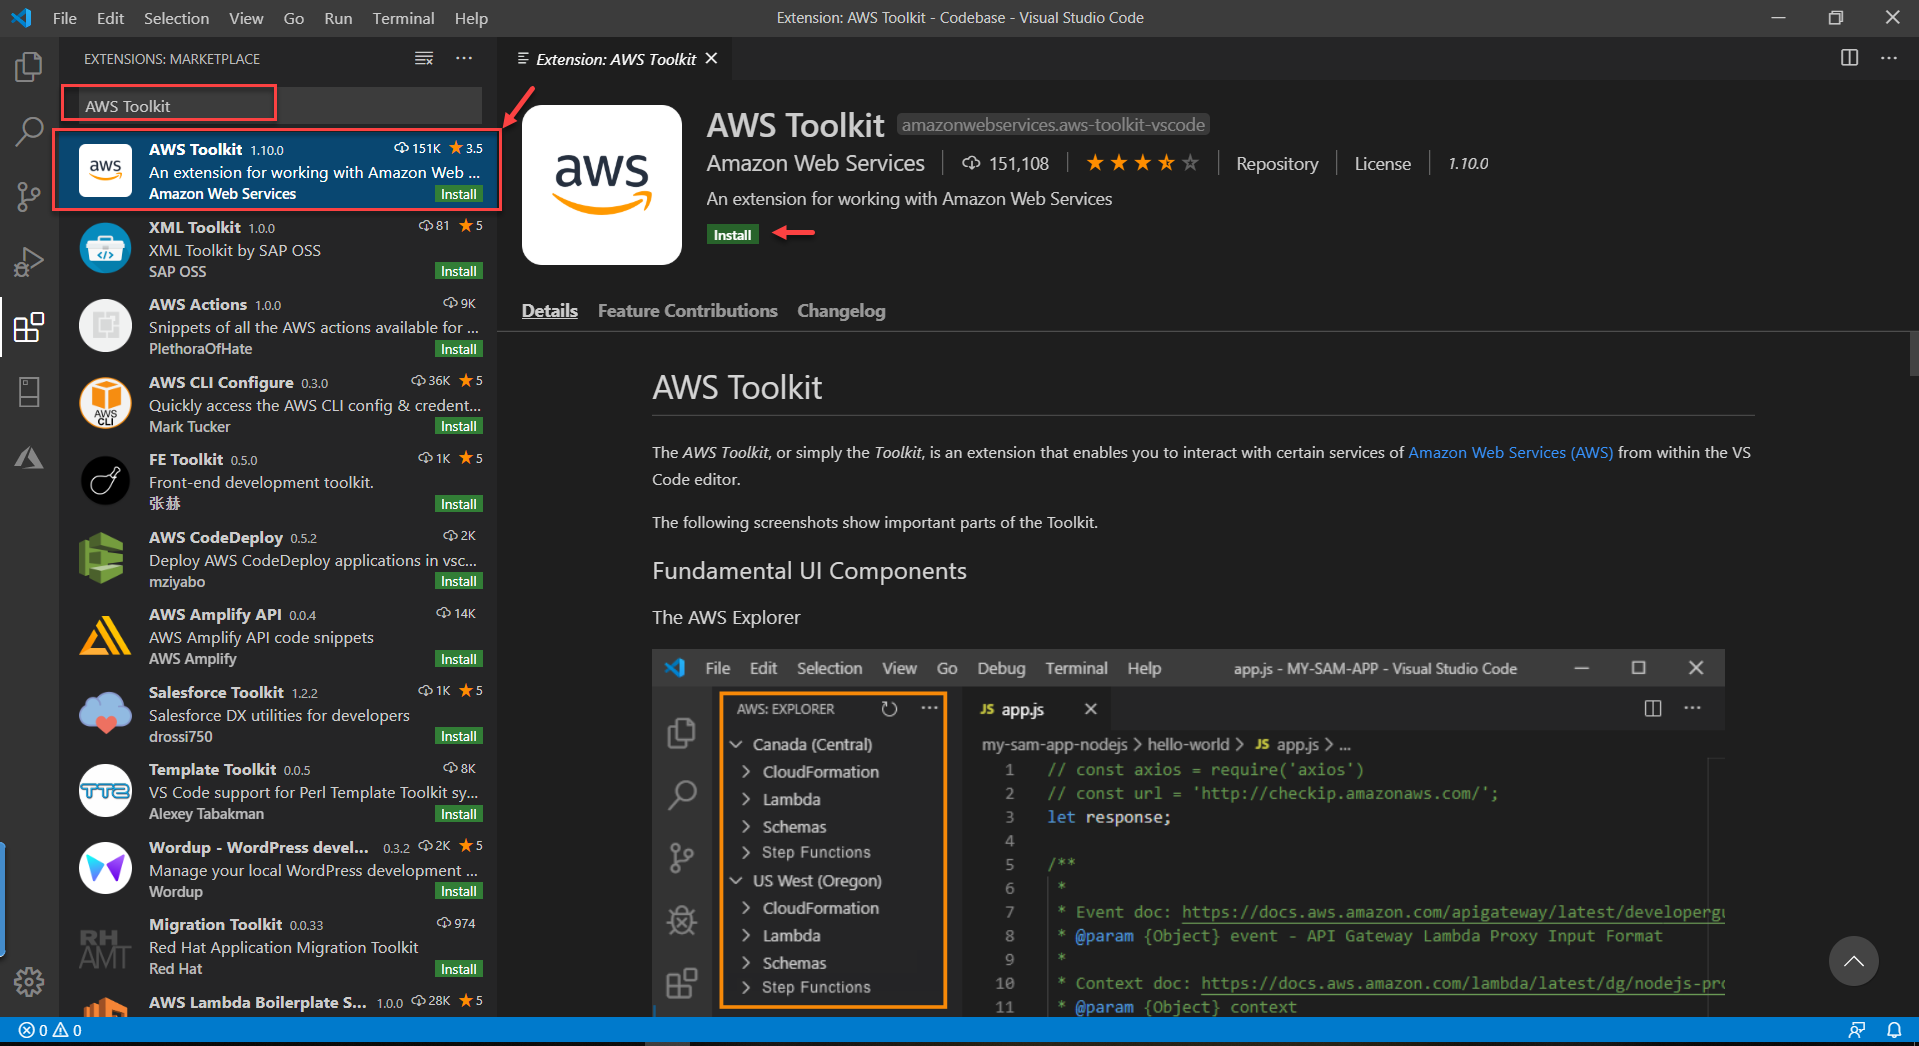
Figure 2 – Install AWS Toolkit for Visual Studio Code
Once the toolkit is installed on your machine, you can see a new icon will appear on the sidebar on the left. You can use it to access all the resources available under your AWS account. The very first thing that we need to do next is to connect to our AWS account using specific credentials, which I be explaining in the later section of this article:
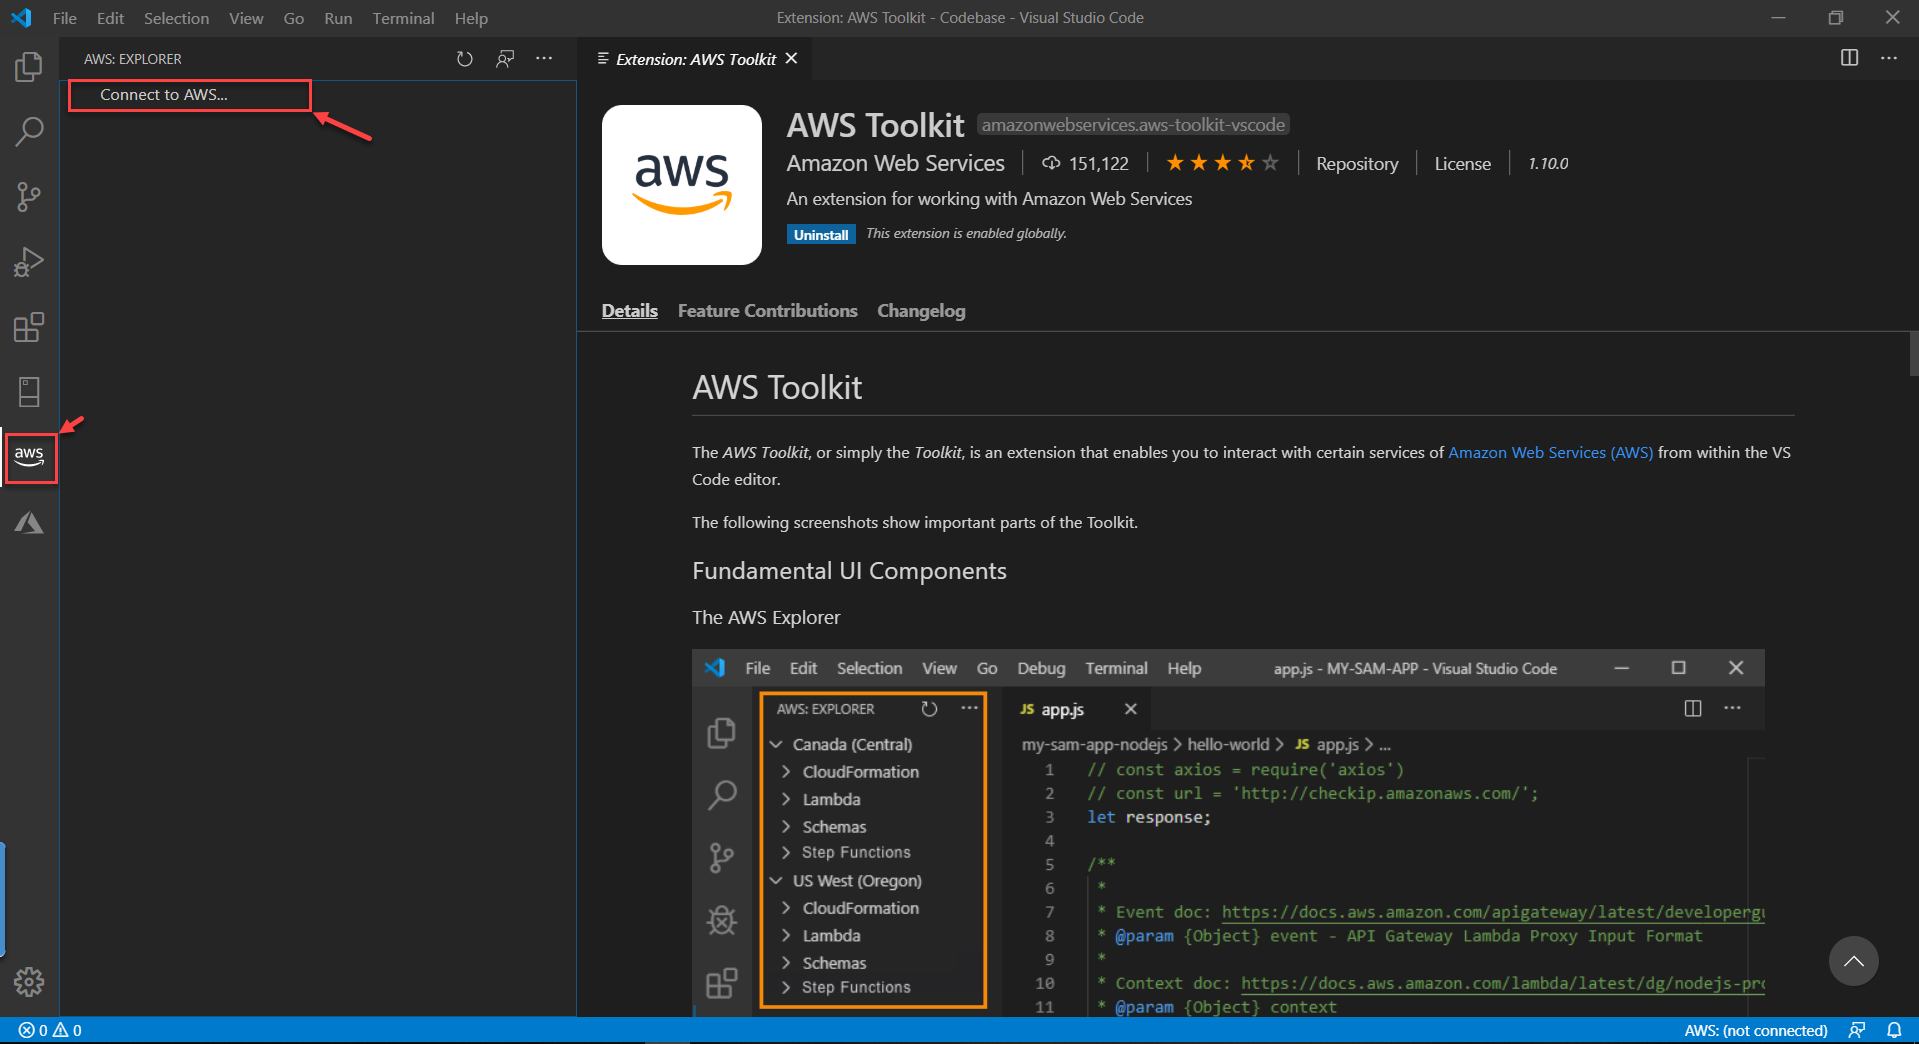
Figure 3 – AWS Explorer
Obtaining the credentials for AWS Toolkit
Now that we have installed the AWS Toolkit extension for VS Code, the next step here is to setup the credentials to connect to the AWS. There are two process in which we can obtain the credentials and use it with VS Code.
- Using the AWS supported credentials – These can be provided by Amazon directly using a shared AWS credential file or a shared AWS config file
- Using an external credential process (not supported by amazon) – This process can be used if you have a process that generates or lookup the credentials not directly supported by Amazon
For the sake of this tutorial, we will go ahead with the AWS Supported Credentials. This is also a two-step process, in which first we obtain AWS Access Keys from the AWS console and then set up the credentials in VS Code. The AWS Access Key is a specific type of credential that allows us to programmatically access the AWS resources. It consists of two parts – the Access Key ID and the Access Key Secret. Let us go ahead and generate these credentials from the AWS Console.
Navigate to the IAM section on the AWS Management Console at https://console.aws.amazon.com/iam/ and choose Users:
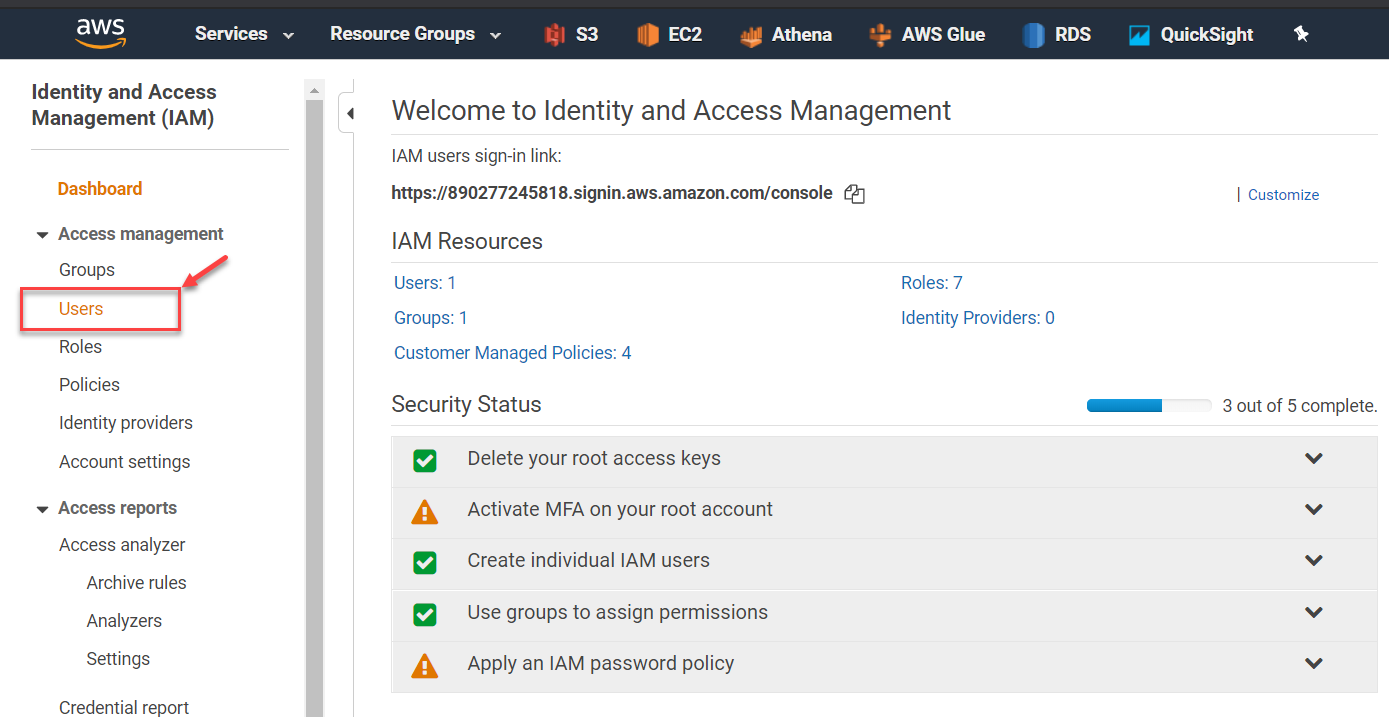
Figure 4 – Navigating to IAM Users
On the Users page, click on the username to see the details:
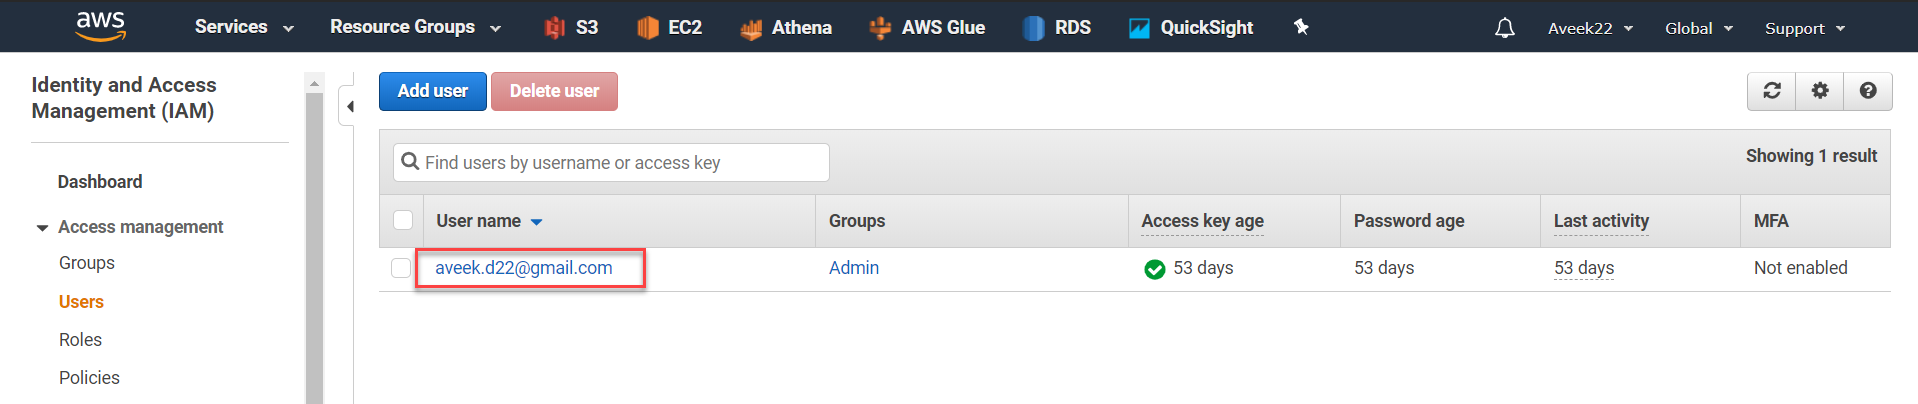
Figure 5 – Select User
Navigate to the Security Credentials page and select Create access key:
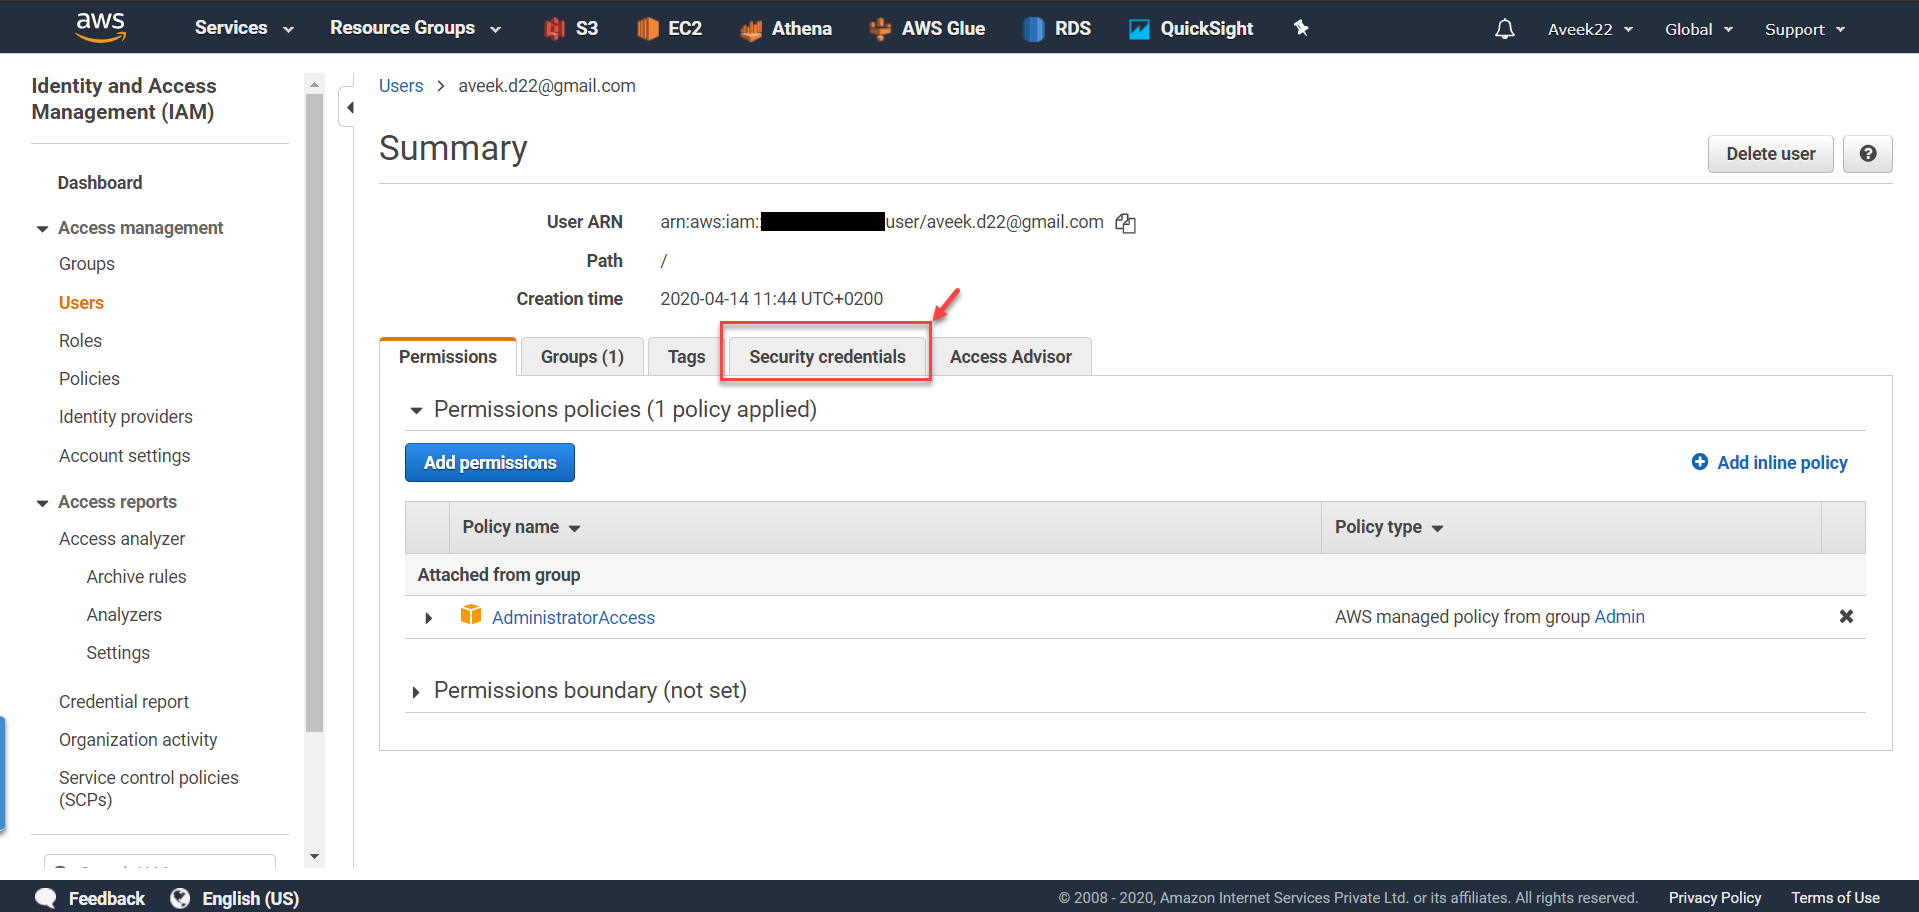
Figure 6 – Security Credentials Page
Once you click on Create access key, a new popup window will open up in which you will get to download the CSV file containing the credentials. Copy the Access Key ID and the Secret Access Key to a secure location and click on Close.
You can also see that the Access Key ID has been added to the summary and is Active at the moment:

Figure 7 – Access Key Added
Setting up the AWS credentials in Visual Studio Code
We would now need to setup the credentials that we obtained from AWS in the toolkit in VS Code. This can be done by using the shared AWS files that is provided by AWS. The shared AWS config file and the shared AWS credentials file are the ones in which we can store the credential information that we received. By default, these files can be found under the “.aws” directory and are named config and credentials, respectively.
Let us now go ahead and create the shared credential and config files in the VS Code. Inside VS Code, open the command palette using the View -> Command Palette.
In the command palette, search for AWS and select AWS: Create Credentials Profile:

Figure 8 – Create Credentials Profile
Provide a suitable name for the profile. Let me enter it as “default”:

Figure 9 – Profile Name
In the next step, we need to provide the AWS Access Key that we have created in the previous step. Paste the access key here and hit Enter:

Figure 10 – AWS Access Key
Finally, enter the AWS Secret Key and press Enter to create the Credential profile:

Figure 11 – AWS Secret Key
Connect to AWS from Visual Studio Code
Now that we successfully have setup our credentials profile, we can go ahead and connect to our AWS environment. Open VS Code and open the command palette as we did in the earlier step.
Search for AWS and select AWS: Connect to AWS from the menu:
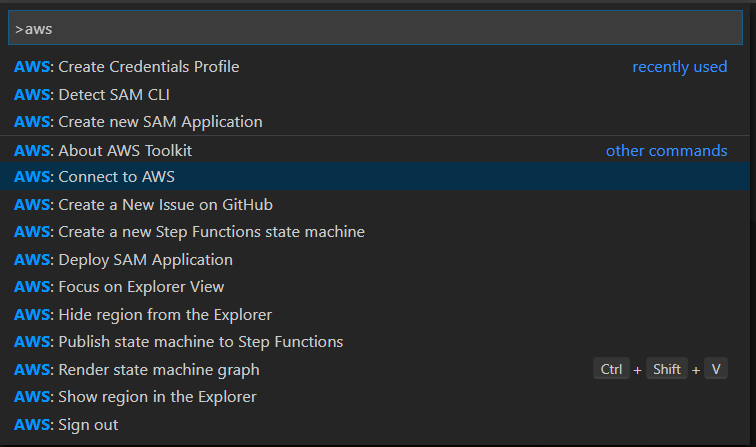
Figure 12 – Connect to AWS
In the next step, select the profile that you have created in the previous step. Let us select the default profile:

Figure 13 – Select the Default Profile
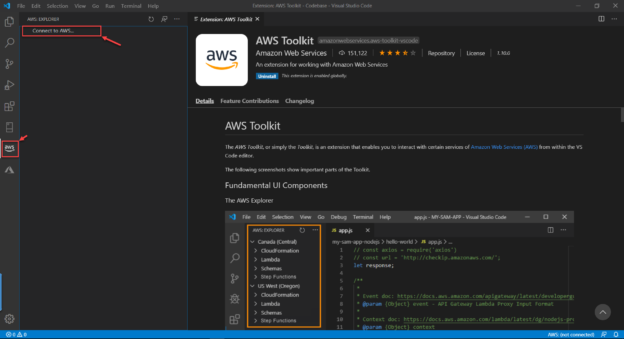
Once you select the profile, the AWS Toolkit for Visual Studio Code will connect to the AWS resources using the credentials and fetch the information within the VS Code environment as follows:
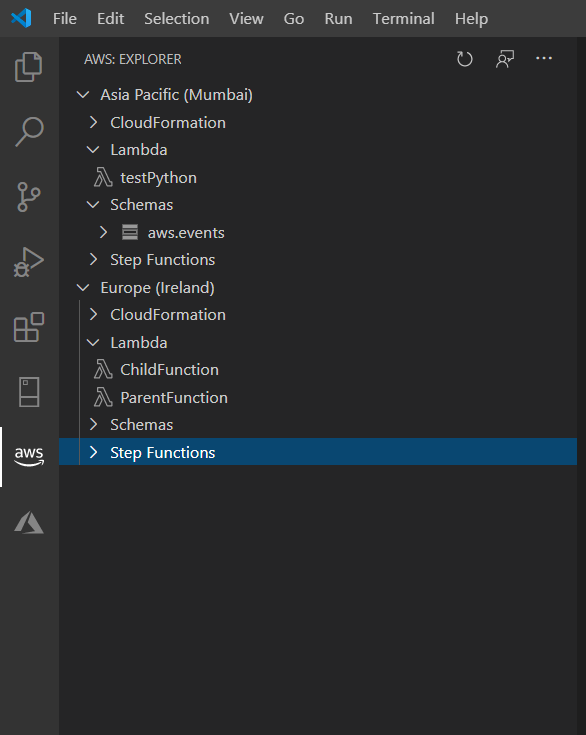
Figure 14 – AWS Toolkit for Visual Studio Code
As you can see in the above figure, that we have two regions defined in our AWS account and both of them are shown in the list. Also, all the lambda functions, schemas and step functions also appear under each region separately so that we can easily organize them and code efficiently.
Conclusion
In this article, I have explained how to use the AWS Toolkit for Visual Studio Code to start developing code locally and then publish it to the AWS Lambda Functions once it is tested and verified locally. Developing the applications locally give the developers the flexibility to use a preferred code editor of choice, for example Visual Studio Code, Sublime Text, PyCharm or any other editor using which we can write and manage efficient code. This is very helpful rather than using an online code editor as these are quite powerful and includes a bunch of other useful features required for code management.

He is a prolific author, with over 100 articles published on various technical blogs, including his own blog, and a frequent contributor to different technical forums.
In his leisure time, he enjoys amateur photography mostly street imagery and still life. Some glimpses of his work can be found on Instagram. You can also find him on LinkedIn
View all posts by Aveek Das
- Getting started with PostgreSQL on Docker - August 12, 2022
- Getting started with Spatial Data in PostgreSQL - January 13, 2022
- An overview of Power BI Incremental Refresh - December 6, 2021