
This article explores data import in SQL Server from a CSV file stored in the Amazon S3 SSIS bucket.
Introduction
The SSIS package is an ETL tool for data extraction, transformation and loading data from various sources such as OLE DB, ODBC, Ado.NET, flat-file connections. Nowadays, many organizations have hybrid infrastructures model. It is a combination of both On-premise and cloud infrastructure. It is essential for a DBA and developer to be familiar with cloud solutions as well.
Recently I have a requirement in that to import S3 bucket property and file data with the following source and destination:
- Source: CSV file stored in AWS S3 bucket
- Destination: On-premise SQL Server database table
First, let’s take an overview of the AWS S3 bucket.
Overview of Amazon S3
AWS S3 is an acronym of Amazon Web Service Simple Storage service. It is a highly scalable and cost-effective cloud storage for data storage, archival. We can upload any file extension in the S3 bucket. Single file size cannot exceed beyond five TB. Users can control the file properties, accessibility such as public or private accessibility. We can store unlimited data in the S3 bucket. The best part is that you only pay for the used storage.
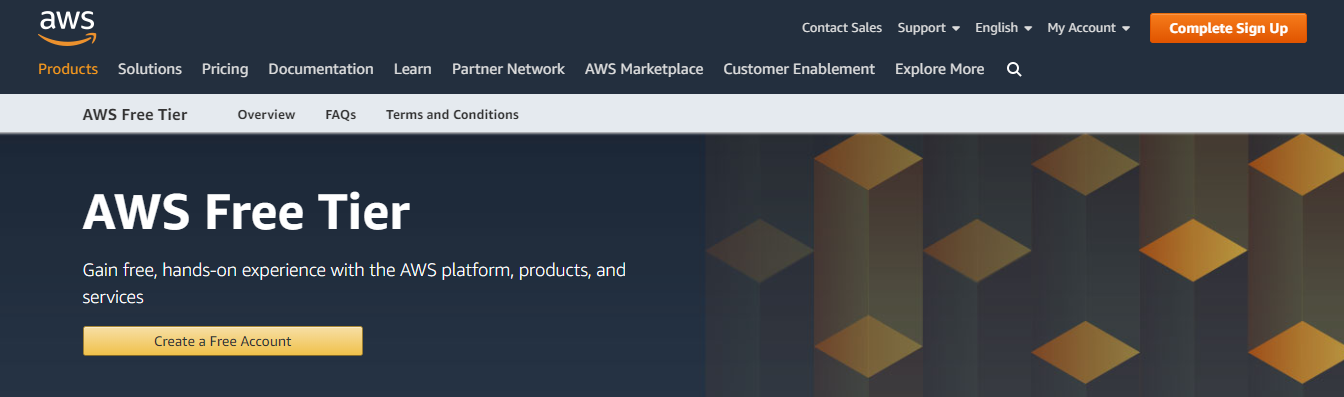
AWS Free Tier account
The starting point of the AWS journey is the AWS Console and creates an AWS free tier account. Go to this URL, and it opens the following free tier page of AWS:
We can create a free account, and it is 12 months free. You can use it as a starting point to learn AWS:
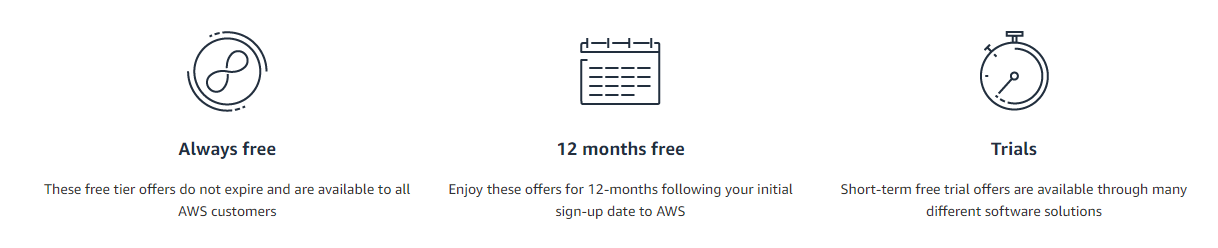
Few vital features of free tier account in AWS are as following:
- 750 hours per month free usage of Amazon EC2 instances
- 750 hours per month free usage of Amazon RDS t2.micro server
- 30 GB per month usage of Amazon elastic storage
- 5 GB free AWS S3 storage
You can go through the URL to read more about the free account in AWS. Click on Create a Free Account and go through the process by entering your personal information such as name, country, email address, etc.
Here is a catch; you need to provide a valid debit or credit card. It deducts 2 rupees from your credit or debit card. Do not worry; you will also get it back in a few days. It is a mandatory step to sign up for a free account. Amazon does not deduct any money until you have not exhausted the limit of the free tier account.
Amazon S3 configuration
To create an S3 bucket do the following:
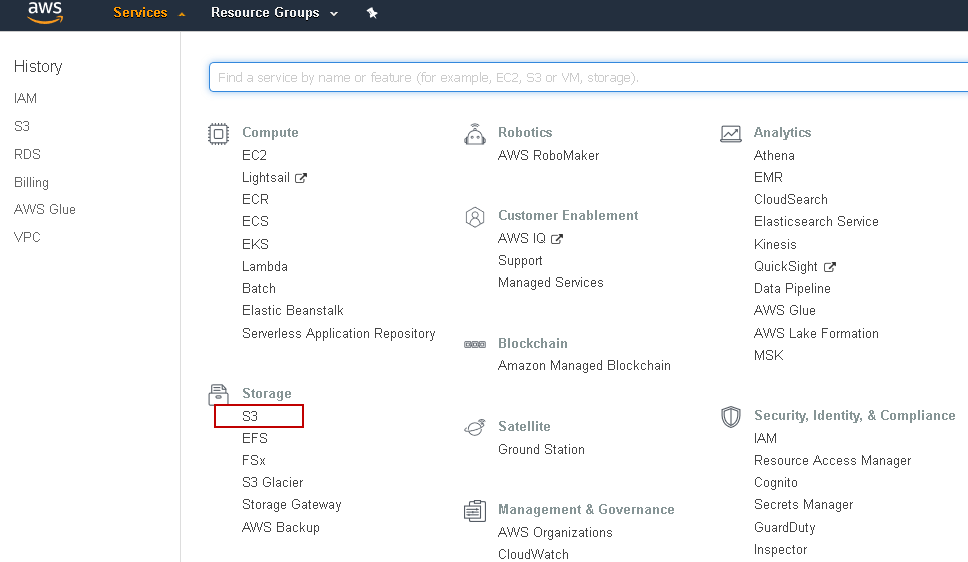
- Open the AWS web console and login to the account using IAM user having permissions to create, access, upload, and import data into the S3 bucket
-
Navigate to Services, Click on S3 in the Storage section:

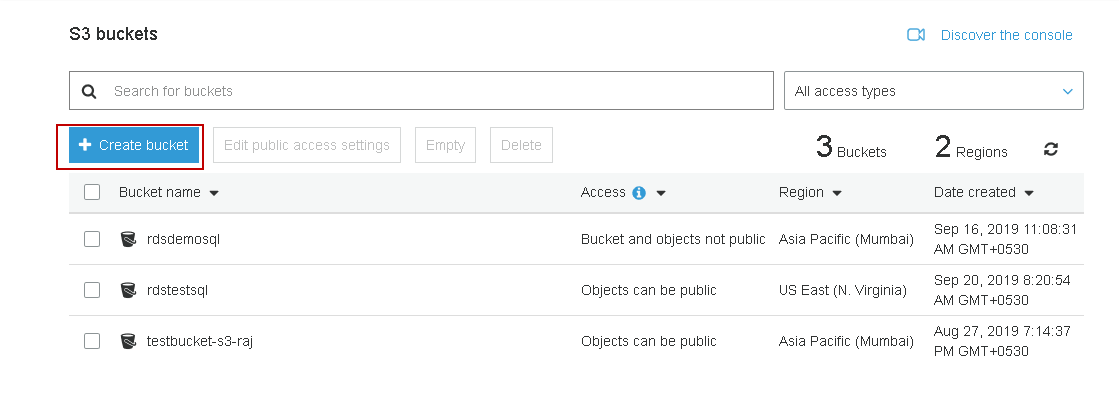
It lists out all existing AWS S3 Bucket. We can see bucket name, access level, bucket region and the created data of the S3 bucket
-
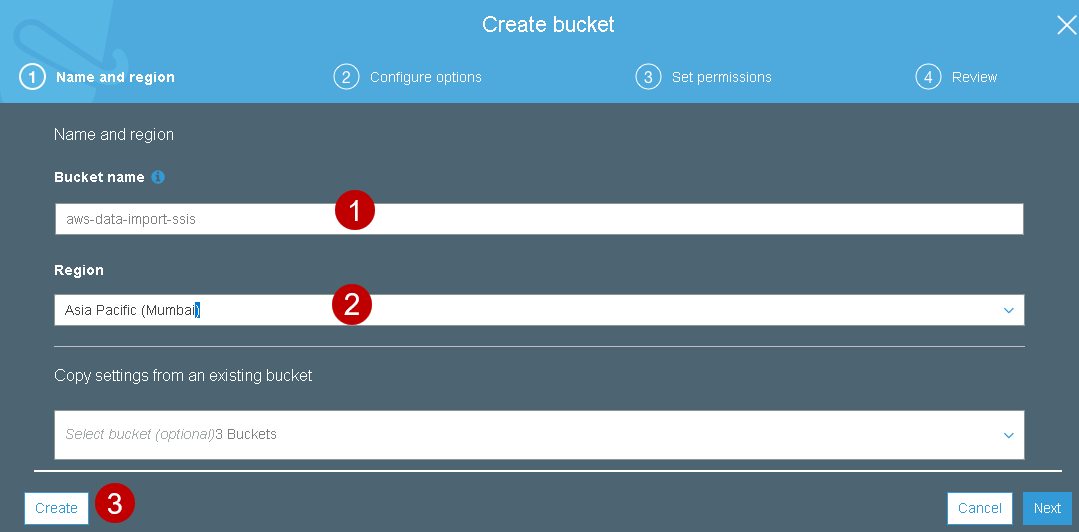
Click on Create bucket and provide the S3 bucket name:
-
Amazon S3 is a region-specific resource; therefore; you need to select the region from the drop-down list. Then, click on Create:
It creates the S3 bucket with default configurations and shows in the bucket list. This bucket belongs to Asia Pacific (Mumbai) region:
-
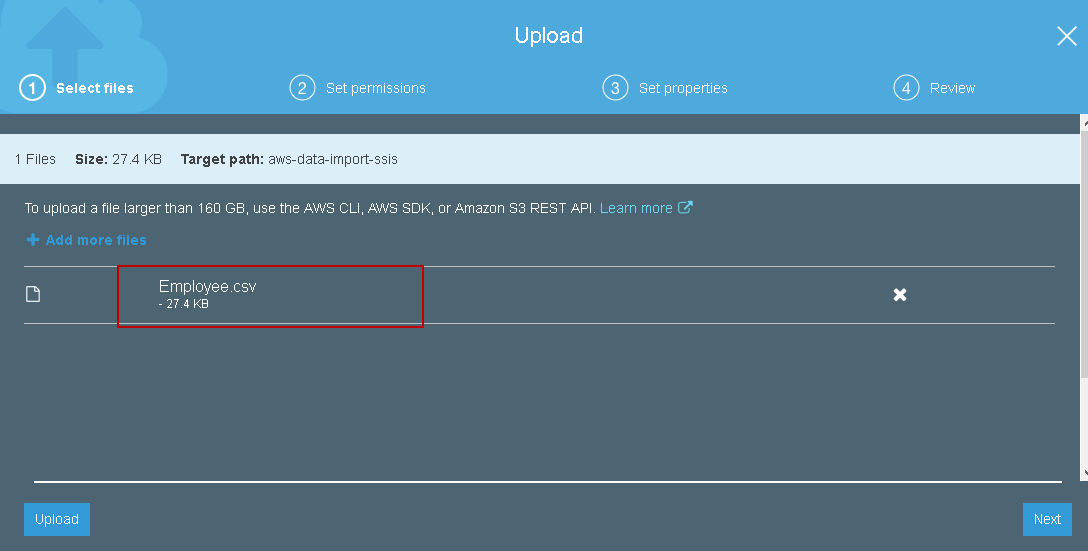
Open this S3 bucket, drag the CSV file from the source system, drop in the S3 bucket, and click the Upload button:
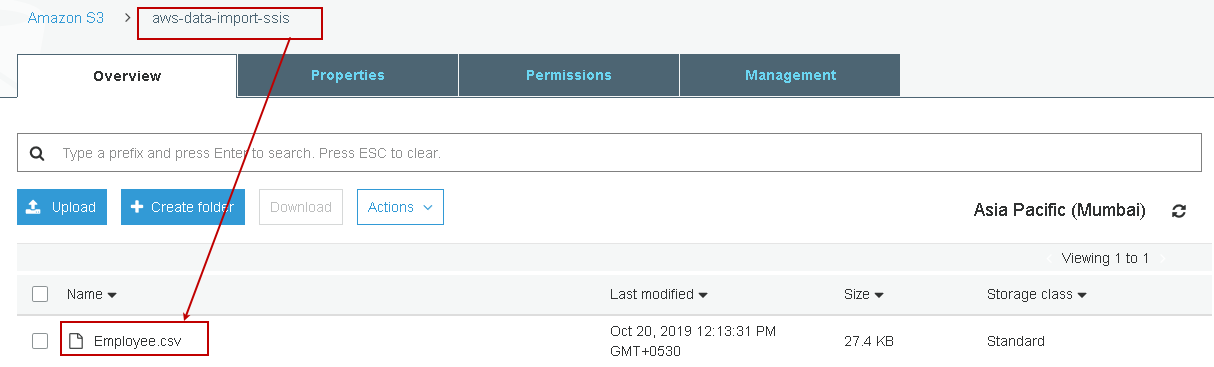
You can see the CSV file in the S3 bucket:

Amazon S3 SSIS data upload
As described earlier, we require data import from CSV file (stored in AWS S3 bucket) into the SQL server table.
Question: How do you connect an SSIS package with an AWS S3 bucket?
By default, the SSIS package does not allow you to connect with the AWS S3 bucket. It does not mean that we do have any mechanism to do so.
We can browse Visual studio Marketplace and use Amazon S3 SSIS Components (SSIS Productivity Pack) for our requirements:
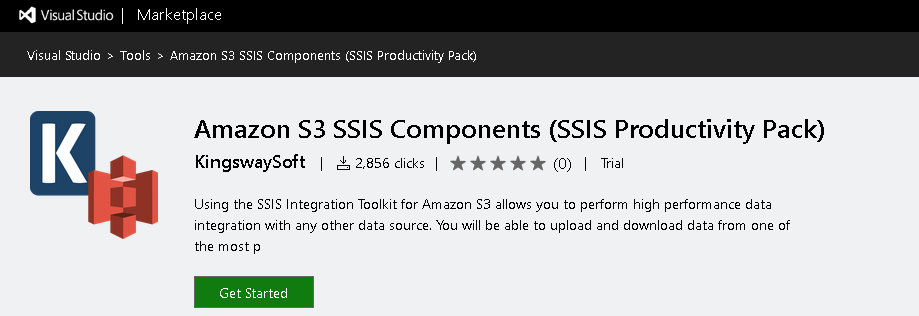
It enables SSIS package and Amazon S3 SSIS bucket integration without writing any specific code. You can easily use this SSIS productivity pack to download complete the task effectively and efficiently.
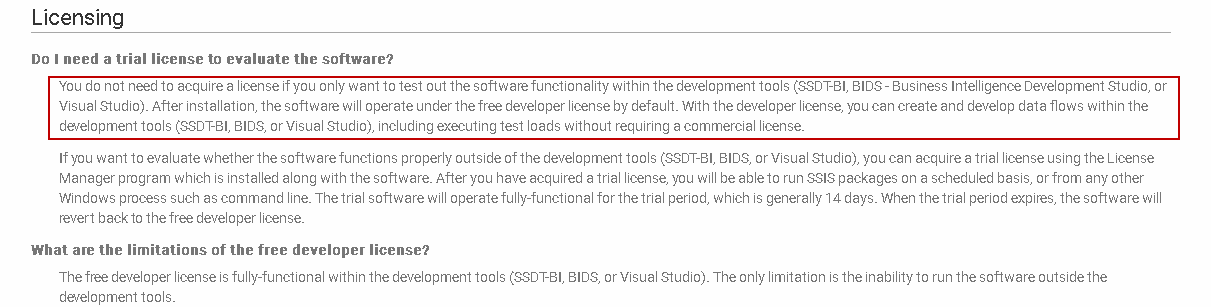
Note: It is trial version software, and you can use this to test out software functionality using development tools such as SSDT. You do not require a license in this case. Read more about licensing and available licenses using the link:
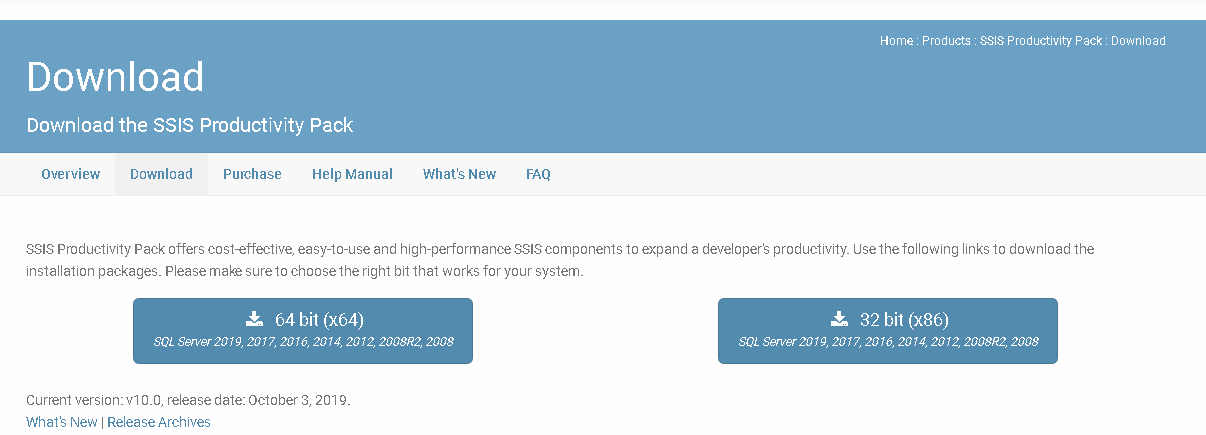
Download the appropriate 64-bit or 32-bit. Double-click on the installer and follow up the installation wizard for installing SSIS productivity pack with default configurations:
Amazon S3 SSIS package configuration
Once you installed SSIS Productivity Pack, launch Visual Studio (SSDT). I am using SSDT Visual Studio 2015 in this article.
S3 bucket connection
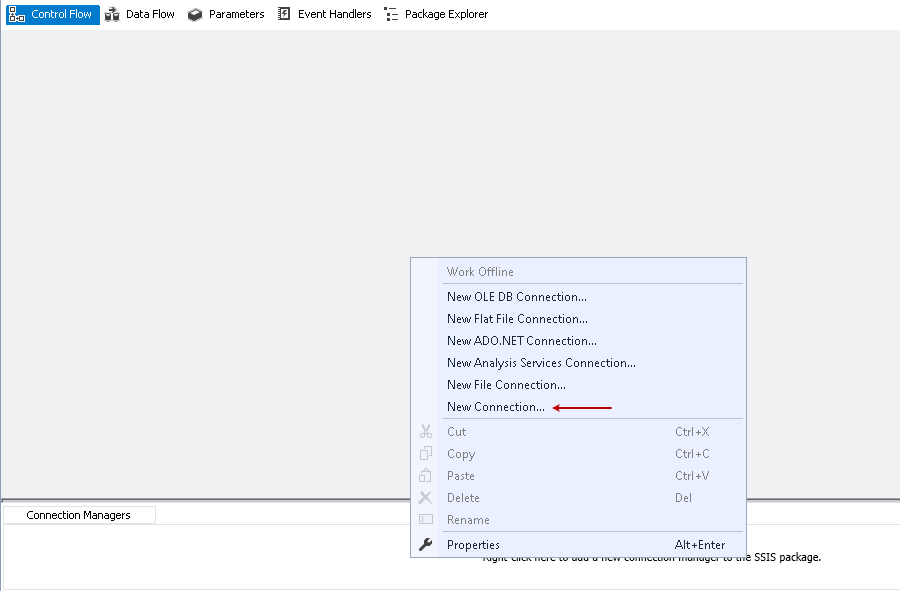
The first step is to create a connection pointing to the Amazon S3 bucket. Right-click on the connection manager and choose New connection:
It opens a list of available connection managers. We require connecting with the AWS S3 bucket; therefore, select the Amazon S3 and click on Add. It opens the Amazon S3 Connection Manager.
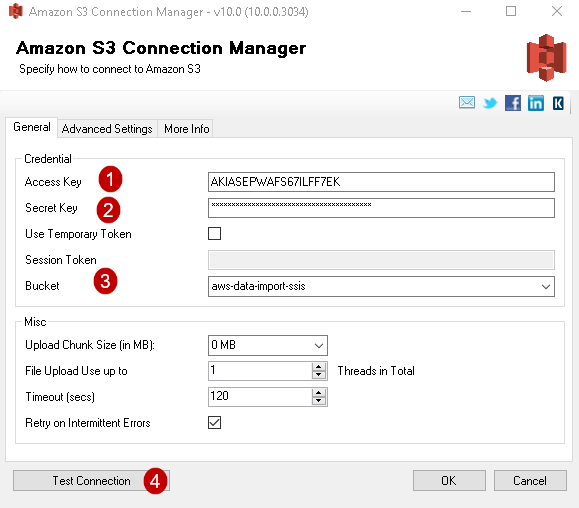
In General page of the connection manager, we specify connection properties and login credentials to the AWS S3 bucket:
-
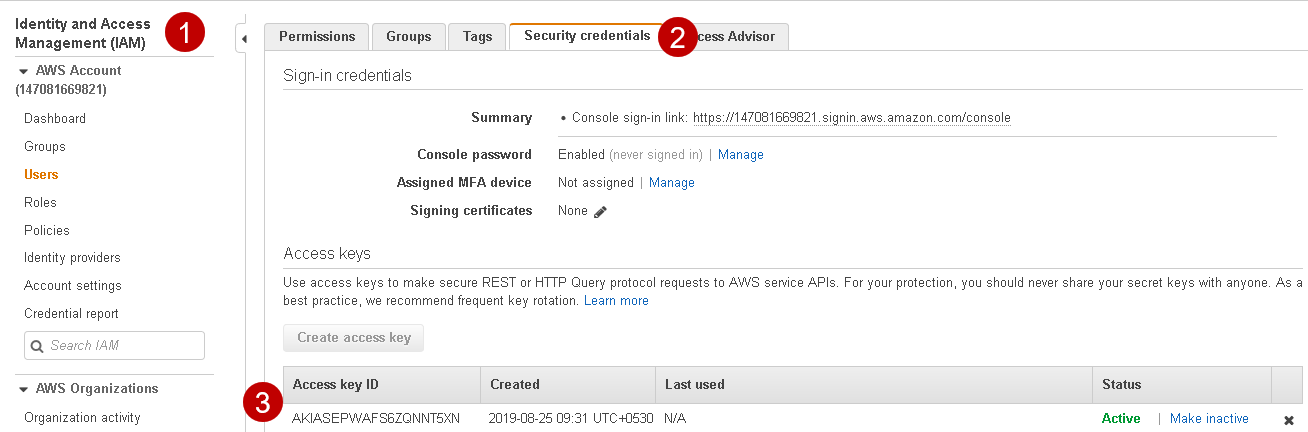
Access and secret key: We specify access and secret key on an IAM user. We get these keys from the IAM console at AWS web services
- Logon to AWS Console and navigate to IAM in the services menu
- Navigate to Users and click on a specific user
- In the user, properties go to the Security credentials tab
- Choose the access key and download the secret key in a CSV file
-
You need to store the access key and secret key in a secured location. Specify it in the Amazon S3 Connection Manager. It authenticates user account in Amazon services using these keys, and you can see the bucket name in the drop-down list
Click on Test Connection, and it checks for connection to the Amazon S3 SSIS bucket. Once the connection is successful, you get the following message:
Click OK, and we can see AWS S3 Connection in the connection manager:


Add a Data Flow task
In the next step, add a data flow task in the SSIS package for the Amazon S3 SSIS bucket:
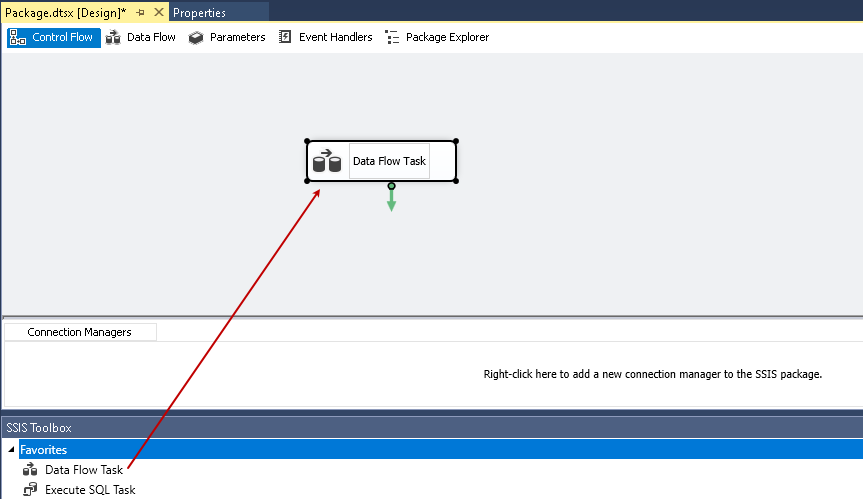
Rename the data flow task as AWS S3 Data Import:

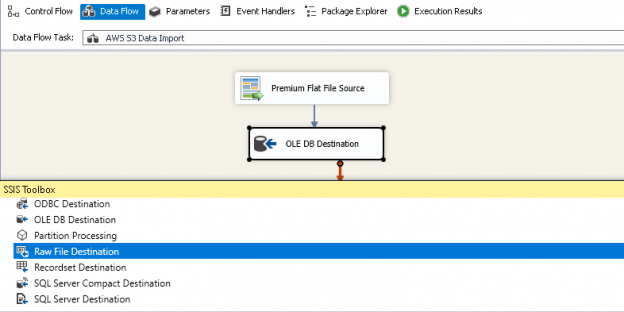
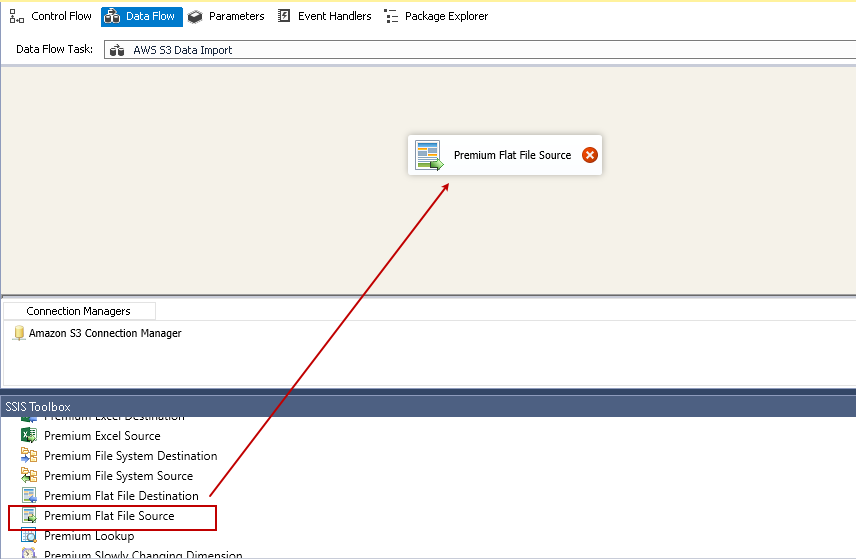
Double-click on this task, and it takes you to the data flow screen. In the SSIS toolbox on the data flow tab, you can see options for Amazon S3 bucket:
- Amazon S3 Destination
- Amazon S3 Source
- Premium Flat File source
- Premium Flat File destination
Drag Premium Flat File Source in the data flow task from the SSIS toolbox:
Double-click on Premium Flat File Source and it opens the editor window for configuration:
- Connection Manager: Select the existing connection to the S3 bucket from the drop-down. If you do not have an existing connection to the S3 bucket, click on New. You require specifying keys (access and security key) information, as shown in previous steps
- Source File Path: It is the CSV file path in the S3 bucket. Click on eclipse and browse to the CSV file path. You might have multiple files in the S3 bucket. The source file path should point to a valid CSV file
Click on eclipse (…) on the source file path and browse to the CSV file path:
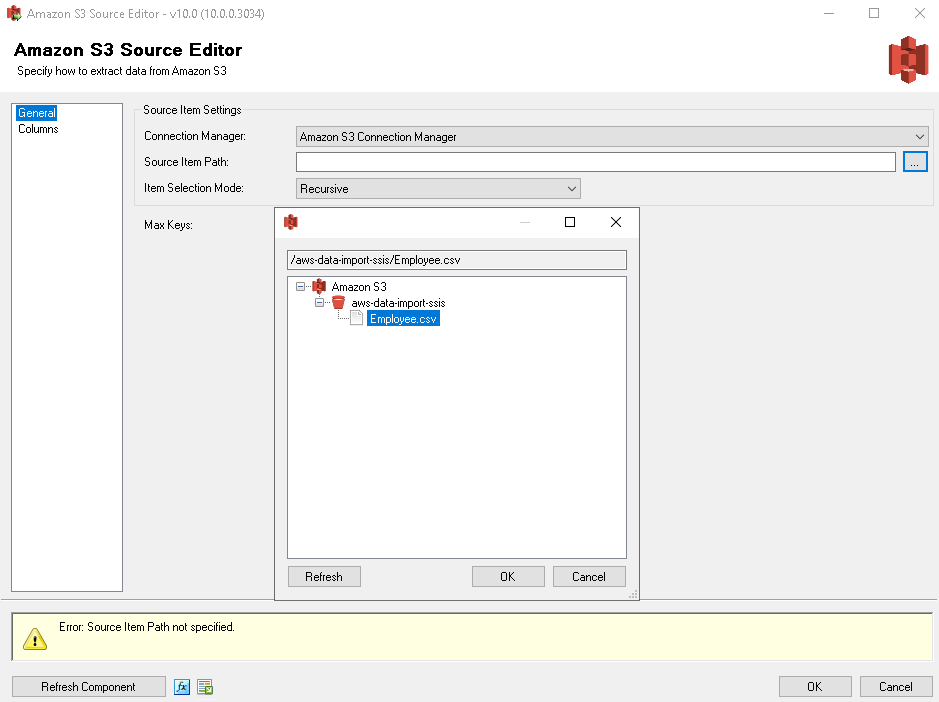
We can see the CSV file in the Source item path column.
- The first row has the header: My CSV file first column contains column headers. Remove the check from here if the CSV file does not contains headers
- Skip Empty Rows: CSV file might contain empty rows. Put a check on this to skip the empty rows

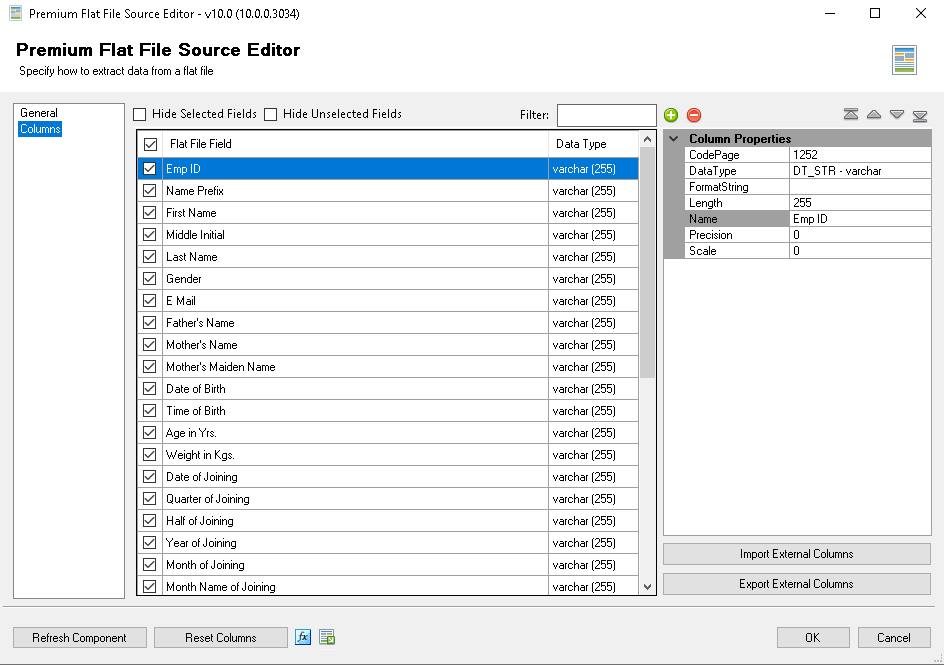
Click on columns tab to view excel file columns. We may uncheck the columns if we do not want to import them into SQL Server tables. It also shows the data type and length automatically. We can change the column data types and their properties in this window. For this demonstration, let’s go with default columns properties in the Amazon S3 SSIS package:
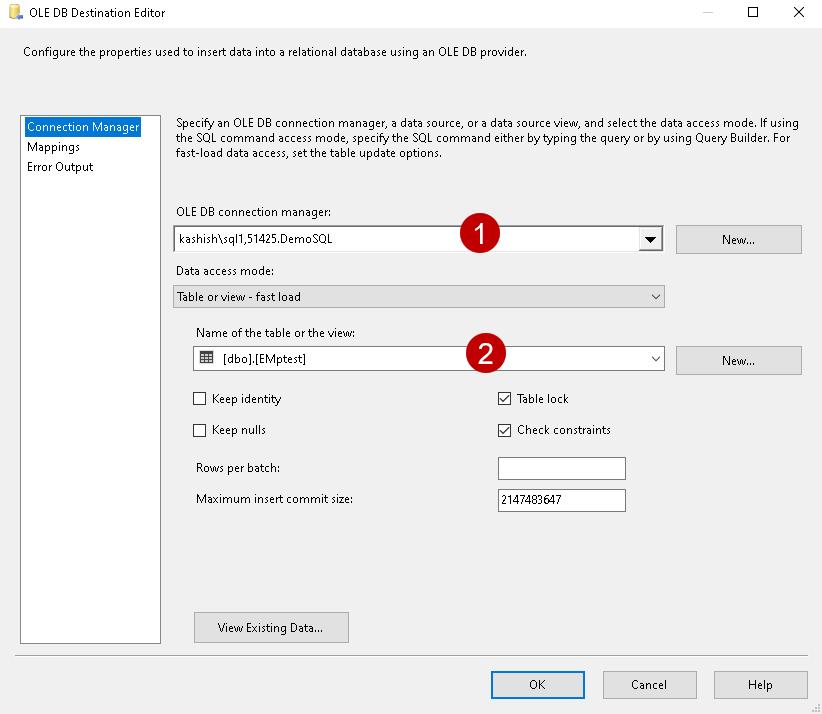
Click OK and add an OLE DB destination connection. This OLE DB destination should point to the SQL Server instance as per our requirement. Right-click and configure the destination with the SQL Server connection and SQL Server table. You also need to do the mapping between source and destination columns:
Once the OLE DB destination connection is successful, you can see the package as shown below:
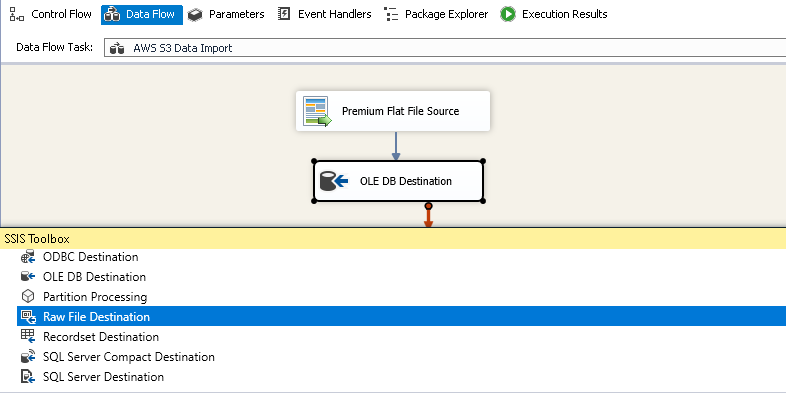
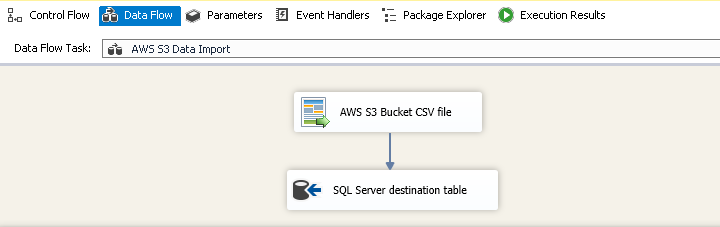
Before executing the Amazon S3 SSIS package, rename the tasks as follows:
- Premium Flat File Source -> AWS S3 Bucket CSV file
-
OLE DB Destination editor: SQL Server destination table
Execute the SSIS package, and it transfers 100 rows from the source CSV file to SQL Server table.
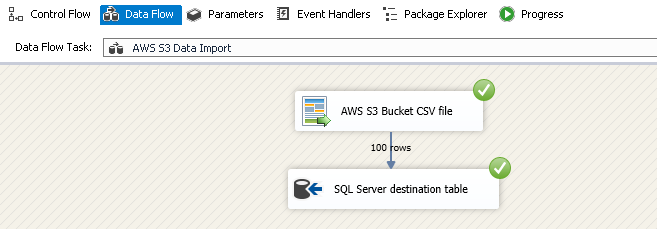
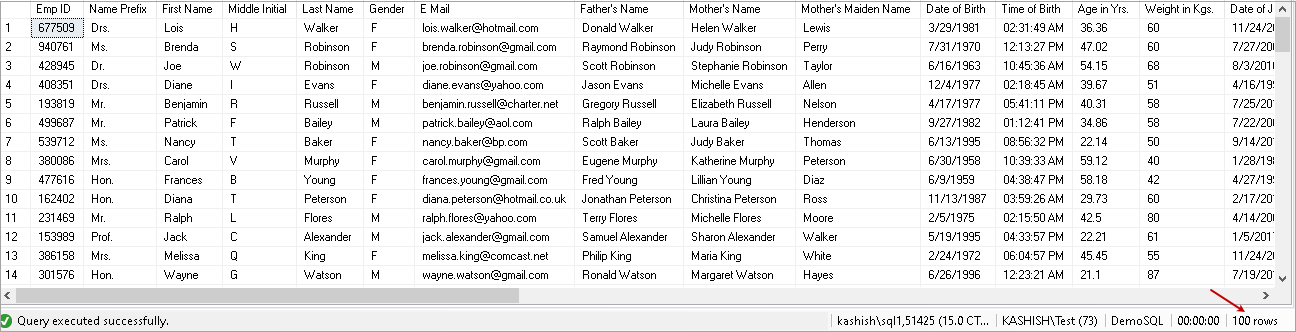
Verify the records in the SQL Server table.
Conclusion
In this article, we explored the method to integrate the SSIS package and the Amazon S3 SSIS bucket. We can use the component specified in this article for data import, export between On-premise and cloud systems as well.

I am the author of the book "DP-300 Administering Relational Database on Microsoft Azure". I published more than 650 technical articles on MSSQLTips, SQLShack, Quest, CodingSight, and SeveralNines.
I am the creator of one of the biggest free online collections of articles on a single topic, with his 50-part series on SQL Server Always On Availability Groups.
Based on my contribution to the SQL Server community, I have been recognized as the prestigious Best Author of the Year continuously in 2019, 2020, and 2021 (2nd Rank) at SQLShack and the MSSQLTIPS champions award in 2020.
Personal Blog: https://www.dbblogger.com
I am always interested in new challenges so if you need consulting help, reach me at rajendra.gupta16@gmail.com
View all posts by Rajendra Gupta
- Understanding PostgreSQL SUBSTRING function - September 21, 2024
- How to install PostgreSQL on Ubuntu - July 13, 2023
- How to use the CROSSTAB function in PostgreSQL - February 17, 2023