

In the previous two articles, Starting your journey with Azure Data Studio and Developing your SQL Server database using Azure Data Studio, we introduced the Azure Data Studio tool by describing the main components of that data studio and showed how we can take advantages from it in developing and organizing the database related projects.
In this article, we will go deeper and present the advanced tasks that can be performed using the Azure Data Studio.
Before you start
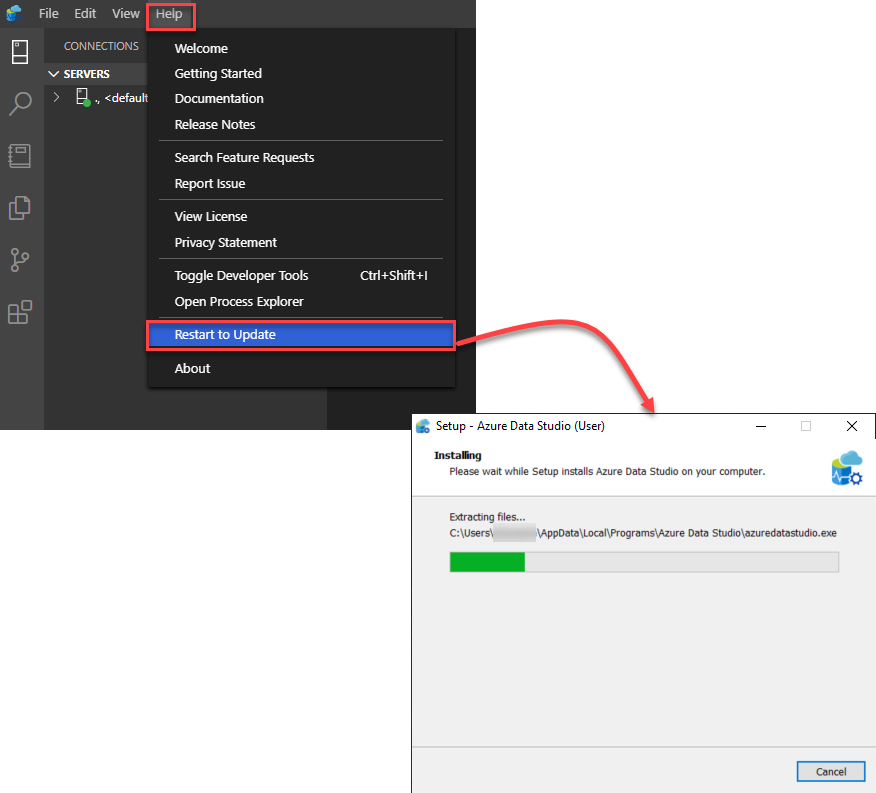
Azure Data Studio is a dynamic tool that is reviewed continuously based on the users’ feedback. Also, it introduced many features that are still under preview and updated frequently. In order to keep the version that is installed on your machine up-to-date and with the latest features and the bug fixes, it is recommended to update it continuously.
To update the Azure Data Studio, open the tool and choose the Restart to Update option from the Help menu, and the studio will be closed, updated with the latest changes then opened automatically, as shown below:
After updating Azure Data Studio, it is recommended to organize SQL Server instances in your environment within groups. This will make it easier for you to directly identify the server that you manage to use in your project. For example, you can create a group for all SQL Server instances in the development environment, another servers group for the testing environment, and a restricted group for the production environment.
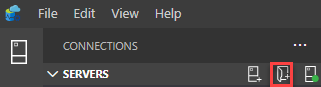
To achieve that, click on the New Server Group button, under the Connections tab, as below:
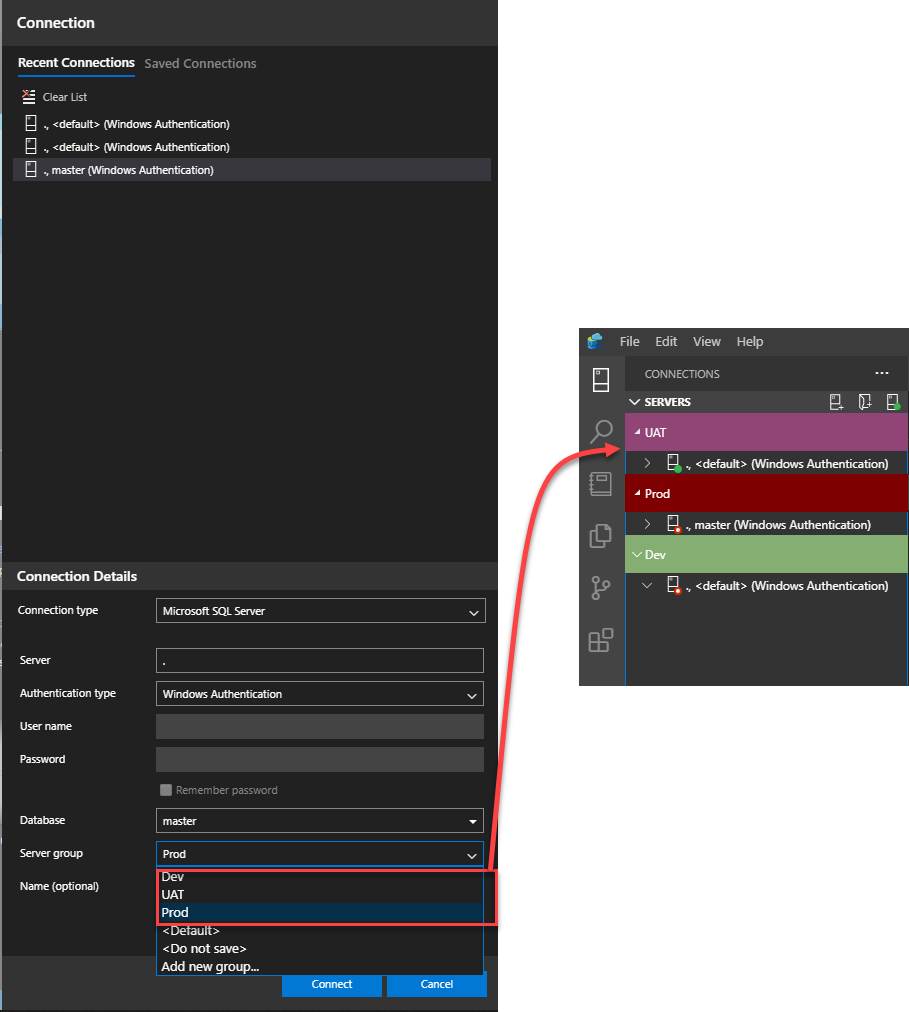
From the Add server group window, provide the name and the description for that server group in addition to color to distinguish that group quickly. In the example below, we will create three servers’ groups: Dev, UAT, and Prod:

Now the server groups are created successfully. To add servers to these groups, choose the related server group name from the group’s drop-down list, during the connection creation process, or modify the recent or the saved connections with the correct group name, and the servers will be displayed directly under the corresponding group when connecting to that server:
Developing stored procedures
Azure Data Studio contains a rich query editor that allows us to develop any database object easily with a few clicks. In the previous article, we showed how to create a new database, a new table, and modify the table’s data without the need to be a skilled database developer.
In this example, we will show how to develop a new stored procedure.
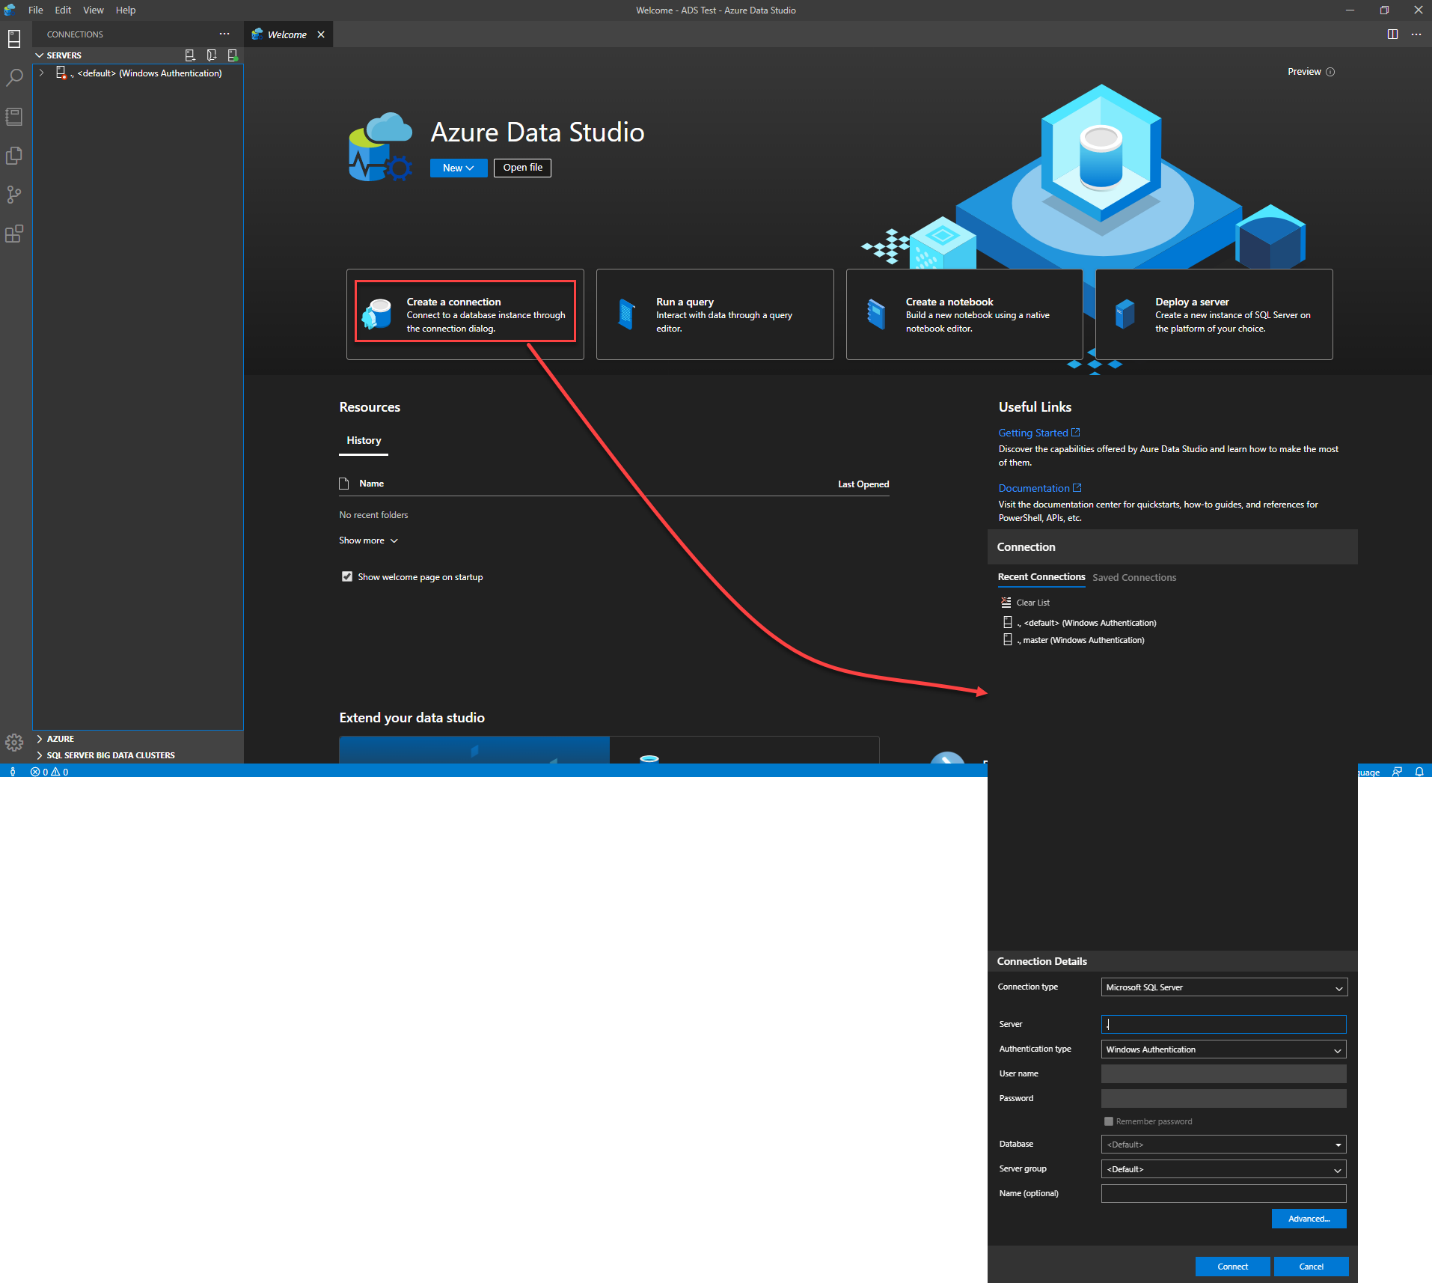
The first step here is to connect to the SQL Server instance that hosts the database where the stored procedure will be created. This can be achieved by different methods like choosing to Create a Connection from the Welcome page, and provide the name of the SQL Server instance, the authentication method and the credentials that will be used to connect to that SQL Server, as below:
After connecting to the SQL Server instance, open the query editor window by choosing New Query option from the File menu, or simply right-clicking on the database that you are interested in creating the stored procedure and choose New Query option, as indicated below:
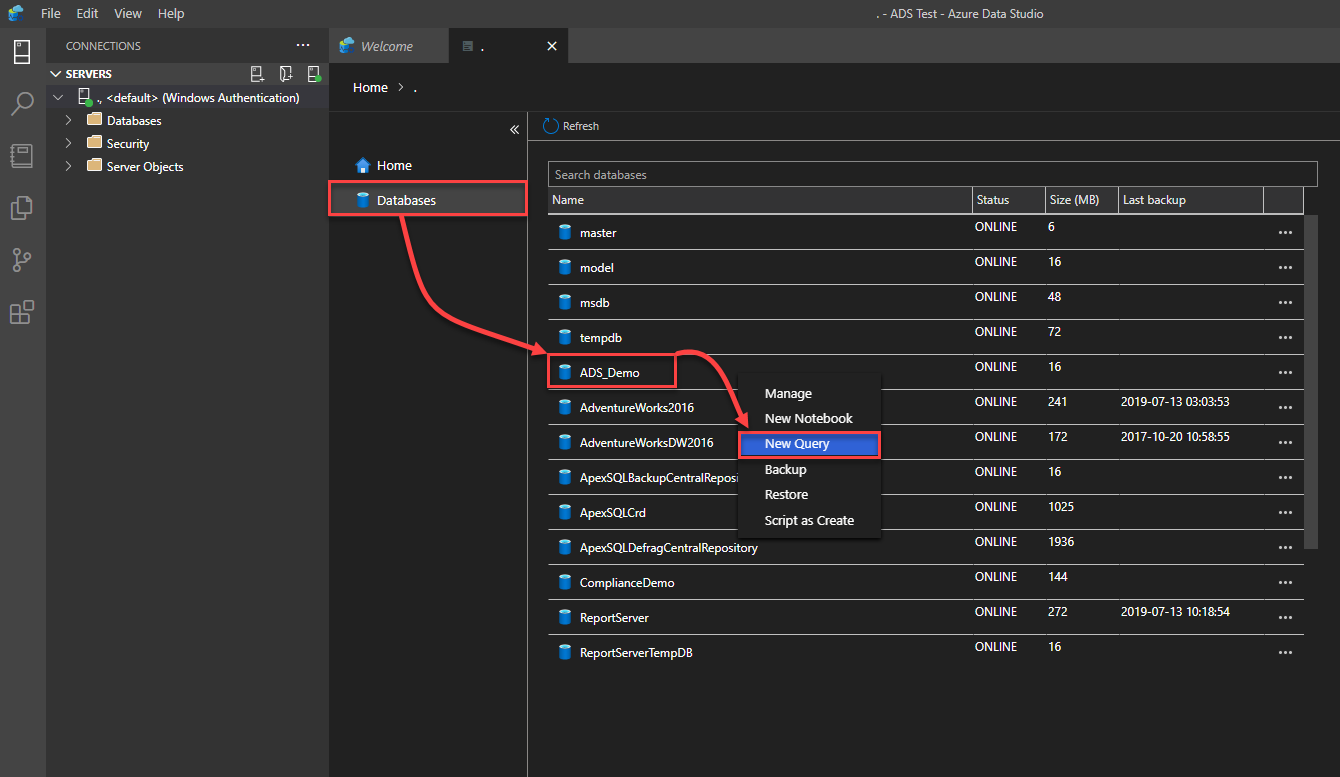
If the query editor window is still showed as disconnected, click on the Connect option and select the name of the connection that represents the SQL Server instance that hosts your database.
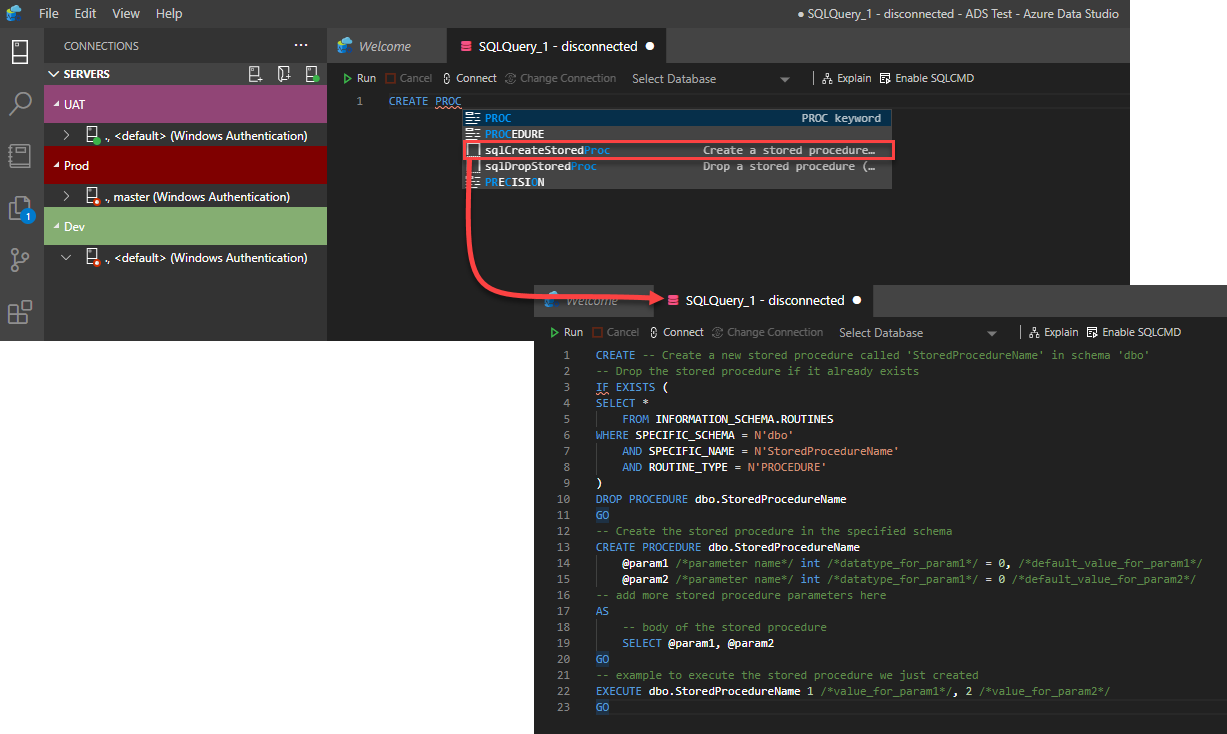
To create a new stored procedure, you can take advantage of the built-in IntelliSense feature that automatically completes the statement you are trying to write or the snippets code feature that provides you with templates for the object you manage to create.
In our demo here, we will use the “Create a Stored procedure” snippet to provide us with the template that can make it easier for us to create that stored procedure and fill only the basic information without recalling the full syntax for the CREATE PROC T-SQL statement.
In the below snippet, you will see that the script will be in the form of “drop, create then execute”. Where it will check first if there is any stored procedure with the same name and drop it before creating the new one then provide the statement that is used to execute that stored procedure for verification purposes, as shown below:
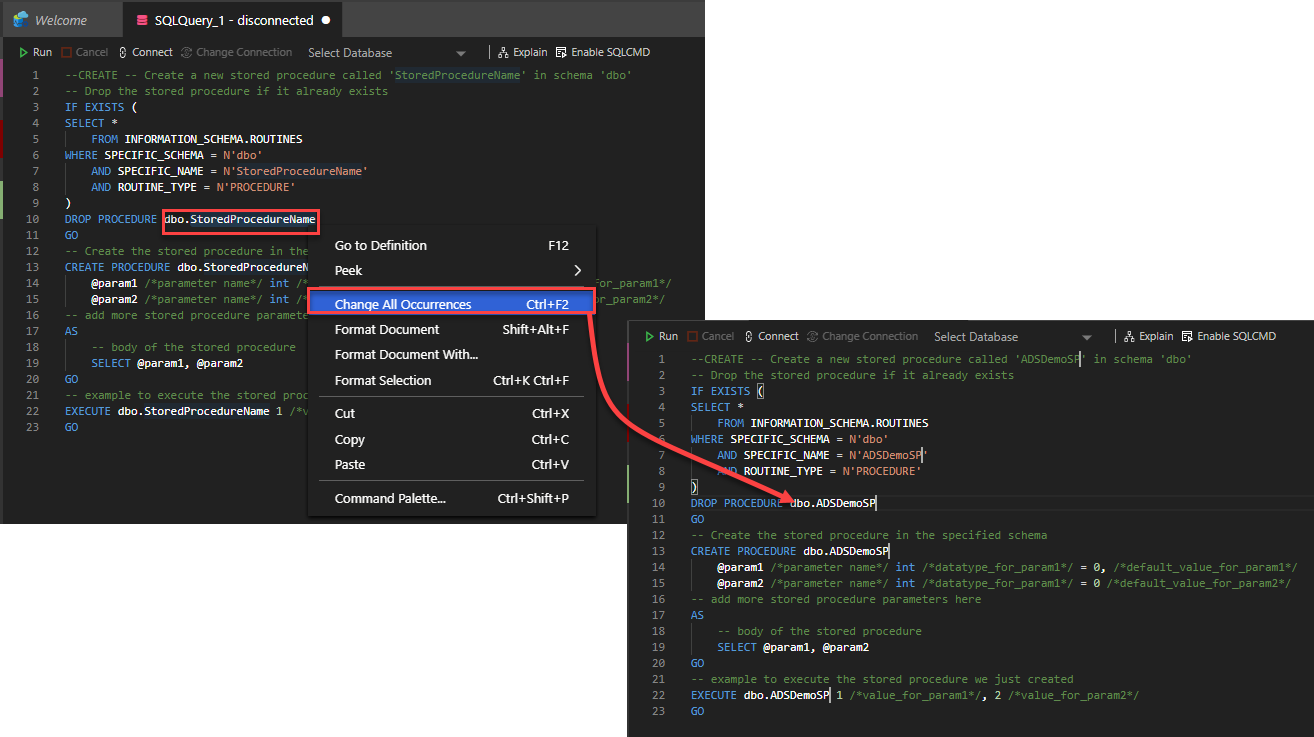
In addition to the useful template, the Azure Data Studio query editor is clever in a way that helps to change all occurrences for a specific statement in the whole document. This will help if you plan to change the default name of the stored procedure wherever it is used.
This can be achieved by selecting the text that you plan to change, right-click on that text, and choose Change All Occurrences option. When you write the new name for the stored procedure, you will see that the cursor is pointing to all text occurrences and the value is changing simultaneously in all cursor locations:
If you are still not surprised by the functionalities of this query editor, Azure Data Studio will make you astonished with the Peek Definition feature.
When we create a stored procedure that is reading from a table that contains a large number of columns or reading from multiple tables and joins between these tables, it is not easy to recall the name of all the columns, the constraints on these columns, and the relations between the tables. Not to mention that visiting the schema of the table is not user-friendly.
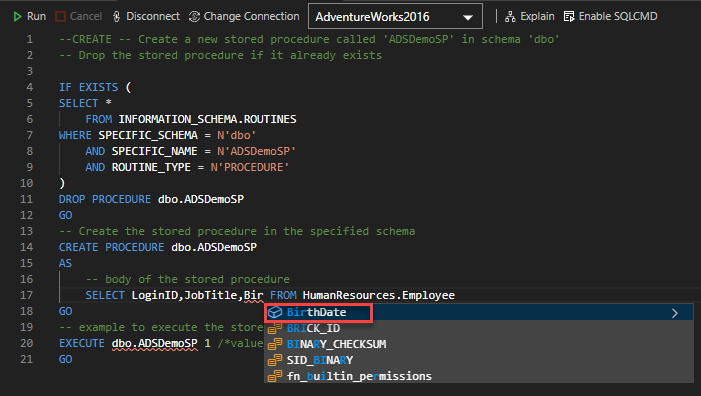
I agree with you that the IntelliSense feature is helpful to get the name of the tables and the columns, but this requires from you to remember part of the names to get the complete name automatically, as can be seen below:
To overcome this issue, Azure Data Studio introduces a feature that helps you open the script that is used to create a specific database object as a pop-up in the same window where you are developing your stored procedure. This is similar to the script that is generating when trying to “Script as Create” for a specific table.
Assume that we plan to use the Employee table in the stored procedure that we are developing. Also, this table contains a large number of columns that do not follow a specific naming convention. So, it is not easy to recall these names.
To display the schema of that table, including the name of the columns, the data types, the constraints and relations, right-click on the name of that table in your stored procedure and choose to Peek Definition option from the Peek options list, and a dark blue pop-up window will be displayed, that contains the schema definition for that table, where you can easily read it and use the displayed information to write your query in the stored procedure at the same time:
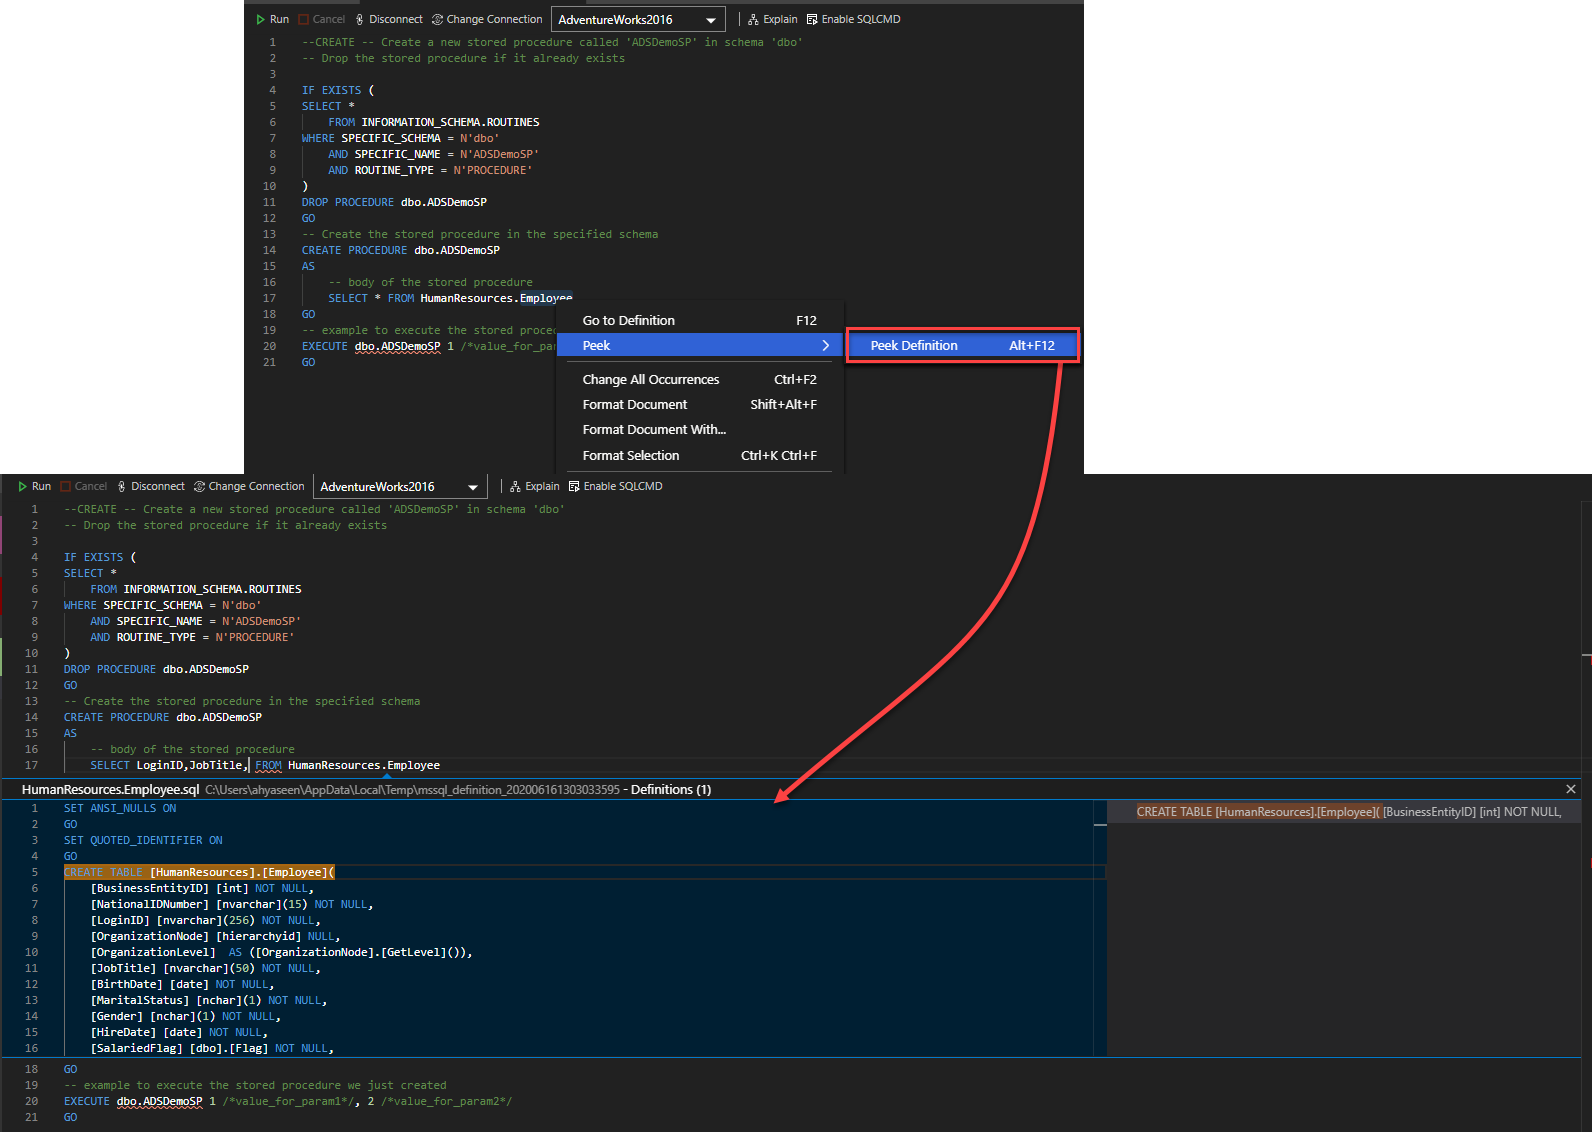
The Go to Definition option in the previous window is helpful when you want to check the definition of another database object, such as stored procedure or function, that is used in that script, without the need to browse it under the database objects list.
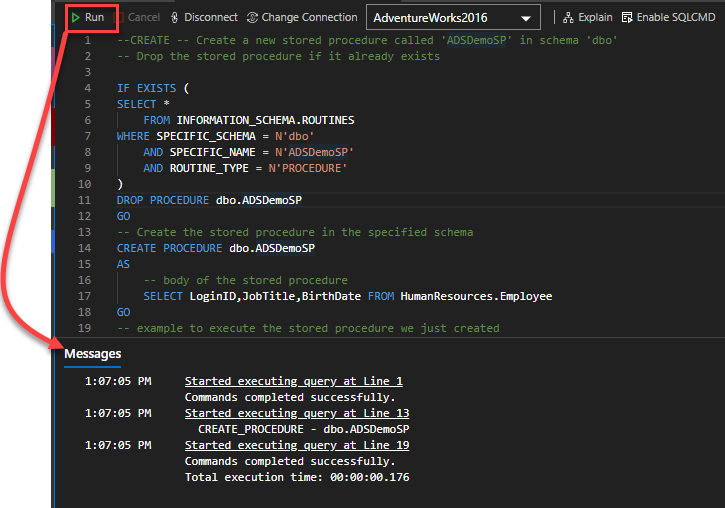
Once you finish writing your stored procedure script, click on the Run option to execute the CREATE PROC statement that will create the stored procedure under the selected database, as you can see below:
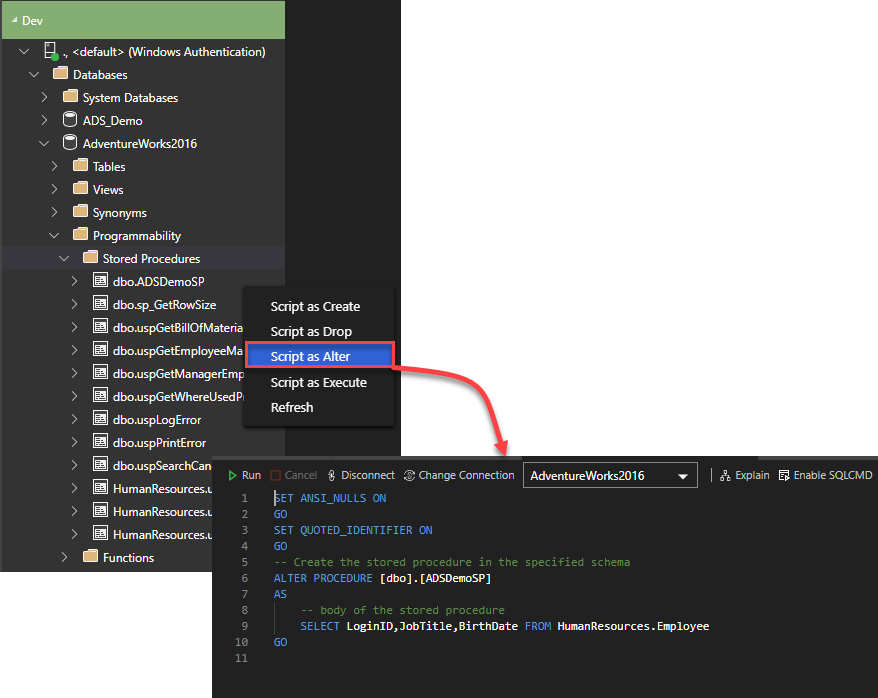
To modify any stored procedure, view or function under a specific database, right-click on that database object, and choose Script as Alter option, where a new window with ALTER PROC script for that object will be displayed, allowing you to modify it as per your requirements.
Other useful options displayed in the same list is generating script to create that stored procedure in order to create it in another database or server, script as drop option to generate a T-SQL statement used to drop that procedure and script as execute option to generate the T-SQL statement that can be used to execute that procedure:
Security development
We mentioned in the previous articles that the Azure Data Studio is not a database administration tool, and it provides no GUI for most of the administration tasks.
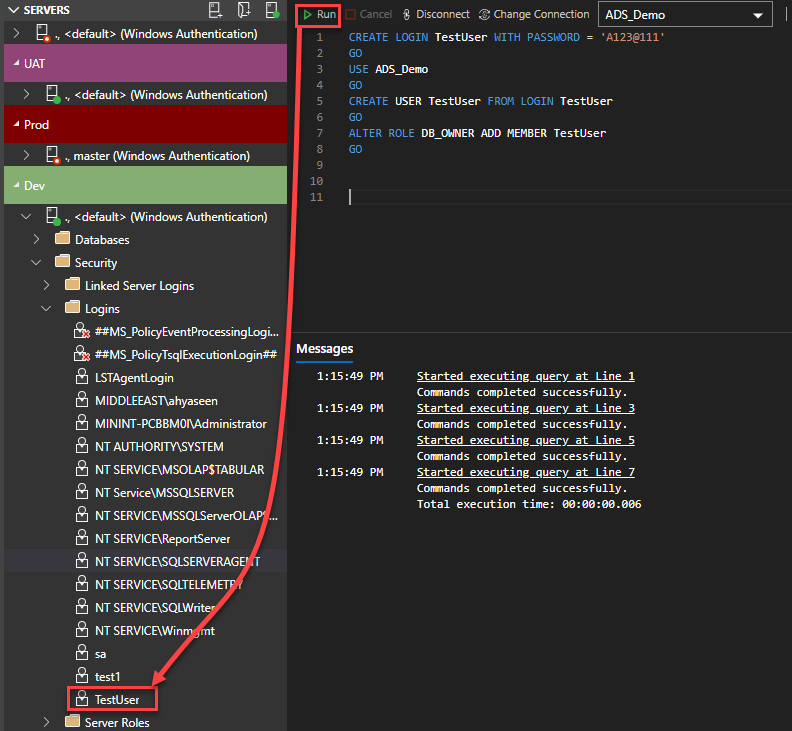
For instance, to create a new server login, a database user, or grant or revoke permission on a specific database object for that user, you need to write a T-SQL script to achieve that.
Again, with the help of the IntelliSense and Snippet code features, this task is not hard. For example, the script below can be used to create a new SQL Server Authentication login, map the user to a specific database and grant him owner permission on that database, as demonstrated below:
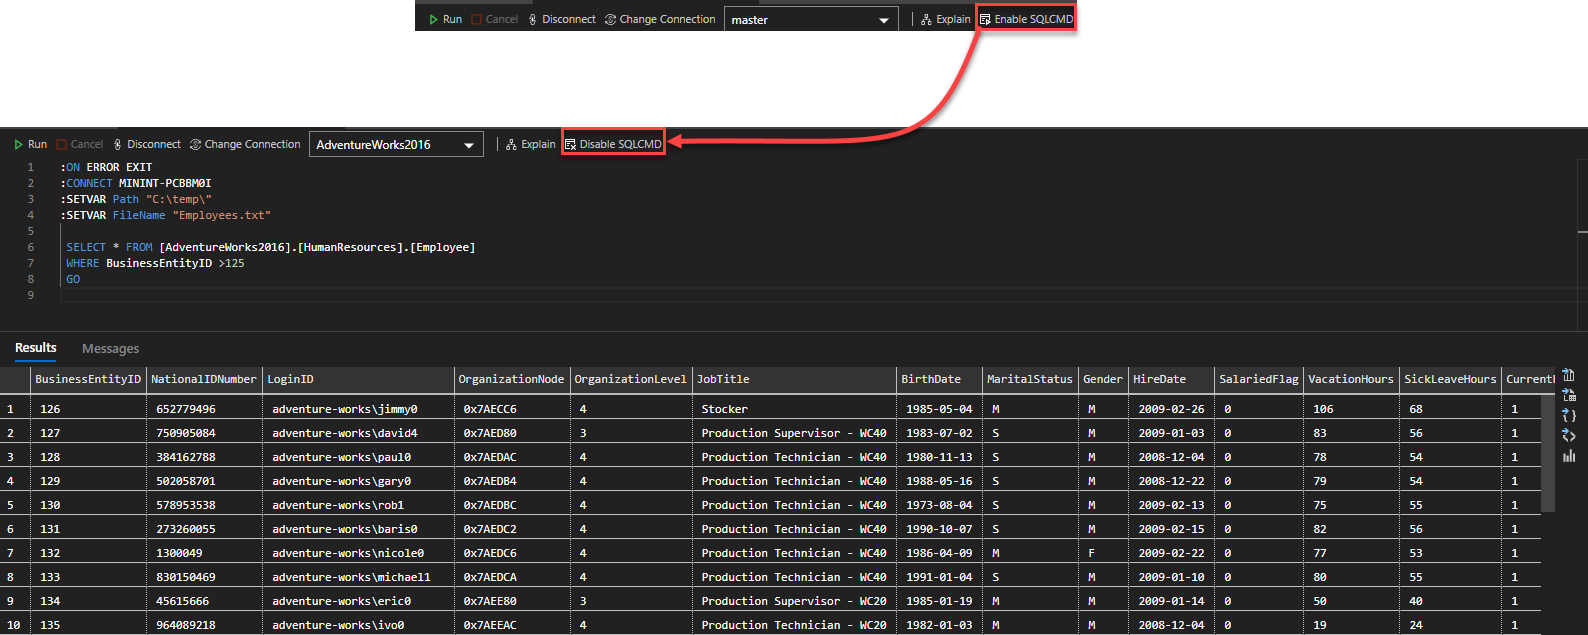
SQLCMD
The query editor of Azure Data Studio provides us with the ability to use the interactive sqlcmd command-line utility to write Windows system commands and T-SQL statements in the same script.
To achieve that, click on the Enable SQLCMD option at the top left side of the query editor and write your “hybrid” code that contains Windows and T-SQL statements, and it will be parsed and executed successfully:
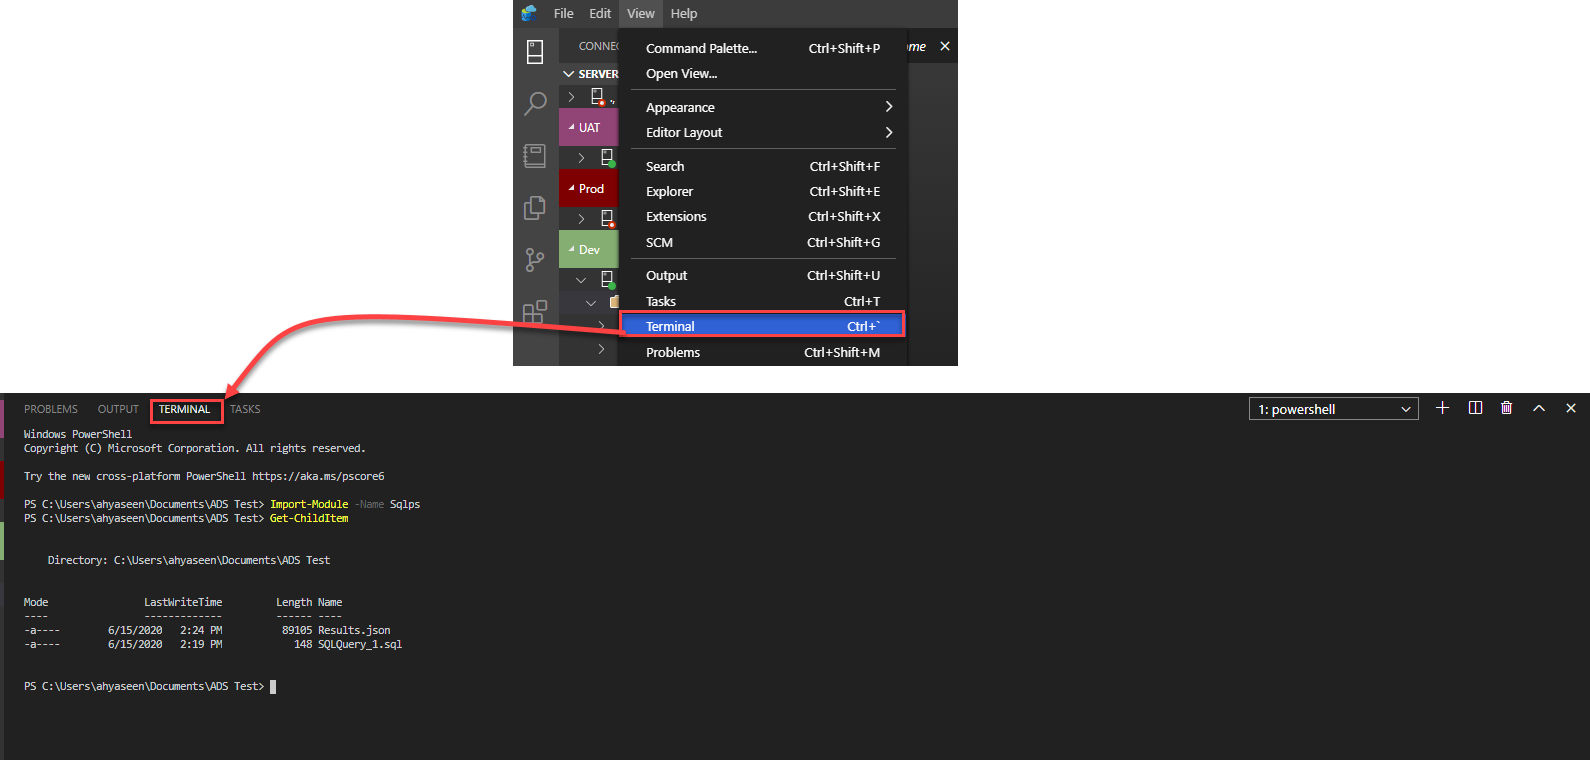
PowerShell
Yes! Rather than opening a separate console to execute PowerShell commands, Azure Data Studio can be used to run these commands directly via the studio terminal.
The terminal window can be opened by choosing the Terminal option under the View menu, then used to write and execute your PowerShell commands directly, as you can observe below:
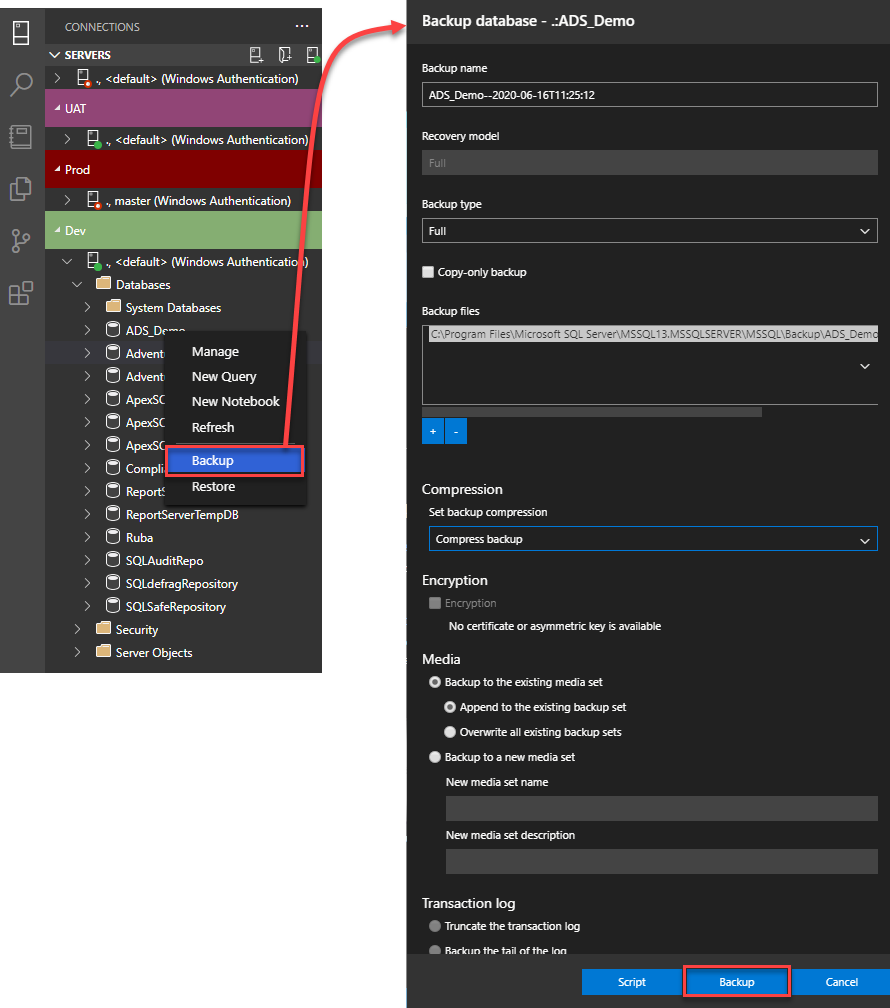
Backup and restore
The responsibility of performing, tracking, and monitoring the backup and restore process is on the database administrators. But the database developers, who are performing changes to the database schema and data, at least in the development environment, need to perform backup and restore the database frequently.
Fortunately, Azure Data Studio provides us with the ability to manually perform the backup and restore operations directly from the same studio, using a backup and restore wizards very similar to the ones we are familiar with in the SSMS tool.
To take a new backup for a specific database, right-click on that database, and choose the Backup option. From the Backup database wizard, specify the name, type, and properties of the backup process then click on Backup option to take a backup or generate a script to perform the backup later, as is shown:
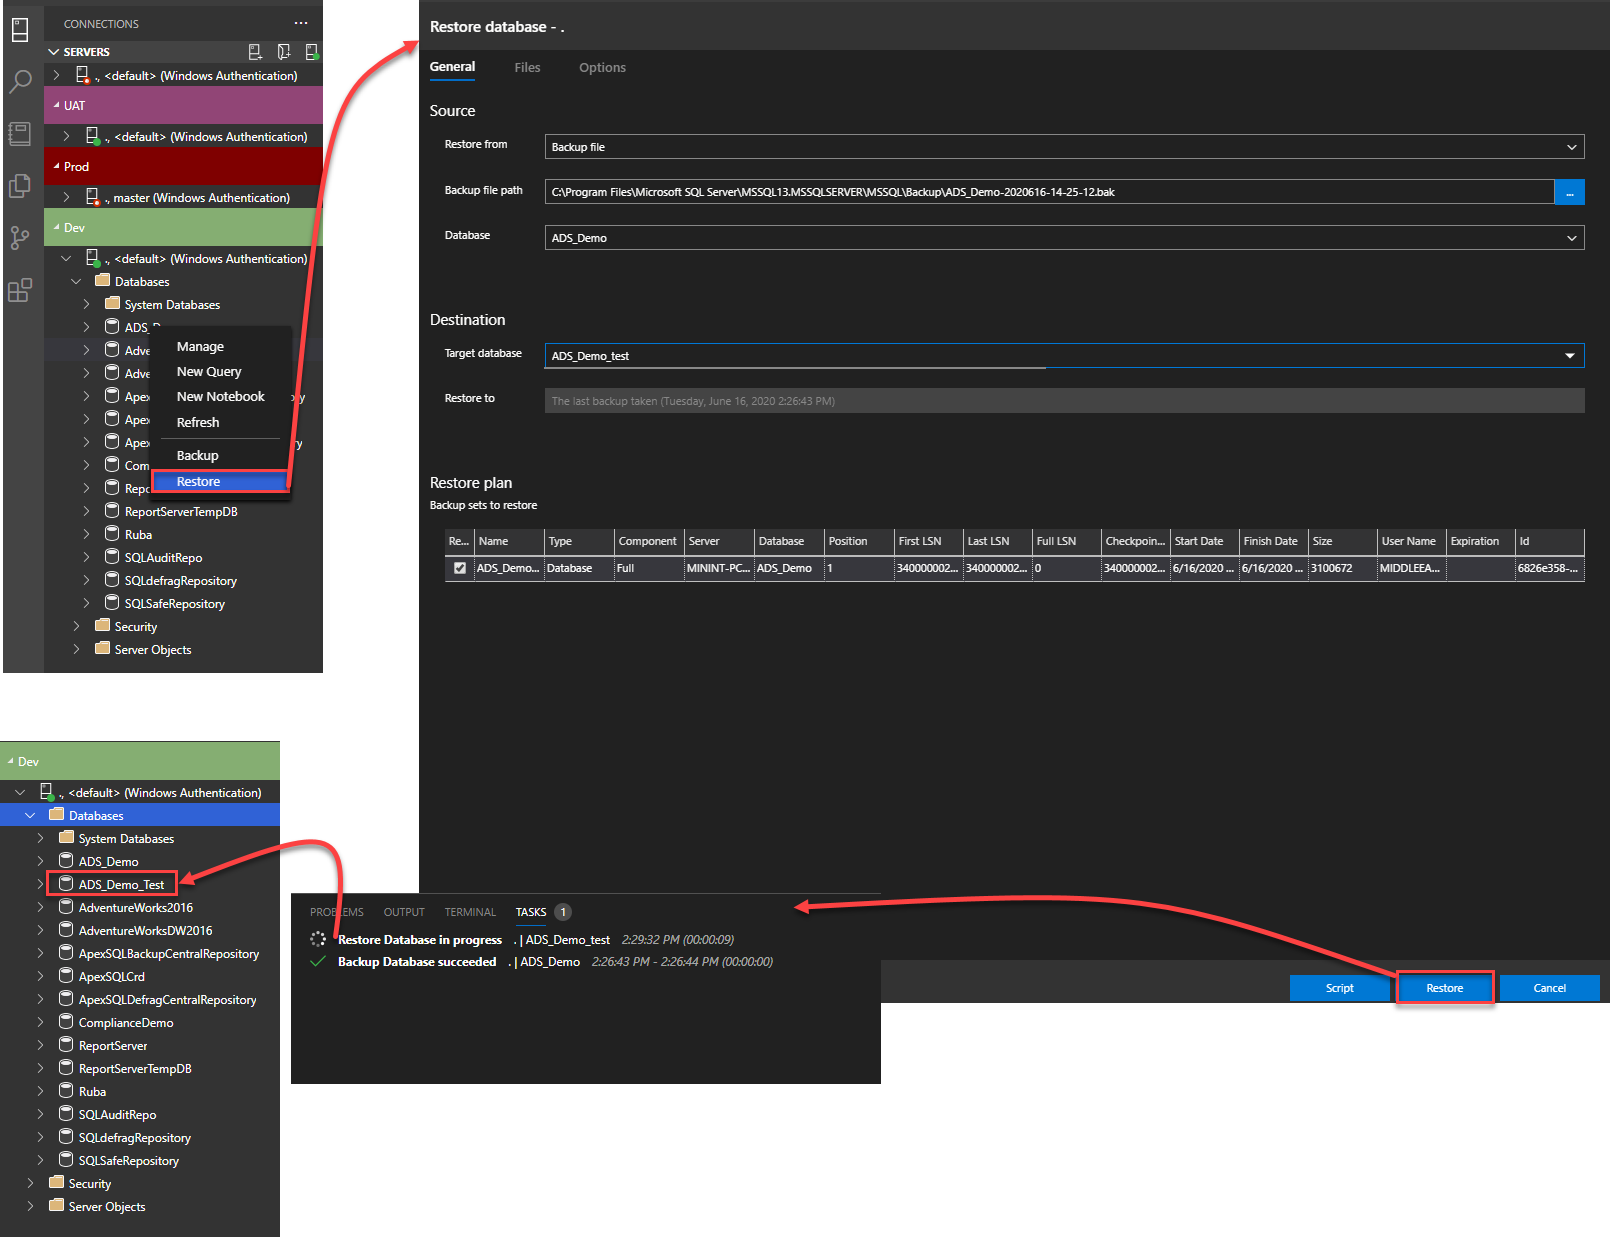
Once the backup operation is completed, based on the displayed Tasks window with the backup operation process, you can restore that backup file to another SQL Server instance, or the same instance with another name, by right-clicking on the SQL Server instance name and choose to Restore option, then choose the location of the backup file and the restore options, similar to the SSMS ones, and click on the Restore option to start the restoration process, or generate script to restore the database later.
You can monitor the progress of the restore operation too from the automatically displayed Tasks window, as you can see below:
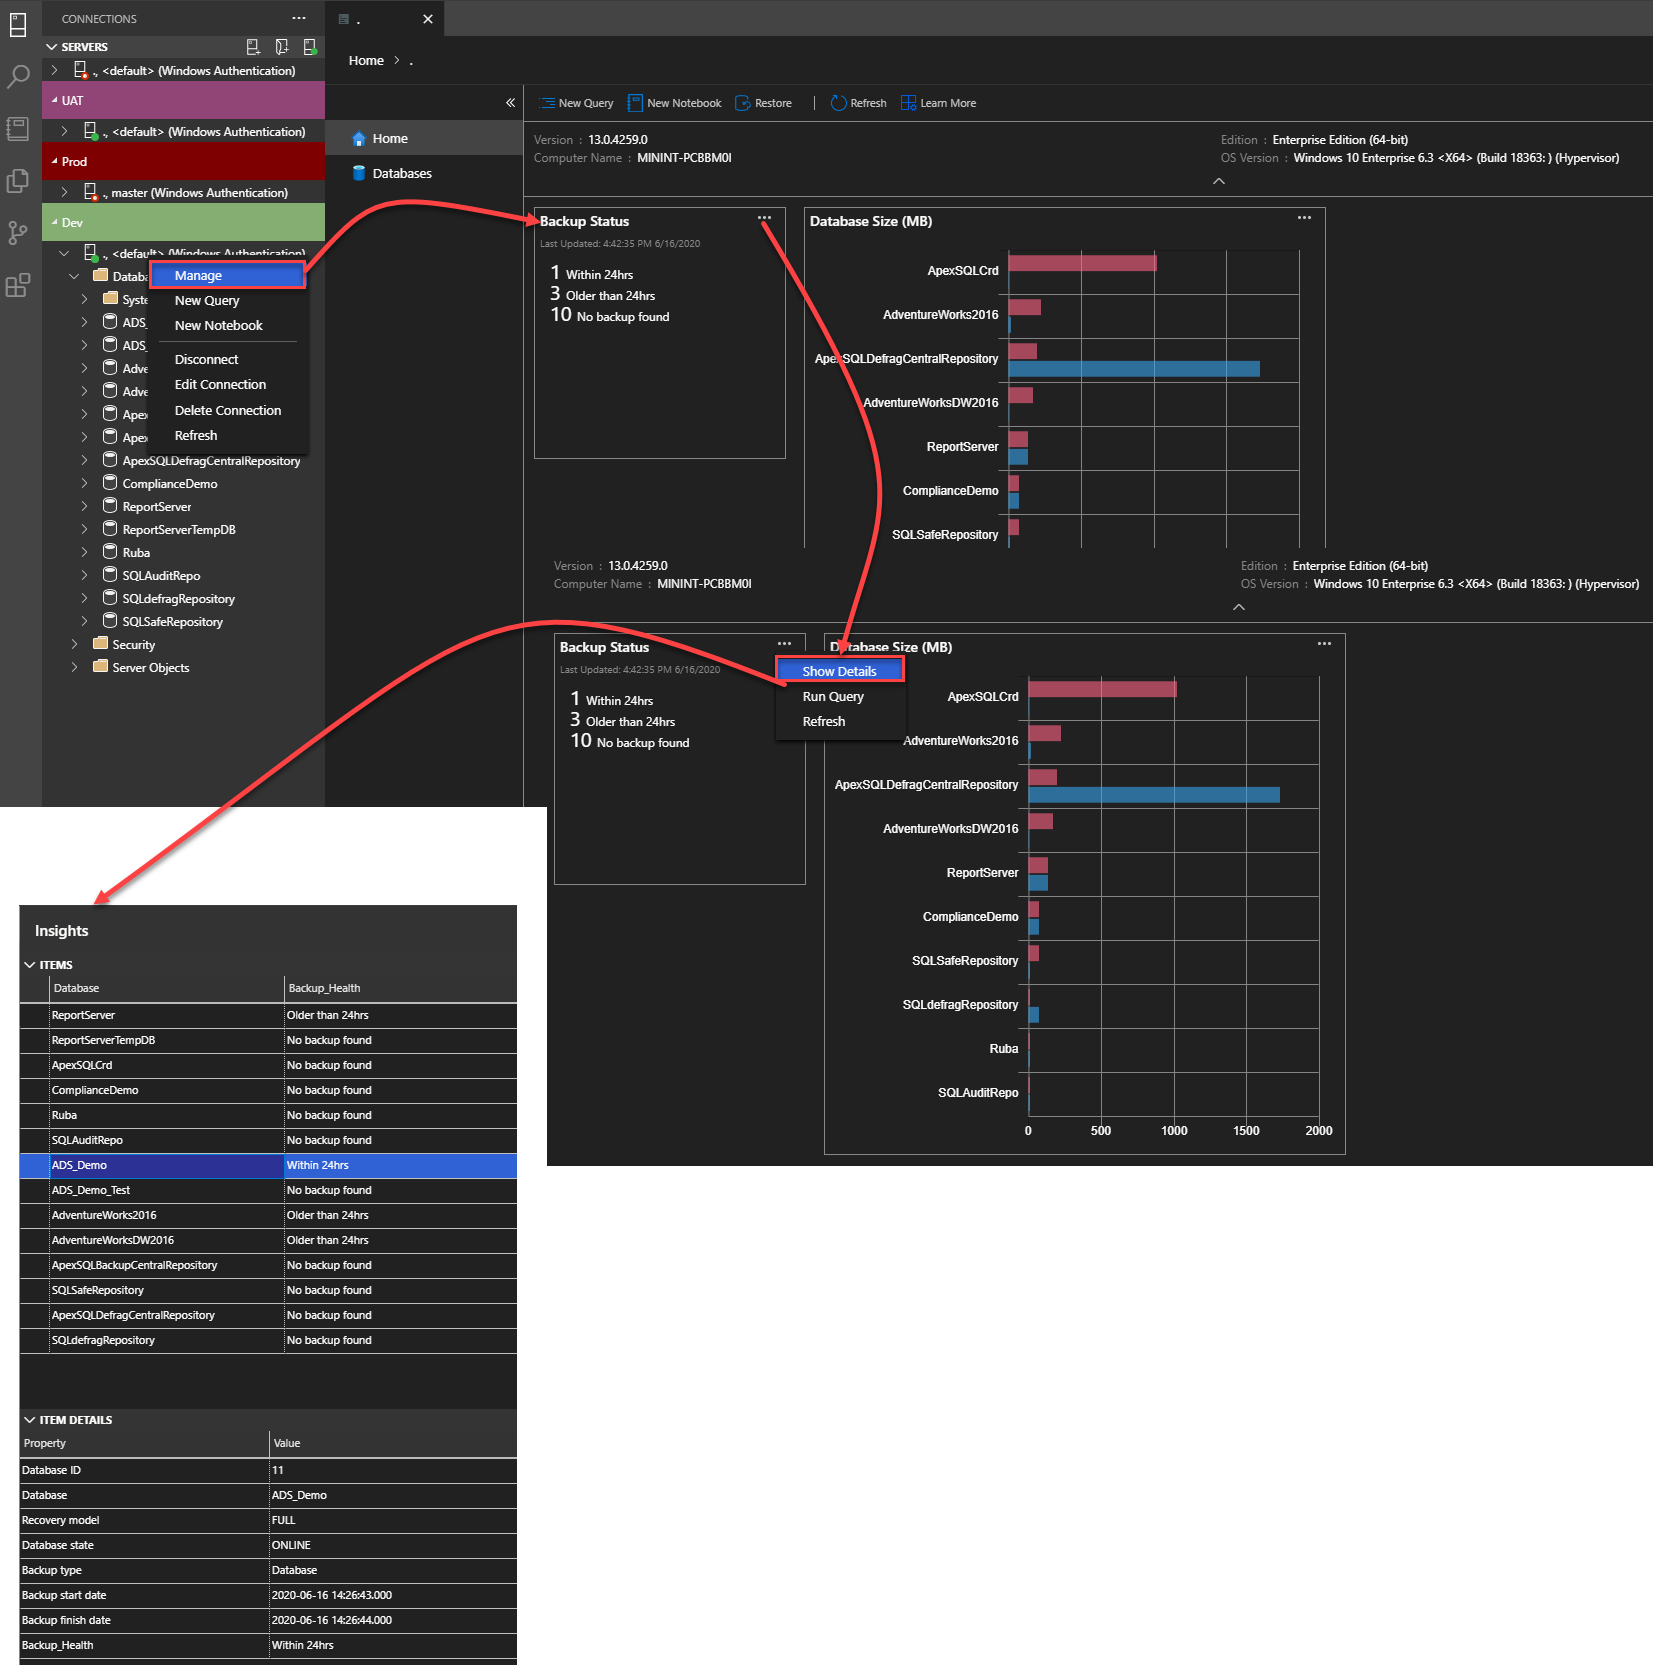
The history of all backup operations performed on a specific SQL Server instance, which contains useful information for the database developers to monitor the versioning of the databases during their development process, can be tracked from the Home page of that SQL Server instance, that can be displayed by right-clicking on the SQL Server instance and choose the Manage option.
The backup status summary window displays statistical information about the backup processes that are performed for the databases hosted in that instance. To get detailed information, click on the three dots beside in that summary box and review the displayed insight:
Conclusion
In this article, we went through many useful functionalities that are provided by the Azure Data Studio to make our database development tasks easier and more organized.
In the next article, we will see how to extend the built-in functionalities of the Azure Data Studio and how to manage an Azure SQL Database within that data studio. Stay tuned!

He is a Microsoft Certified Solution Expert in Data Management and Analytics, Microsoft Certified Solution Associate in SQL Database Administration and Development, Azure Developer Associate and Microsoft Certified Trainer.
Also, he is contributing with his SQL tips in many blogs.
View all posts by Ahmad Yaseen
- Azure Data Factory Interview Questions and Answers - February 11, 2021
- How to monitor Azure Data Factory - January 15, 2021
- Using Source Control in Azure Data Factory - January 12, 2021