

This article guides you to create a Jupyter notebook for Azure SQL Database deployment using Azure Data Studio.
A quick overview of Azure SQL Database and Azure Data Studio
Microsoft offers Azure SQL DB as a relational Database-as-a-Service (DBaaS) with the latest stable SQL Server version. It is a high-performance, secure, reliable cloud database for the data-driven applicable without an organization managing infrastructure.
Additionally, you have options for deploying SQL Server on Azure VM or Azure SQL Managed Instances, as shown below.
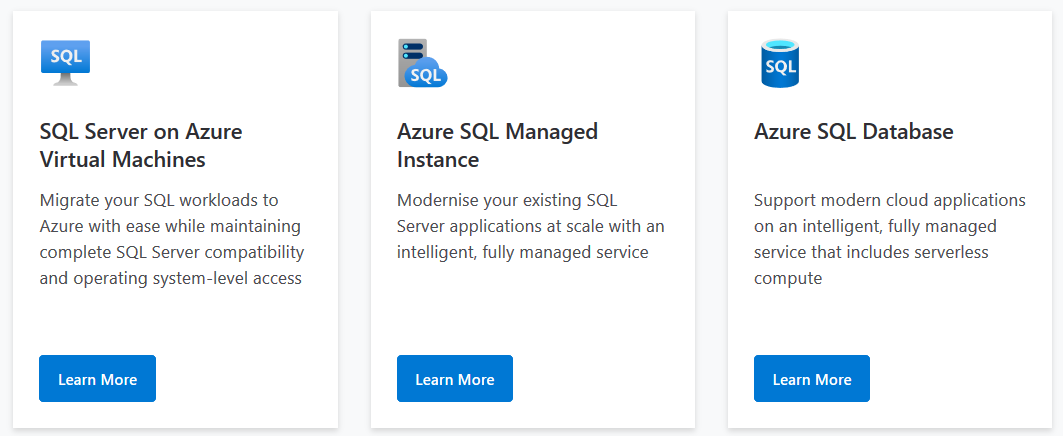
Image reference: Microsoft
Azure Data Studio is a Microsoft offering for managing both on-premises and cloud SQL databases for both Windows and Linux operating systems. It has a modern rich editor with IntelliSense, Source control, Code snippets, customized dashboards, and PowerShell, Bash terminal.
- Note: You can refer to Azure Data Studio for exploring existing articles on SQLShack
Pre-requisites
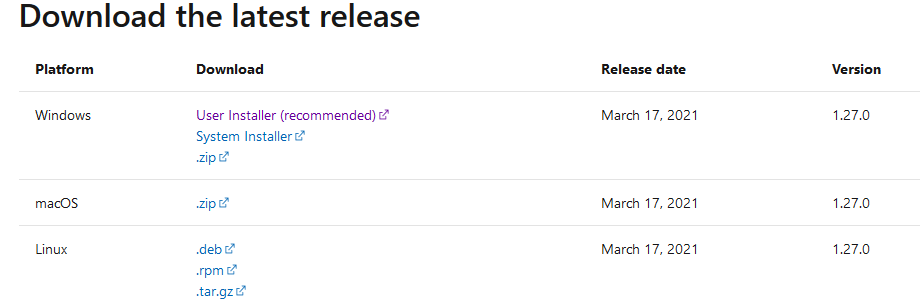
For this article, you can download and use the latest Azure Data Studio version 1.27.0. Check out Microsoft docs for the latest version.
Deploy Azure SQL Server using Azure Data Studio (ADS)
You can deploy an Azure SQL DB using the following ways.
- Azure portal
- Azure PowerShell
- Azure CLI
- Azure ARM templates
Azure SQL Database exists on a logical Azure SQL Server. Suppose we want to utilize ADS for deploying Azure resources in a GUI method. ADS generates a Jupyter notebook with the CLI scripts. You can modify parameter values and deploy a new Azure database quickly and without writing any complex code.
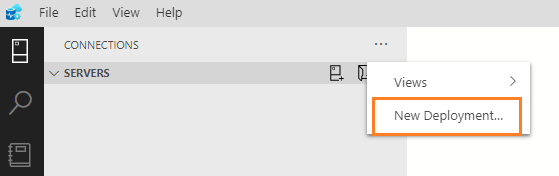
To create a logical SQL Server, Launch the ADS and click on three dots(…), New deployment.
In the new deployment, ADS asks you to choose from the following deployment options.
- On-premises: SQL Server on Windows, SQL Server container Image, SQL Server Big data cluster
- Cloud: SQL Server Big data cluster, Azure SQL DB, Azure SQL Managed Instance, SQL Server on Azure virtual machine
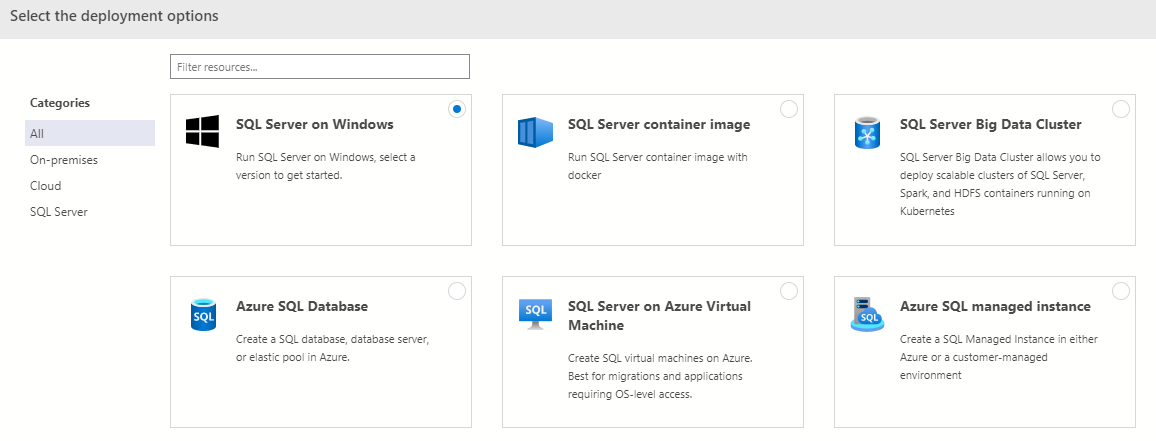
For this article, click on the Azure SQL Database. It opens a wizard to deploy Azure SQL DB, as shown below.
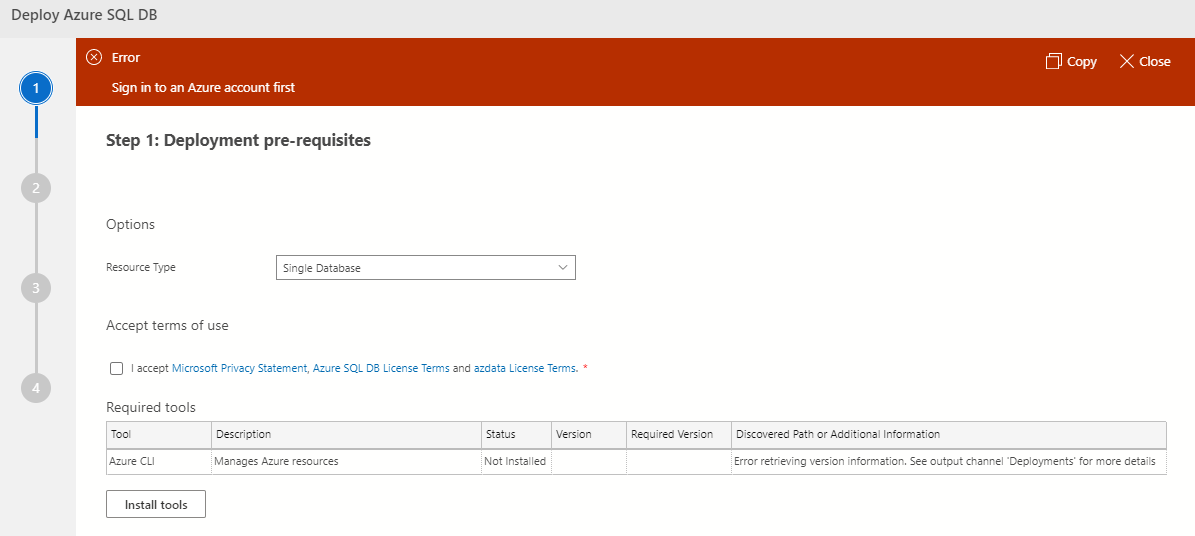
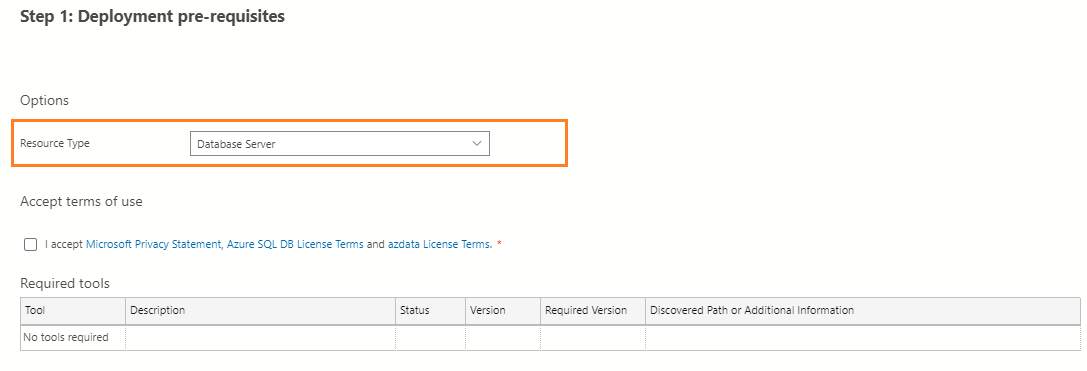
You get an error message in the ADS deployment: Sign in to Azure Account first. We can ignore this error for now. We require to deploy an Azure SQL Server for hosting the Azure SQL DB. Therefore, modify the resource type as Database Server from the drop-down menu, as shown below.
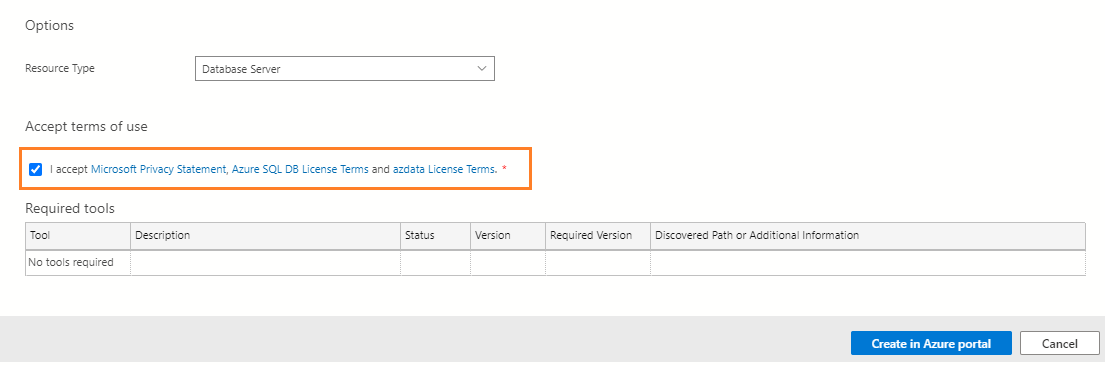
Accept the Microsoft license terms and click the Create in Azure Portal button.
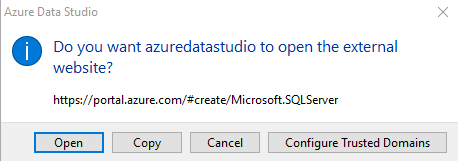
To open the Azure portal, click on Open.
Provide your Azure credentials, and after authentication, it directly takes you to Create SQL Database Server page. On this basic page, give the following inputs:
- Subscription
- Resource group
- Server name
- Location
- Azure region
- Server admin login
- Server admin password
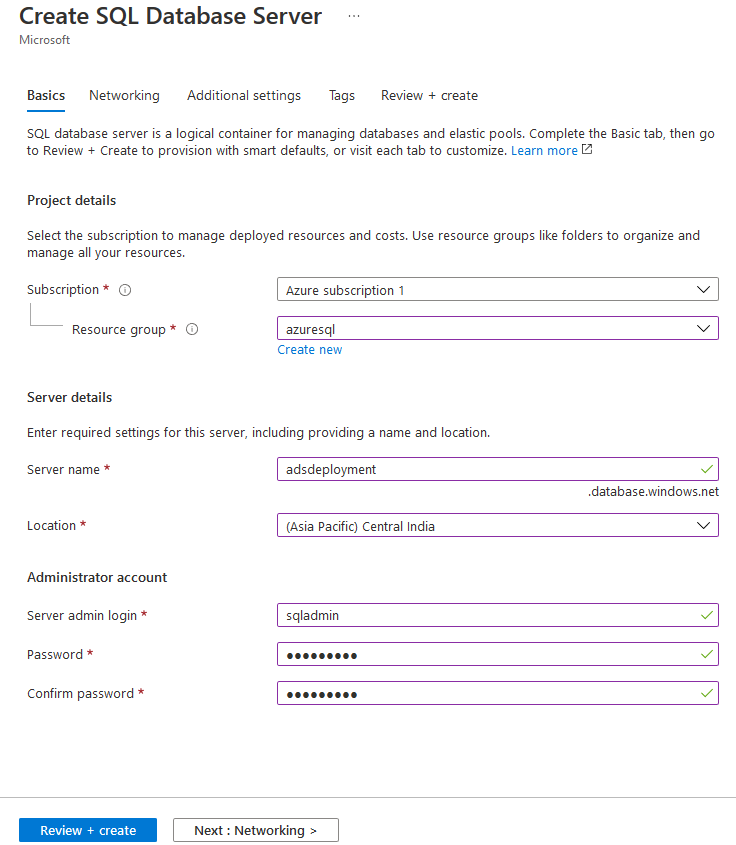
We can skip the other sections -Networking, Additional settings and Tags. Click on Review + Create. Review your Azure SQL Server configurations.

Click on Create. It starts the deployment, and within a few minutes, you get a message – Your deployment is complete.

Click on Go to resource and note down the Azure SQL Server name as highlighted below.

Now, go back to Azure Data Studio. In the new connection window, enter the server name, credentials.
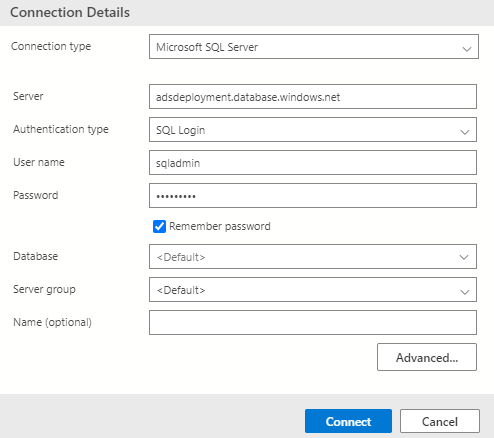
Click on Connect. If your client IP address does not have server access, you need to sign in to the Azure account using Azure Data Studio and add a firewall rule.
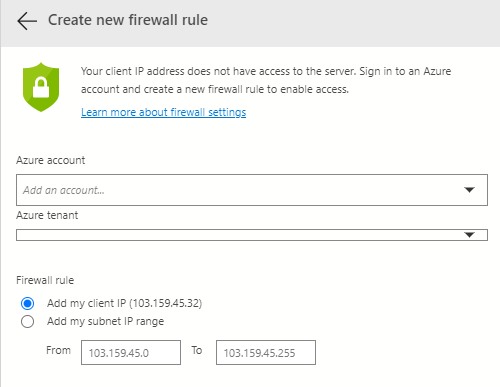
Click on Azure Account -> Add an account. Authenticate your Azure account, and you get the following message- Your account was added successfully.

In the ADS, you get Azure account details. In the firewall rule, either add a client IP or subnet IP range.
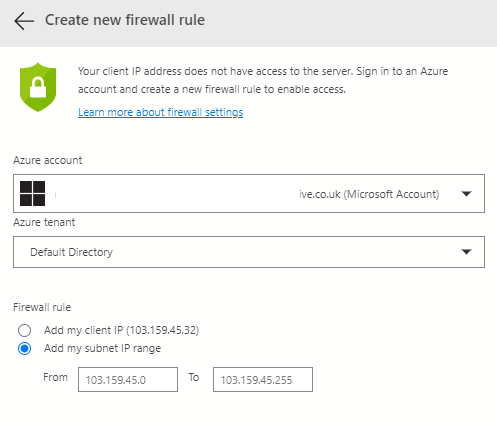
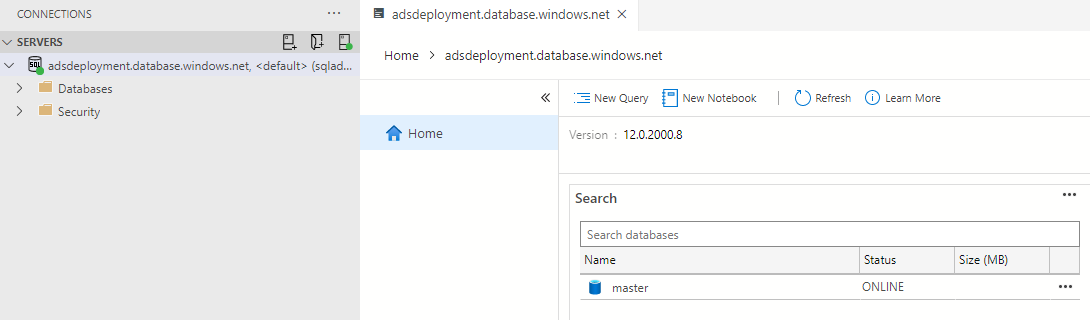
Click on Create, and you get an active connection to Azure SQL Server. By default, you get the master database.
Deploy Azure SQL Database using Azure Data Studio
We deployed the logical Azure Server in the above section. Now, we require an Azure SQL DB. Therefore, in the ADS, click on New deployment and select the Azure SQL Database. You get a prompt to reauthenticate to access the ARM resource.
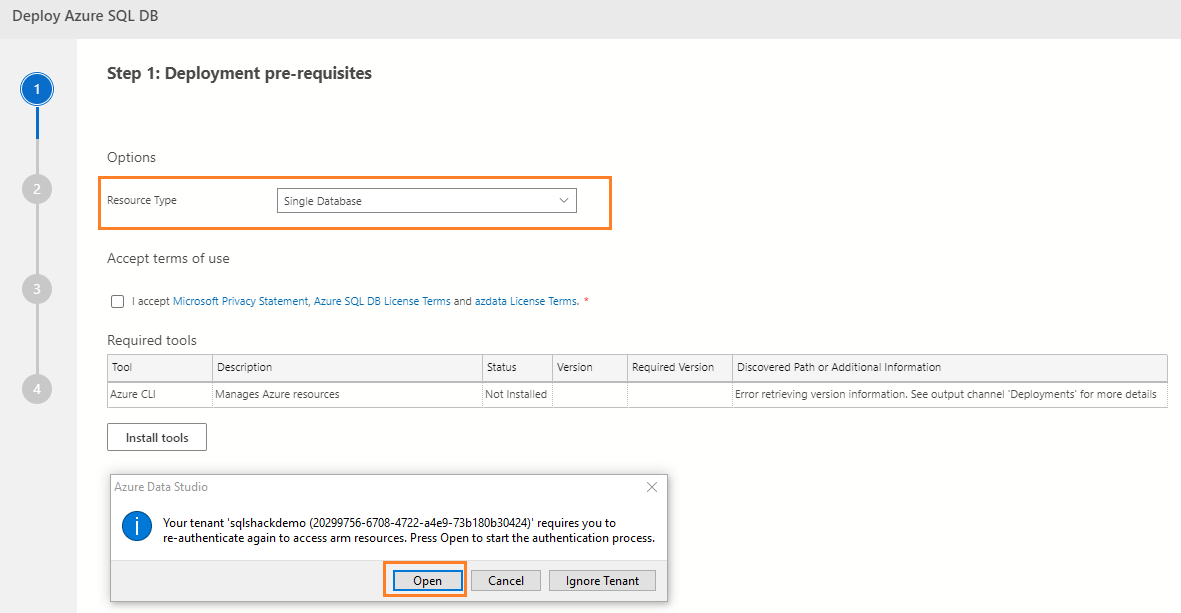
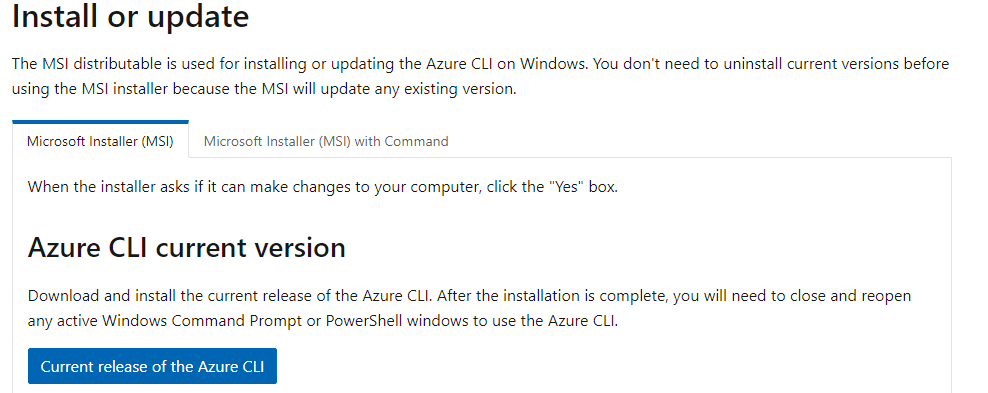
Click on Open and reauthenticate using your Azure credentials. Before you move forward, install Azure CLI tools using the Microsoft docs. Click on the current release of Azure CLI and install it with straightforward steps.
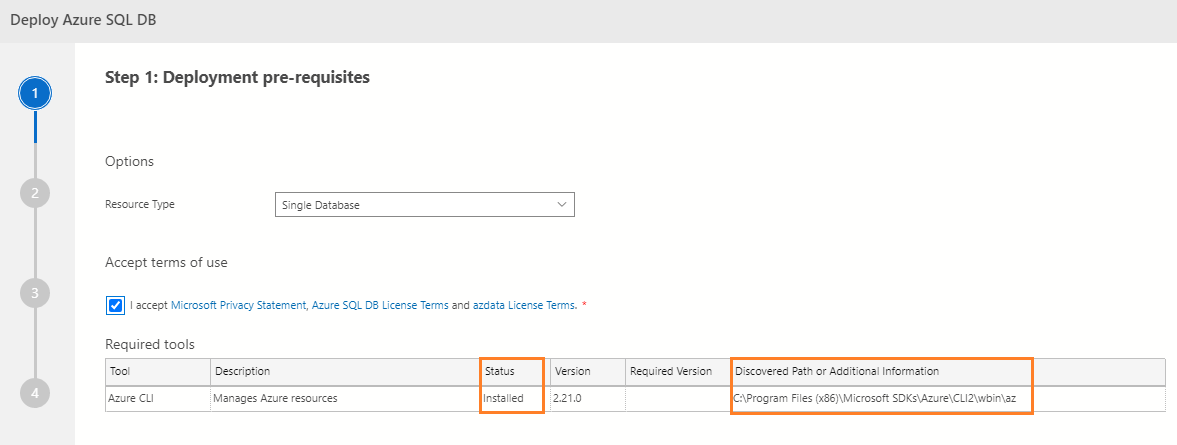
In Step 1: deployment prerequisites, click on Install tools. It starts downloading the required Azure CLI commands.
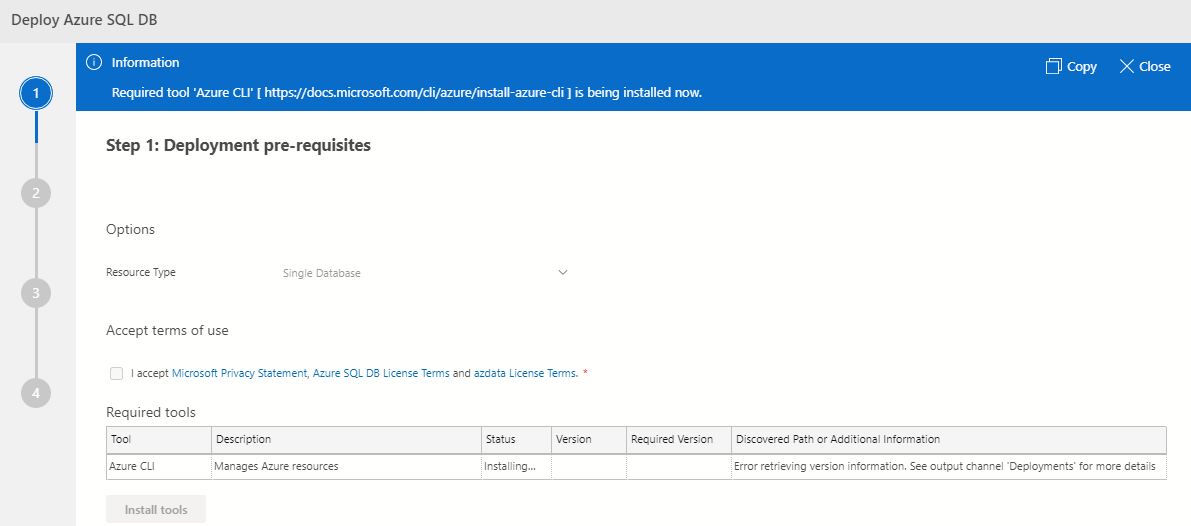
Once it is installed, you can see the discovered file path and status as below.
Select the license terms and click on Next.
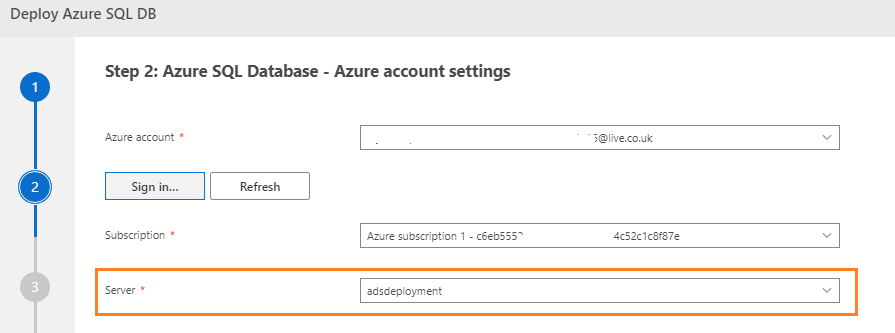
In Step 2: Azure SQL Database – Azure account settings page, verify the Azure account, subscription and the Azure SQL Server.
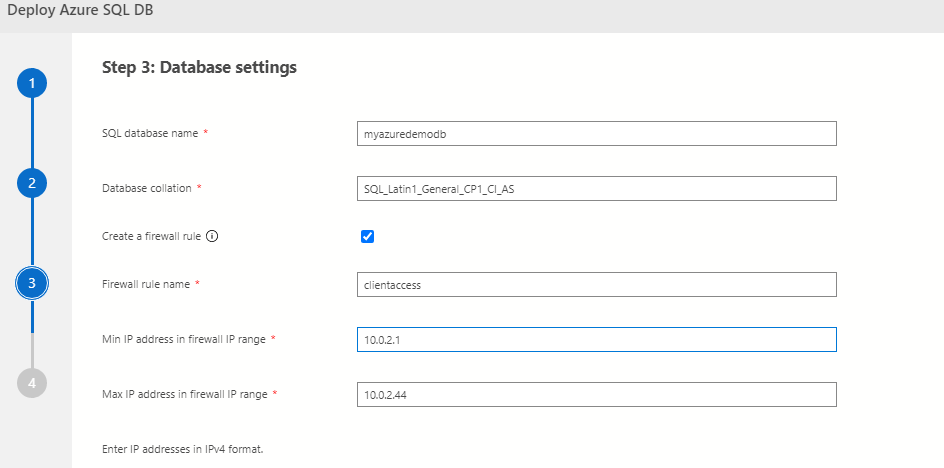
In Step3: Database settings, specify the Azure SQL DB name, database collation, specify a firewall rule name, IP address range as shown below. In my demo, I have specified the Azure DB name as [myazuredemodb].
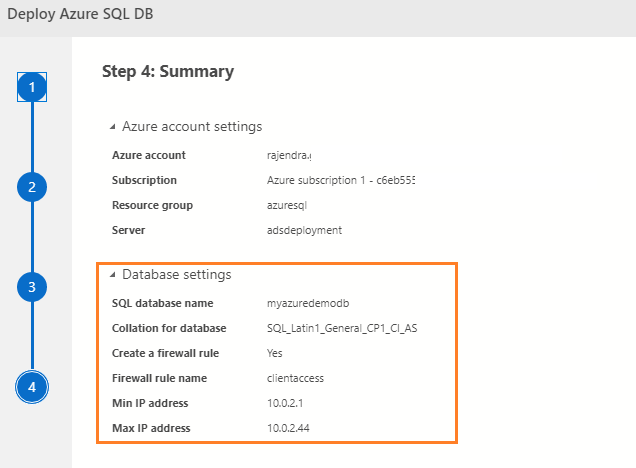
Click Next, Step 4: Summary, review and click on Create.
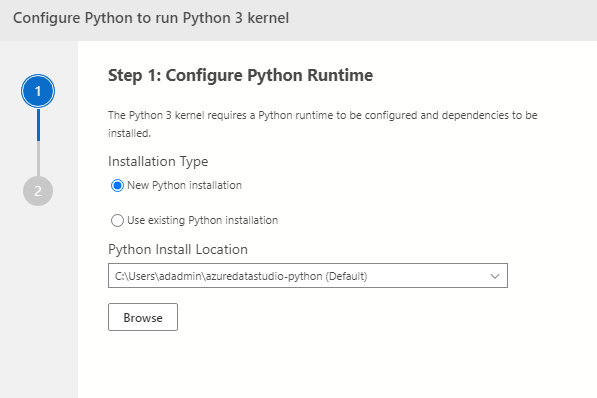
Azure Data Studio creates a Jupyter notebook with Azure CLI scripts for deploying Azure DB. Therefore, it requires configuring Python Runtime. It opens a window to configure Python to run the Python 3 kernel. Click on New Python installation.
Step 1:Configure Python Runtime
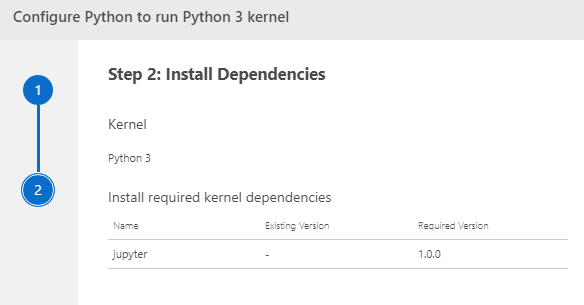
Step 2: Install Dependencies
In step 2, click on Install dependencies. As shown below, it installs Jupyter 1.0.0.
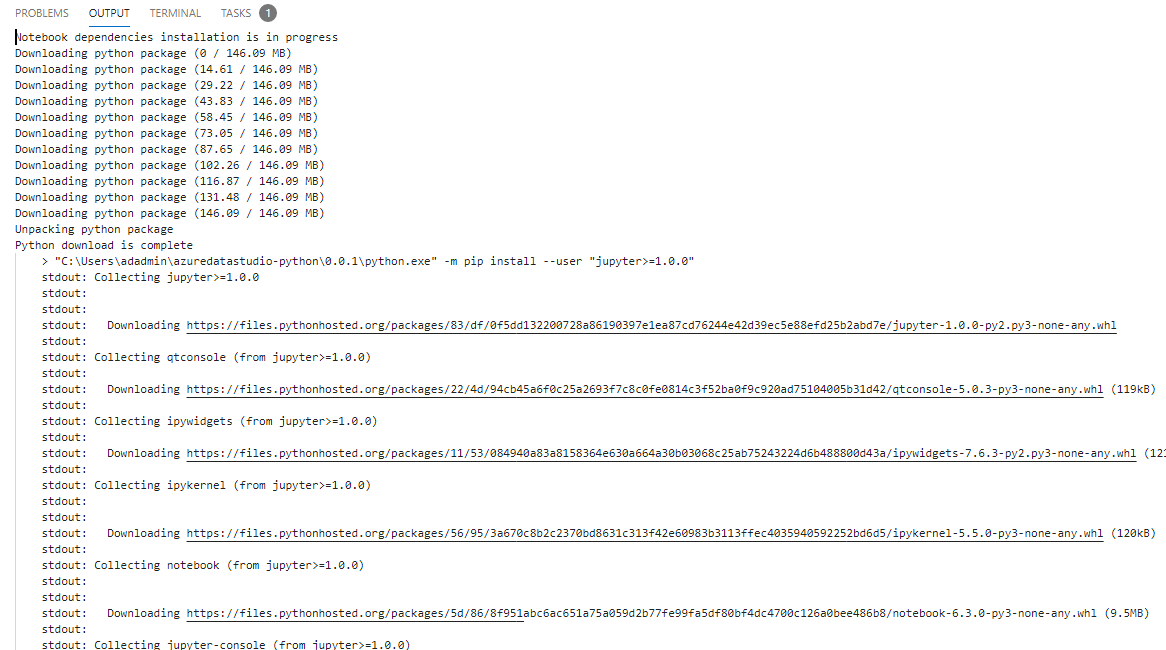
It shows the downloaded package details and their installation progress in the Output tab of Azure Data Studio.
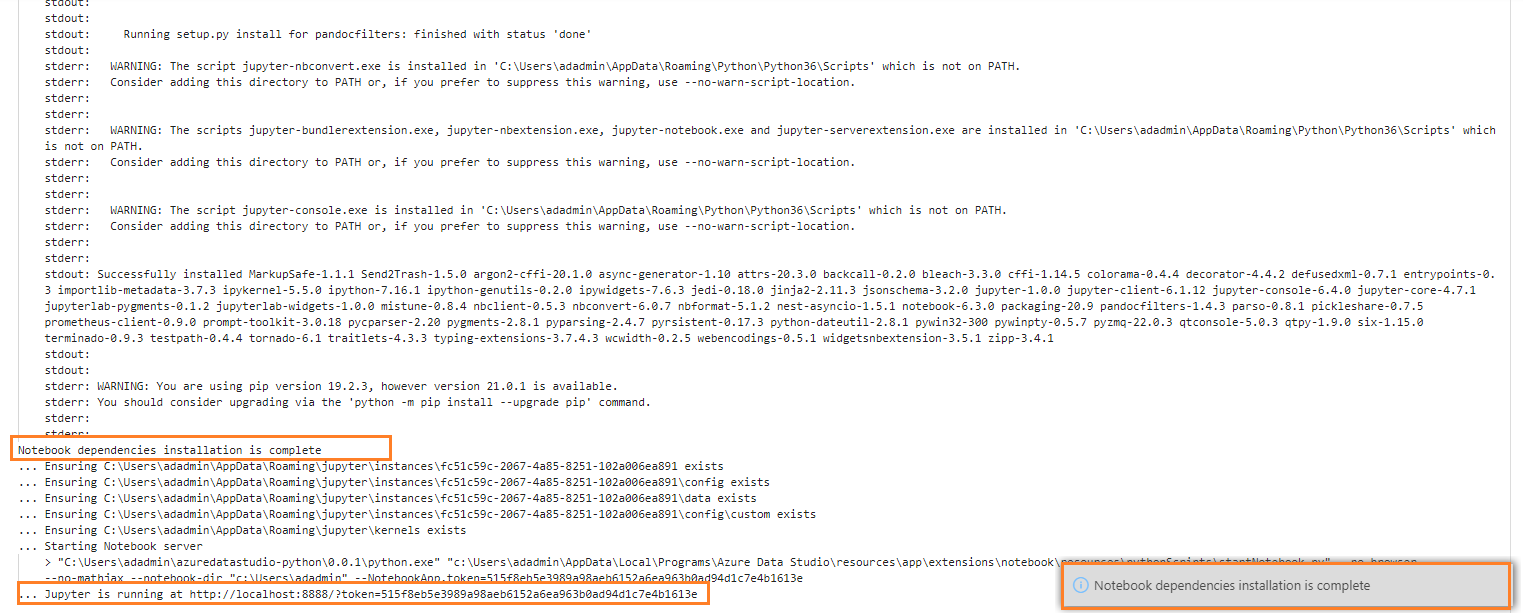
Once Jupyter and its dependencies are installed, it gives a prompt – Notebook dependencies installation is complete as shown below.
Explore Jupyter notebook for Azure SQL Database deployment
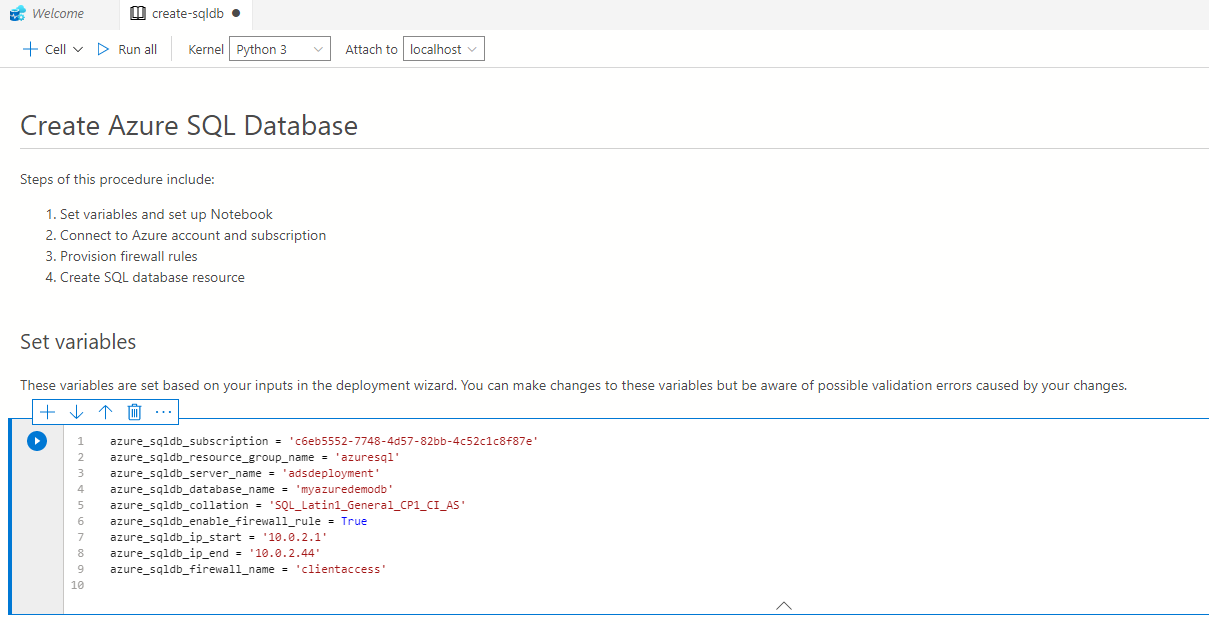
As shown below, you get a notebook to create the Azure SQL Database. This notebook has Azure CLI scripts and instructions as per your defined input. It has the following steps.
-
Set variable and set up Notebook : This section contains the variable for Azure DB deployment
- azure_sqldb_subscription: This parameter is for Azure subscription ID
- azure_sqldb_resource_group_name: Resource group name for Azure DB
- azure_sqldb_server_name: Azure logical SQL Server name
- azure_sqldb_database_name: Azure SQL Database name that we want to create
- azure_sqldb_collation: It has SQL Database collation name. By default, it uses collation SQL_Latin1_General_CP1_CI_AS
- azure_sqldb_enable_firewall_rule: Enter True for enabling firewall
- azure_sqldb_ip_start: Minimum IP address
- azure_sqldb_ip_end: Maximum
- azure_sqldb_firewall_name: Firewall rule name

-
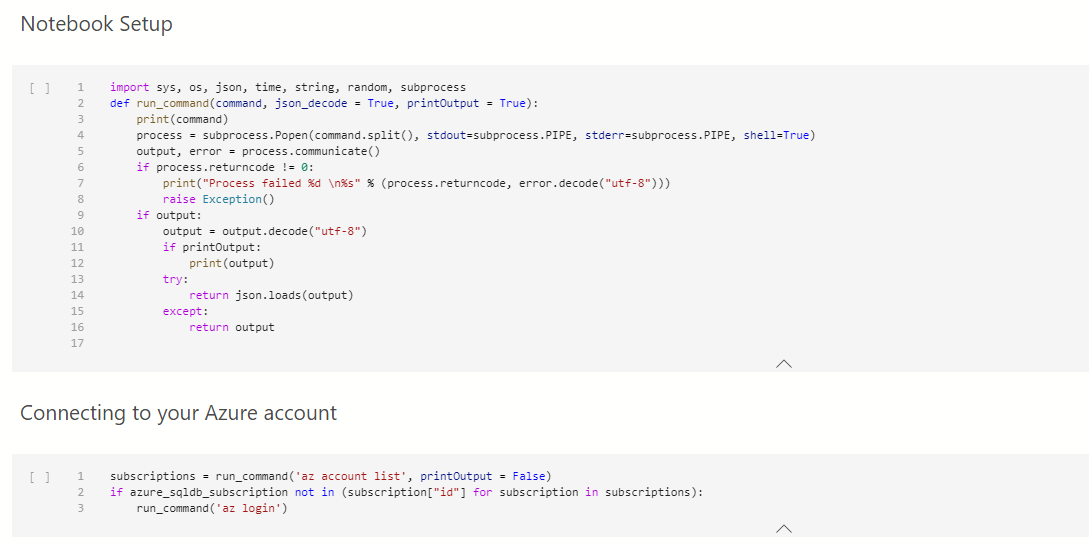
Notebook set up and connect to Azure account: This step connects to Azure account for subscription ID specified in the variable azure_sqldb_subscription
-
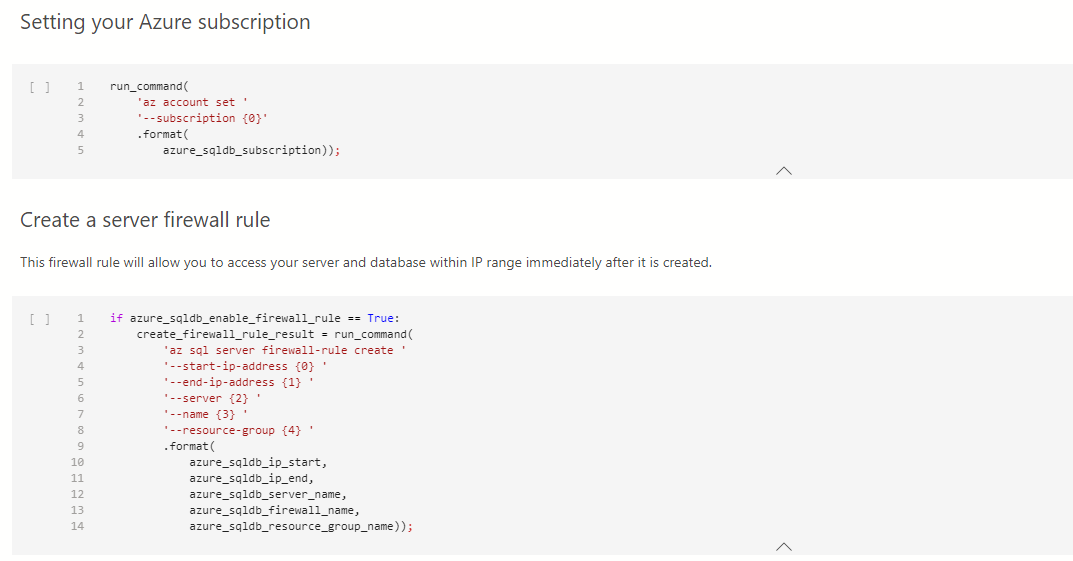
Setting Azure subscription and create a server firewall rule: In this step, Jupyter notebook defines a firewall rule with the specified IP address
-
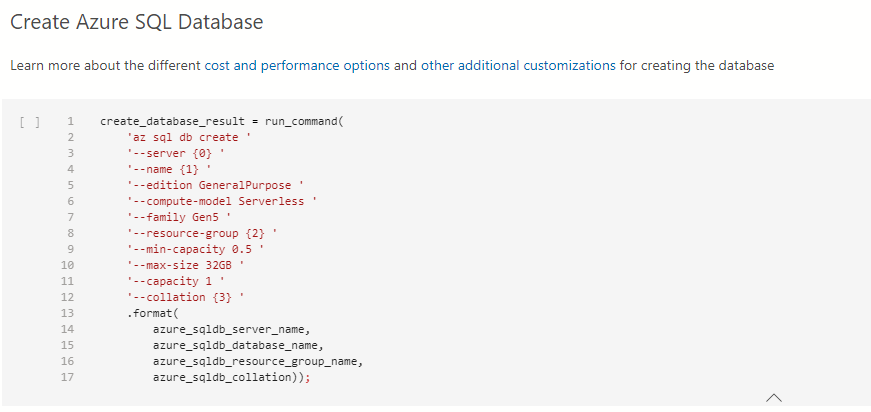
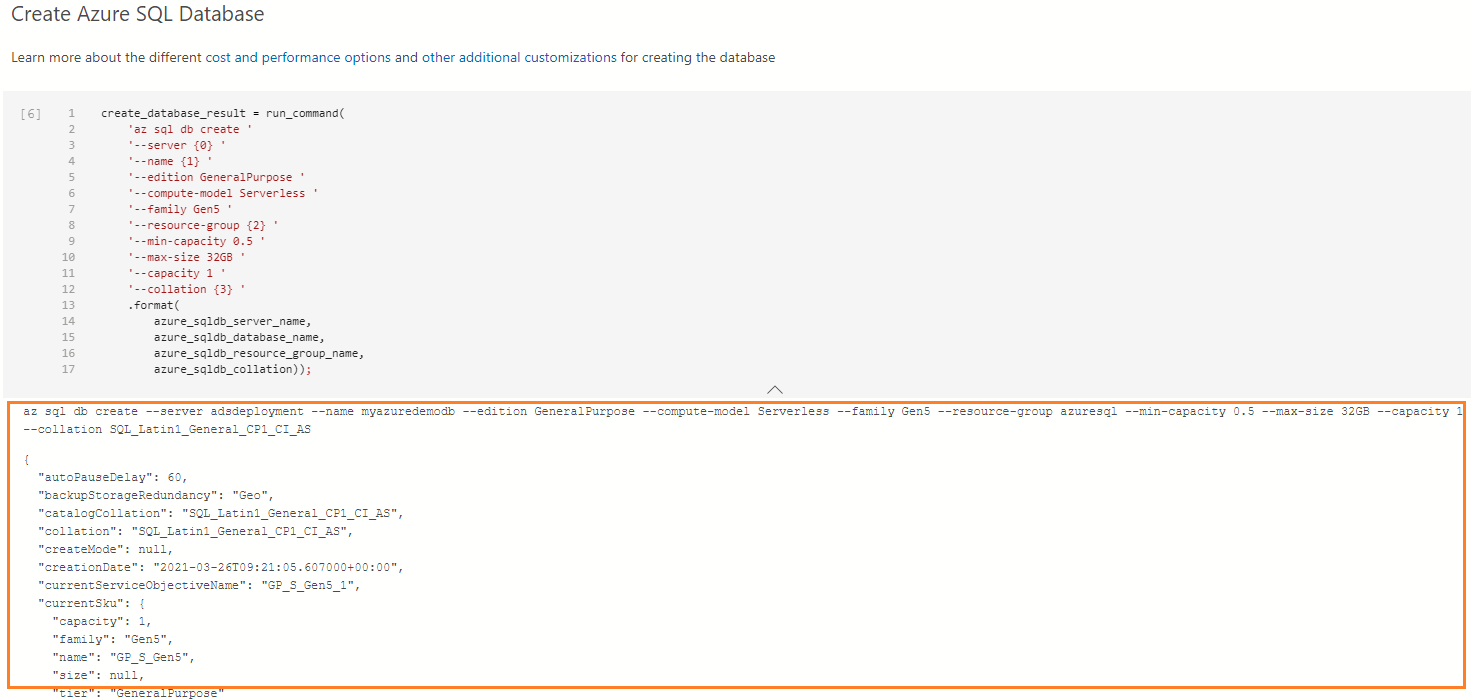
Create Azure SQL Database: It uses az sql db create CLI command for database deployment. By default, it makes a serverless compute model with the Gen5 family. You can configure different pricing tiers and additional customization in the script
You can refer to az sql db to learn more details.
To deploy an Azure DB using the Azure SQL Studio Jupyter notebook, click on Run all.

The Jupyter notebook displays all Azure CLI scripts and their output in the relevant section. The following figure shows az sql db create command output for creating a new Azure SQL Database.
To validate the deployment, refresh your ADS connection, and you have [myazuredemodb] Azure DB, as shown below.
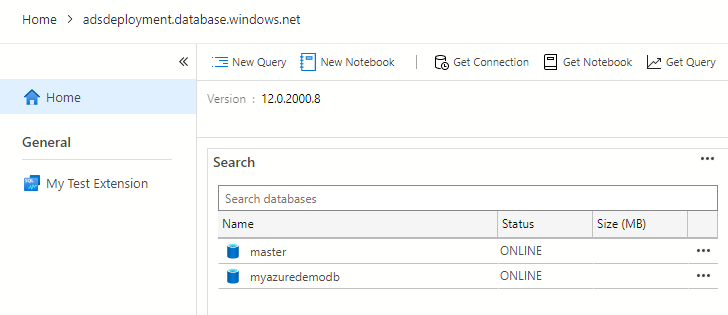
You can view the deployed database logical server name, pricing tier, auto-pause delay using the Azure portal as well.

Conclusion
Azure Data Studio generates Jupyter notebook with Azure CLI scripts for deploying Azure SQL Database. It helps you to automate, customize and deploy the database quickly without worrying about the scripting. To deploy a new database, you can modify the required parameter value and run the notebook for seamless deployment of Azure DB.

I am the author of the book "DP-300 Administering Relational Database on Microsoft Azure". I published more than 650 technical articles on MSSQLTips, SQLShack, Quest, CodingSight, and SeveralNines.
I am the creator of one of the biggest free online collections of articles on a single topic, with his 50-part series on SQL Server Always On Availability Groups.
Based on my contribution to the SQL Server community, I have been recognized as the prestigious Best Author of the Year continuously in 2019, 2020, and 2021 (2nd Rank) at SQLShack and the MSSQLTIPS champions award in 2020.
Personal Blog: https://www.dbblogger.com
I am always interested in new challenges so if you need consulting help, reach me at rajendra.gupta16@gmail.com
View all posts by Rajendra Gupta
- Understanding PostgreSQL SUBSTRING function - September 21, 2024
- How to install PostgreSQL on Ubuntu - July 13, 2023
- How to use the CROSSTAB function in PostgreSQL - February 17, 2023