

In this article, we will learn how we can backup and restore the SQL Database in CentOS. This article is the third article on the topic Manage SQL Server on CentOS. In my previous article, we learned how to copy data SQL database between windows 10 and CentOS Linux using SQL Server management studio.
In this article, we will learn how to copy databases using SQL Server 2019 import export wizard. I have restored the stackoverflow2010 database on my workstation.
I have created a virtual machine and installed CentOS 8.0. The IP Address of the virtual machine is 192.168.1.47. I have created an empty database named DevStackoverFlow2010 on the SQL Server instance of CentOS.
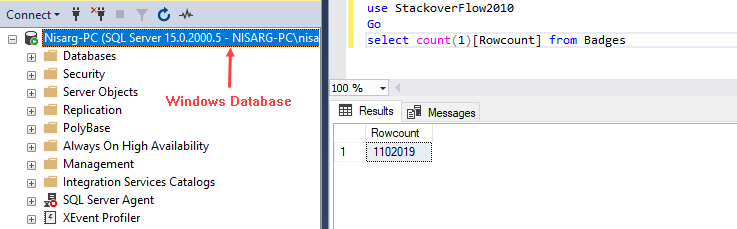
Before exporting the data, let us see the row count of the badges table. Run the following query:
|
1 2 3 4 5 |
use StackoverFlow2010 Go select count(1)[Rowcount] from Badges |
Query Output
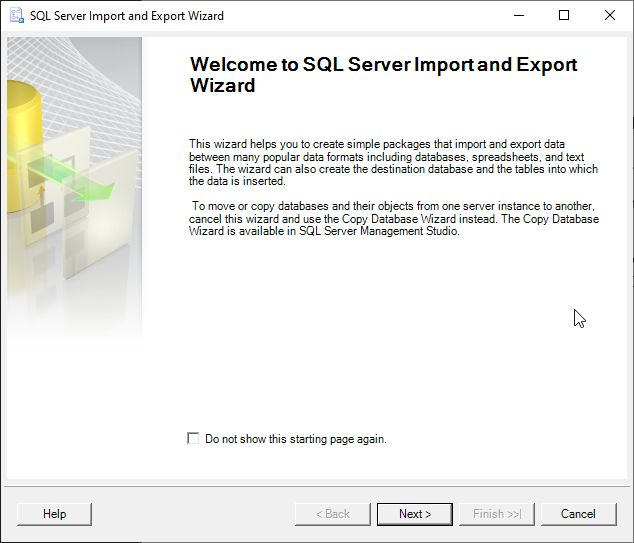
Now, let us begin the data transfer process. Open SQL Server 2019 import export wizard. The first screen is an introduction and task to be performed by the import-export wizard. Click Next.
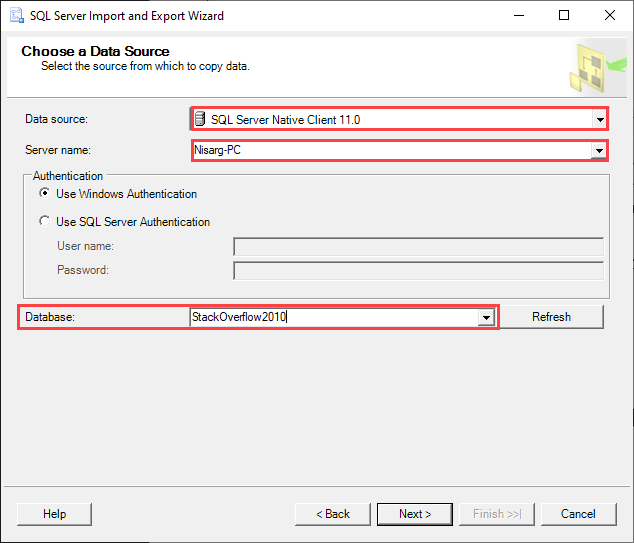
On Choose a Data Source screen, you can configure the source connection details. Specify the following parameters to connect to the source database server.
- Data source drop-down: SQL Server Native Client 11.0
- Server Name: Nisarg-PC
- Authentication: Windows Authentication
- Database: Stackoverflow2010.
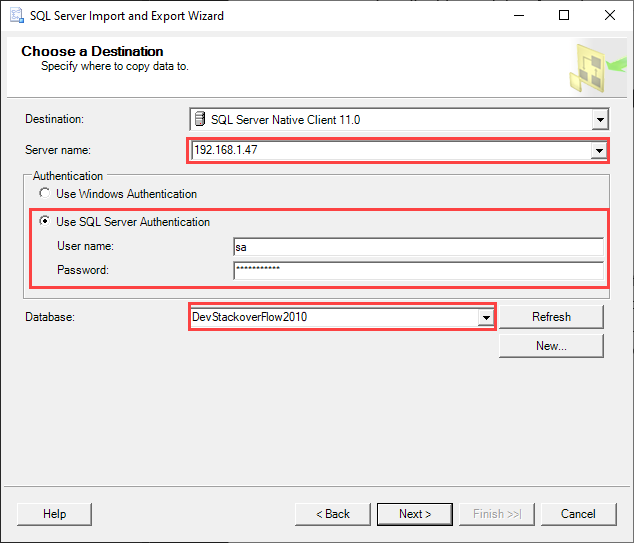
On Choose a Destination screen, you can configure the destination connection details. Specify the following parameters to connect to the source database server.
- Data source drop-down: SQL Server Native Client 11.0
- Server Name: 192.168.1.47 (IP Address Linux virtual machine)
- Authentication: SQL Server Authentication (I have configured the SQL Server authentication to connect to the SQL Server on CentOS)
- Username: sa
- Password: Specify the sa password
- Database: DevStackoverFlow2010
Following is the screenshot:
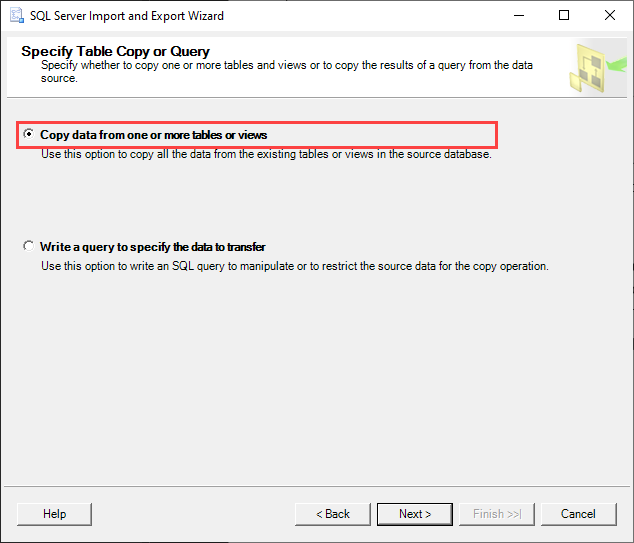
On the Specify Table Copy or Query screen, you can choose any of the following options
- Copy data from tables or views: Choose this option to copy all tables and views with their data from the source SQL database to the SQL destination database.
- Write a query to copy the specific data to transfer: Choose this option if you want to copy a specific dataset from one or multiple tables or view from the source database to the destination database. We can write a SQL Query to copy the data between source and destination.
We are copying all tables and data from StackOverFlow2010 to DevStackOverFlow2010, so choose the first option.
On the Select Source Tables and Views screen, we can choose all or specific tables and view whose data you want to transfer between the source and destination database server. We are transferring the data of the Stackoverflow2010 database, and it has few tables, so the list of tables and views are listed in the source column of the Tables and Views grid-view. The DevStackoverflow2010 database is empty and does not have any tables, so the destination column of the Tables and Views grid-view will be empty. See the following image.
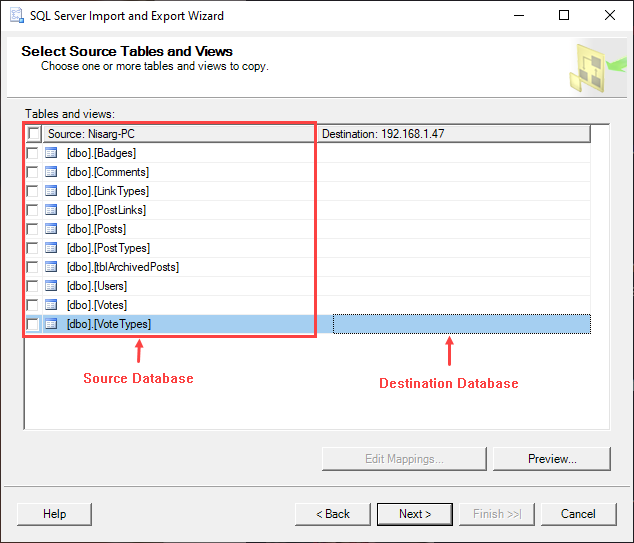
Now, we want to transfer all tables and data from the Stackoverflow2010 database to the DevStackoverflow2010 database; click on the checkbox at the top of the Tables and Views gridview. When we click on the check box, the wizard automatically generates the definition of the source database table. Click Next.

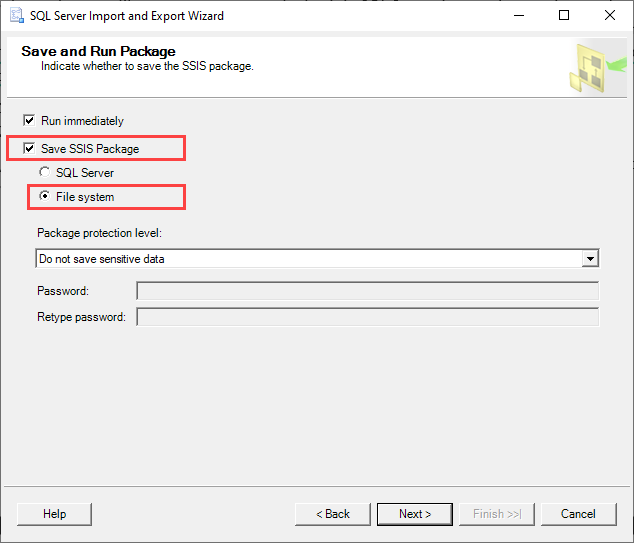
The SQL Server 2019 import-export wizard creates a SQL Server integration services package. Hence, you have an option to save the package on the file system, or you can deploy it in the SQL Server integration service catalog database. On the Save and Run package screen, you have an option to save the SSIS package on the file system or integration service database. We are saving the integration service package to the D:\Migration directory. To do that, select the Save SSIS Package option.
It enables the following actions.
- SQL Server: Choose this option if you want to save the package in an integration service catalog.
- File system: Choose this option if you want to save the SSIS package on a computer.
Also, we can define the SSIS package protection level. We do not want to use the package protection; therefore, select the “Do not save sensitive data” option from the Package protection level drop-down box. Click Next.
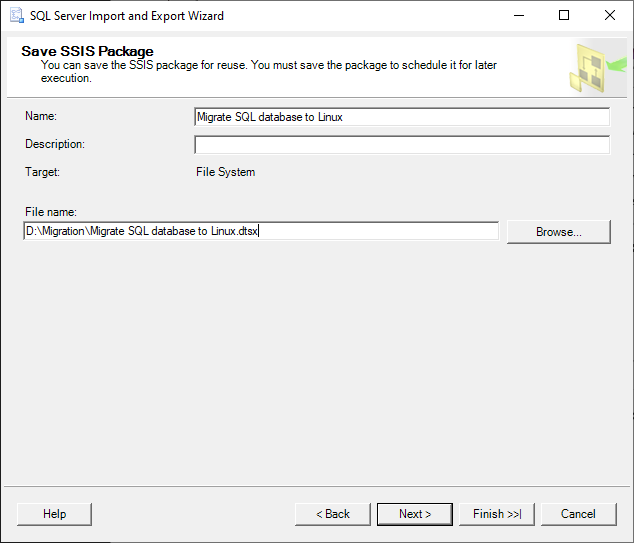
On the Save SSIS Package screen, enter values of the following options.
- Name: Enter desired package name.
- Description: Describe the SSIS Package.
- File Name: Specify the filename and location.
Click on Finish to begin the data transfer.
On the Complete the Wizard screen, you can view the lists of actions that are going to be performed by the wizard.

The data migration process begins.
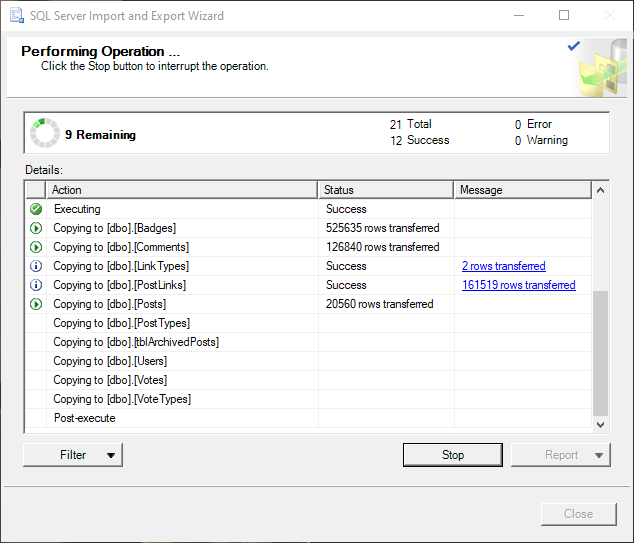
The stackoverflow2010 database is large so it will take some time to finish. Once data has been copied, run the following query to verify that data have been copied. To verify, run the following query.
|
1 2 3 4 5 |
use DevStackoverFlow2010 Go select count(1)[Rowcount] from Badges |
Query output
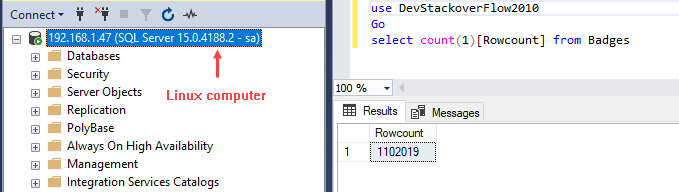
As you can see, all records of the Badges table have been copied.
Summary
This article explained how to transfer the data of the SQL database from SQL Server on Windows 10 to SQL Server on CentOS. I have explained how we can use SQL Server 2019 import-export wizard to transfer data from source to destination server. This method gives you more control over managing the tables and data. Suppose we are testing a specific module of an application to test the application’s behavior after migrating the database to the Linux operating system. We can use the import-export wizard to migrate the specific tables and views along with the data. The next article will explore the methods to automate database maintenance tasks.

He has expertise in database design, performance tuning, backup and recovery, HA and DR setup, database migrations and upgrades. He has completed the B.Tech from Ganpat University. He can be reached on nisargupadhyay87@outlook.com
- Different ways to identify and change compatibility levels in SQL Server - July 22, 2024
- Copy SQL Databases between Windows 10 and CentOS using SQL Server data tools - October 19, 2022
- Changing the location of FILESTREAM data files in SQL Database - October 14, 2022