

This article will provide a detailed walkthrough for retaining items in Cosmos DB for different durations and on different levels.
Introduction
As Microsoft states, Azure Cosmos DB “is a fully managed NoSQL database service for building scalable, high-performance applications”. Cosmos DB is widely used for storing NoSQL data with options to create using different Core (SQL), MongoDB, Cassandra, Table, and using gremlin.
With wide usage, the content storage also increases, sometimes even in Gigabytes a day. With such content storage, retention and archival of data are one of the common ask from the customer. Today, we are going to talk about how to retain data and remove unnecessary data periodically from Azure Cosmos DB. Before we do that, we need to understand a storage concept called “Container”
Container
A Container is a logical entity that has horizontal physical partitions and throughput. In other words, it can be a collection of items, documents and others partitioned and replicated across multiple regions.
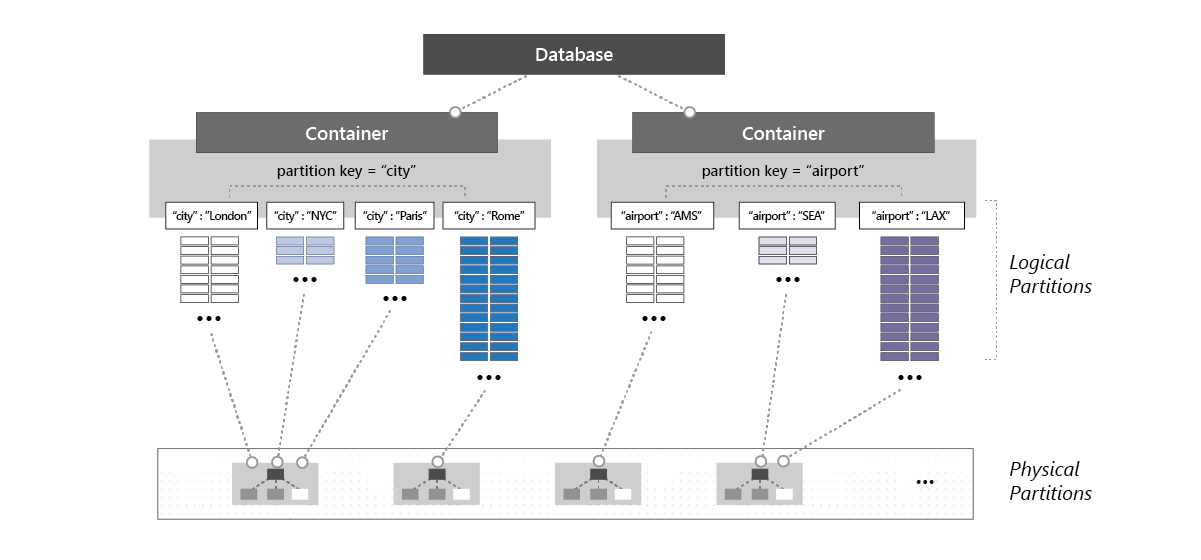
Above shown is one of the Microsoft diagrams which clearly shows:
- More than one container in a single database
- Each container has a partition key
- Based on partition keys, data will separate logical partitions
- Each physical can have one or more logical partitions
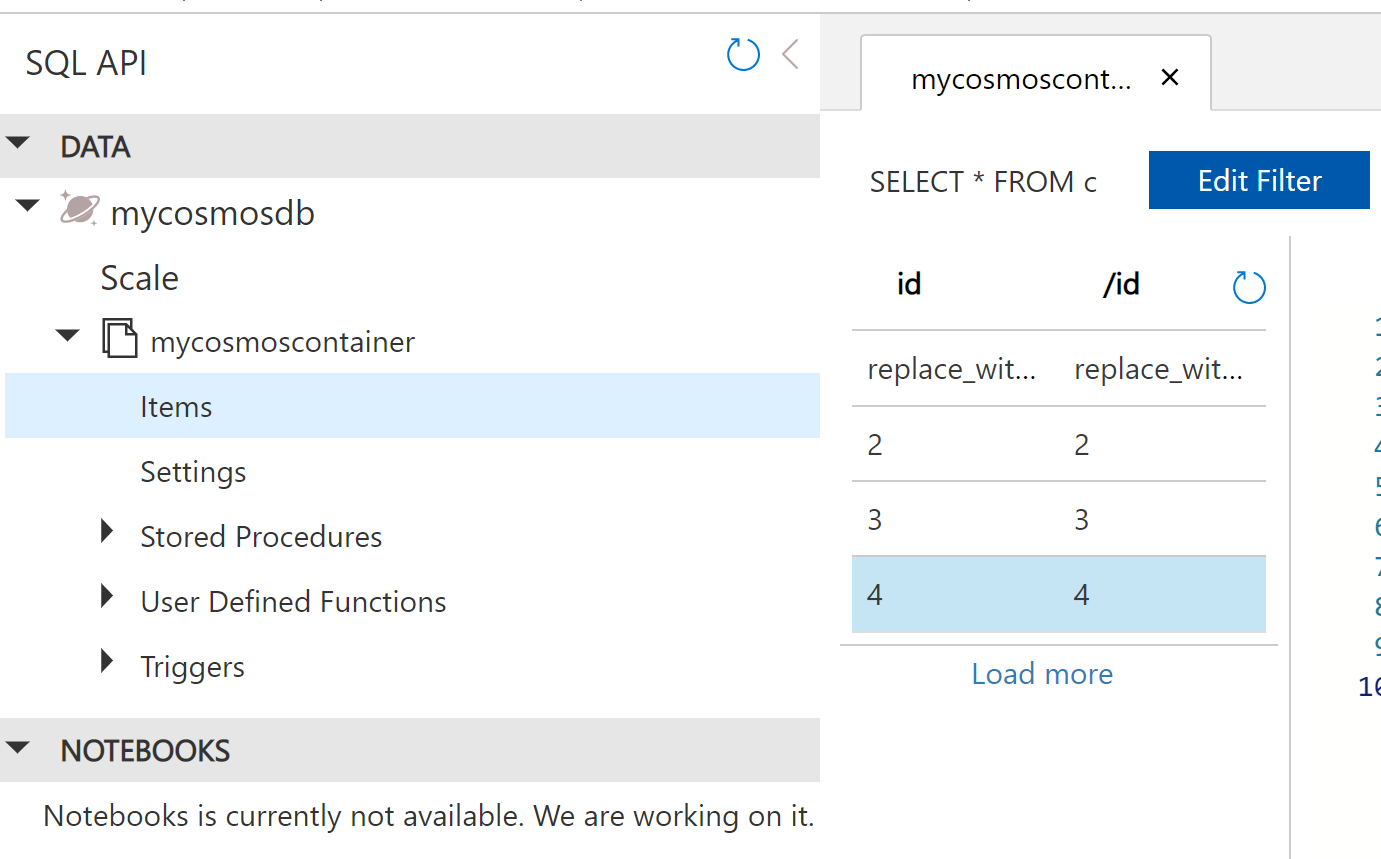
In our case, we will use items to store, retain and remove for the current scenario. Below is the container I have created and the items we have:
Now there are different levels at which we can retain and remove items:
- Container: where we set the retention at the container level and state for how long the container and all items beneath will be retained
- Items: where we specifically target items to retain for a certain period and remove afterward.
TTL
To apply retention/automatic removal, Azure Cosmos DB has a feature called TTL (Time to live). This feature allows containers and items within it to either delete automatically or retain for an infinite period. Now we need two points to understand:
- Requests addressed with leftover Request Units (RUs): TTL retention request is a background process. It executes based on the Request Units (is a performance currency abstracting the system resources that are required to perform database operations in Cosmos DB) availability. The priority will usually be given to priority-based workloads and only after those priority tasks are completed, only then the TTL request will be addressed.
- Delay in case of fewer RUs: As above explained, in case of RUs are expired or are not enough, then the removal request of Items won’t be processed until sufficient RU’s are available. However, Microsoft ensures that once the retention period is over/expired, even though the removal request is not processed still one will not be able to access that data.
There are different ways to implement TTL.
TTL using portal
Retention at the item level
Let us open data explorer and go to the items. In the below screen, we can see I have 4 items on my list.

Click on “Settings” just below “Items” in the left-hand pane
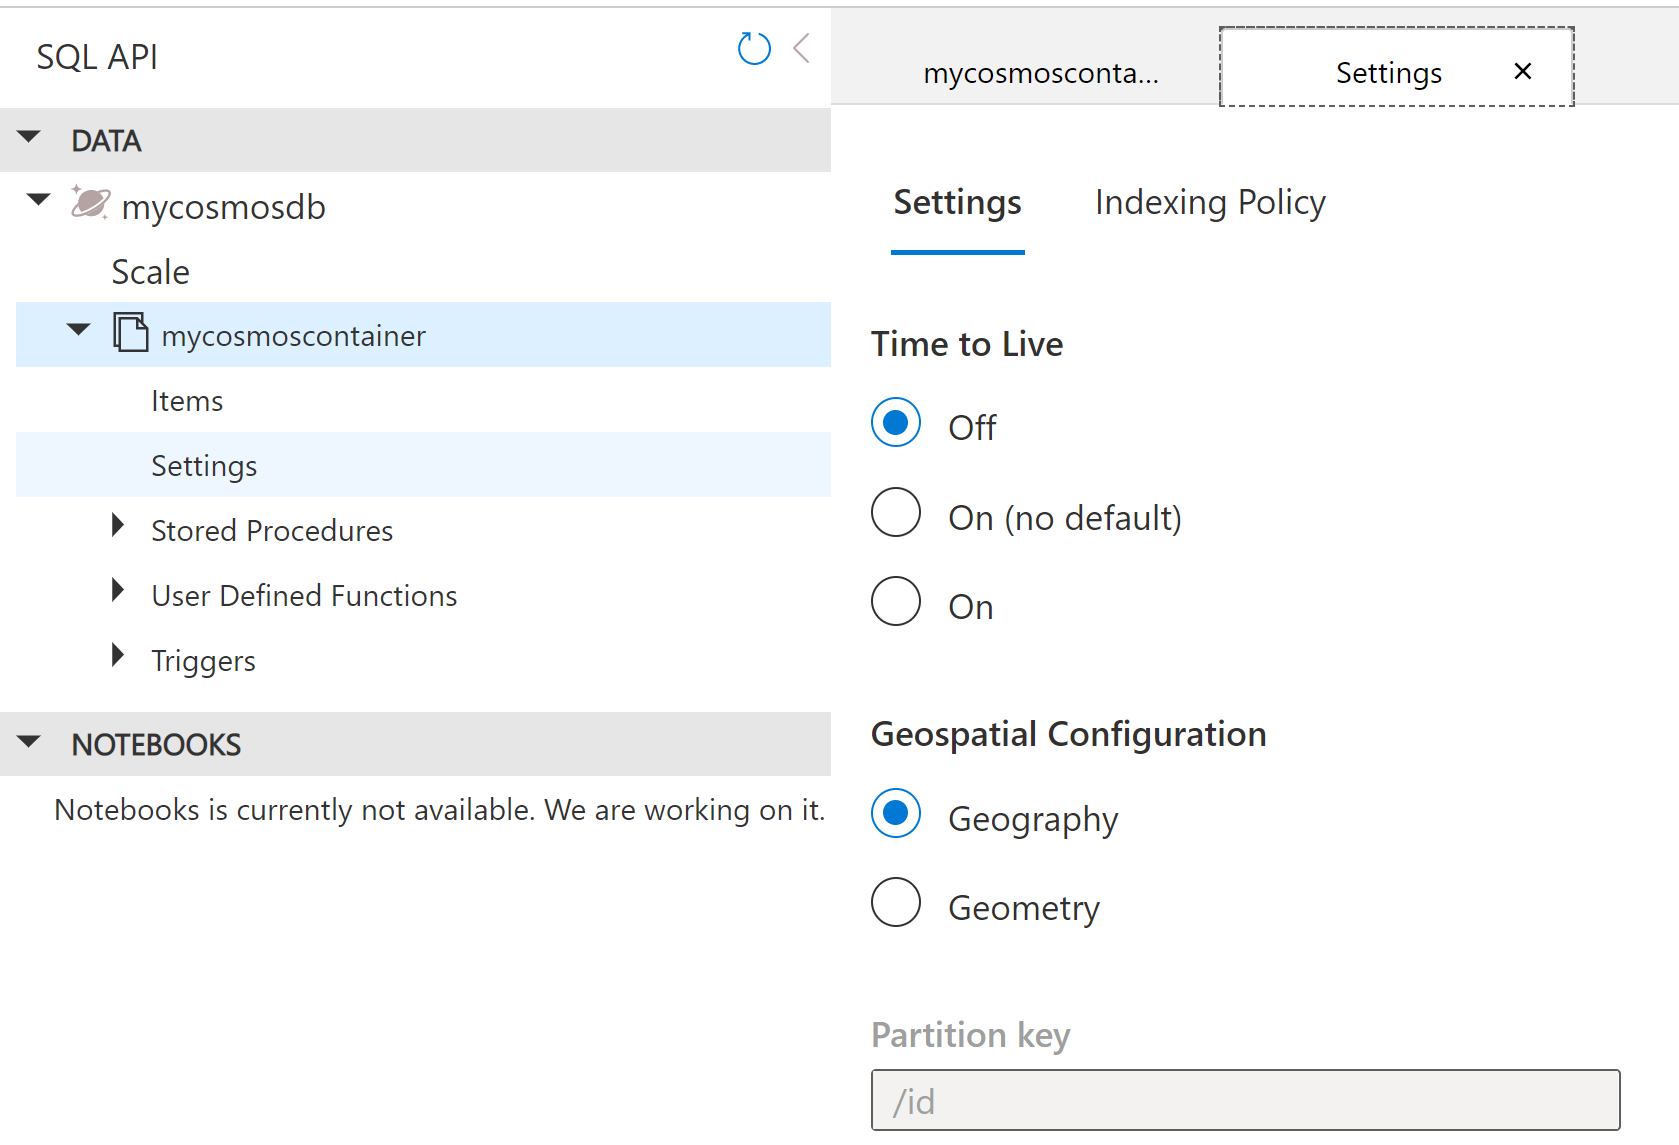
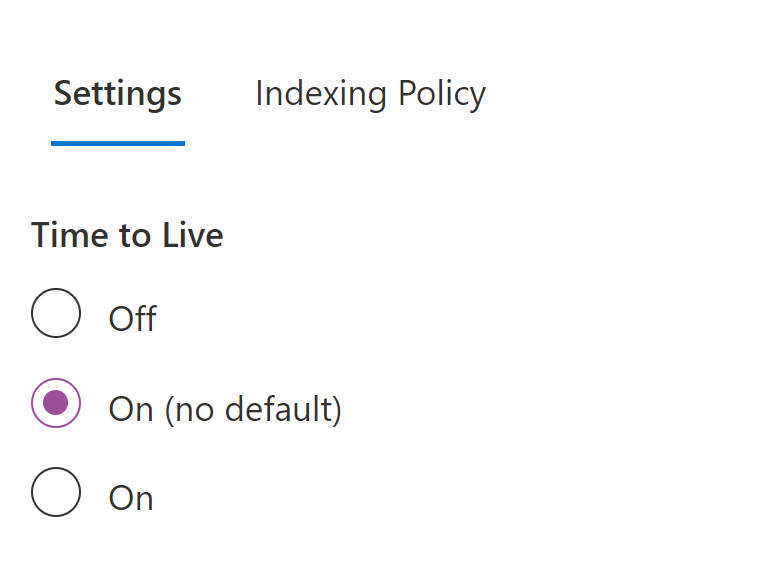
Once clicked, you will be able to see three options under “Time to Live” on the right side:
- Off: Meaning the items won’t expire ever (even if items are marked as deleted)
- On (no default): will let items get deleted (as per the expired time mentioned)
- On: will delete expired items based on TTL value
For our scenario, we will select “On (no default)”. This will allow us to delete items at separate intervals.
Once selected, go back to items, and open the item. Set the TTL property as shown in the image:
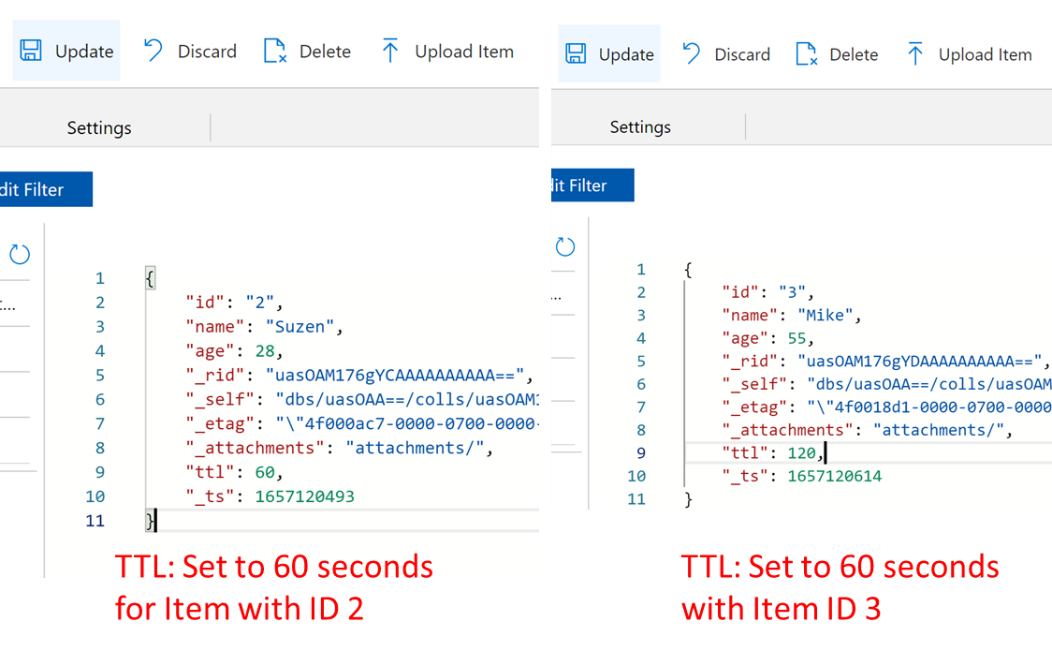
I have two different intervals in items, one at 60 seconds and another at 120 seconds. Please keep in mind that the number you set will be in seconds. Once you set the property, click on “Update” and the items will be set to expire. In the below image, you will see three different results at three different times.
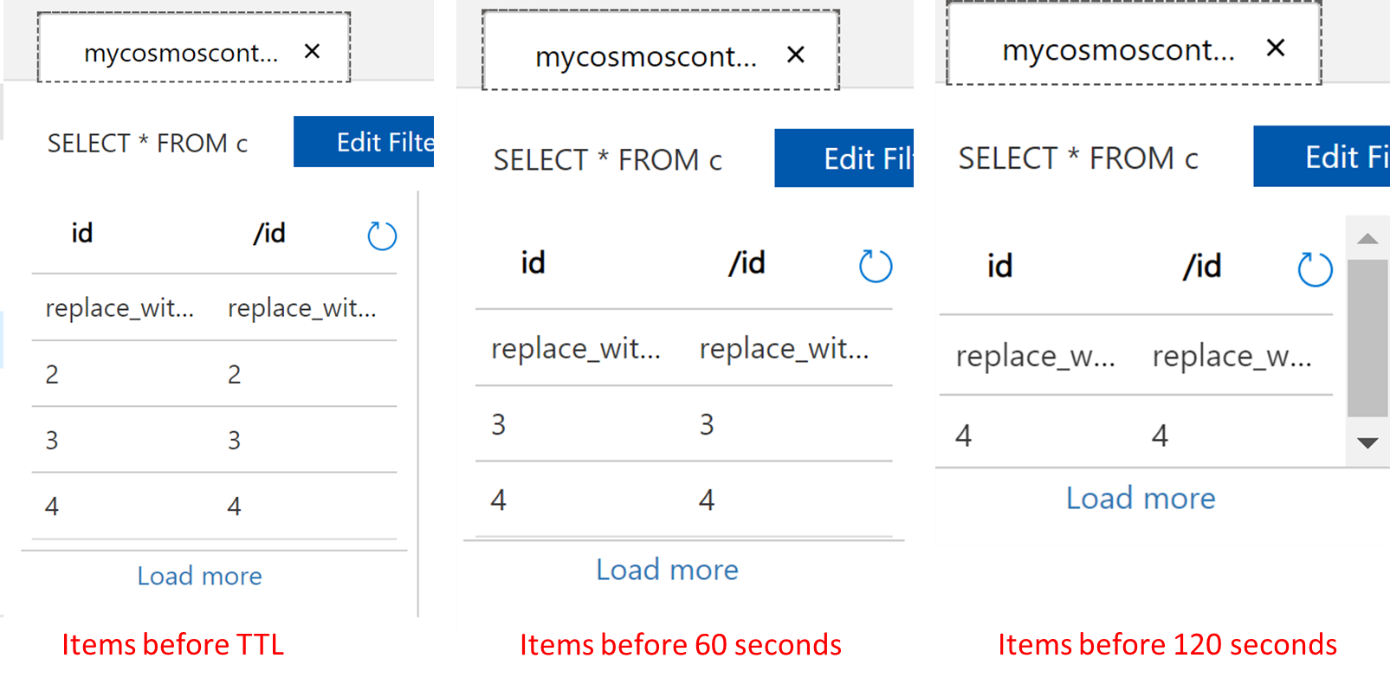
Based on the TTL set, each item gets automatically removed after the mentioned period in its property.
Override container retention
Now let’s say I want to remove an entire container and not one single item at a time. To do so go to Items > Settings > TTL > On > set the time in seconds.
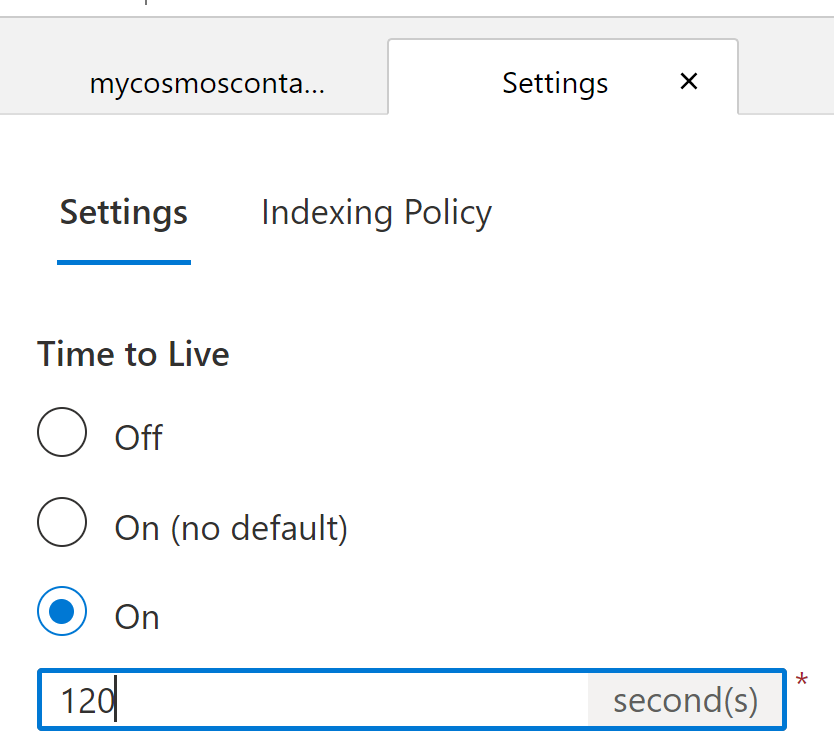
As shown in the below image, once you set the TTL at the container, all items will be automatically removed once the period expires.

However, there are certain scenarios and caveats where even though the container expiry period is overridden by items configuration. I will explain it next section
Items retention after container expiration
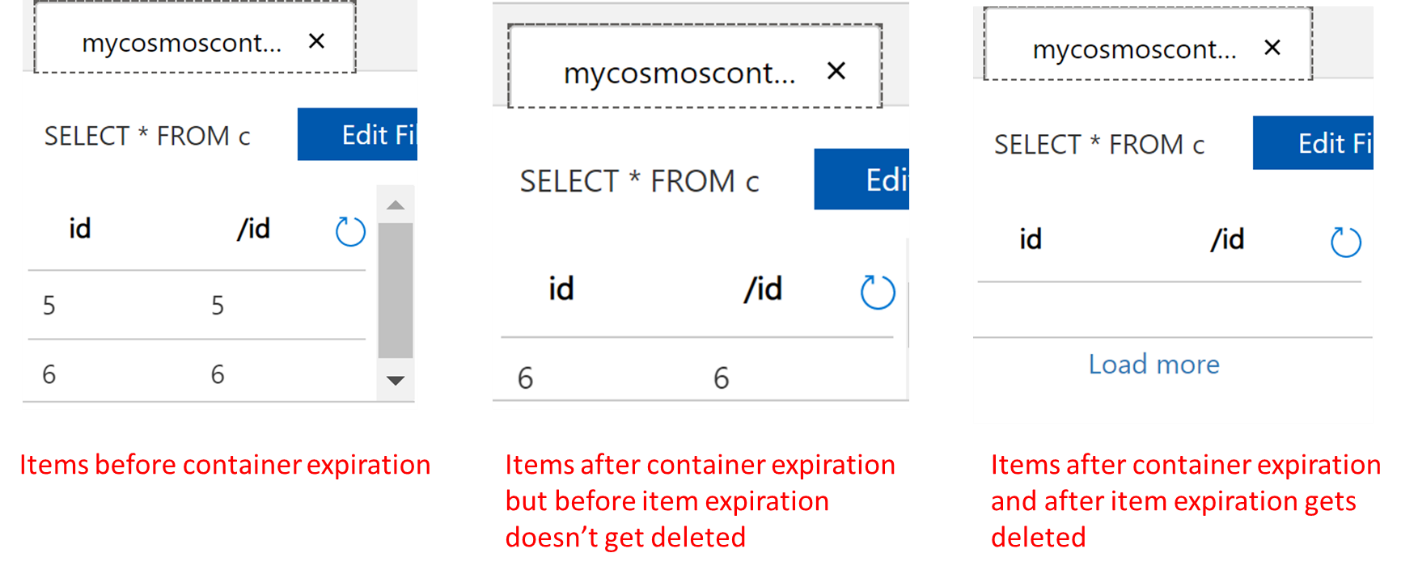
Scenario 1 – Items set to expire after the container is expiring, will not be removed:
In this scenario, it is simply the expiration period of an item is higher than the container expiration set. For example, the container might be set to expire in 120 seconds however, the item’s expiration is set to 500 seconds.
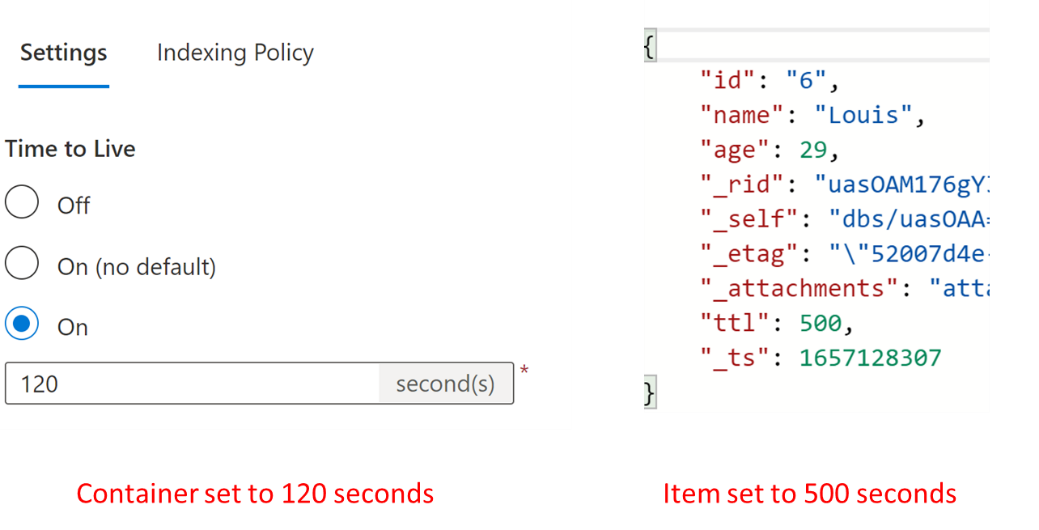
In the above configuration, all the items apart from the item set to 500 seconds get deleted. The item only gets deleted once the item is expired as shown below. So, it is crucial to ensure to validate the container and item expiration item overlapping.
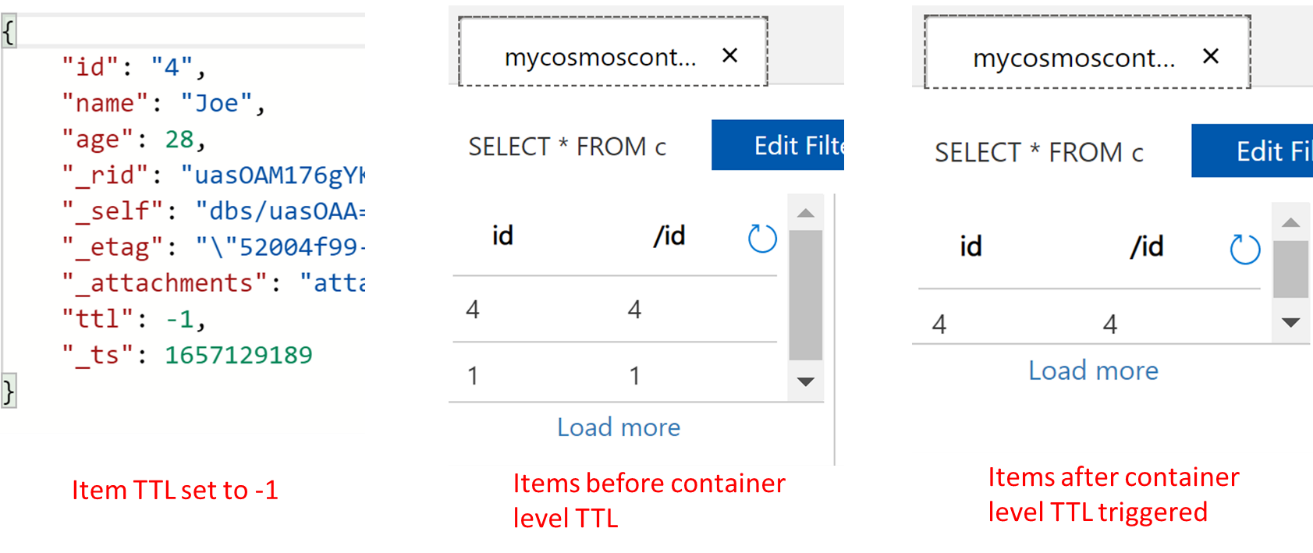
Scenario 2 – Items set to expire never even though the container is expiring, will not be removed
Similar to the above scenario, let’s say the item’s TTL is set to “-1” which is the configuration for the container/item to never expire. In such type of scenario will still be the same. For example, I have kept the container expiration at 120 seconds however, I changed the item with ID 4 TTL to -1 as shown below. As a result, even though the rest of the items are deleted, an item with 4 ids will remain in the container forever.
TTL using PowerShell
In the above examples, we have used the Azure portal to update TTL in Container. In addition, you can do it using PowerShell as well. To update the TTL, you can type the below command in either Cloud Shell or Powershell file as well:
az cosmosdb sql container update -g ‘RGCosmos’ -a ‘samplecosmosdb4trial’ -d ‘mycosmosdb’ -n ‘mycosmoscontainer’ –ttl=3600

Where:
az cosmosdb sql container update: is the command to update the container
-g ‘RGCosmos’: RGCosmos is the resource group name in which Cosmos DB exists
-a ‘samplecosmosdb4trial’: is the Cosmos account name
-d ‘mycosmosdb’: is the Cosmos DB name
-n ‘mycosmoscontainer’: is the Cosmos DB container name
–ttl=3600: is the Time to Live in seconds
There are a few other key considerations:
- TTL can be set to a maximum of 2147483647 seconds
- TTL is set in seconds and the time is calculated from the time an item was last modified
- Azure policy set to Cosmos DB will override TTL
- “TTL” keyword is case-sensitive. So ensure to type in lowercase while updating an item
Thus, through the above examples we learned the following:
- To retain items forever after TTL, set the items/container to “-1”
- To delete the container after a certain time, set the “On” option in TTL
- To enable deletion of container/items, set “On (Default)”
- To delete specific items, use the “TTL” property in items
- To override deletion at an item level, set the “TTL” property in items
- To disable the deletion at items or containers, disable the “TTL” option at the container level
- To configure TTL using Portal, CLI, and PowerShell
Conclusion
In this article, we learned how to set retention on Cosmos DB and also using PowerShell to automate the retention with the help of DevOps. We also saw Analytical TTL (ATTL) to retain data in the Analytical store.

He has worked internationally with Fortune 500 clients in various sectors and is a passionate author.
View all posts by Rahul Mehta
- Finding Duplicates in SQL - February 7, 2024
- MySQL substring uses with examples - October 14, 2023
- MySQL group_concat() function overview - March 28, 2023