

In this article, we will learn how to configure properties and relationships in Azure Synapse Lake Database.
Introduction
In my previous article, Getting started with Azure Synapse Lake Database and Lake tables, we learned how to create an Azure Synapse instance and create a Lake Database as well as tables in it. We created data on Azure Data Lake Storage and then created data structures on Azure Synapse Lake Database and configured this structure to be integrated with the data, and finally accessed this data successfully. In production scenarios, there are hundreds of tables typically which may be modeled in specific ways with constraints and relationships. Also, the result may need analysis in a more graphical manner than just data in a tabular format represented on data grids. Azure Synapse Lake Database, as well as Tables provide a graphical and intuitive way of configuring constraints, properties, and table relationships.
Configuring Azure Synapse Database and Table properties
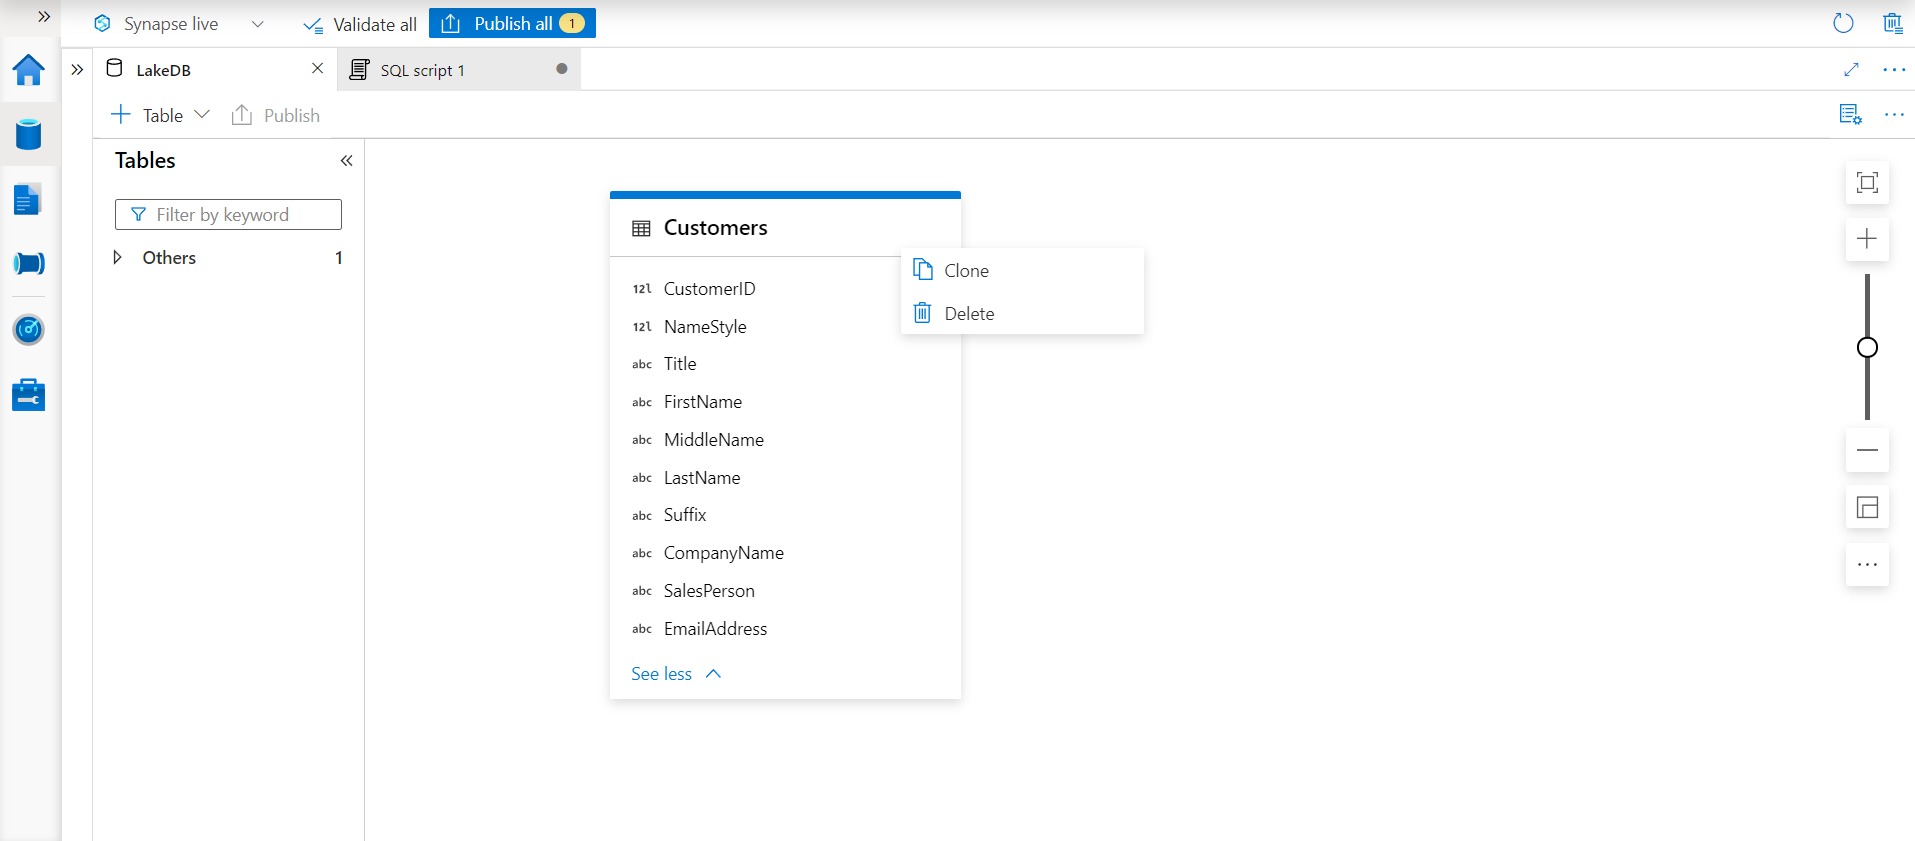
It is assumed that one already has followed the previous two articles on Azure Synapse Lake Database and created the Lake Database instance and table in it. This is an absolute prerequisite to proceed with the rest of the steps in this exercise. In the last article, we ended with the creation of the Customers table that points to the data file hosted on Azure Data Lake Storage. Let’s say we intend to clone this table for any reason, typically to create copies or an archive of the same table where the schema of the table is identical, but data is different. In this case, we can click on the Customers table ellipsis as shown below, and we would get an option to readily clone this table.
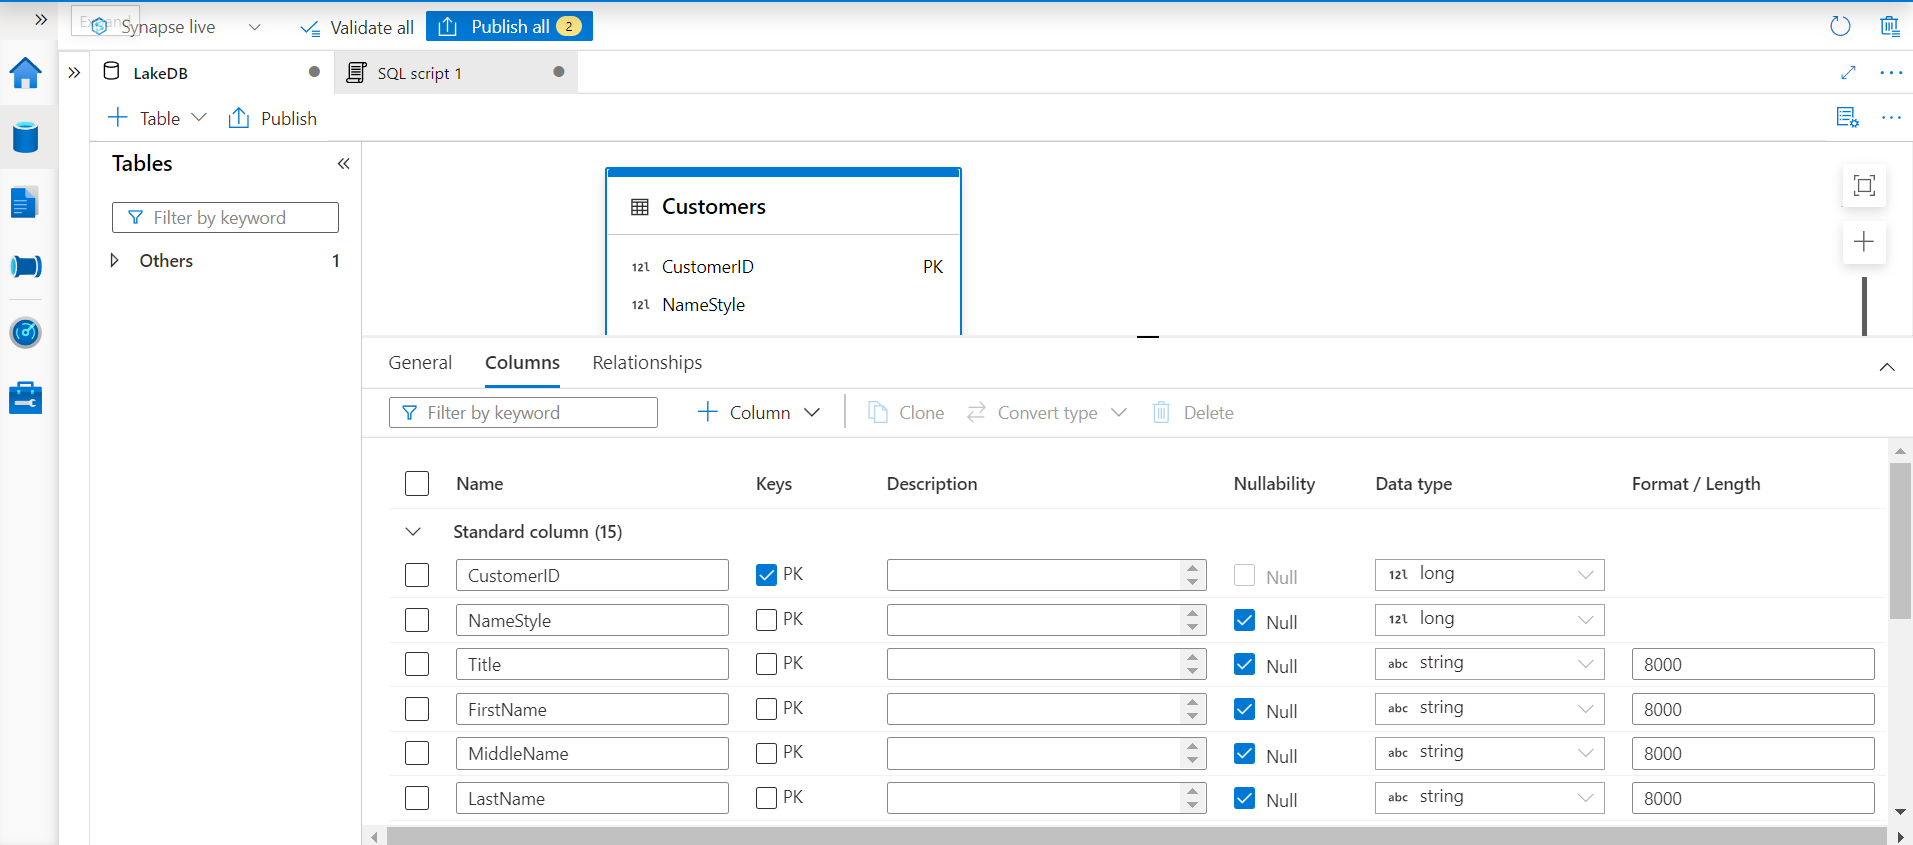
Now that the table is already in place, we can start to look at the default configuration and customize it as required. Click on the table and the configuration pane will appear on the bottom as shown below. It has three tabs – General, Columns and Relationships. Let’s look at all the three one by one. In the General properties tab, we will find the option to modify the name of the table, description, and the display folder in which the table is listed while browsing. The next set of properties in this section are related to storage. We can configure the table to inherit all the properties like linked service, input folder and other such relevant properties from the Azure Synapse Lake Database instance configuration itself by selecting the checkbox titled Inherit from database default.
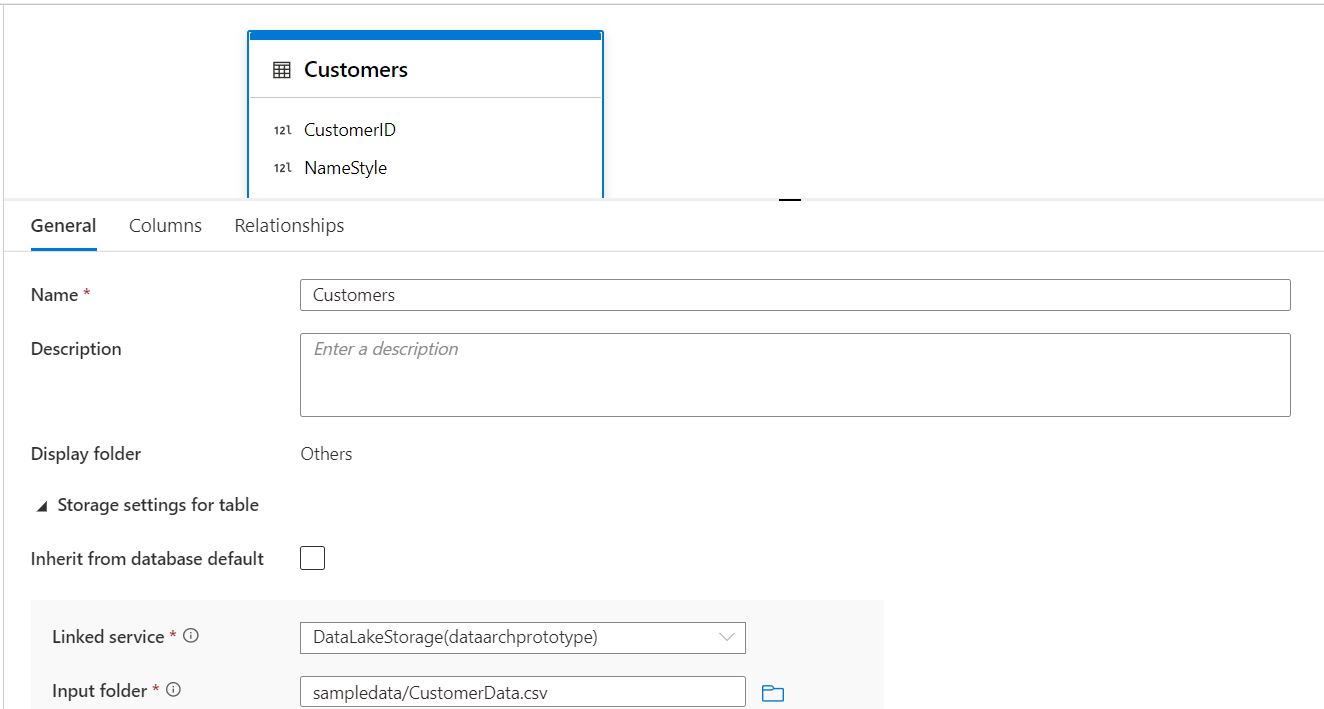
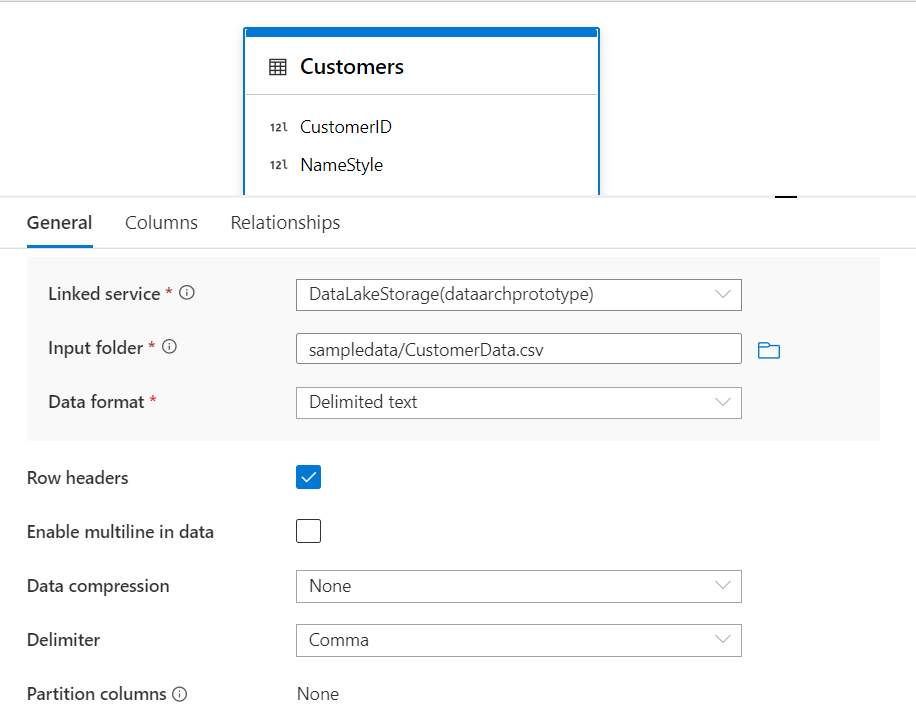
The other properties related to the table which we can modify from this section are linked service, input folder or file location, and data format. Other options like Row Headers allow multiline in data, Data Delimited, Compression and Partition can be configured depending on the type of data that will be hosted in the data source.
The next tab is the Columns tab where we can find all the columns listed in the table. This is the place from where we can modify the schema of the table. We can add constraints like Primary Key by selecting the relevant check box against each field name. We can also modify the data type as well as the length or precision of the data from here. At any point in time, we can also add or remove fields from this tab. To save these changes, it is necessary to publish the changes else the changes will be discarded from the workspace.
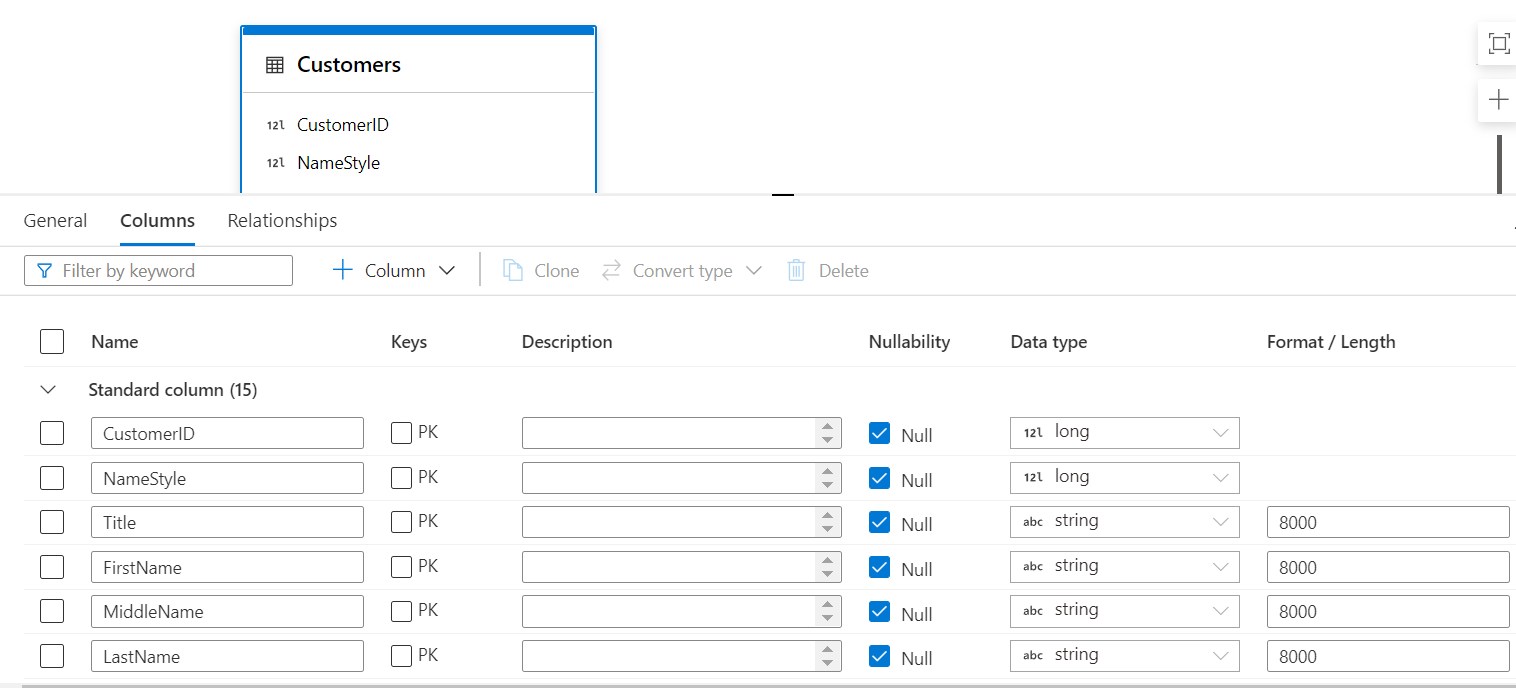
Let’s say that we want to make the CustomerID field in the Customers table as the primary key, so we can check the PK checkbox and uncheck the Null checkbox and publish the changes. When we select two or more fields of the same data type, we can use the Convery Type menu option to bulk convert a column from one type to another.
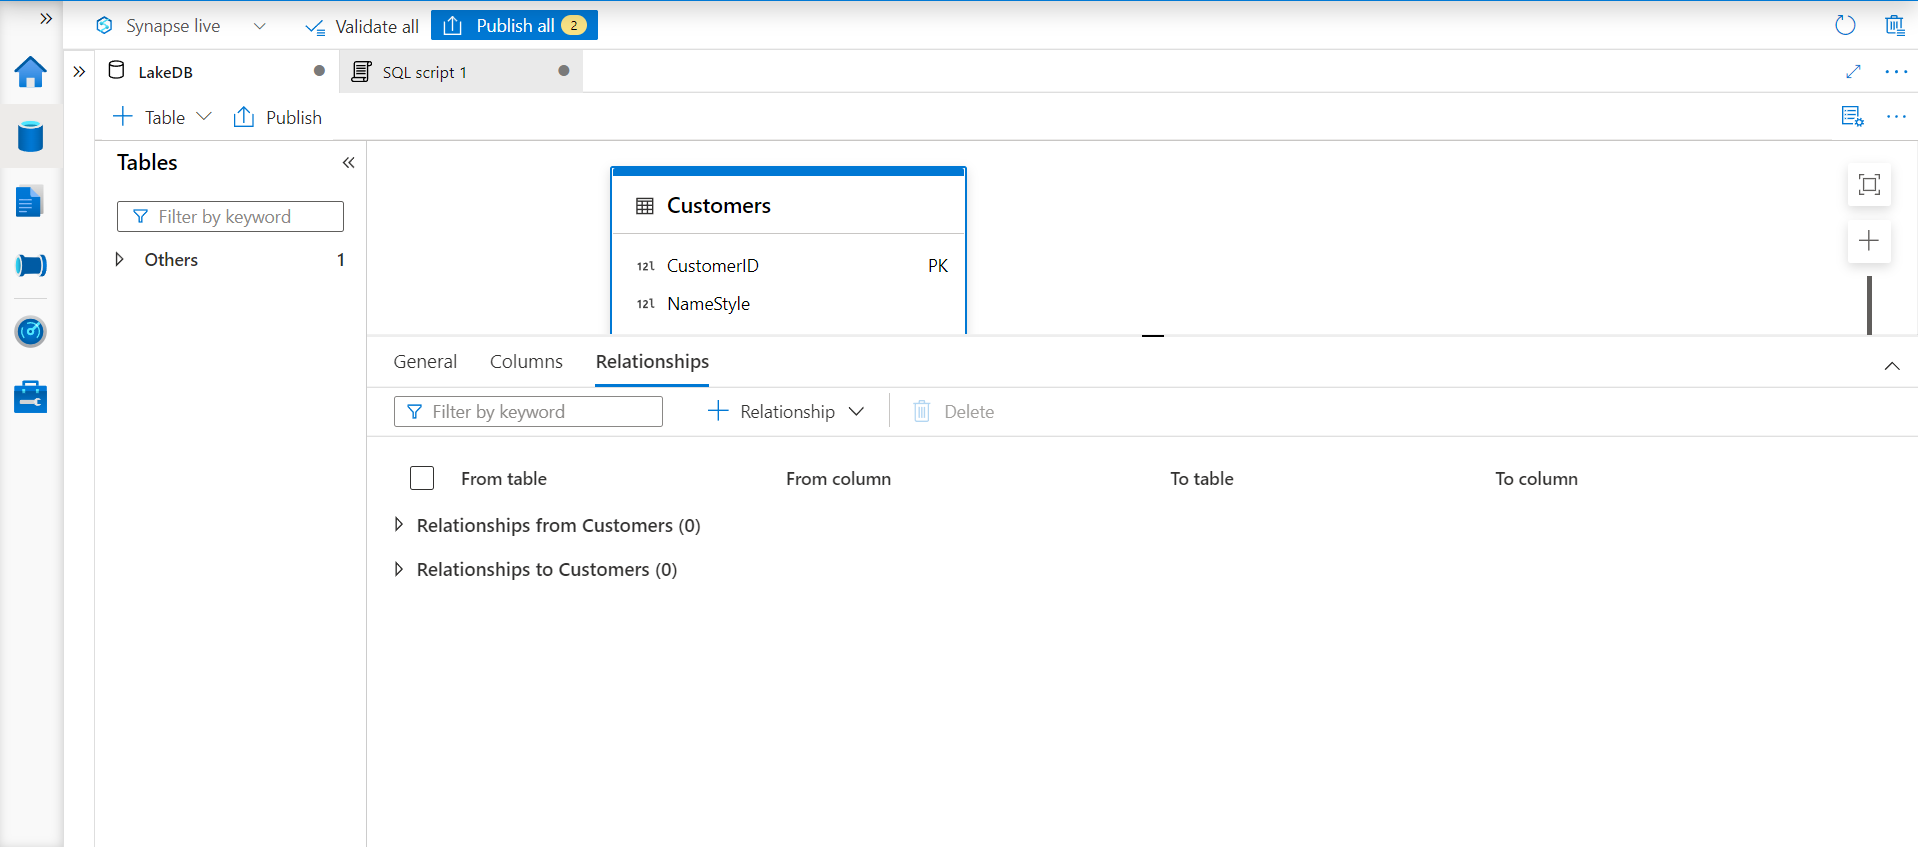
The next and final tab in the configuration pane is the Relationships tab. In this tab, we have the option to define relationships for the table. Relationships can be incoming as well as outgoing. In simple words, it means that a table can have a key as a foreign key, which may be the primary key of another table. In other words, the relationship where the table is a child table. The other way of relationship is where the table is acting as the master table and is having its primary key being used as a foreign key in another table. Here we have the provision to define both types of relationships from various tables defined in the Azure Synapse Lake Database instance. To try out configuring the relationship feature, we need at least one table.
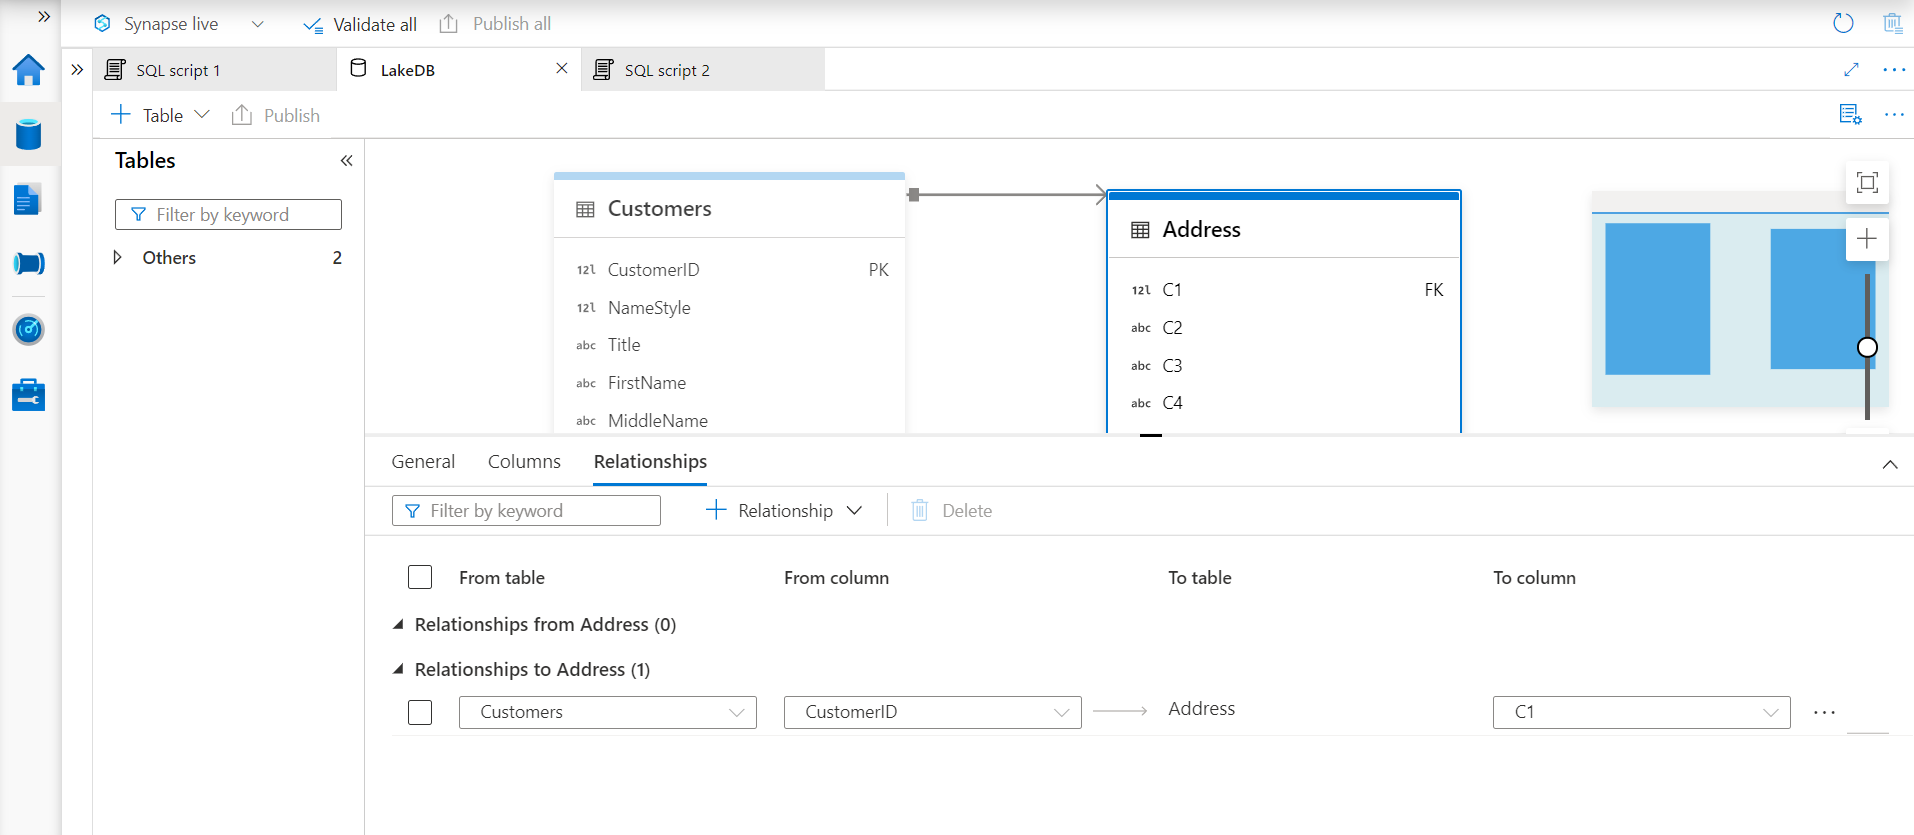
Follow the steps that we did earlier to register the Customers table and register another table using a different data file hosted on Azure Data Lake Storage. In this case, I have created an Address table that has CustomerID the same as the ones in the Customers table. Once this table is registered, it looks as shown below. Here we have intentionally kept field names as C1, C2 and so on to simulate a situation where field names may not be identical in two tables.

Now to define relationships for the newly created Address table, select this table and click on the Relationships menu item as shown below. Select the To table option as the Customers table is acting as the parent table to the Address table. Once we select this option, the details row will pop up as shown below.

On the left-hand side, select the Customers table with the field as Customer ID, and on the right-hand side, we will select the Address table with the relevant field which has CustomerID i.e., the foreign key field.
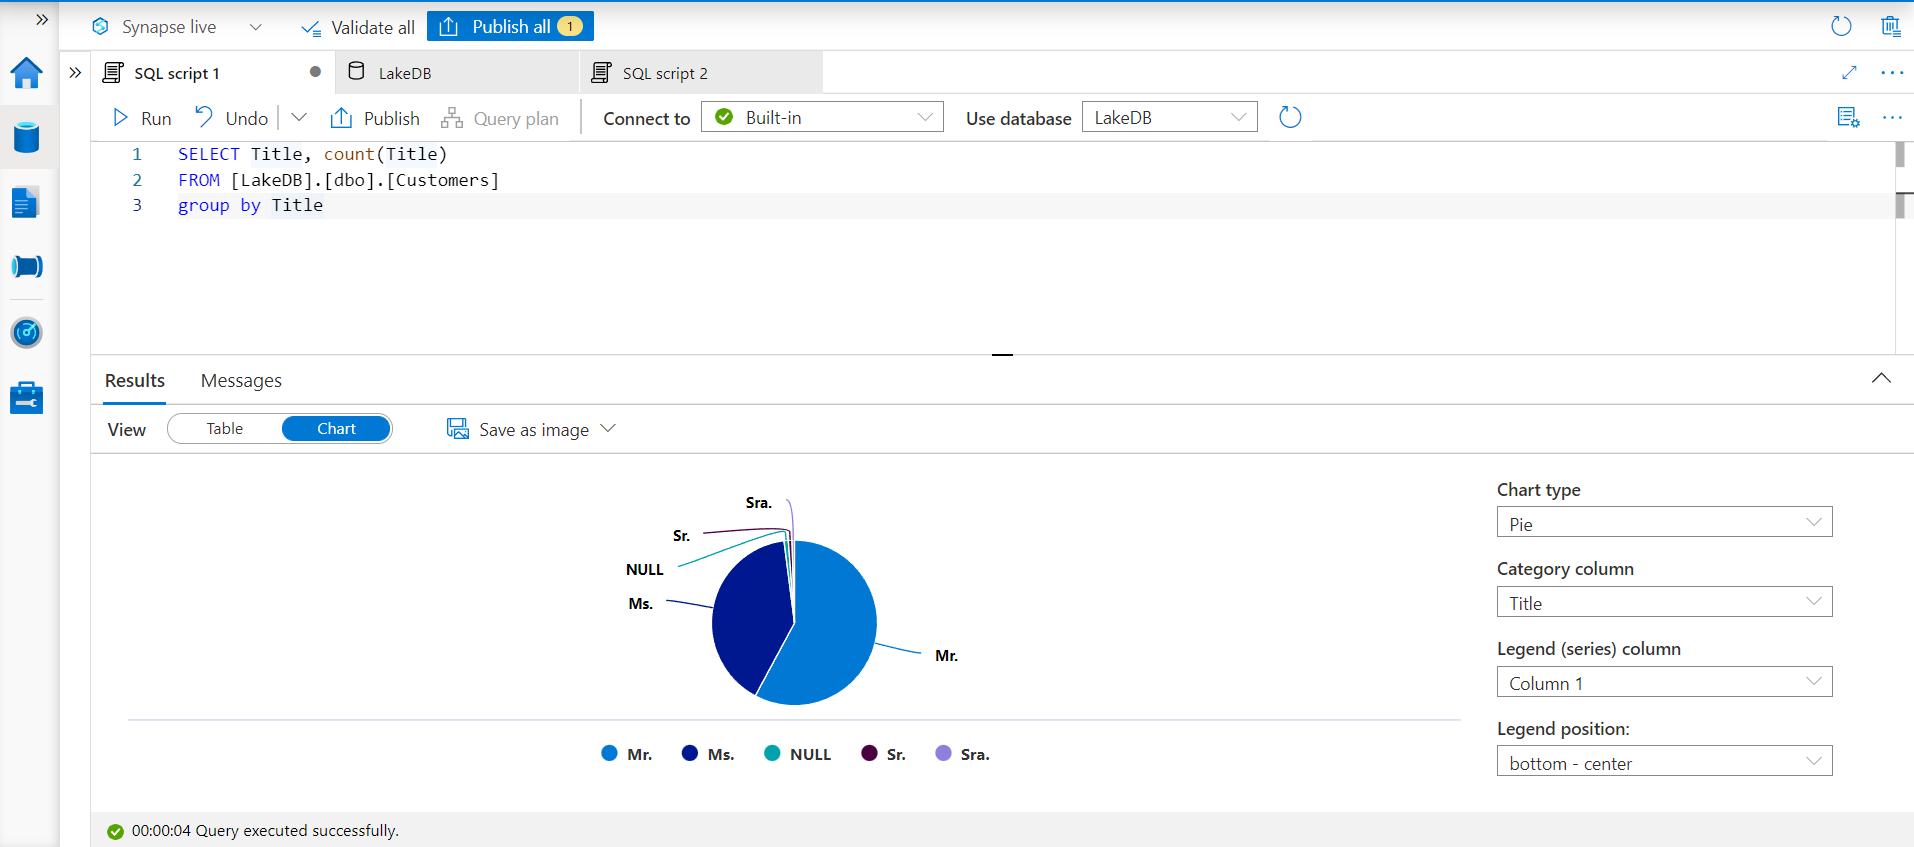
Now the relationship is defined, and the two tables are now related. We can open a script window to explore the data from these related tables as well. As shown below, here we have a SQL query that joins two tables on the CustomerID field. Click on the Run button to execute the query and the results are as shown below.

By default, the data is shown in a tabular option but there is more that we can do with this data as well. There is an option to export this data in formats like CSV and JSON. Let’s say that we intend to explore this data in a graphical manner. We do not need to copy or export this data and take it to a different tool to create basic charts using this data. This option is available in the same results interface. Click on the Chart option as we would be able to find charting options as shown below.
Multiple types of charts are supported and depending on the type of chart, the options to configure the chart may vary. In this case, we have a query where we are counting the number of customers grouped by their title. This data shows the distribution of customers based on an attribute, and a pie-chart is one of the simplest and widely used charts to show data distribution. We just have to select chart-type as pie and the category as title, and the chart would look as shown below. This can export this chart image as well in formats like jpeg and png.
In this way, we can model the metadata of the Azure Synapse Lake Database and Tables and explore data in an intuitive way.
Conclusion
In this article, we learned how to use the visual modeler to configure the properties and relationships related to Azure Synapse Lake Database and Table and explore the data in an intuitive way from multiple tables.

She has a deep experience in designing data and analytics solutions and ensuring its stability, reliability, and performance. She is also certified in SQL Server and have passed certifications like 70-463: Implementing Data Warehouses with Microsoft SQL Server.
View all posts by Gauri Mahajan
- Oracle Substring function overview with examples - June 19, 2024
- Introduction to the SQL Standard Deviation function - April 21, 2023
- A quick overview of MySQL foreign key with examples - February 7, 2023