
This article will get you started with Azure Synapse Lake Database and Lake tables.
Introduction
In my previous article, Introduction to Azure Synapse Lake Database in Azure Synapse Analytics, we learned about the significance of data structures and data modeling paradigms like data lake house concepts. We also learned what Azure Synapse and Azure Synapse Lake Database are positioned to cater. We also looked at the major components of the Synapse ecosystem and the Azure Synapse Lake Database at the center of it. We learned conceptually about all these components in the previous article. We will start to explore how to stand up an Azure Synapse instance and register a new Lake Database and a Table within such that we can access data out of it, which is synonymous to any data consumer using that data from the Synapse Lake Table.
Creating Azure Synapse Instance
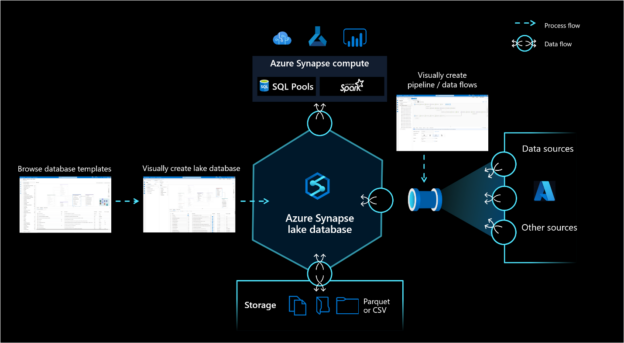
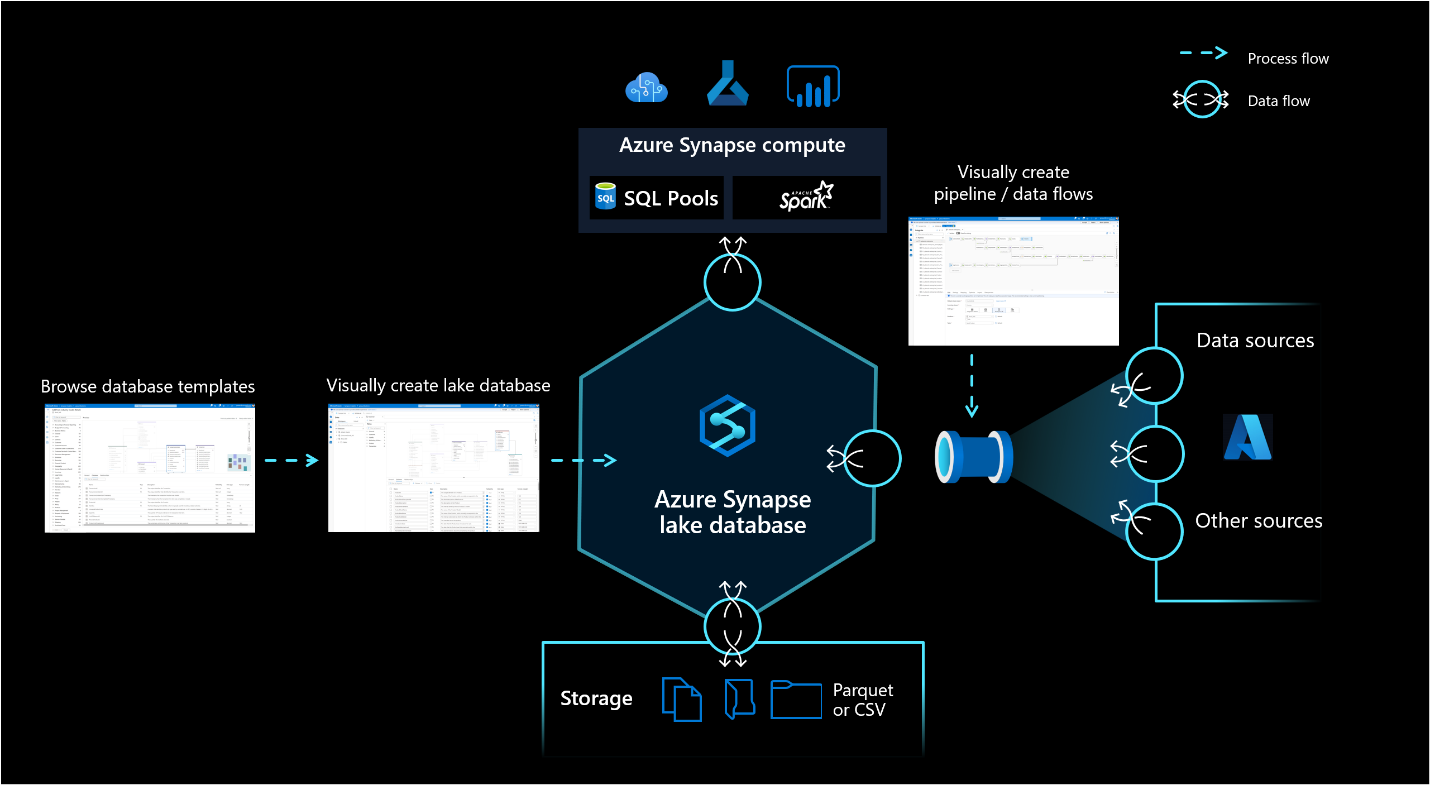
The diagram shown below conceptually depicts the different components that are associated with the Azure Synapse Lake Database. On the top, we have Azure Synapse pools – namely the Serverless SQL Pool and Spark pool. On the bottom, we have the Azure Data Lake Storage with data files in CSV and Parquet format. So, it is easy to figure out that the first pre-requisite that we would have in this case is an Azure Synapse instance.
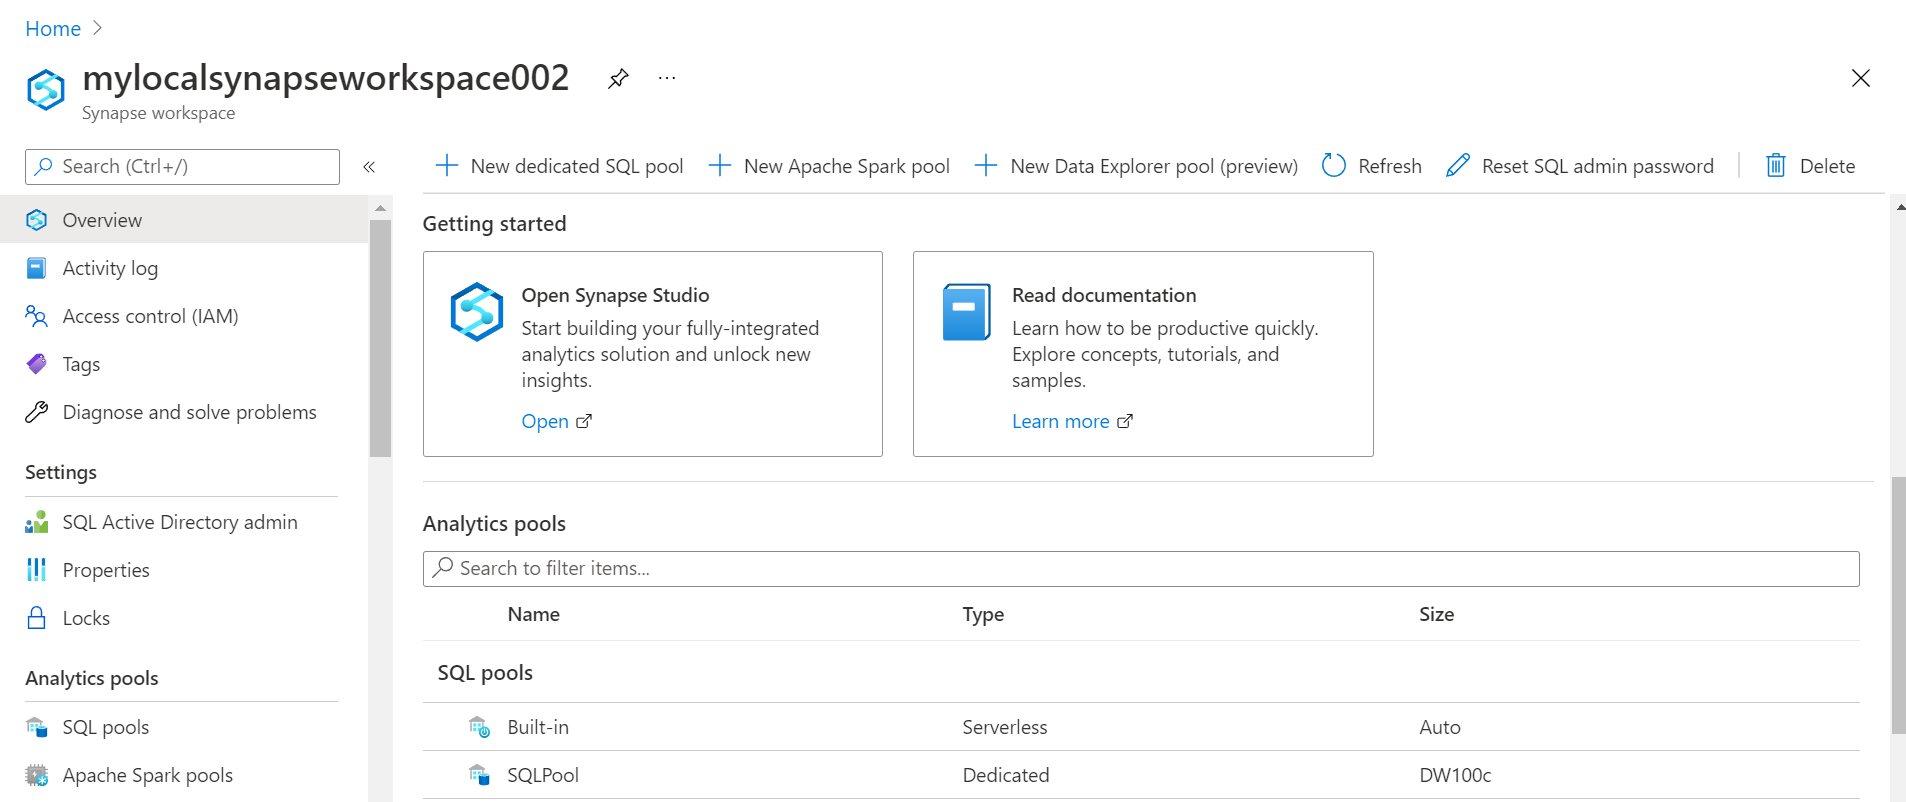
It is assumed that one already has an Azure account in place with the required privileges to access the Azure Synapse Analytics service. Open the dashboard of this service and create a new instance using the default option in the region of your choice. Once the instance is created, open the dashboard of that instance and the home page would look as shown below. In the getting started section, we would be able to see a tile named Synapse Studio. This is the gateway to open the console i.e., Azure Synapse Studio from where we can operate different features and services related to Azure Synapse including Azure Synapse Lake Database. One can optionally create a dedicated SQL pool as well, but we won’t need them for this exercise.
Before we proceed to the next step, another pre-requisite is creating a storage account of Azure Data Lake Storage – Type 2 and having at least one data file in CSV format with some sample data in it. This is a critical prerequisite to proceed with the next steps in this exercise. It is assumed that one has already met the requirements of this pre-requisite, and then proceed with the next steps.
Creating Azure Synapse Lake Database
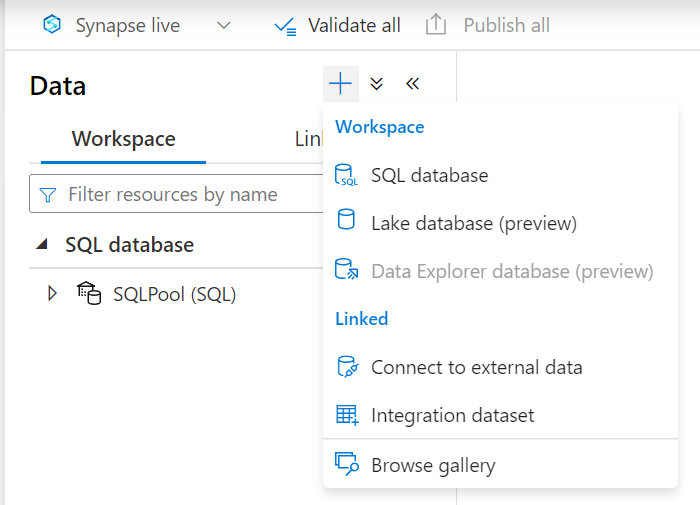
Navigate to Azure Synapse Studio, and then from the home page, click on the Data tab. It would open a new page from where we can click on the + sign to explore the options as shown below. Azure Lake Database is in preview as of the draft of this article. Click on the Lake database option which would open a new wizard.
The properties window on the right-hand side would show the properties of the Azure Synapse Lake Database with default values as shown below. We can start with giving an appropriate name to the database and an optional description of it.
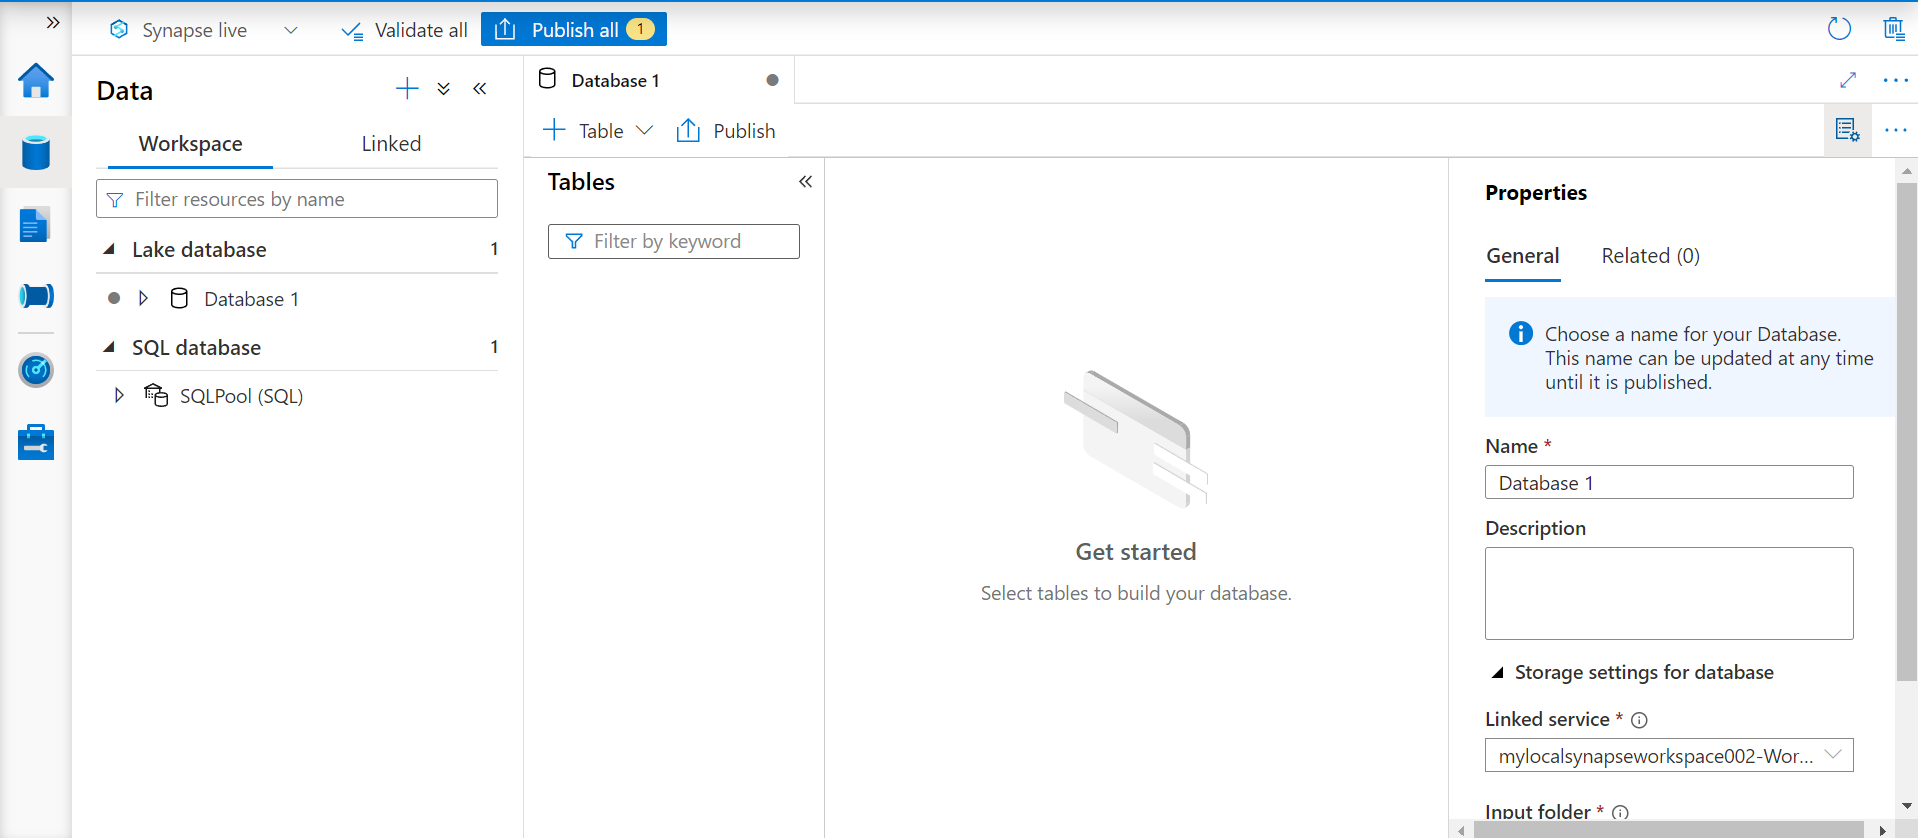
The storage settings section is one of the important properties that we should carefully configure. For any type of data being sourced, a linked service is created and used by the Azure Synapse service. One of the linked services is attached to the workspace and the other is linked to Azure Data Lake Storage. We intend to create a table based on the data stored in the data lake. Typically, one would have data accumulated in the Azure Data Lake in the form of files and one would want to create metadata structures on the top of these data files so that they can be accessed in the desired manner. So, we will select the linked service related to the data lake.
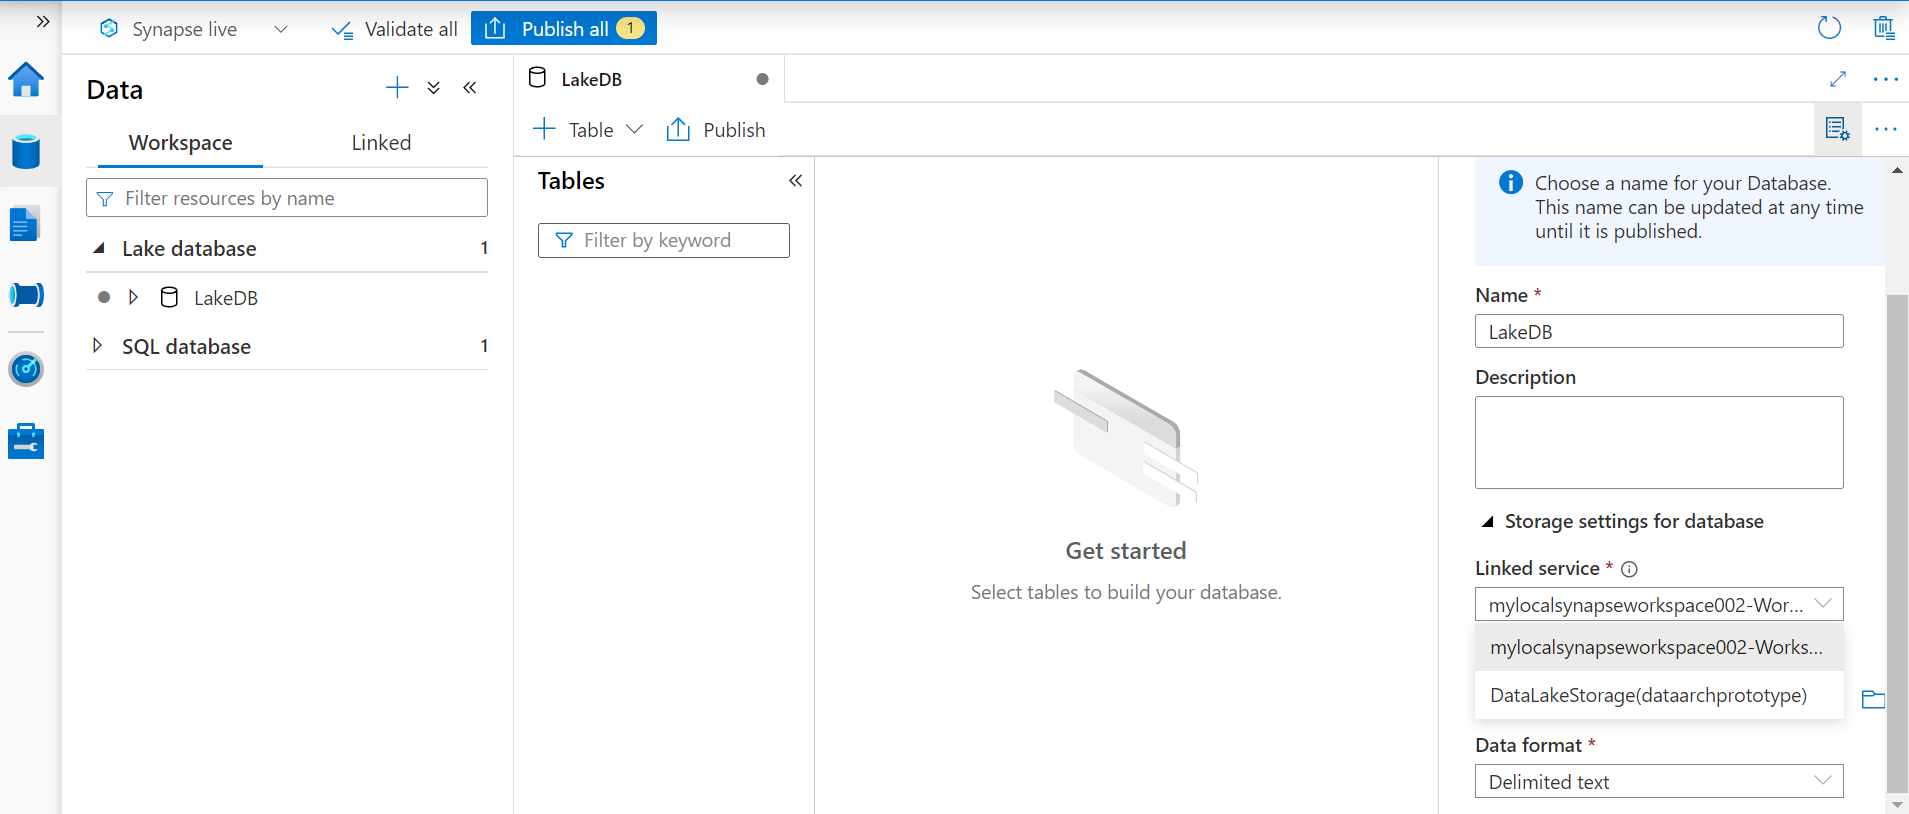
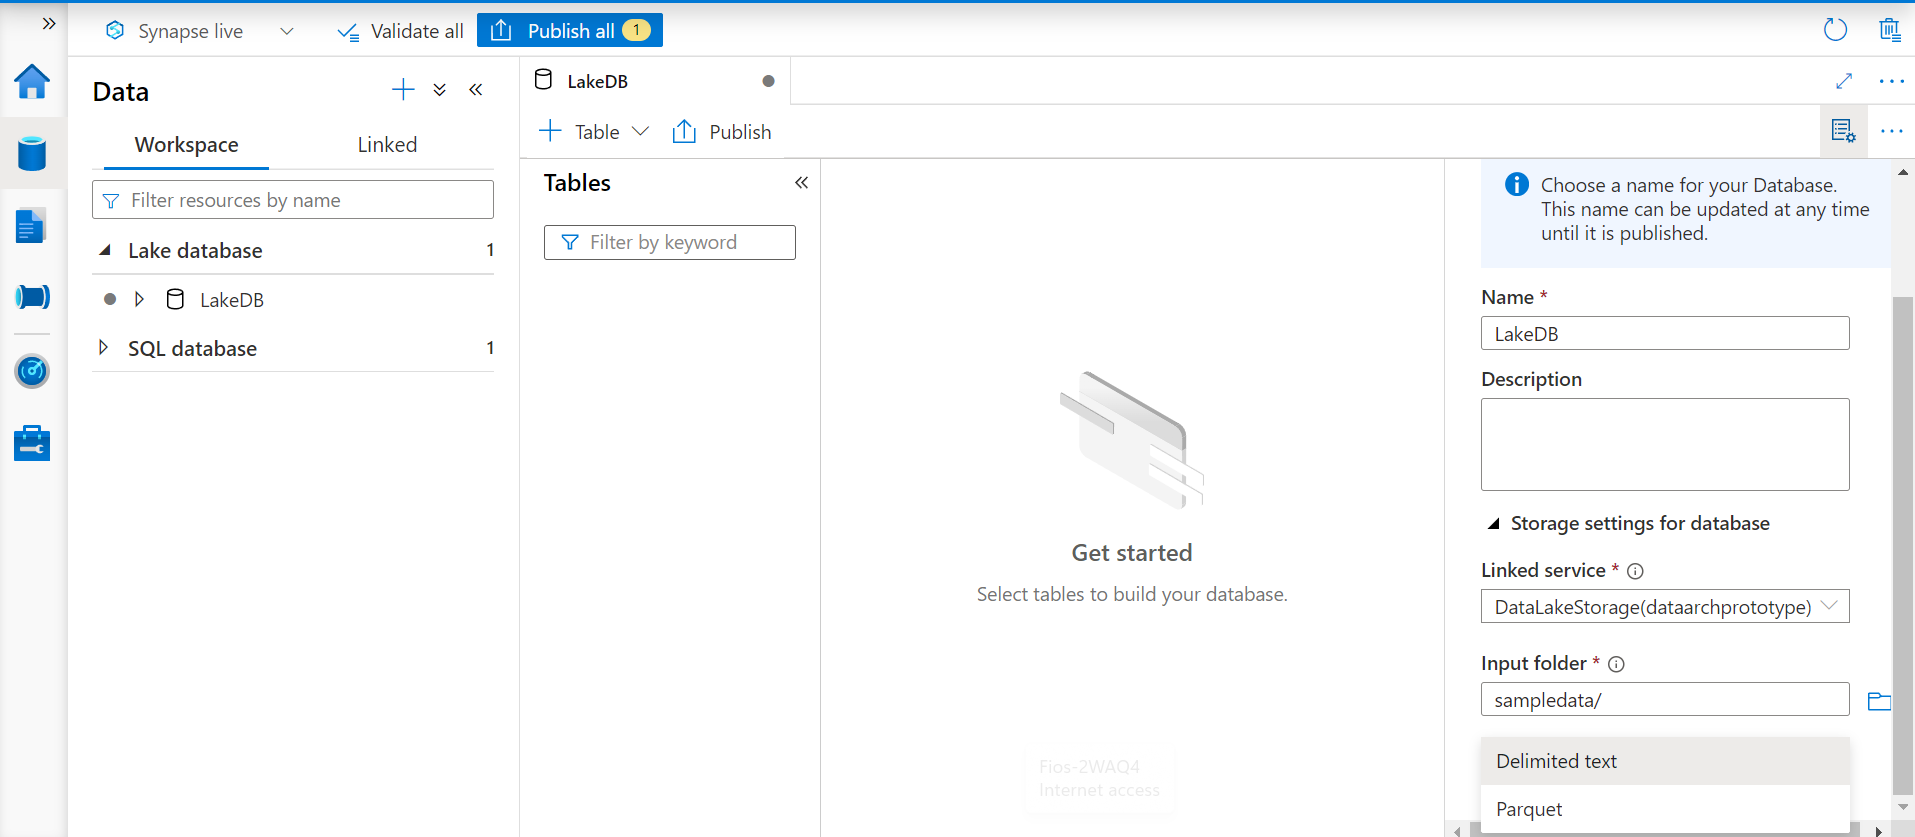
When we select Azure Data Lake as the data source, we need to select the input folder where our data is hosted. In this case, we have our data stored on an input folder named sampledata. In cases, where one does not have any linked services available, one can register a linked service from the Azure Synapse studio and then it would start appearing in the linked service option as shown below. After the data lake linked service and the correct location on the data lake is configured, the next step is to select the format of data. As of the draft of this article, the supported input formats are CSV (delimited text) and Parquet. We will continue with the default option of delimited text. Ideally, one would want to use columnar formats like Parquet which are highly compressed and offers greater space savings and performance efficiency compared to text-based delimited file formats.
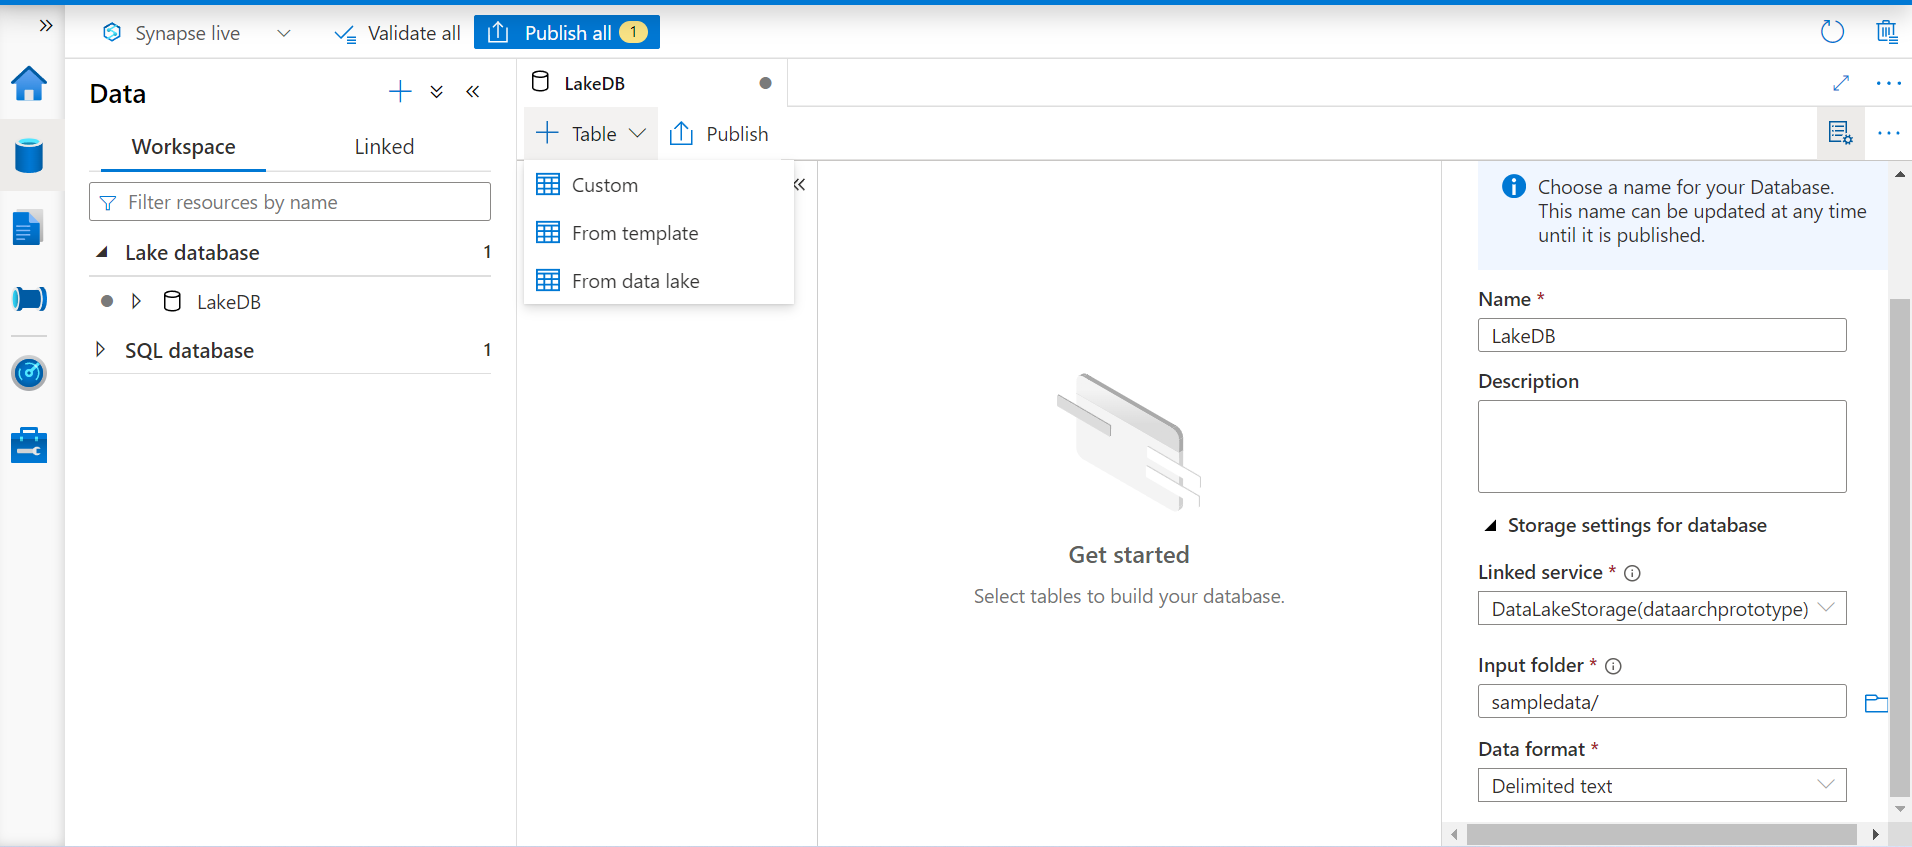
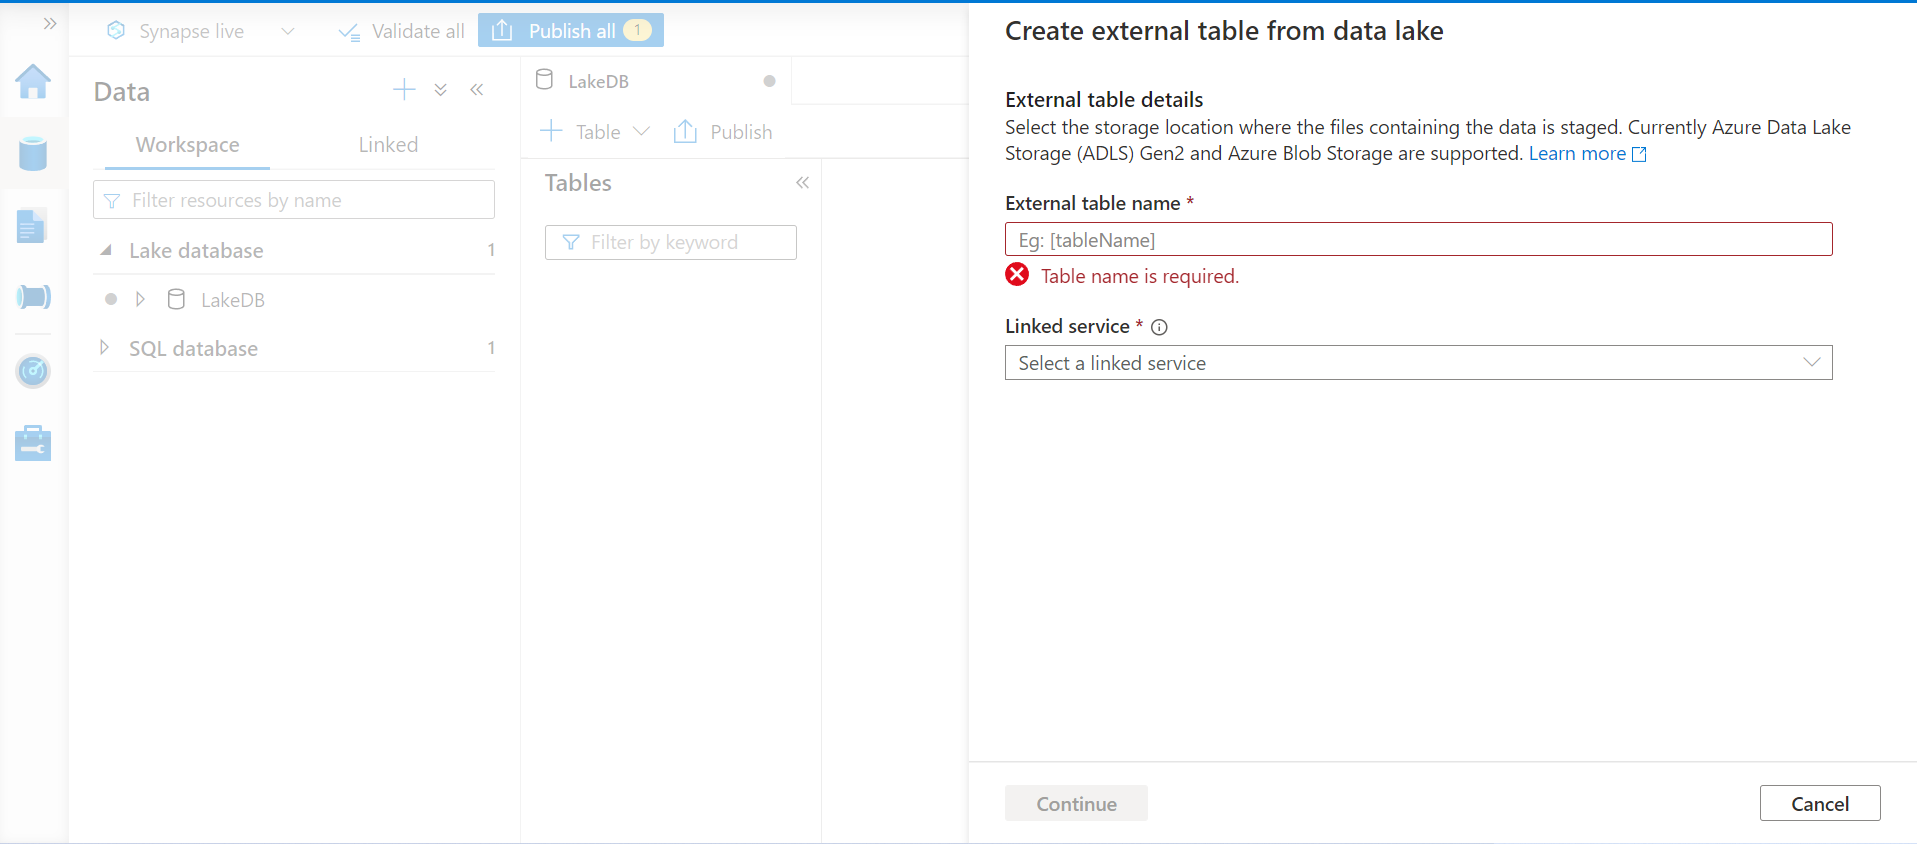
Now that we have the Azure Synapse Lake Database already in place, we can focus on creating tables in this database. Click on the Table option as shown below, and we would find three options to create new tables. One option is to create a table from a template, one option is to create a custom table from scratch and the third option is to create a table based on data stored in the data lake. As we have already stored data in the data lake in the form of a CSV file, we will go with this third option.
Once we select the above-mentioned option, it would pop-up a new window on the right-hand side as shown below to define the new table. We can start by assigning an appropriate name to this table.
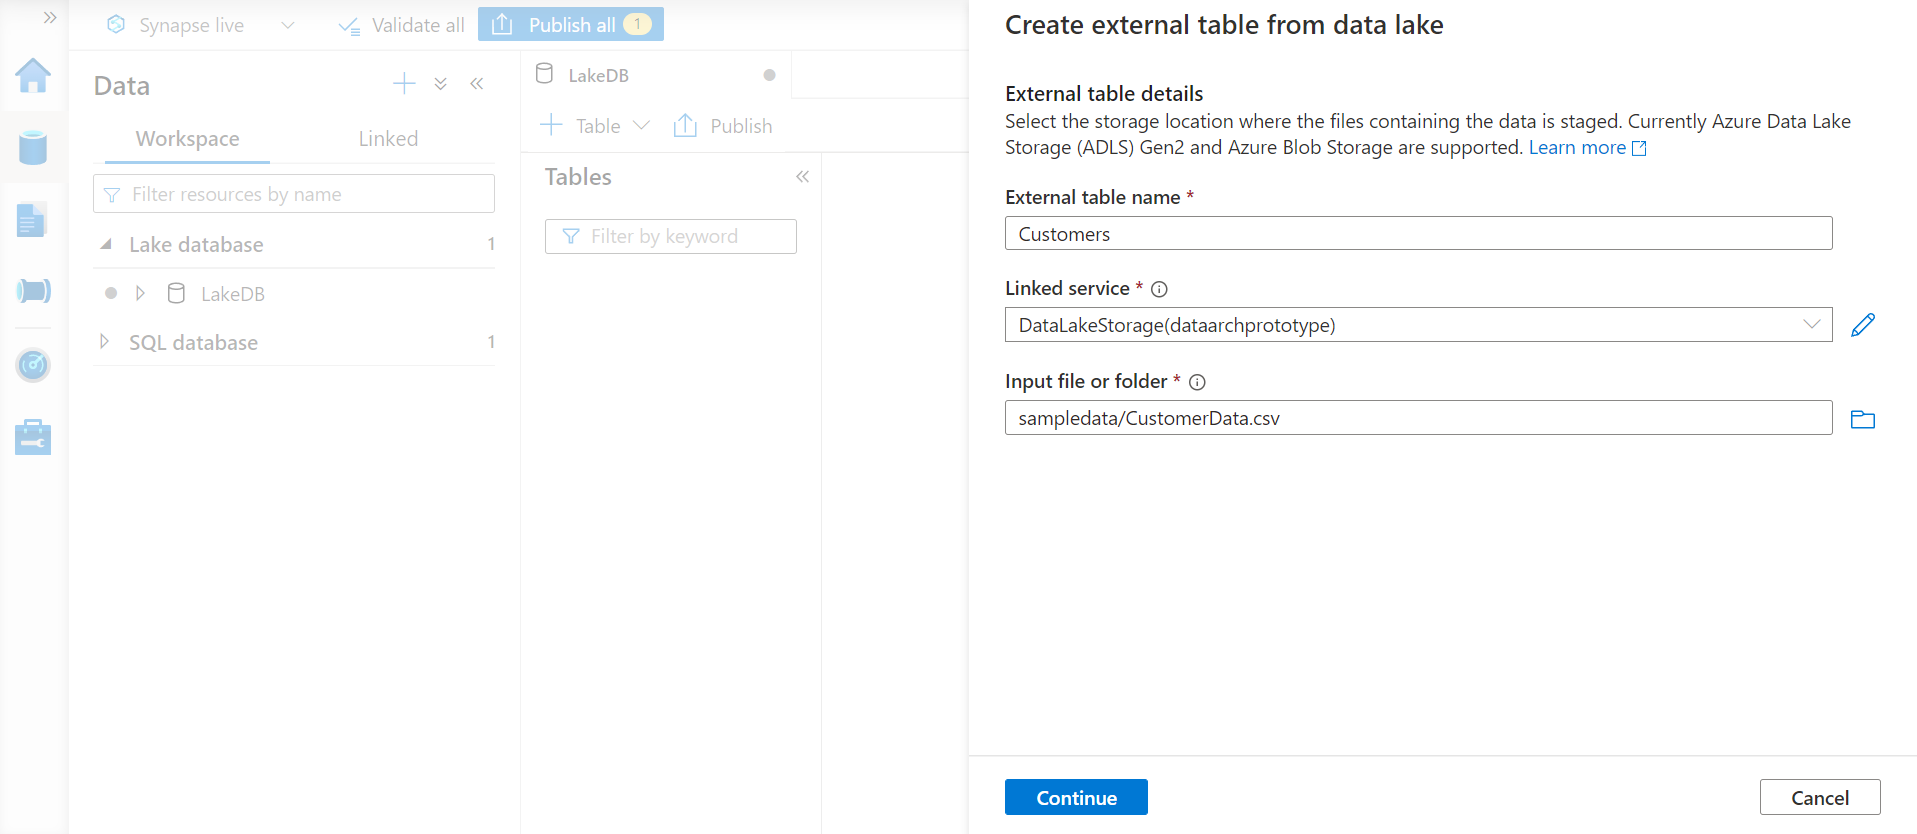
Let’s say we want to create a customer’s data and assume that the data we stored on the Azure Data Lake Storage account has customers’ data in the CSV file. We will use the same linked service of the Azure Data Lake that we used earlier and select the exact file this time instead of just selecting the folder that hosts the data file. The data in this file will be parsed and metadata will be inferred from this file for configuring table definition.
By default, this wizard would assume that the file is of CSV delimited type with comma as the delimiter. We can configure all the typical options that are available while parsing delimited files as shown below. We also have to option to specify whether the first record in the data file contains column headers.
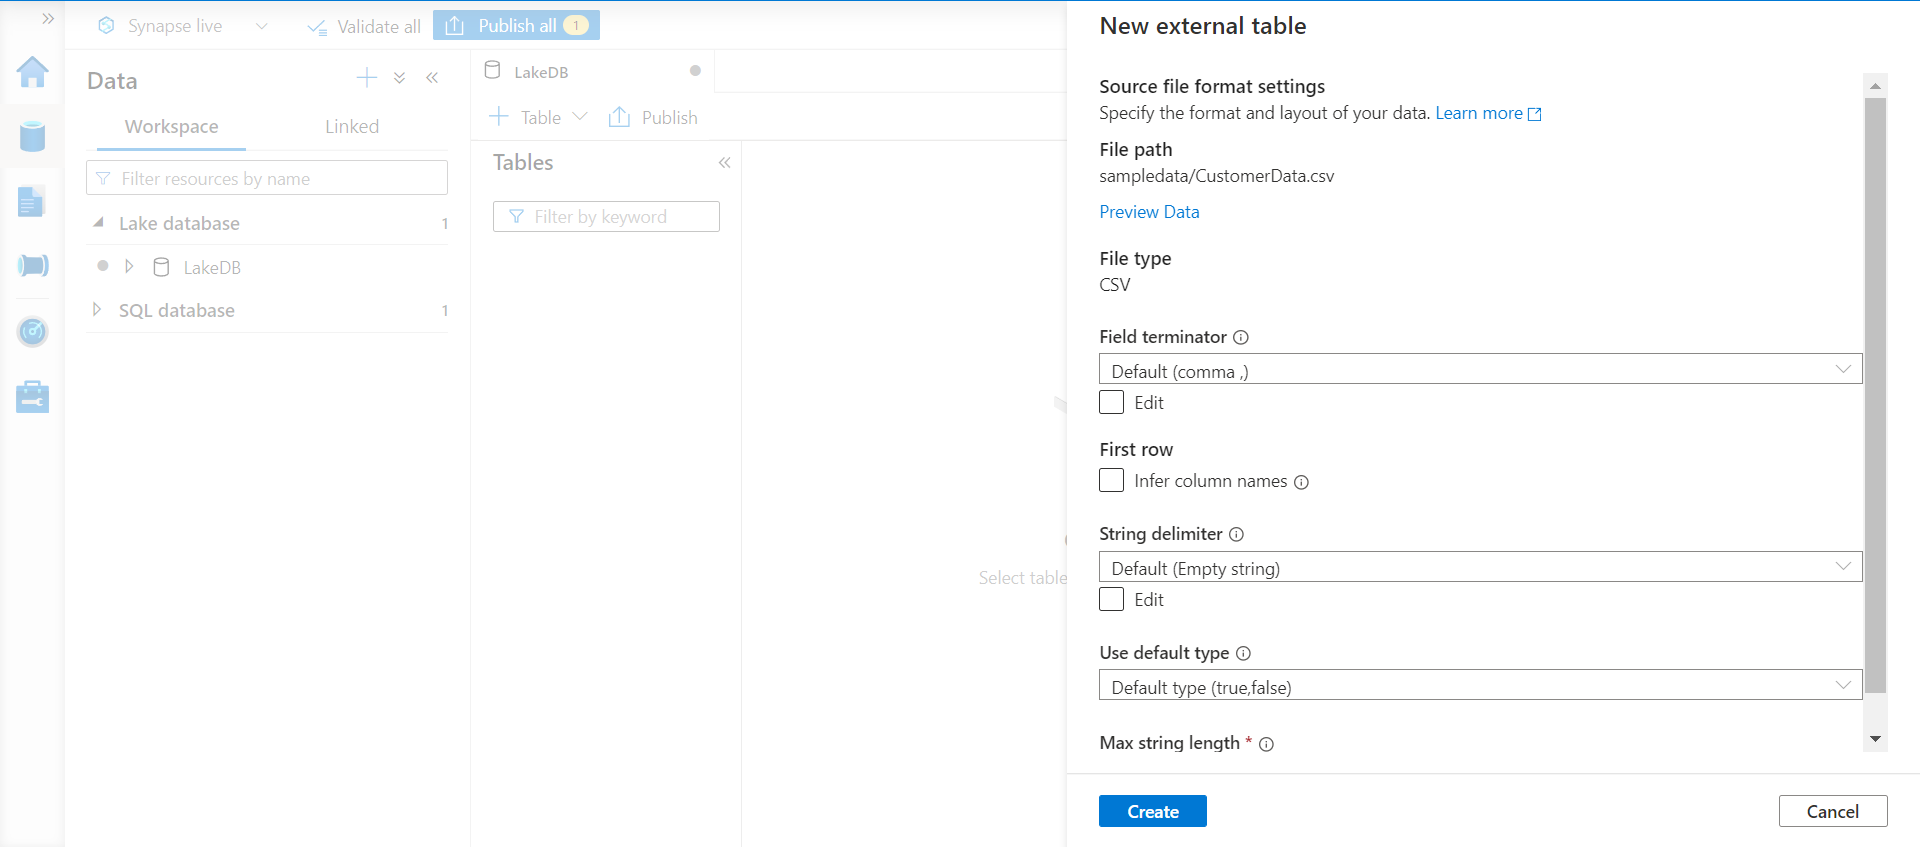
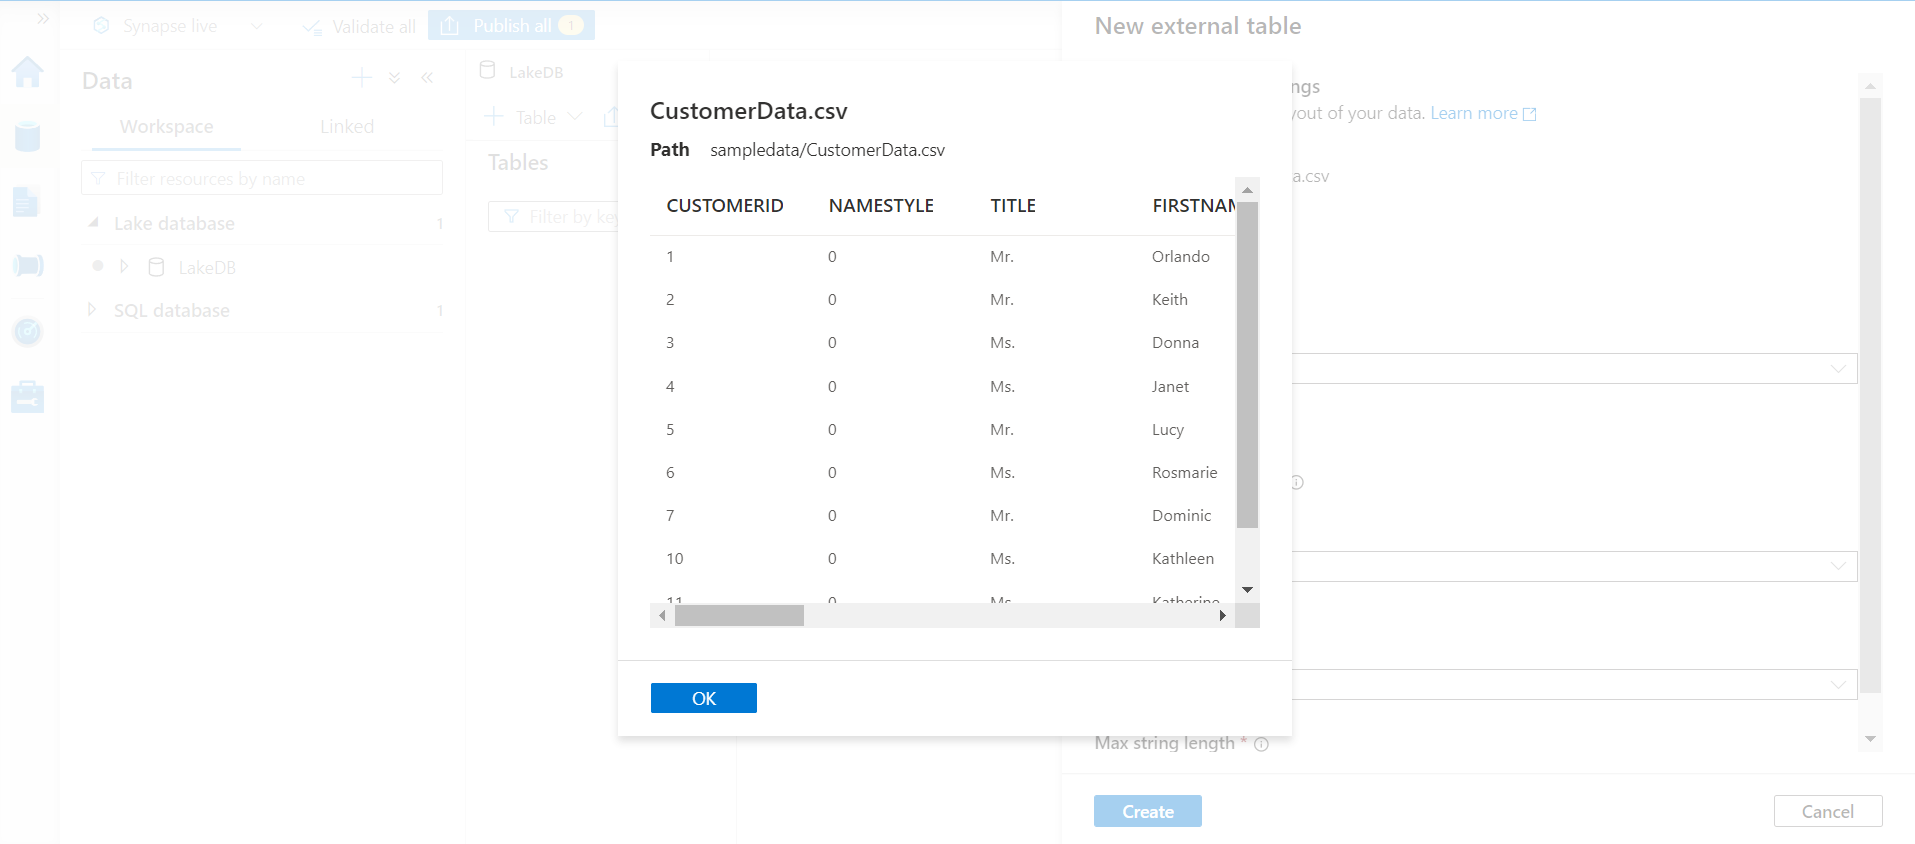
Click on the Preview Data option to preview the data, which helps in ascertaining whether the file is being parsed as desired. The Preview window would look as shown below where we can see that the data is being read correctly along with the column headers as well.
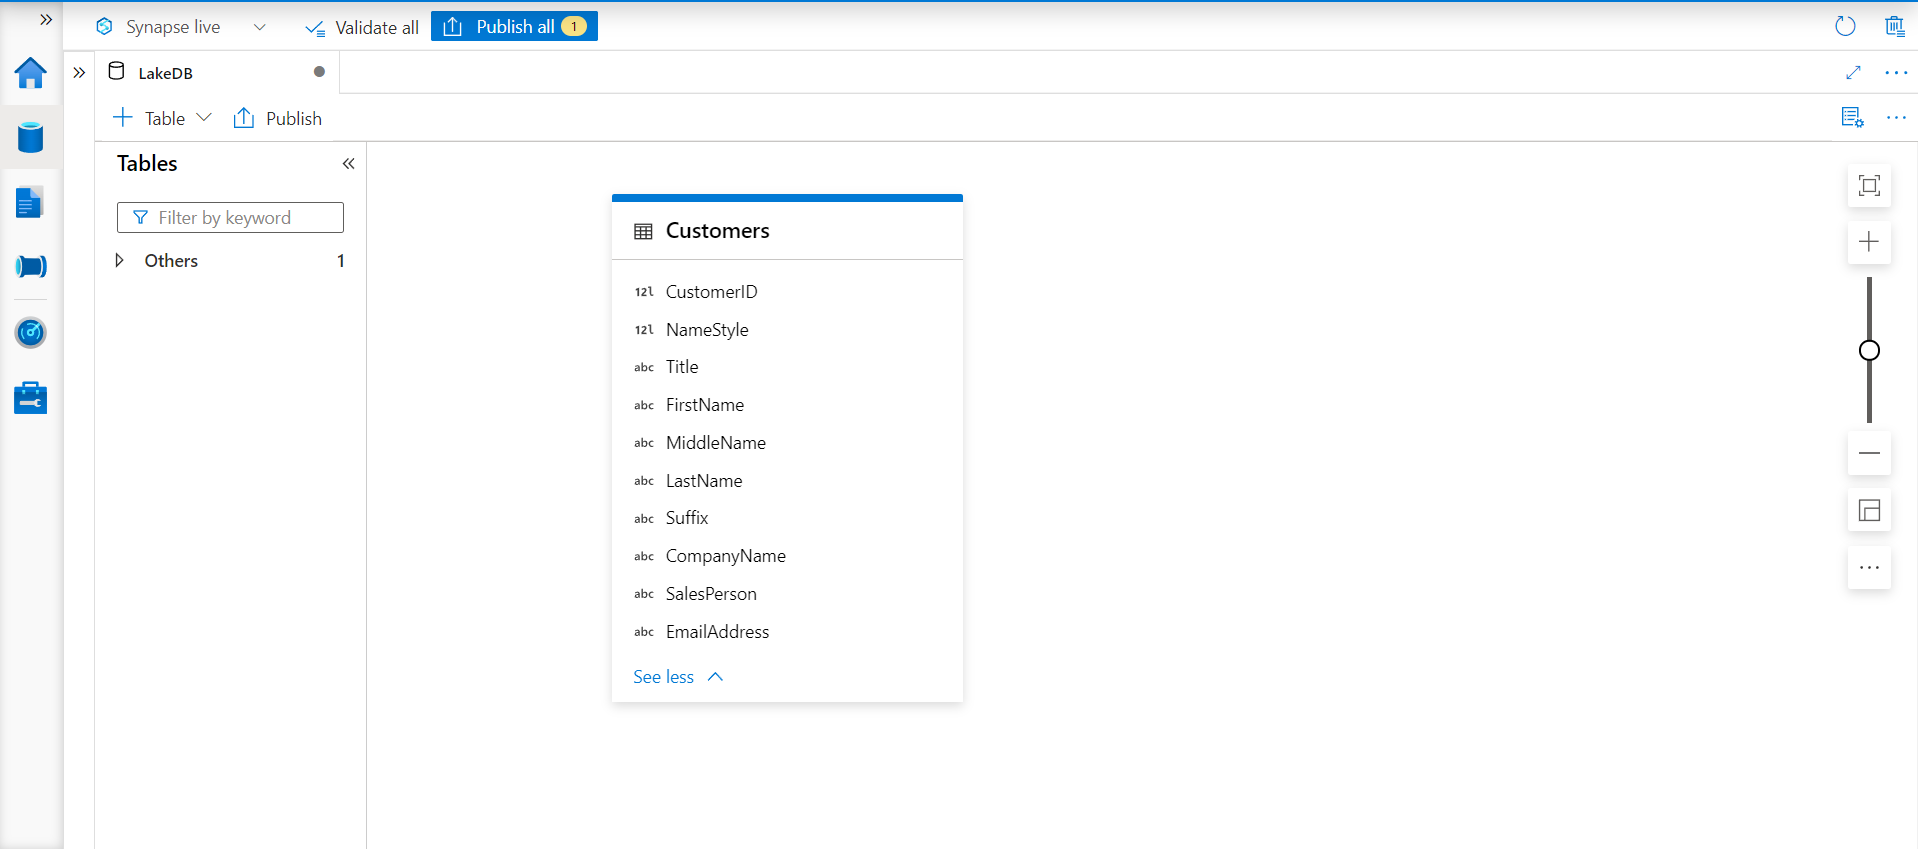
Click on the Continue button and proceed with the creation of the new table. Once the table is created, it would look in the design pane as shown below. We can also identify the data type of the fields from the small icon to the left of field names.
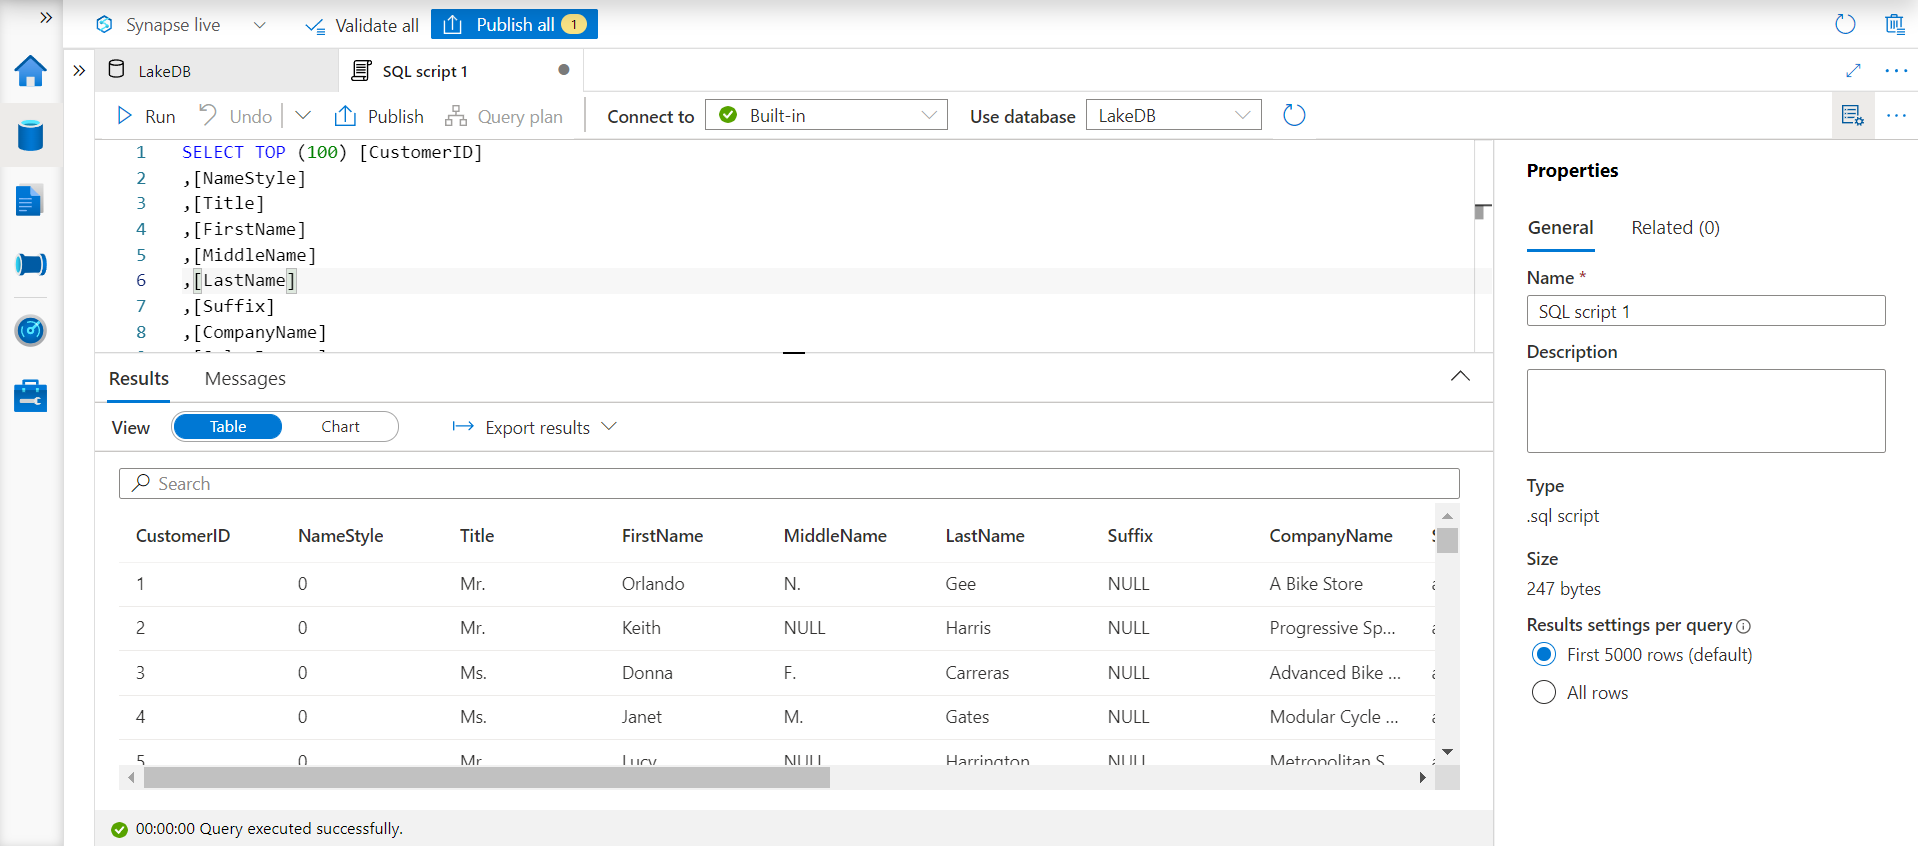
Now that the table is created, it is time to test whether we can access the data from this table. It should be kept in view that the table we created is just a metadata definition, and the actual data, in this case, resides on the Azure Data Lake Storage in the form of the data file. Click on the Actions ellipsis on the new table that we just created and select the option to SELECT TOP 100 rows as shown below.

This would open a new page with an interface to execute the SQL statement as shown below. Click on the Run button to execute this SQL statement, and if everything is configured as explained above, we would be able to view the data in the results pane as shown below.
In this way, we can create Azure Synapse Lake Database and tables in it using data hosted on Azure Data Lake Storage.
Conclusion
In this article, we learned how to create an Azure Synapse Lake Database and configure it to create metadata structures that source data from Azure Data Lake.

She has a deep experience in designing data and analytics solutions and ensuring its stability, reliability, and performance. She is also certified in SQL Server and have passed certifications like 70-463: Implementing Data Warehouses with Microsoft SQL Server.
View all posts by Gauri Mahajan
- Oracle Substring function overview with examples - June 19, 2024
- Introduction to the SQL Standard Deviation function - April 21, 2023
- A quick overview of MySQL foreign key with examples - February 7, 2023