

The Bulk Copy Program (BCP) utility can move bulk data between SQL Server instances. You can export SQL Server data into BCP files. You can also use them for moving data from on-premises SQL Server instances to Azure SQL Database. The BCP files do not contain schema or the format information of your data. Therefore, you cannot use it as a database migration tool. However, it is adequate to import or export many rows. However, you need to create the table or use a format file to import data into a table.
The BCP utility installs automatically with the SQL Server installation. You can verify the installation version using the command bcp /v. The latest BCP utility version is 15.0.2000.5, and it comes with SQL Server 2019 (15.x). The BCP 15.0.2000.5 version supports Azure AD authentication, Multi-factor authentication, Azure Synapse Analytics.
You can also download the BCP utility separately using the link on both x64 and x86 systems.

As shown below, in my lab environment, the BCP version is 15.0.2000.5

Requirements
For this article, you require an on-premises SQL Server and an Azure SQL Database used for data import and export.
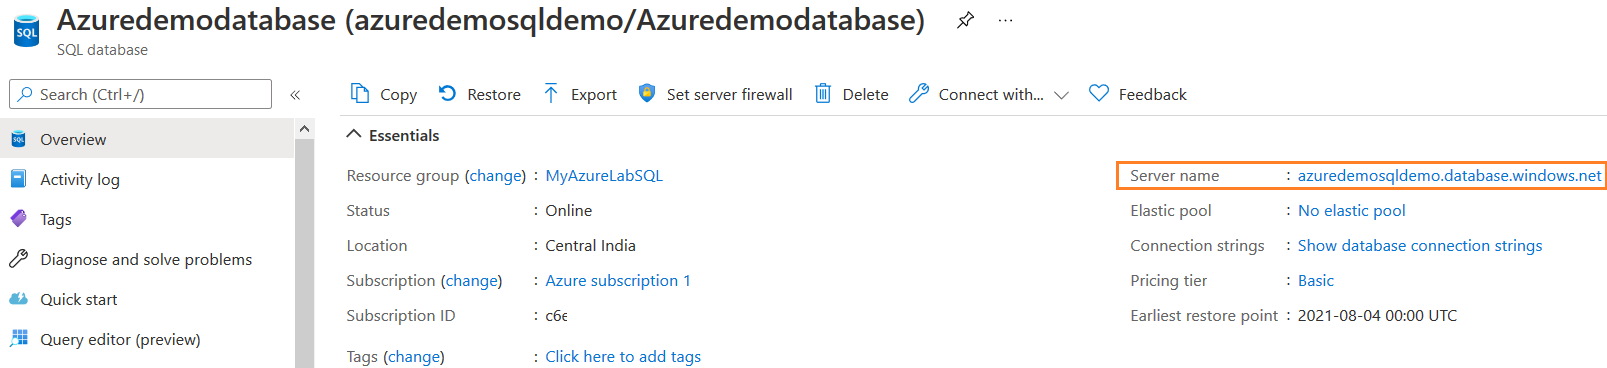
Export data from Azure SQL Database using BCP
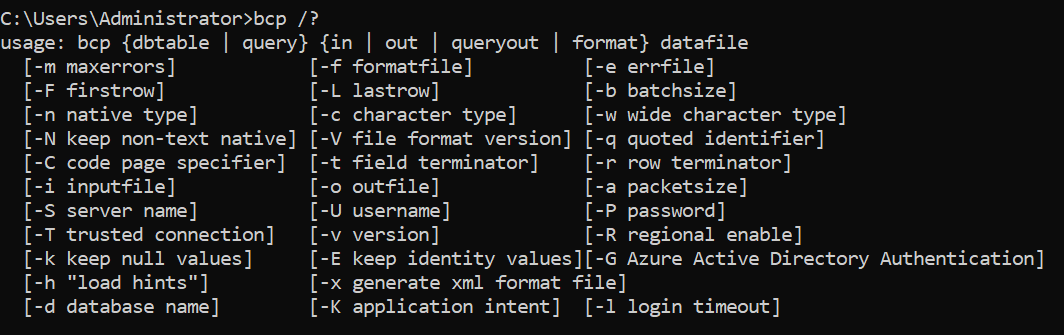
The BCP tool involves multiple parameters for writing scripts of data import and export. You can get these parameters list using the command bcp /? as shown below.
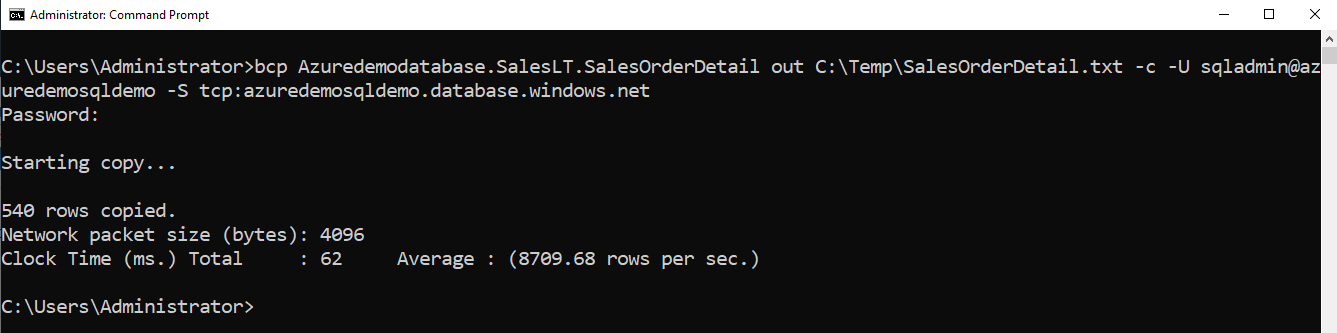
Suppose as a developer or database administrator, you want to take a backup of a table with a massive set of data. You can export the table in the BCP data file. The BCP script for data exporting from Azure SQL Database is as below.
bcp Azuredemodatabase.SalesLT.SalesOrderDetail out C:\Temp\SalesOrderDetail.txt -c -U sqladmin@azuredemosqldemo -S tcp:azuredemosqldemo.database.windows.net
Let’s understand this command before its execution.
- Input parameter
- Azure Database name: Azuredemodatabase
- Table schema: SalesLT
- Table name: SalesOrderdetail
- Database user: sqladmin@azuredemosqldemo
-
Server name: azuredemosqldemo.database.windows.net
Note: The database username will be in the format of UserName@AzureServer
The argument -c (in small letters) instructs to import or export with a character data type
- Storage type: char
- field separator: tab character (\t)
- Newline character: \r\n
- Output parameter
-
Out: We can specify the output directory and file name with extension for data export
Press Enter to run the query. It asks for password input for the specified user. The output gives the followings values
- Number of rows copied
- Network packet size (bytes)
- Total time is taken in milliseconds (clock time)
- The average number of rows copied per second
-
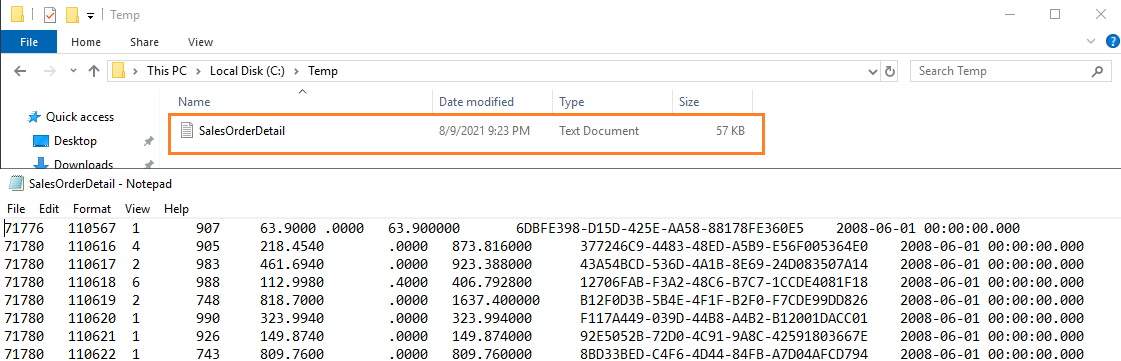
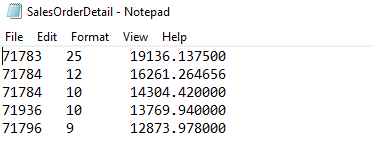
As shown below, we have data exported from Azure SQL Database using BCP utility. The screenshot shows a portion of exported data.
Note: If you want to include the password in the script, specify it using the -P “password” parameter
Exported query output using BCP utility
We copied complete data from the [SalesOrderDetail] table to an output file in the previous example. Suppose you want to export only specific columns or specific data. For this requirement, we can specify the query in the BCP command.
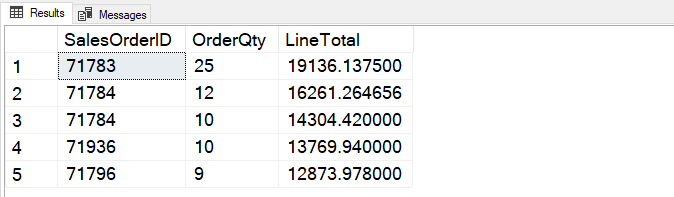
For this example, we require the following query output exported from Azure SQL Database into a BCP output file.
|
1 2 3 4 5 |
SELECT TOP 5 [SalesOrderID] ,[OrderQty] ,[LineTotal] FROM [SalesLT].[SalesOrderDetail] ORDER BY SalesLT.SalesOrderDetail.LineTotal desc |
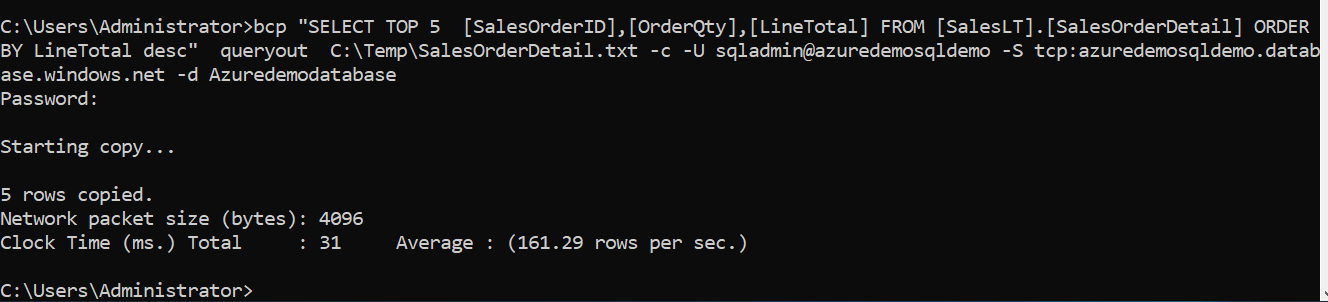
We can specify the SQL query in the BCP script as shown below:
- The script use queryout for exporting SQL query output
- We can specify the database name using the -d parameter
bcp “SELECT TOP 5 [SalesOrderID],[OrderQty],[LineTotal] FROM [SalesLT].[SalesOrderDetail] ORDER BY LineTotal desc” queryout C:\Temp\SalesOrderDetail.txt -c -U sqladmin@azuredemosqldemo -S tcp:azuredemosqldemo.database.windows.net -d Azuredemodatabase
As output shows, it copied 5 rows into the BCP file.
You can compare the query output from the SSMS query output.
Similarly, you can filter the rows using a WHERE clause in the select statement of SQL query.
bcp “SELECT TOP 5 [SalesOrderID],[OrderQty],[LineTotal] FROM
[SalesLT].[SalesOrderDetail] where SalesOrderID>10 ORDER BY LineTotal desc”
queryout C:\Temp\SalesOrderDetail.txt -c -U sqladmin@azuredemosqldemo -S tcp:azuredemosqldemo.database.windows.net -d Azuredemodatabase
Import data into Azure SQL Database using BCP
Suppose you regularly get files from 3rd party vendors to upload in your database tables. There are multiple ways to import data; however, BCP can be a handy tool for bulk data import and export. First, you should create the table in the Azure SQL Database where you want to import data.
You can run the script in the SQL Server Management Studio (SSMS), Azure Data Studio or using the SQLCMD command-line tool.
|
1 2 3 4 5 6 7 8 9 10 11 12 |
CREATE TABLE [SalesLT].[SalesOrderDetail_BKP ]( [SalesOrderID] [int] NOT NULL, [SalesOrderDetailID] [int] IDENTITY(1,1) NOT NULL, [OrderQty] [smallint] NOT NULL, [ProductID] [int] NOT NULL, [UnitPrice] [money] NOT NULL, [UnitPriceDiscount] [money] NOT NULL, [LineTotal] [numeric](38, 6) NOT NULL, [rowguid] [uniqueidentifier] NOT NULL, [ModifiedDate] [datetime] NOT NULL ) ON [PRIMARY] GO |
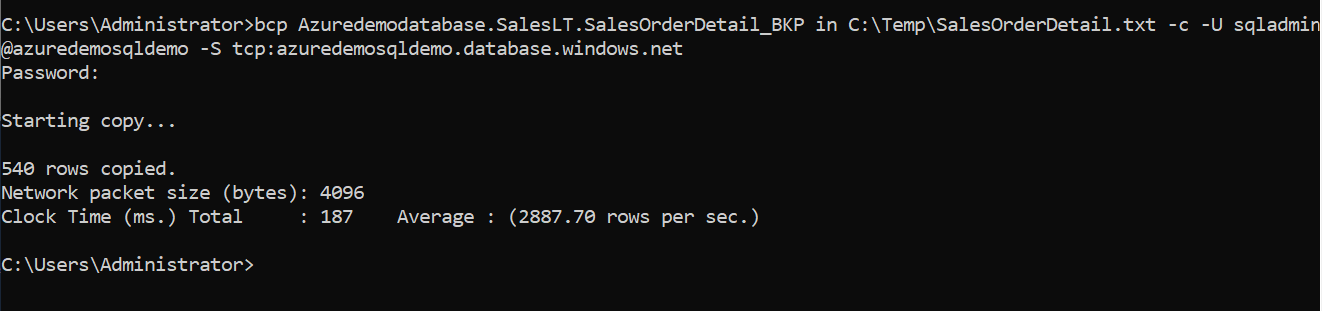
In this example, we import data into table [SalesOrderDetail_BKP] from the BCP file placed in the C:\Temp directory.
bcp Azuredemodatabase.SalesLT.SalesOrderDetail_BKP in C:\Temp\SalesOrderDetail.txt -c -U sqladmin@azuredemosqldemo -S tcp:azuredemosqldemo.database.windows.net
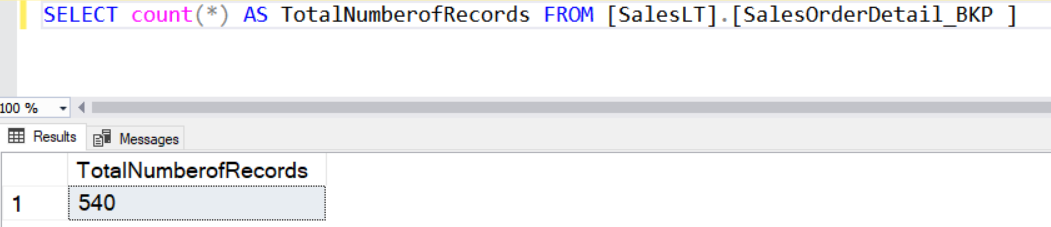
As shown below, it imports 540 rows in the destination table.
Run a select statement to verify the number of records.
Sometimes, you might get query timeout during data import or export operation if you work with enormous data sets. To overcome this, you can specify the batch size parameter and the number of rows in each batch. Once you specify a batch size, SQL Server considers each batch as a separate transaction and commits the whole batch. You should always specify the batch size in a small number than the total number of rows in a table or query output. Another benefit of specifying batch size is that only batch changes are rolled back if a batch fails. It does not affect the batches already imported and committed.
To specify the batch size, we use parameter switch -b “batch_size_in_numbers”. The following script specifies a batch size of 100 for data import.
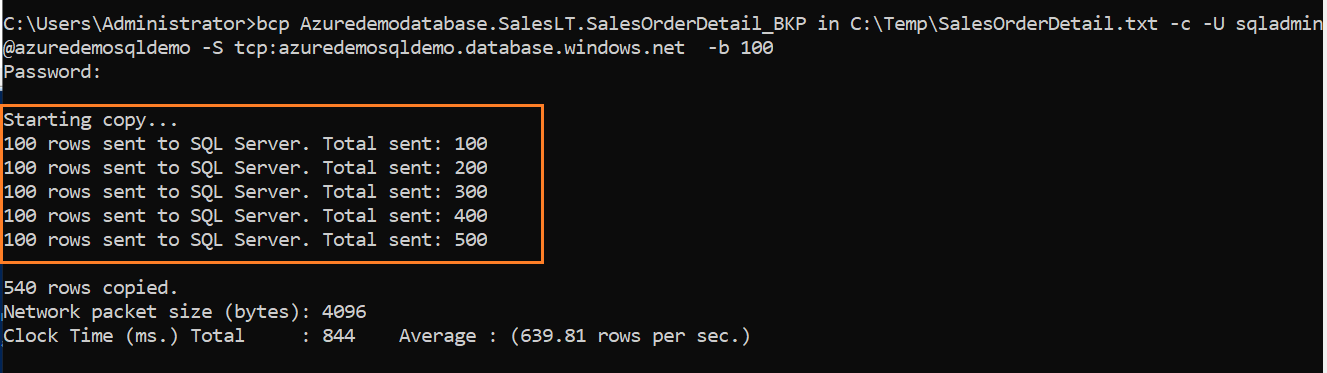
bcp Azuredemodatabase.SalesLT.SalesOrderDetail_BKP in C:\Temp\SalesOrderDetail.txt -c -U sqladmin@azuredemosqldemo -S tcp:azuredemosqldemo.database.windows.net -b 100
As shown below, it takes a batch of 100 rows and imports data into SQL tables. The output logs the status of each batch with the incremental total number of imported rows.
Suppose our source data file has millions of records. We do not want to import complete data and require only 1000 rows for the sample data. In this case, we can use parameter switch -L “Number of rows“.
In the following query, we import data into the Azure SQL Database with a batch size of 100. It limits the total number of imported rows count to 200.
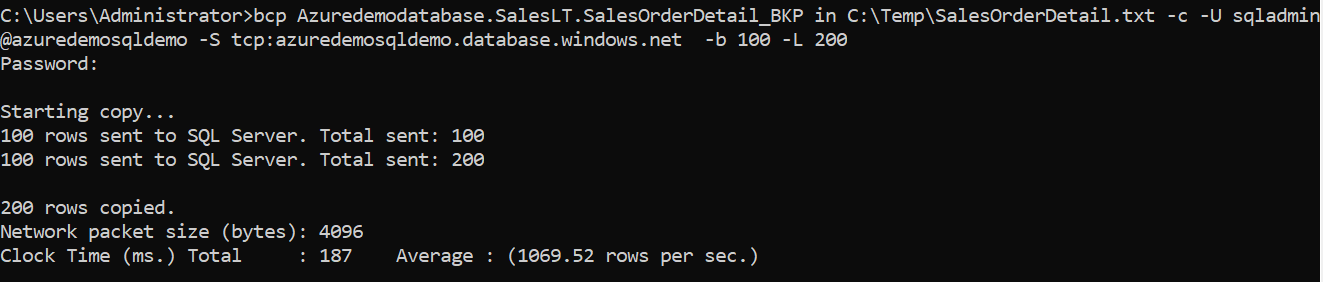
bcp Azuredemodatabase.SalesLT.SalesOrderDetail_BKP in C:\Temp\SalesOrderDetail.txt -c -U sqladmin@azuredemosqldemo -S tcp:azuredemosqldemo.database.windows.net -b 100 -L 200
As shown below, although we have 540 rows in our source file, it imports only 200 records and commits them without proceeding further to the remaining batch.
As we stated earlier, while we use batches for data import, if any batch fails, it will be skipped. However, DBAs need to investigate any data import failures or errors during import. Therefore, you can add the error log files using the -e(small letters) with the log file directory. The BCP tool stores any failed rows in this log file for us to review later.
bcp Azuredemodatabase.SalesLT.SalesOrderDetail_BKP in C:\Temp\SalesOrderDetail.txt -c -U sqladmin@azuredemosqldemo -S tcp:azuredemosqldemo.database.windows.net -b 100 -L 250 -m 1 -e c:\temp\Error_in.log
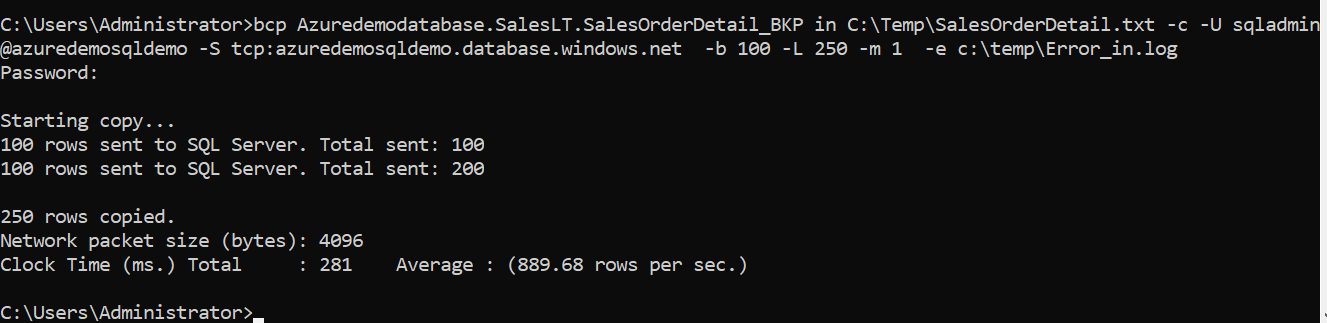
If there are no errors, it still creates an empty file.

Azure Active Directory Username and Password
In the earlier examples, we used SQL authentication and specified a username, password for connecting to Azure SQL Database. However, if you have configured Azure Active Directory authentication, you can use the -G switch and specify the active directory credentials using the same U and P switch.
bcp Azuredemodatabase.SalesLT.SalesOrderDetail_BKP in C:\Temp\SalesOrderDetail.txt -c -G
-U alice@aadtest.onmicrosoft.com -P xxxxx
-S tcp:azuredemosqldemo.database.windows.net
However, it is advisable to use Azure Active Directory Integrated authentication as it does not require specifying credentials in the script. For the integrated authentication, use the -G switch without any username, password. You should be logged in to the system with the AAD account. Therefore, the G switch takes the current logged-in Windows user account for database authentication.
bcp Azuredemodatabase.SalesLT.SalesOrderDetail_BKP in C:\Temp\SalesOrderDetail.txt -c -G -S tcp:azuredemosqldemo.database.windows.net
You can also enable the interactive authentication and specify the username in the script with the -G option. For the interactive mode, you get a prompt to enter the password manually or complete the MFA (Multi-Factor Authentication) with your configured MFA device.
bcp Azuredemodatabase.SalesLT.SalesOrderDetail_BKP in C:\Temp\SalesOrderDetail.txt -c -G -U alice@aadtest.onmicrosoft.com
-S tcp:azuredemosqldemo.database.windows.net
Conclusion
This article explored the use of the SQL Server BCP tool for data import and export in the Azure SQL Database. You can use SQL authentication, Azure AD authentication, MFA authentication, and interactive mode to connect to the database. It also enables you to specify batch size, limit the number of rows for adequate data import\export activity.

I am the author of the book "DP-300 Administering Relational Database on Microsoft Azure". I published more than 650 technical articles on MSSQLTips, SQLShack, Quest, CodingSight, and SeveralNines.
I am the creator of one of the biggest free online collections of articles on a single topic, with his 50-part series on SQL Server Always On Availability Groups.
Based on my contribution to the SQL Server community, I have been recognized as the prestigious Best Author of the Year continuously in 2019, 2020, and 2021 (2nd Rank) at SQLShack and the MSSQLTIPS champions award in 2020.
Personal Blog: https://www.dbblogger.com
I am always interested in new challenges so if you need consulting help, reach me at rajendra.gupta16@gmail.com
View all posts by Rajendra Gupta
- Understanding PostgreSQL SUBSTRING function - September 21, 2024
- How to install PostgreSQL on Ubuntu - July 13, 2023
- How to use the CROSSTAB function in PostgreSQL - February 17, 2023