
This article explores Visual Studio Code integration with Git Source Control.
Introduction
Visual Studio Code is a well-liked editor to support various development activities, programming languages. You can start exploring it by referring to the Getting started with Visual Studio Code (VS Code) article.
Git is a source control platform, and it helps you in managing the development activities. It takes snapshots of your filesystem and saves the state of the project in a snapshot. It maintains the stream of snapshots as the file changes over time.
In the articles below, we explored the useful functionality of Git in the Azure Data Studio.
Source Control using Git in Azure Data Studio (ADS)
- It gives an overview of Git along with its installation, configuration in Azure Data Studio
- It also explores a repositor’s initialization, commits, and timeline of the changes
Integrating Azure Data Studio with Git and GitHub
- Integration of Git and GitHub web repository
- It covers synchronization between Git and GitHub in bidirectional mode
Working with Git components in Azure Data Studio
- It explains the data flow between the Staging area, working tree and repository
- Explain a few useful Git commands in a terminal
In this article, we will explore Git integration in the Visual Studio Code and its useful features
Visual Studio Code and Git Source Control
VS code contains integrated Git source control. It also supports various other source control such as Azure Repos, Perforce, TFS, and SCM using extensions.
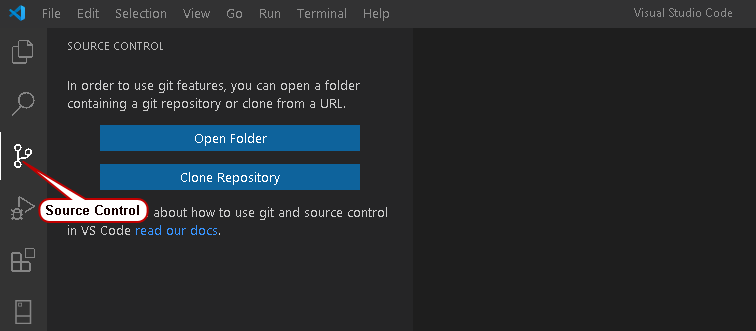
Launch VS code, and in the left-hand menu, click on the Source Control icon for Git. It gives two options – Open Folder and Clone Repository.
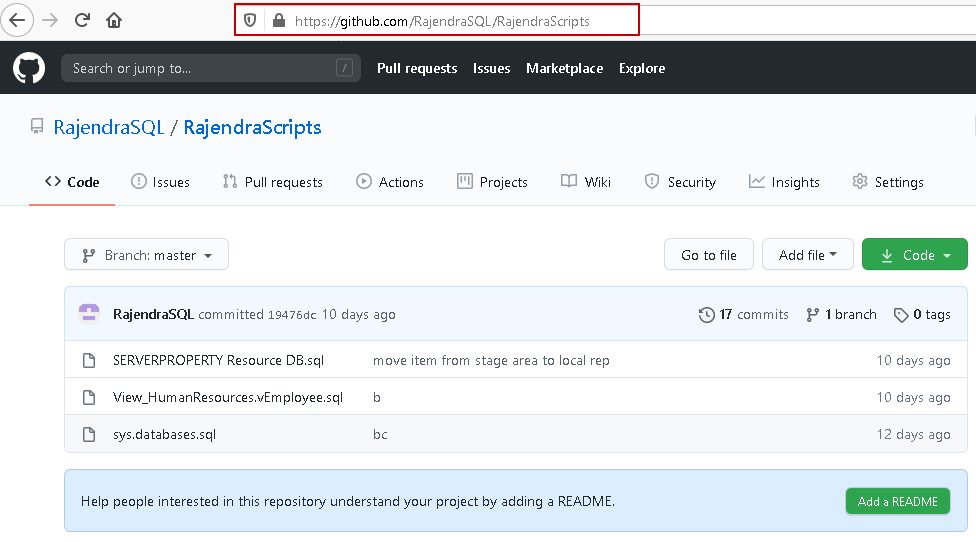
We can open a git repository folder or clone from a GitHub URL. We already set up a GitHub repository in the previous article. Therefore, instead of creating a new repository, let’s clone the repository from GitHub in the VS Code.
First, log in to your GitHub profile, view the files in it, and copy the repository URL.
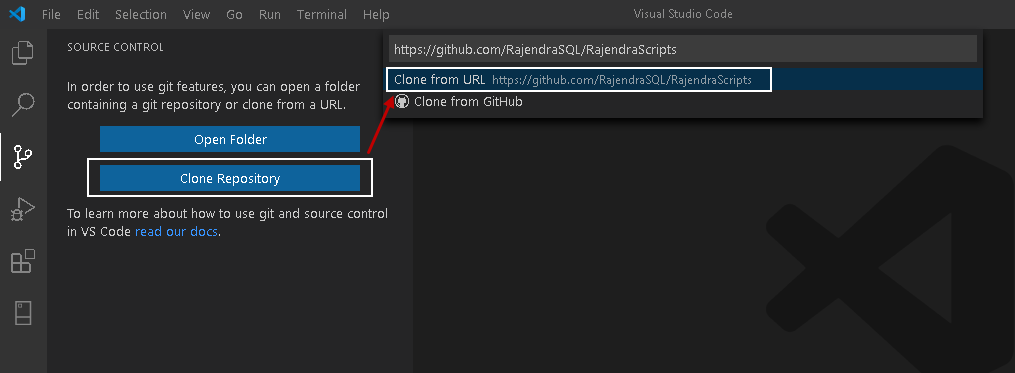
In the VS Code, click on the Clone Repository. It asks for the GitHub URL, pastes the URL, and clicks on the Clone from URL.
Next, it asks for the folder in your local system. VS Code will copy the scripts from the GitHub repository into the VS Code Git repository.
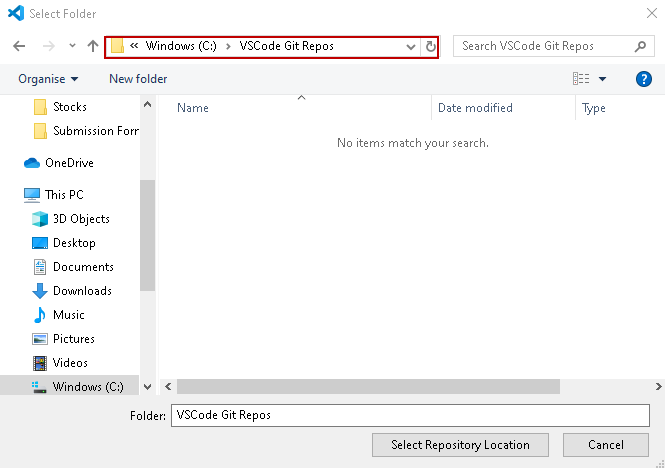
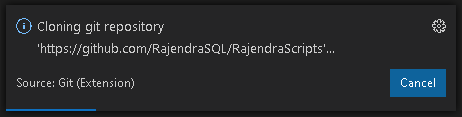
Click on the Select Repository Location. You get a prompt while it clones the repository from the GitHub URL you specified.
Once the cloning process is completed, it asks you – Would you like to open the cloned repository?
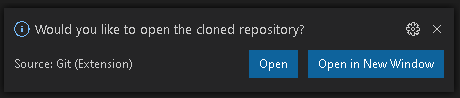
Click on Open to view all the files in VS code repository. You can compare both the VS Code repository and the GitHub Repository.
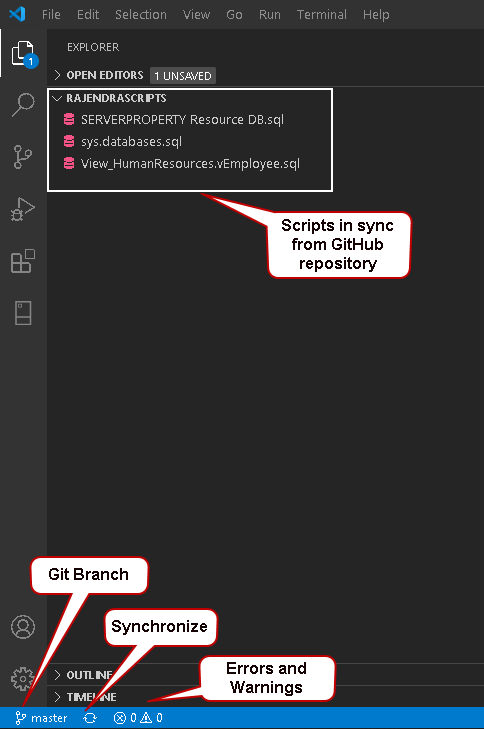
Git Status Bar actions
In the Git status bar, you get the following indicators.
- Branch: It shows the Git Branch. By default, it uses a master branch for all scripts and changes
- Synchronize: You can click on the Synchronize Changes indicator to synchronize the VS code repository with the upstream branch. It pulls the remote changes to the Visual Studio Code local repository. Similarly, if you have performed any changes in the local repository, it pushes changes back to the GitHub branch
- Errors and Warning: If your code contains any errors, warnings in the script, these indicators highlight it
For example, I made a syntax error in the SQL script on purpose. It highlights the same in the indicator. You can click on the indicator to view the errors in a separate window, as shown below.

Gutter indicators
Once we make the changes in the Git repository scripts, VS Code adds annotations in the gutter and the overview ruler.
- A red triangle is for the deleted lines
- A green bar for the newly added files
- A blue bar is for the modified lines
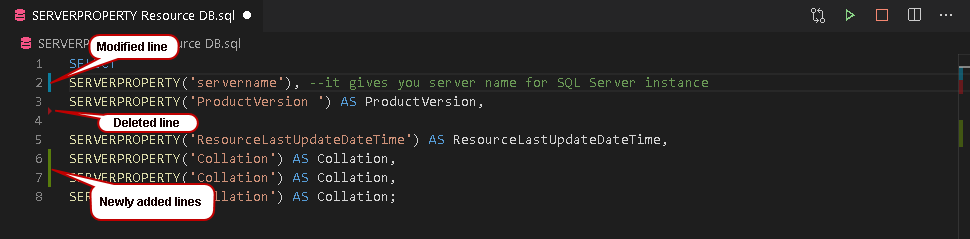
Similarly, it also shows the indicators in the overview ruler.
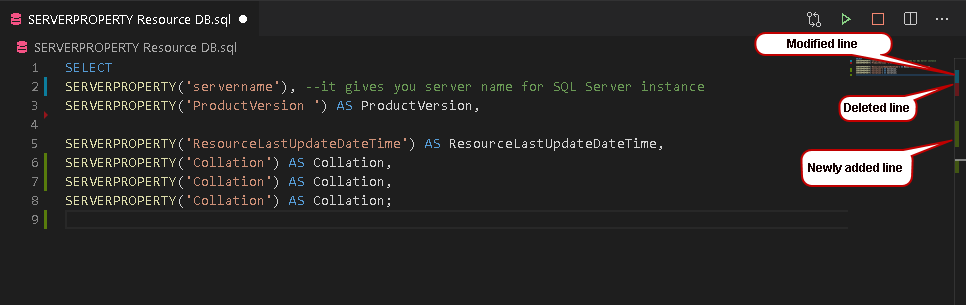
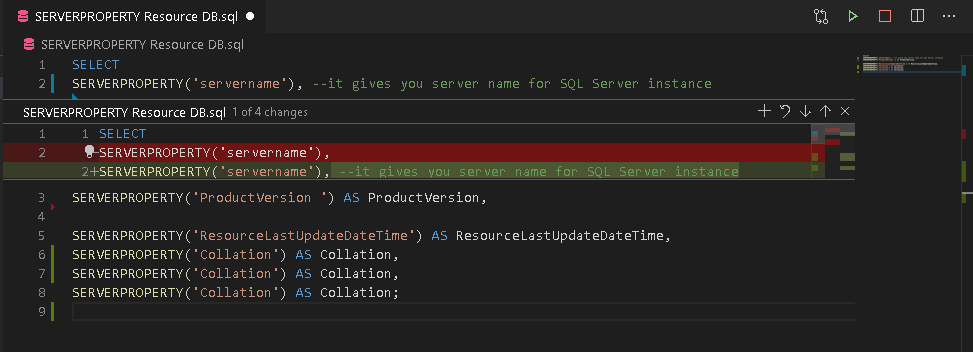
The gutter helps you to identify the code that was modified, deleted, or inserted. For example, click on the red triangle, and it shows the deleted line from the code. Suppose you realized that someone deleted the row by mistake, you can revert the changes as well.
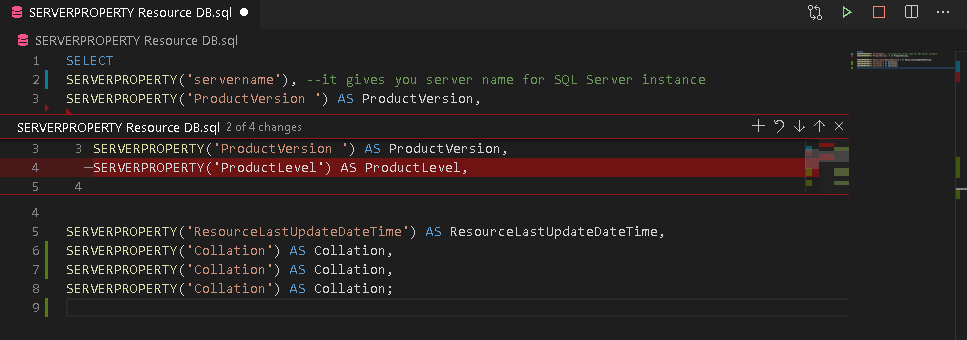
Click on the Revert Change icon, as shown in the following image.
![]()
Similarly, you can click on the green or blue bar to see the changes done in the script.
Viewing diffs
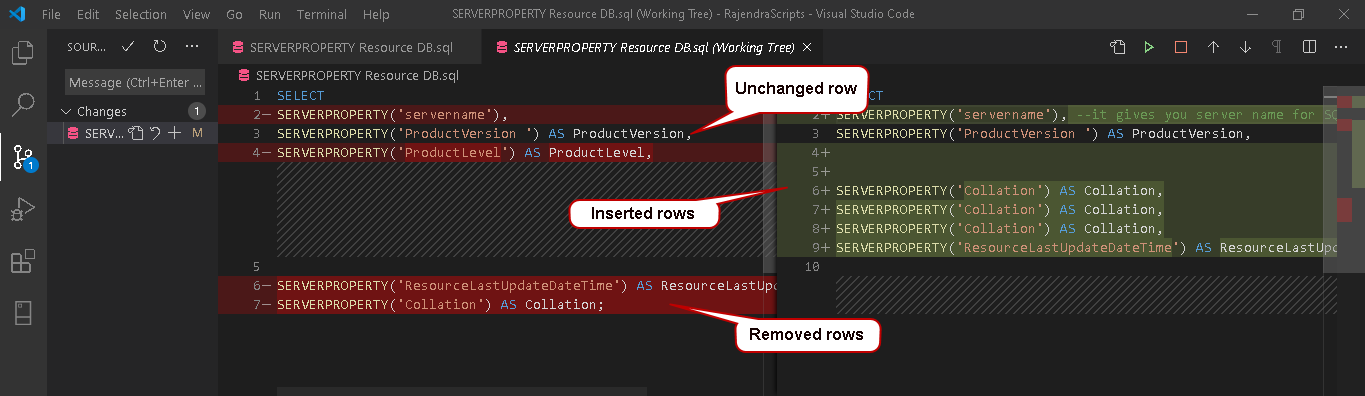
VS Code also provides the functionality to perform a diff on query files. Usually, you download a separate third party tool for the comparison of the two different versions of a script. It compares the script changes with the last commit file in a Git repository and gives comparison visually. It saves your efforts to copy the code in a separate tool, then make the comparisons, and come back to the VS Code for further changes in the script.
To view the demo for this feature, open any script in the Git repository, and make the changes. In the following screenshot, note the following things:
- Few code lines are removed after the last commit. It shows those rows in the red background
- Few code lines are unchanged. It does not put any background color for those lines
- Few code lines are inserted recently after the last commit. You can see a green background for those rows
Git output window
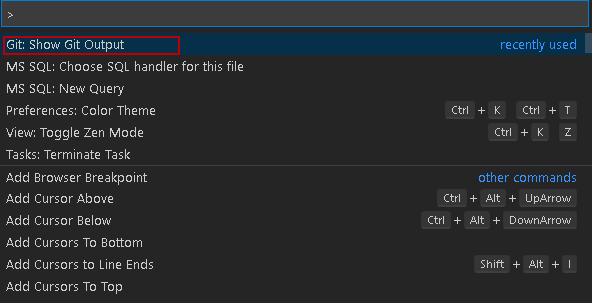
You might be interested to learn the Git commands that are performing the tasks for you once you click on any option in the Git source control in the Visual Studio Code. VS Code provides a git output window and shows you commands that it is using. It helps learn the Git language and commands.
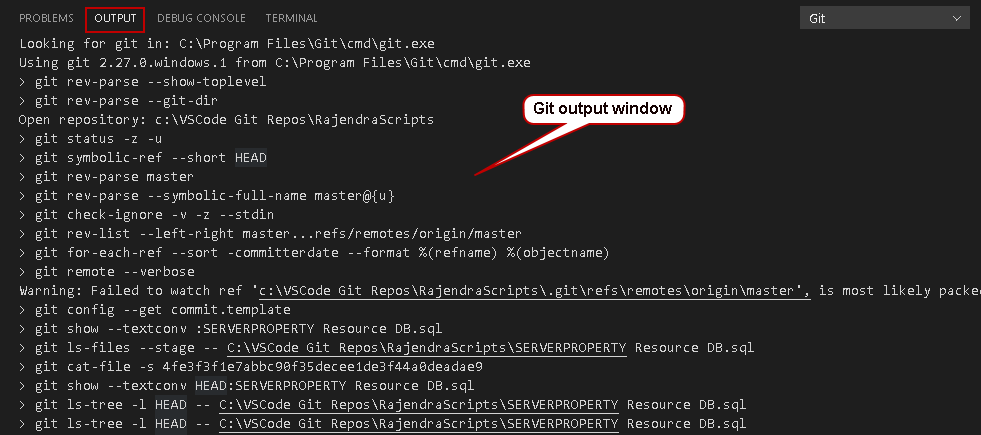
In the VS Code, navigate to Command Palette -> Git: Show Git Output.
It opens another window for Git output, and you can see all commands in real-time.
Git Extensions
VS Code provides several extensions to extend the functionality of the Git Source control. You can install these git extensions from the VS Code market place.
Click on the Extensions icon in the menu and search for the Git keyword. It shows all related extensions in the list.
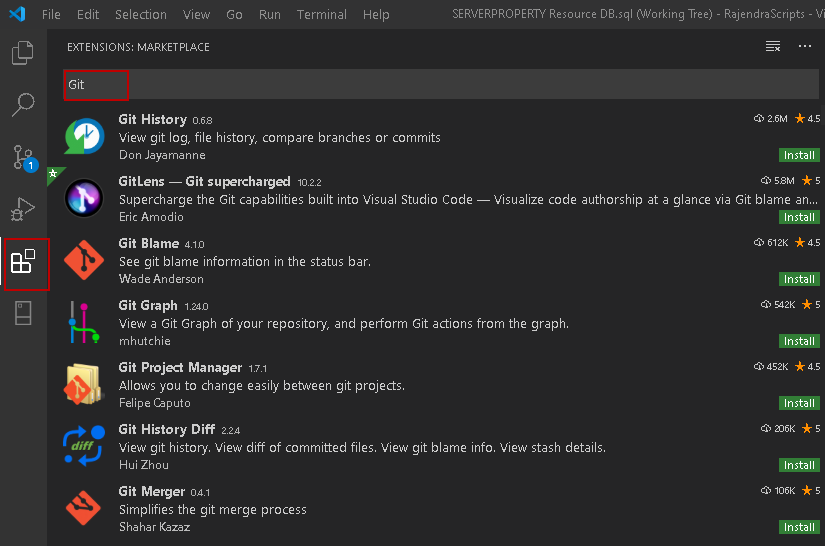
Few useful extensions for Git source control are as below.
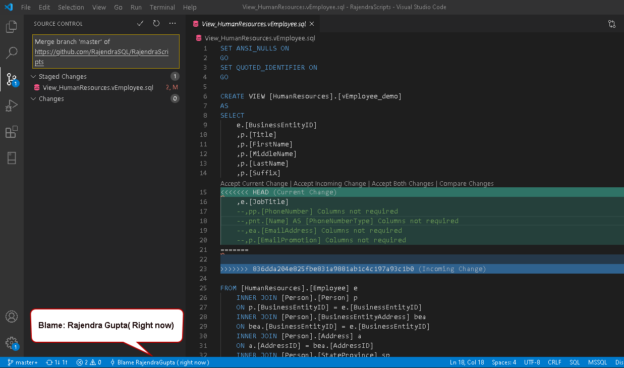
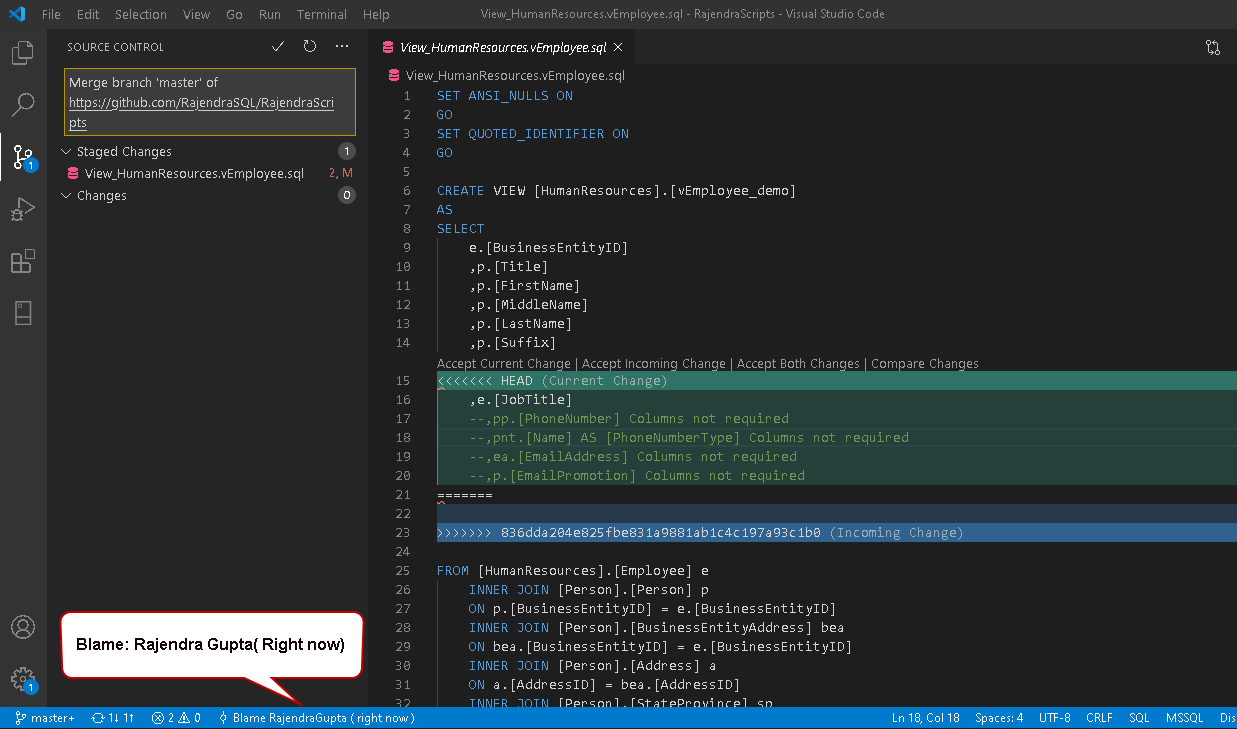
Git Blame
Git blame gives information about the person who modified the code in the status bar. Suppose someone changed the code intentionally, and you want to know about the person and when it was changed. Git blame shows the information, as shown below. Its purpose is to keep you aware of the changes, and you can ask the questions for the developer in case of any issues.
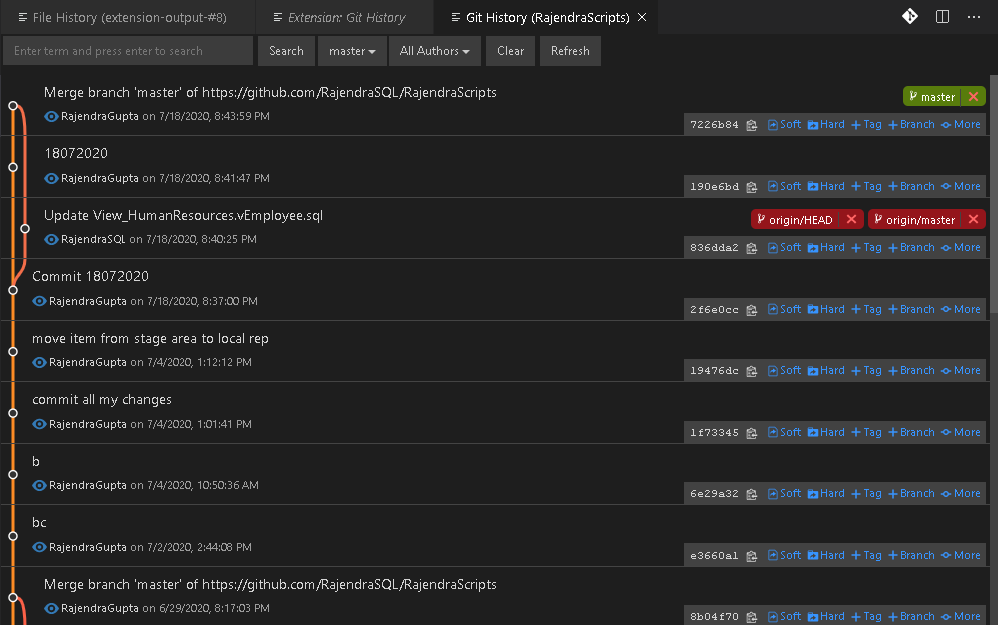
Git History
You can explore the history of a file, author, branch in a GUI mode using Git history extension. You can search for a term as well. It provides additional information, commit history, branch actions, compare branches, and compares commits.
You can install the Git History extension and launch it from the VS Code Command Palette. You get the following options in the command palette.
- View Git history
- View file history
- View line history
Let’s say we require information about a particular line from history.
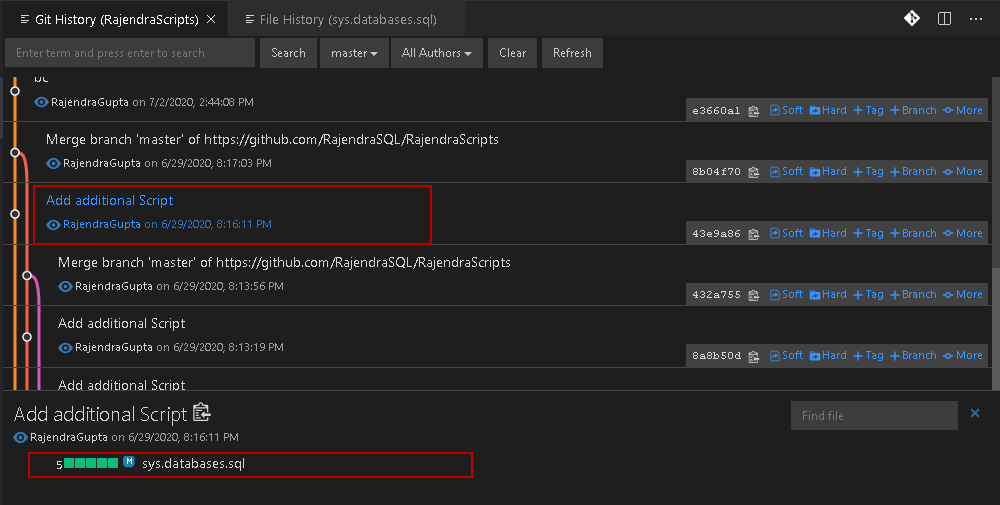
The highlighted line is for adding the additional script. Click on the file name, and you get additional options such as view file contents, compare files against workspace, compare against previous versions, or view file history.
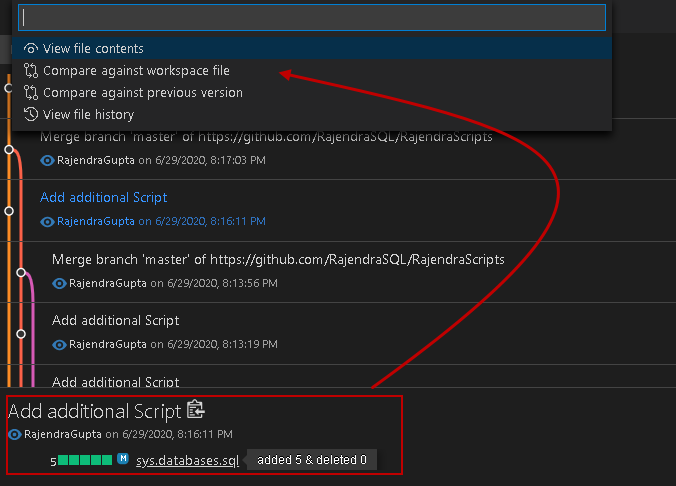
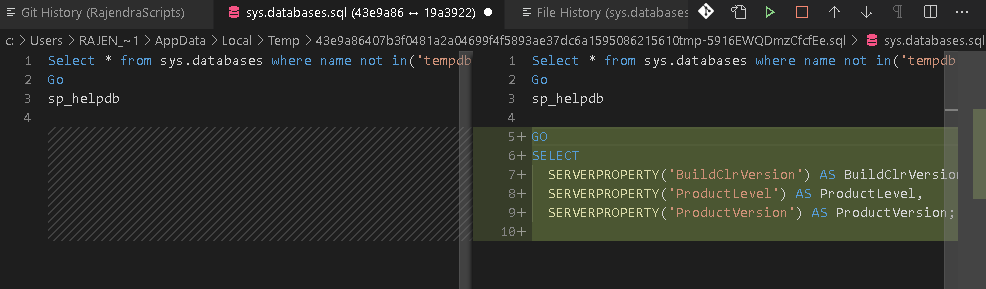
If you click on compare the file against the previous version, it opens the current script and its comparison with the previous version.
Conclusion
In this article, we explored the Git source control integration in the Visual Studio Code. It provides useful editor features for Git extension. We will continue exploring Git in the upcoming articles.

I am the author of the book "DP-300 Administering Relational Database on Microsoft Azure". I published more than 650 technical articles on MSSQLTips, SQLShack, Quest, CodingSight, and SeveralNines.
I am the creator of one of the biggest free online collections of articles on a single topic, with his 50-part series on SQL Server Always On Availability Groups.
Based on my contribution to the SQL Server community, I have been recognized as the prestigious Best Author of the Year continuously in 2019, 2020, and 2021 (2nd Rank) at SQLShack and the MSSQLTIPS champions award in 2020.
Personal Blog: https://www.dbblogger.com
I am always interested in new challenges so if you need consulting help, reach me at rajendra.gupta16@gmail.com
View all posts by Rajendra Gupta
- Understanding PostgreSQL SUBSTRING function - September 21, 2024
- How to install PostgreSQL on Ubuntu - July 13, 2023
- How to use the CROSSTAB function in PostgreSQL - February 17, 2023