

In this article, we will learn how to create a simple PostgreSQL server on the Azure platform and learn how to use the Postgres check constraint to implement data validation.
Introduction
Databases host data in database objects typically in tables. Data ingestion into database objects that hold data can be done using a variety of mechanisms like directly ingestion data into the tables, ingestion using views, procedures, applications, etc. As data is ingested into tables using a variety of routes, implementing data validation checks on every possible mechanism is hard and often prone to missing out on data validation. One of the easiest and primary means of applying data validation on tables is by applying data constraints. PostgreSQL is a popular open-source relational database, which also offers to host data in tables. The way to implement data validation on these tables is by implementing the Postgres check constraint. This article will walk you through how to create a simple PostgreSQL server on the Azure platform and also the way to use the Postgres check constraint to implement data validation. This will protect data integrity that may get corrupted inadvertently by different ingestion gateways.
Creating PostgreSQL Server on Azure
To learn about the Postgres check constraint, firstly we need an installation of the PostgreSQL Server. One can install the community edition or any available edition of PostgreSQL Server for this exercise. In the era of the cloud, one of the easiest means to temporarily create the PostgreSQL Server is by creating it on any cloud platform. In this exercise, we will use Azure cloud to quickly create a simple setup of PostgreSQL Server.
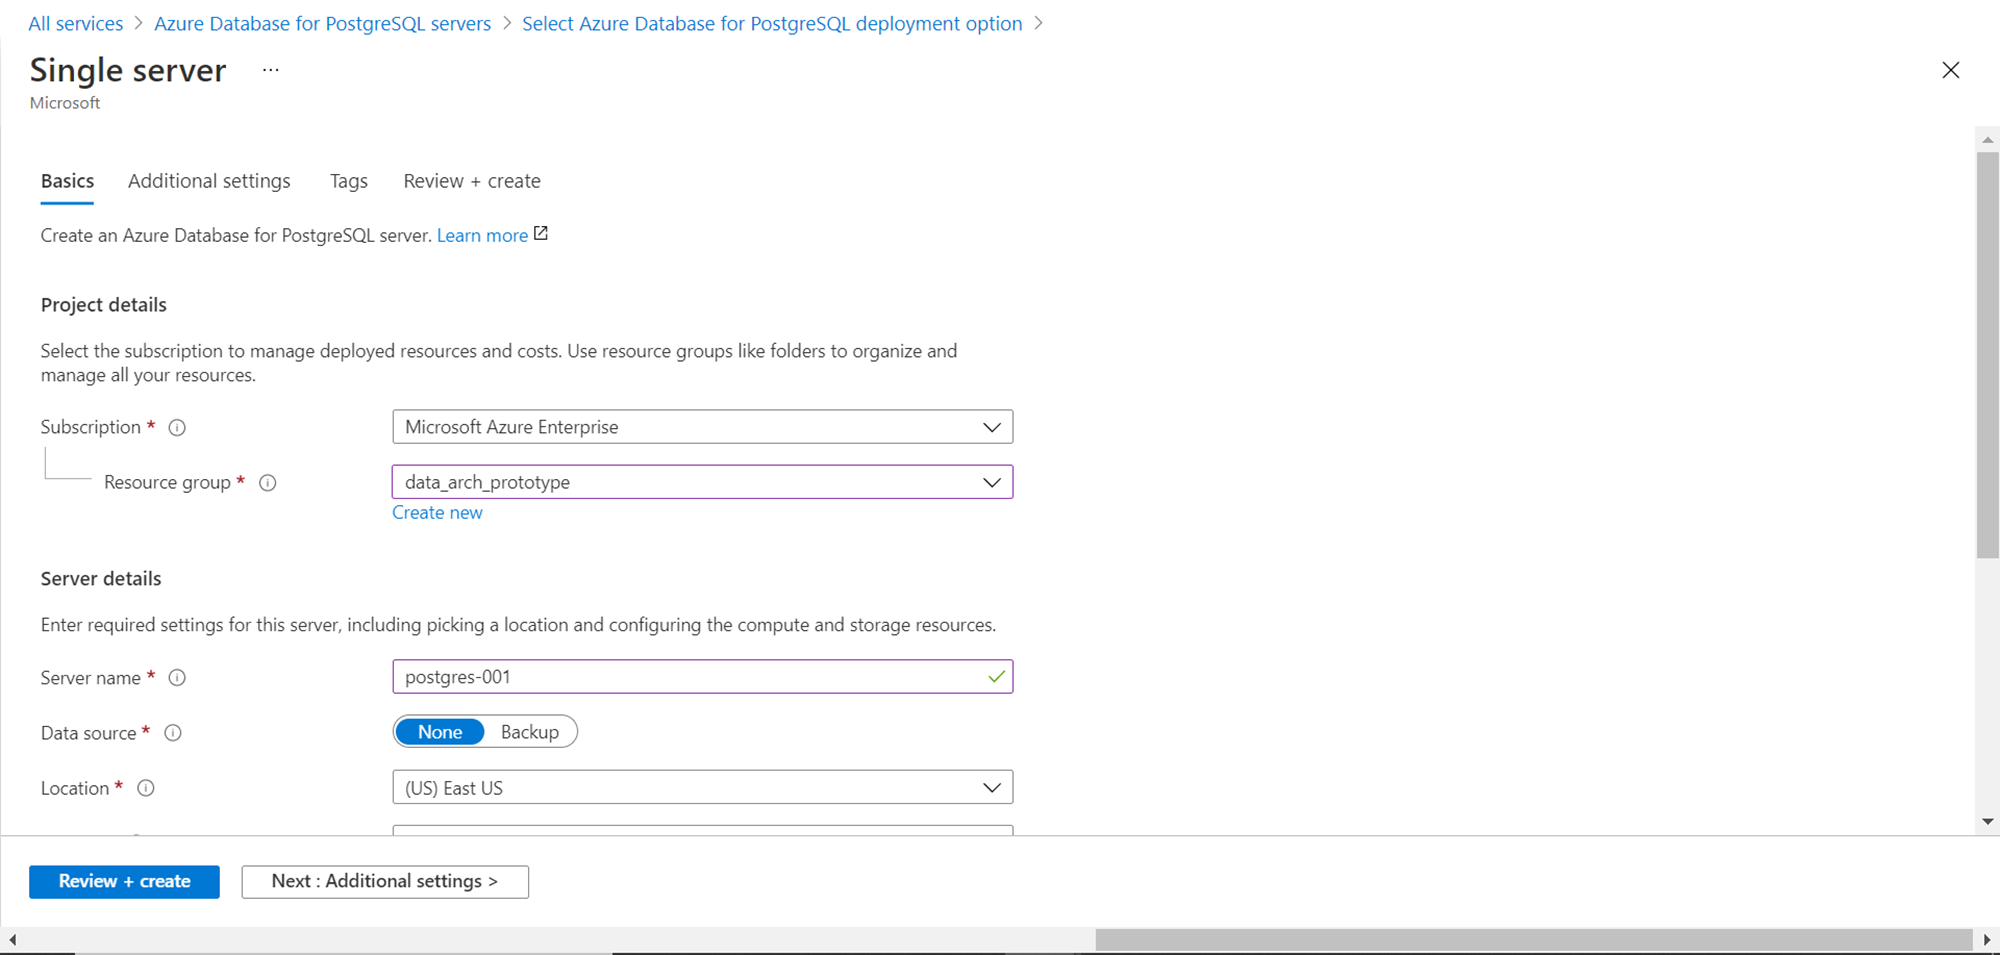
It’s assumed that one has required access to Azure Database for PostgreSQL Server on the Azure platform. Navigate to the Azure portal and navigate to this service. On the dashboard page, click on Create Azure Database for PostgreSQL Server button and it would pop up the different options to create a PostgreSQL server. We intend to use the simplest and most economic option for this exercise. So, select the Single Server option and click on the Create button. It would start the wizard to create the database server. Select the subscription, resource group, and location details as shown below.
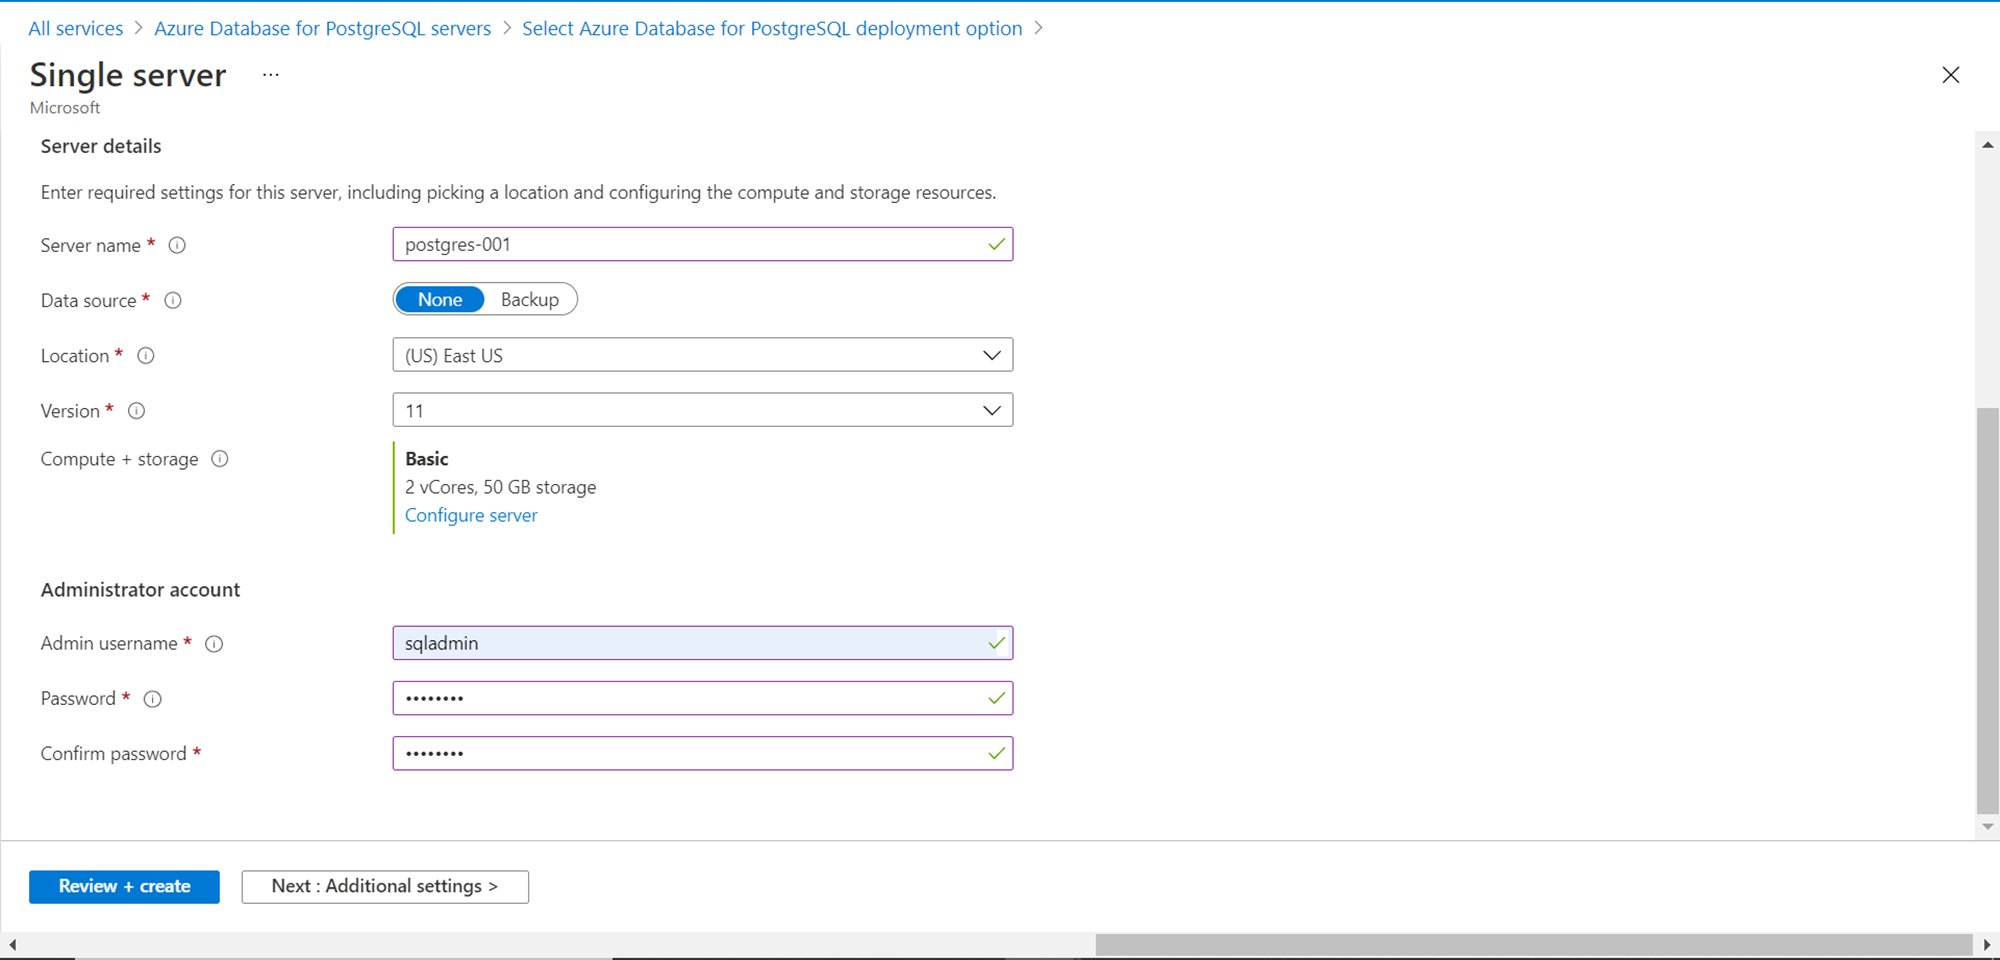
Scroll down and click on the configure server link and select the most economic and smallest capacity of the server as this would incur a fractional cost as we intend to stand up the PostgreSQL server temporarily for this exercise. After selecting the capacity, provide the administrative credentials that we would use to connect to this instance as shown below.
Click on the Review + create button to start deploying the instance. Once the server instance is created, navigate to the dashboard of this instance, open the firewall rules section, and add the client IP of the machine from where we will be connecting to this server instance. This dashboard page will have the host address or URL of the server instance to which we will connect.
Working with Postgres check constraint
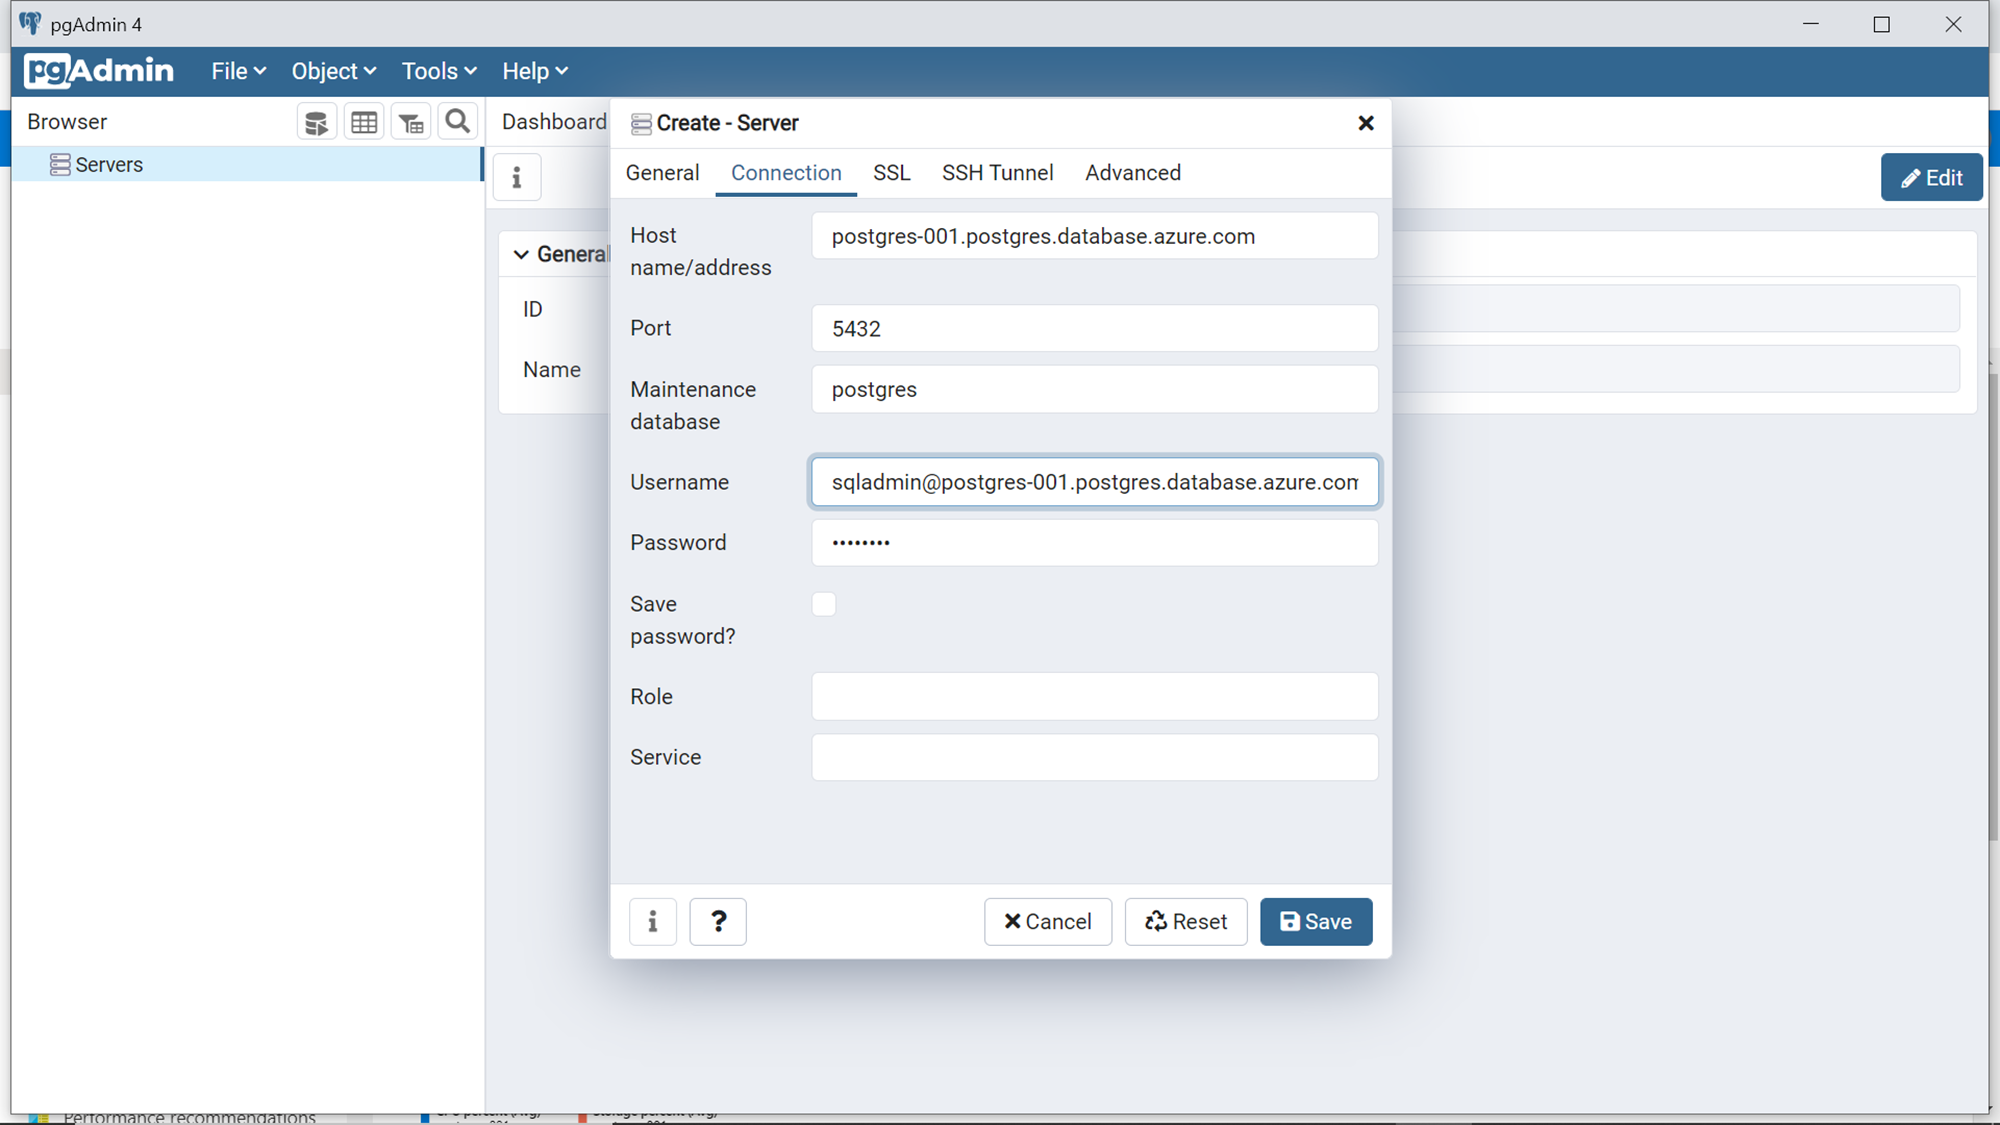
One of the most popular client tools that is used to operate on PostgreSQL Server is the pgAdmin tool which is a freeware IDE. It is assumed that this tool is installed on the client machine. It is not necessary to use only this IDE. Any IDE that can work with PostgreSQL Server can be used for this exercise. Open pgAdmin, right-click on the Server icon and select the Create Server link. It will pop up a window. Fill up the server details as shown below and click on the Save button to register a new server.
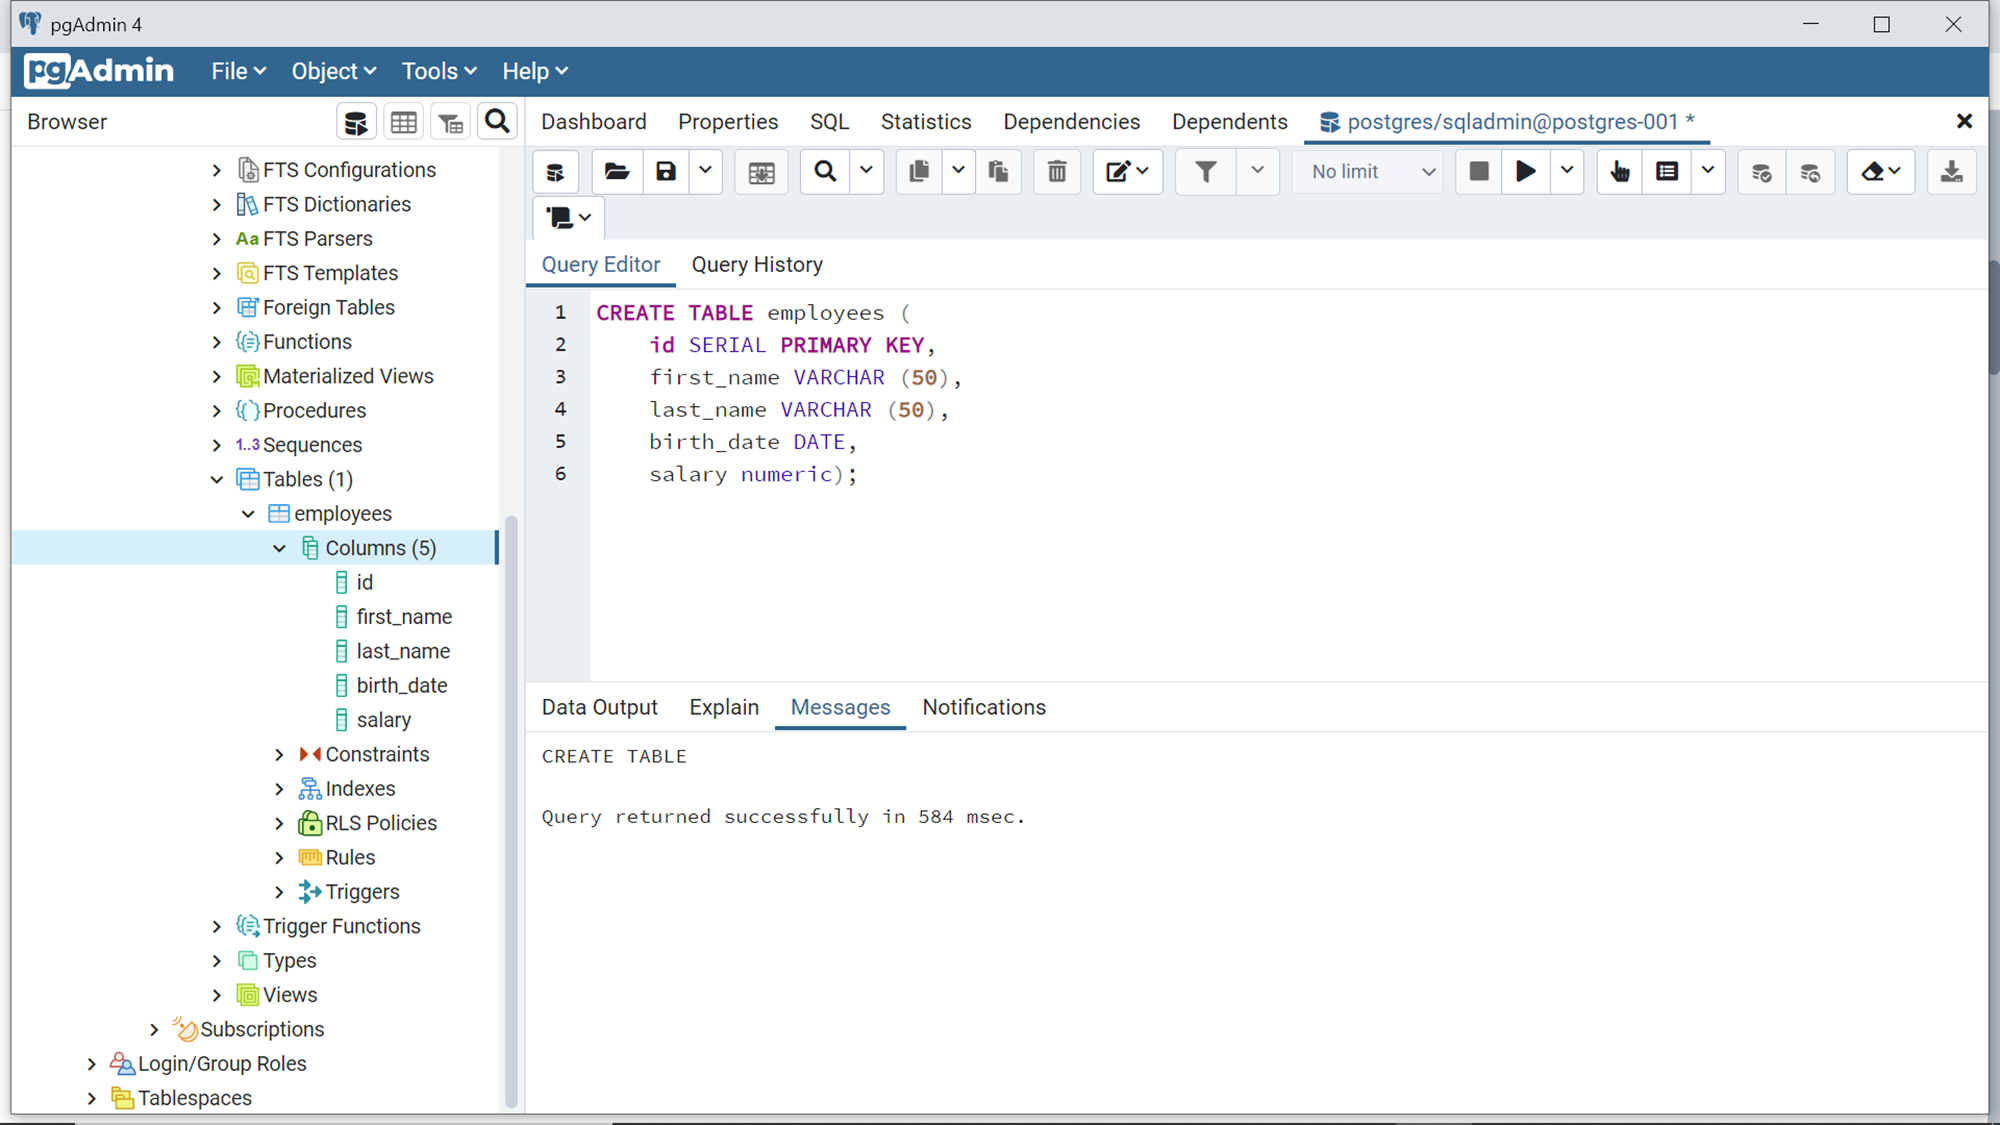
Once you successfully connect to the database server, the browser pane would be populated with several database object categories. Navigate to the Tables category first. There are two ways to create a new table. Either right-click on the tables category and select Create Table menu item which will provide a GUI wizard to create a table and columns step by step with all options. Alternatively, if you are comfortable with SQL, you can right-click and open the Query interface and type the query as shown below to create a simple table quickly.
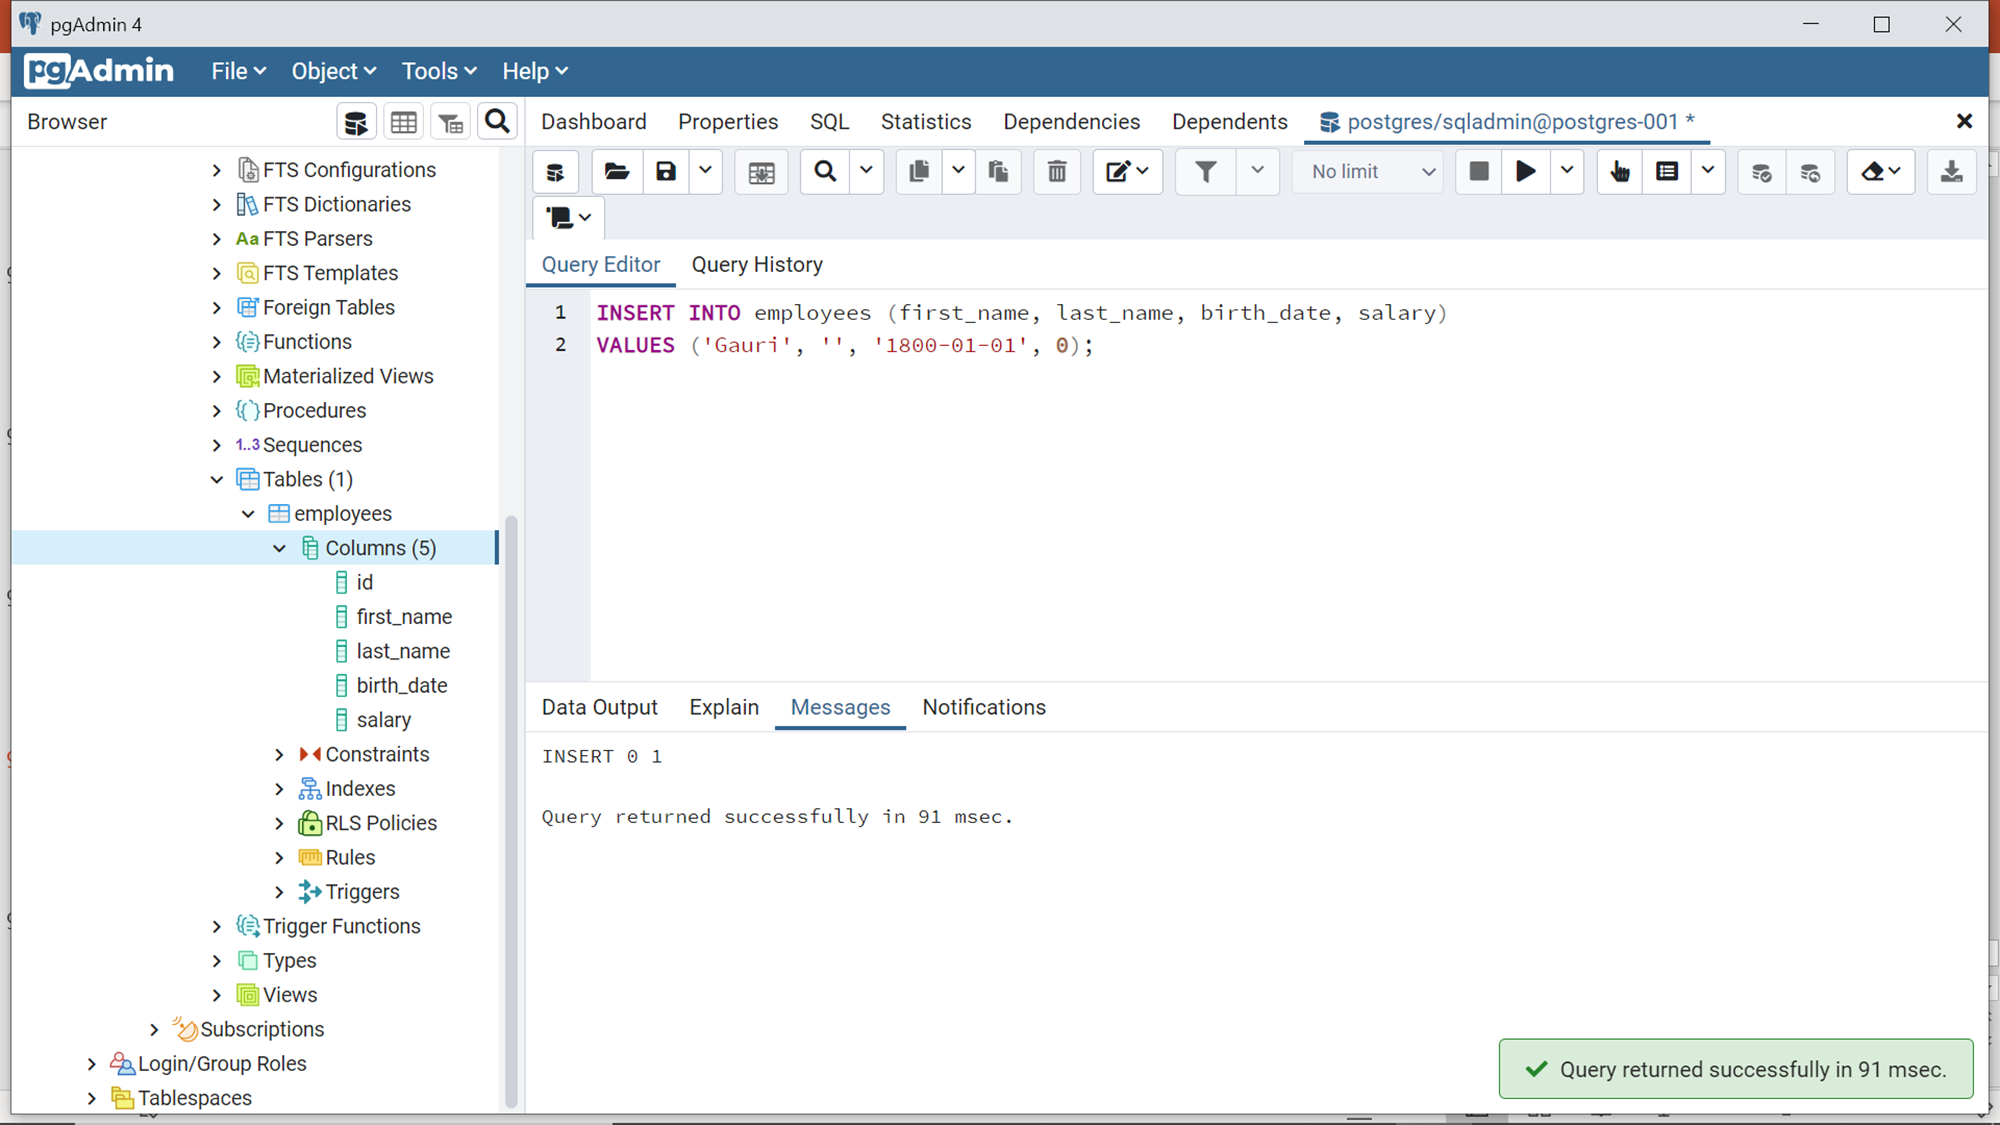
Let’s test the data validation of this table by inserting data that is invalid. As we have not defined any data validation constraints, we should be able to insert any data. As shown below, here we are inserting a record that has an invalid birthdate and salary value of zero which too may be considered invalid generally. Using the insert command, we can insert this invalid data without any errors.
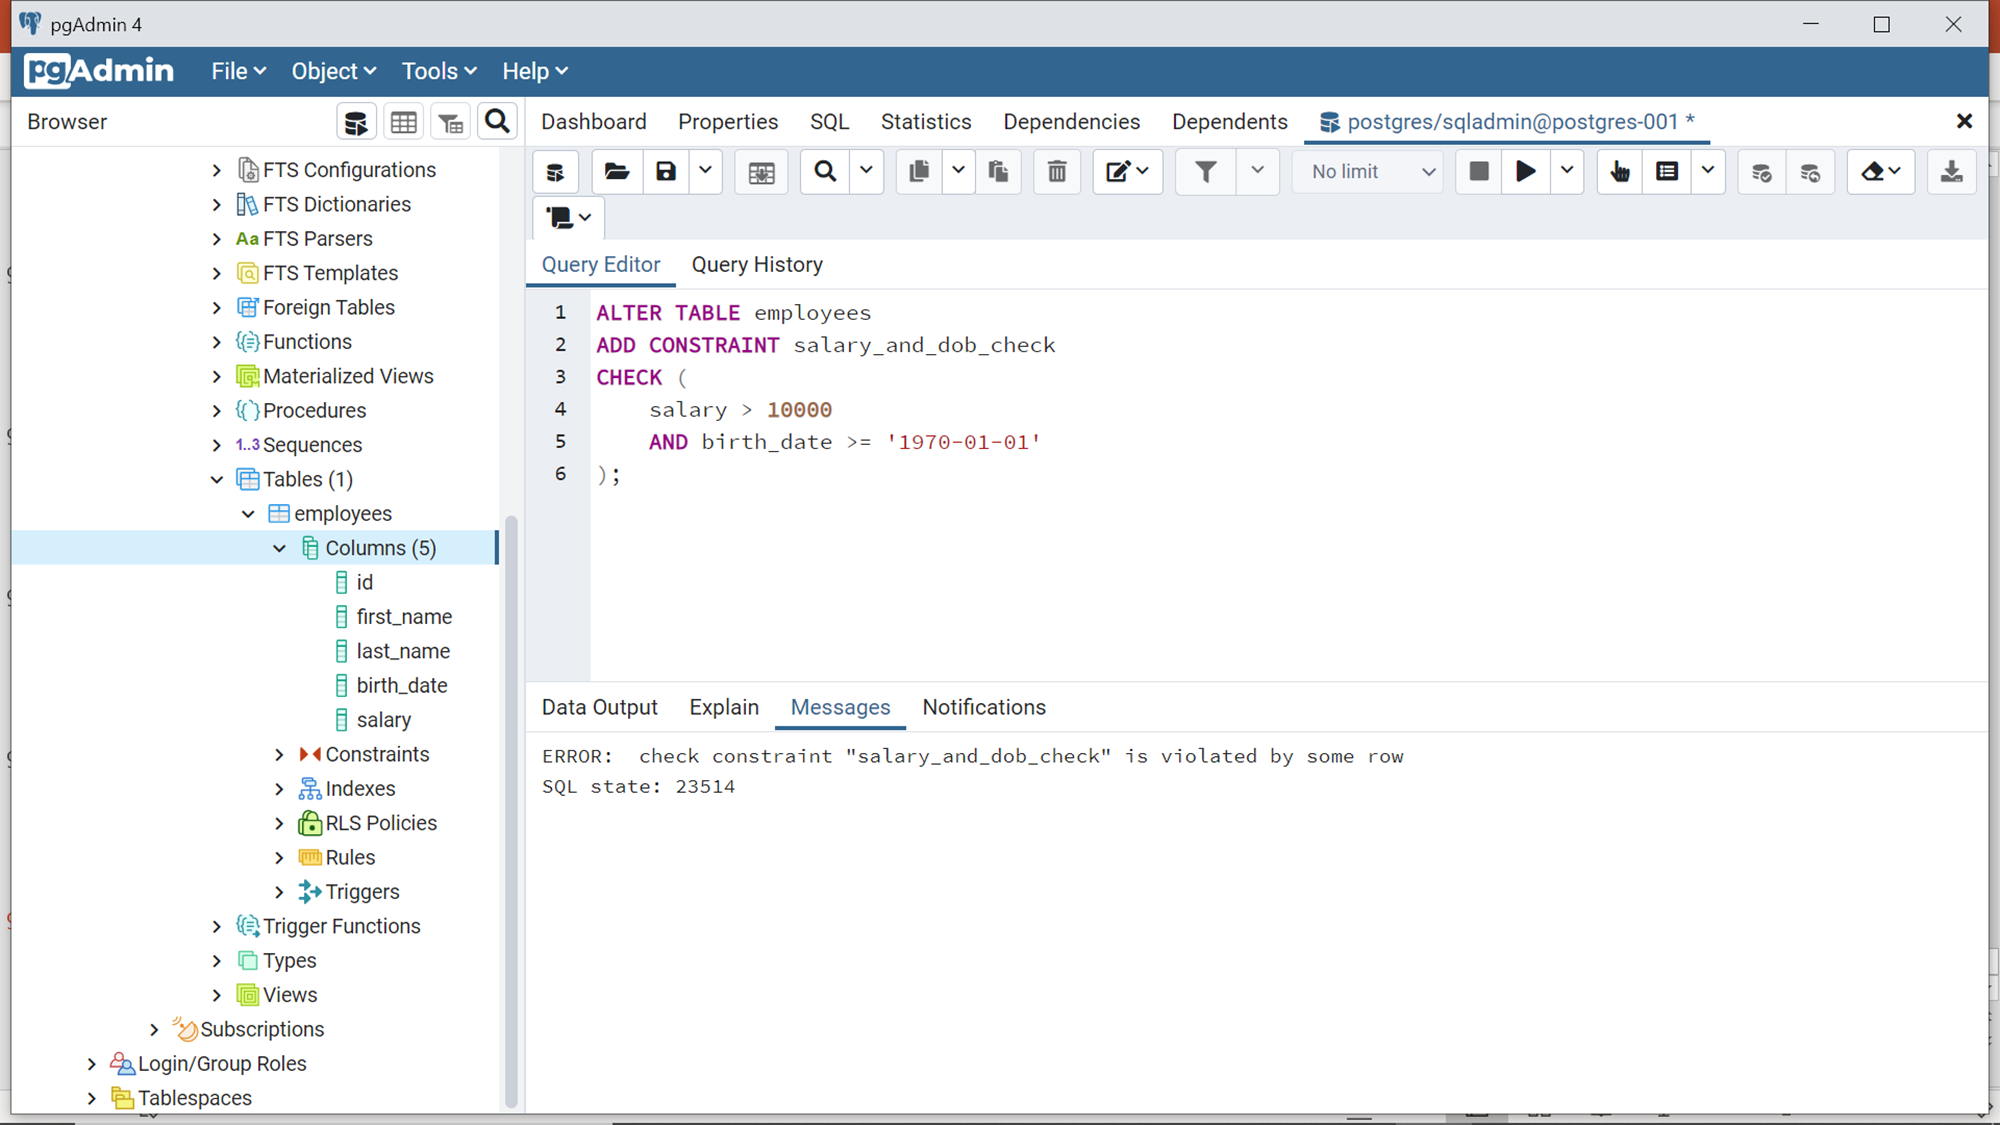
If you carefully observe the categories in the browser pane, right below the tables category there is a constraint category. Let’s add a check constraint to this table as shown below. Here we are modifying the table with the Alter command and adding a new constraint named “salary and dob check” and defining the Postgres check constraint using the CHECK keyword. The criteria that we are providing to this check constraint is that the value of salary should be greater than 10000 and birth date should be greater than 1st January 1970. Execute this command and the constraint would return an error that the table already contains data that violates this constraint as shown below.
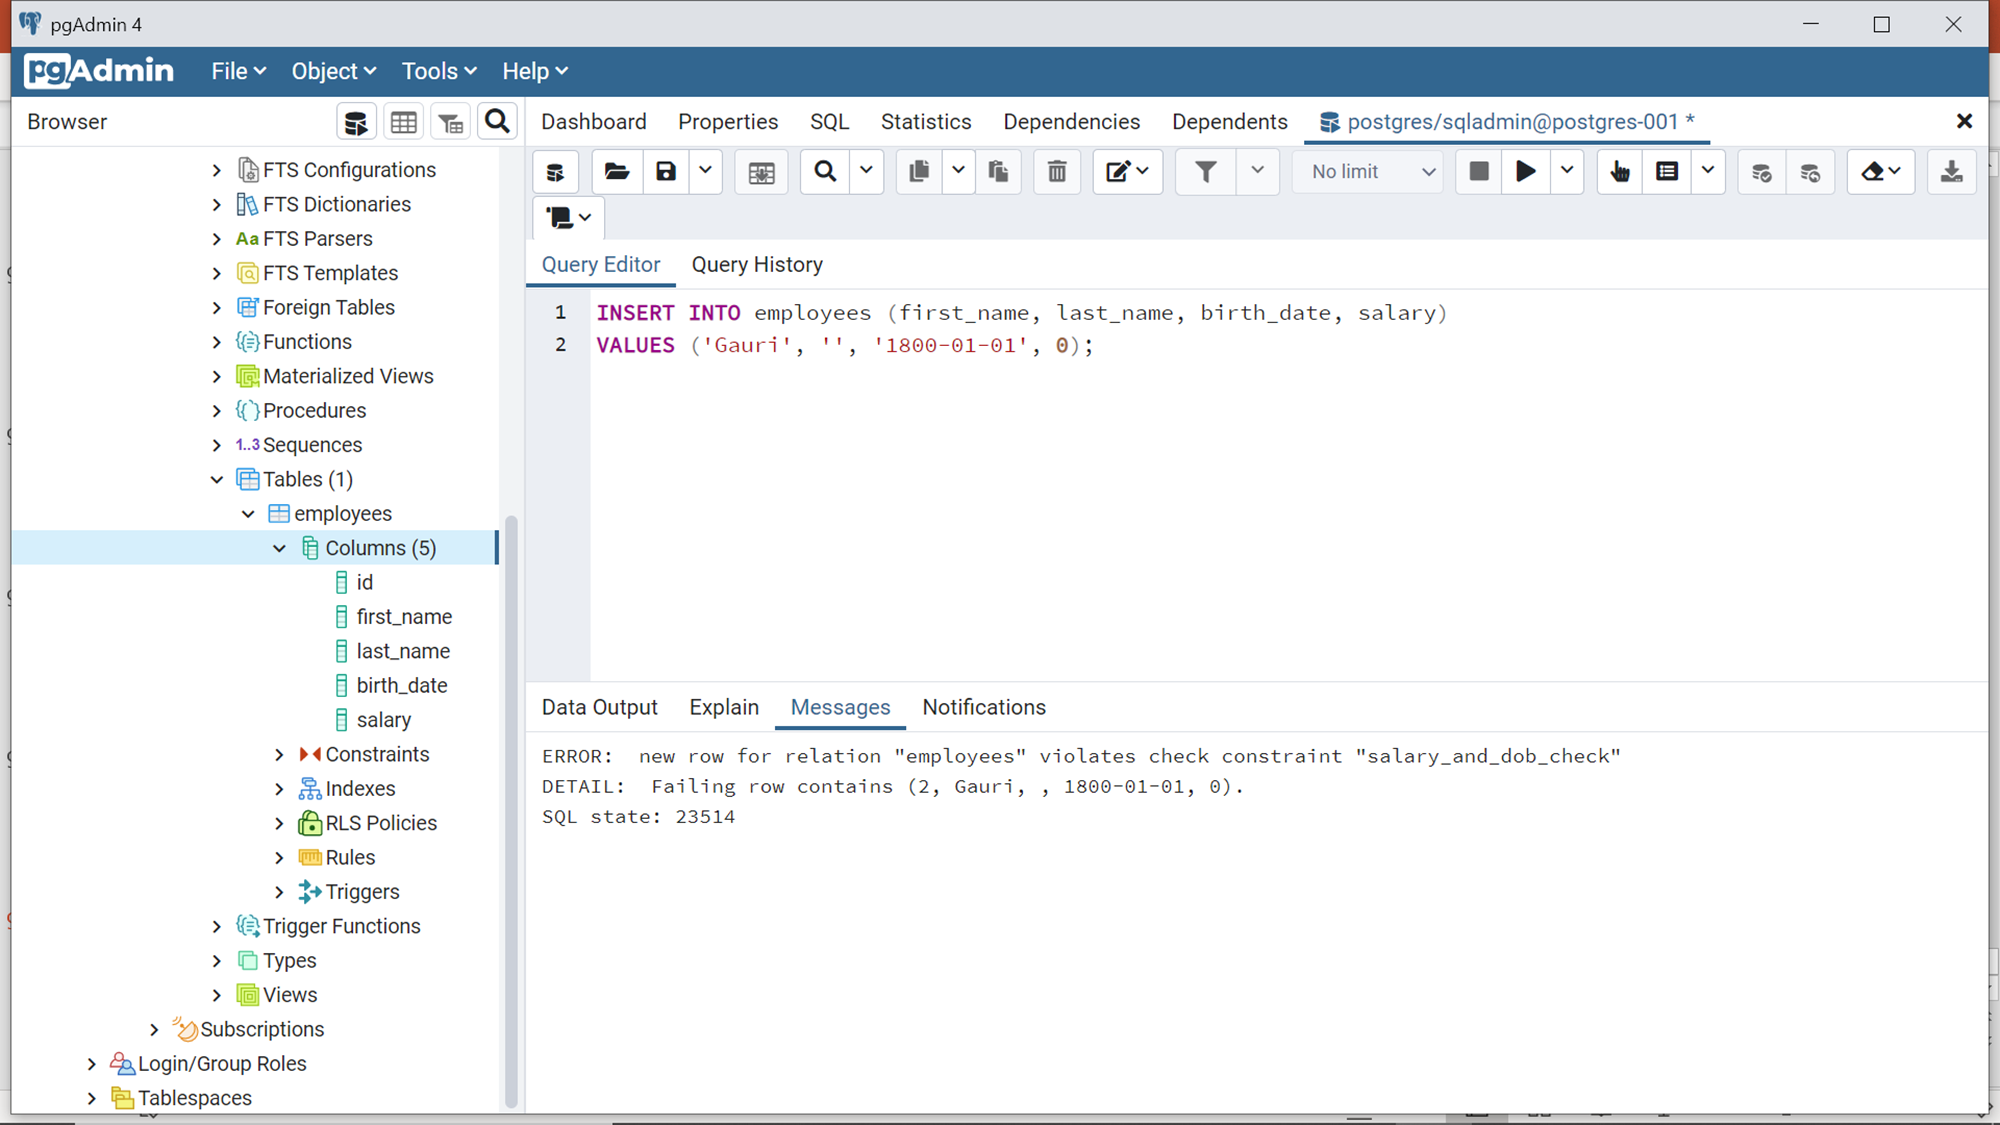
Delete the record that we added earlier to this table using the delete SQL command, and then re-execute this command. This time we should be able to successfully add the Postgres check constraint to this table. Now let’s attempt to re-insert an invalid record in this table as shown below. This time we won’t be able to insert this record as it violates the Postgres check constraint that we added earlier, and it will result in an error shown below.
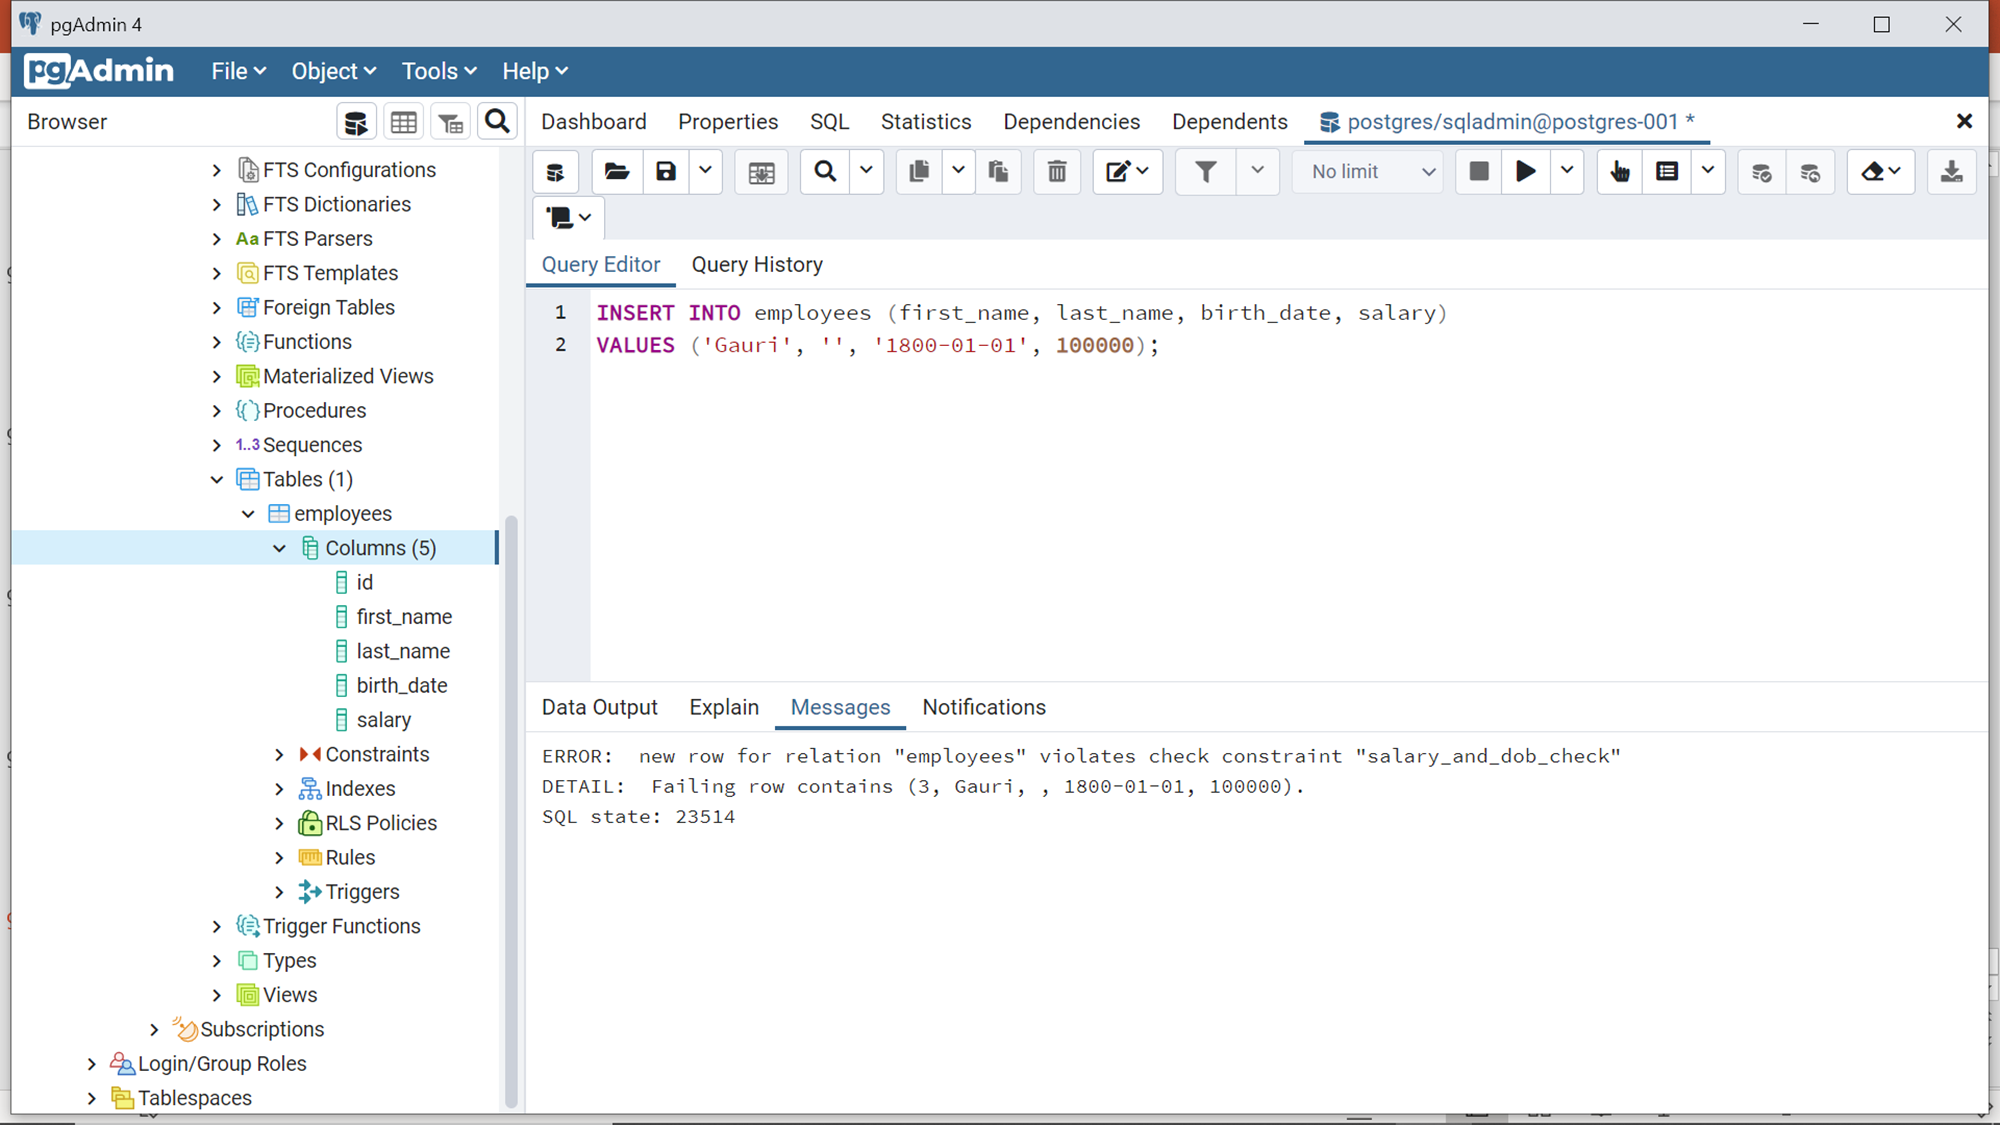
If we modify just the salary part to a valid value but not the birth date and re-attempt to insert this record, it will still result in an error as it still violates the criteria of the Postgres check constraint. Also note that as the ID field is a serial data type, the value of ID would still auto-increment though the record was not inserted.
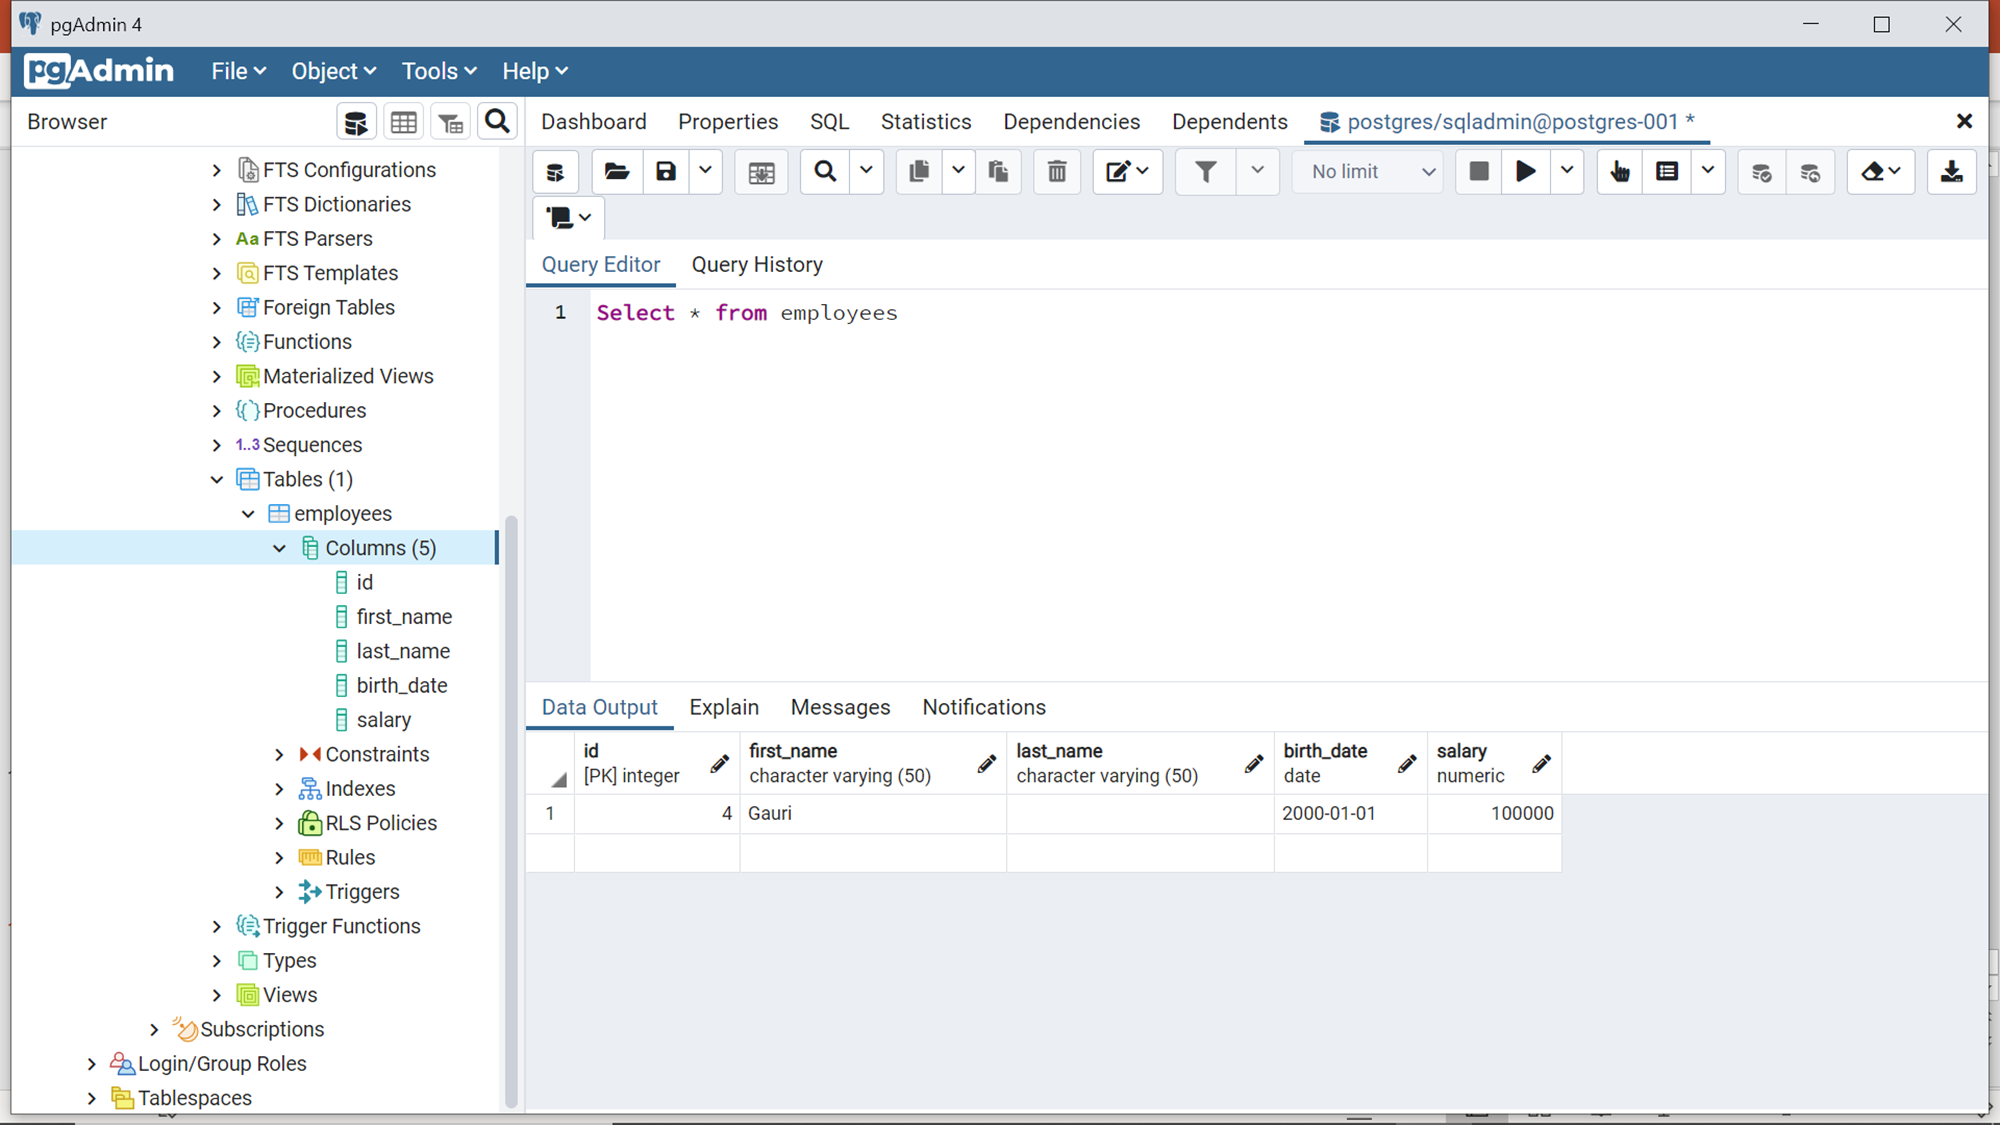
Once we provide a valid value for the birth date as well as the salary field and then insert the record, it will successfully get inserted. To ensure that the record got inserted we can view the newly added record using the select command as shown below.
In this way, using the Postgres check constraint, we can add data validation to tables in the PostgreSQL server very easily and maintain the validity of data.
Conclusion
In this article, we learned about how constraints are one of the easiest mechanisms to maintain data validity. We learned how to create a PostgreSQL Server on Azure, connected to it using the pgAdmin tool, created tables on the server instance, added a Postgres check constraint on the table and learned how this constraint works with an example.

She has a deep experience in designing data and analytics solutions and ensuring its stability, reliability, and performance. She is also certified in SQL Server and have passed certifications like 70-463: Implementing Data Warehouses with Microsoft SQL Server.
View all posts by Gauri Mahajan
- Oracle Substring function overview with examples - June 19, 2024
- Introduction to the SQL Standard Deviation function - April 21, 2023
- A quick overview of MySQL foreign key with examples - February 7, 2023