
This article will show different features of Azure Purview as well as describe how to get started with this service on Azure.
Introduction
Azure provides a variety of data repositories for different varieties and volumes of data. In any large IT eco-system, data exist on-premises, on multi-cloud, and on many SaaS vendors who offer their products in a Software as a Service model. Organizations have data pipelines that often transport as well as transform data between these data repositories. Azure recently launched Azure Purview – a new service that provides many with the pace of data generation, data movement as well as data transformation, there comes a strong need to manage, monitor, and govern data. Features to deal with all these aspects of data governance and management. We will see how you can work on this service and its different features in this article.
Azure Purview Features
Azure Purview got recently launched (as of the draft of this article) in preview mode primarily as data governance and catalog service. This service has some very interesting features which one should be aware of before starting to practically work with this service on the Azure portal. Some of the major and important features are listed below.
- Support for hybrid data platforms – This service supports sourcing metadata from supported data repositories hosted on-premises, on Azure cloud, as well as on cross-clouds
- Automated data discovery – It offers a mechanism to scan data repositories and detect metadata with more than 100 classification rules that automatically classify the attributes based on the matching rules
- Lineage identification – Purview has a mechanism with which one can bind it to services like Azure Data Factory from which it can automatically extract lineage
- Purview Metadata Catalog and Business Glossary – It supports the creation of business glossary terms that can be used and mapped with the metadata created in the purview metadata catalog
- Data Map with Search – Different data repositories from different hosting sources can be organized in the form of collections which allows the creation of data maps. The metadata created for these data sources can be easily discovered using the search functionality
Creating an Azure Purview Instance
Log in to the Azure portal and search for Azure Purview service. Click on the service to open the dashboard page. As this service is in preview if you are using a corporate account in which you may be restricted from accessing preview features, you may not be able to access them. In that case, you may need to work with your administrator to gain the required privileges to access this service. Once the dashboard opens, you would be able to see a screen as shown below.
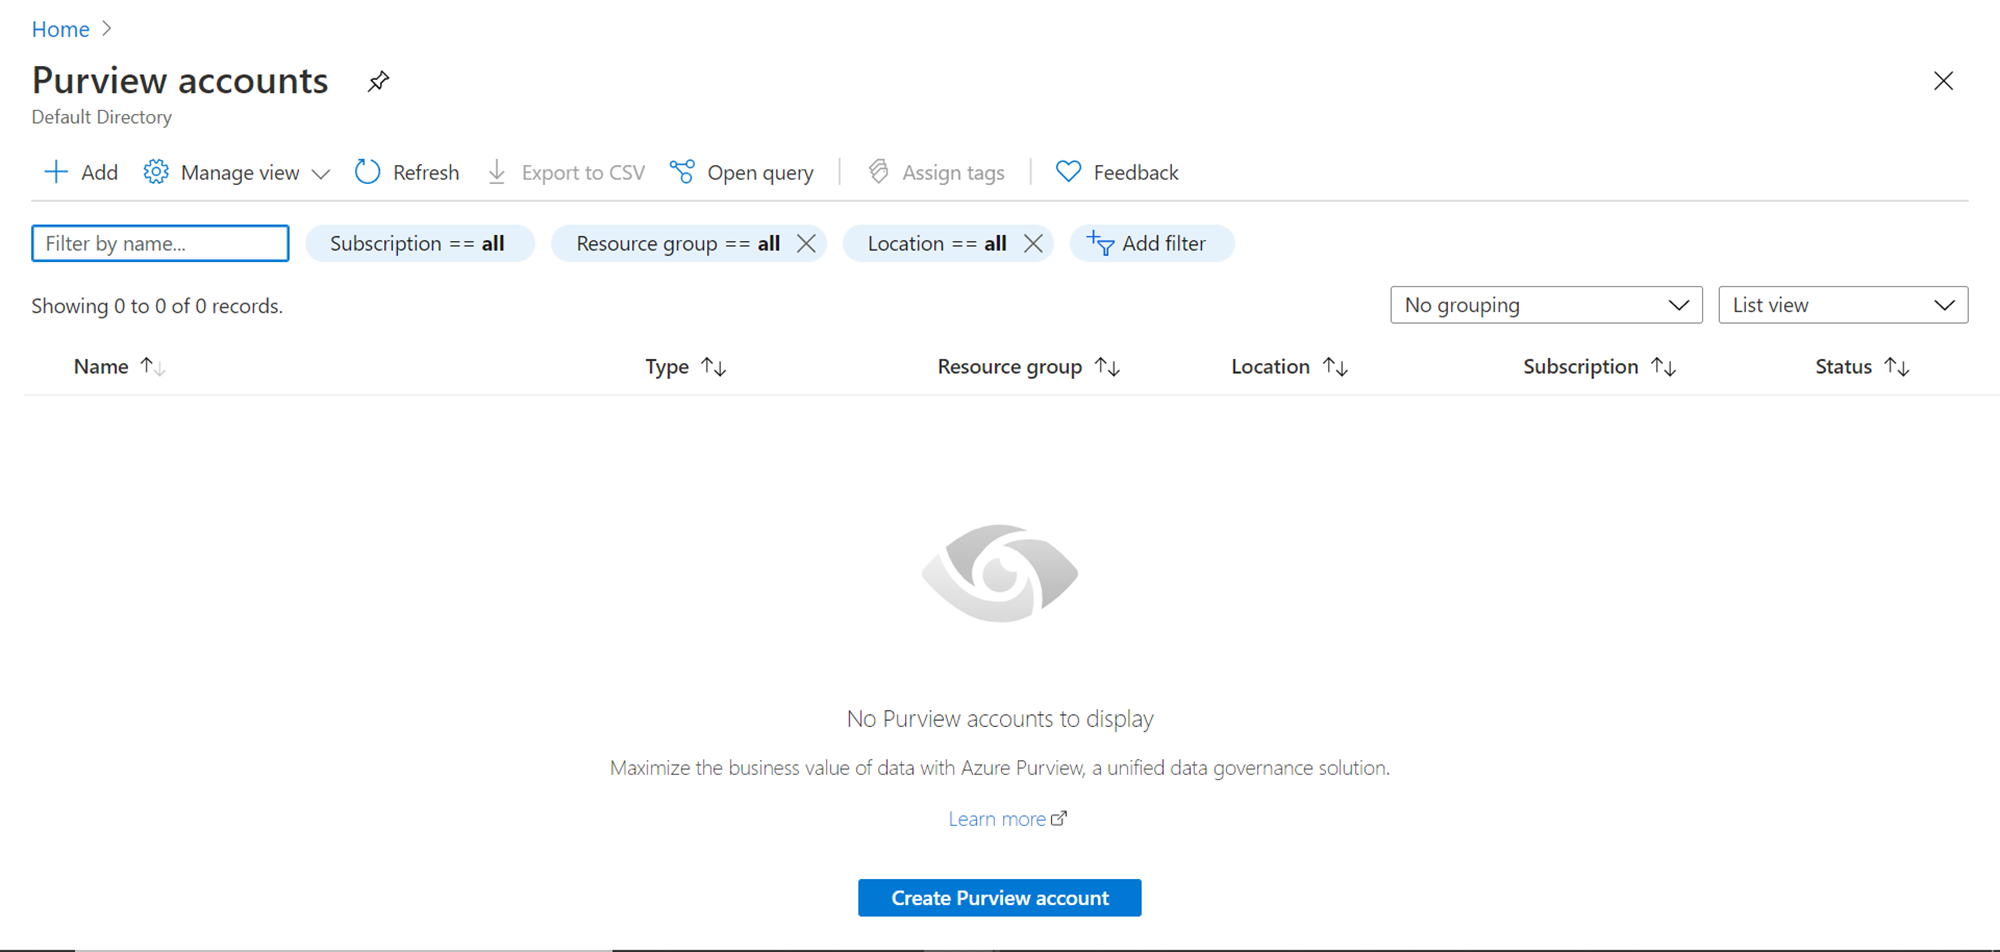
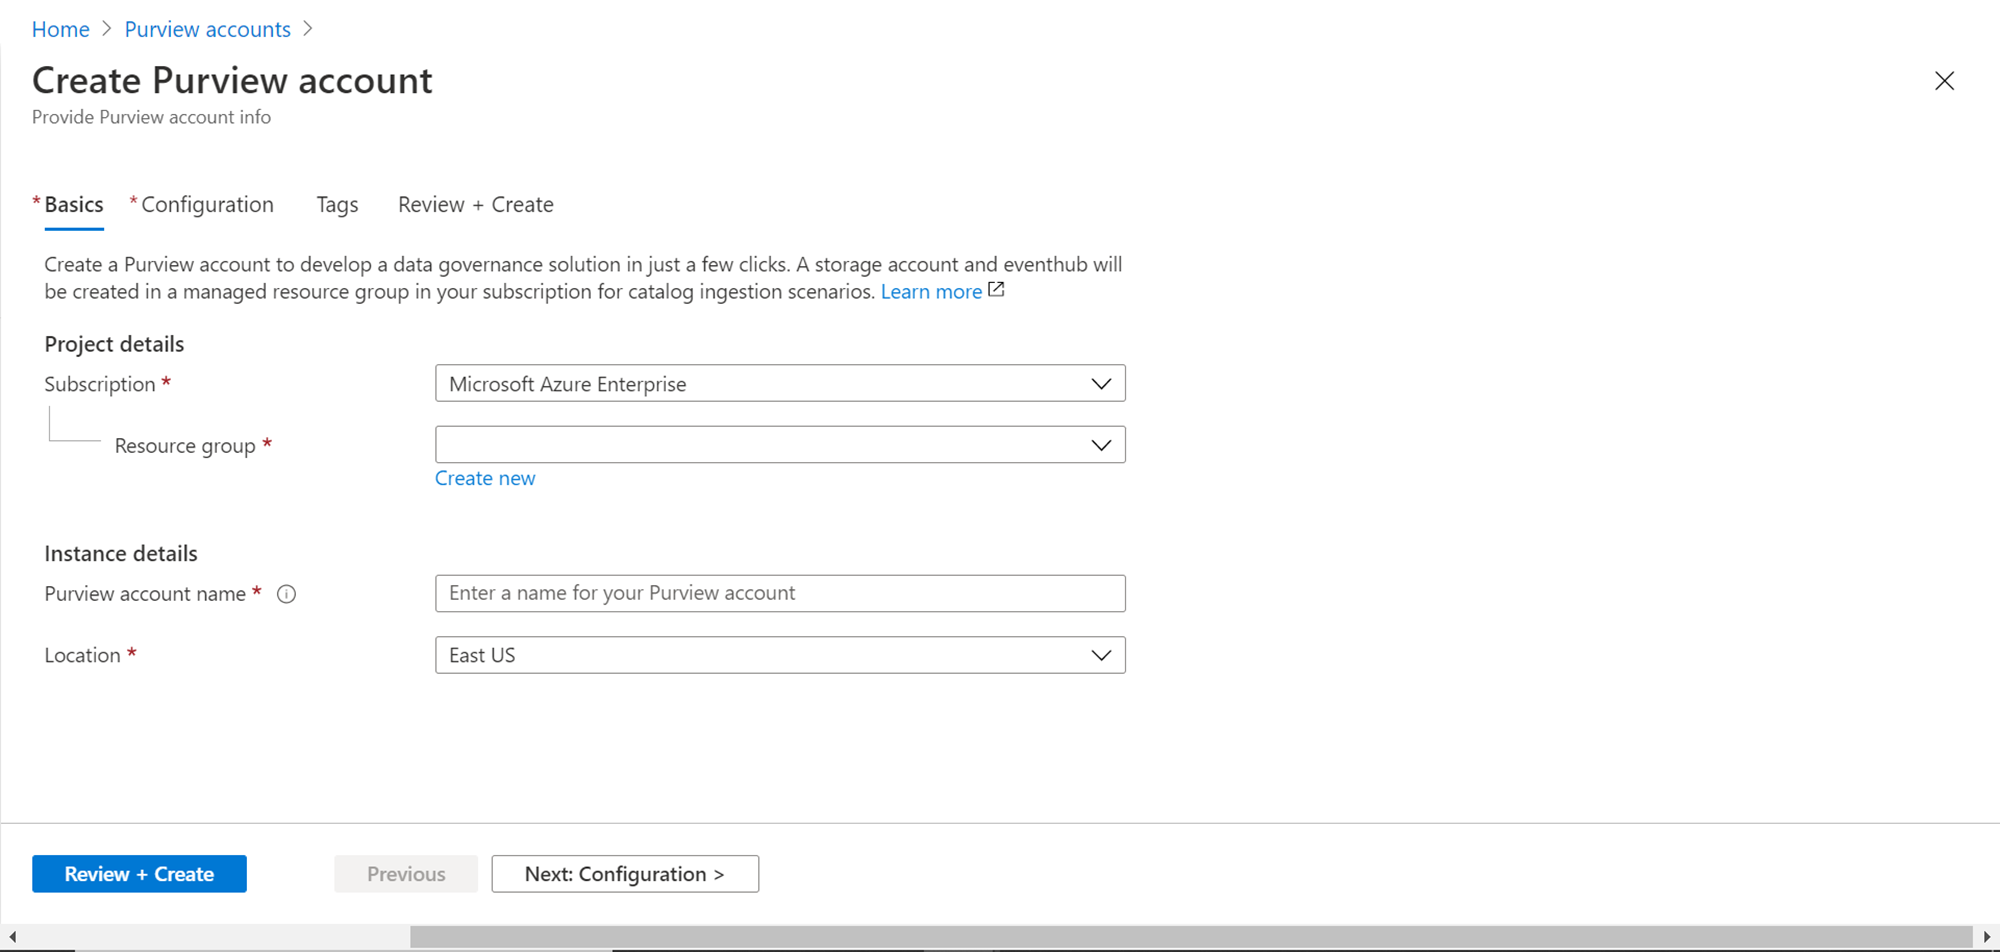
From this page, one can create and manage Azure purview accounts. Assuming we are accessing this service for the very first time, it will not have any accounts created. We are going to create a new account now. Click on the Create Purview account button to invoke the account creation wizard as shown below. In the first step of the wizard, we need to provide basic details like the name of the subscription, the resource group in which the account would be created, the name of the new account, and the location in which the new account must be created. Once the details have been provided, click on the Next button.
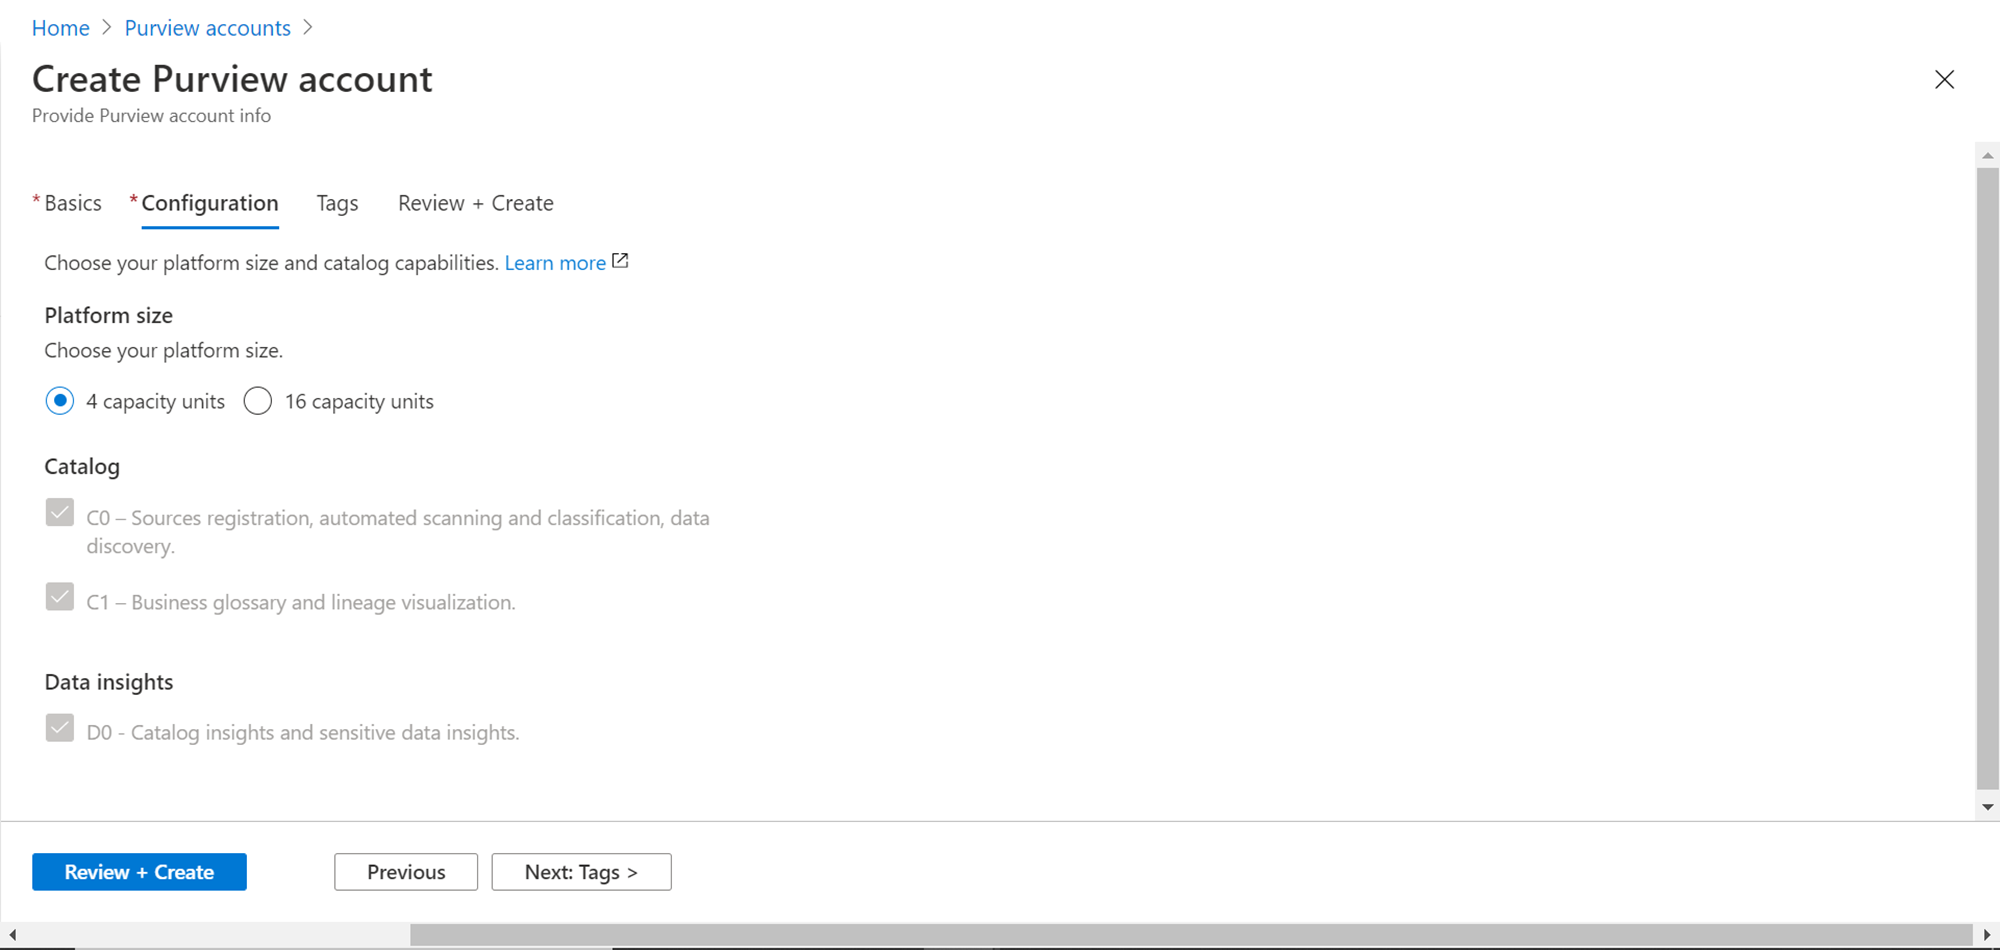
In this step, we need to select the platform size and capabilities. As of the preview mode, it comes with two capability options – 4 units and 16 units. Till the preview ends, the 4 capacity units are free of cost including the sources registration, automated scanning, classification, data discovery, business glossary, lineage visualization, catalog insights, and sensitive data insights. The Catalog and Data Insights options are disabled in the preview mode, but once this service goes generally available, both of these options will be open for selection as they will incur individual charges based on capacity and feature selection. After the platform size is selected, click on the Next button.
Over here, we can optionally provide any tags to the account that is about to be created. One may have separate accounts for separate purposes, repositories, businesses, regions etc. Tags can help to add some metadata that enables easily distinguishing these accounts. For now, we can skip adding tags and move to the next step by clicking on the Next button.

Now, the wizard would start validating the configuration details provided to see if it has the necessary details and privileges to create a new purview account. If it’s the first-ever time you are creating a new purview account, you may encounter an error as shown below. Upon carefully reviewing the error message and analyzing the details, you would find that service dependent service ARM may not be registered for use, which is obstructing Azure purview to create a new account.
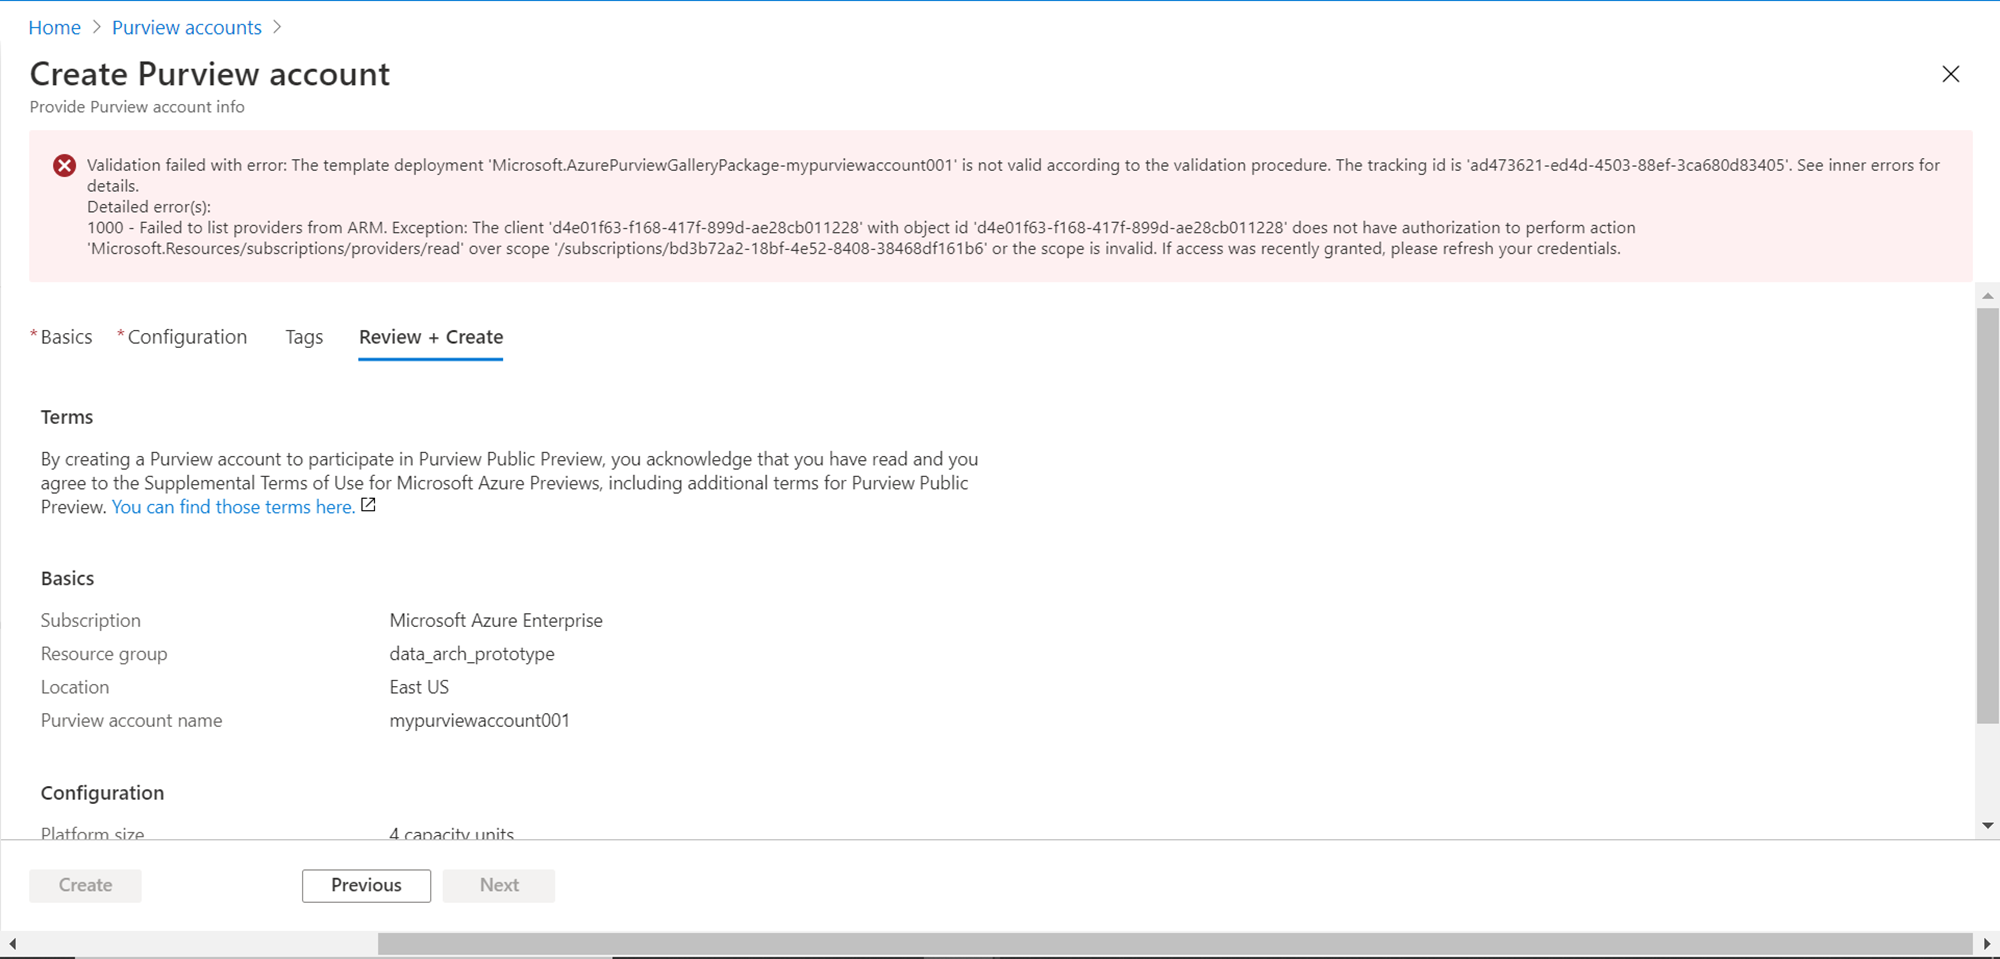
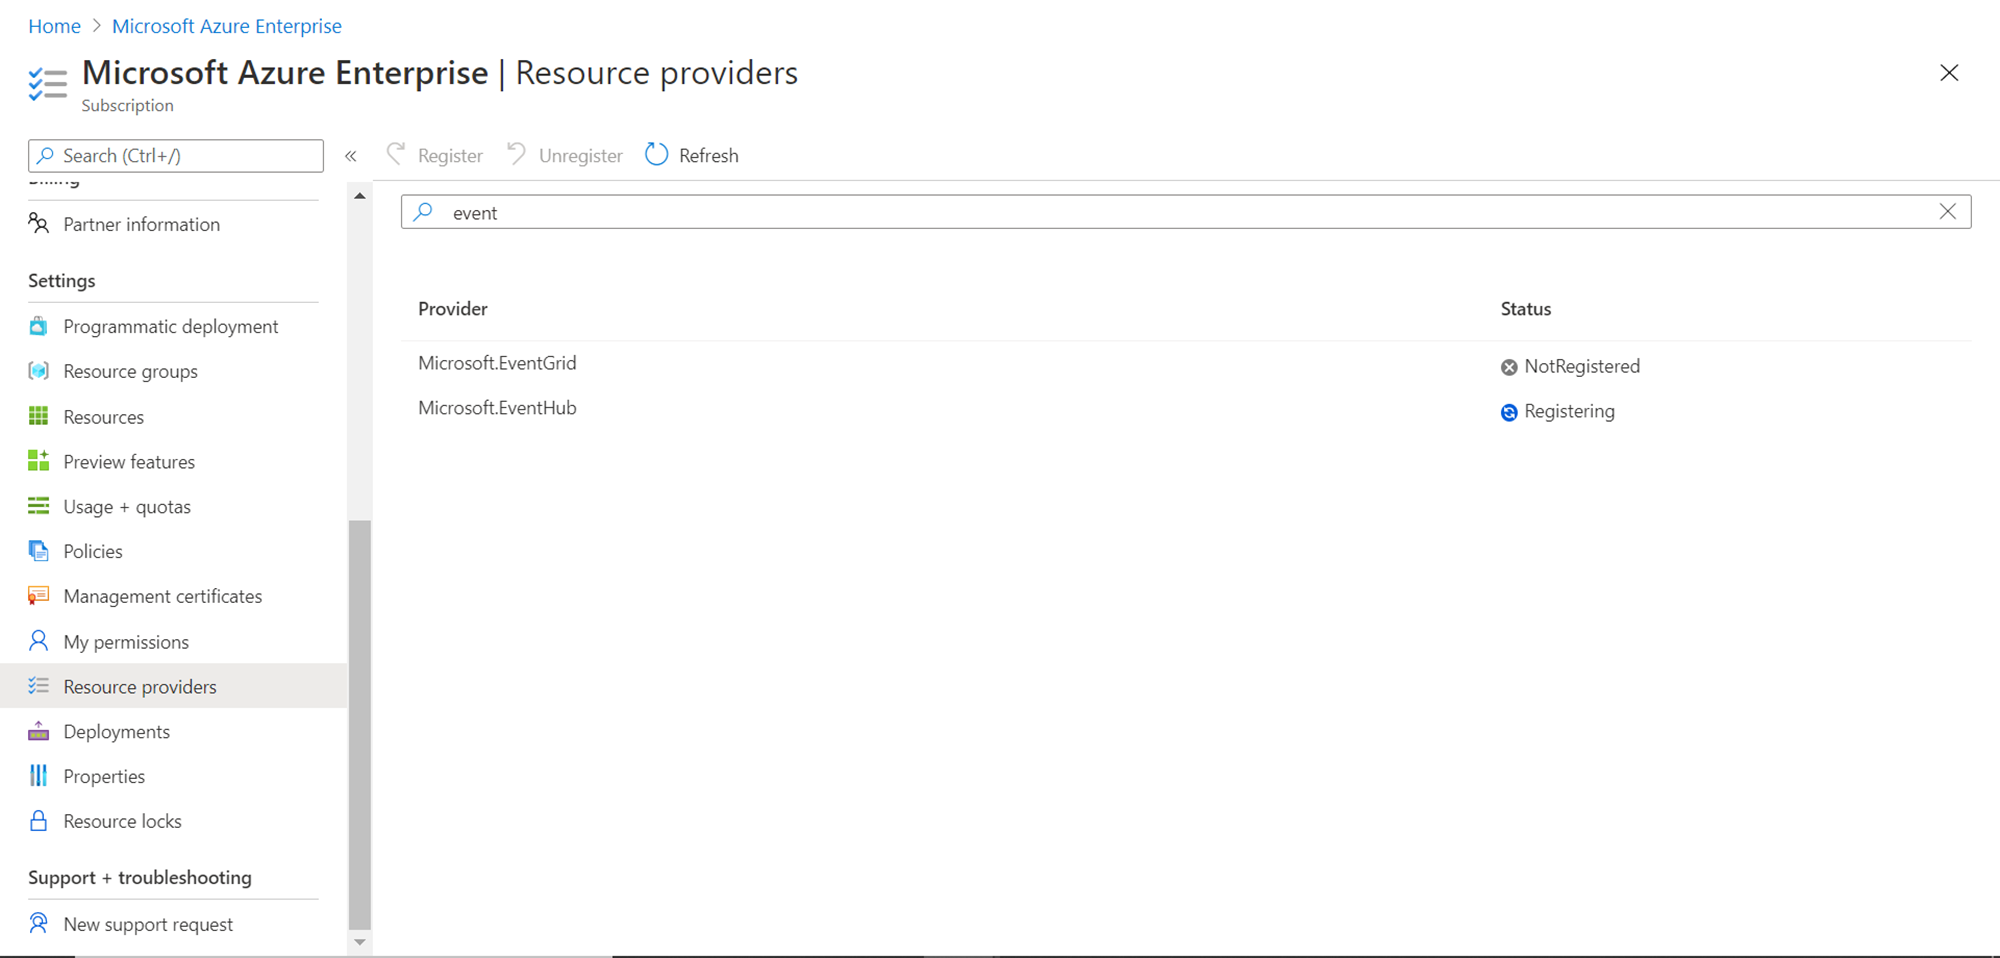
To resolve this issue, navigate to your subscription by opening the Subscriptions service and clicking on the name of your subscription. Then click on the resource providers section as shown below and search for the services that are not registered and are required by Azure purview to create a new account. For example, in this case, the EventHub service was not registered as was causing an error. Type the name of the service provider, select the service provider name and click on the Register button. This will start the registration process which lists the service provider to be used with the subscription. Once registered, the status would turn to registered.
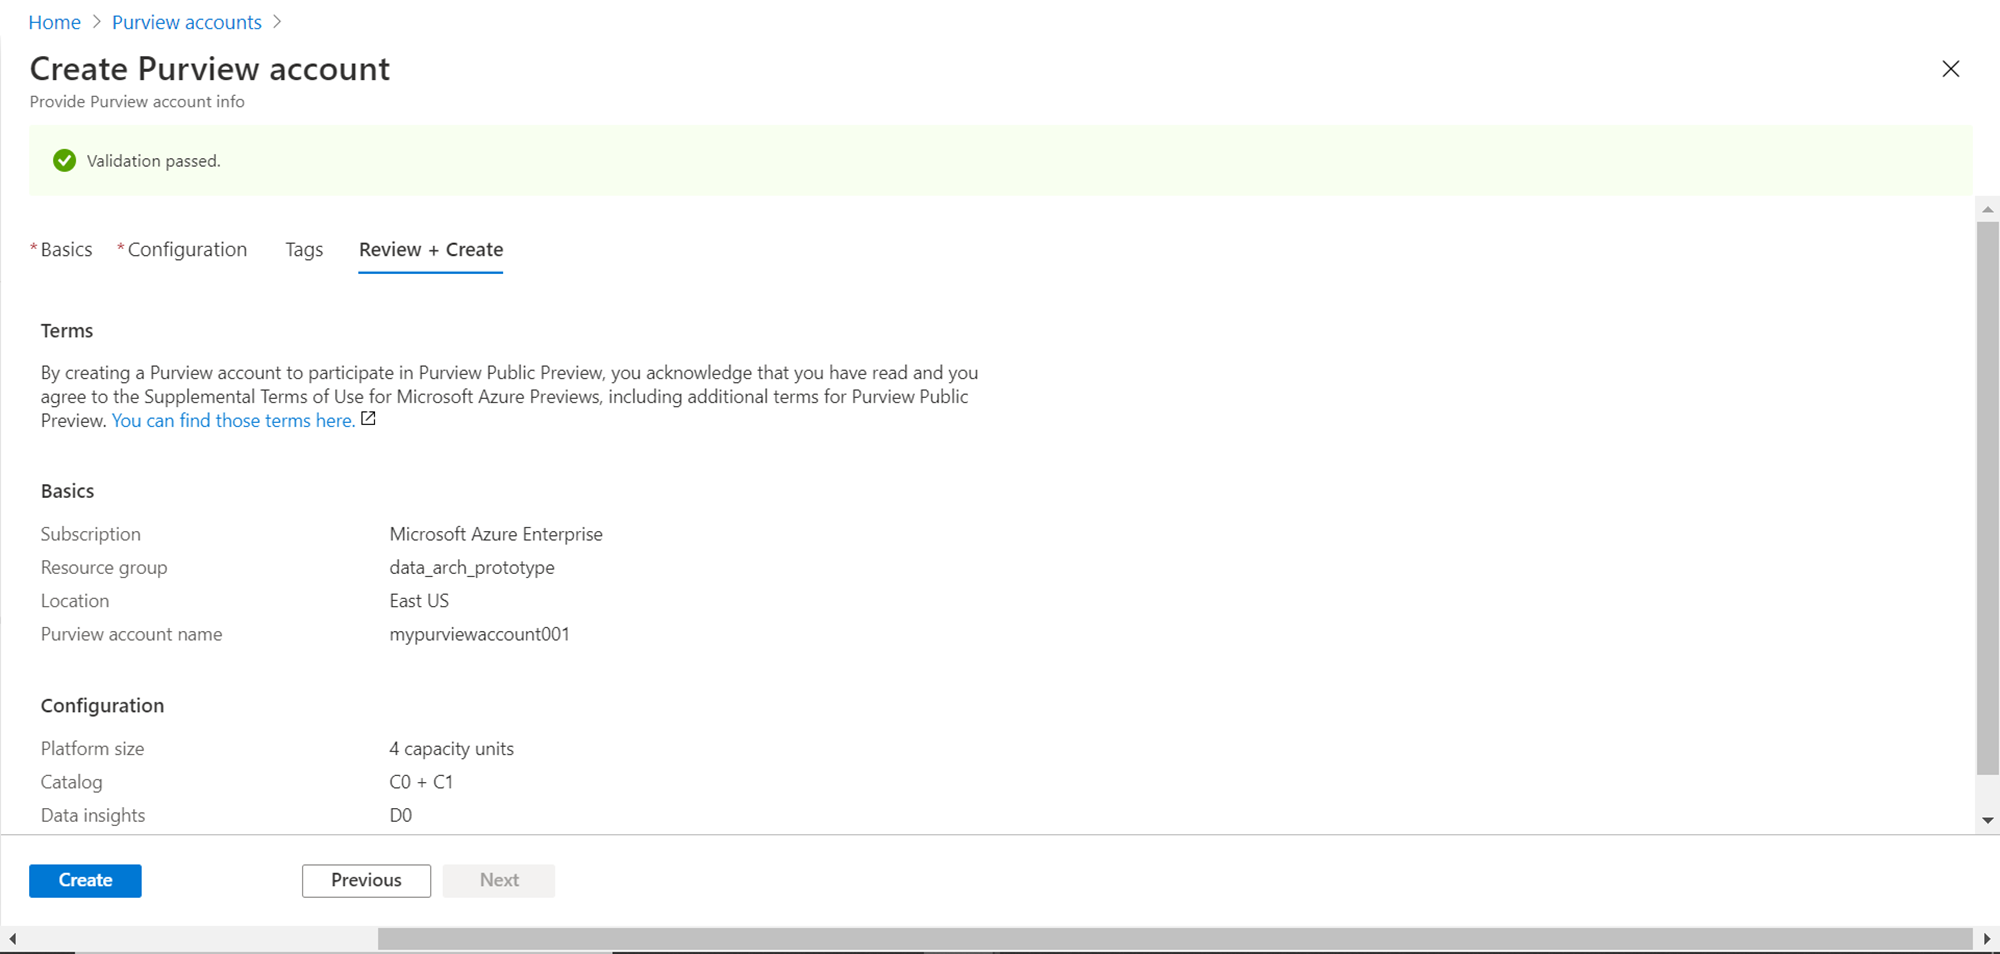
Navigate back to the wizard, click on the back button, and again click on the next button to re-start the validation process as shown below. This time, if all the required service providers are registered with the subscription, then the validation would pass as shown below. At this stage, we are ready to create the account. Click on the Create button to start the account creation process.
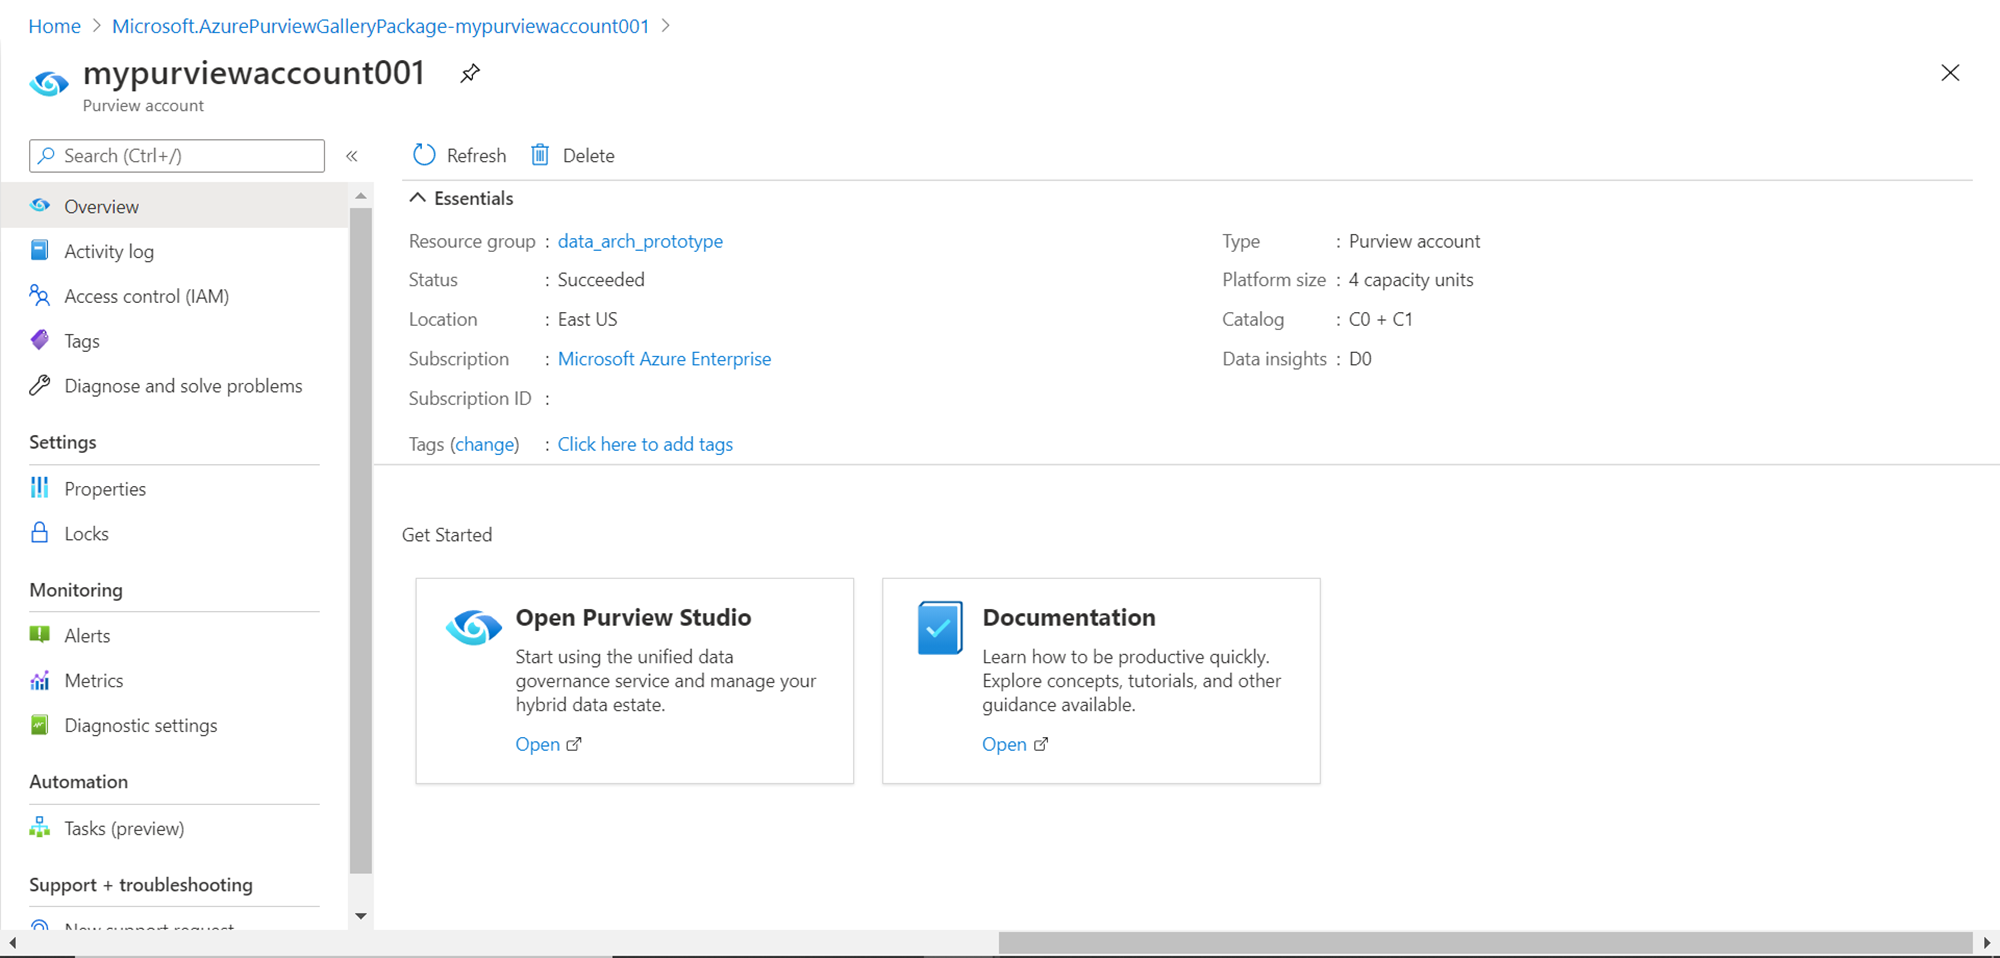
Once the account is created, open the account and it would look as shown below. On the dashboard page of the account, you would be able to view the same configuration details as configured. Ensure that the status of the account is Succeded. On the left pane, you would be able to find options to view configuration properties, as well as set monitoring options like alerts, view metrics, and configure automation tasks. Like the way some services like Azure Synapse and Azure Data Factory offers a studio environment to work with the service, Azure Purview also offers a Purview Studio, which can be opened by clicking on the Open Purview Studio button as shown below. For those who intend to go through documentation specific to this service, one can click on the Documentation link.
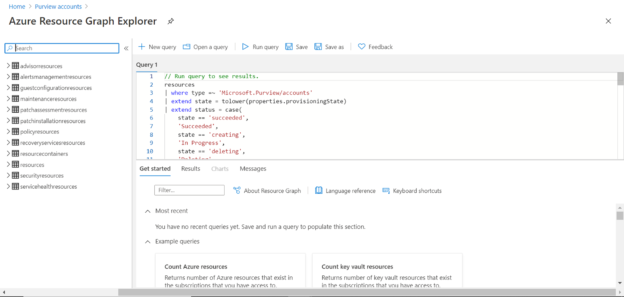
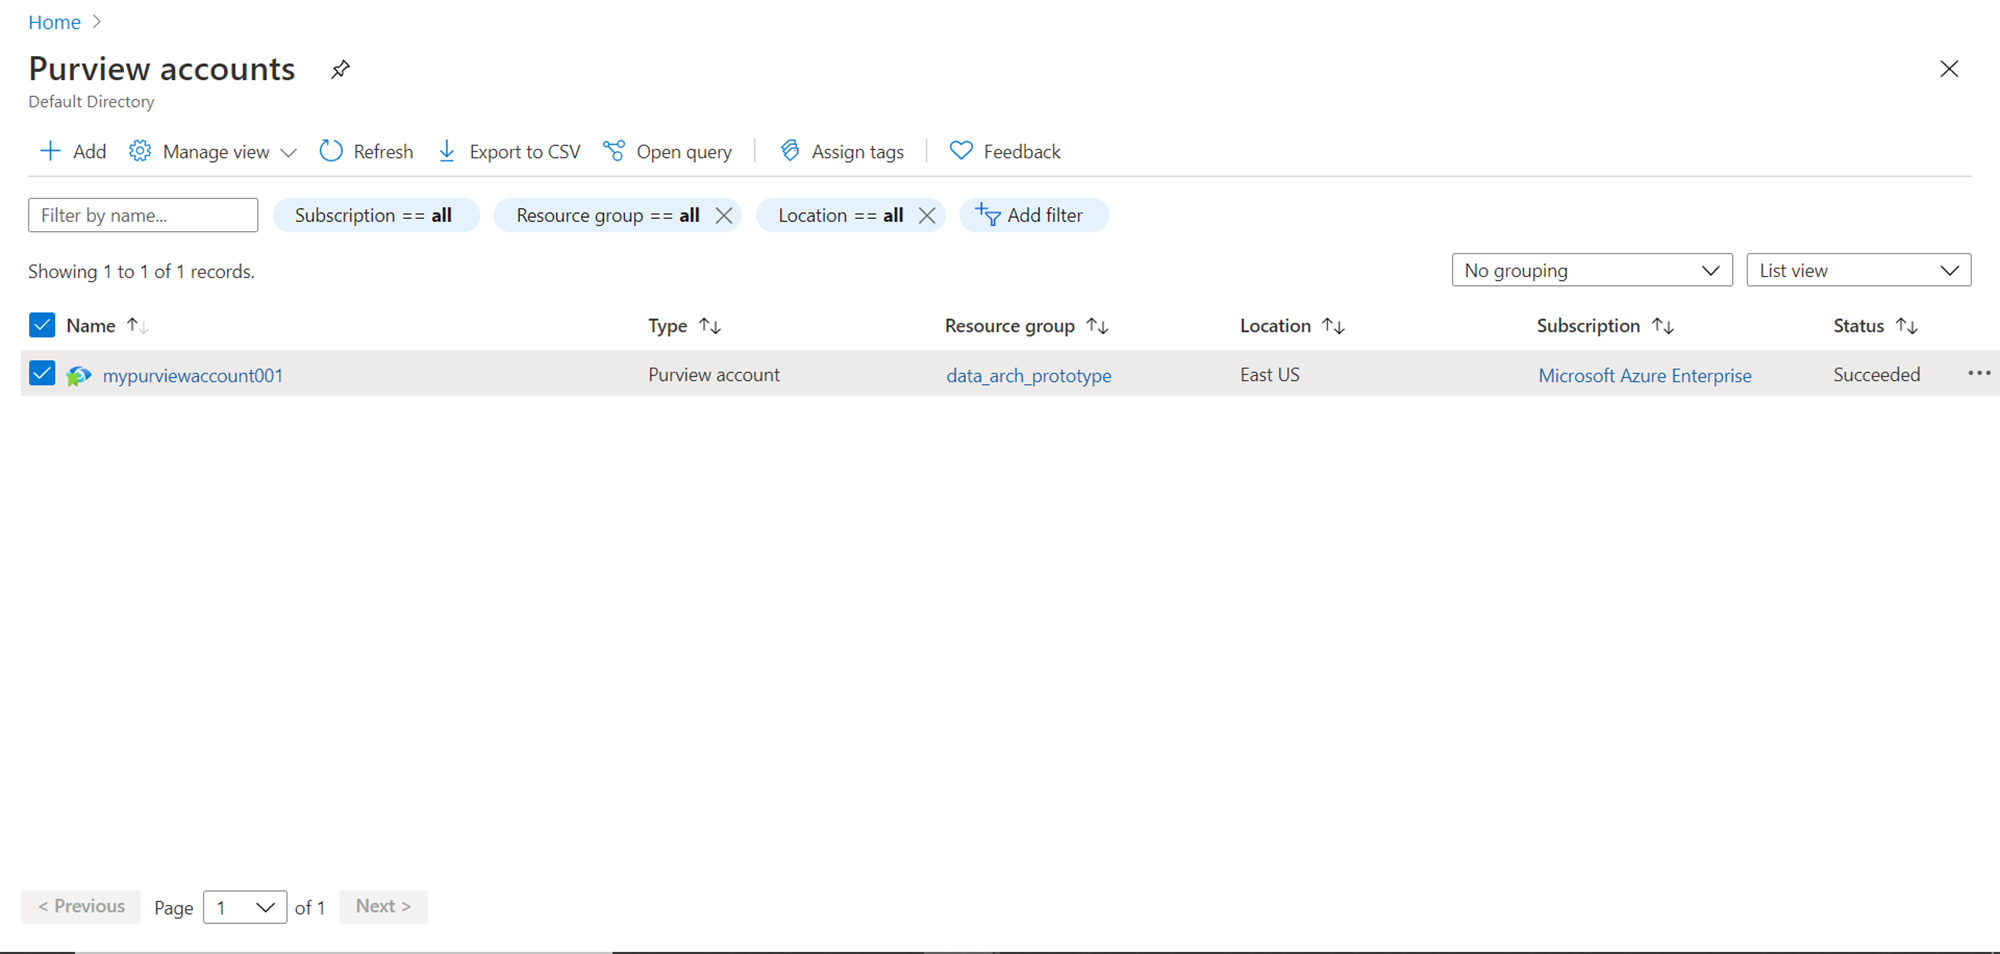
We can navigate back to the purview service and we would be able to find the newly created account listed here as shown below. We get one additional option from here, which is the Open Query option which lets us query resources in subscription using Azure Resource Graph Explorer and find the list of Azure purview accounts. Click on the Open Query button.
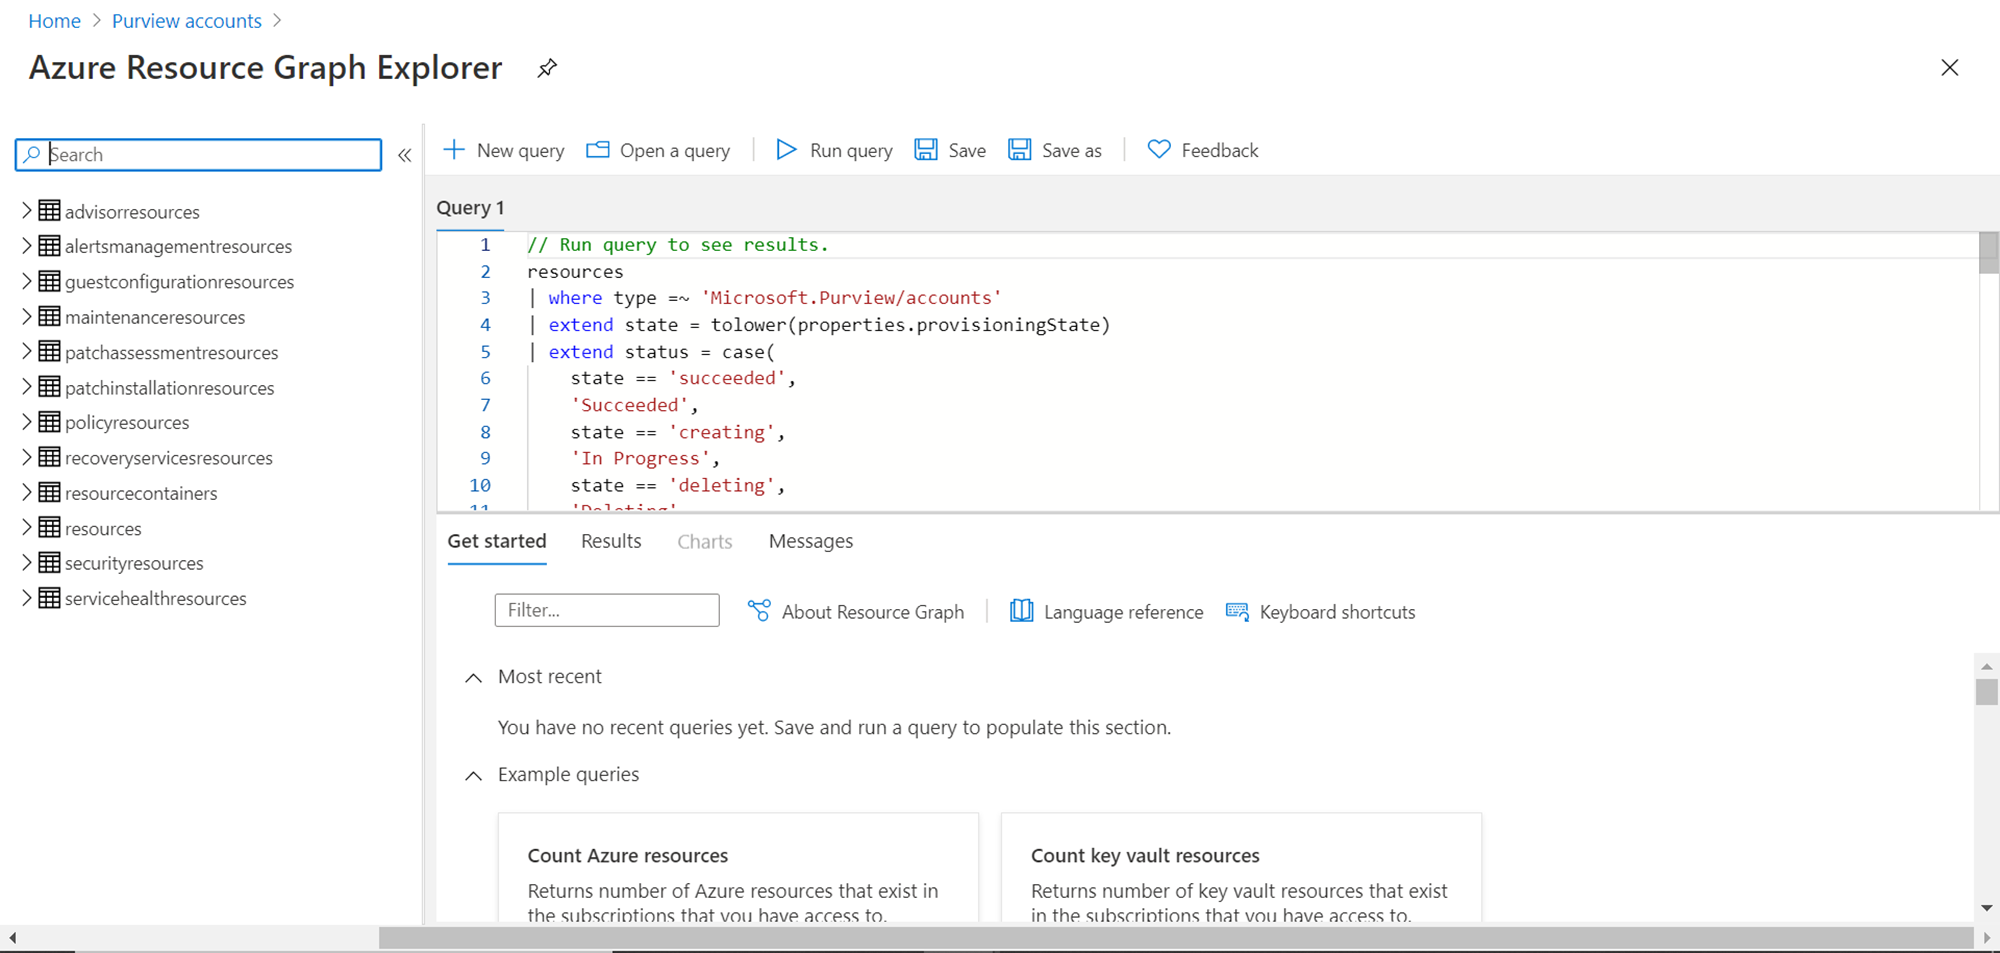
Once you click on this button, the Azure Resource Graph Explorer screen would open as shown below. It would have a ready to use query as seen below in the right pane of the screen, which lists the purview accounts.
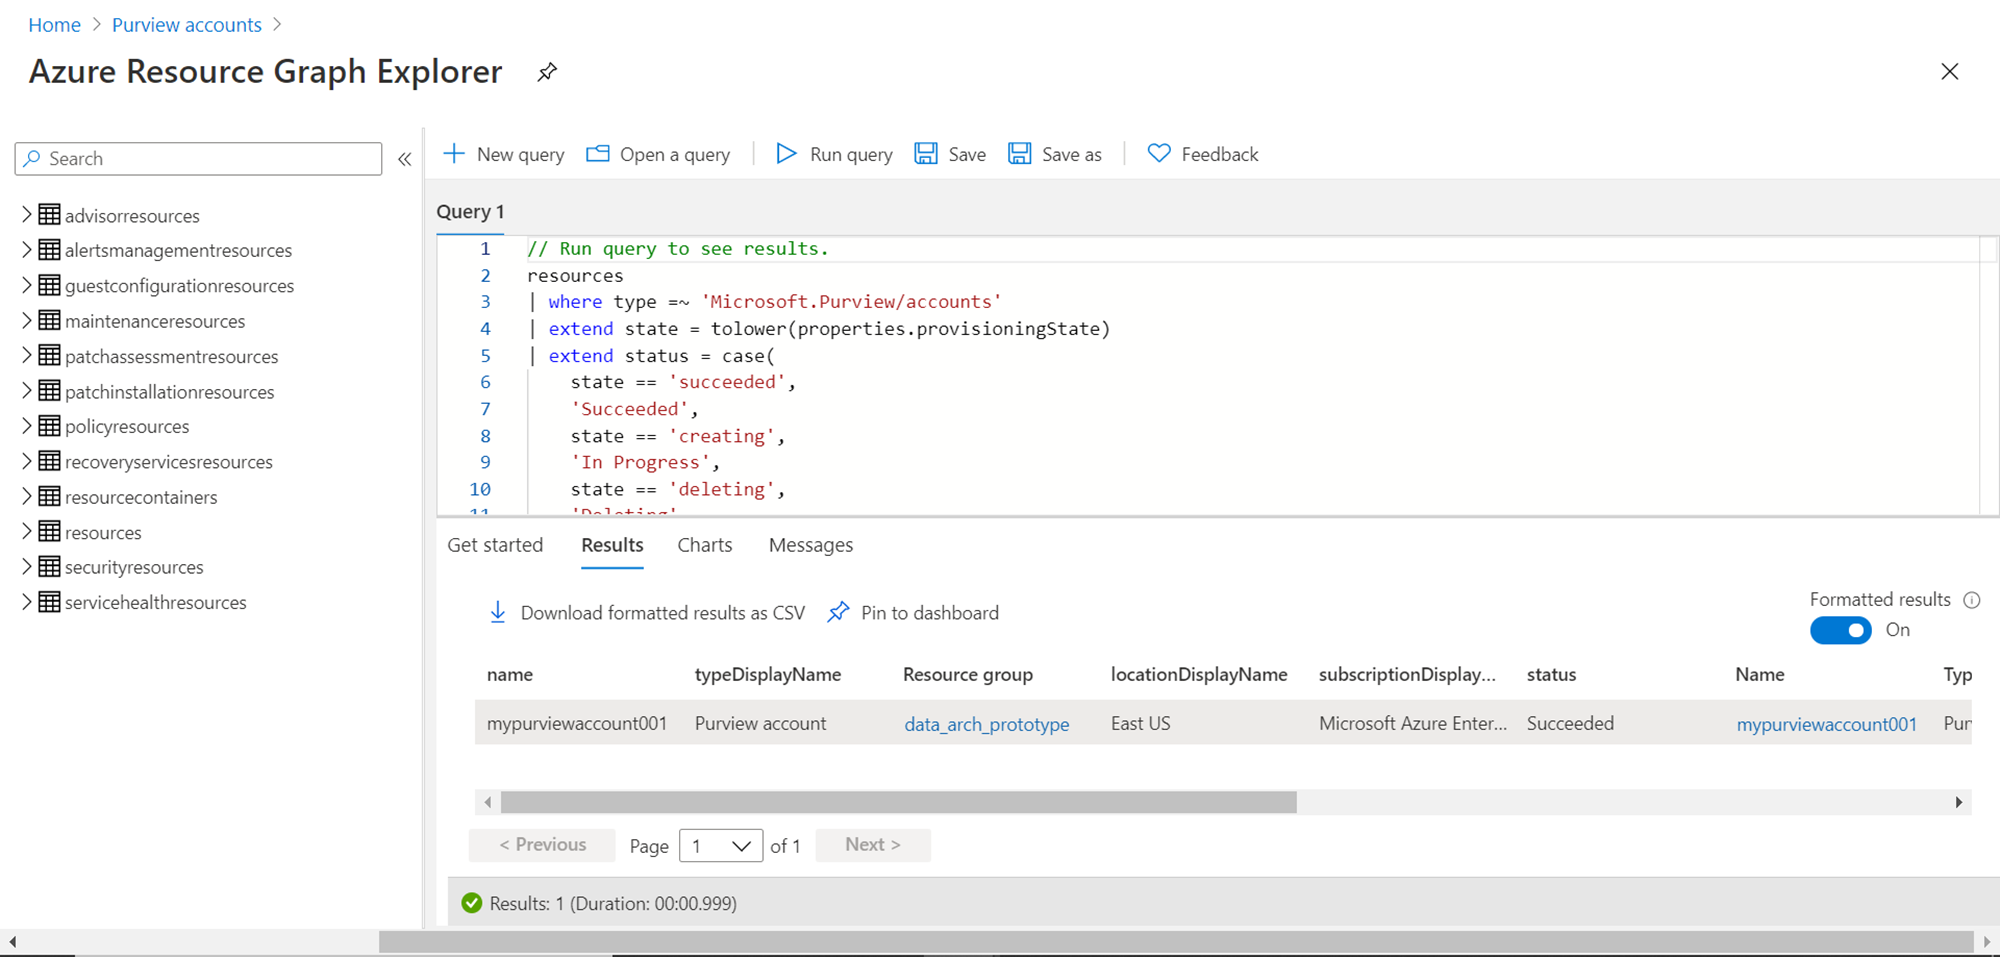
If you click on the Run Query button, you would find the results which list the Azure purview account that we just created as shown below.
In this way, one can create and manage purview accounts and get started with it to use data governance, data cataloging, data maps, and other features provided by this service.
Conclusion
In this article, we understood the features or capabilities provided by the Azure Purview service. We created a new purview account step by step and learned some specific configurations we may need to make to successfully create a new account to the extent that we get access to the purview studio, to get started with using this service.
Table of contents
| Getting started with Azure Purview for Data Catalog and Governance |
| Getting started with Azure Purview Studio |
| Cataloging metadata with Azure Purview |
| Using Azure Purview to analyze Metadata Insights |

He has worked internationally with Fortune 500 clients in various sectors and is a passionate author.
View all posts by Rahul Mehta
- Finding Duplicates in SQL - February 7, 2024
- MySQL substring uses with examples - October 14, 2023
- MySQL group_concat() function overview - March 28, 2023