In this article, we will discuss the essentials of the SQL unit testing and then we will explore how to apply SQL unit testing methodology in Azure SQL Database with help of SQL Server Data Tools (SSDT). In particular, this article will focus about unit test theory in terms of SQL Server database development aspect and illustrate SQL unit testing with a detailed example.
Unit Test:
Unit testing is used to check basis functionality and behavior of the smallest and independent part (function, method or etc.) of the code blocks that performs certain operations. In modern software development approaches, unit testing plays a key-role because unit tests directly affects code quality. On the other hand, when we look at unit testing in terms of continuous integration and continuous development approach, the entire application code can be tested before the production deployment process with help of unit test methods. If any unit test returns fail, we can automatically cancel the deployment process.
Database Unit Test:
Now let’s review the basic concept of unit testing concept with a focus on SQL unit testing. The SQL unit testing approach allows us to test individual and programmable part of database objects such as stored procedures, functions, triggers and schema. The advantage of SQL unit testing is to develop more robust database designs, because these objects have already been checked before production deployment, so SQL unit testing process allows us to minimize the errors which are related to database objects. Assume that we are developing a stored procedure and we know that it will not return any rows, so we can configure a test condition to verify this behavior of the stored procedure and then it can be tested according to this condition as part of a review of the database, or latest database changes.
Prerequisites
In this article we will use the following tools:
Visual Studio 2017: It is an integrated development environment (IDE) which allows us to develop various project types in different programing languages.
SQL Server Data Tools: It is also known as SSDT, another required tool to develop SQL unit testing projects. SSDT allows us to develop SQL Server database projects and it also provides Analysis Service, Reporting Service and Integration Service projects.
Azure SQL: It is a cloud based relational database that can be use database as a service so that we can use Azure SQL database without any physical hardware or on premise-installation.
Steps
The following SQL unit testing demonstration will be completed in the below three phases:
- Import Azure SQL Database to SQL Server Database Project: In this phase, we will connect to Azure SQL database and import Azure SQL database objects to database project
- Add New Stored Procedure to SQL Server Database Project: In this phase, we will add a new stored procedure to database project
- Create SQL Unit Testing: In this last phase, we will develop a SQL unit test project and then we will test a stored procedure which was added in the previous phase
Importing an Azure SQL Database Schema to a SQL Server Database Project in SSDT
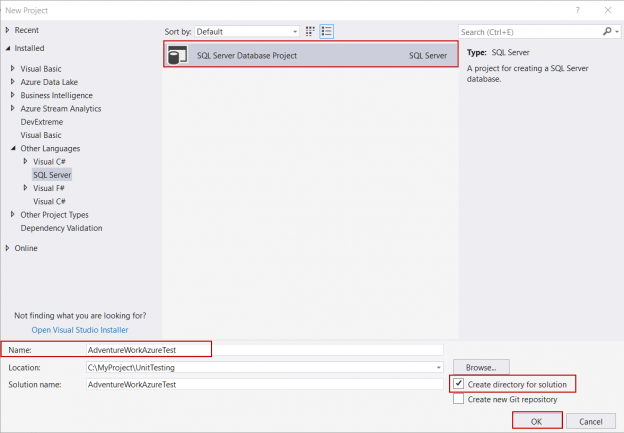
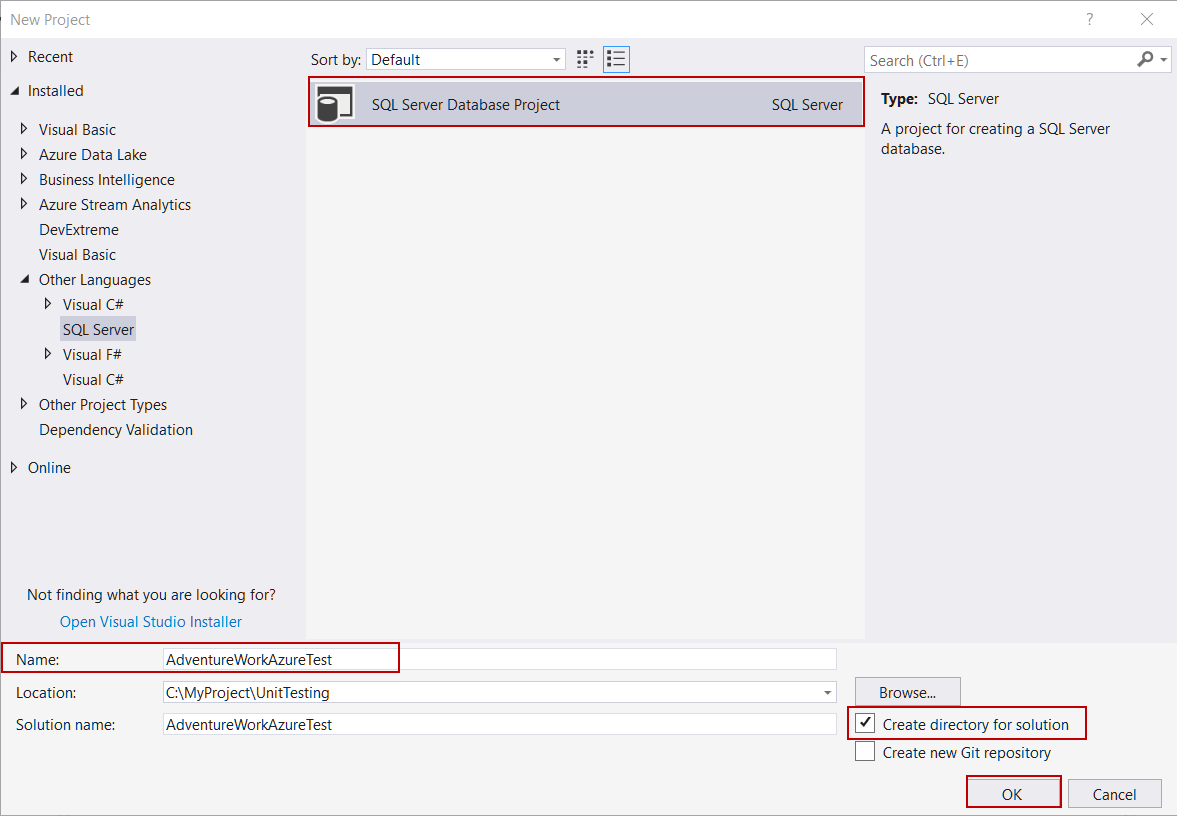
In this first step, we will launch Visual Studio and then add a new SQL Server Database Project in SSDT. We will give a name to our database project and then check Create directory for solution. After that click OK so that our database project will be saved to specified location. If you check Create new Git repository, it allows us to track and save our project into Git source control.
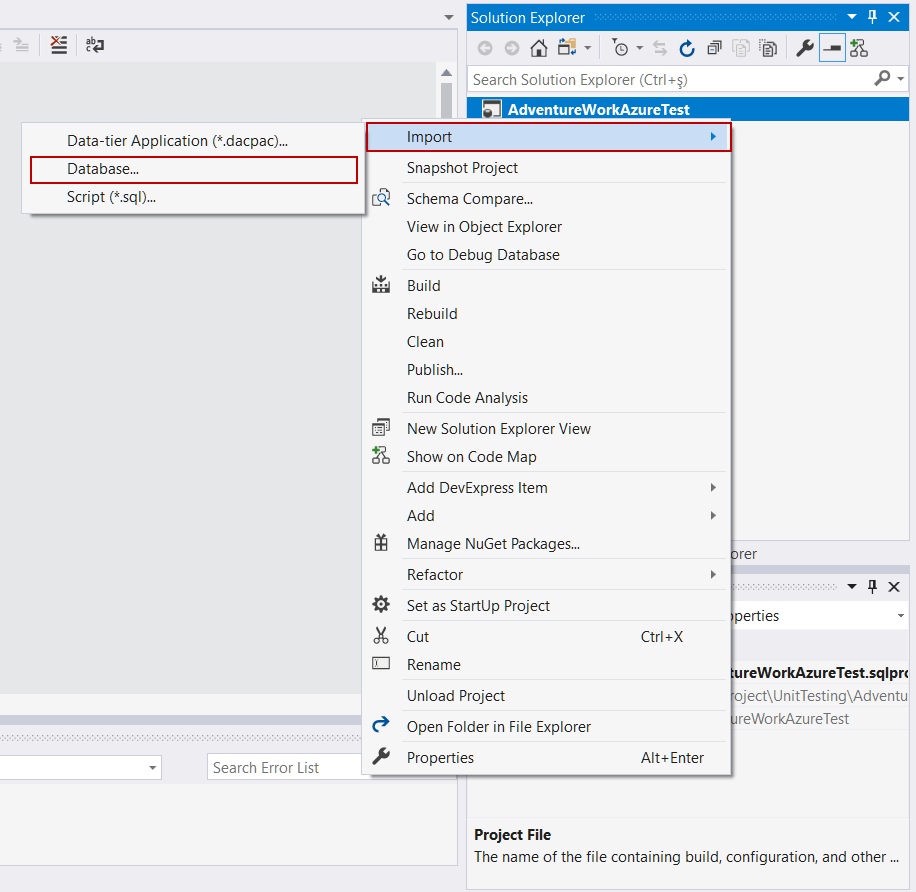
In the Solution Explorer window in SSDT, we will right click the database project name and select database import method in the context menu. In this option, Visual Studio allow us two types of database importing method option. First one is Data-tier Application option which is also known as dacpac. Dacpac is a zipped deployment package which contains the database schema and other database objects definitions in xml files. The most significant benefit of this package is portability so we can deploy our database to any SQL Server instance and also we can deploy dacpac file to Azure SQL. Another method is to connect to database and then import database schema and object definitions from database server. We don’t have Azure SQL database dacpac file therefore we will choose this method. Actually, importing database operation process reads database schema and other object definitions from the source database and then creates a dacpac file under bin folder of database project so that Visual Studio performs deployment process through this dacpac file.
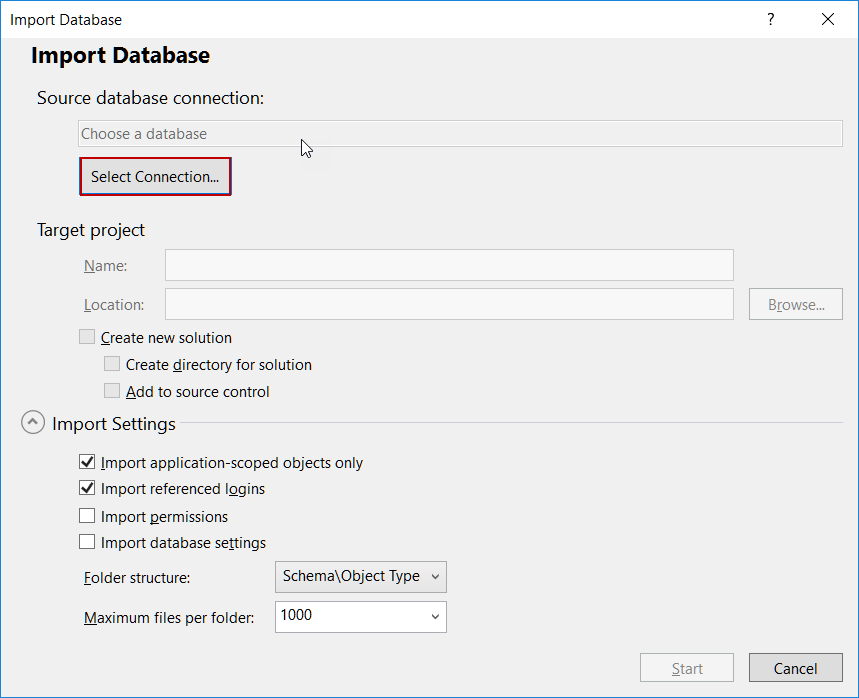
In the Import Database screen, we will click Select Connection and then connect to Azure SQL database in SSDT with proper credentials.
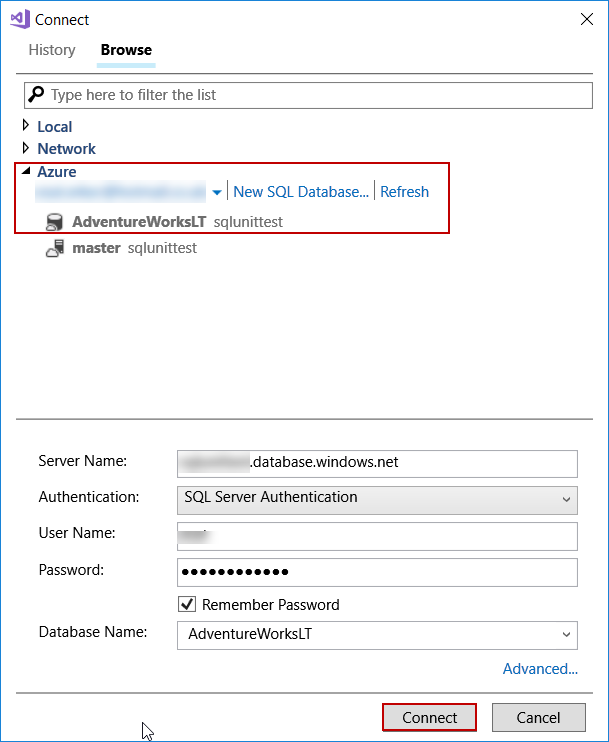
We will navigate and expand Azure tab then fill the credential options of the database connection and then click Connect.
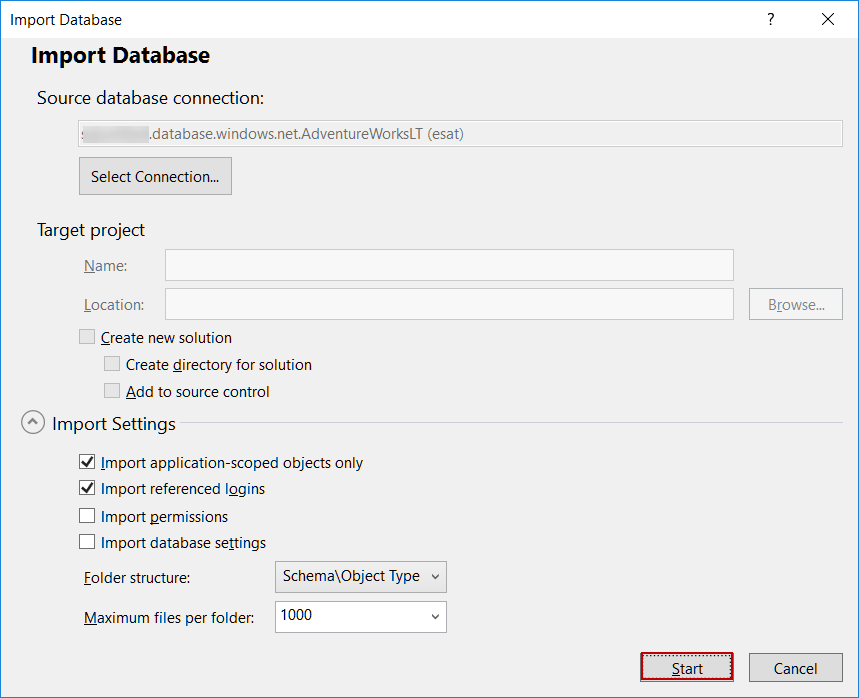
And finally, everything is ready to start importing database schema and object definitions from source Azure SQL database to database project. We will click Start in SSDT to begin importing database schema process.
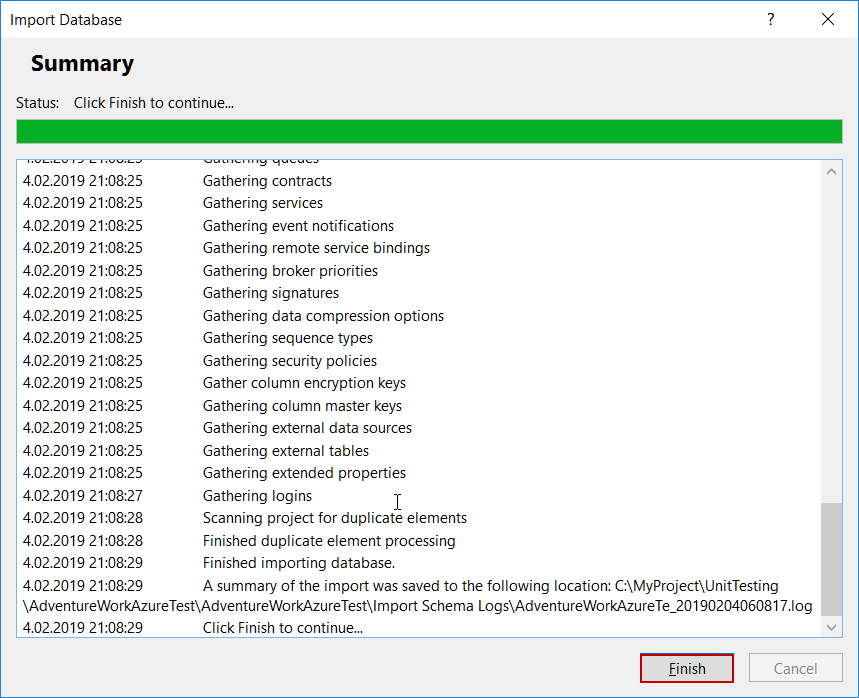
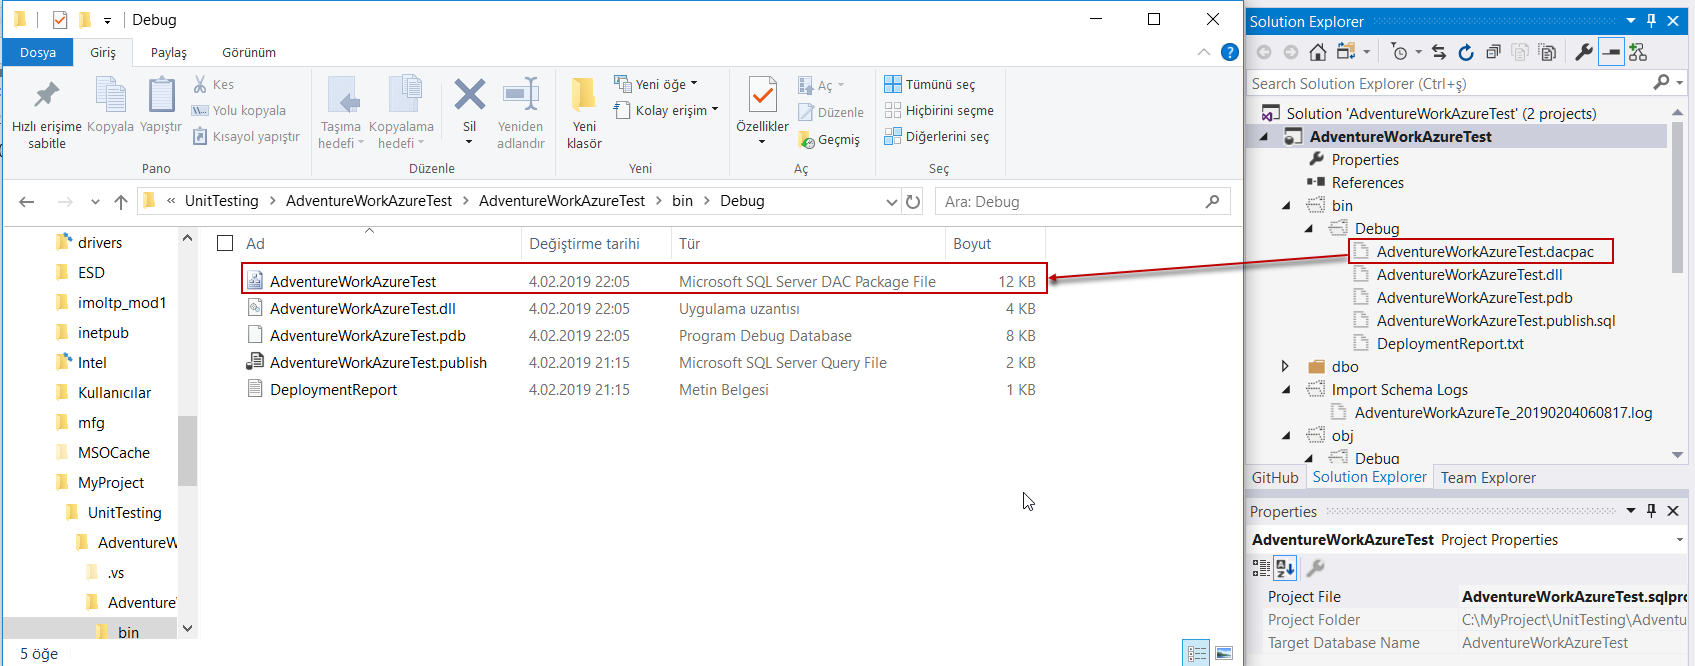
As already we noted that, Visual Studio created a dacpac package under the bin folder and every schema and object details are stored in this file. You can also import this file manually into another database server. We will right click to project and then select Open Folder in File Explorer in SSDT.
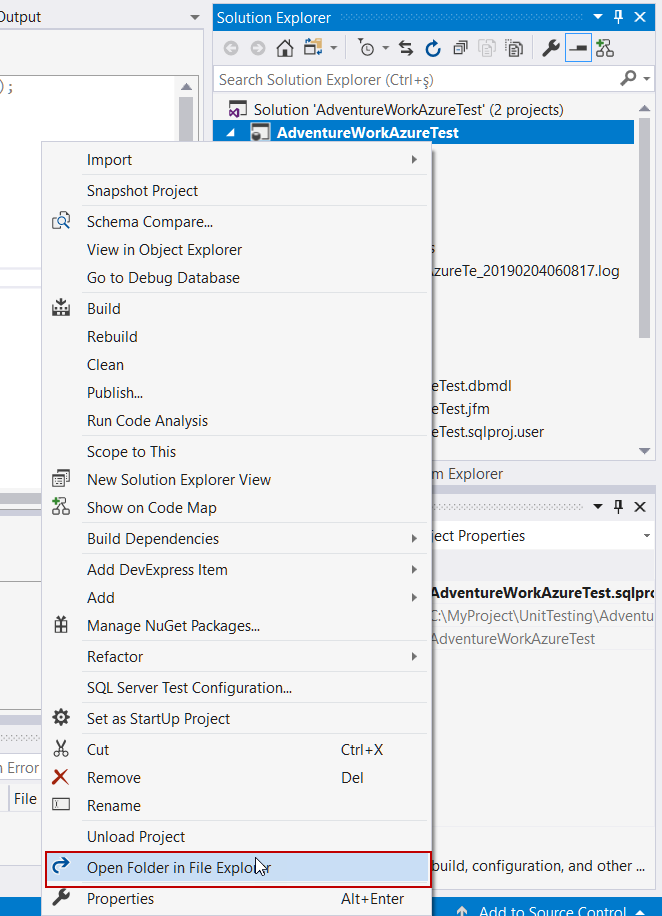
We will navigate to bin -> Debug folder in SSDT so that we can find out DACPAC package.
Now, we will change the target database property of database project because we will deploy it to Azure SQL. Right click in the database project and then select Properties option in SSDT and then change the target platform to Microsoft Azure SQL Database V12

We will rebuild project in order to check errors in the project and check on the output of the project.
Adding a new stored procedure to SQL Server database project in SSDT
In the solution explorer, all of the database objects will be imported after the schema importing.
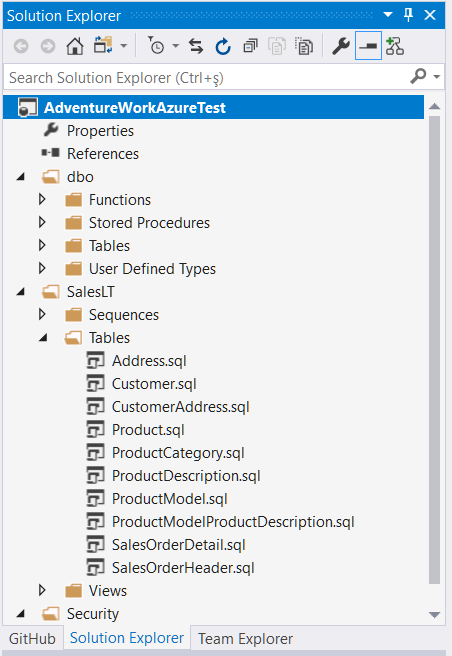
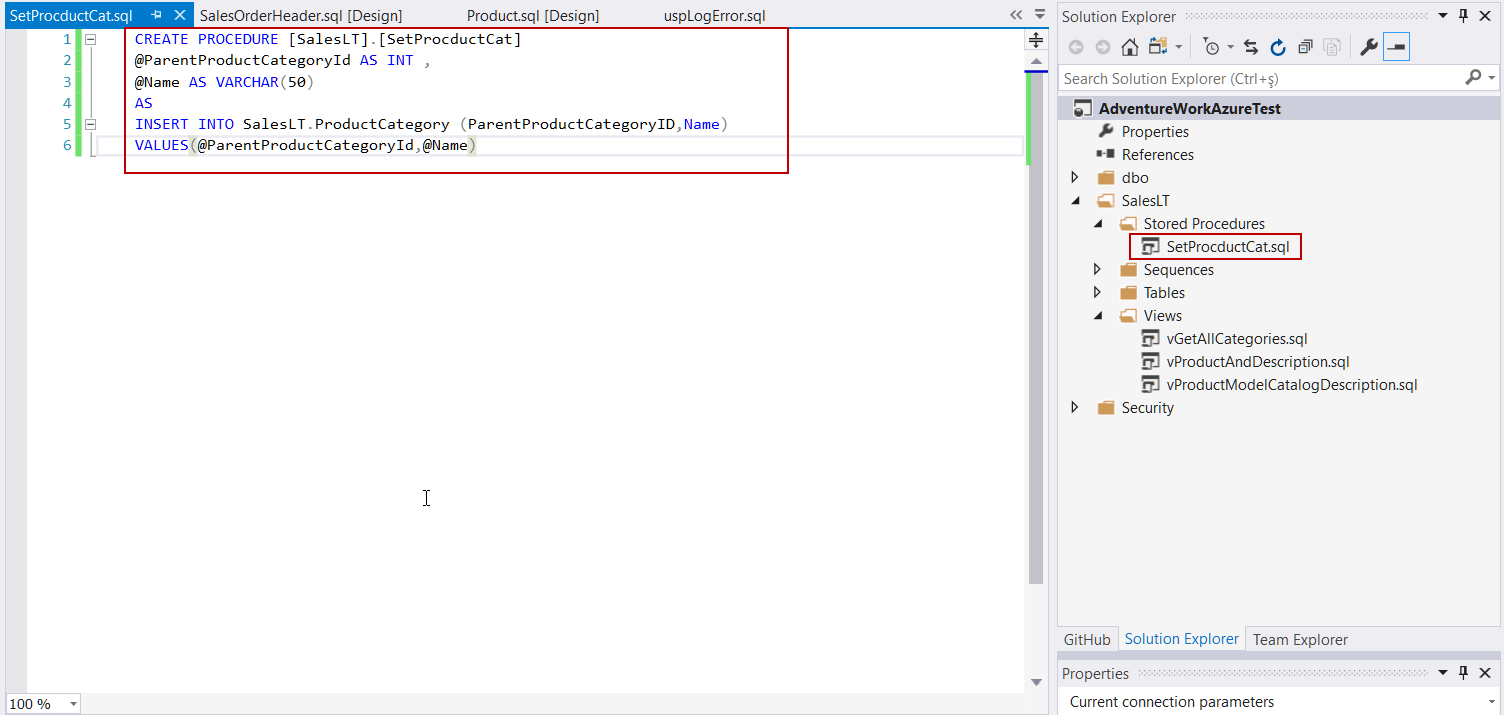
In this part, we will add a new stored procedure under SalesLT schema which inserts new a new row to ProductCategory table. Right click into stored procedure folder in the Solution Explorer panel in SSDT and then add new item.
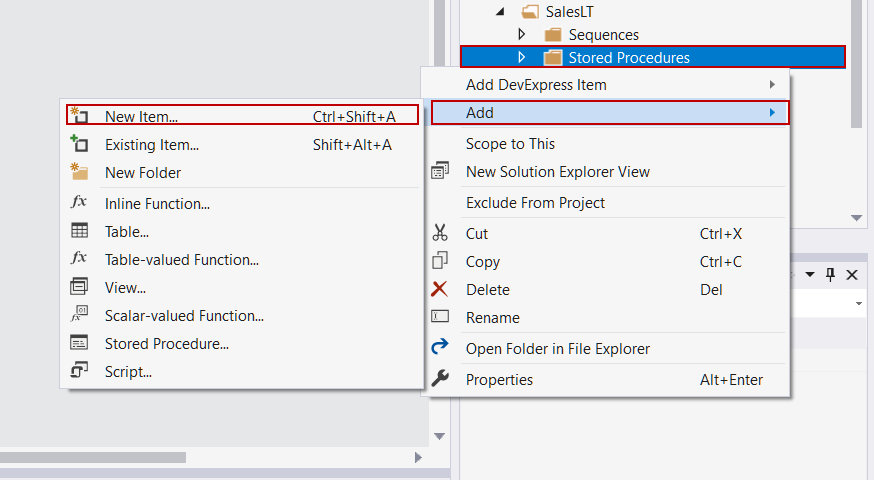
Chose the Stored Procedure in the object list and then give a name to this stored procedure.
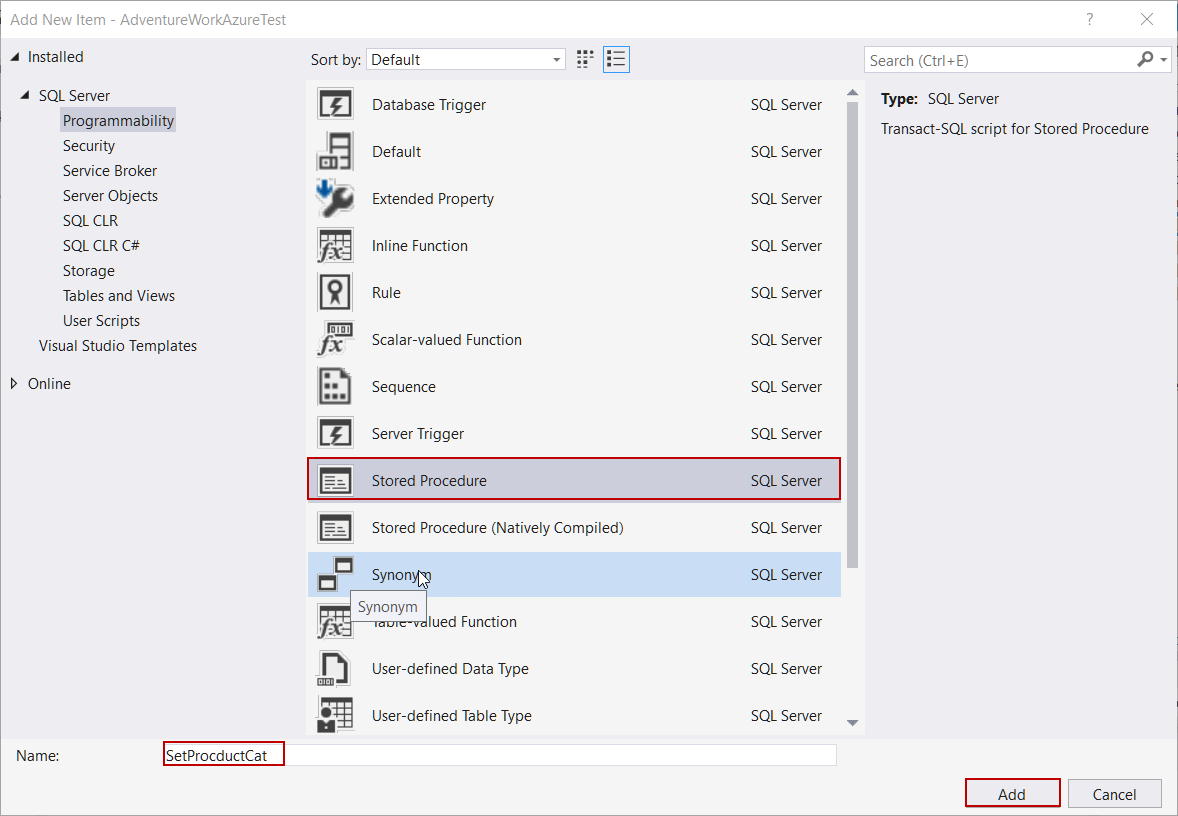
We will add the following script in order to create stored procedure.
|
1 2 3 4 5 6 |
CREATE PROCEDURE [SalesLT].[SetProcductCat] @ParentProductCategoryId AS INT , @Name AS VARCHAR(50) AS INSERT INTO SalesLT.ProductCategory (ParentProductCategoryID,Name) VALUES(@ParentProductCategoryId,@Name) |
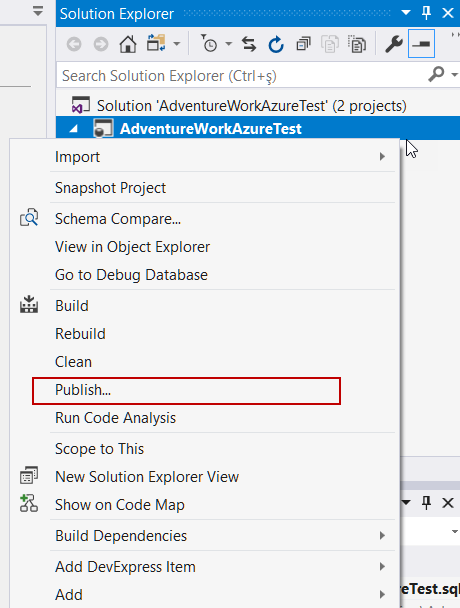
Now, we will make our first publish to Azure SQL database. Right click in the project and then select Publish.
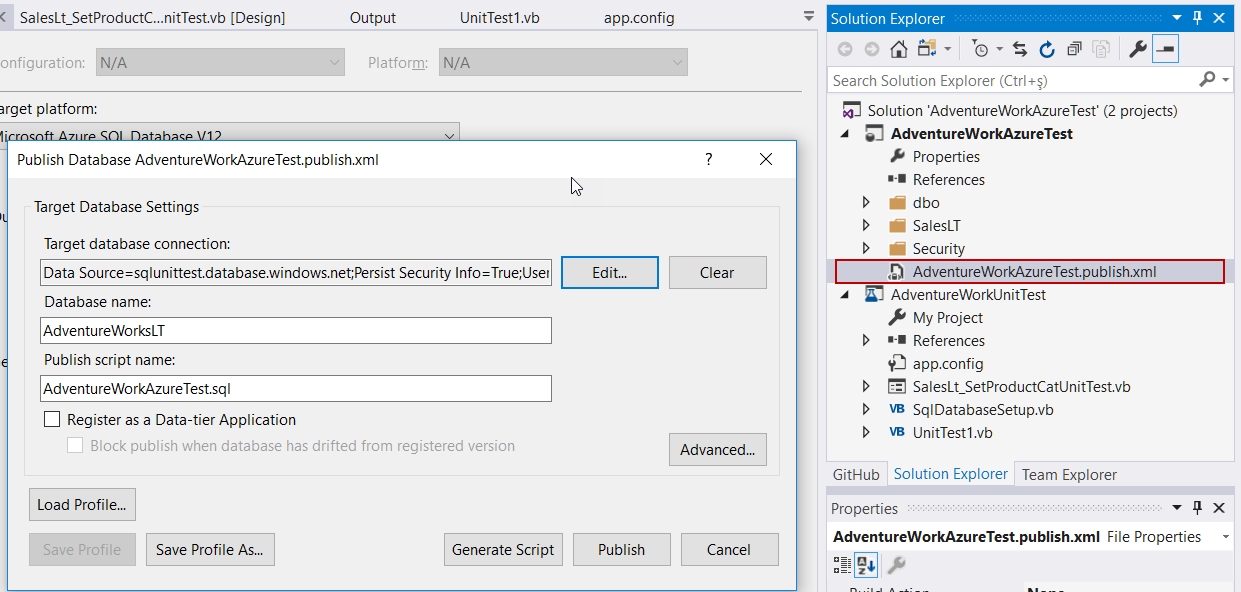
Publish Database window in SSDT will be open. In this window, we can configure the target database connection and save this configuration through Create Profile option.
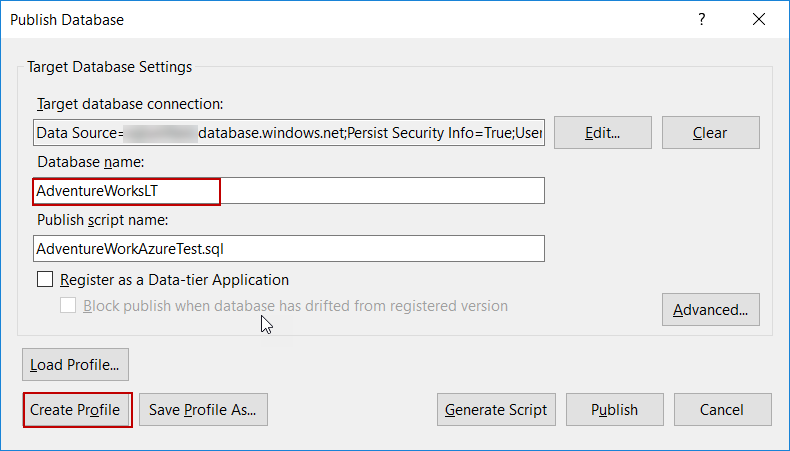
When you click Create Profile button, Visual Studio automatically creates publish.xml file which stores the credentials and other options. When you double click this file Publish Database screen will be reappear.
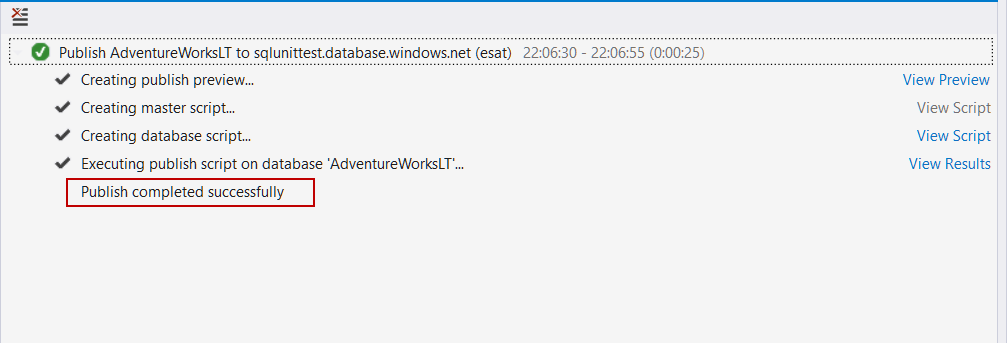
The publish operation will be completed successfully.
Creating SQL Unit Testing in SSDT
In this section, we will focus to how to create and configure SQL unit testing project with help of SSDT. In the previous parts we created a database project and then we added a new stored procedure. However, we don’t have any idea about this stored procedure functional behaviors. For this reason, we need to add unit test to check its behavior. In generally, SQL unit testing is based on three phases and these are;
- Pre-Test: In this step we can check any required conditions before the test method. For our test, we will delete particular rows which we will insert later in unit test
- Test: In this step, we can specify and add the test conditions
- I want to add a tip in here, you have to add a well-defined and clear explanations comments to test method because this description will help other developers to figure out to main idea of the test method. On the other hand, a well-prepared test documentation will take a significant advantage during to unit test development process because it will be hand-guide of unit test
- Post-Test: In this step, we can specify required operations after the test method
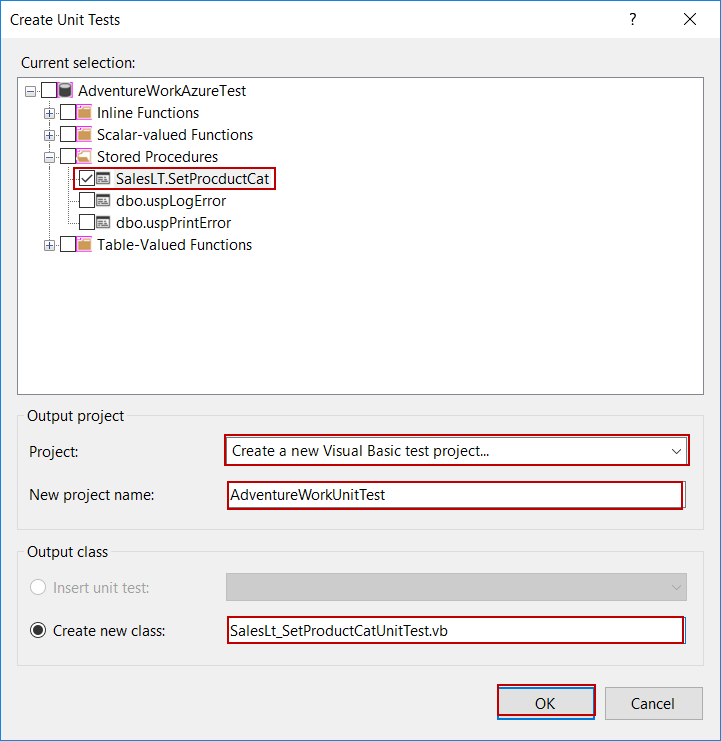
Now, let’s return to our SQL unit testing demonstration. We will right click to stored procedure and click Create Unit Test which we created in the previous steps. In the Create Unit Tests screen we will give a name to unit test project and select programing language of the test project. We can select C# or Visual Basic in SSDT.
After these steps, SQL Server Test Configuration screen will appear. In this screen we will specify the connection string for test project and also we will check to automatically deploy the database project before unit tests are run. This option allows us to deploy the database project before running unit test.
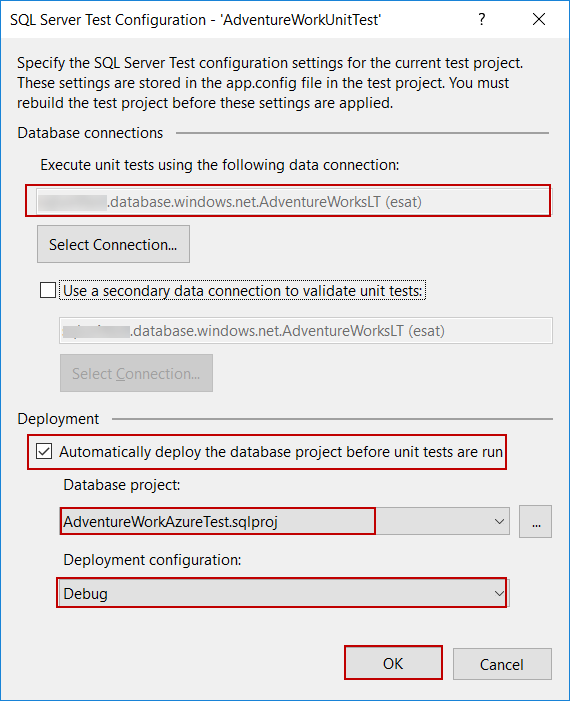
This setting is stored into app.config file of test project so that you can edit this setting according to yourself.
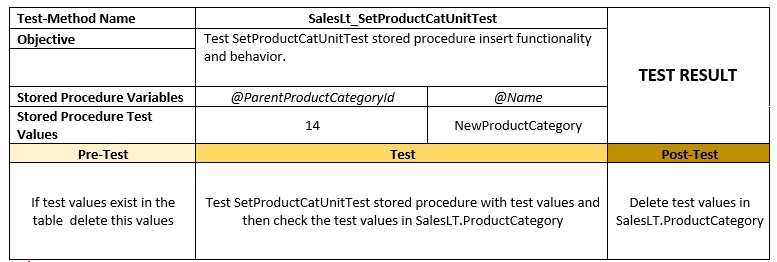
Visual Studio SSDT will automatically create a test template however we need to change this unit test method. We will develop the test method according to following sample test document.
We will select Pre-test option in the test condition combobox then add the following query. We will also add a little definition regarding to test document.
|
1 2 3 4 5 6 7 8 9 10 11 |
/* If test values exist in the table delete this values in Pre-Test Test Values : @ParentProductCategoryId =14 @Name =NewProductCategory */ DECLARE @ParentProductCategoryId AS INT = 14 DECLARE @Name AS VARCHAR(50) = 'NewProductCategory' DELETE FROM SalesLT.ProductCategory WHERE ParentProductCategoryID=@ParentProductCategoryId AND Name=@Name |
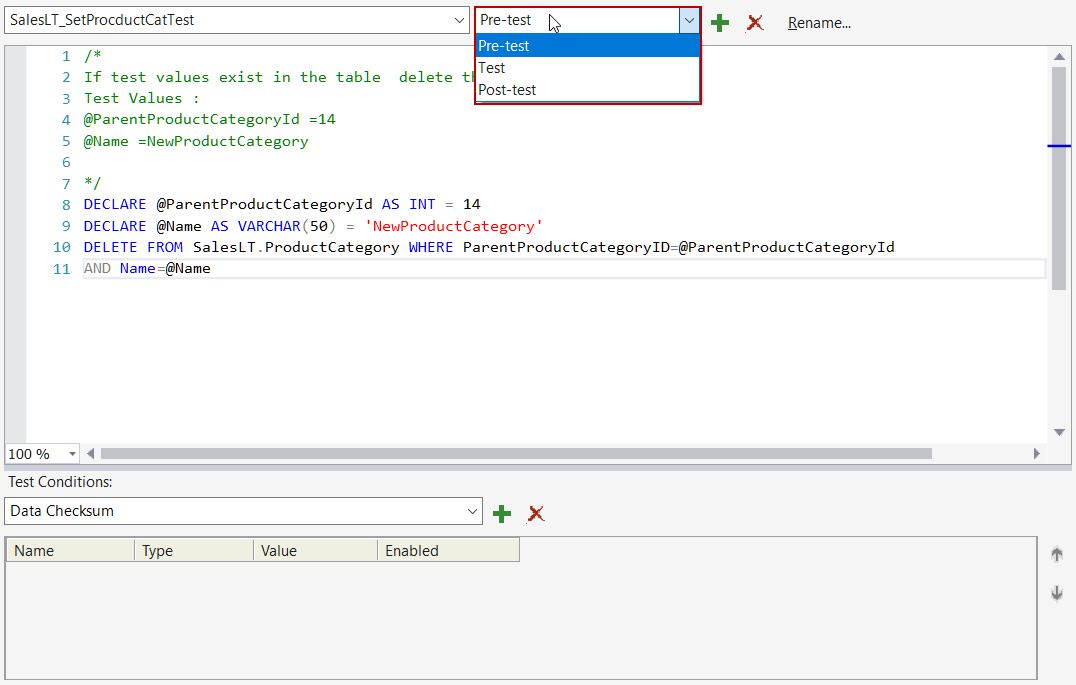
Visual Studio offers various predefined test conditions. These are:
Data Checksum: This test condition compares expected result and set row values and resultset values which returned from test. If this resultsets values don’t match it will be a fail.
Empty ResultSet: This test condition expects empty result set if tested.
Execution Time: This test condition compares the tested method execution time and expected execution time. If tested method execution time takes longer than the expected execution time, it will be fail. The default value of this test condition is 30 second.
Expected Schema: This test condition compares expected result set schema (columns and data types) and result set schema which returned from test. If this resultsets schema don’t match, it will be fail.
Not Empty ResultSet: This test condition expects non-empty result set from test method.
Row Count: This test condition compares resultset row number and expected row number.
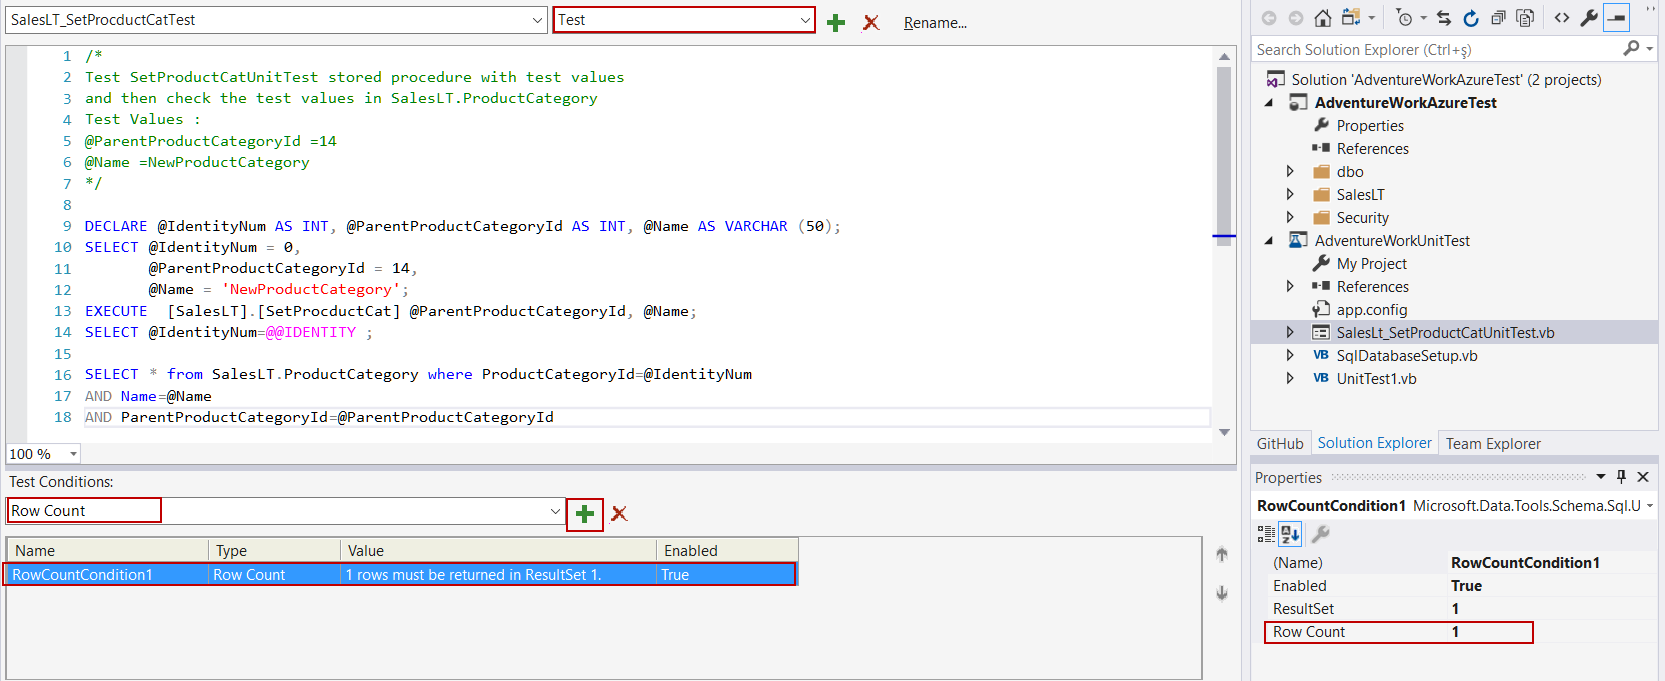
Scalar Value: This test condition compares expected value to particular value which returns from test method. In this test method we can configure column number and row number. Now, we will change the combobox to Test.
The test condition must be Row Count because we have to check to insert functionality. In the Row Count condition, the Row Count property must be set as 1.
|
1 2 3 4 5 6 7 8 9 10 11 12 13 14 15 16 17 18 |
/* Test SetProductCatUnitTest stored procedure with test values and then check the test values in SalesLT.ProductCategory Test Values : @ParentProductCategoryId =14 @Name =NewProductCategory */ DECLARE @IdentityNum AS INT, @ParentProductCategoryId AS INT, @Name AS VARCHAR (50); SELECT @IdentityNum = 0, @ParentProductCategoryId = 14, @Name = 'NewProductCategory'; EXECUTE [SalesLT].[SetProcductCat] @ParentProductCategoryId, @Name; SELECT @IdentityNum=@@IDENTITY ; SELECT * from SalesLT.ProductCategory where ProductCategoryId=@IdentityNum AND Name=@Name AND ParentProductCategoryId=@ParentProductCategoryId |
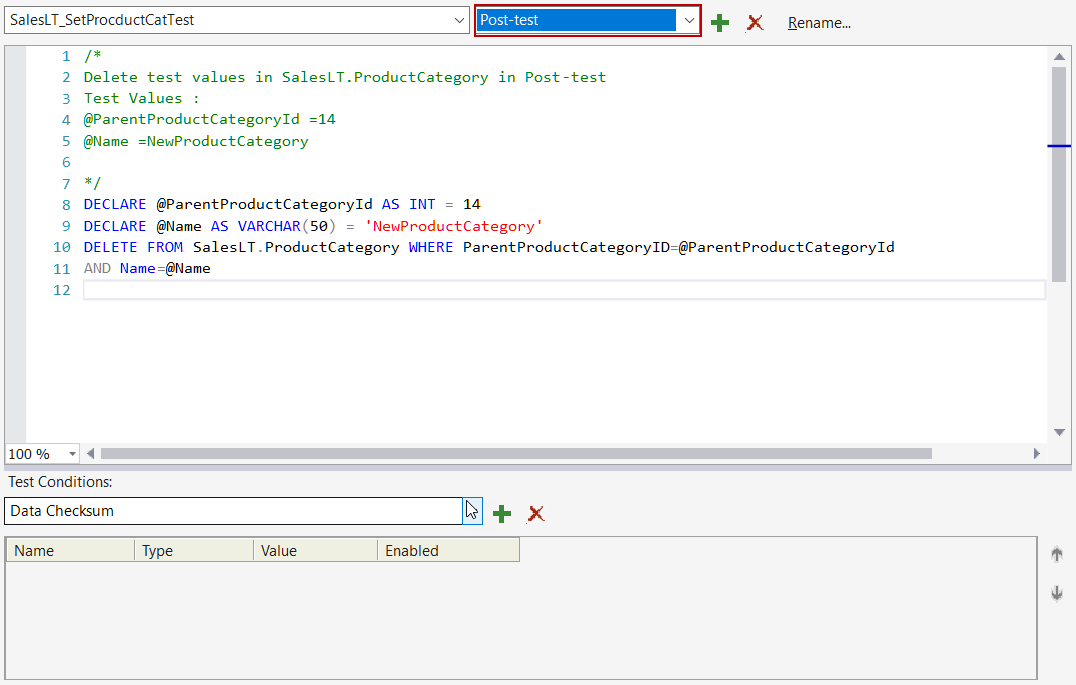
Lastly, we will add Post-Test method in SSDT and then delete the inserted values from table.
|
1 2 3 4 5 6 7 8 9 10 11 |
/* Delete test values in SalesLT.ProductCategory in Post-test Test Values : @ParentProductCategoryId =14 @Name =NewProductCategory */ DECLARE @ParentProductCategoryId AS INT = 14 DECLARE @Name AS VARCHAR(50) = 'NewProductCategory' DELETE FROM SalesLT.ProductCategory WHERE ParentProductCategoryID=@ParentProductCategoryId AND Name=@Name |
Let’s run our unit test. In Visual Studio SSDT you will find Test Menu or Test explorer so that you can run the unit test. Let’s use test explorer and then click Run All test method.
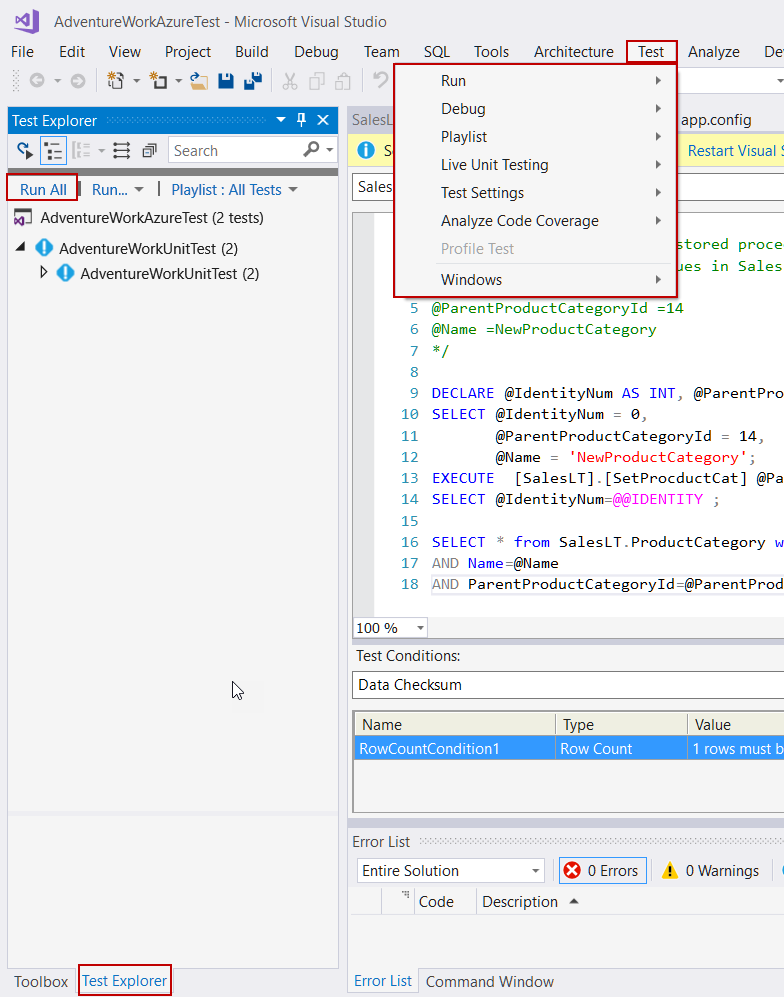
At first, Visual Studio SSDT deploys the project to target database and then it will run unit test methods.
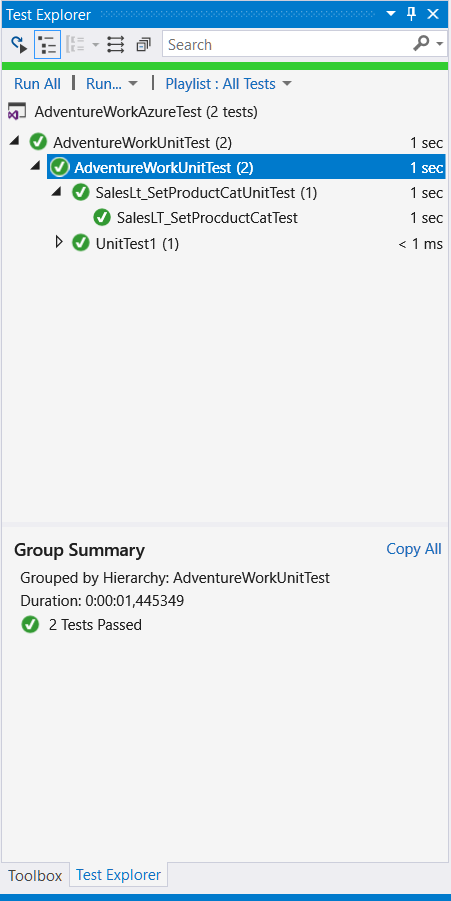
Now, we will add Expected Schema test condition to check result set column names and datatypes.
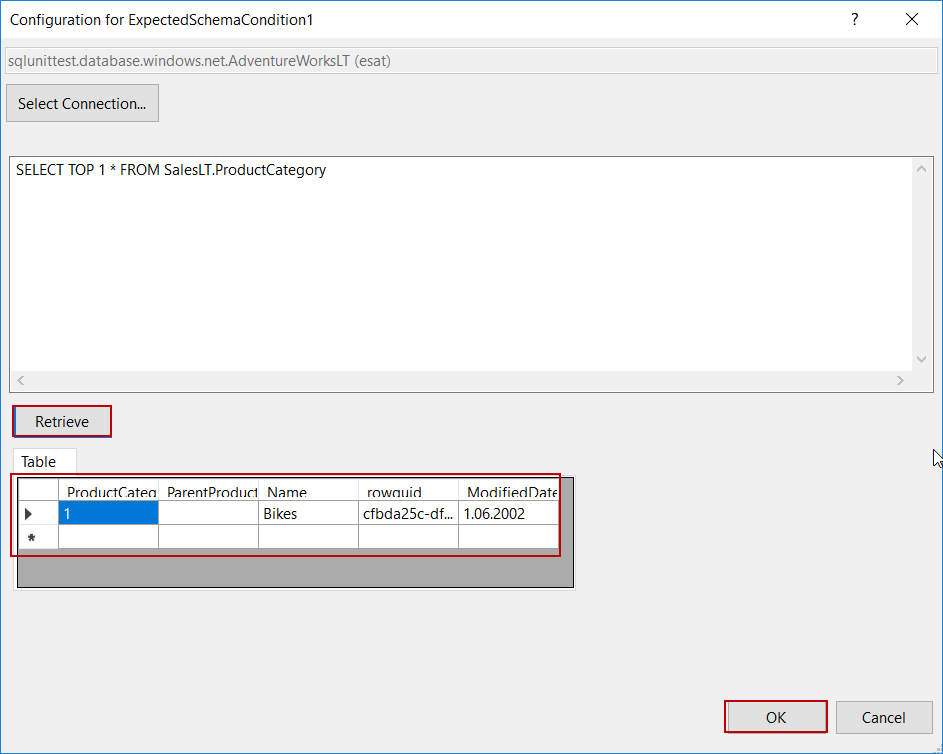
We will add new test condition which is expected schema and then click Configuration (…) button in the properties of the expected schema test condition.
We will click a Select Connection… and configure a database connection then we will set the expected resultset columns and datatypes through the following query. In this point, the main idea is to compare expected resultset schema with test method resultset schema. According to our stored procedure, inserted row columns and datatypes have to match any row of the SalesLT.ProductCategory table.
We will use the following query in the query and then click Retrieve in SSDT.
|
1 |
SELECT TOP 1 * FROM SalesLT.ProductCategory |
We will re-run the test so that click Run All.
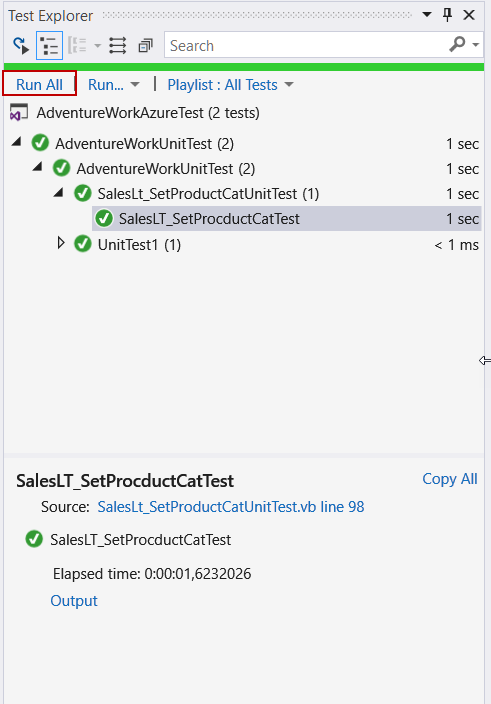
Finally, our all test method passed.
Conclusion
In this article we mentioned about SQL unit testing in SSDT and also we learnt how to develop and run unit testing in Visual Studio. SQL unit testing implantation provides various advantages to us such as improve coding quality, reduce development costs and degrade the defects of database schema and objects.
Table of contents
- SQL Performance Tuning tips for newbies - April 15, 2024
- SQL Unit Testing reference guide for beginners - August 11, 2023
- SQL Cheat Sheet for Newbies - February 21, 2023

