
In my earlier tutorial, I explained how to install SQL Server Management Studio in few easy steps. In this tutorial, I shall demonstrate the configuration of SQL Server Management Studio to reap the best of it as well as to make the work quite simple. In addition, I will walk you through the multiple settings of SQL Server Management Studio configuration, which can help you build a conducive environment and prevent frequent configurations. You will also learn the best / most efficient way to find the right feature at the right place at the right time, because this is one of the biggest challenges for a newbie.
Let me demonstrate how to configure SQL Server Management Studio (SSMS) in seven easy steps.
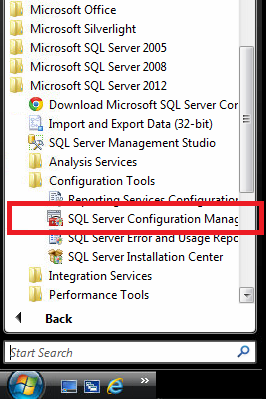
Step 1 – Open SQL Server Configuration Manager:
Go to Start >> All Programs >> Microsoft SQL Server 2012 >> Configuration Tools >> SQL Server Configuration Manager. SQL Server Configuration Manager is a user friendly tool to manage the services related to SQL Server.
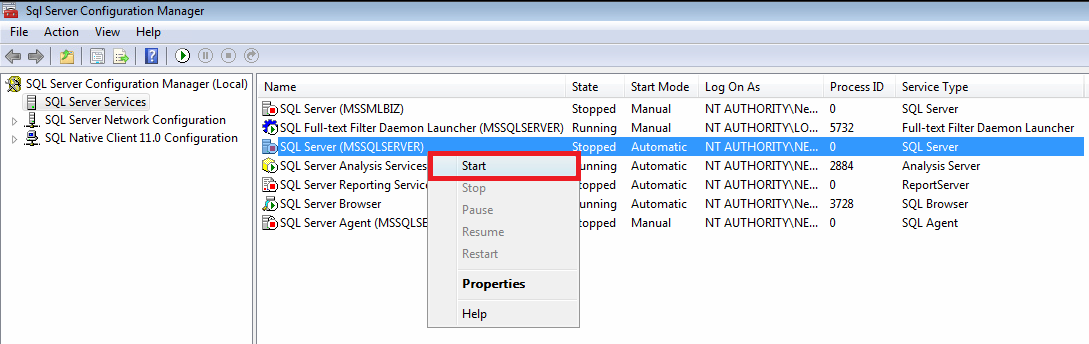
Step 2 – Start SQL Server Service:
Once you are inside SQL Server Configuration Manager tool, you can see a lot of services in multiple states (start, pause, running). In this step, check if SQL Server service is running or not. If not, start this service by selecting the service, right click and start. Ensure service status has been changed to Start mode.
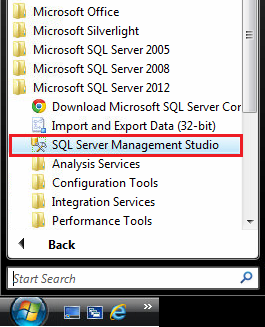
Step 3 – Start SQL Server Management Studio:
Open SQL Server Management Studio. Again select Start >> All Programs >> Microsoft SQL Server 2012 >> SQL Server Management Studio.
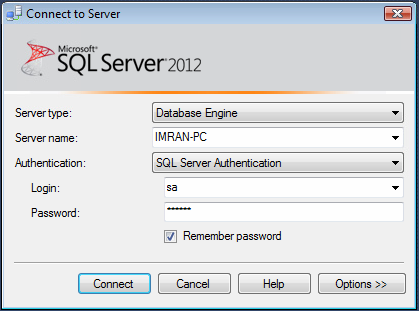
Step 4 – Provide Credentials:
Provide the credential of SQL Server which you intend to connect. If you would like to connect locally installed SQL server, you can place a dot instead of Server name and it will connect to that server. However, for the best practice you must enter the Server name, Login & password for SQL Server Authentication. But, in case of windows authentication, you DO NOT need login and password details, however you need to give sufficient access rights to windows login to connect to SQL Server. Just click on Connect.
Step 5 – Setup Environment:
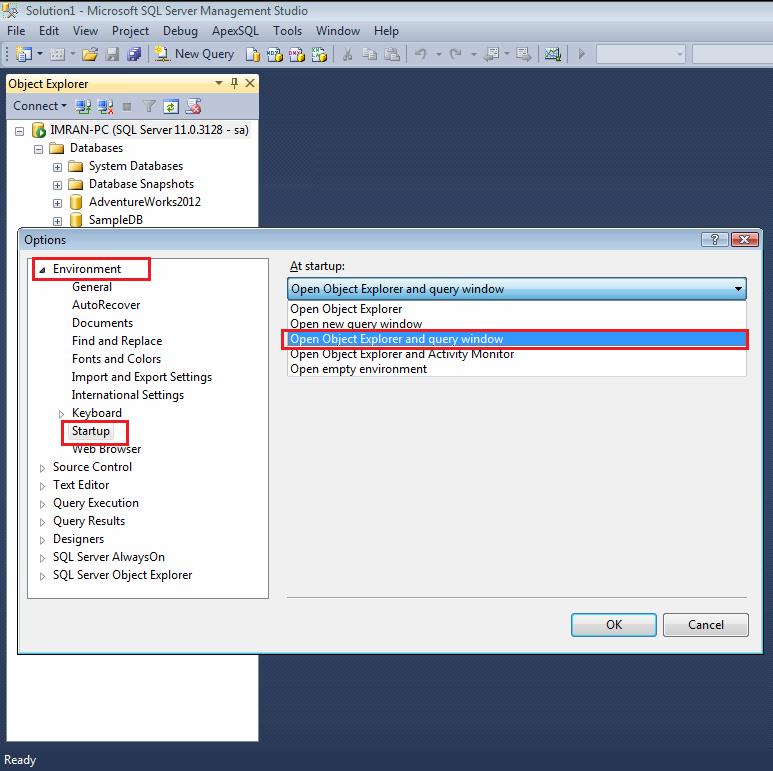
Once you login the SQL Server you can see the default environment of the SQL Server Management Studio. You can see Object explorer on the left hand side (LHS ) of the SQL Server Management Studio and on your right hand side (RHS), a blank area that we usually use for SQL query. This can be kept as a default option, but I recommend that you to go through the below startup options and select the one which best fits your environment. As I explained earlier, 1st option is the default one. However, I usually configure 3rd option in order to avoid opening of a new query window each time when connecting to SQL Server Management Studio. It automatically opens object explorer along with new query window.
- Open Object Explorer (This is the default option)
- Open New Query Window
- Open Object Explorer and new query (Recommended)
- Open Object Explorer and Activity Monitor
- Open Empty Environment

To achieve it, you need to select tools from the menu and further select options….. Once you select options, it pops up the options window, where you can configure lots of SQL Server Configuration that can make your SQL Server activities easier.
Let’s select startup option from the left hand side pane in the option windows & select Open Object Explorer and query window from the right hand drop down as shown below and Press OK.
Next time when you open SQL Server Management Studio, it will not only open Object explorer but also open a blank query window.
Step 6 – Setup Window Position:
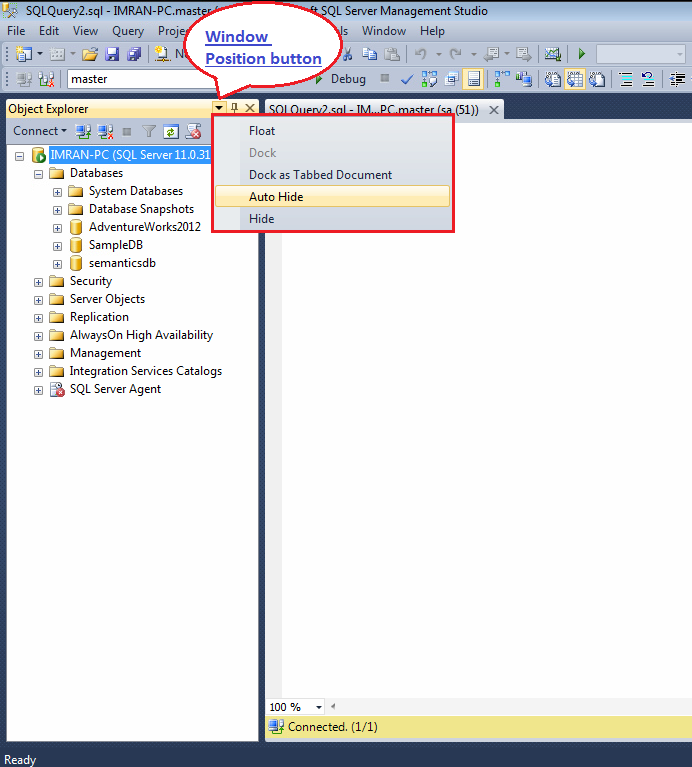
In this step, let’s review the window position button of any window in SQL Server and its options. This option is available in almost all Microsoft IDE (Integrated Development Environment), for example Visual Studio. Basically window position button allows you to set the position of any windows by providing below options. Please note that it is very important to set the position of these windows especially when working on multiple query windows and running short of space.
- Float
- Dock
- Dock
- Auto Hide
- Hide
Note: If you set it up incorrectly and you want to restore it on default option, you do not need to put much effort, just select Window menu, click Reset Window Layout.
Step 7 – Setup Keyboard Settings:
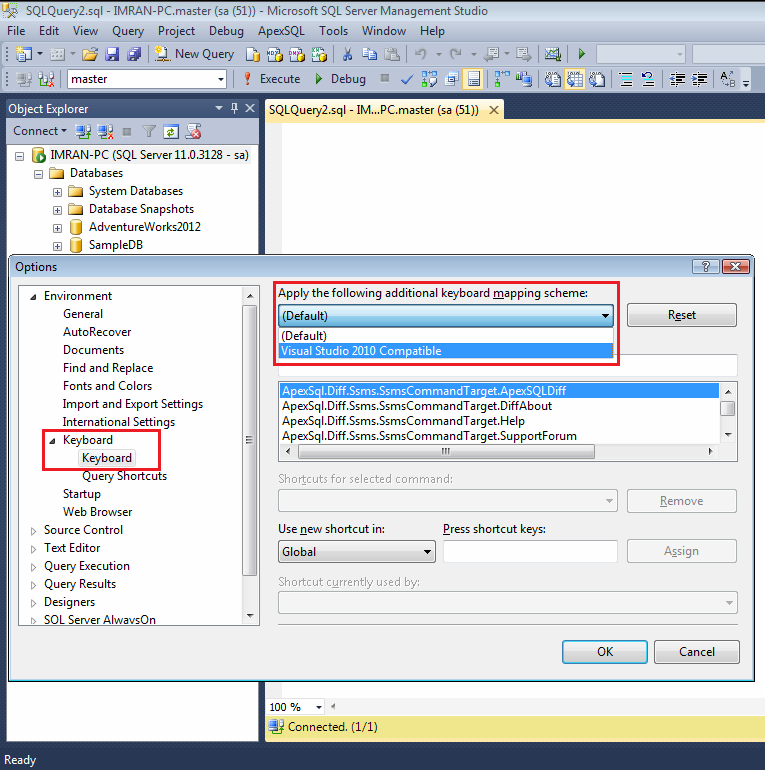
In this step, let’s discuss the Keyboard Shortcut Scheme & Query shortcut of SQL Server Management Studio. If you are a frequent user of visual Studio 2010 then I recommend that you set the Shortcut scheme to Visual Studio 2010 compatibility. Once setup, you will use the Visual Studio shortcut schema instead of the standard SQL Server Management Studio Shortcut. In order to do it, you need to select tools menu and options….. It will open options window. Once you are in the options window select Environment >> Keyboard >> Keyboard on the left hand pane and select Visual studio 2010 compatibility in the additional keyboard mapping schema on the right hand side.
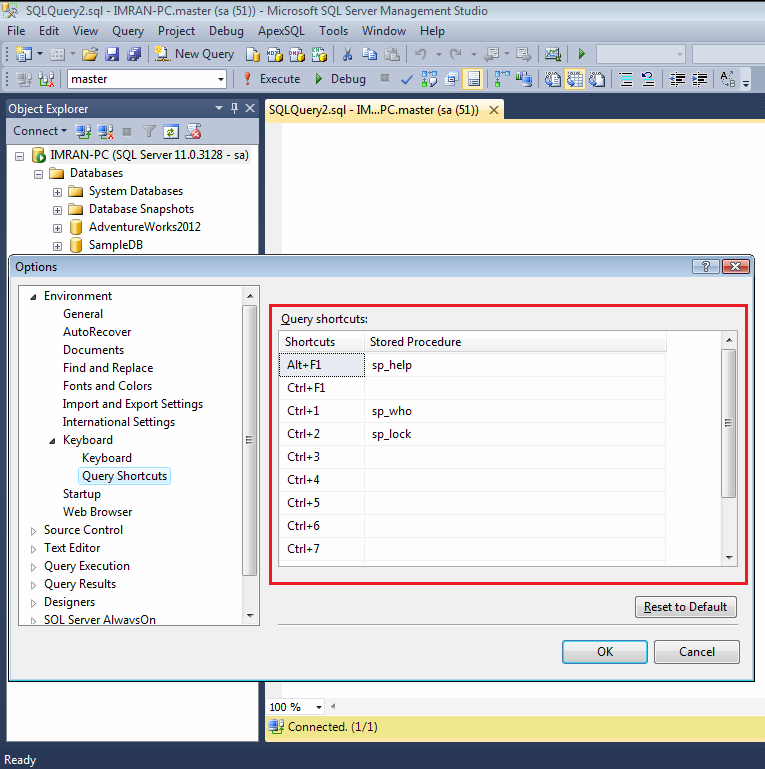
In addition to that you can also setup the query shortcuts in the same window. For that, you just need to select Environment >> Keyboard >> Query Shortcuts. In this window you can find few built-in shortcuts. However, you can define your own shortcuts to expedite your SQL work quickly. Please note that if you configure it incorrectly, you can restore to default at anytime by clicking Restore to Default button.
Conclusion:
I explained SQL Server Management Studio in few easy steps and focused on core configurations. However there are a lot of configurations that I could not cover in this tutorial but you can adjust those settings as per your requirement and can make your work much more efficient and easier.

He is not only passionate but has a proven ability to decipher intricacies and has authored over 350 articles. His spare time activities include swimming, football and surfing social networks
View all posts by Muhammad Imran