
Why is this installation so important? Like any other technology, in SQL Server too we need to focus on theoretical knowledge as well as hands-on practice and in order to achieve hands-on practice, SQL Server Management Studio (SSMS) is essential.
In this SQL Server Management Studio tutorial, I will demonstrate how to install SQL Server Management Studio (SSMS) in 12 easy steps. This tutorial will help you to perform the installation process of the SQL Server Management Studio (SSMS).
Step 1:
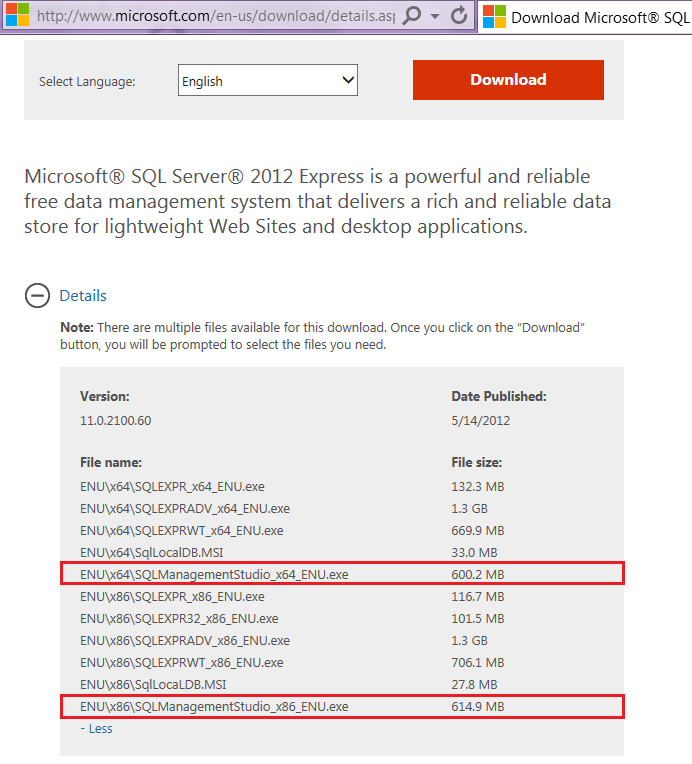
First of all you need to download SQL Server Management Studio (SSMS) installation files (SQLManagementStudio_x64_ENU.exe / SQLManagementStudio_x86_ENU.exe) from the SQL Server download page depending on your server type (x64,x86), and keep it in a separate folder.
Step 2:
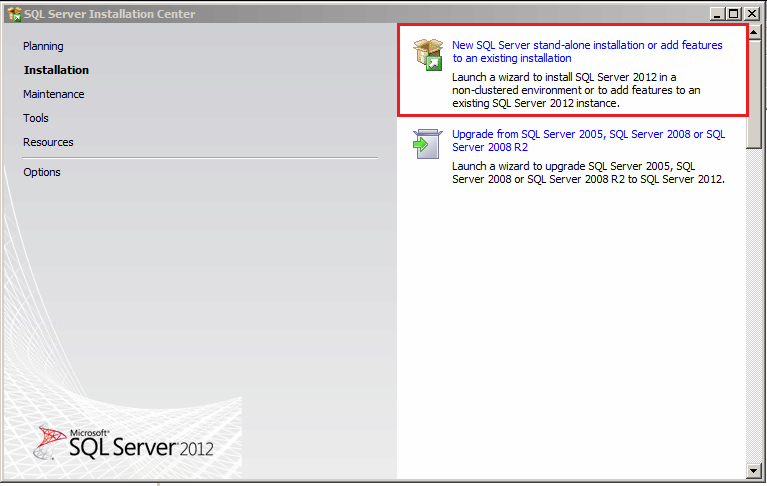
Once you downloaded the respective file as per your server type, you need to execute it. It will then take you to the first screen namely SQL Server Installation Center as shown below. This is the primary installation screen of SQL Server. Other SQL server tools installations can be launched from here as well. Once you are on this screen, you need to select “New SQL Server stand-alone installation or add features to an existing installation” to proceed with the installation.
Step 3:
Once you select the “New SQL Server stand-alone installation or add features to an existing installation” option, it will check the setup rules (pre-requisites) on the server and take you to the license terms screen. The license terms must be read and accepted like with any other application’s license terms. Please note that your server must pass the setup rules in order to proceed with the installation.

Step 4:
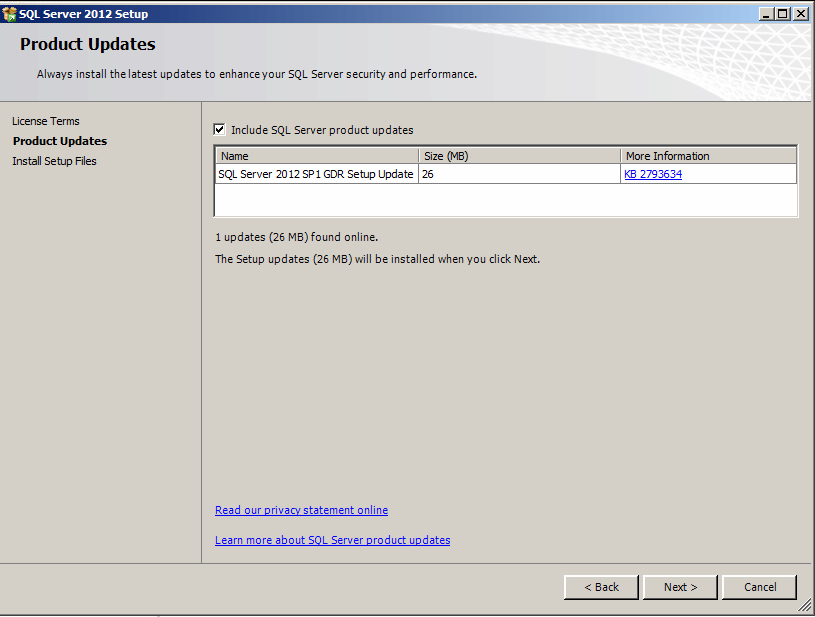
Once you accept the license terms, it is time to scan all the available product updates. The required updates, size and details will be displayed. However, if you need further details, you can select More Information which will take you to the support page where you will find all the details related to the updates. You can ignore these updates by deselecting the ‘Include SQL Server product updates’ option at this stage.
I highly recommend that you download these updates along with the installation. This step might take some time depending on the size of the update files.
Step 5:
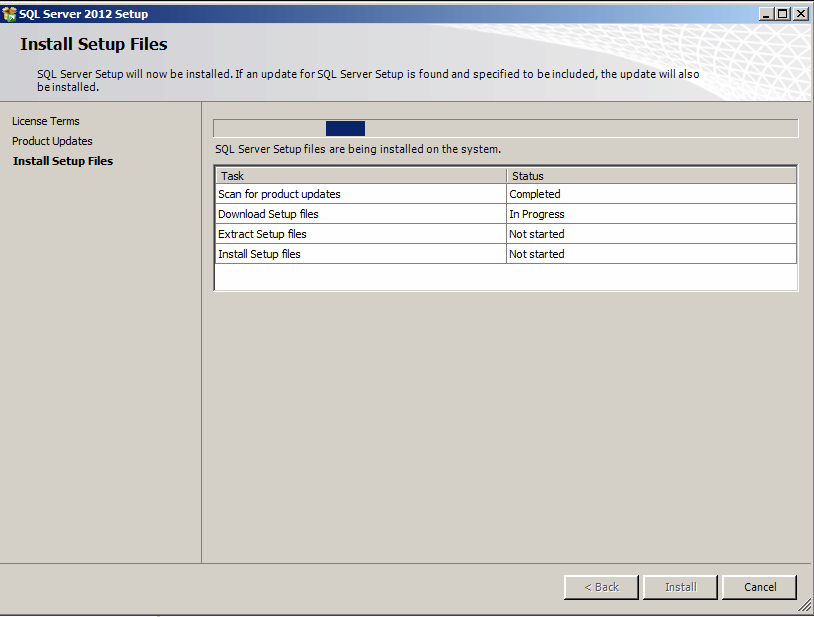
The next step is the Install Setup Files step, where SQL Server Management Studio (SSMS) setup will download, extract and install all necessary setup files to your server.
Step 6:
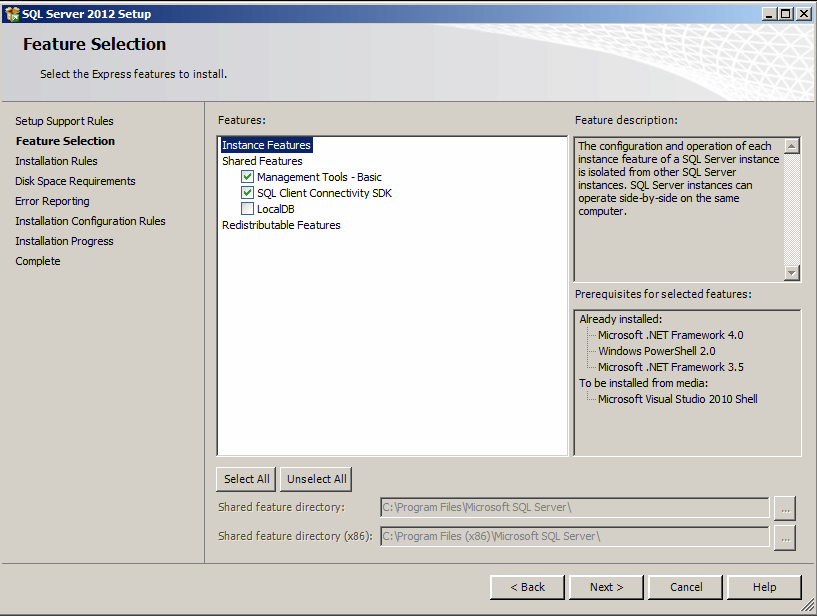
Once SQL Server Management Studio (SSMS) setup is done with the install setup files, it verifies the setup support rules in order to proceed. It then takes you to the feature selection screen. This is a very comprehensive screen which has detailed information about each feature. When we run the SQL Server Management Studio (SSMS) installation, it selects Management Tools by default, so you do not need to select anything here. In addition you can select Management tools – Basic. To get more information on this feature you can view the detailed feature description on right hand side.
This screen also gives you the ability to select and deselect all features in one go. This saves lots of time when you need to install multiple features. It also provides detailed information about the prerequisites, the selected features, which prerequisites have already been installed and which will be installed through this installation. You just need to click on the Next button to continue.
Step 7:
In this step, SQL Server Management Studio (SSMS) setup will check the installation rules (pre-requisite for the SSMS). Just click on the Next button to continue.

Step 8:
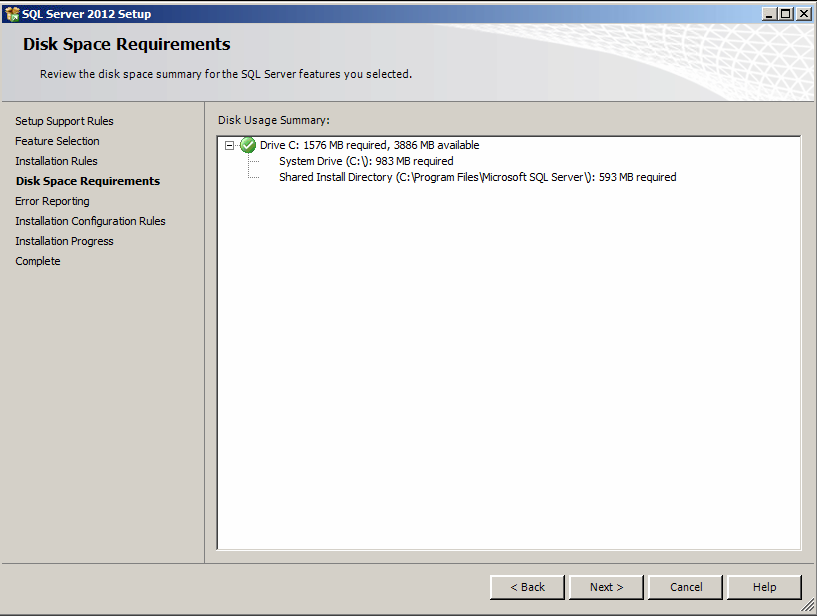
In this step SQL Server Management Studio (SSMS) setup will verify the disk space. Please make sure that you have sufficient disk space available. Not having sufficient disk space may result in a faulty installation. Just click on the Next button to continue.
Step 9:
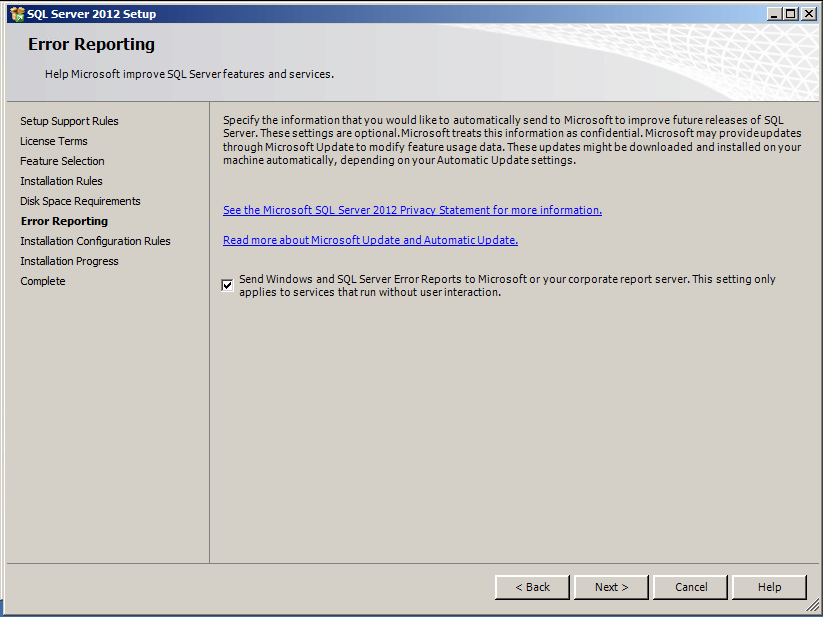
In this step, you have the opportunity to decide whether or not to send the error notifications to Microsoft. This is highly recommended in order to help Microsoft improve future releases and to fix any bugs in the existing release.
Step 10:
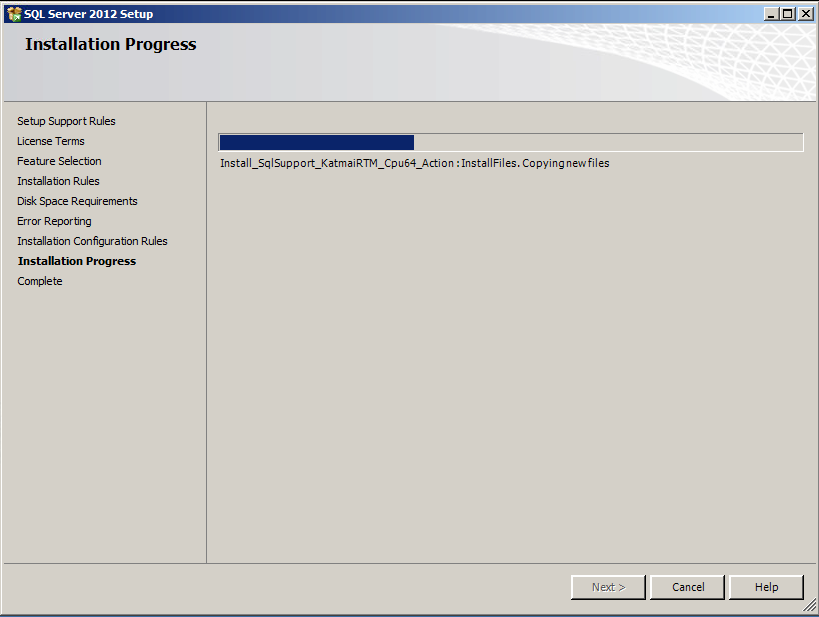
Once you click on the Next button, setup checks the installation configuration rules and if it passed, setup continues. This step will take some time to install SQL Server Management Studio. You can sit back and relax 🙂
Step 11:
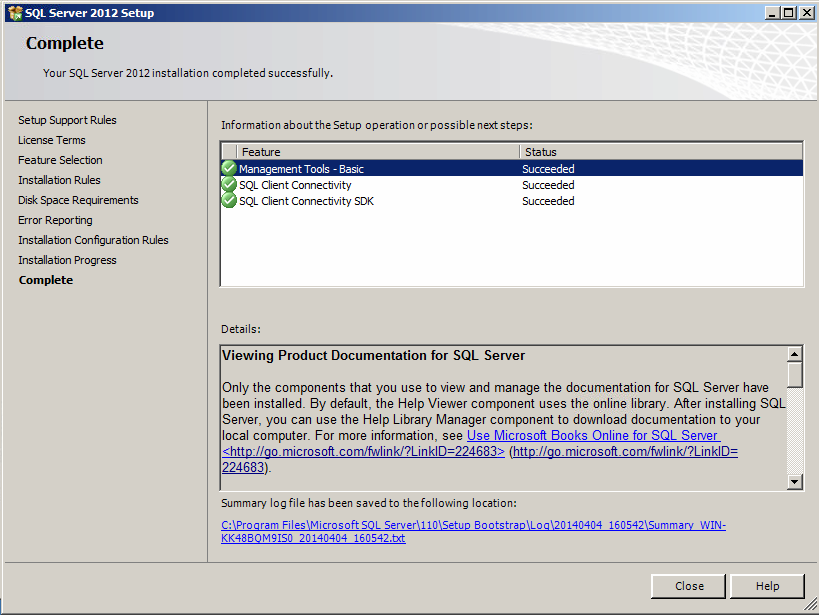
This step displays the installation status of SQL Server Management Studio (SSMS) along with each feature, like a summary. This screen really helps to view what has been installed and what has not. In case one of the features could not be installed, you can re-run the same installation procedure and install that particular feature.
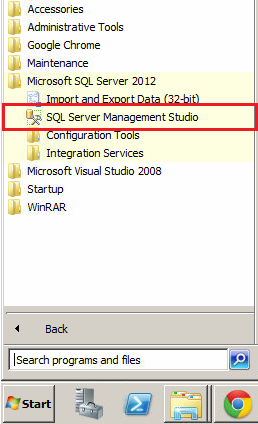
Step 12:
In order to check whether SQL Server Management Studio (SSMS) has been installed successfully, you need to select start menu of your server and then further select the SQL Server 2012 menu. You will find the link to SQL Server Management Studio there.
Alternate Option:
Please note that above installation procedure is for a standalone installation of SQL Server Management Studio (SSMS). However you can install SQL Server Management Studio (SSMS) along with the SQL Server installation as well, just ensure that you have selected Management Tools in the feature screen as shown below.
Conclusion:
As you can see, the SQL Server Management Studio (SSMS) installation is not complicated at all, it is quite user friendly. You just need to read the instructions carefully and follow them accurately, for a smooth installation.
Now that you have installed SQL Server Management Studio, you can update this software with some free add-ins from ApexSQL that will add formatting, auto-complete, refactoring and search capabilities. Click here to see how to install these.

He is not only passionate but has a proven ability to decipher intricacies and has authored over 350 articles. His spare time activities include swimming, football and surfing social networks
View all posts by Muhammad Imran