
SQL Server Management Studio (SSMS) is the official Microsoft application used for managing all components within Microsoft SQL Server. It is a powerful tool which allows users to control any objects in the SQL Server. It also provides script editing and GUI tools which are easy to use and user friendly.
SQL Server has multiple editions including: Enterprise Edition, Enterprise Core Edition, Business Intelligence Edition, Standard Edition, Web Edition, Express and Developer Edition each with its own features and functions.
SQL Server Management Studio is widely available and even has a free “Express” version which can be downloaded directly from the Microsoft website from the following link: Microsoft SQL Server Management Studio 2012. The free “Express” version does not include all the options other versions have, but will satisfy your basic needs.
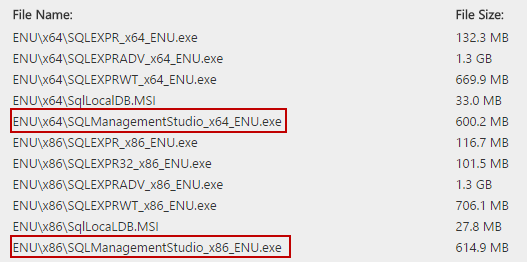
Be advised that by clicking the download button you will list all available files of SSMS 2012, but we only need one of these files. Based on your system version (32-bit or 64-bit) it is important to choose the appropriate file for download from the list:
Note: To determine whether your system is 32-bit or 64-bit, do the following:
- Click the Start button
- Right click on “My computer” or “Computer”
- Select properties and look for “System type” or “system”
- Here, the operating system type can be seen.
Once the appropriate installation file for your server type has been acquired, you will need to run it, you can find it in your specified download location.
The downloaded file will be in .exe file format and the size should not exceed 620 MB.
Double click on it to begin the installation wizard.
A window will pop up extracting the files for installation to a temporary location, don’t worry these files will be deleted right after the installation or anytime you quit the installation wizard.
When the process finishes extracting, it will close the window and there may be a small delay until the wizard begins.
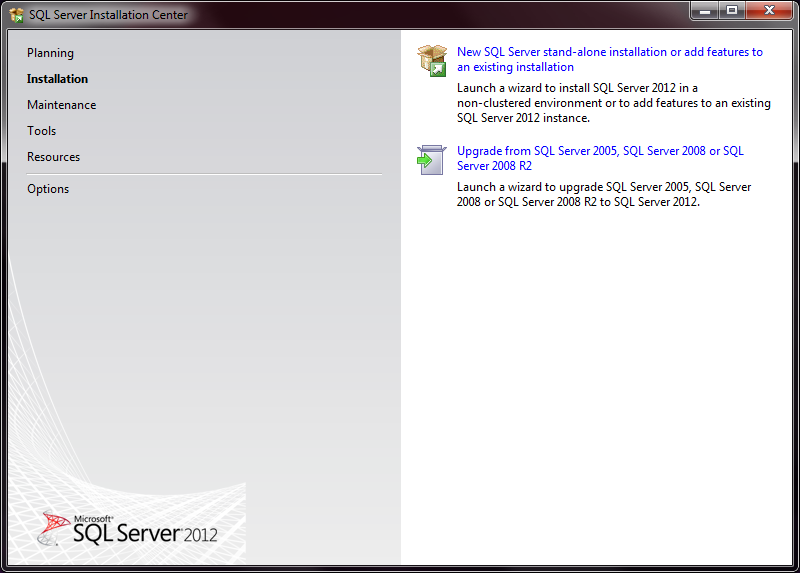
Once started, the SQL Server Installation Center is displayed.
This is the first screen of SQL Server installation process. If not already selected, choose the Installation tab on the left.
Select “New SQL Server stand-alone installation or add features to an existing installation” to initiate the installation of a new SQL Server instance.
When the “New SQL Server stand-alone installation or add features to an existing installation” option is selected, a screen will pop up and perform a check on the setup rules on the server. There is no user interaction here, and it is quickly completed.
After this, the License Terms screen is shown which must be accepted in order to proceed with the installation. And optionally if you want to send feature usage data to Microsoft you must check the option bellow “Send feature usage data to Microsoft. Feature usage data includes information about your hardware configuration and how you use SQL Server and its components”.
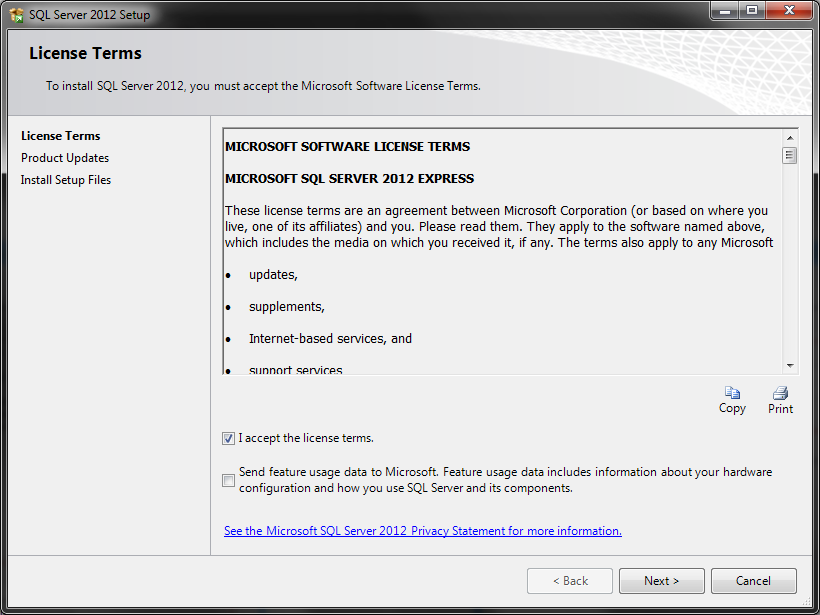
It’s up to the user to accept or deny sending usage data. Keep in mind that the next version upgrade will be installed with this option enabled by default.
Proceed with the installation by clicking on the Next button.
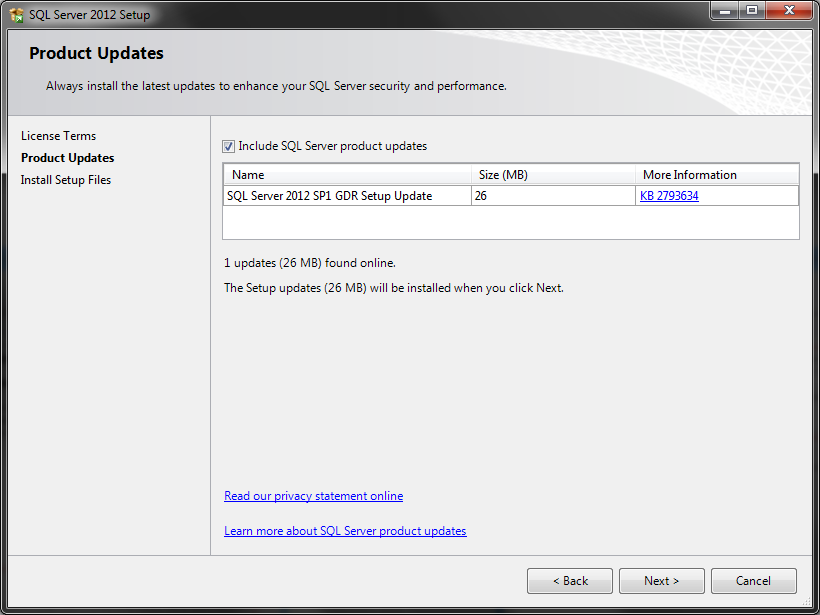
At this point, the installation will perform a search for any product updates which might be available, so the latest version is installed immediately.
The updates and updates information will be shown in the installation window.
Once again these choices are optional, however it is recommended that you download any critical updates along with the installation.
To proceed with the installation click the Next button.
The next installation step of SQL Server Management Studio setup will download and install setup files to your server. This might be a lengthy process, depending on the file size, and internet/network limitations. It is strongly recommended not to close the window while the operation is processing.

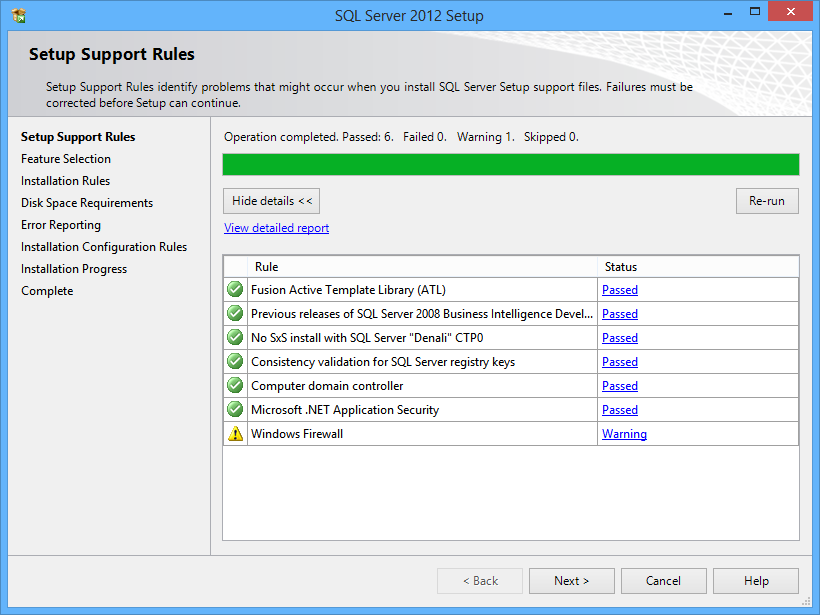
In the next step of installation wizard, Setup support rules, wizard will perform a check on potential problems which might occur when setup support files are installed.
The dialog may show warnings which may be ignored, such as Windows Firewall warning, because it is a warning for remote access and is unnecessary if you plan to run SSMS on your local computer.
You can also configure firewall settings in order to pass the firewall warning.
Microsoft has a detailed instruction here.
The provided list shows the rules that must be fulfilled in order for the installation process to continue. The rules may vary based on the operating system, architecture type of the system and system updates.
It will automatically check the rules and determine the components which may have the following status: passed, failed, warning and skipped.
Additionally you may click on the status result for more information about each rule.
These rules only involve the files needed in the setup, not the application itself. If any changes or permissions have been changes at this point (due to some warning or fails on initial run), the check should be performed again by clicking on the Re-run button which will provide fresh values for the statuses.
If there are no failures you may proceed, by clicking on the Next button:
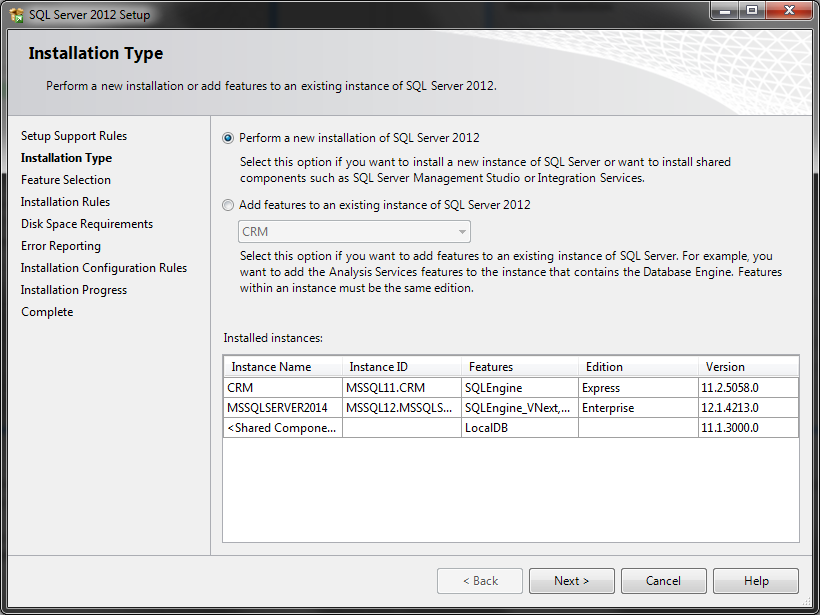
When SQL Server Management Studio (SSMS) setup is done with installing setup files you can proceed to the next installation step that will take you to the Feature selection screen or if you already have another instance of SSMS installed to the Installation type screen.
When you are at the Installation type screen you have two options:
- Install a fresh copy of SSMS 2012
- Add features to an already installed version of SQL Server via the drop down menu, note that the features within an instance must be the same edition.
Below you can see the list of already installed instances, and their editions along with version numbers.
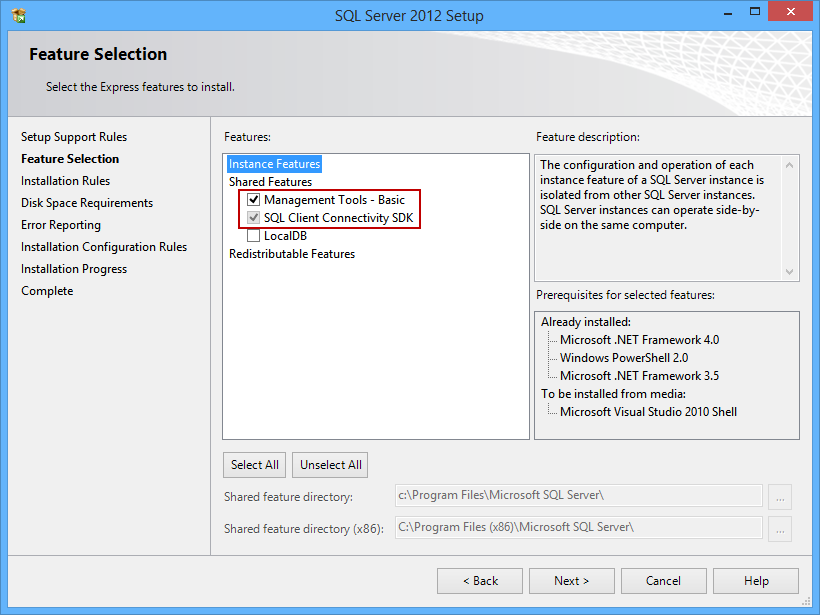
When you are at the Feature Selection screen, you will see a few options under the Shared features list.
Due to this being the free Express version you have only one option to choose from.
Select Management tools – Basic.
This option installs support for the Database Engine, Server CLI (Command line interface) support, SQL Server Express itself and the PowerShell provider.
SQL Client Connectivity SDK. It’s a SQL server integration service.
Make sure both options are selected before you proceed.
By selecting both tools you will get the most of SSMS and get optimized settings.
Click the Next button:
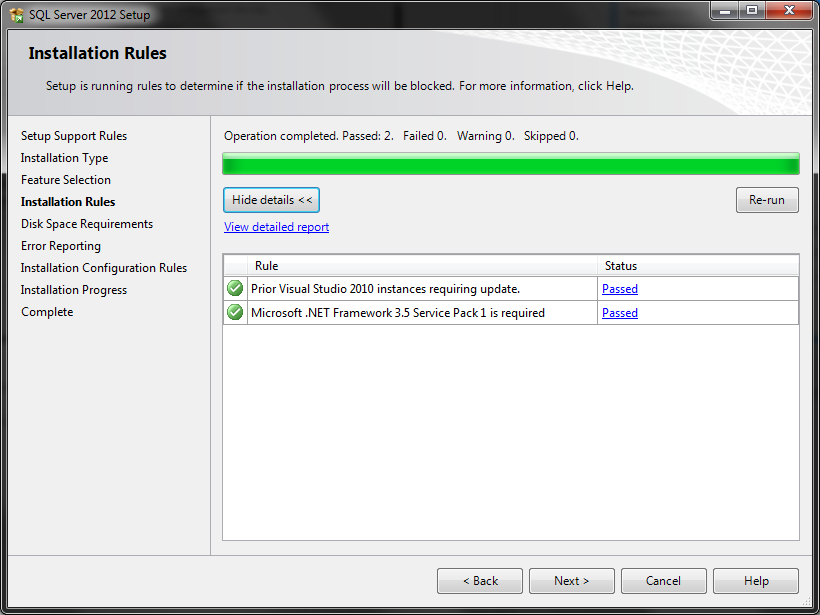
SQL Server Management Studio (SSMS) setup will check the installation rules.
These rules affect the application directly and have to be passed in order to continue the installation.
They also vary based on the operating system, the system type and installed updates. Most commonly the rules needed to be fulfilled are:
- Device administrator privileges
- NET Framework components
- Any previous restarts pending
- Windows updates
Microsoft offers support for any problems encountered during the installation on the official Microsoft Forums
Click the Next button to continue:
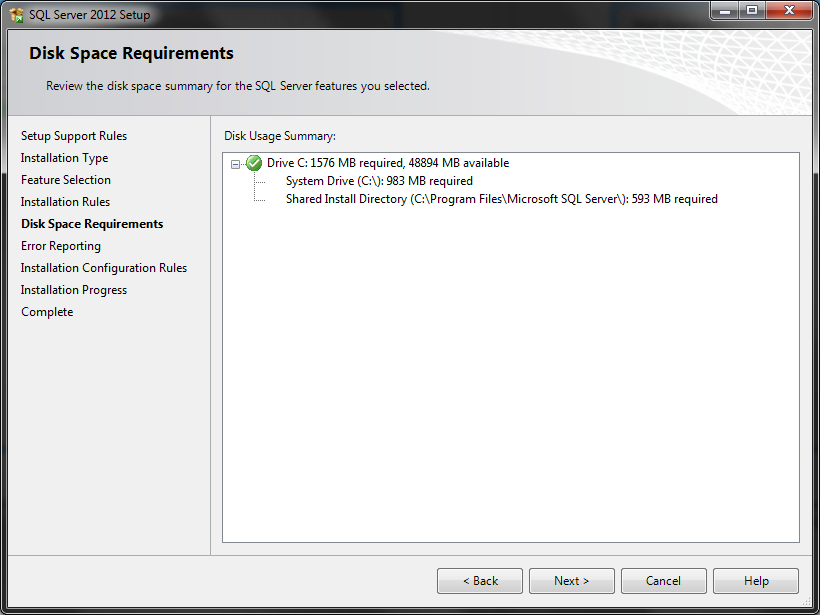
SQL Server Management Studio (SSMS) setup will then verify the disk space.
It will inform you of the install location and directory and also about total space on the system drive and the space it requires.
Click on the Next button to continue:
Note that the last two steps might automatically proceed and fast forward you to Error reporting.
You may manually return and review these steps but it is not necessary as there is no user input.
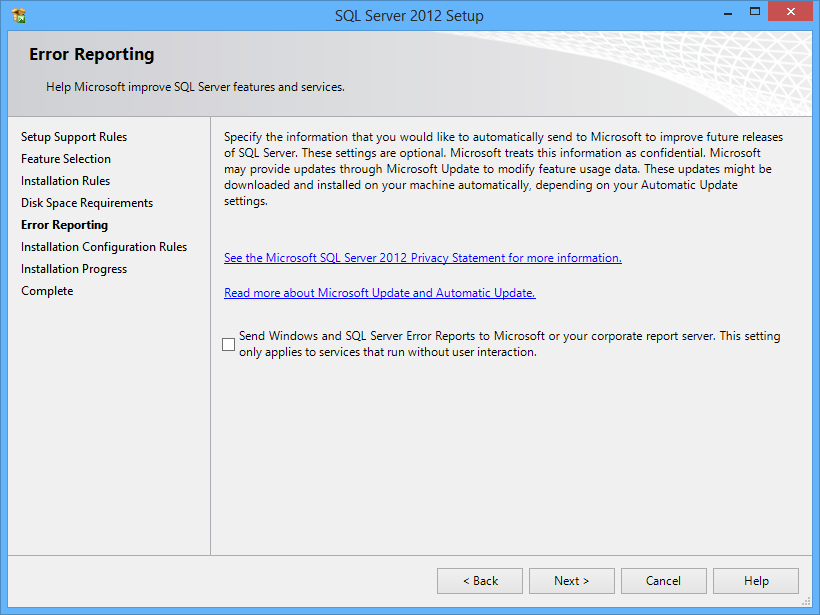
In this step Error reporting window will show. And you can select optionally if you want SQL Server Management Studio (SSMS) to send error reports to Microsoft.
Click the Next button:
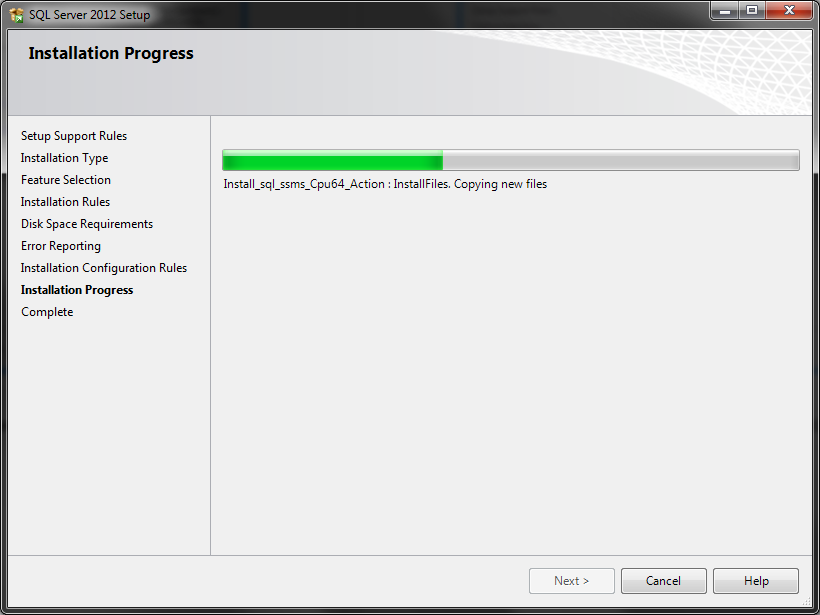
Next step will briefly configure installation rules and start Installation progress window.
When the Installation progress completes click the Next button:
This is the final step that shows the installation status of SQL Server Management Studio (SSMS), which feature has been installed and the status of the installation.
You may additionally click on the Help button for further assistance and support regarding SSMS.
Click the Close button:

In order to start SQL Server Management Studio 2012, look for it in the default installation directory or open the start menu and find it in all programs.
Now that you have SSMS 2012 installed, you are ready to upgrade it with some free productivity add-ins

He was amazed how technology affected and eased our life and has always wanted to contribute and be evolved in it. He experienced firsthand many problems you can encounter with software while he was working at a computer diagnostics and repair center.
His interest got him studying web design and java development and is currently employed by ApexSQL LLC as a Software Sales Engineer, where he is assisting customers with any technical issues and does quality assurance for one of many ApexSQL tools.
View all posts by Stefan Daniel Plačkov
- Step by step installation of SQL Server Management Studio (SSMS) 2012 - January 12, 2016