
This article shows the best way to import a copy of your MySQL database table to SQL Server using the SQL Server import data feature. We’ll demonstrate how to perform data import and export using a query with the assistance of SQL Server Management Studio.
While individual database technologies are proprietary, they operate on common principles that give them the ability to import from and export to other database engines. Microsoft SQL Server can import data from and export it to MySQL. SQL Server import data activity is an easy and efficient way to copy tables or explicit columns into a SQL Server table from MySQL. Indeed, any user can do this it using a query execution, although not automatically.
A SQL Server import can be performed using a linked server with Open Query as well; although most developers prefer the straightforward steps, we’ll show below.
Configure a data source
From within the SQL Server import and export wizard, choose MySQL Data Provider. In the Tasks options, the Import Data wizard makes an SSIS bundle for you. The SSIS bundle can be run immediately or may be saved to edit or execute later.
We have databases named user_portal in MySQL and pub_db in SQL Server. Multiple tables exist with the MySQL database (user_portal), such as privileges_mst, privileges_api_link, privileges_api_link and others. For this example, we will copy a number of columns from a few tables to the pub_db database and priv_emp_detail table in SQL Server.
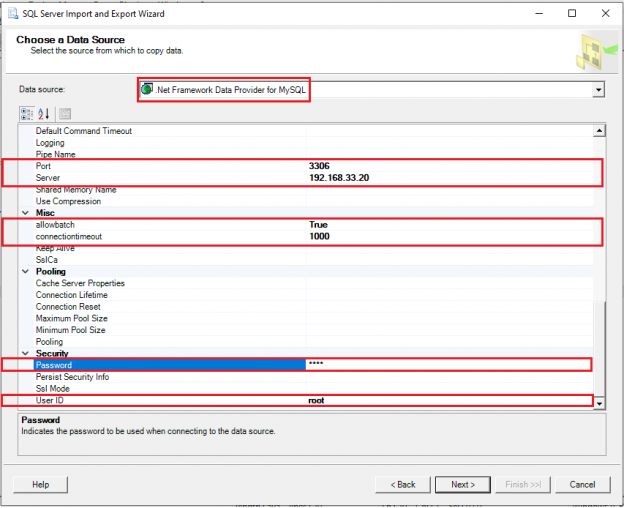
Navigate to Tasks > Import Data… > Next… > Data Source:

Select any data source from the drop-down list; it can be ODBC, OLEDB, Flat File, Access, Excel, etc. The format you select will depend on the type of data you are importing into SQL Server and its source database.
When choosing MySQL as a data source, there will be a wizard that prompts you for information that allows authentication and authorization. In the above screen, we referenced the MySQL server IP address in the Server field. We can also utilize the instance name with the host entry, which could be resolved with the IP address. In a security segment, the user needs to enter a MySQL user name and password to perform authentication. There are more MySQL server configuration detail fields, which can be applied to the association of MySQL with SQL Server during the activity.
Configure a destination server
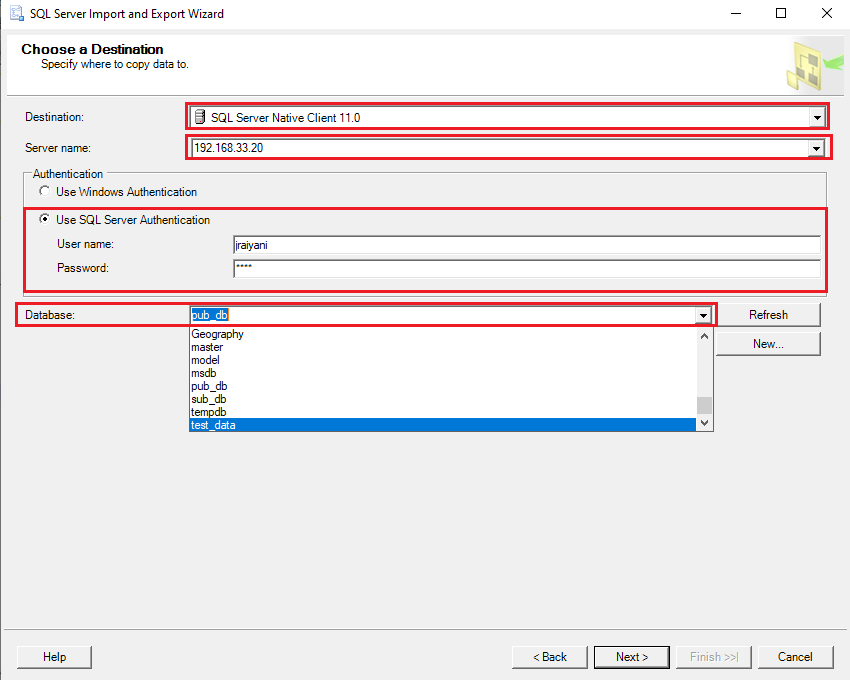
Next, enter the SQL Server instance name or IP address to select it as the destination server. You must also provide a SQL Server login name and password to authenticate with SQL Server. Tick the Use Windows Authentication checkbox if using Windows authentication or you can enter SQL Server login credentials. Click the Refresh button in the Databases pane to list all databases, and then select either the current database or enter another database name; this wizard will automatically create the new database during the process:
Choose tables and views or parse query in the source database
In the source database, select tables or views to copy information from existing tables, or use views. If a user needs to copy information from multiple tables or the denormalized structure to the SQL Server database table, the option Write a query to specify the data to transfer is the appropriate choice:
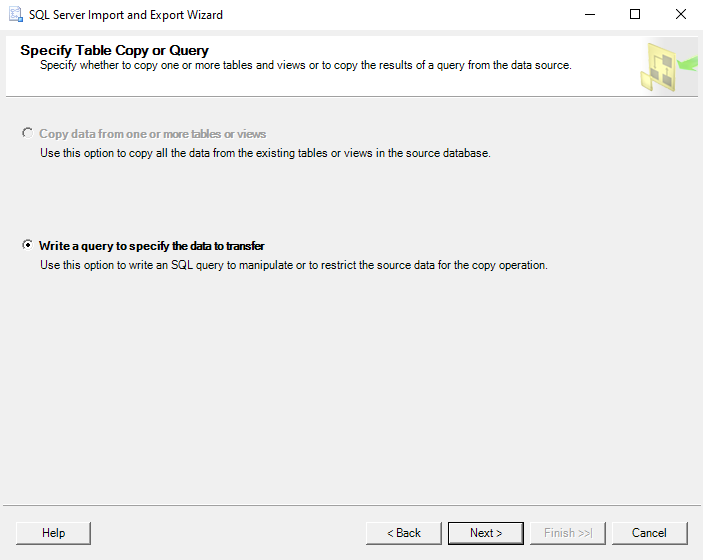
With this option, the wizard allows the parsing of the T-SQL query. Users can manipulate multiple data tables and export them to one or more tables. For example, we utilized the join of three tables (privileges_mst, privileges_api_link, api_mst) and executed a SELECT statement with several columns from two tables as shown:
|
1 2 3 4 |
SELECT pm.privilege_id, pm.privilege_name, am.api_id, am.api_name, am.uri FROM privileges_mst pm INNER JOIN privileges_api_link apl ON pm.privilege_id = apl.privilege_id INNER JOIN api_mst am ON am.api_id = apl.api_id |
We can even use the WHERE clause to filter through the data with explicitly required conditions.
Choose tables and views in the destination database
Select the tables and views from the source database and attach them to the destination tables. Clicking the destination field will display tables in the drop-down with the schema name. When tables and views are selected for copying, the Preview button will show the column mapping from the source tables, views or Query to the destination database:
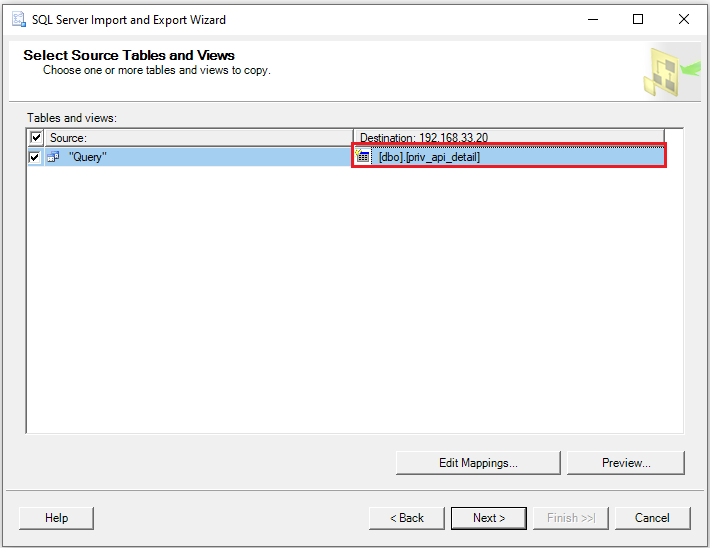
Column mapping can be altered if the columns are not equivalent between the source and destination. Unless we can avoid using unnecessary large object datatype columns to reduce IO transfer over the network and memory consumption.
Execute SQL Server Import Data Wizard
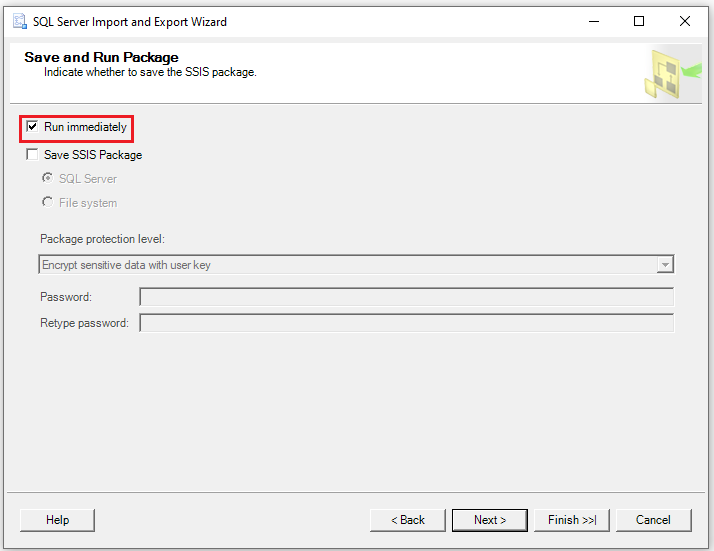
Clicking Next creates an SSIS Package for the data transfer. The user is given a choice to execute the action immediately or save the SSIS Package. The save options will request a directory to store the package on the server or file system:
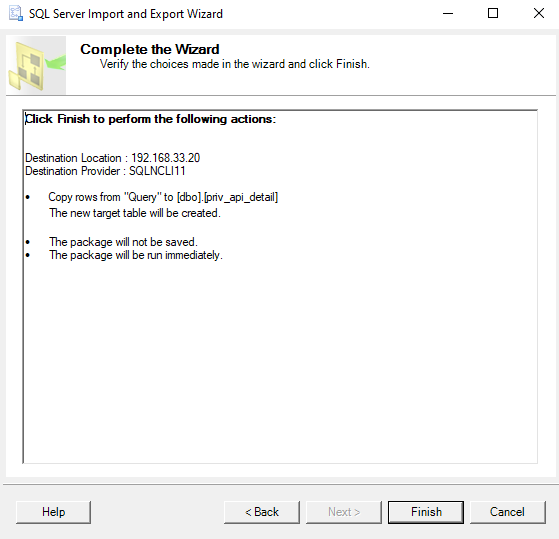
In the following step, the user receives destination server details, along with Source and Destination object names. The screenshot below indicates that a new target table will be made. This is because in the destination selection we referenced a new table name, rather than an existing table from the dropdown:
Finish task
Click Finish to start the migration, and the wizard will quickly and automatically migrate data from MySQL to SQL Server while checking the status of each step as shown below:
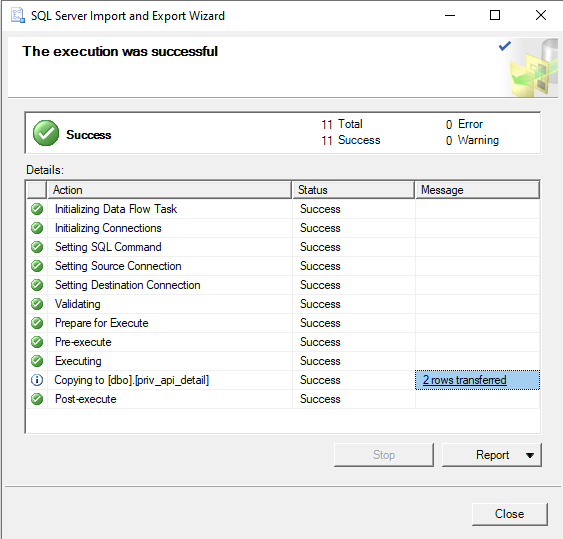
On successful execution, the row count will be visible, along with the status of the steps. If needed, each step can be analyzed for troubleshooting.
If you go to the destination database in SSMS and right-click, in the task list there should be an option called Import Data. It’s essentially a wizard that makes an SSIS package for you, which can either run immediately or be saved and modified later as needed. There will likely be situations where you need to move data from MySQL to SQL Server.

View all posts by Jignesh Raiyani
- Page Life Expectancy (PLE) in SQL Server - July 17, 2020
- How to automate Table Partitioning in SQL Server - July 7, 2020
- Configuring SQL Server Always On Availability Groups on AWS EC2 - July 6, 2020