
![user database [LinuxAGSQL]](https://s33046.pcdn.co/wp-content/uploads/2020/10/user-database-linuxagsql-624x475.png)
Database professionals get the standard requirement for SQL database restores from production to non-production instances. As you know, SQL Server runs on the Linux and Windows operating systems starting from SQL Server 2016. Suppose you are exploring the SQL Server Linux instance features and configurations.
You want to compare the performance of objects (stored procedure) for a database in the Windows environment as well as the Linux environment. You can either generate the objects scripts (with data) from the source and execute the script on the Linux database. It might not be feasible for a vast database. In that case, you want to restore the SQL database backup from the Windows SQL Server to SQL Server Linux.
For example, you get a requirement to restore the databases with the following source and destination:
- Source: SQL Server 2019 on Windows platform
- Destination: SQL Server 2019 on Ubuntu Linux
Can we restore the databases on cross-platform SQL Server instances? It is interesting to see if we can see do it and if yes, how?
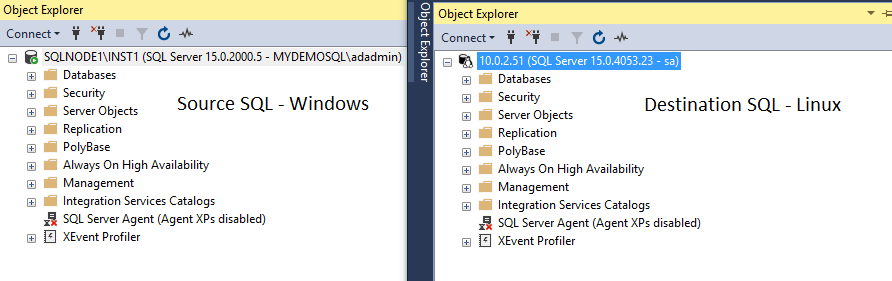
Environment details
I have the following SQL Server instances in my lab environment, as shown below.
|
Source SQL |
Destination SQL |
|
SQLNode1\INST1 (10.0.2.21) |
Linuxnode2 (10.0.2.51) |
|
Version: 15.0.2000.5 (SQL 2019 RTM) |
Version: 15.0.4053.23 (SQL 2019 CU6) |
|
OS: Windows Server 2016 |
OS: Ubuntu Linux 18.04 |
In this lab, my source and destination SQL versions are different. We cannot restore a database into the lower version. It is okay because the destination Linux SQL instance is on a higher version than the source version.
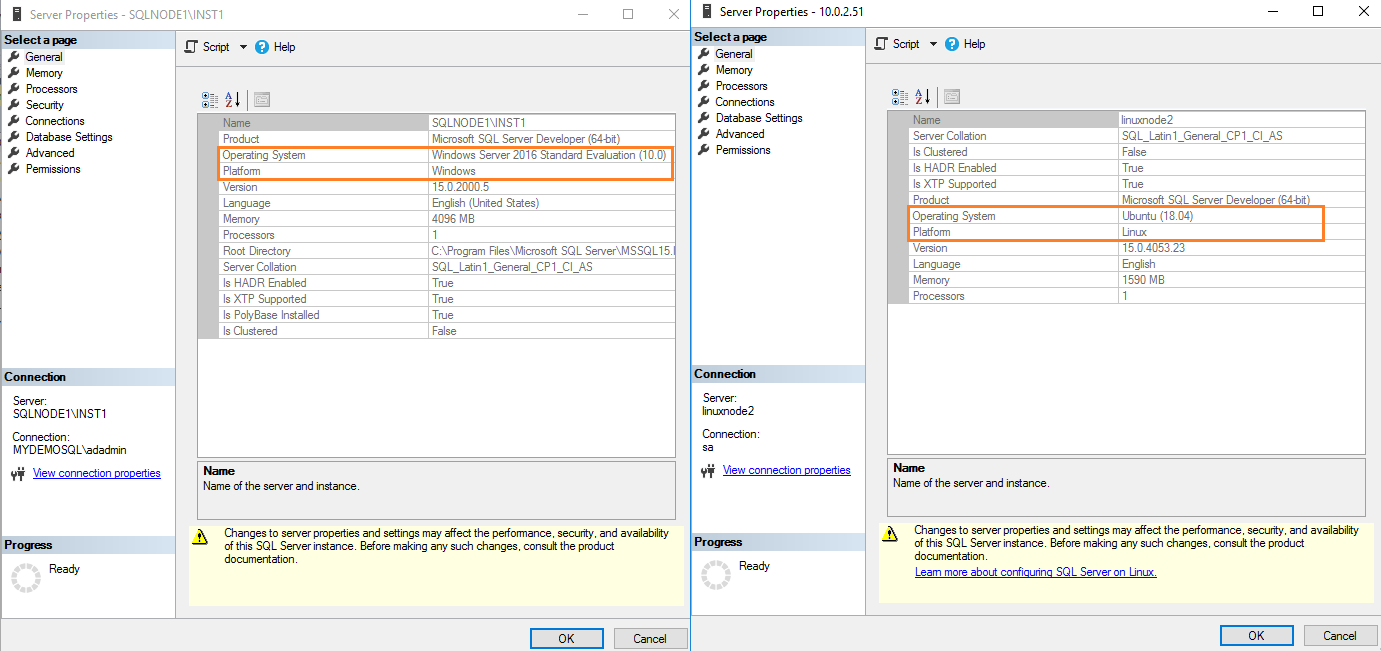
Right-click on SQL instance and view the SQL Server properties to verify the operating system and platform.
If you do not know the process to install SQL Server on Linux, you can follow existing articles on SQLShack.
Steps to restore a database from Windows SQL Server to SQL Server Linux
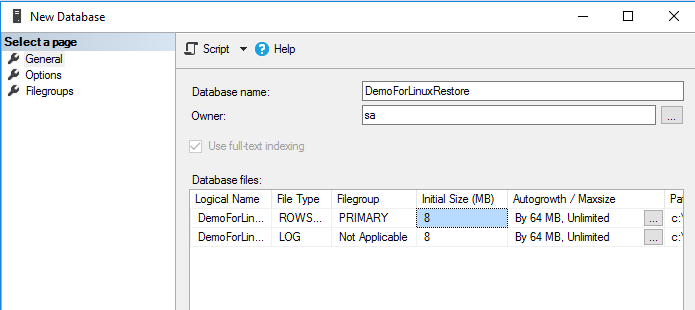
For this article, let’s create a new database [DemoForLinuxRestore] on the Windows SQL Server. You can right-click on the databases tab and create a new database with default properties, as shown below.
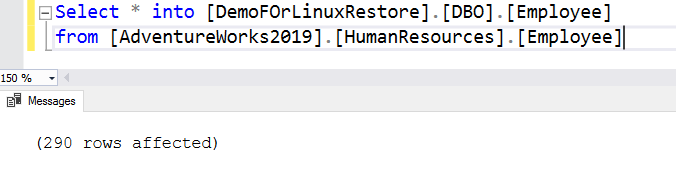
Insert some sample records into the new database. For this purpose, I use the SELECT INTO statement that creates a new table automatically from the source table data.
Take a full backup of the [DemoForLinuxRestore] database
You can take a full database backup either using SSMS GUI wizard or with the BACKUP DATABASE script.
Backup Database DemoForLinuxRestore to disk=’C:\SQL\DemoForLinuxRestore.bak’
![Take a full backup of the [DemoForLinuxRestore] database](/wp-content/uploads/2020/10/take-a-full-backup-of-the-demoforlinuxrestore-da.png)
Copy the database backup from Windows server to Linux server
Usually, when you need to restore the database between two SQL instances on the Windows servers, you create a shared folder and access the backup file from the destination instance.
In this article, we need to copy the backup file from a Windows to Linux operating system. For this purpose, we use WinSCP.
Download the WinSCP and install it with the default ( Commander) interface style. In this mode, we use two separate consoles for the source and destination server. You can drag the files from source to destination in this Commander mode.

Launch the WinSCP. It automatically connects to the Windows server while it asks you for connection information on another server.
We can connect the Linux server using the SFTP protocol on Port 22. Specify the hostname (IP address), user name and the password to connect the Linux server.
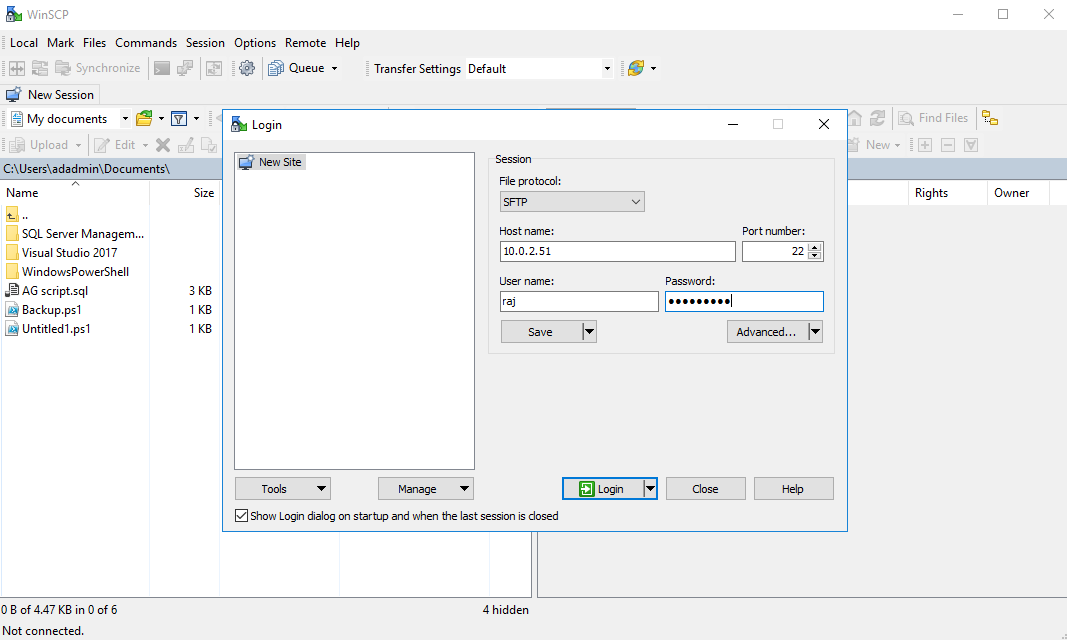
On the left side, we have the Windows server directory while on the right, it has the Linux server.
Change the directories in the WinSCP, as shown below.
- Source: C:\SQL ( the backup directory)
- Destination: /tmp/ ( Temporary directory to copy the files in Linux)
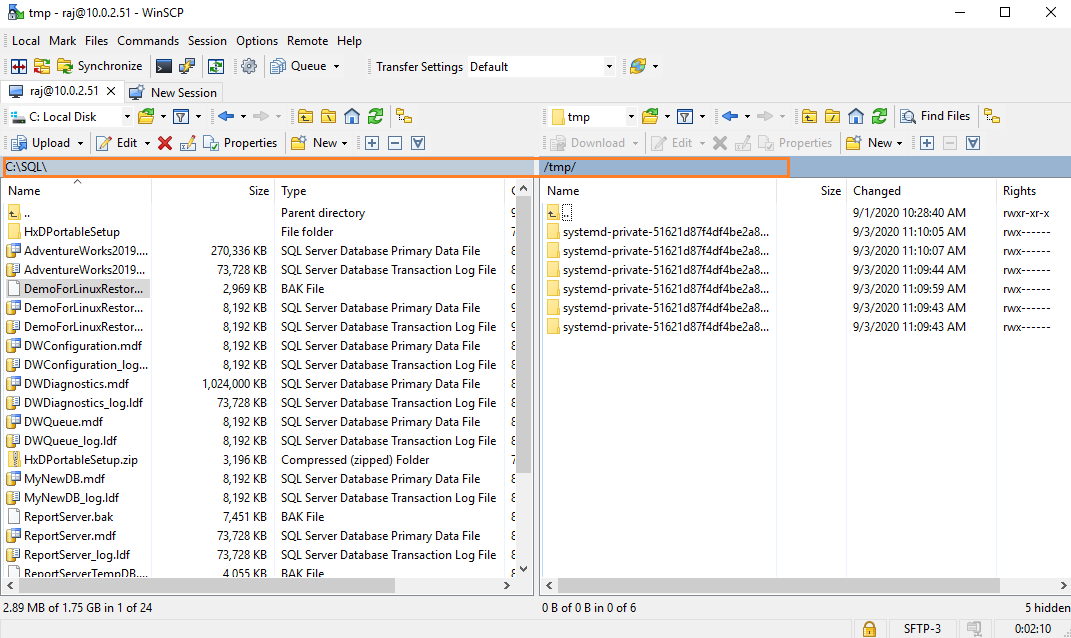
Drag the SQL database backup from Windows to Linux console as shown below.
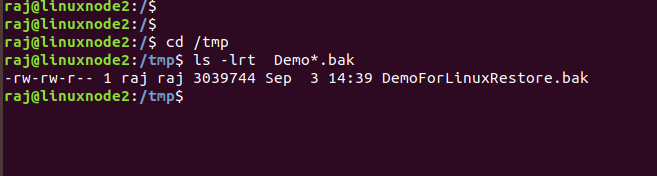
Now, connect to the Linux server using the terminal and view the backup file exists.
$ cd /tmp
$ ls -lrt Demo*.bak
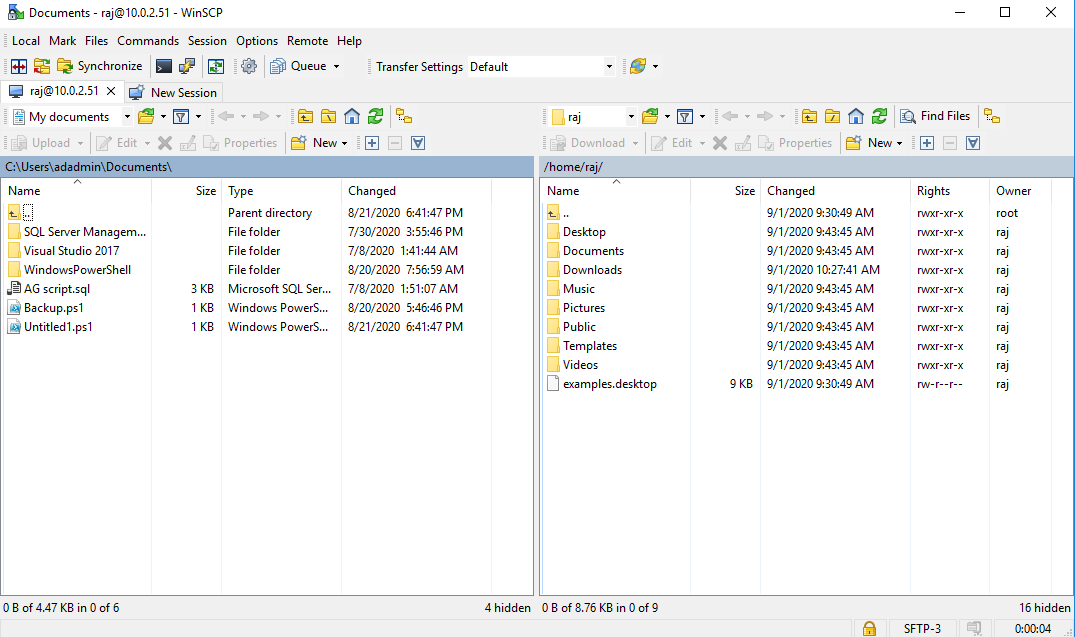
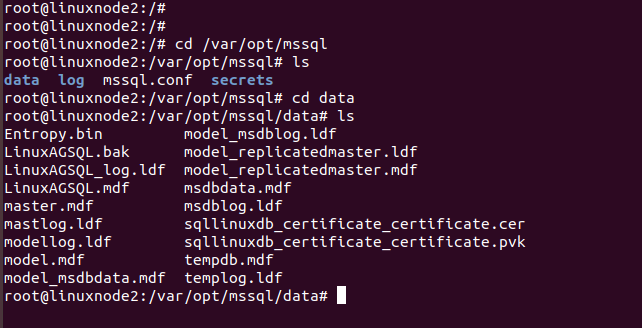
Use Sudo access to browse to the SQL Server Linux directory /var/opt/mssql.
$ sudo su
$ cd /var/opt/mssql

The mssql directory has the data, log folders that contains SQL database primary file and log file.
/var/opt/mssql# cd data
/var/opt/mssql# ls
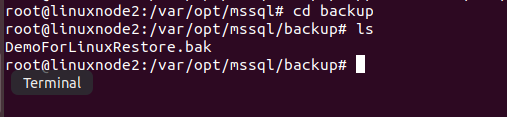
Let’s create a new directory in the /var/opt/mssql and copy the backup file from the /tmp to the new directory.
/var/opt/mssql# mkdir backup
/var/opt/mssql# scp /tmp/Demo*.bak /var/opt/mssql/backup

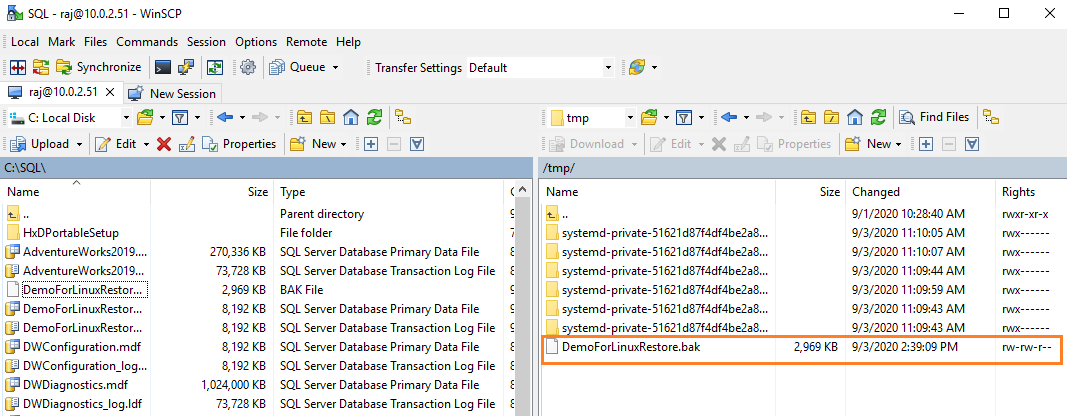
View the backup file in the backup directory, as shown below.
Restore the backup file in SQL Server Linux using the Azure Data Studio
We can use command-line tools such as SQLCMD in SQL Server Linux to perform database activities. Azure Data Studio is also useful on the Linux server to perform certain database activities. If you want to use the SQL Server Management Studio, you need to connect the Linux instance in SSMS installed on a Windows server.
You can download the Azure Data Studio latest version and connect the Linux instance.
Currently, we have one user database [LinuxAGSQL] for linuxnode2 instance.
![user database [LinuxAGSQL]](/wp-content/uploads/2020/10/user-database-linuxagsql.png)
Right-click on the instance -> Manage to launch the server dashboard. In this dashboard, click on Restore.

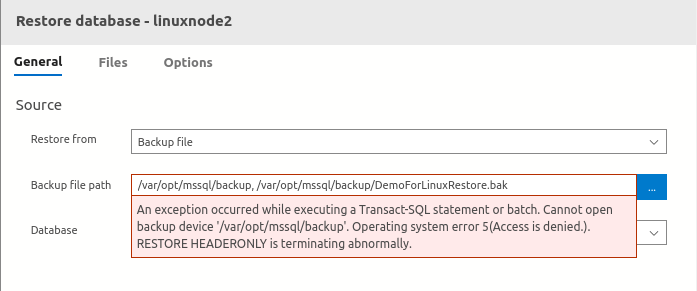
In the restore database wizard, browse to the Linux directory contains the backup file. You can browse similar to a Windows directory in Azure Data Studio.

We get an error – SQL Server is unable to open the backup file in the /var/opt/mssql/data. Due to the permission issue, the RESTORE HEADERONLY command terminated.
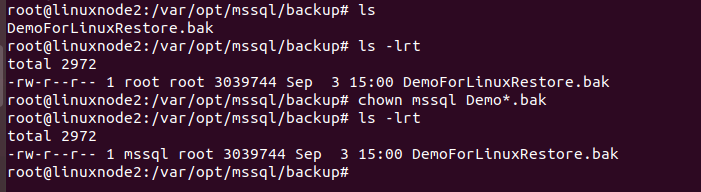
To investigate the issue, check the backup file owner with the ls-lrt command. Currently, the root user has ownership of the SQL database backup file.
Modify the permissions to the mssql user using the chown command as shown below.
# /var/opt/mssql/backup# ls -lrt
# /var/opt/mssql/backup# chown mssql Demo*.bak
Now, relaunch the restore database wizard, and it can access the backup file. You get the backup file details in the restoration plan.

You can directly execute the backup ( click on Restore) or generate a RESTORE DATABASE script. In this script, verify the following:
- Data and Log file location is /var/opt/mssql/data
- backup file location is /var/opt/mssql/backup
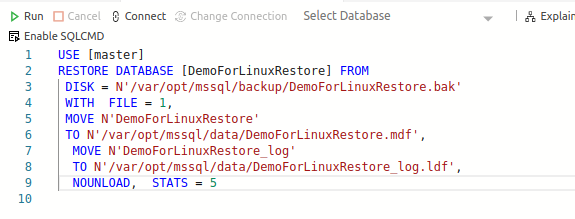
Click on Run to execute the restore command. It shows you the progress of the database restores in the message tab.

Database Validations
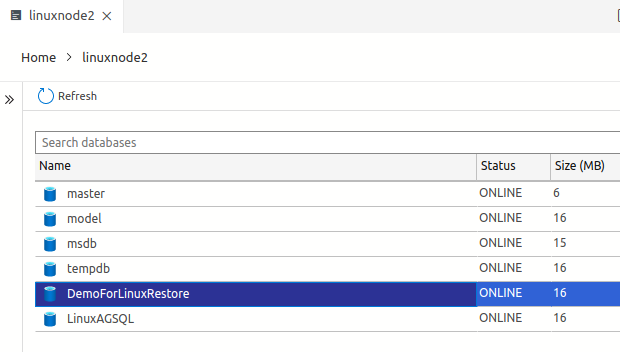
Refresh the databases in Azure Data Studio, and you see the restored [DemoForLinuxRestore] database in the Linux.
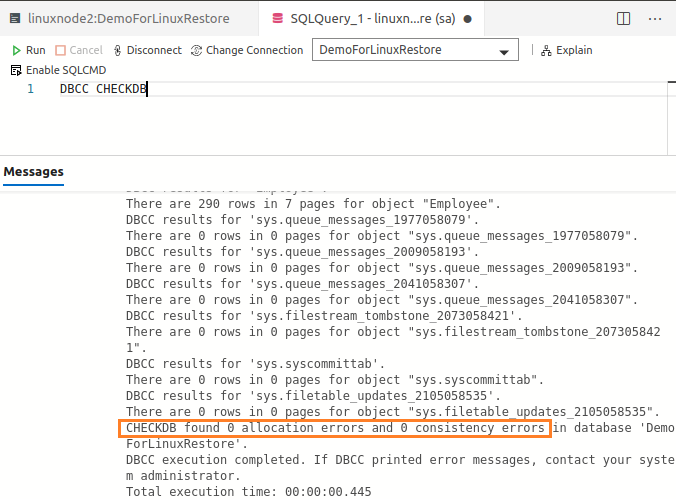
Database consistency check
As we restore a Windows-based SQL database to the Linux instance, it is good to perform a database consistency check using DBCC CHECKDB. As shown below, CHECKDB did not raise any consistency issues.
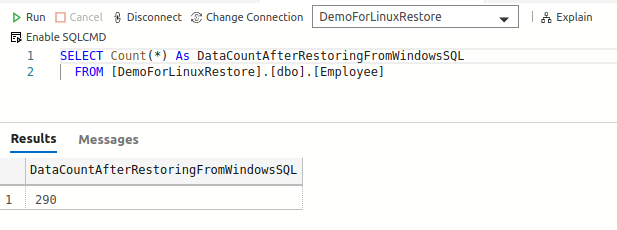
Verify table record counts
In the last step, verify the table record counts. Previously, we inserted the 290 rows in Windows SQL before taking database backup. As shown below, it has the same record count after database restore in SQL Server Linux.
Conclusion
In this article, we restored a SQL database from the Windows SQL Server to SQL Server Linux instance. You can restore the database similar to restore between two different Windows SQL instances.

I am the author of the book "DP-300 Administering Relational Database on Microsoft Azure". I published more than 650 technical articles on MSSQLTips, SQLShack, Quest, CodingSight, and SeveralNines.
I am the creator of one of the biggest free online collections of articles on a single topic, with his 50-part series on SQL Server Always On Availability Groups.
Based on my contribution to the SQL Server community, I have been recognized as the prestigious Best Author of the Year continuously in 2019, 2020, and 2021 (2nd Rank) at SQLShack and the MSSQLTIPS champions award in 2020.
Personal Blog: https://www.dbblogger.com
I am always interested in new challenges so if you need consulting help, reach me at rajendra.gupta16@gmail.com
View all posts by Rajendra Gupta
- Understanding PostgreSQL SUBSTRING function - September 21, 2024
- How to install PostgreSQL on Ubuntu - July 13, 2023
- How to use the CROSSTAB function in PostgreSQL - February 17, 2023