

In this article, we will learn how to perform a point-in-time restore in Azure Cosmos DB on an account that has been configured with a continuous backup policy.
Introduction
In my last article, Continuous Backups in Azure Cosmos DB, we understood the concept of continuous backups in Azure Cosmos DB. We also learned the use-cases and restrictions under which we can use this feature as of the draft of this article. After backing up data, the obvious need is to restore the data. The need to perform a continuous backup is to have the ability to have granular control over the time or event to which the data can be restored. Instead of selecting only intervals when the backup was performed on the entire data, which does not provide the ability to select specific events which have raised the need for the restore operation, continuous backup provides the convenience of selecting the exact event to which the restore is required.
Point-in-time Restore
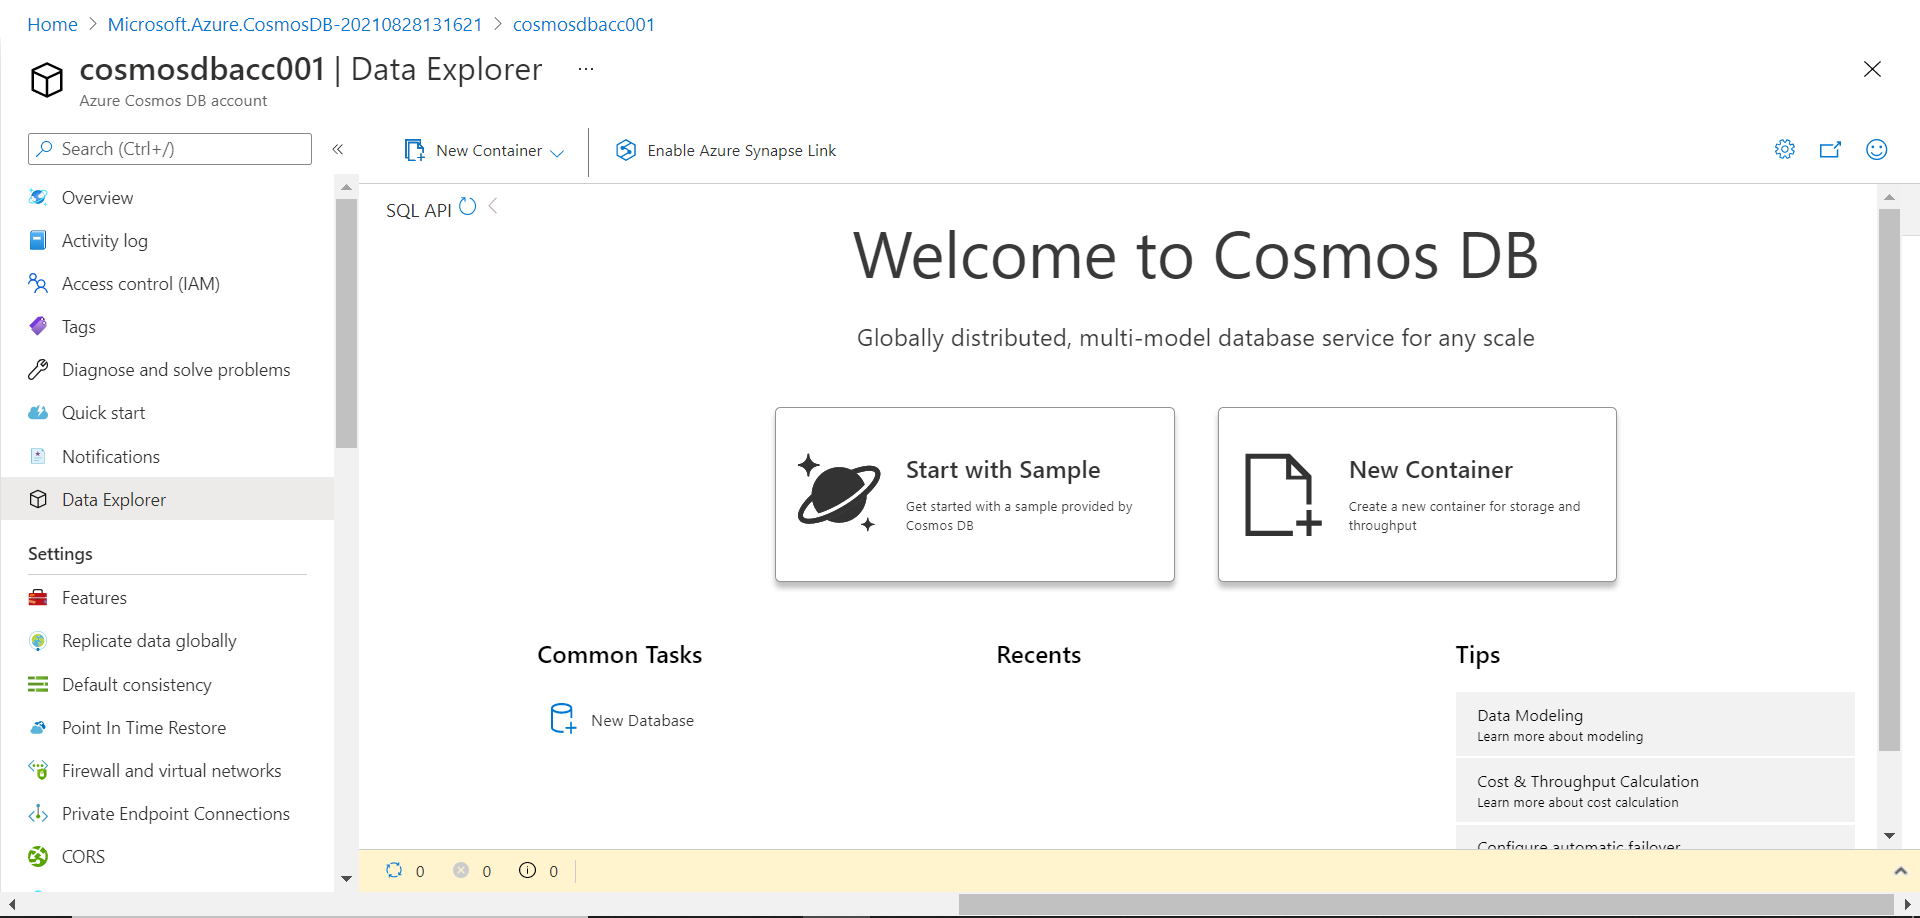
Before we start with the exercise explained below, it is assumed that an Azure account with an instance of Azure Cosmos DB with a continuous backup policy is already in place and one has administrative privileges over this account. Navigate to the account home page, and from the left pane, click on the Data Explorer menu option as shown below. It would open the data exploration page of the account. If you have created a brand-new account, by default, you won’t have any data in it. The data explorer page would provide options to create sample data as well. To perform a point-in-time restore, we would need some data to create some events, so that we can make changes and revert it by performing a point-in-time restore. Let’s create some sample data in this account. Click on Start with Sample option by click on the tile as shown below. This step will result in the creation of a new database as well as a container with sample data in it.
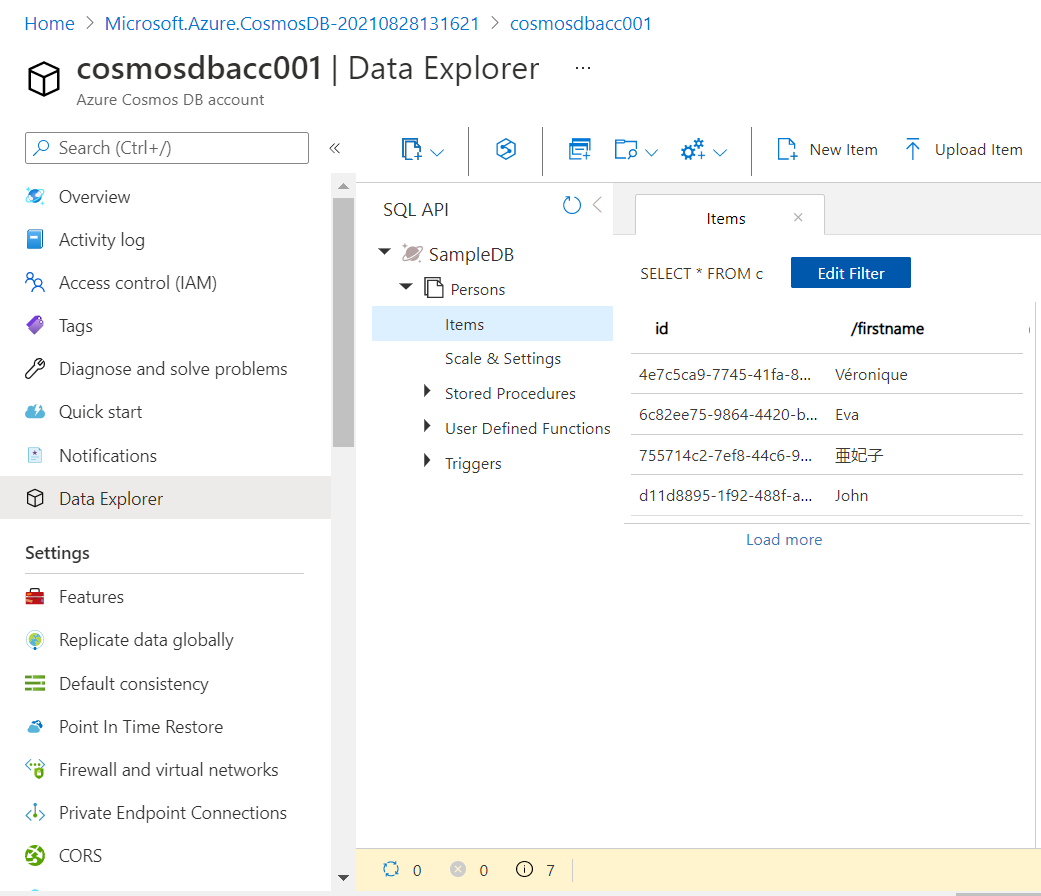
Once the sample data creation process is complete, we should be able to see a database named Sample DB and a container named Persons in it. Once we click on this container and open the Items option, we would be able to view the data in it as well as shown below. The creation of the sample data generates and marks an event in the Azure Cosmos DB account.
From the left pane, we can select the Point-in-time restore option which will provide us the option to perform the actual restore option. When we click on this option, it would open a page as shown below.
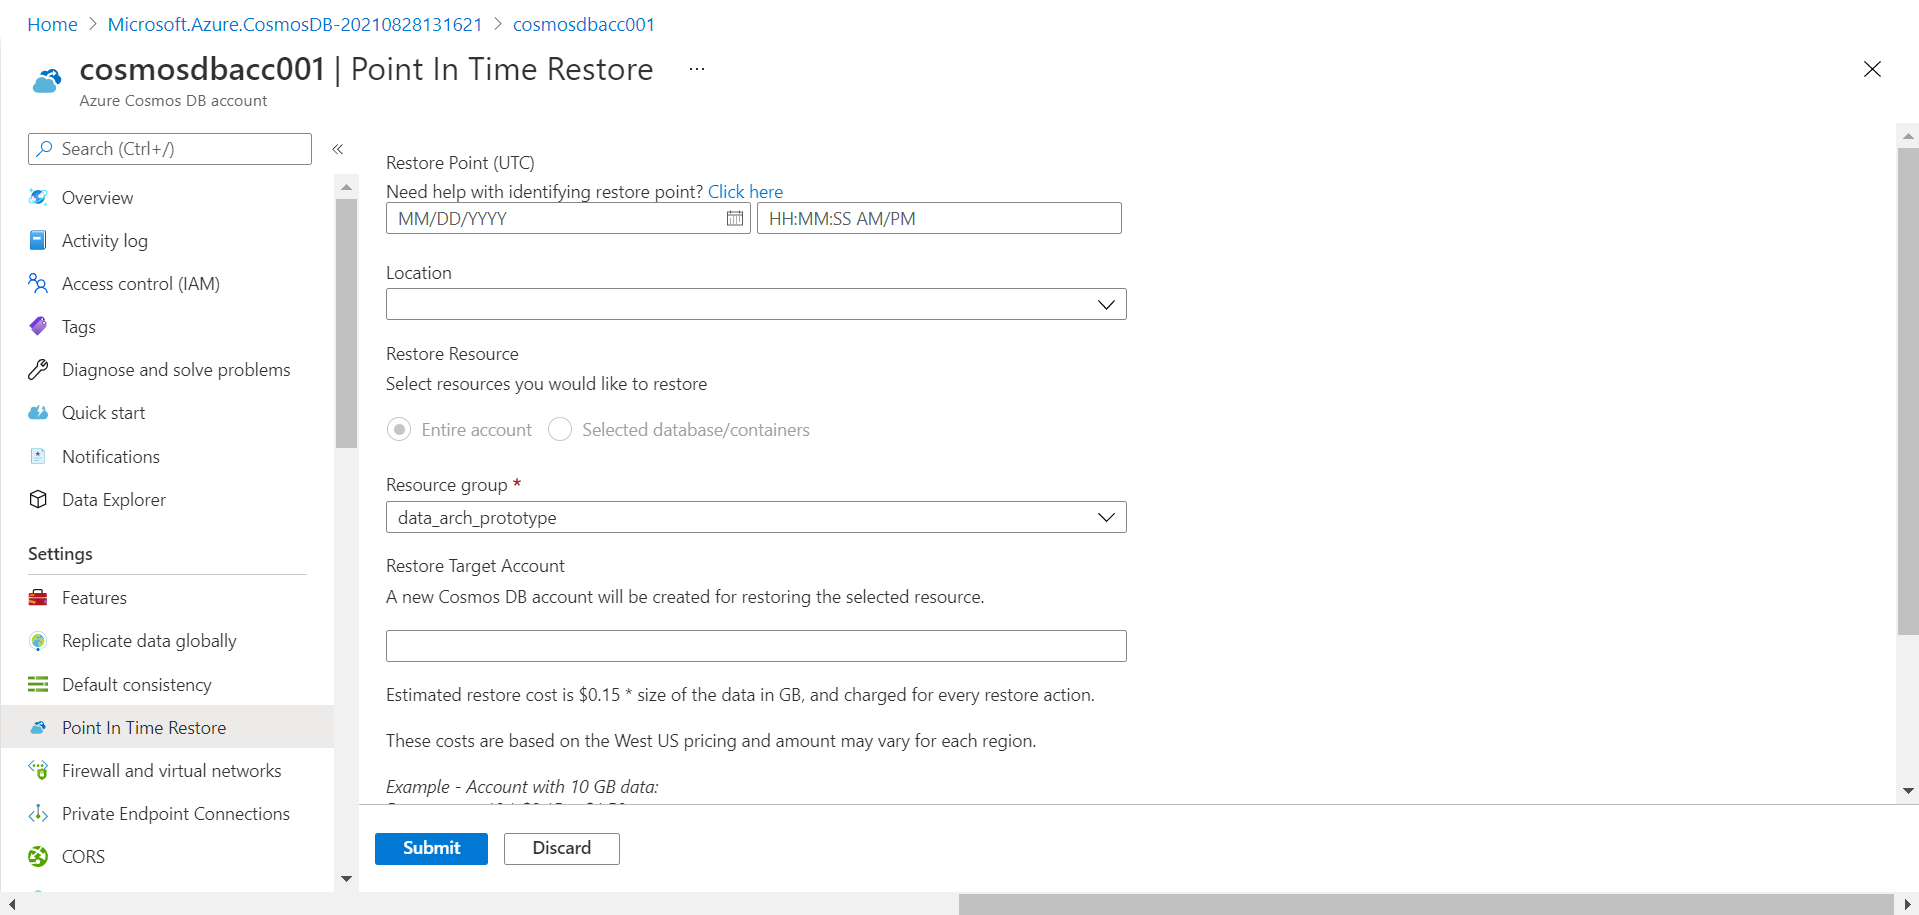
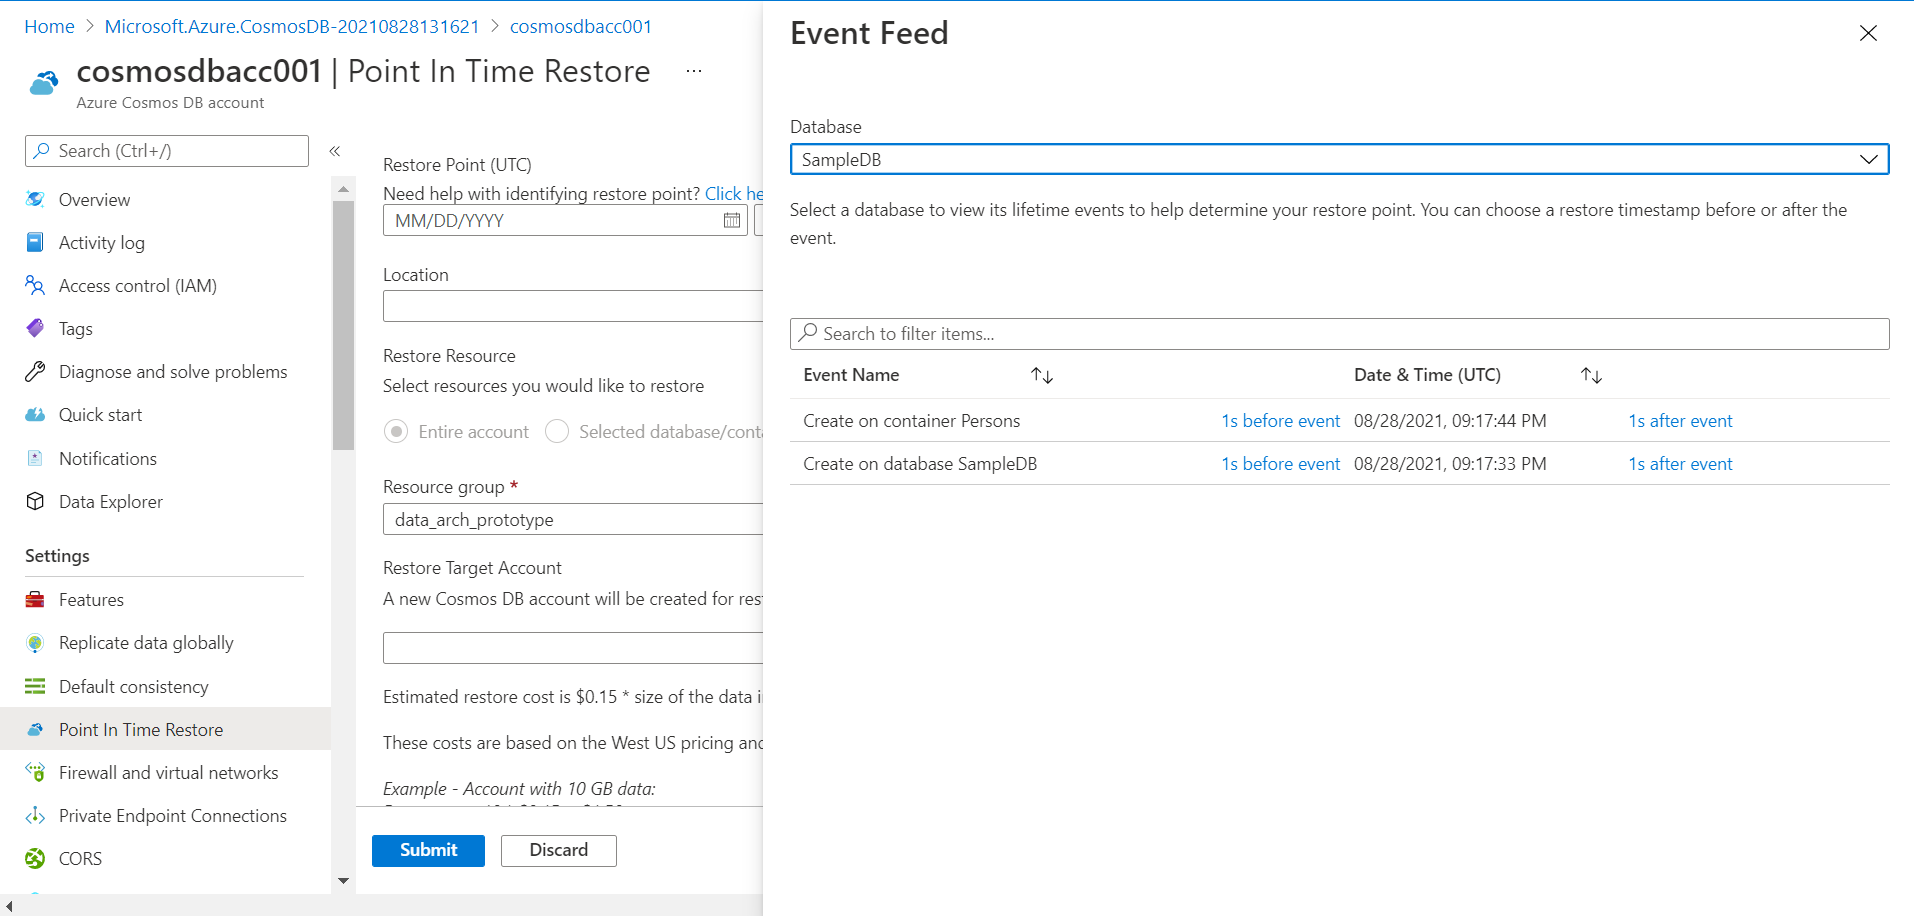
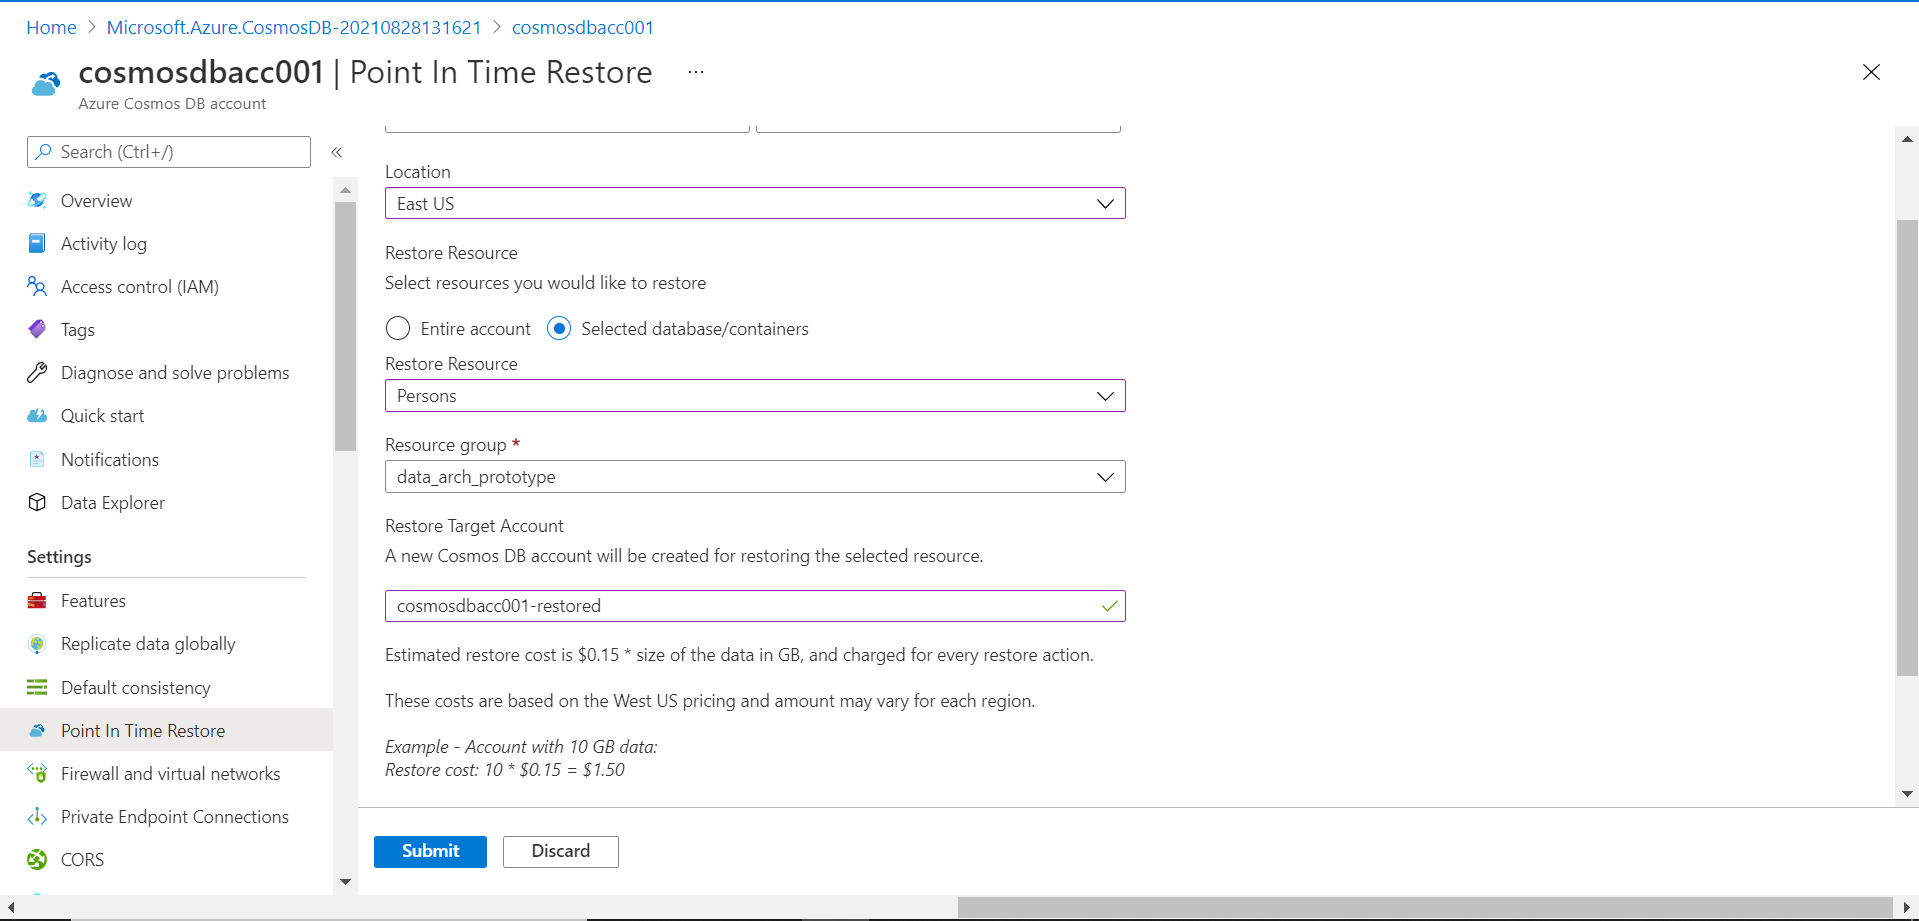
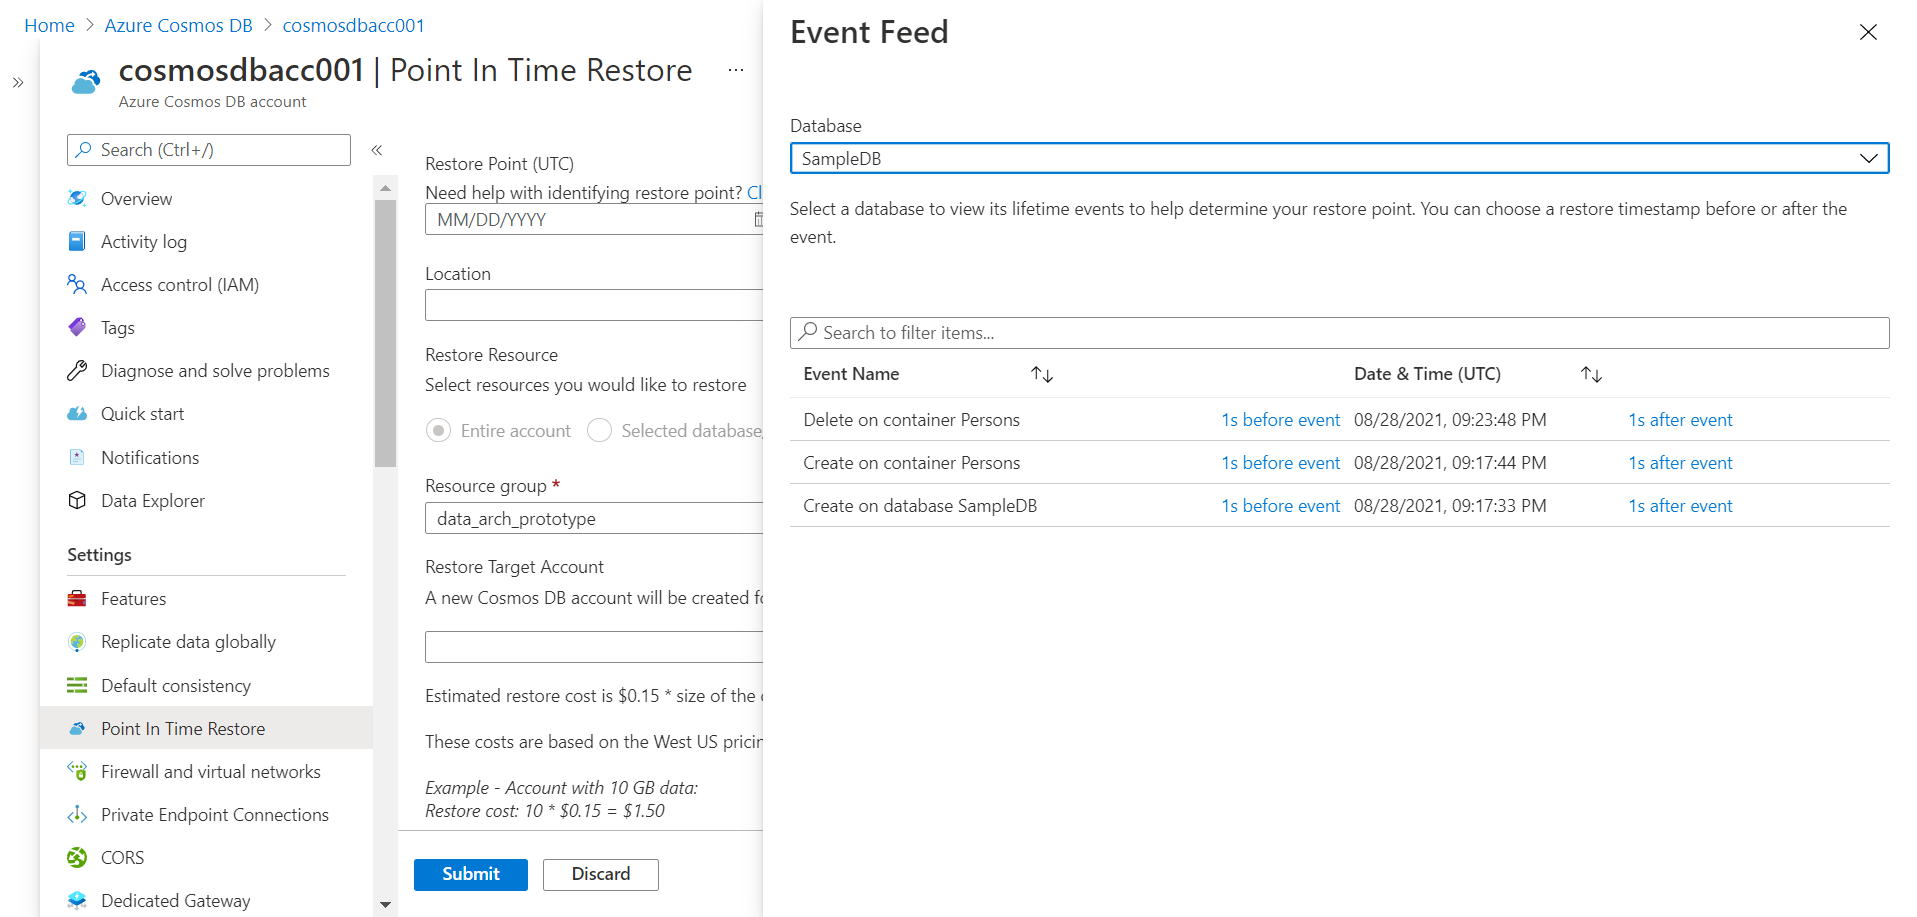
The first step towards performing a point-in-time restore is selecting the restore point. As many operations are performed on different databases and containers in an account, it may get difficult to pinpoint the exact event. We have the option to select the time range when the restore point of interest would have taken place. If we do not know the exact timings, we can click on the link shown on the page to explore the event feed which would list all the available restored points as shown in the pop-up window. In the event feed, we can select the database for which we want the explore the event feed and it would list all the most recent events. We just created a new sample database and a container, so the same is available here. We have the option to select the time before and after the event.
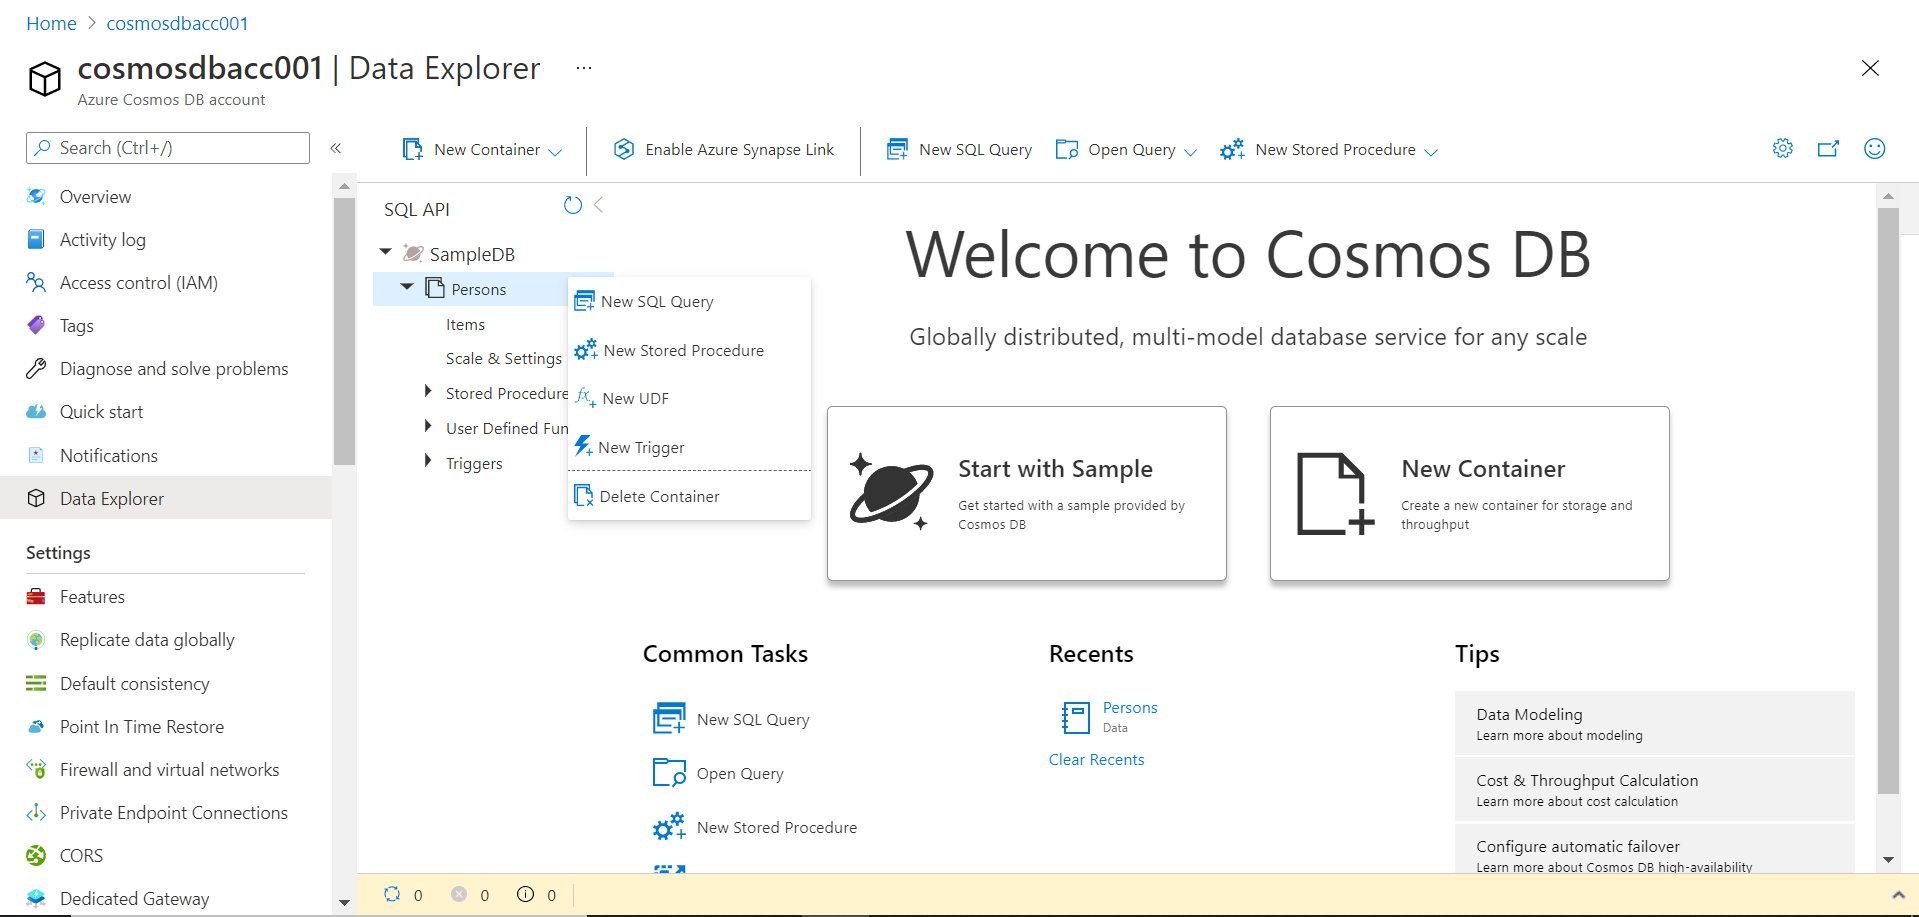
Typically, point-in-time restores are driven by data events like restoring a historic version of data or restoring data in the stable state which got corrupted accidentally. We can simulate one such situation by deleting the container along with its data, which we will try to restore using the point-in-time restore option of Azure Cosmos DB. Click on the ellipsis of the container which will open a menu as shown below. From the menu options, click on the Delete Container button to delete the container along with its data. This will generate an event internally in the Azure Cosmos DB event feed.
Navigate back to point in time restore options and select the event where it shows 1 second after the container got created. This will select the exact time of the restore point. Now, we need to select the location in which the newly restored account would be created. Then we need to select the database or containers that we need to restore. We are interested in restoring the container, so we will select the Persons container from the Sample DB database.
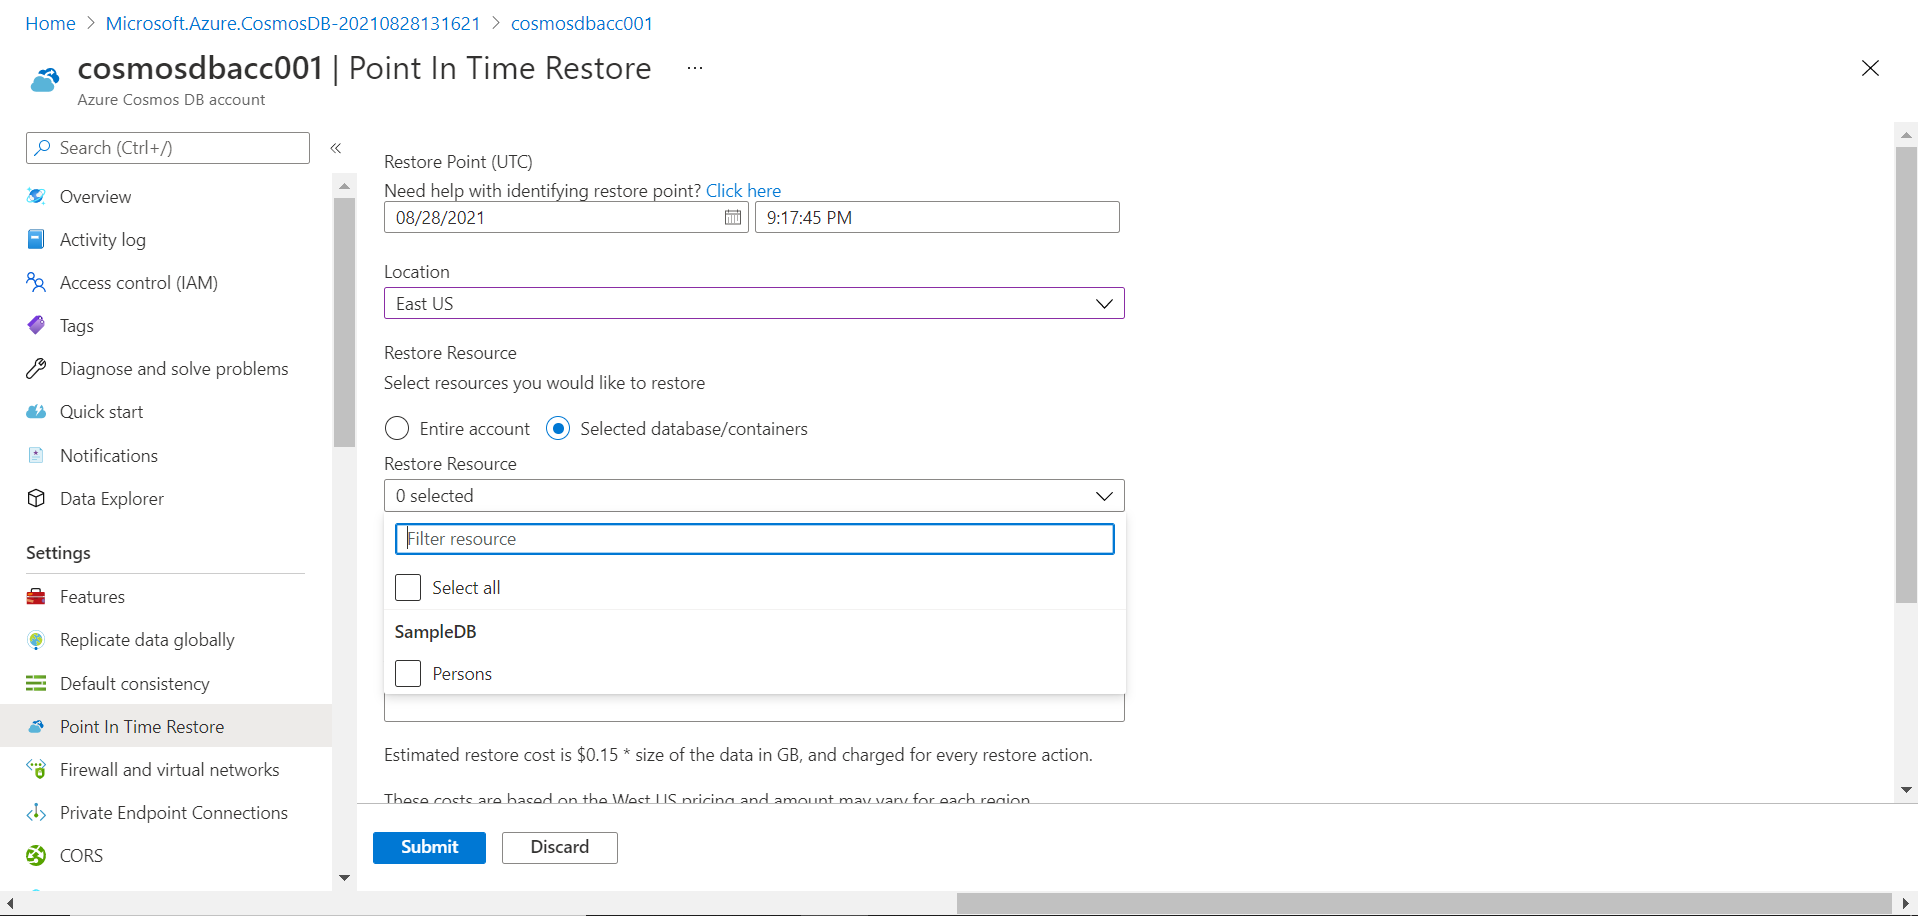
Provide a new name for the target restore account that would be created, and then click on the Submit button. This would start the point-in-time restore process. It can take a few minutes for the new account to get restored.
Once the new account is created, you would be able to explore the data and find that the deleted container is restored in the same database, but in a new account. The data won’t be restored in the existing account.

If we navigate back to the previous account in which we deleted the Persons container and explore the event feed in the point-in-time restore option, we would be able to find the event that got created when we deleted the container as shown below.
In this way, we can use the point-in-time restore option in Azure Cosmos DB to restore data from a Cosmos DB account with a continuous backup policy.
Conclusion
In this article, we learned the use-cases for point-in-time restore. We learned how to use the point-in-time restore option in Azure Cosmos DB, and restore data using specific events from the event feed.

She has a deep experience in designing data and analytics solutions and ensuring its stability, reliability, and performance. She is also certified in SQL Server and have passed certifications like 70-463: Implementing Data Warehouses with Microsoft SQL Server.
View all posts by Gauri Mahajan
- Oracle Substring function overview with examples - June 19, 2024
- Introduction to the SQL Standard Deviation function - April 21, 2023
- A quick overview of MySQL foreign key with examples - February 7, 2023