
This is the second article in Ola Hallengren’s SQL Server Maintenance Solution series. It will cover the jobs for database integrity, backup history cleanup and job history cleanup. The installation of Ola Hallengren’s Maintenance Solution is covered in the first article in the series: Ola Hallengren’s SQL Server Maintenance Solution – Installation and SQL Server Backup solution
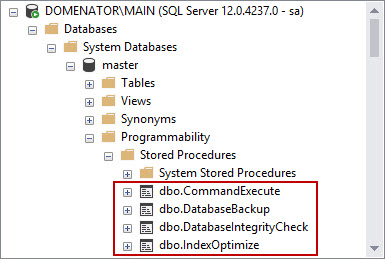
Before proceeding with reading the article, to be able to follow along, make sure that all stored procedures from the Ola’s Maintenance Solution are installed properly on master database. To do this, Expand the following nodes in Object Explorer tree view in SQL Server Management Studio:
Databases\System Databases\master\Programmability\Stored Procedures
In the final node, four stored procedures should be present if the solution is installed properly:
- dbo.CommandExecute
- dbo.DatabaseBackup
- dbo.DatabaseIntegrityCheck
- dbo.IndexOptimize
It is possible to implement Database integrity check solution independently from the Backup and Index maintenance solutions. In this case, it is not necessary to install the procedures dbo.DatabaseBackup and dbo.IndexOptimize. The procedure dbo.CommandExecute must be installed though, as it’s used for all created jobs in the Maintenance Solution.
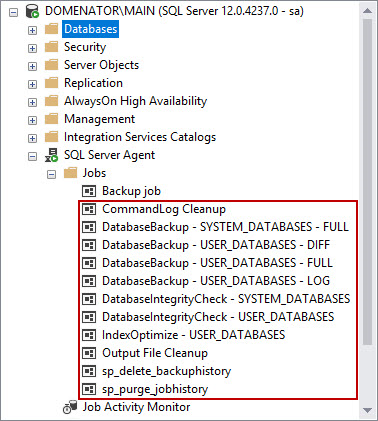
Besides these stored procedures, the installation script also created 11 SQL Server Agent jobs. To view these jobs, expand the nodes SQL Server Agent\Jobs in Object Explorer in SSMS.

Database integrity check
When used with the default settings, the database integrity check jobs runs the DBCC CHECKDB command against system or user databases. The integrity check is often performed to ensure that there are no traces of corruption on a database. If the check fails, it is strongly advised to determine and remove the source of corruption to prevent the potential data loss.
As all other jobs used in Ola’s Maintenance Solution, integrity check jobs also come without the configured schedules. These jobs can be used as such to run the integrity checks manually, but they do need the configured schedule if the solution needs to be automated. Running the integrity check on a large database might take the significant amount of time, so it’s best to schedule these jobs for a time window when low server traffic is expected. A common practice is to run the integrity check jobs daily, during the server maintenance hours.
To configure the schedules for the integrity check jobs, perform the following steps:
-
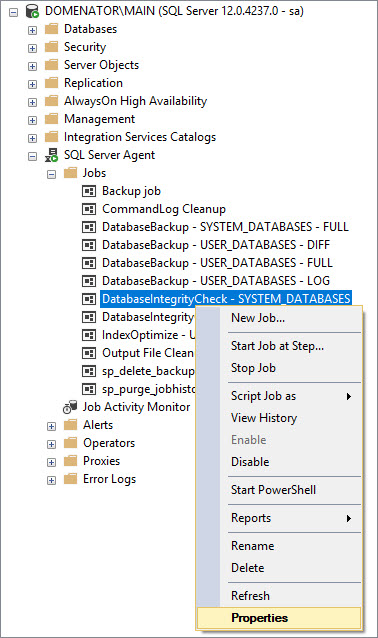
Right click on the integrity check job, and select Properties.

-
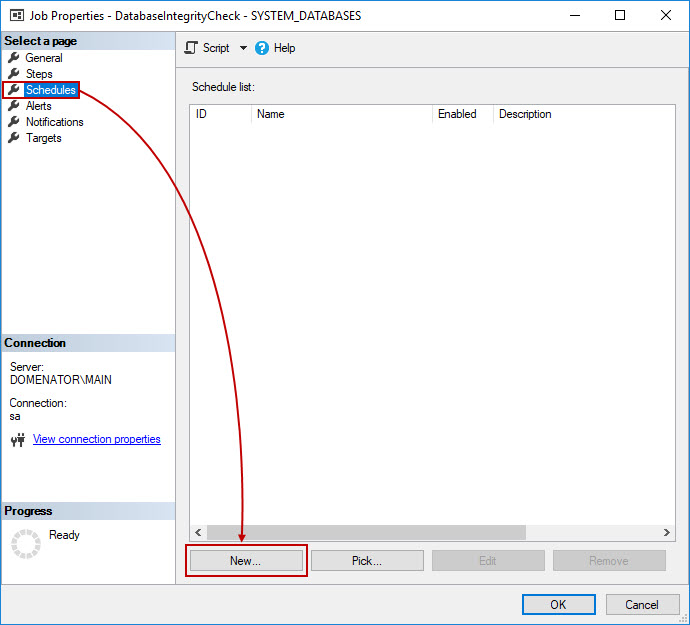
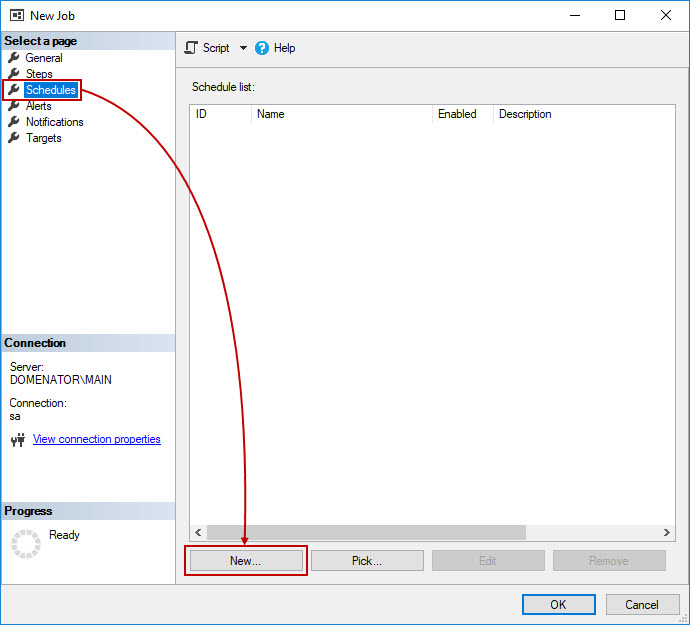
In Job Properties form, navigate to Schedules tab, and click New… button to create a new schedule, or click Pick… button to use a pre-created schedule.
-
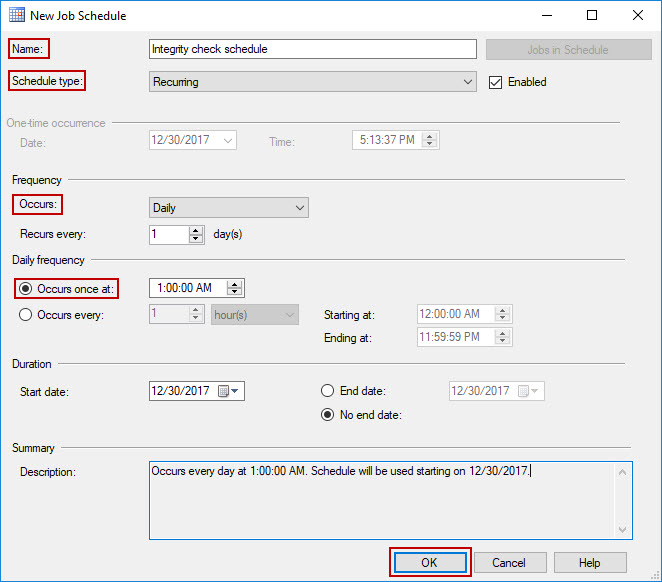
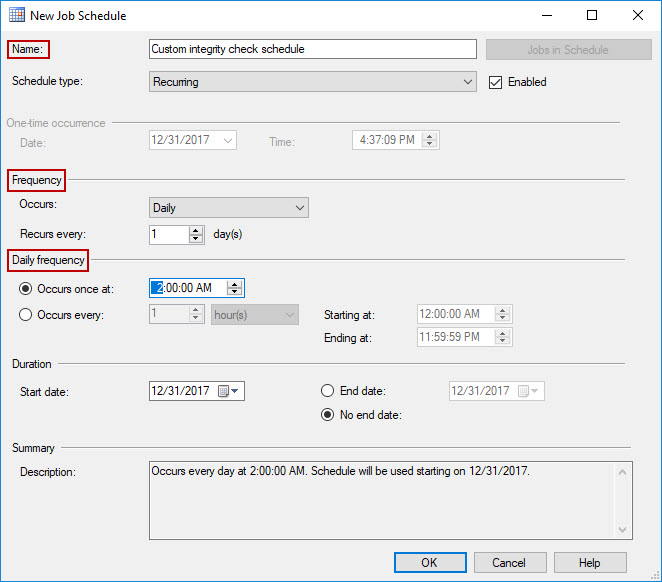
In the New Job Schedule form, provide the name for the schedule, and specify its type, frequency, daily frequency and duration. Check the schedule Description in the Summary section, and if no further changes are needed, click OK button to save the schedule.
As the integrity check is usually performed daily, the schedule in this example will be set accordingly:
-
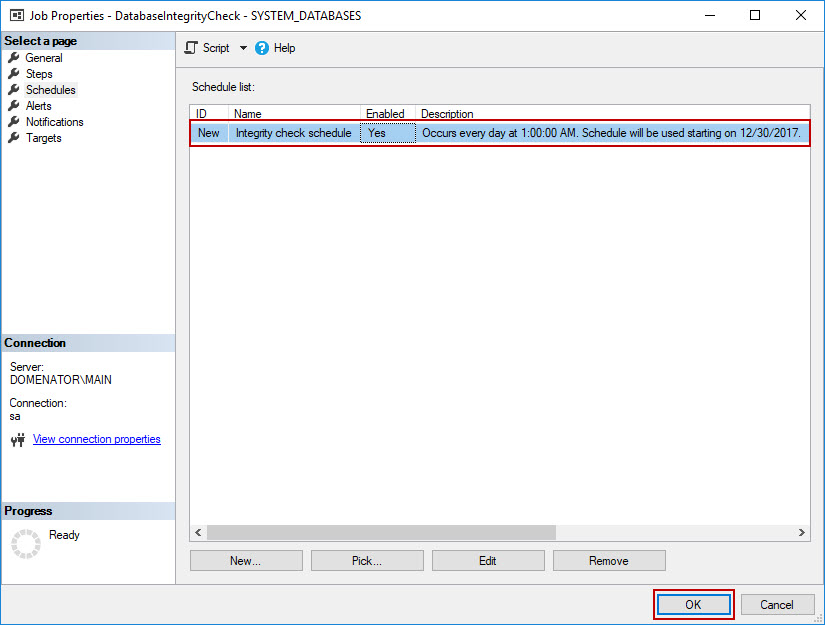
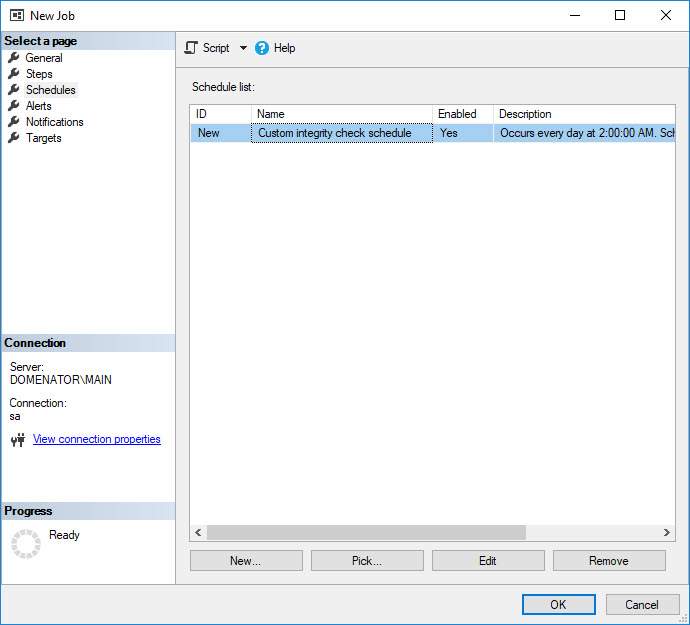
In Job Properties form, click OK to use created schedule.
-
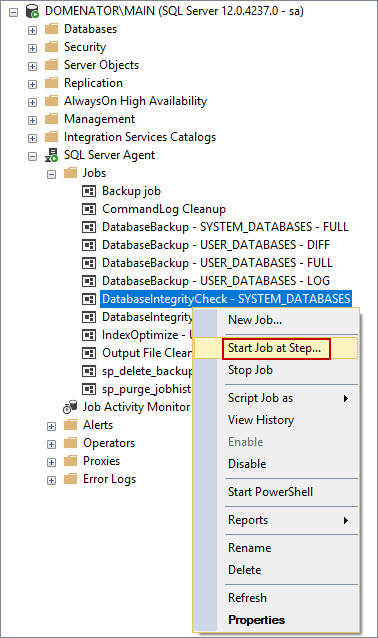
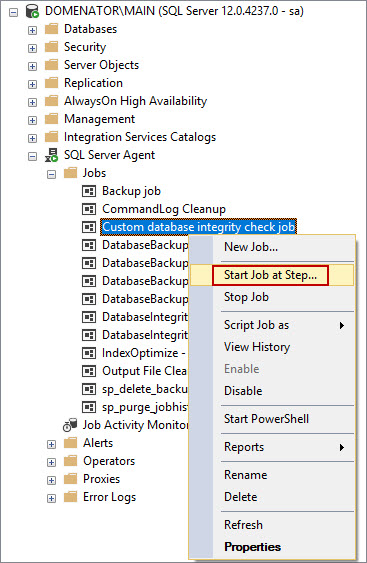
The job will now run on the defined schedule. If it needs to be run manually, right click on the job, and select Start job at Step…
-
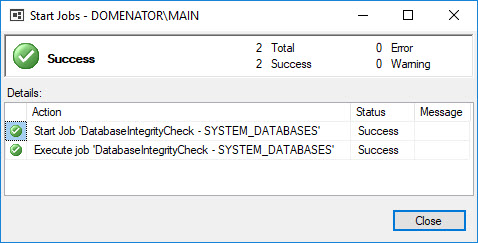
The success message is displayed if no errors are encountered.
DatabaseIntegrityCheck stored procedure
It is possible to use these pre-made jobs on any server, but the full power of Ola’s solution lies in its customization options. The stored procedure dbo.DatabaseIntegrityCheck accepts the total of 15 parameters, which can be provided through SQL Server Agent CmdExec script. The script can then be used to create a custom, fully automated SQL Server Agent job.
To see the list of all parameters accepted by the procedure, just expand the Parameters under the dbo.DatabaseIntegrityCheck stored procedure node in SSMS.
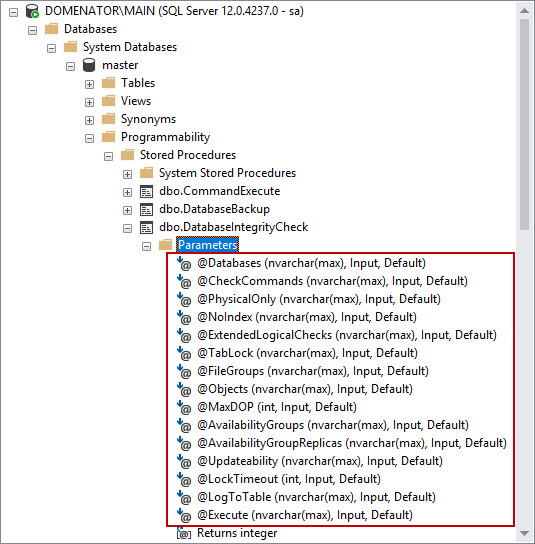
It is not advised to change the default values of these parameters, as this will affect the pre-made database integrity check jobs. Instead, the custom parameters can be passed to the procedure by the script. To write the script, we need to check the properties and values for each parameter.
Databases
This parameter is used for the database selection. The parameter is usually followed by the database name. To include multiple databases in the script, just separate the names by comma (,) To exclude a database from the certain selection, add hyphen character (-) in front of the database name. Percentage character can also be used for a wildcard selection. Below is the table of all values supported for the Databases parameter:
Value Description SYSTEM_DATABASES Selects all system databases USER_DATABASES Selects all user databases ALL_DATABASES Selects all databases on the SQL Server instance AVAILABILITY_GROUP_DATABASES Selects all databases in availability group Database1, Database2 Selects databases named Database1 and Database2 %A% Selects all databases that have character “A” in their names USER_DATABASES, -Database1 Selects all user databases, but excludes Database1 from the selection CheckCommands
The parameter specifies the integrity check commands that will be performed. To include multiple commands in the script, just separate them by comma (,).
Value Description CHECKDB Performs the DBCC CHECKDB command on the set of selected databases. This is used as a default value, if no other values are provided. CHECKFILEGROUP Performs the DBCC CHECKFILEGROUP command on the set of selected databases. CHECKTABLE Performs the DBCC CHECKTABLE command on the set of selected databases. CHECKALLOC Performs the DBCC CHECKALLOC command on the set of selected databases. CHECKCATALOG Performs the DBCC CHECKCATALOG command on the set of selected databases. PhysicalOnly
This parameter limits all checks to the physical structure of the database. It is equivalent to PHYSICAL_ONLY SQL Server option for DBCC check commands. The accepted values are Y (Yes) and N (No). N is used as default value if not specified otherwise.
NoIndex
The parameter is equivalent to NOINDEX option for DBCC check commands in SQL Server. This option skips the check for nonclustered indexes. Available values for the parameter are “Y” (Yes) and “N” (No), “Y” being the default value.
ExtendedLogicalChecks
The parameter equals the EXTENDED_LOGICAL_CHECKS option is SQL Server. Accepted values are “Y” (Yes) and “N” (No). No is the default value. This parameter cannot be combined with PhysicalOnly.
TabLock
Equals the TABLOCK option for DBCC check commands in SQL Server. Accepted values are “Y” and “N”, “N” being the default.
FileGroups
Performs the selection on the specified set of filegroups, but only if CHECKFILEGROUPS value is specified for the CheckCommands parameter. The syntax is same as for the database selection:
- Multiple filegroups can be included in the selection if they are separated by comma (,)
- Hyphen character (-) is used to exclude a filegroup from the selection
- Percent character (%) is used for wildcard selection
Accepted values and examples:
Value Description ALL_FILEGROUPS Selects all filegroups Database1.Filegroup1 Selects the Filegroup1 belonging to Database1 Database1.%Filegroup% Selects all filegroups in Database1, that contain “Filegroup” string in their name Objects
Performs the object selection. The same rules apply for the hyphen, comma and percent character. The parameter can be used only if CHECKTABLE is specified as a value for CheckCommands parameter.
Value Description ALL_OBJECTS Selects all objects Database1.Schema1.Table1 Selects the Schema1.Table1 in Database1 Database1.Schema1.% Selects all objects in Schema1 in Database1 MaxDOP
The parameter equals MAXDOP SQL Server option for DBCC check commands. It specifies the number of processors used for the operation. If not specified, the global maximum degree of parallelism is used.
AvailabilityGroups
Selects the availability groups. Same syntax rules apply as in previous cases.
Value Description ALL_AVAILABILITY_GROUPS Selects all availability groups AvailabilityGroup1 Selects AvailabilityGroup1 ALL_AVAILABILITY_GROUPS,
-AvailabilityGroup1Selects all availability groups except AvailabilityGroup1 %AvailabilityGroup% Selects all availability groups that contain “AvailabilityGroup” string in their name AvailabilityGroupReplicas
Specifies the replicas in availability groups that will be included in integrity check. If not specified, the integrity check is run against all replicas. Available values are presented in table:
Value Description ALL Checks all replicas PRIMARY Checks the primary replica only SECONDARY Checks all secondary replicas Updateability
Performs the selection on READ_ONLY, READ_WRITE, or all databases.
Value Description ALL Selects all databases, regardless of the read status READ_ONLY Selects READ_ONLY databases READ_WRITE Selects READ_WRITE databases LockTimeout
The parameter sets the time in seconds that a command waits for a potential lock to be released. The default value is unlimited, but if needed, any integer can be used as the value.
LogToTable
Set the value to “Y” to log the commands to dbo.CommandLog table. Otherwise, there is no need to specify this parameter, as “N” (no) is the default value.
Execute
Specifies if all defined commands will be executed (Y), or just printed (N). The default value is “Y”.
Writing a custom script
To create a custom script, use the parameters described inpreviously.
Each script should start with EXECUTE dbo.DatabaseIntegrityCheck (call for the procedure).
To assign a value to a parameter, use @ sign before the parameter name, equal mark to specify the equality, followed by the parameter value inside single quotation marks.
Each parameter needs to be followed by the comma (,).
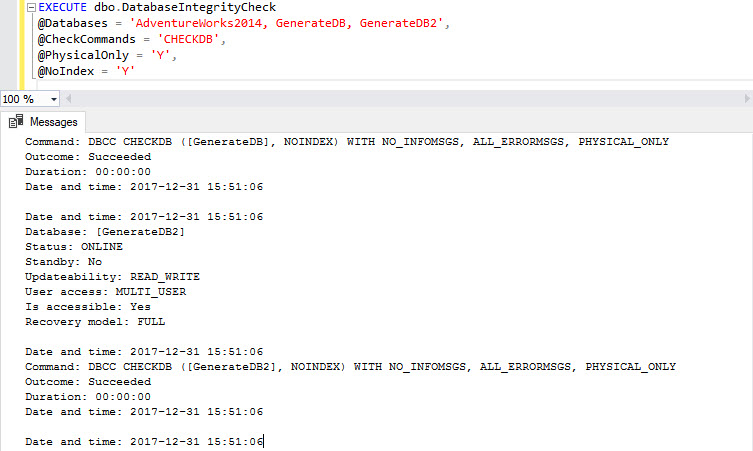
For example, this script selects 3 databases, runs DBCC CHECKDB command, checks only physical structure of the databases, and skips the check for nonclustered indexes:
|
1 2 3 4 5 |
EXECUTE dbo.DatabaseIntegrityCheck @Databases = 'AdventureWorks2014, GenerateDB, GenerateDB2', @CheckCommands = 'CHECKDB', @PhysicalOnly = 'Y', @NoIndex = 'Y' |
To confirm that the script is working, run it against the master database.
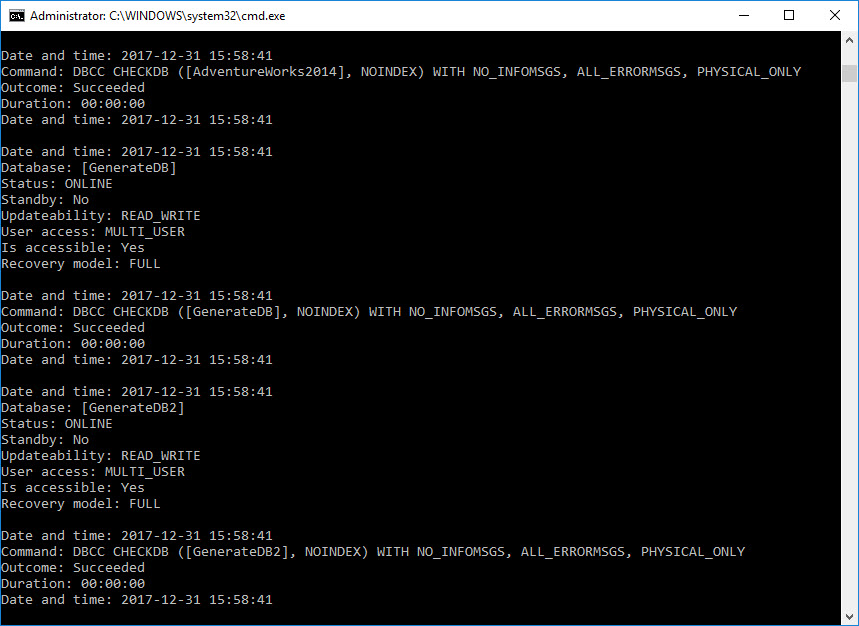
Another option is to run the script with sqlcmd utility. Make sure to provide the correct server name after the S switch (DOMENATOR\MAIN in this case), and to place all commands in a single line:
sqlcmd -S DOMENATOR\MAIN -E -d master -Q “EXECUTE dbo.DatabaseIntegrityCheck @Databases = ‘AdventureWorks2014, GenerateDB, GenerateDB2’, @CheckCommands = ‘CHECKDB’, @PhysicalOnly = ‘Y’, @NoIndex = ‘Y'” -b
The script can be executed directly from the Command Prompt.
Automation
Created scripts can be included in SQL Server Agent jobs, and set to run on a specified schedule. To do this, perform the following steps:
-
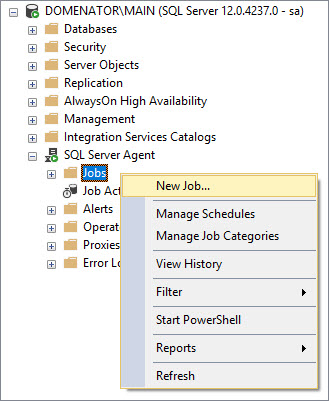
Right click on Jobs folder of SQL Server Agent node in Object Explorer in SSMS, and click on New Job…
-
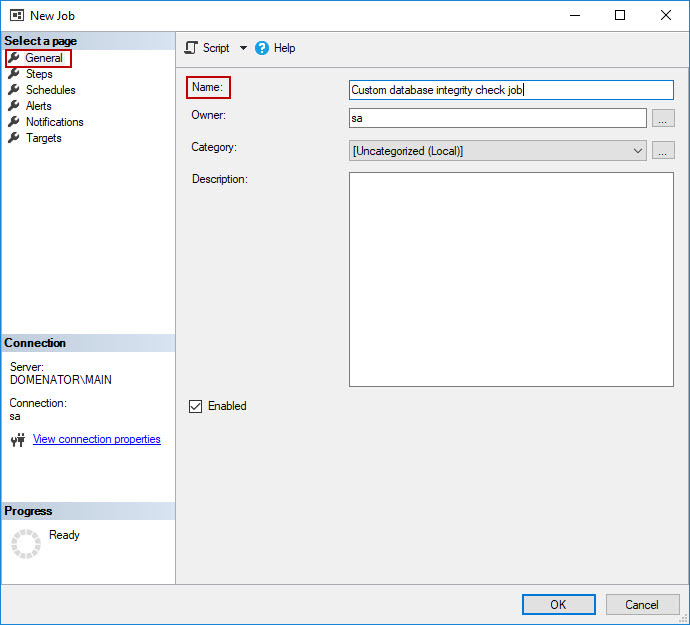
In General tab of the New Job form, provide the name for the job. Optionally, set owner, category, and description.
-
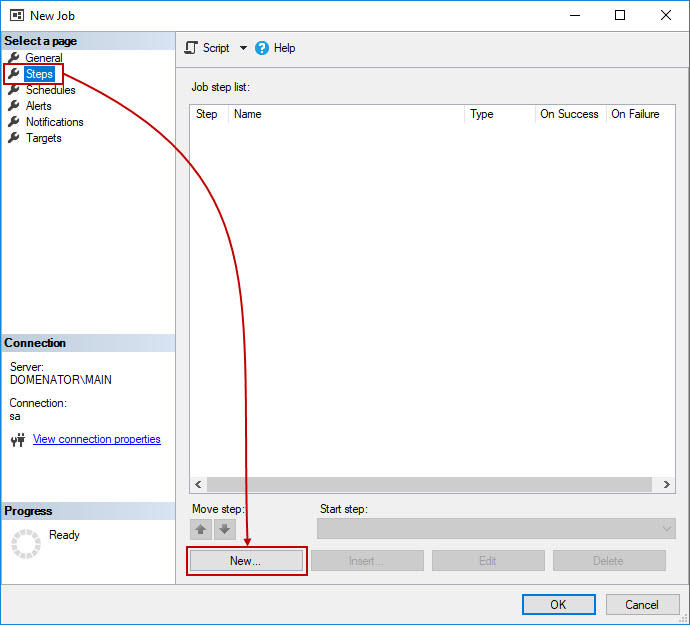
In Steps tab, click New… button.
-
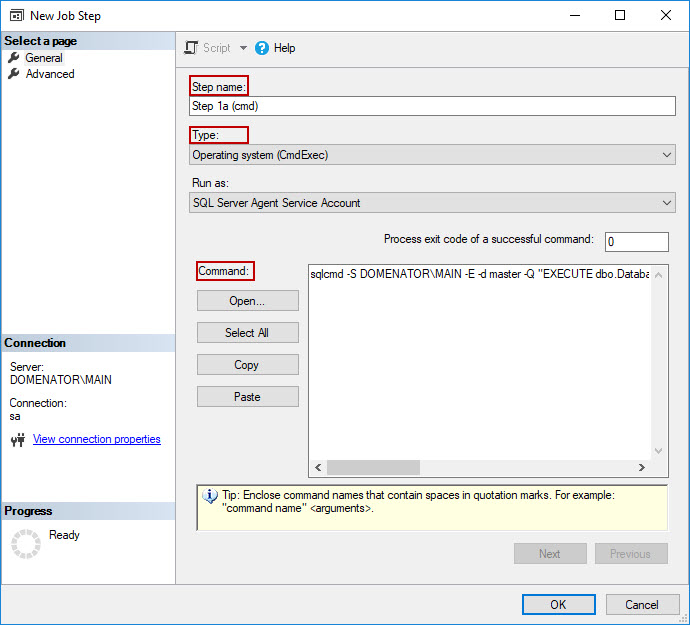
In the New Job Step form provide the name of the job step. Depending on the script that is used, choose one of the available options:
– Select “Operating system (CmdExec)” as script type, if you want to use cmd script, described in previous chapter. Paste the script in the Command box.
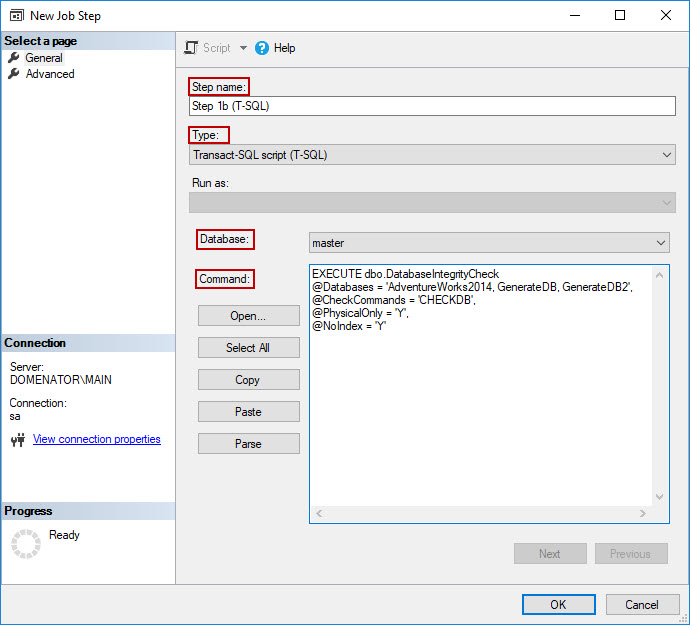
– Alternatively, use the T-SQL script from the previous chapter, specify the Transact-SQL script (T-SQL) as a script type, and set the master database as the script target.
Click OK button to save the changes.
-
In New job form, navigate to Schedules tab. Click on New… button to create a new schedule, or Pick… to use an existing schedule.
-
In New Job Schedule form, provide the name and the type for the schedule, and set its frequency. Check the description to confirm that the schedule is configured well, and click OK to save changes.
-
In New Job form, select the created schedule, and click OK to save all job settings.
-
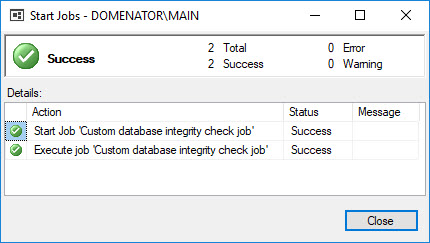
To run the job, expand the SQL Server Agent and Jobs node in Object Explorer. Right click on the job, and select Start job at step… from the context menu.
-
The success message is generated as soon as the job completes.
Other articles in this series:
- Ola Hallengren’s SQL Server Maintenance Solution – Installation and SQL Server Backup solution
- Ola Hallengren’s SQL Server Maintenance Solution – Index and statistics maintenance
Useful links
- SQL Server Integrity Check
- Modify a Stored Procedure
- DBCC CHECKDB (Transact-SQL)
- DBCC CHECKFILEGROUP (Transact-SQL)
- DBCC CHECKTABLE (Transact-SQL)
- DBCC CHECKALLOC (Transact-SQL)

He has a great passion for new technologies, science, video games, and medieval history. He also likes reading, writing, and learning new languages.
Robert is currently working for ApexSQL LLC as Software Sales Engineer where he specializes database backups and indexes.
View all posts by Robert Seles
- Multiple methods for scheduling a SQL Server backup automatically - July 17, 2018
- Ola Hallengren’s SQL Server Maintenance Solution – Index and statistics maintenance - January 23, 2018
- Ola Hallengren’s SQL Server Maintenance Solution – Database integrity check - January 10, 2018