In the previous articles of this series, we built the bridge that leads us to the best way of migrating our SQL workload to Microsoft Azure, by showing how to create the databases migration strategy that contains a deep study of the current environment and the available options in Azure to replace the on-premises setup, which we tried to make it easier by providing all Azure database services and the workload that fits each service, and finally, we introduced several Microsoft tools and services that can be used to assess the current setup, provide migration guidance steps and migrate the databases to Microsoft Azure services with the minimal downtime.
I recommend you go through these articles before stepping to this point of the article’s series:
- Migrating your SQL Workload to Microsoft Azure: Planning the Jump
- Migrating your SQL Workload to Microsoft Azure: Services Selection
- Migrate your SQL Workload to Microsoft Azure: Guidance and Assessment Tools
- Migrating your SQL Workload to Microsoft Azure: Assessment and Migration Tools
In this article, we will show how to migrate a SQL Server database from an on-premises server to a SQL Server instance hosted in Azure VM.
Why Azure VM
Although the cost of hosting your SQL Server instance in an Azure VM is higher than using other PaaS services, still can be controlled by the compute and storage size of the VM, it comes with many benefits, include:
- Provides you with full administrative control over the operating system and the SQL Server instance installed in that virtual machine
- Ability to customize high availability, disaster recovery and backup plans
- Supports other SQL Server components that are not supported by the Azure SQL Database, such as SQL Server Transactional Replication, SQL Server Integration Services, SQL Server Analysis Services, SQL Server Reporting Services, Log Shipping and Always On Availability Groups
- Optimized for migrating on-premises SQL Server databases to Azure with the minimal required changes, due to 100% compatibility with all SQL Server versions 2005 and later
- Ability to host multiple databases in the same instance, allowing cross-database transaction execution
Migration Planning
Before migrating your SQL Server databases to a Microsoft Azure VM, you should use the discovery and assessment tools to make the migration process clear and smooth. These tools include the Microsoft Planning and Assessment tool that can be used to discover the on-premises environment configurations and components, the Data Migration Assistant tool that is used to assess the on-premises databases for any blocking or compatibility issue that may affect the migration process and the Database Experimentation Assistant tool that is used to assess the target server for the current workload type.
After assessing the current environment, we should decide which license type we will use for the SQL Server Virtual Machine, where Microsoft supports both the pay-as-you-go (PAYG) model, in which the license cost will be included in the per-second billed cost, and the bring-your-own-license (BYOL) model, in which you can use your own SQL Server license in the Azure VM and billed for the VM usage only.
The next thing to consider here is the size of the virtual machine that will host the SQL Server instance in Microsoft Azure. The size of the machine should consider on-premises workload handling and growing requirements. Take into consideration that the minimum VM size for SQL Server Enterprise editions DS3_v2, and DS2_v2 for the Standard edition. For more information about the VMs sizing in Azure, check the Size for Virtual Machines in Azure.
Prepare a VM on Microsoft Azure
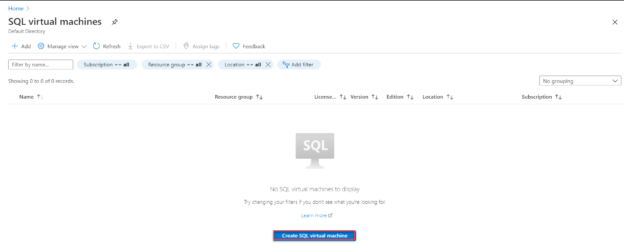
Before we start the migration process, we should prepare the Azure Virtual Machine that will host the target SQL Server instance. To create the SQL Virtual machine, search for SQL Virtual Machines in Azure Portal then click on Create SQL virtual machine, as below:
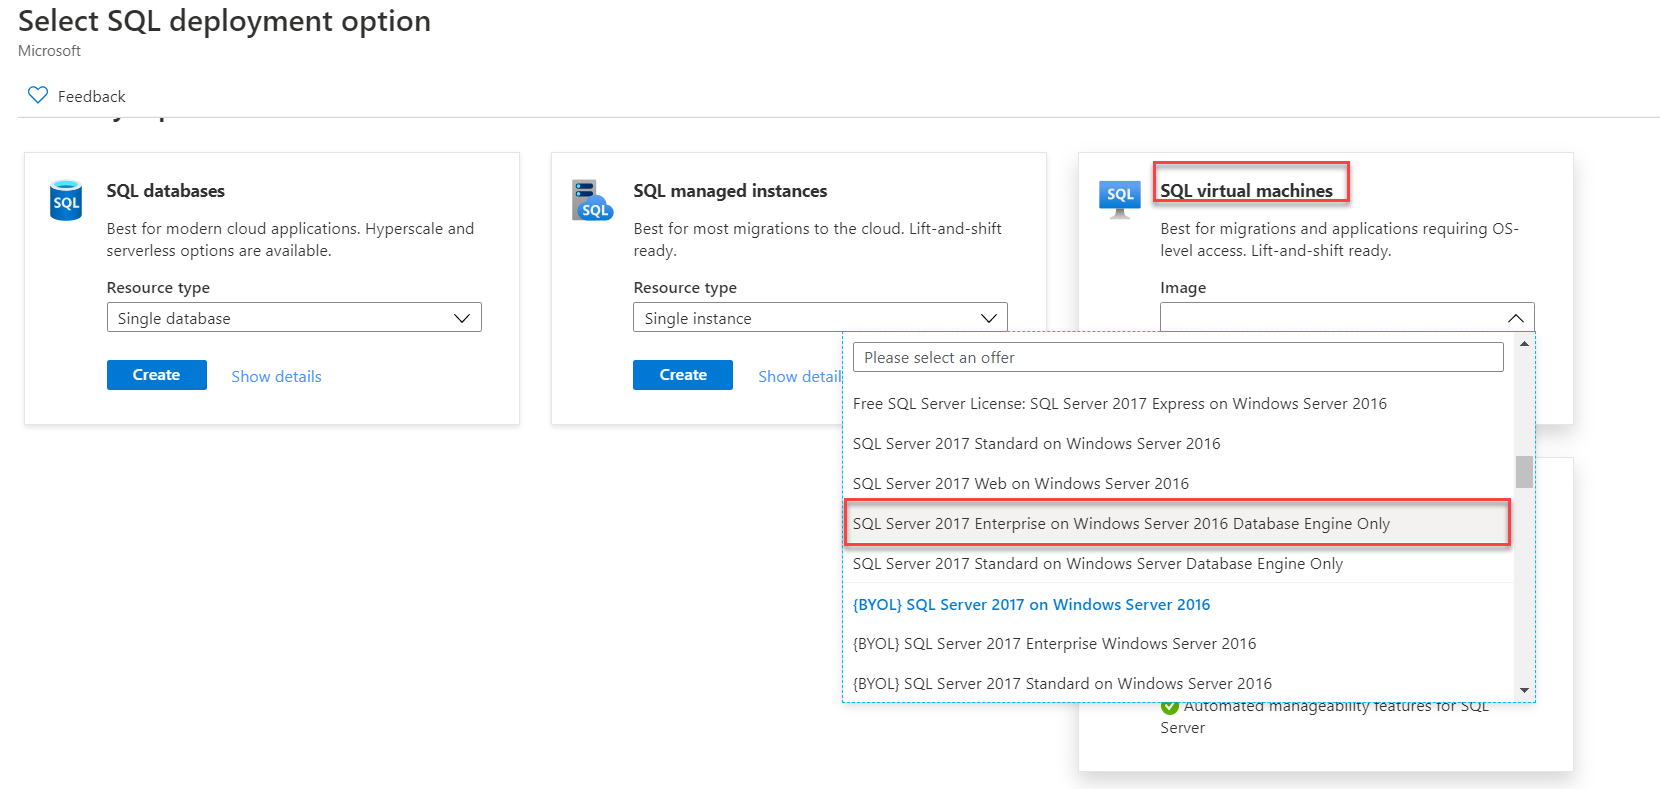
In the “Select SQL deployment option” page, choose the image that will be used to install the Operating System and the SQL Server instance, based on the license and version requirements, then click Create, as below:
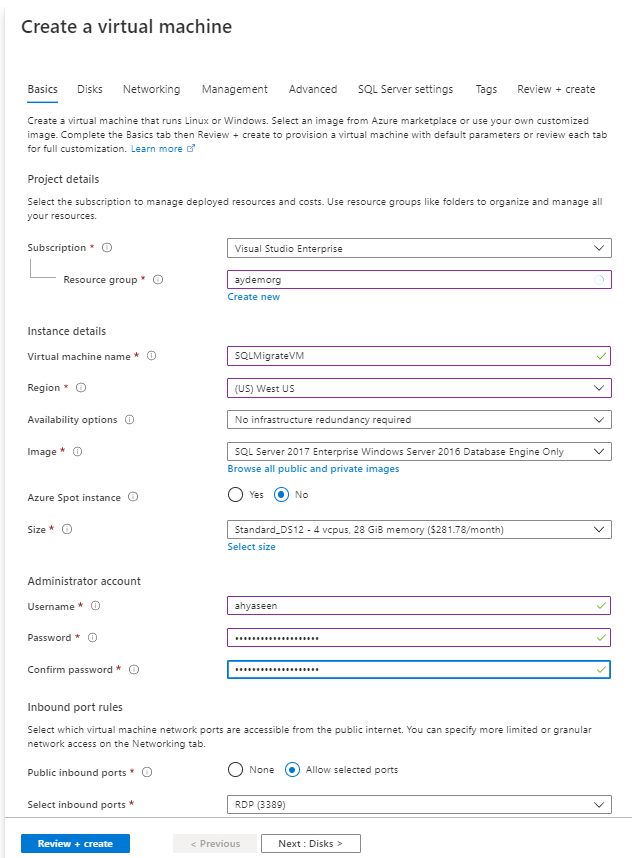
In the Basic page of the Create a Virtual Machine window, provide the resource group under which you will create the VM, the region where the VM will be hosted, a unique name for the VM, the size for the VM and the administrative account that will be used to connect to that VM. After providing the required information, click on Next to configure the SQL Server Settings:
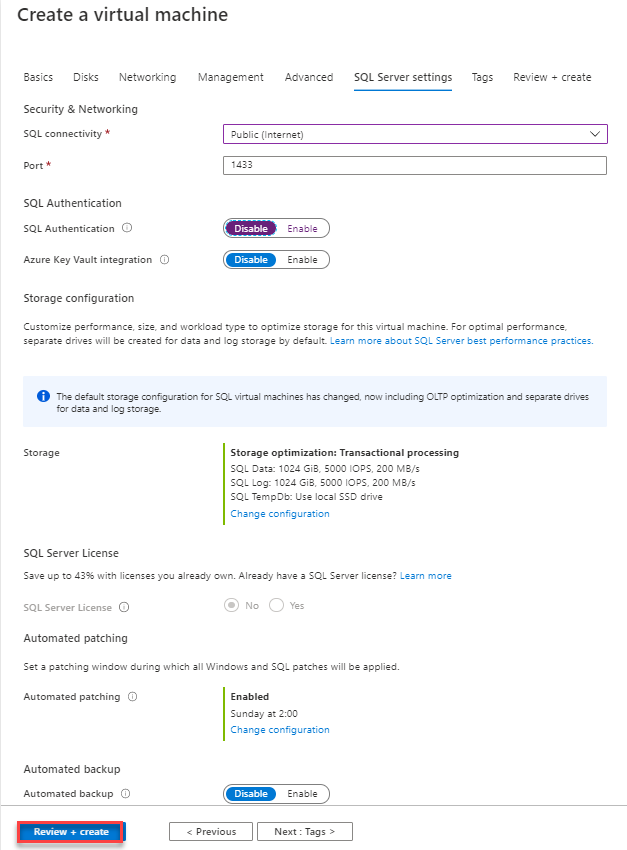
In the SQL Server settings, configure the SQL Connectivity as Public to allow connections to the SQL Server over the internet. Internally, the portal will enable the TCP/IP protocol for the SQL Server, configure a firewall rule to open the configured TCP port, enable the SQL Server Authentication and configures the network security group on that SQL VM to all TCP traffic on the configured TCP port. Click Review + Create to proceed with the VM creation, as below:
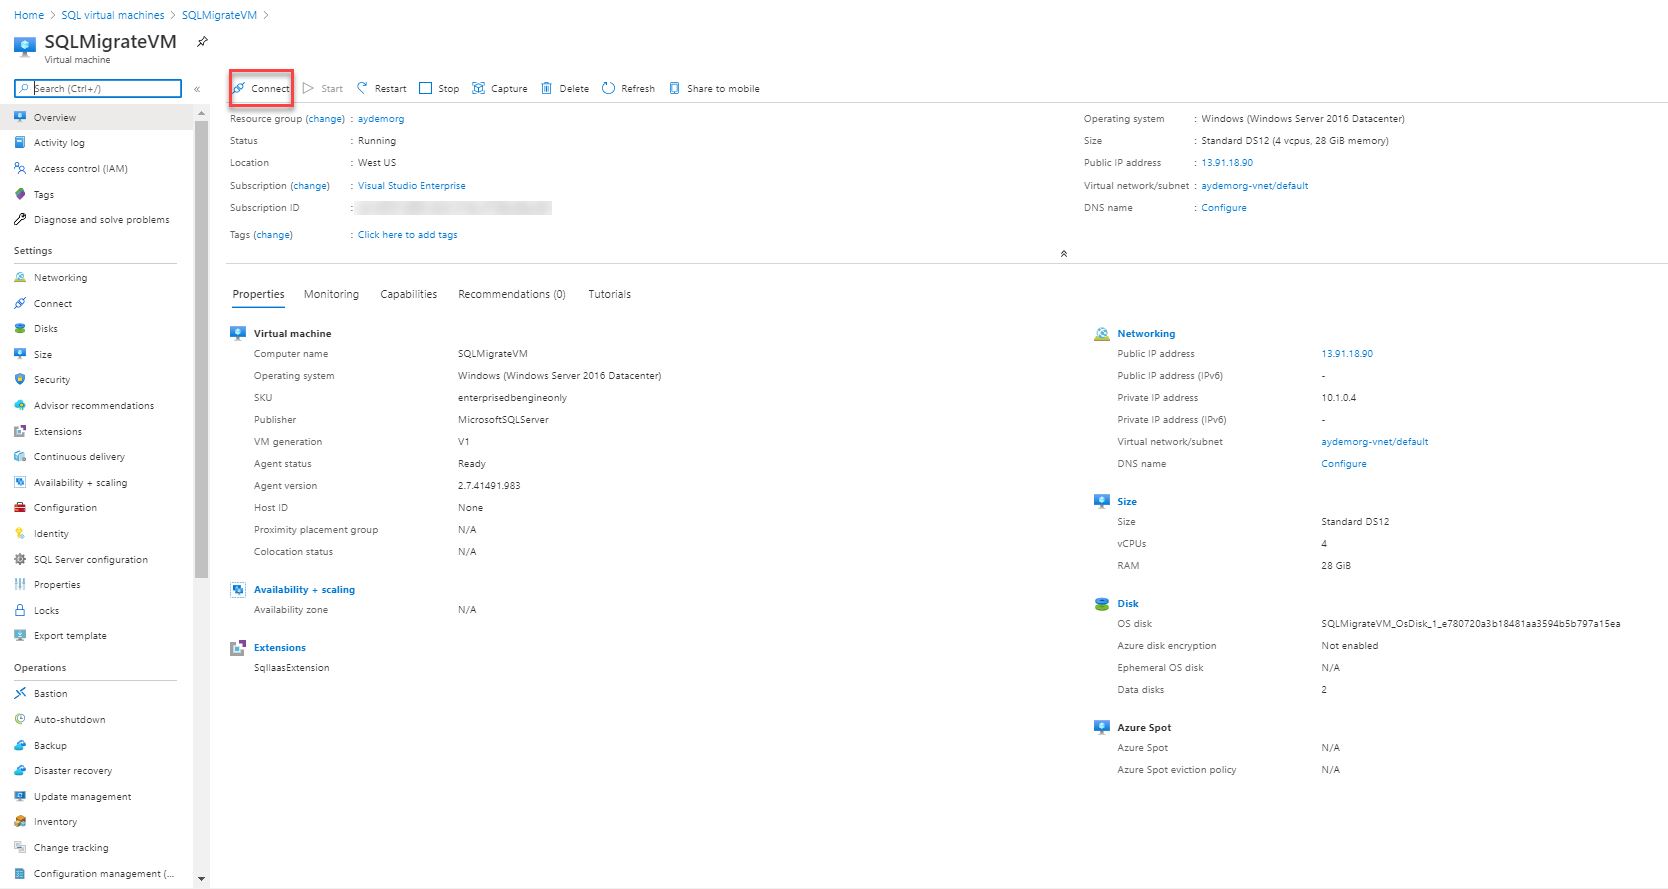
Once the SQL VM is created successfully, open that VM from the Virtual Machines page and click on the Connect option to create a connection to that machine, as shown below:
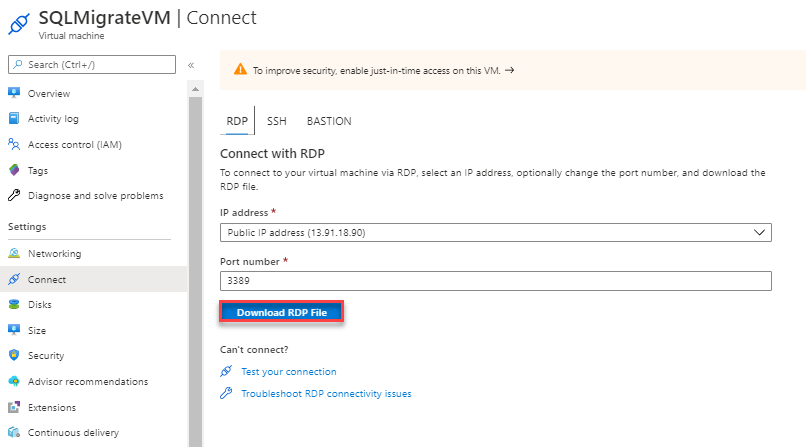
From the Connect page, we need to connect using RDP as this is a Windows machine. Click on Download RDP File option to download locally a .exe file that will be used to connect to that Microsoft Azure VM, as follows:
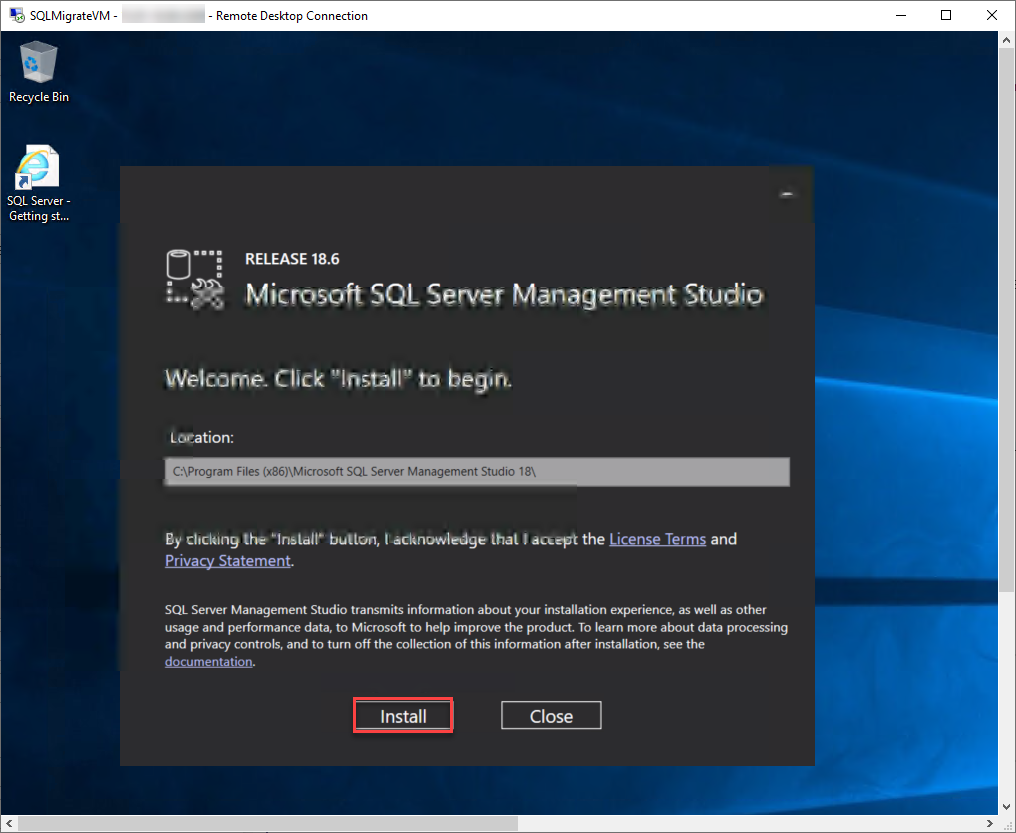
After connecting to that machine, using the previously configured credentials, we will install the SQL Server Management Studio in order to connect to the SQL Server on that machine, as shown below:
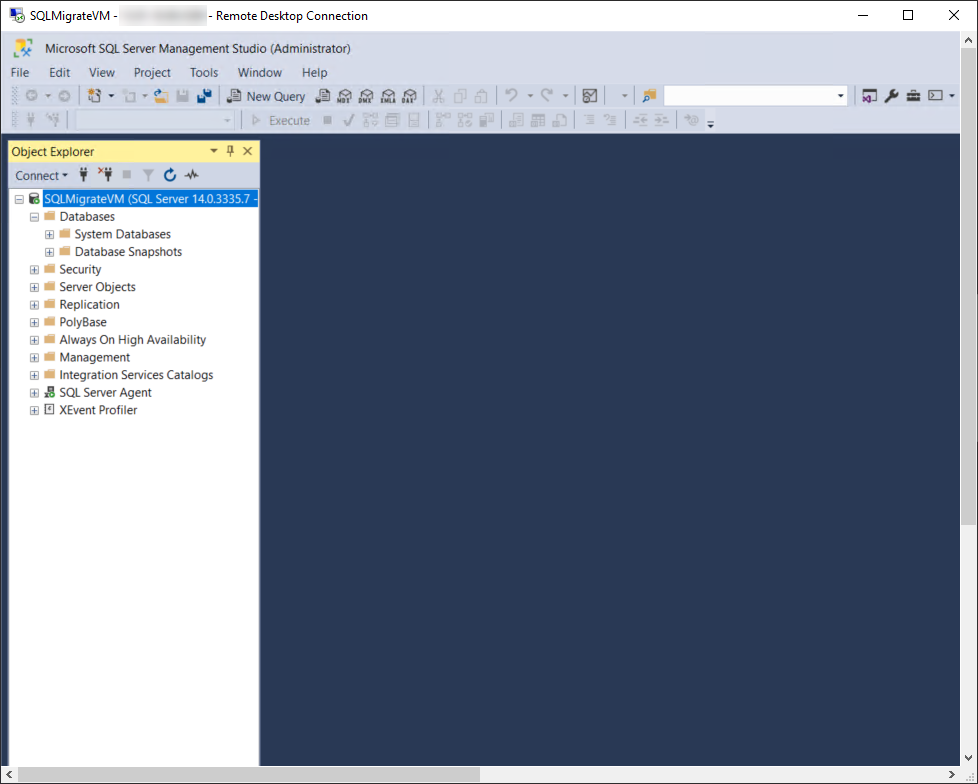
After installing the SSMS tool, open it and connect to the local SQL Server instance and you will see a normal SQL Server instance that has no difference from the on-premises SQL Server instances you are familiar with, except for that this instance is hosted in a Microsoft Azure VM, as follows:
Migration Methods
SQL Server provides us with different methods that can be used to migrating the SQL Server databases from an on-premises SQL Server instance to a SQL Server instance hosted in Microsoft Azure VM. The decision of which tool to use depends on the planned downtime for the migration process, whether to automate the migration process or migrate manually and the network bandwidth you have, with other factors based on each individual scenario. These SQL Server databases migration methods include:
- (Offline Migration) Take a compressed backup from the on-premises SQL Server database, with version 2005 and later, copy it to the Azure VM then restore it to the SQL Server instance hosted in the Azure VM
- (Offline Migration) Perform backup from the on-premises SQL Server instance, with version 2012 SP1 CU2 and later, with the Azure Blob Container URL as the backup target, then restore to the SQL Server instance hosted in the Azure VM from that Azure URL
- (Offline Migration) Detach the database from the on-premises SQL Server instance, copy the database files to an Azure Blob Storage using AZCopy command-line utility, then attach the database files to the SQL instance on that Azure VM from the Azure Blob Storage URL, without the need to copy the database files to the Azure VM
- (Offline Migration) Convert the on-premises physical machine to Hyper-V VHD, upload that VHD to Azure Blob storage, then deploy the VHD as a new Microsoft Azure VM
- (Offline Migration) Use the Data Migration Assistant to migrate the on-premises database schema and data to the Azure VM
- (Online) Configure the Always On Availability Group in the on-premises SQL Server instance, add the target Azure VM as a replica using the Add Azure Replica wizard, or using the T-SQL commands, then perform a failover to make the SQL Server instance hosted in the Azure VM as the primary replica, and direct the users to connect to the new replica hosted in the Azure VM. This method provides us with the minimal possible downtime during the migration process
- (Online) Configure SQL Server Transactional Replication with the on-premises SQL Server instance as the publisher and the SQL Server instance hosted in the Azure VM as the subscriber. After synchronizing the changes between the two databases, you can disable the replication and direct the users to connect to the SQL Server instance that is hosted in the Azure VM. This method also provides us with the minimal possible downtime during the migration process
Based on the provided migration method, you can choose the method that meets your requirements and fits your own scenario.
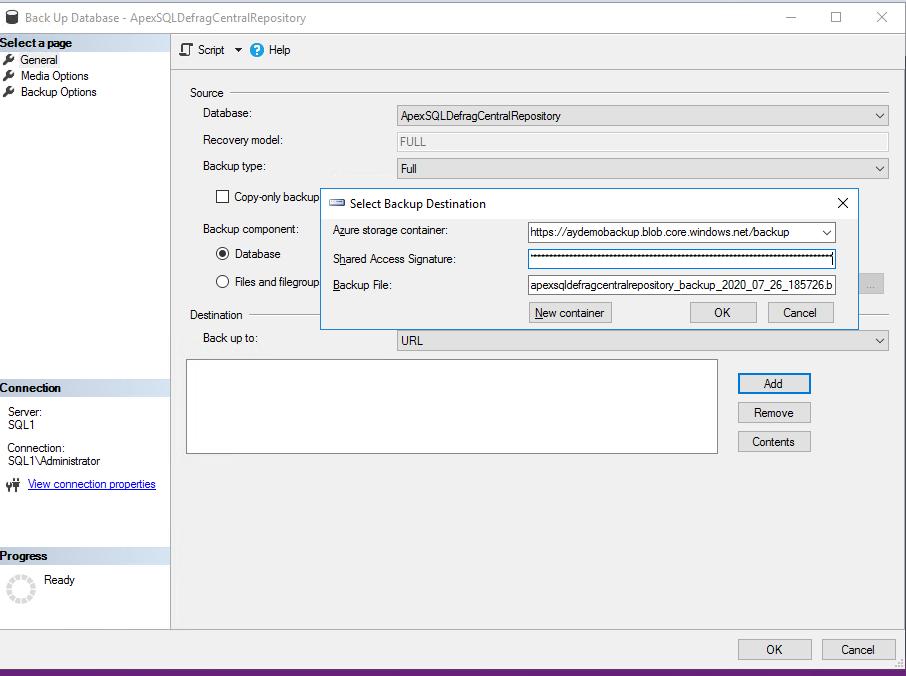
In this demo, we will take a compressed backup and configure the destination of that backup as the Azure Blob Storage URL, where you will be asked to provide the URL for the Azure Blob container where the backup will be stored and the Shared Access Signature to authenticate the access to that container, as shown below:
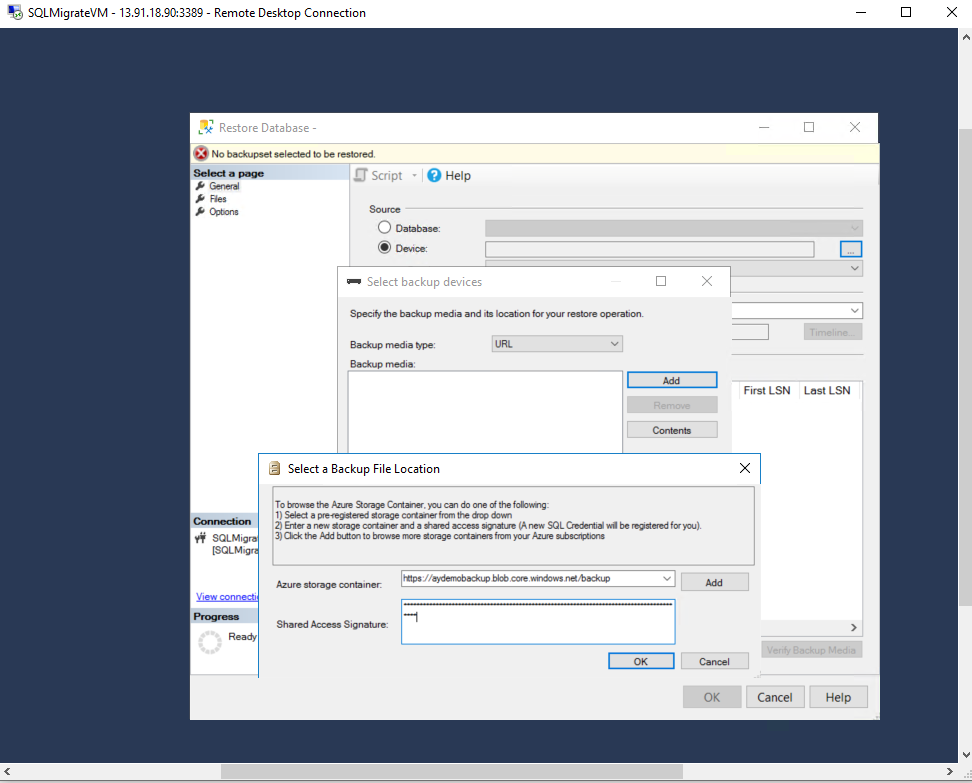
After completing the backup process, we will restore the database backup file from that URL to the SQL Server instance hosted in the Azure VM, again by providing the URL for the container where the backup is stored and the Shared Access Signature to authenticate the access to that container, as shown below:
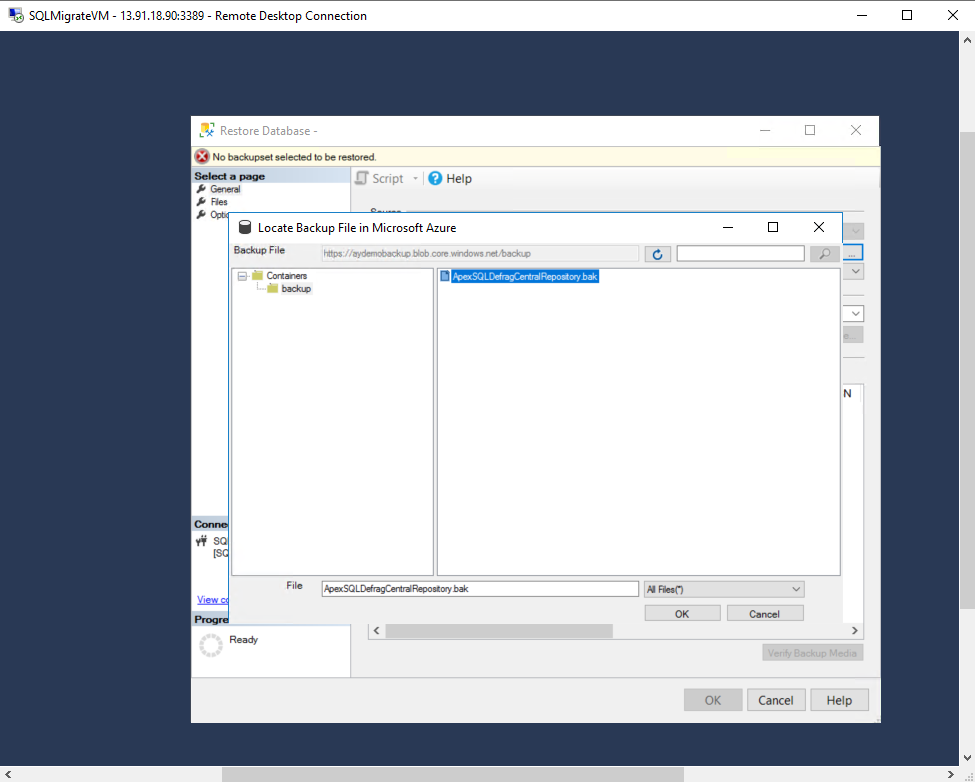
When you provide the container URL and SAS key, you will be able to access the container and choose the backup file that will be restored to that SQL Server instance, as below:
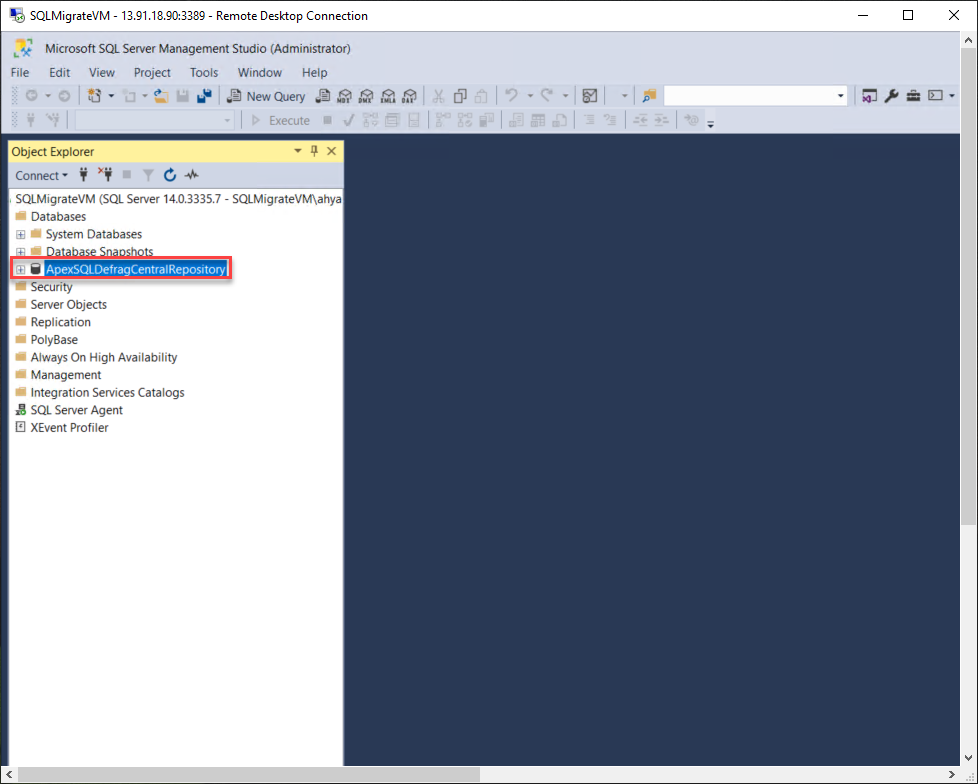
When the Restore from the URL is completed, the database will be online in the SQL Server instance hosted in the Microsoft Azure VM, and you can create the logins that should be granted permissions on that SQL Server instance then point the database and application users to that instance, as below:
Conclusion
In this article, we went through the different considerations and methods that can be used to migrate an on-premises SQL Server database to a SQL Server instance hosted in a Microsoft Azure VM.
In the next article, we will see how to migrate a SQL Server database from an on-premises server to an Azure SQL Database. Stay tuned!
Table of contents
- Azure Data Factory Interview Questions and Answers - February 11, 2021
- How to monitor Azure Data Factory - January 15, 2021
- Using Source Control in Azure Data Factory - January 12, 2021

