

In the previous article of this series, Migrate SQL workloads to Microsoft Azure: Databases trip to SQL Server on Azure VM, we went through the methods that can be used for assessing your on-premises SQL Server databases before the migration process then migrating it to a SQL Server instance hosted in a Microsoft Azure VM.
In this article, we will discuss how to migrate an on-premises SQL Server database to Microsoft Azure SQL Database.
Why Azure SQL Database
When migrating your SQL Server database to Microsoft Azure SQL Database, you will enjoy several benefits on the target database platform. These benefits include:
- Being categorized under Platform-as-a-Service (PaaS) platform, Azure SQL Database removes the need to administer and manage the infrastructure of the hosting machines
- Azure SQL Database provides us with an automatic backup process, with long retention period up to 10 years and restore the backup to a specific point in time
- Azure SQL Database comes with built-in high availability that consists of three secondary replicas, leading to a 99.99% availability guarantee
- Azure SQL Database allows you to replicate your database between Azure regions, using the Active-geo replication feature
- The ability to scale your Azure SQL Database up and down automatically
- The ability to scale out your Azure SQL Database using multiple shards
- The ability to share the compute resources between different Azure SQL Databases using the Elastic Pools model
- Azure SQL Database provides support for Transparent Data Encryption (TDE), which is enabled by default, Dynamic Data Masking, Row-level Security and Always Encrypted security features
- Azure SQL Databases provides you with two purchasing models, the DTU model for predictive costing level based on the provided tiers and vCore model that allows you to scale the storage and the compute individually
- Read Scale-Out that provides you with the ability to direct the read-only SQL workloads to the secondary replica
Planning to Migrate
Before migrating your database that is hosted in an on-premises SQL Server instance to Azure SQL Database, you should prepare a pre-migration plan that contains:
- The tools that should be used to discover and assess the current on-premises database, such as the Microsoft Planning and Assessment tool that can be used to review the on-premises resources and configurations, the Data Migration Assistant that is used to assess the on-premises database for any compatibility issue that may affect the migration process and provide enhancement recommendation for the new setup in Microsoft Azure, and the Database Experimentation Assistant tool that helps in assessing the current workload in the target database platform
-
The alternatives that will be used to replace some of the features and functionalities that are not supported in Azure SQL Database. For example:
- The SQL Server Agent Jobs, that can be replaced by the Azure Automation and Elastic Database jobs
- The Windows Authentication logins that can be replaced by Azure Active Directory Authentication
And other features and functionalities that are no longer available in Azure SQL Database. Check the Features Comparison documentation for your reference
- Consider performing some changes on the source or target database that may speed up the migration process. For example, you can disable the auto-statistics, partition the database tables and indexes, drop the indexed views and move the historical data to another database and migrate it separately. Once the migration completed, you can update the statistics and recreate all the dropped objects
Create Azure SQL Database
In order to migrate the database to Microsoft Azure SQL Database, we should prepare the target Azure SQL Database. To achieve that, search for SQL Databases in Azure Portal and click on Create SQL database option, as shown below:

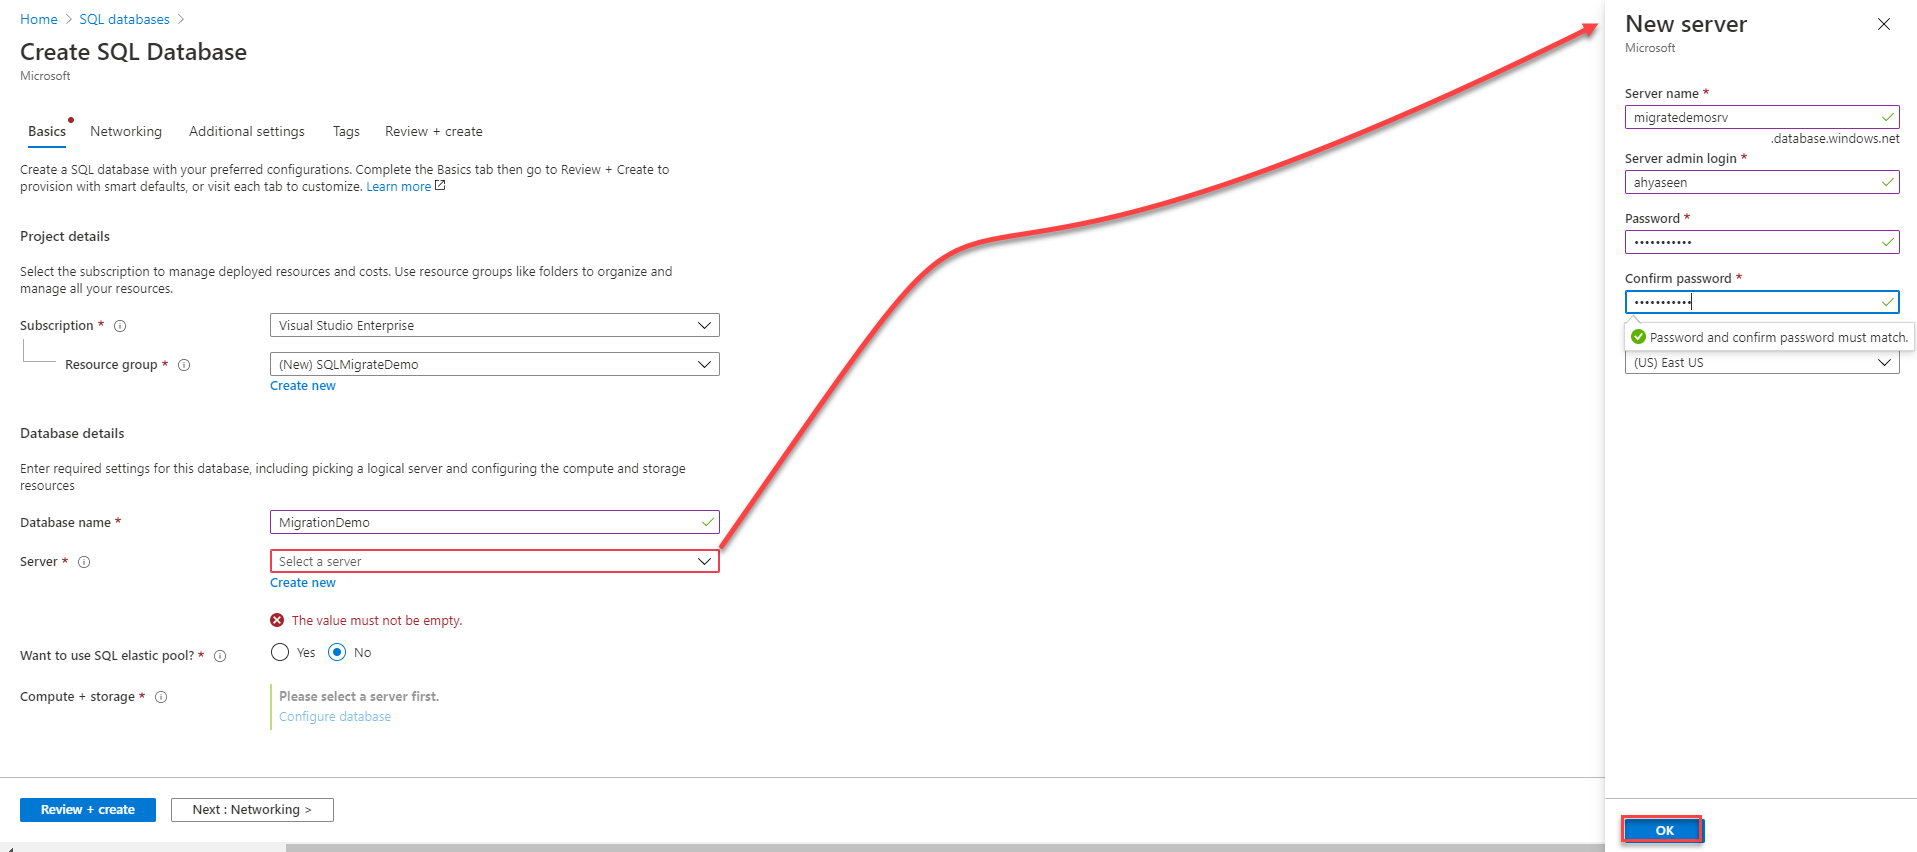
In the Create SQL Database window, provide the subscription under which the database will be created, specify an existing Resource Group to host that database or create a new one, provide a unique name for the Azure SQL Database and choose the logical SQL Server where the database will be hosted from the existing SQL Servers or create a new one.
When creating a new SQL Server to host that Azure SQL Database, provide a unique name for that server, the region where the server will be created and the credentials that will be used to connect to and administer that server.
You will be asked also to specify whether to create a single database or use an elastic pool to host that database, with other databases that share the same resources pool.
Finally, configure the resources that will be assigned to the created database. It is highly recommended to assign the highest possible service tier and compute size based on the planned budget to get the best transfer performance, with the ability to scale the Microsoft Azure SQL Database down when you finish the migration process to lower the cost.
After configuring the new Azure SQL Database, click Review + Create to proceed with the Azure SQL Database creation, as shown below:
Take into consideration that, we may need only to create an Azure SQL Server for some migration methods, while we need an empty Azure SQL Database to migrate using other methods.
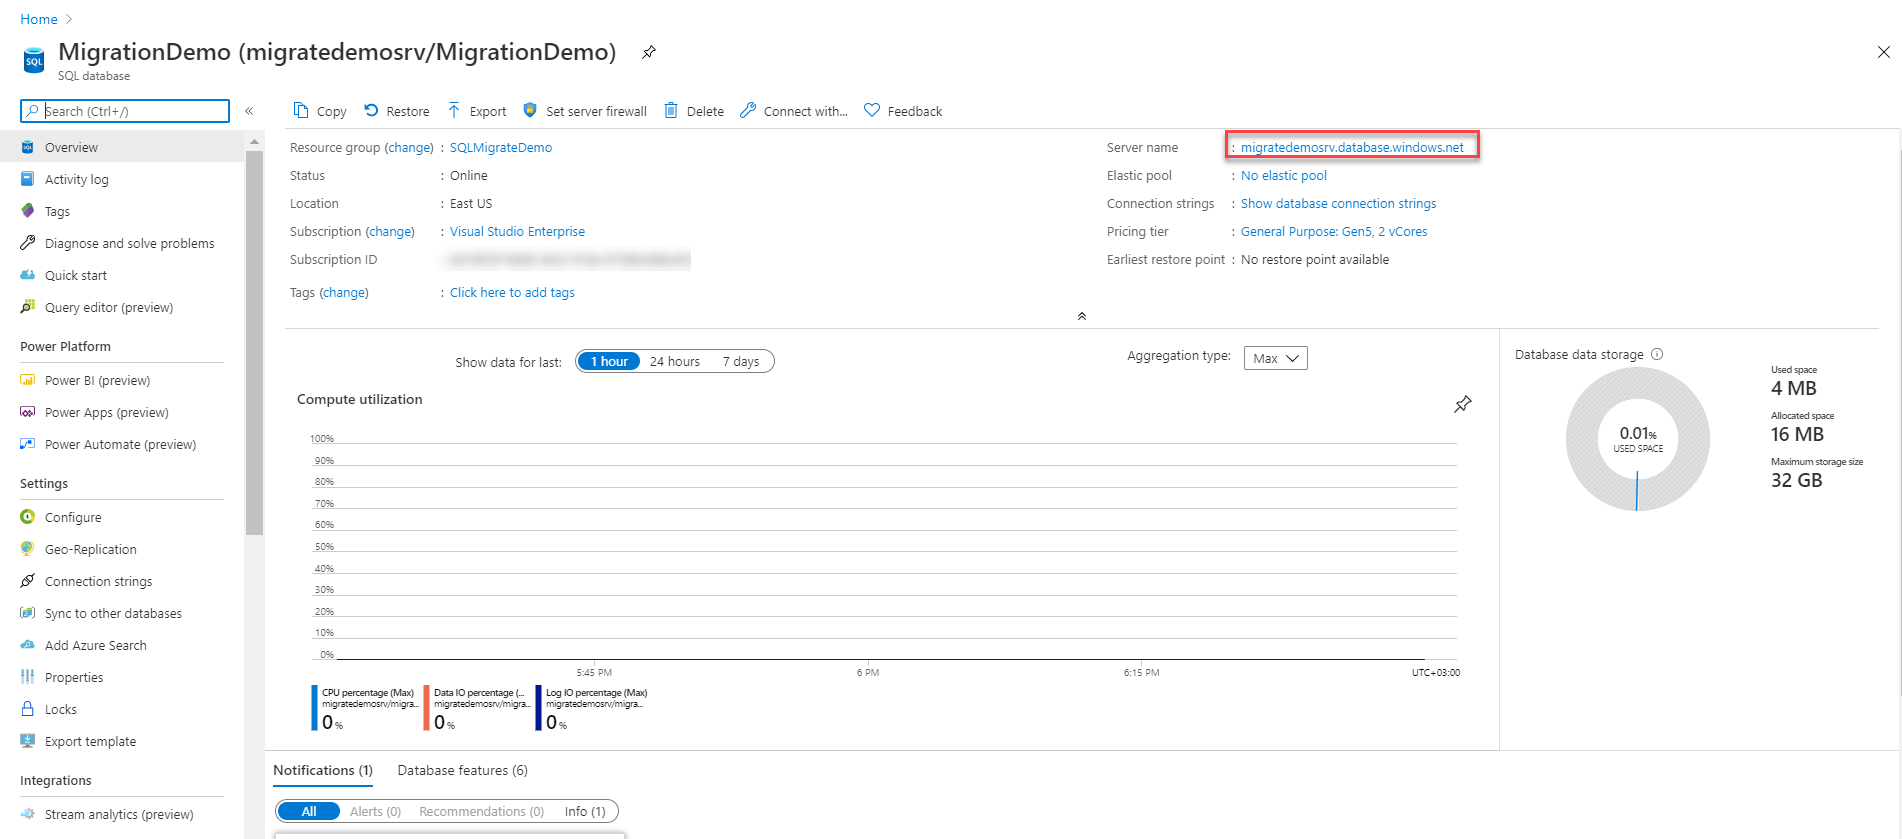
Once created, open the Azure SQL Database then review and edit the configurations of that database to meet your requirements, before migrating the on-premises SQL database to Azure, as below:
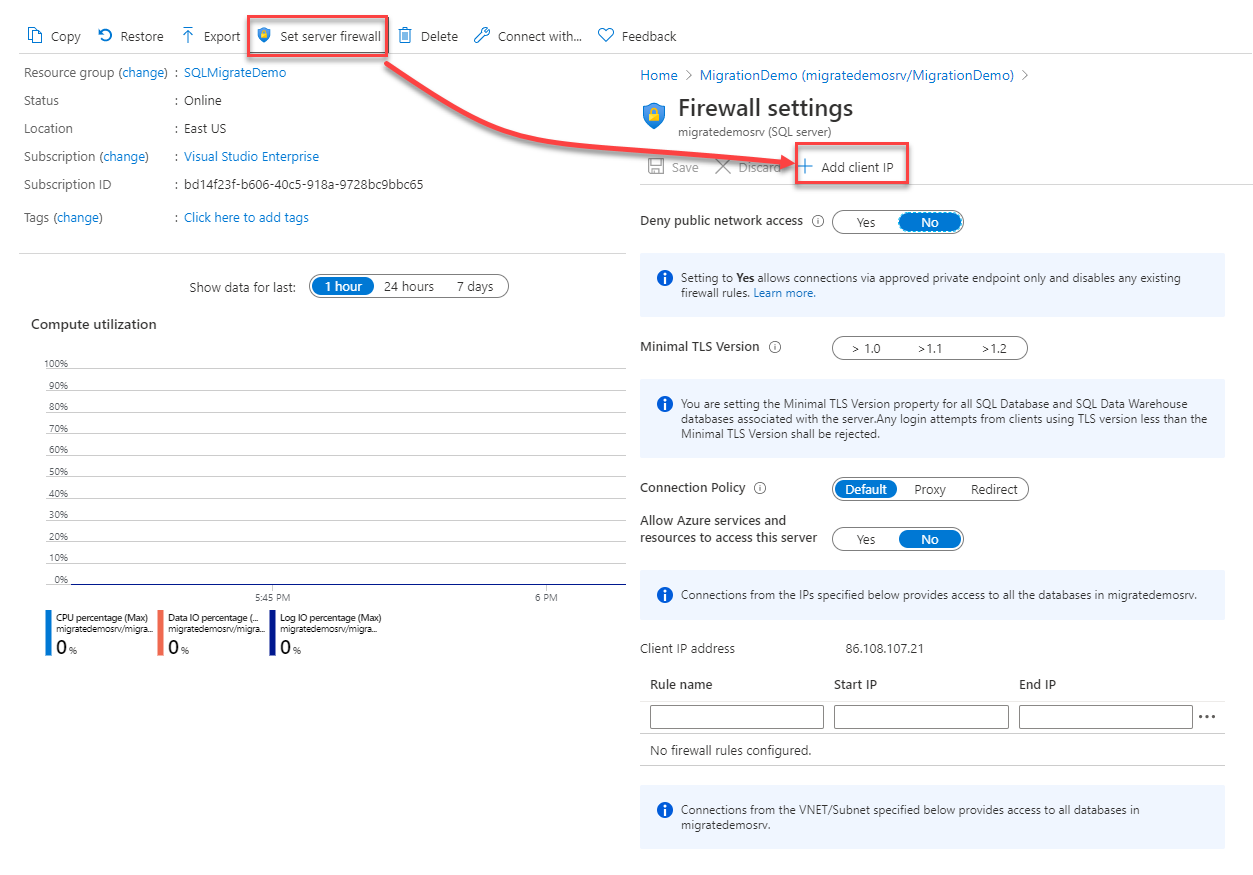
To be able to connect to the Azure SQL Database from your machine, click on the Set server firewall option and choose to Add Client IP from the firewall settings page, as shown below:
After that, copy the FQDN name of the SQL Server that is hosting the Azure SQL Database from the portal, and use the SQL Server Management Studio (SSMS) to connect to that server from your machine, providing the previously defined administrator account credentials, as shown below:
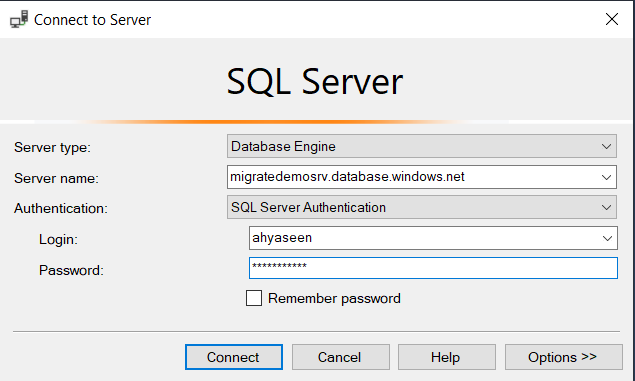
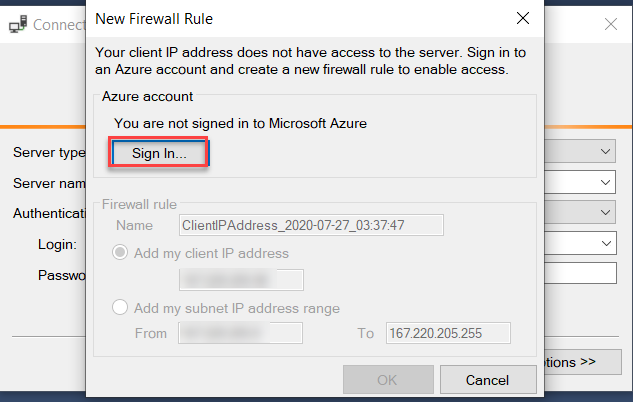
If your IP address is not added yet to the Azure SQL Database Firewall Settings page, SSMS will notify you to sign in to Azure in order to create the firewall rule that allows access to the IP address of your machine, as shown below:
When the firewall rule is created, you will be able to connect to the Azure SQL Database, review the database configurations and apply any changes required before the migration process, as shown below:
Migrate to Azure SQL Database
SQL Server provides us with three main methods that can be used to migrate your database from your on-premises SQL Server to the Microsoft Azure SQL Database, taking into consideration that you already performed all compatibility checks and assessments and confirm that the database can be migrated to the Azure SQL Database with no blocking issue. The decision of choosing the migration tool depends on your migration requirements and the downtime confirmed in the migration plan. These methods are:
- The Data Migration Assistant tool, which can be used to assess your SQL database hosted in an on-premises SQL Server instance for any compatibility or migration blocking issue, fix the identified issues then migrate the consistent database to a single or pooled Azure SQL Database. You can use the Data Migration Assistant tool if your database is not very business-critical and can tolerate downtime
- Using BACPAC, by importing the on-premises SQL Server database into the Azure SQL Database using a BACPAC file generated from the source database and stored in an Azure Blob Storage. Again, you can use this method to migrate your database if your database is not very business-critical and can tolerate downtime
- Using SQL Server Transactional Replication, where you can take snapshot from your on-premises database then apply it to the Azure SQL Database and keep the publisher and the subscriber in sync state until the planned migration point where you need only to point the users to connect to the Azure SQL Database then remove the replication. This method is the best migration method for the business-critical databases, as it migrates the database with minimal possible downtime
In this demo, we will use the BACPAC method to migrate our database from an on-premises SQL Server instance to the Microsoft Azure SQL Database.
First, we need to generate a BACPAC file from the database that we plan to migrate to Microsoft Azure. To achieve that, right-click on the database to be migrated, and choose the Export Data-tier Application… option, under the Tasks list, as shown below:

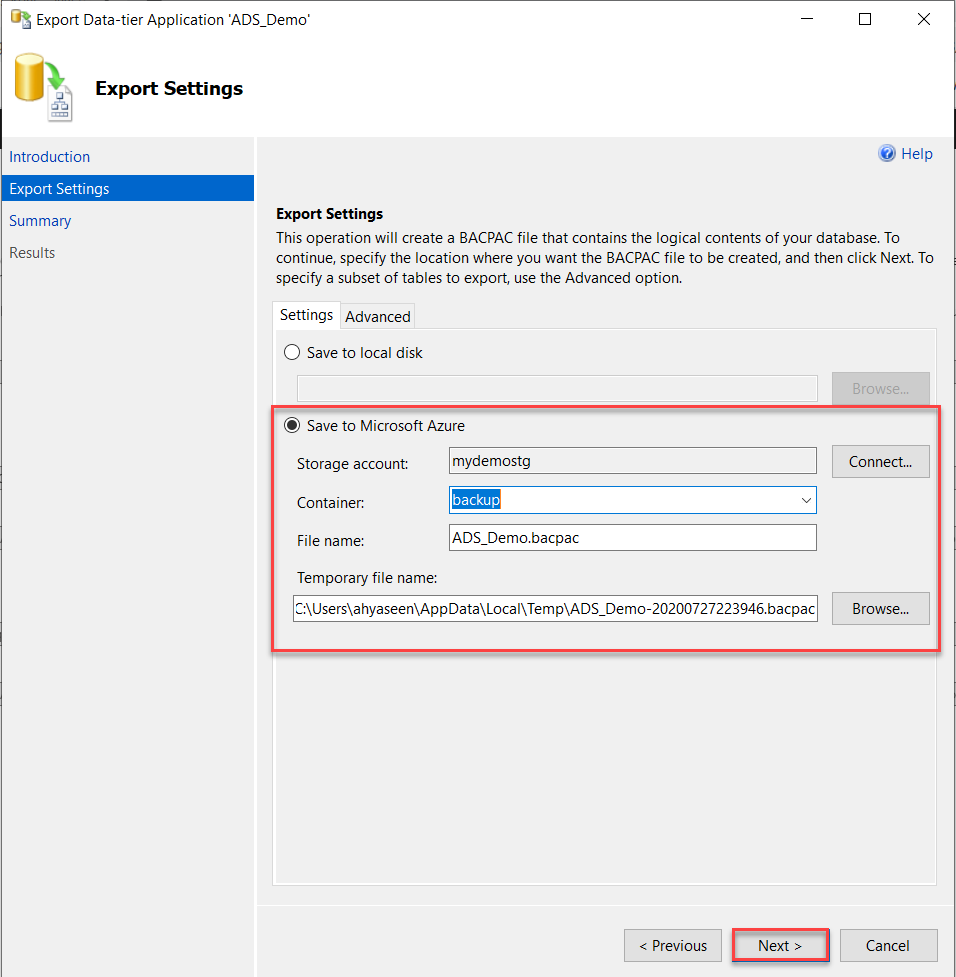
In the Export Settings window, choose to save the BACPAC file to Microsoft Azure by connecting to the Azure Storage account and the blob container where the BACPAC file will be saved, then click Next to proceed, as below:
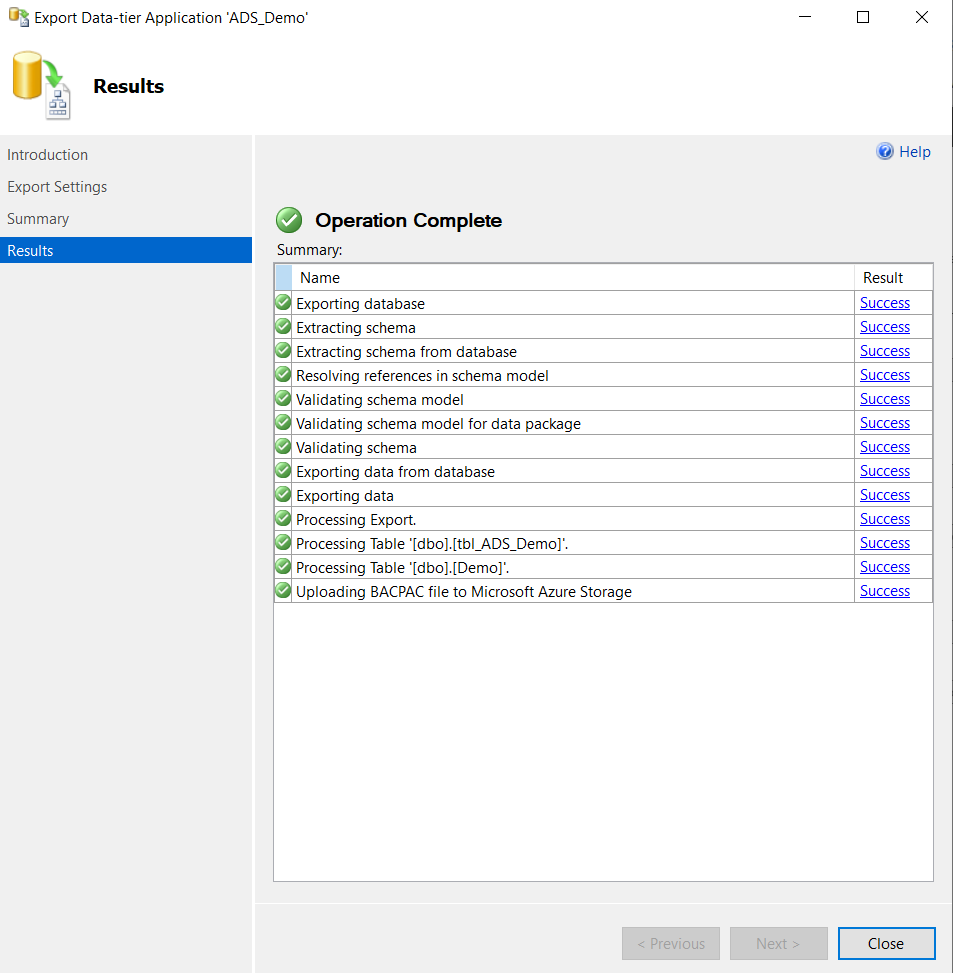
Review the Summary page then start the BACPAC file generation. Monitor the file generation and make sure there is no blocking issue during the file generation, then click Close when the file is generated successfully, as shown below:
You can also connect to the target storage account to verify that the file is generated, as below:

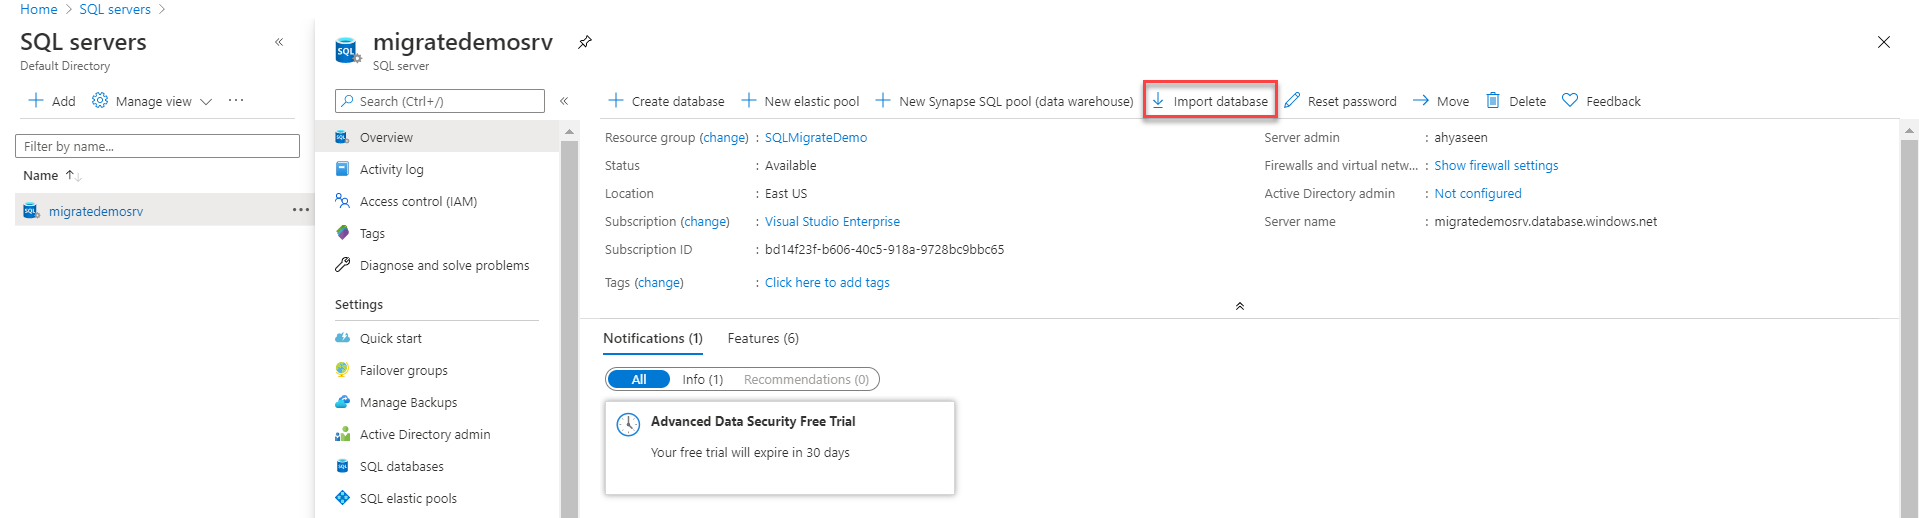
Now, connect to the Azure SQL Server that we created previously and click on Import Database option:
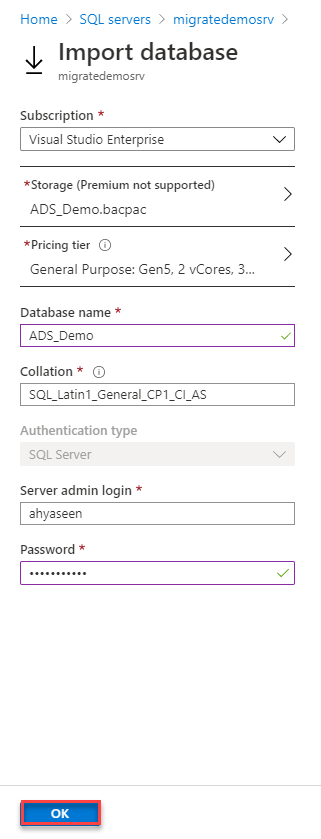
From the Import Database window, connect to the storage account where the BACPAC file is stored and select the previously generated BACPAC file, provide a unique name for the database and the administrative credentials to connect to the SQL Server and import the database, then click OK to import the database to the Microsoft Azure SQL Server, as shown below:
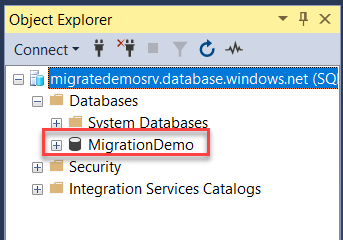
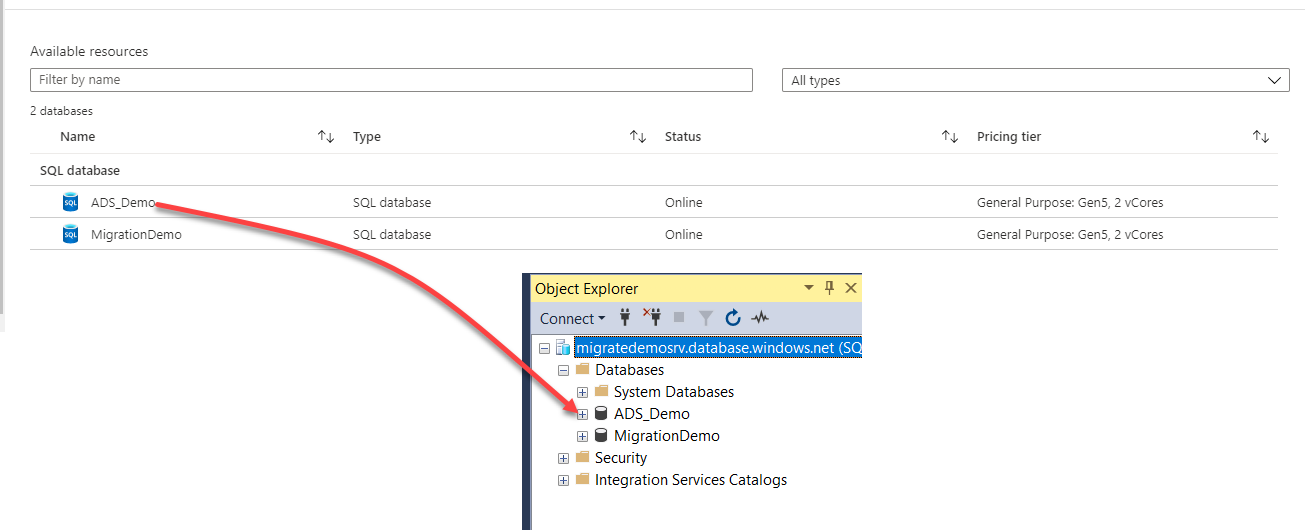
Monitor the progress of the database import process and make sure that there is no issue faced during the import process. Once imported, you can verify by refreshing the databases lists hosted under that Azure SQL Server or by connecting to the Microsoft Azure SQL Server from your machine using SSMS, as shown below:
Conclusion
In this article, we discussed the benefits that we can gain from hosting our databases in the Microsoft Azure SQL Databases and the different methods that can be used to migrate your on-premises SQL Server database to Azure.
In the next article, we will see how to migrate an on-premises SQL Server database to Microsoft Azure SQL Managed Instance. Stay tuned!
Table of contents

He is a Microsoft Certified Solution Expert in Data Management and Analytics, Microsoft Certified Solution Associate in SQL Database Administration and Development, Azure Developer Associate and Microsoft Certified Trainer.
Also, he is contributing with his SQL tips in many blogs.
View all posts by Ahmad Yaseen
- Azure Data Factory Interview Questions and Answers - February 11, 2021
- How to monitor Azure Data Factory - January 15, 2021
- Using Source Control in Azure Data Factory - January 12, 2021