

In this article, I am going to explain in detail about the SQL Server Agent service. This is a windows service that enables database developers and database administrators to schedule jobs on the SQL Server machine. The jobs can be simple T-SQL scripts, stored procedures, SSIS packages or SSAS databases. This service is available on all the editions of SQL Server except the Express edition.
Overview
In this era of automation, it is often required that we execute multiple scripts repeatedly in a timely fashion. These scripts can be used to back up an existing database, delete extra log files, process data from a table, drop and rebuild indexes on a table, or running an ETL job etc. All these tasks are repetitive and can be automated using the SQL Server Agent. This gives us the flexibility that the job will be executed as per the rules defined in the schedule and there is minimal human intervention required in order to execute these jobs. Once the jobs are executed, you can view the history if the execution was successful or failed. In case of a failure, there is an option to restart the job manually.
There are a few components of the SQL Server Agent service that you must be aware of before proceeding forward.
- Jobs – This is a program that defines the rules about the repetitive execution of one or more scripts or other utilities within the SQL Server environment
- Steps – These can be considered as the building blocks of the jobs. Your job can contain one or multiple steps. Each step executes a specific set of instructions. The next step can be executed based on the success or failure of a previous step
- Schedules – These are periodic rules set on the job to execute automatically based on a pre-defined time slot. These jobs can be scheduled hourly, daily, weekly, monthly, or even on specific days of the week
- Alerts – SQL Server generates events that are stored in the Microsoft Windows Application Log. Whenever the agent finds a match, it fires an alert which is a response to the event
- Notifications – You can set up email notifications to update about the result of the job execution. This is mostly done in case of job failures so that the person responsible for the jobs can take appropriate actions
How to find the windows service
Now that we have some idea about the SQL Server Agent, let us now go ahead and start the service if not already done. In my machine, the service is currently not running, and I am going to start it from scratch. You can follow the steps below to start the agent service on your machine.
Head over to Run and type the command services.msc. Click OK once done.
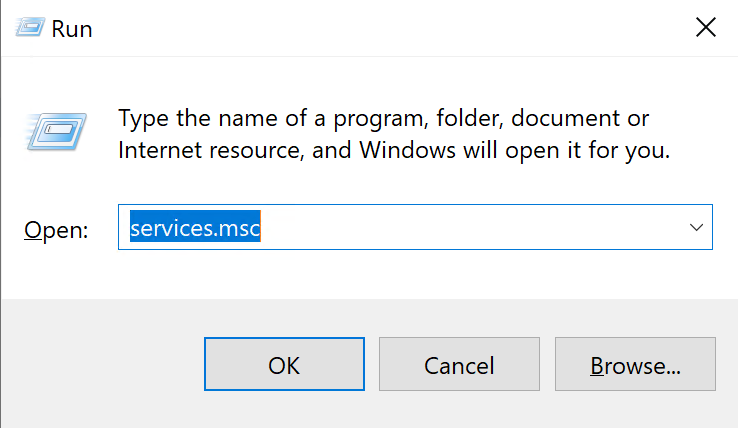
Figure 1 – Opening the Windows Services
Once you hit OK, the Services window will show up. You can scroll below to find the service with the name “SQL Server Agent (<<INSTANCE NAME>>)”. As you can see in the figure below, the status of the service is not running. Let us go and start the service.
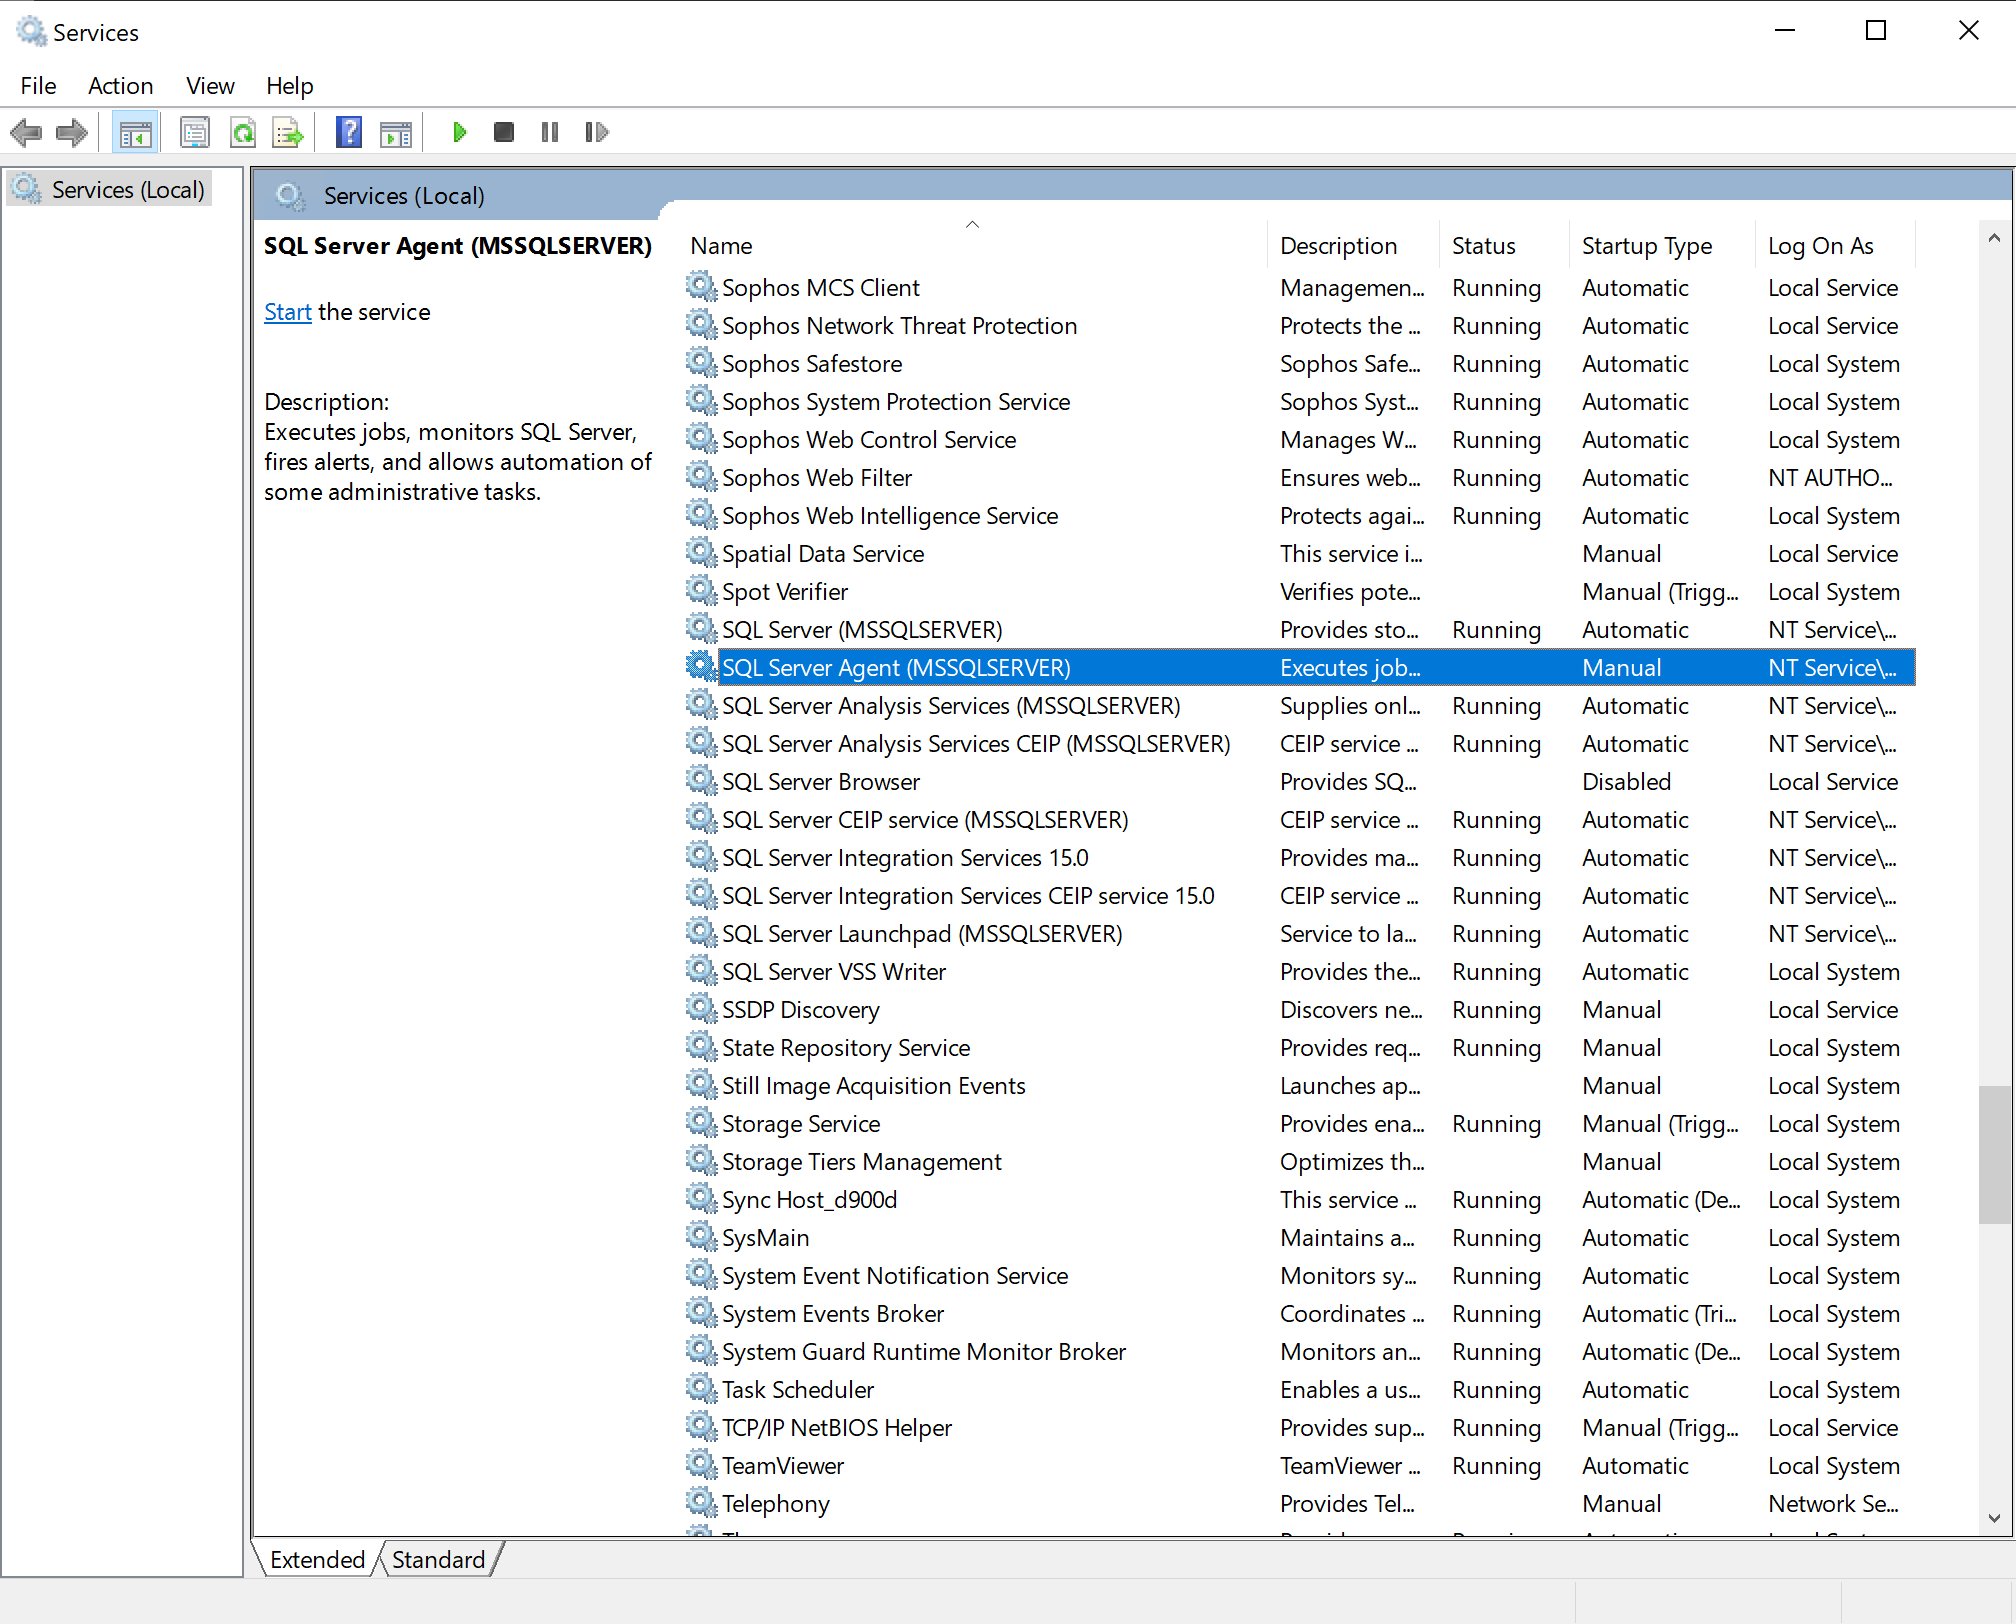
Figure 2 – Starting the SQL Server Agent Service
Right-click on the service and select Start from the context menu.
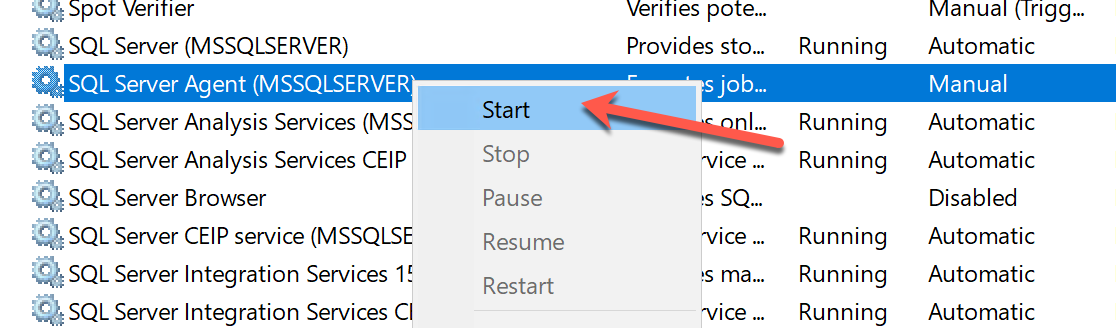
Figure 3 – Starting the SQL Server Agent Service
It might take a while to start the service. Once the service has started, the status will change to Running.
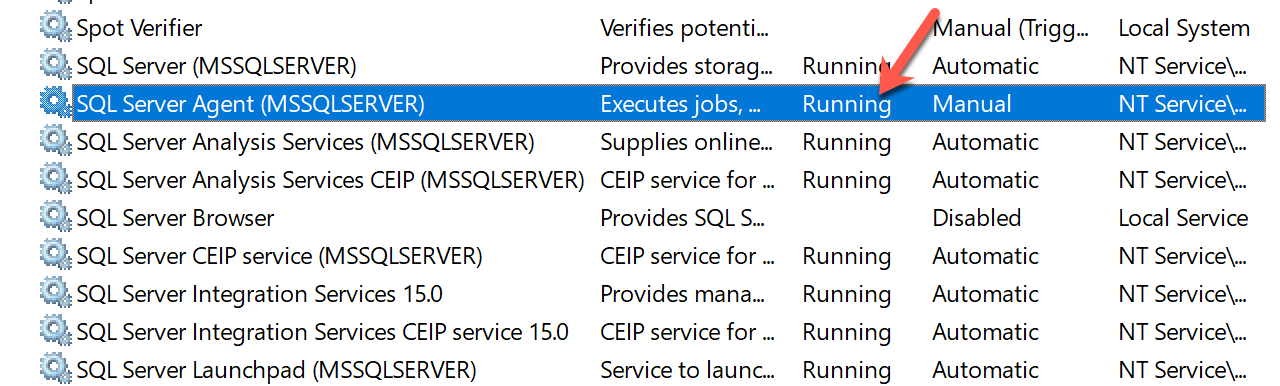
Figure 4 – SQL Server Agent Service Running
Now, you can verify the status of the SQL Server Agent service using the SQL Server Management Studio as well. Head over to SSMS and navigate to the SQL Server Agent on the bottom of the Object Explorer.
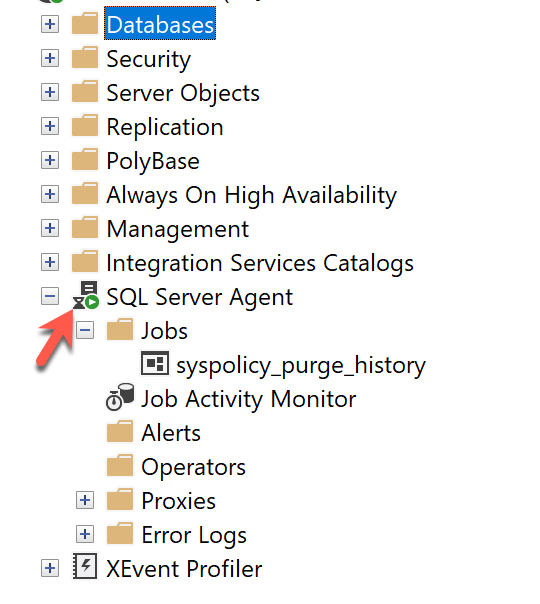
Figure 5 – SQL Agent running in SSMS
Preparing the database
Now that our agent service is up and running, let us create our first job using the graphical user interface. We can also create jobs using T-SQL scripts; however, it is out of scope for this article and will be covered in some later articles. To demonstrate the execution of the job, we will create a small table in a SQL Server database that will store the date and time of the execution along with a random number. This is a dummy table just to demonstrate the feature. You can use the following script to create the table.
|
1 2 3 4 5 6 7 8 9 10 11 12 |
CREATE DATABASE SqlAgentDemo GO USE SqlAgentDemo GO CREATE TABLE SqlAgentDemoTable( [ID] INT IDENTITY(1,1), [Number] FLOAT, [Timestamp] DATETIME ) GO |
In this table, we are going to use the following script to insert records.
|
1 2 |
INSERT INTO SqlAgentDemoTable ([Number],[Timestamp]) SELECT RAND(), GETDATE() |
Creating the first SQL Server Agent job
As we have prepared our database, let us now create the job using the GUI. Right-click on Jobs and select New Job from the context menu.

Figure 6 – Selecting New Job from the context menu
As you click on New Job, the window appears on which you can define the properties of the job that you want to create.
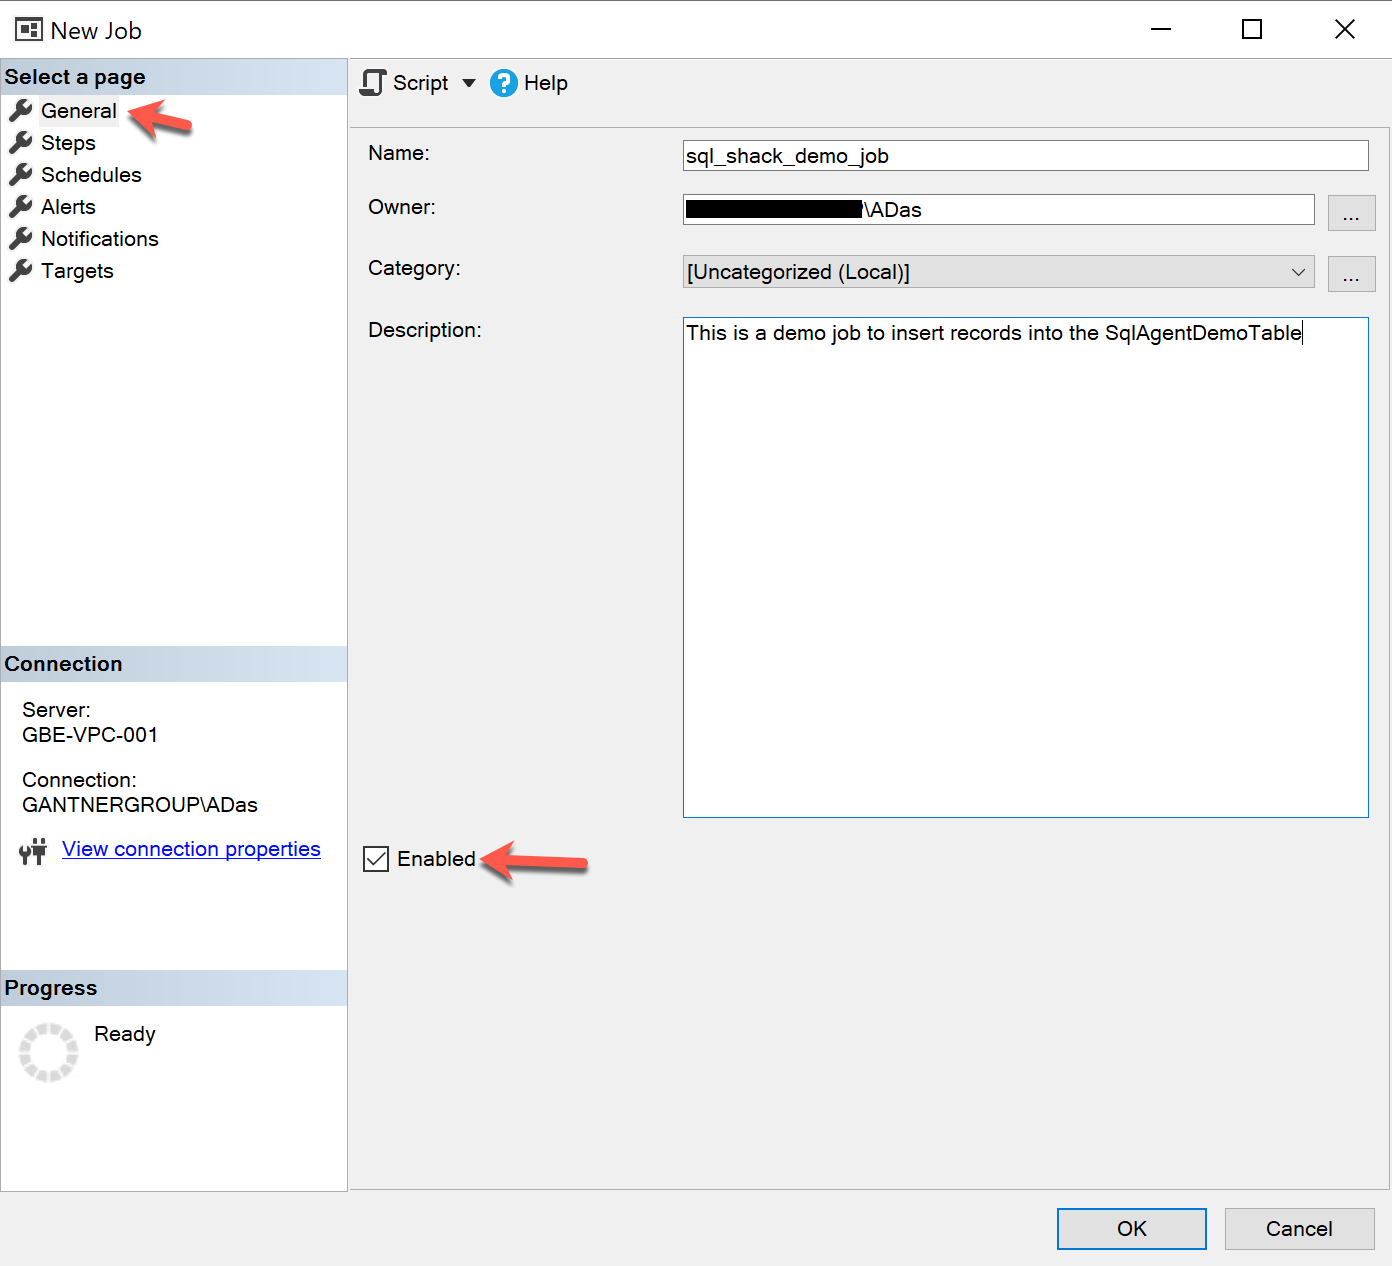
Figure 7 – Creating the New Job
If you look at the figure above, under the General tab, I have provided a valid Name to the job. The Owner of the job should be a defined user in the SQL Server environment. I am logged on using my Windows Authentication mode. There is a Description field, where you can provide details regarding the tasks performed by the job. This is purely for documentation purposes. Finally, make sure that the Enabled is checked, otherwise, the job will not trigger. Click OK once done and click on Steps.
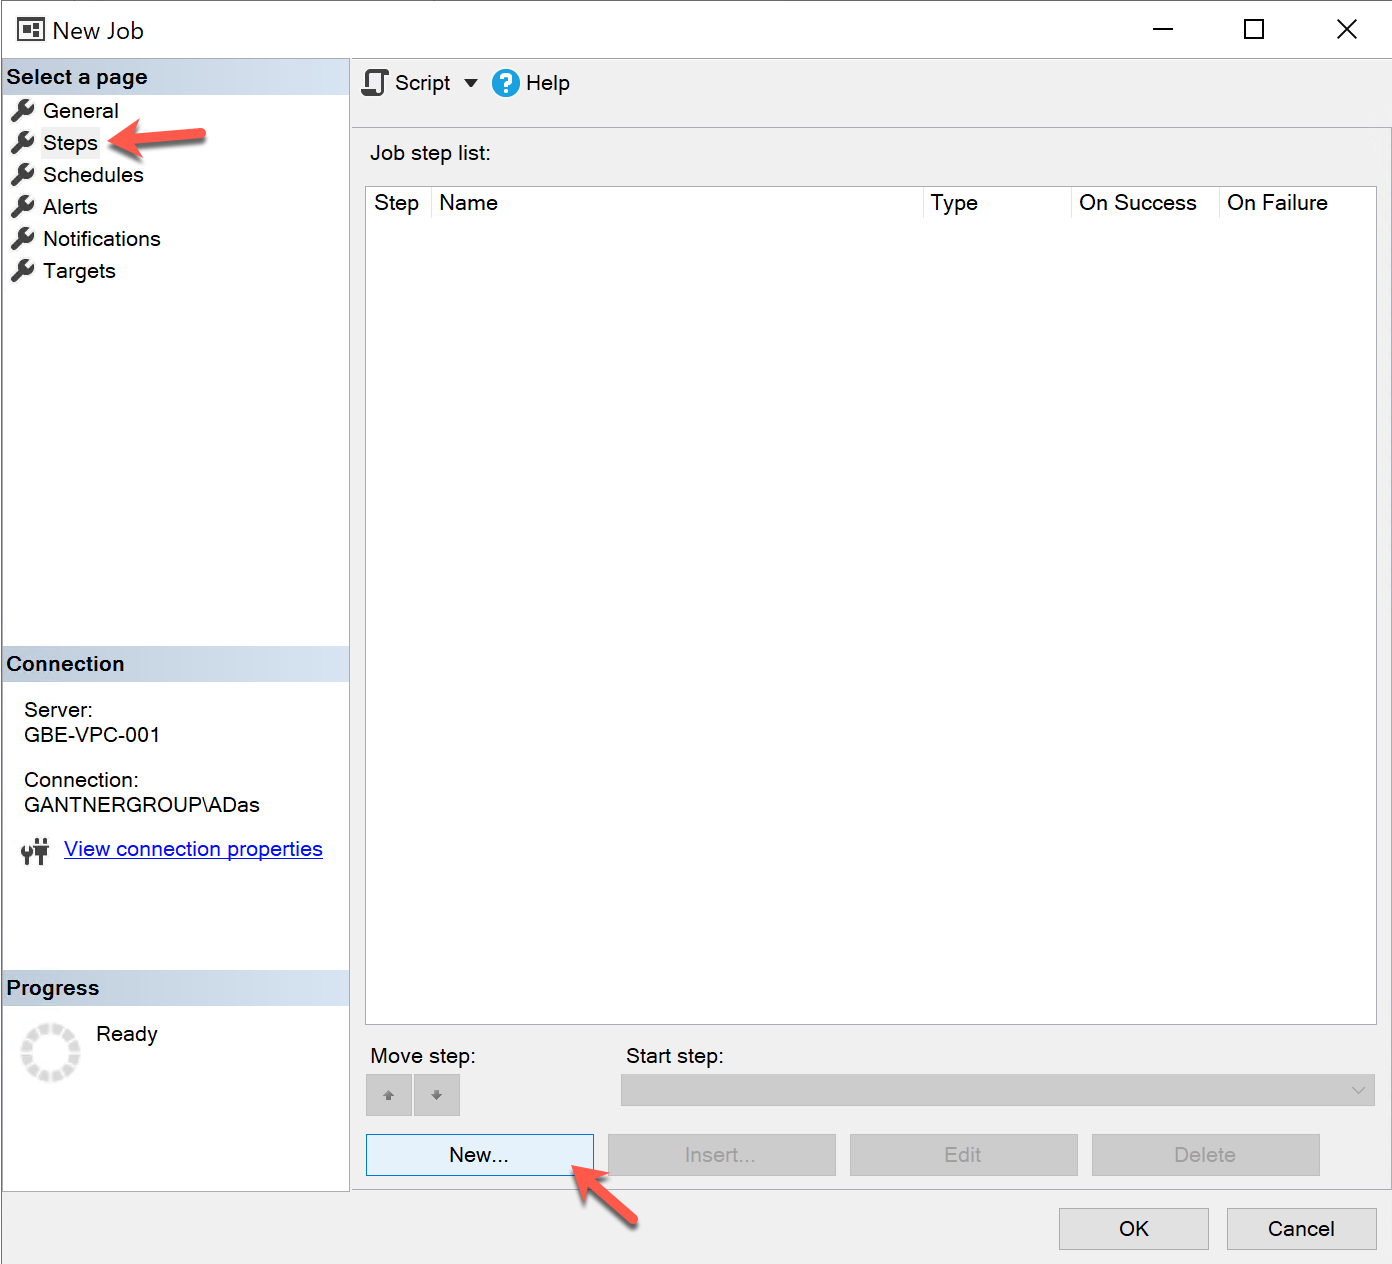
Figure 8 – Defining Steps
Navigate to the Steps section and click on New. Here we will define the steps in the job. For this article, we will consider a single step, but there can be multiple steps as well.
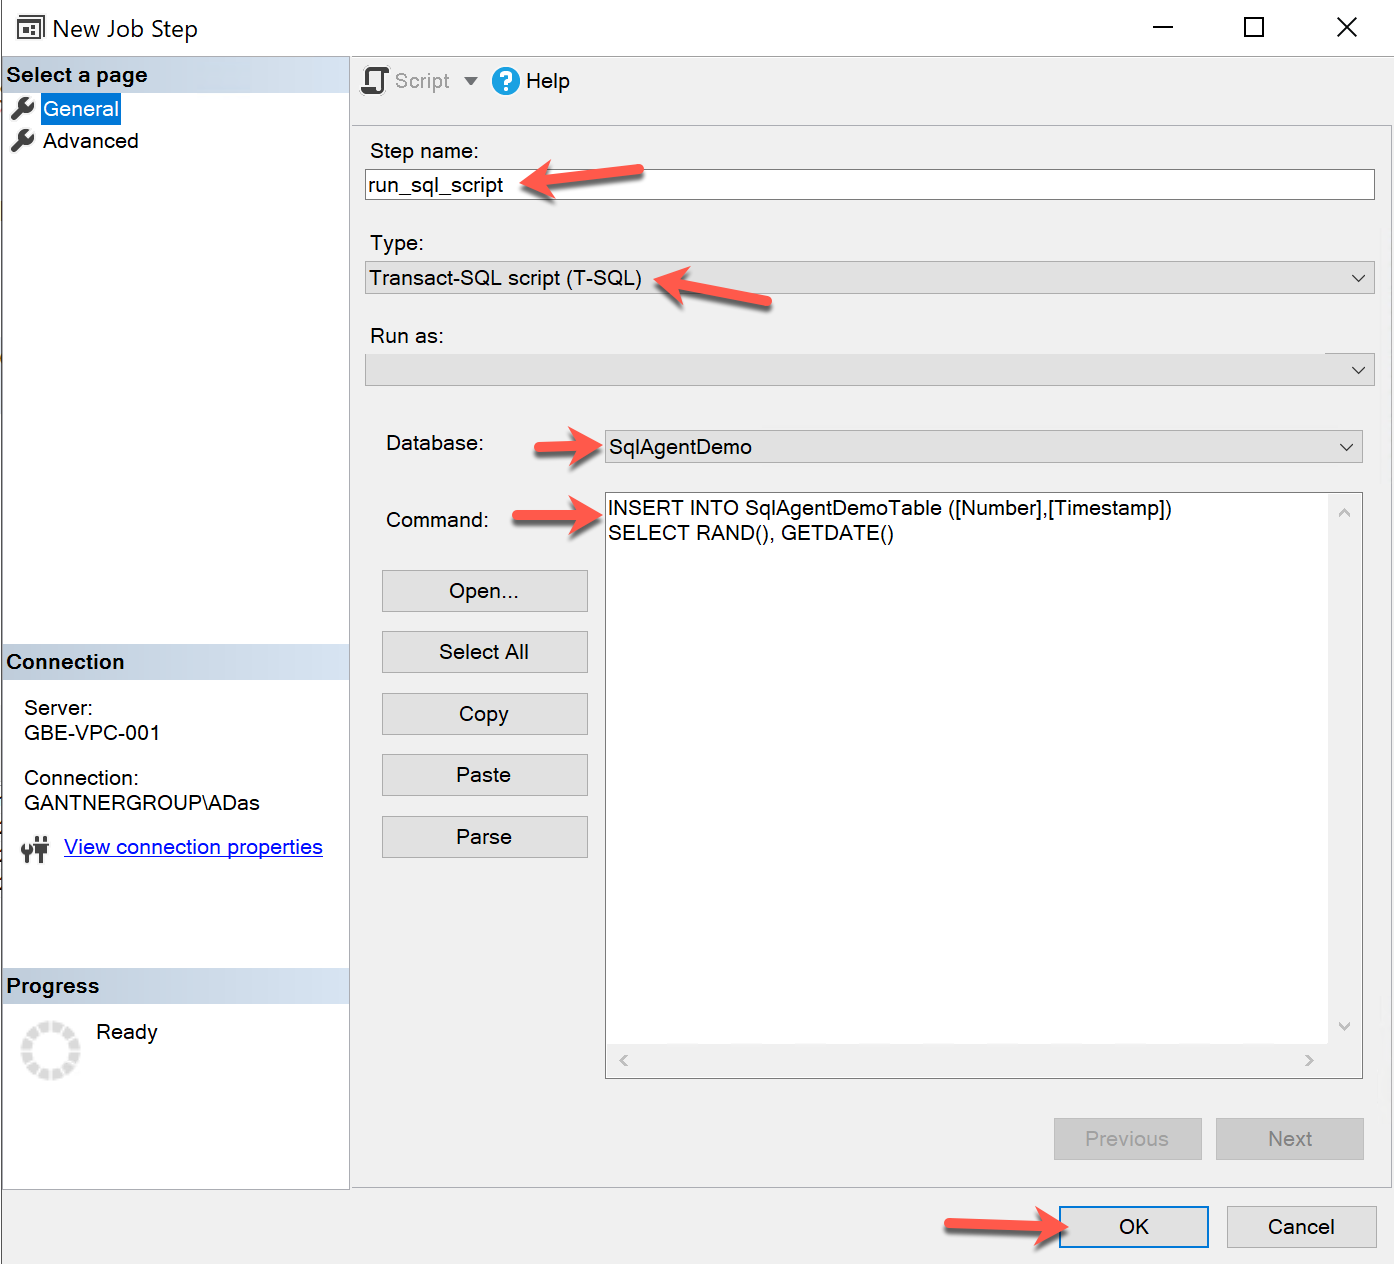
Figure 9 – Defining the Job Step
Provide a name to the step and select the step type. Since we are going to execute a T-SQL statement, please select Transact-SQL script (T-SQL) from the dropdown. Select the Database on which the script is to be executed and provide the SQL command as mentioned. Click OK once done.
Click on Schedules and select New.
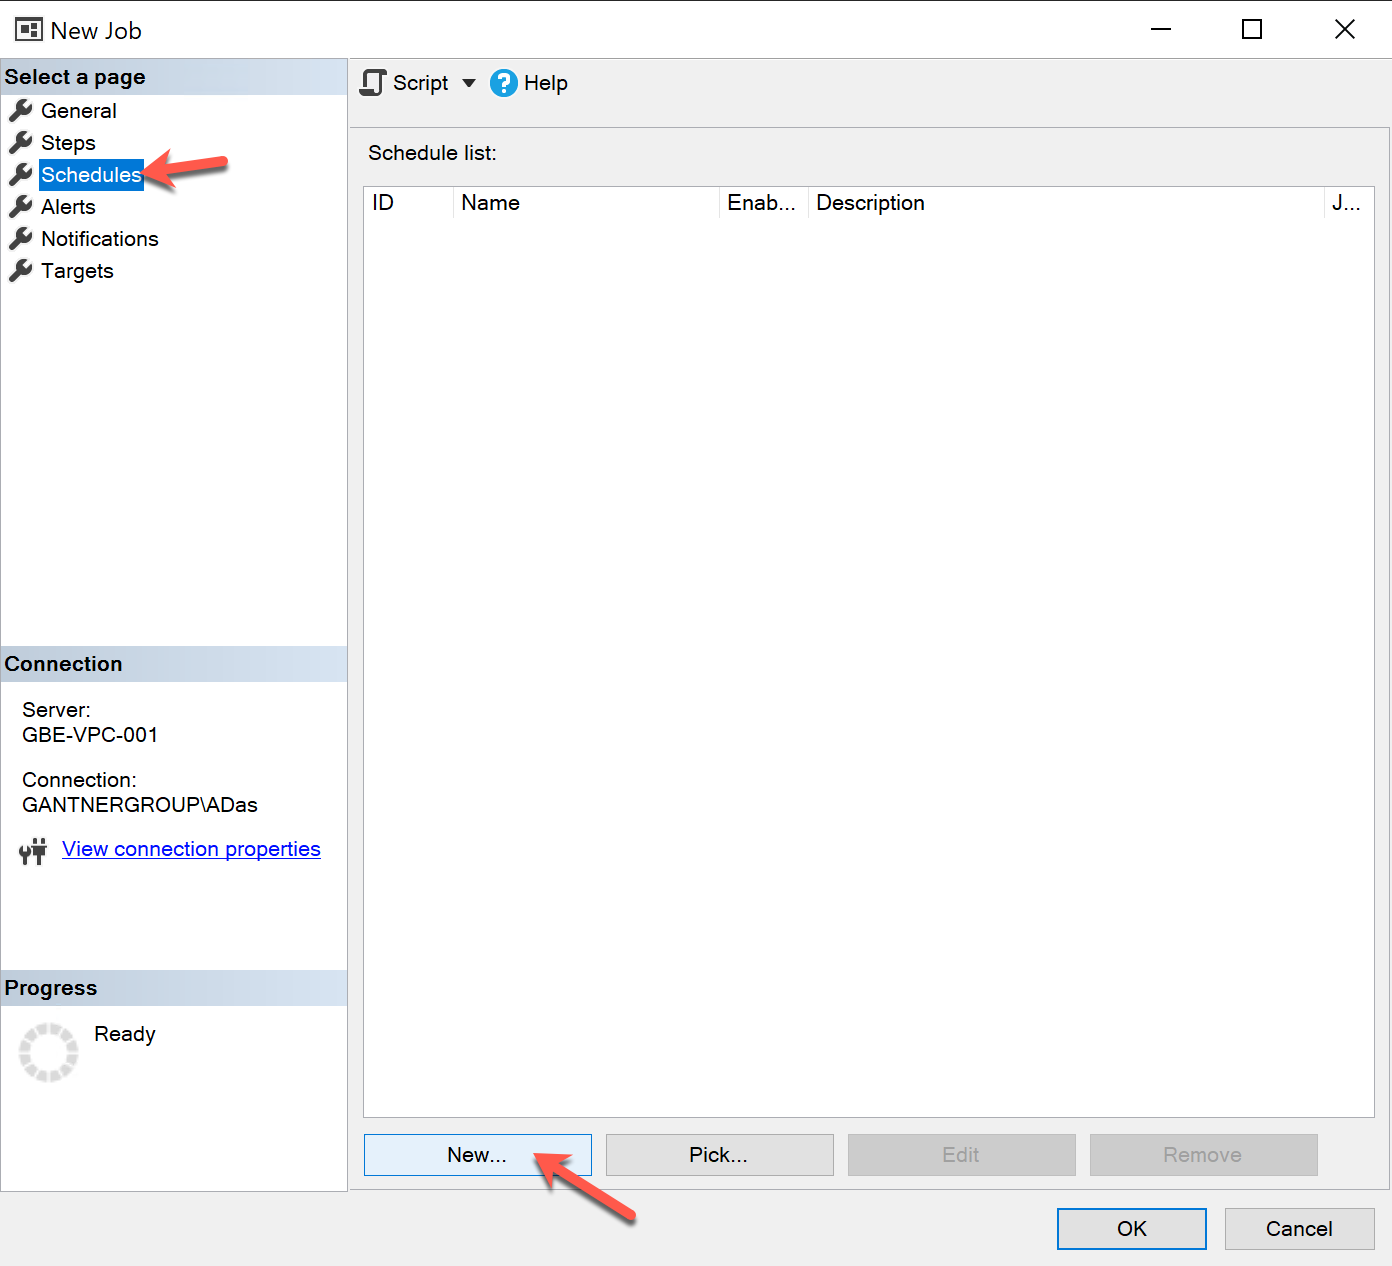
Figure 10 – New Schedule
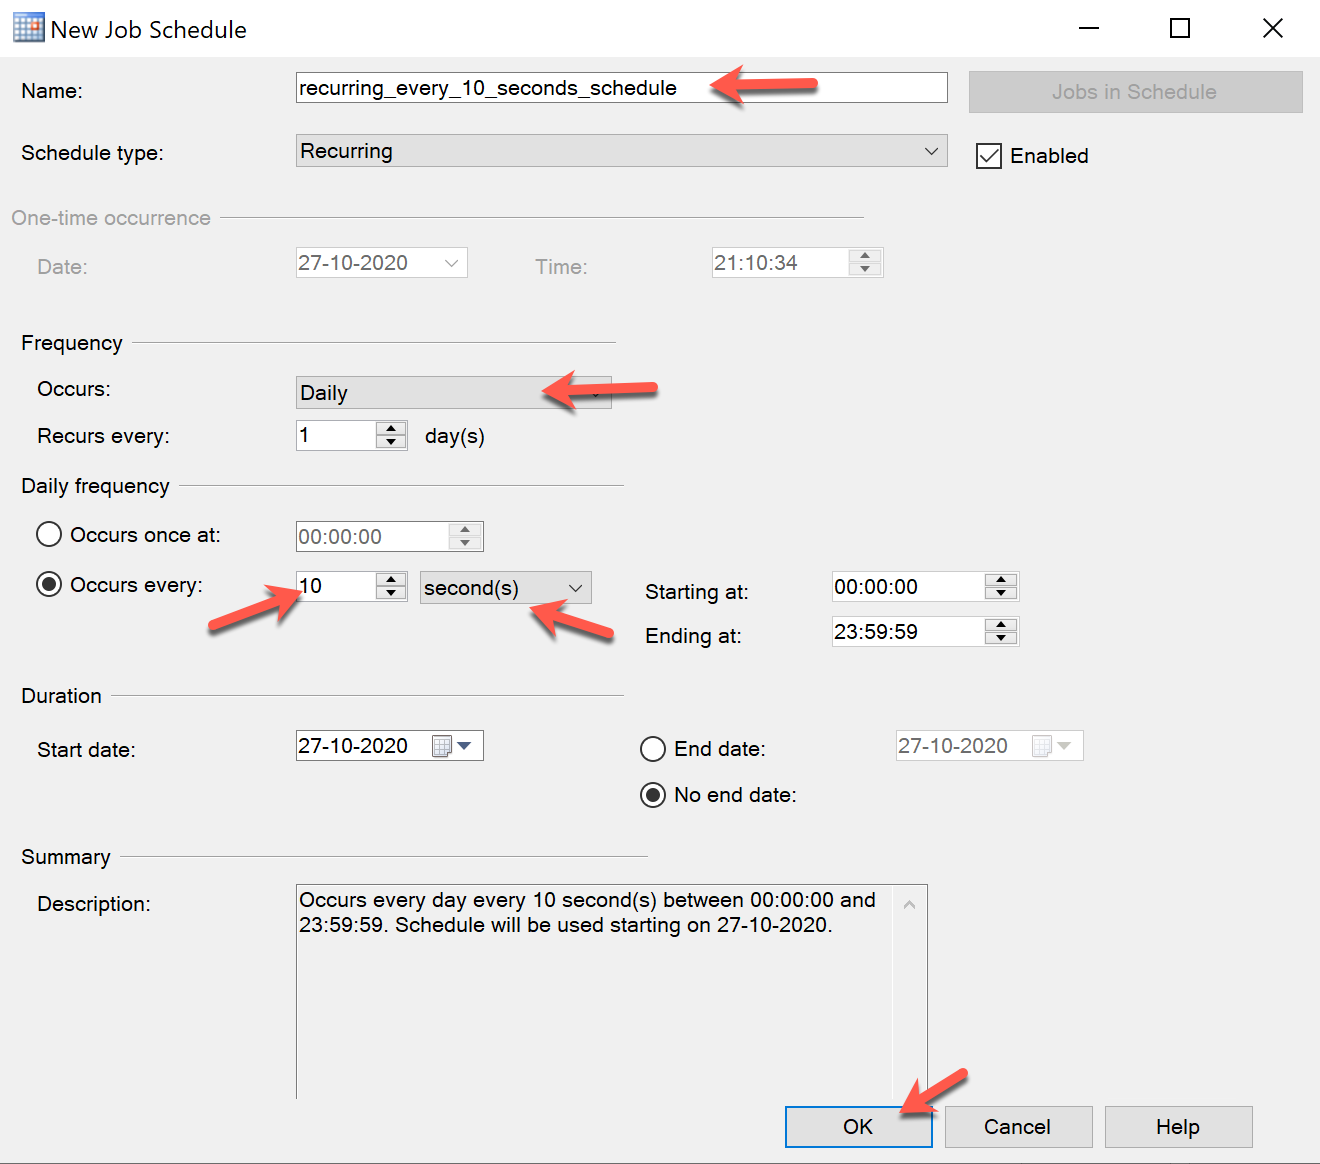
Figure 11 – Defining the new Job Schedule
On the New Job Schedule window, provide a name for the schedule. Most often, we keep a descriptive name so that it is easier to understand the nature of the schedule. Select the Schedule Type as Recurring since we are going to execute the job repeatedly. Select the Frequency as Daily and Daily Frequency as every 10 seconds. In real applications, it is usually scheduled every hour or every day depending on the requirements. Click OK once done.
Finally, click OK on the Job Properties page. Your job has been successfully scheduled now.
Viewing the data
Let us now execute the following command to view the data.
|
1 |
SELECT * FROM SqlAgentDemoTable |
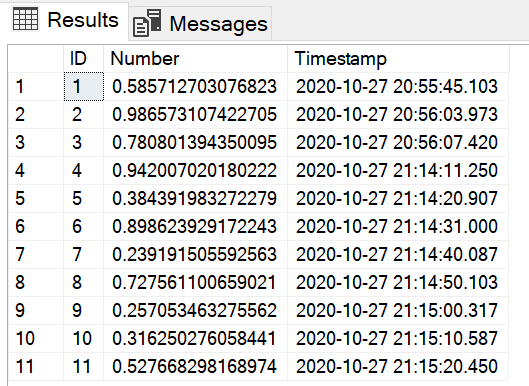
Figure 12 – Viewing the automated data
Since the job is scheduled to execute every 10 seconds, we can view the data from the table easily and verify the execution of the job. A new record will be inserted every 10 seconds from now on.
Viewing Execution History
Alternatively, you can also view the execution history of the job by right-click and selecting View History from the context menu.
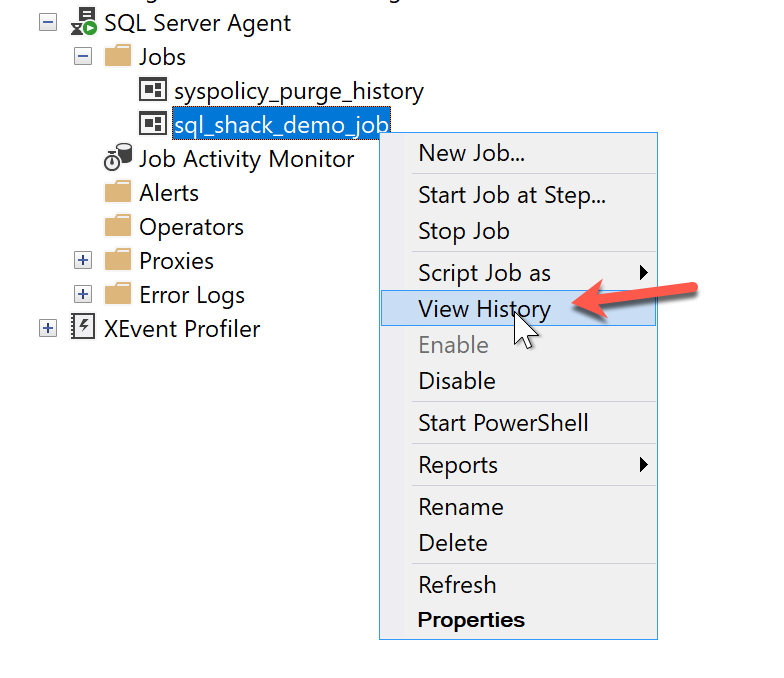
Figure 13 – View Job History
This will open the Log File Viewer window, where you can see the status of all the executions so far. All successful executions are highlighted in green while failed executions will be highlighted in red.
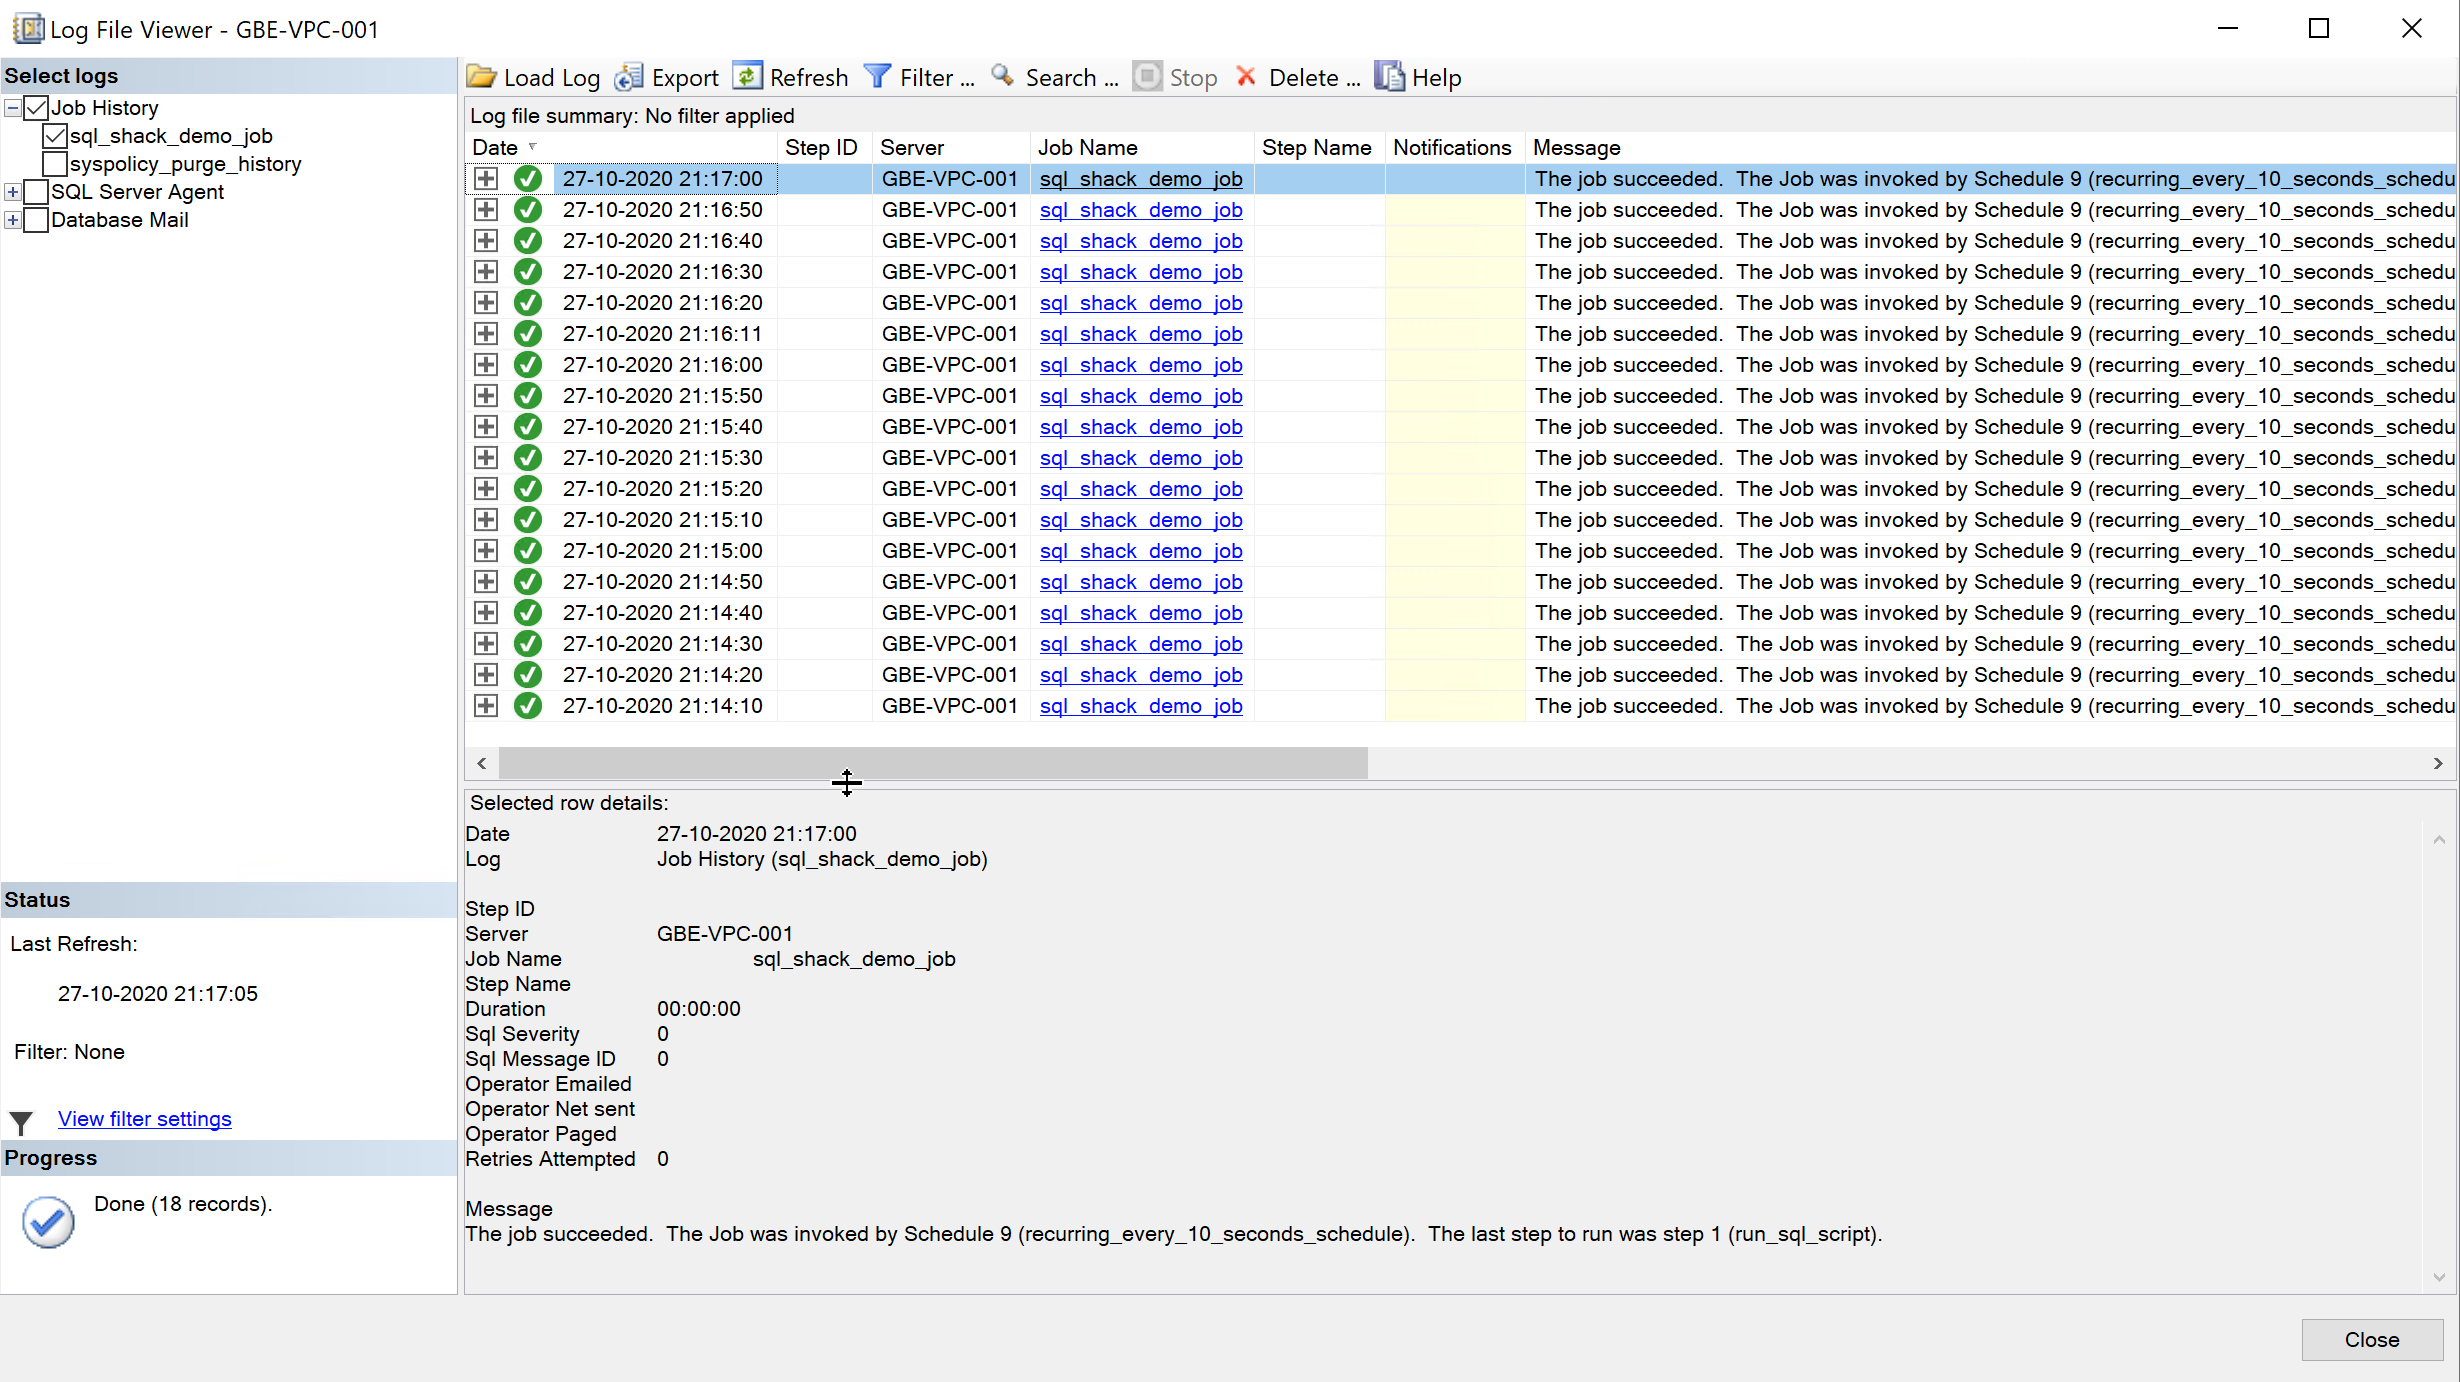
Figure 14 – Log Viewer Window
Conclusion
In this article, I have explained in detail about how to schedule jobs in SQL Server using the agent service. This is a very powerful scheduling agent that can do a lot of the heavy lifting in terms of database maintenance and running other business jobs. Using the agent service and the monitoring service, you can monitor the active jobs that are currently running, the jobs that have failed or yet to start execution. You can also script the creating of the jobs totally, however that requires a bit of experience with the system stored procedures and various commands associated with it. If you are starting new with scheduling jobs in SQL Server, I would rather advise using the graphical user interface to create and manage the jobs on the server.

He is a prolific author, with over 100 articles published on various technical blogs, including his own blog, and a frequent contributor to different technical forums.
In his leisure time, he enjoys amateur photography mostly street imagery and still life. Some glimpses of his work can be found on Instagram. You can also find him on LinkedIn
View all posts by Aveek Das
- Getting started with PostgreSQL on Docker - August 12, 2022
- Getting started with Spatial Data in PostgreSQL - January 13, 2022
- An overview of Power BI Incremental Refresh - December 6, 2021