
In this article, we will learn how to establish successful connectivity from Azure Data Factory to the Azure Databricks platform.
Introduction
Azure Databricks is a modern data engineering as well as data science platform that can be used for processing a variety of data workloads. Azure Databricks integrates with a variety of data repositories which can be used as a source as well as the target. When moving data to and fro in Azure Databricks, data pipelines are required to move this data. Though Azure Databricks itself provides several options to import and export data, to build enterprise-scale integration with Azure Databricks, tools and technology that specialize in building enterprise-grade and scale of data pipelines is required. On the Azure cloud platform, Azure Data Factory is one of the most popular and capable services that is used to build data pipelines. Data Factory provides tens of connectors out of the box that can be used to connect to data sources for building data pipelines. Compared to other databases like SQL Server, Postgres, MySQL and others, Azure Databricks is a platform than just a database. Typically, it is used for building data lakes using Delta Lake format that is natively supported by it.
Creating an Azure Databricks cluster
In this exercise, we are going to create an Azure Databricks instance and a cluster. Then we will create an Azure Data Factory instance and attempt to connect it with Azure Databricks. It is assumed that one has required access to the Azure cloud account and privileges to administer the services in scope.
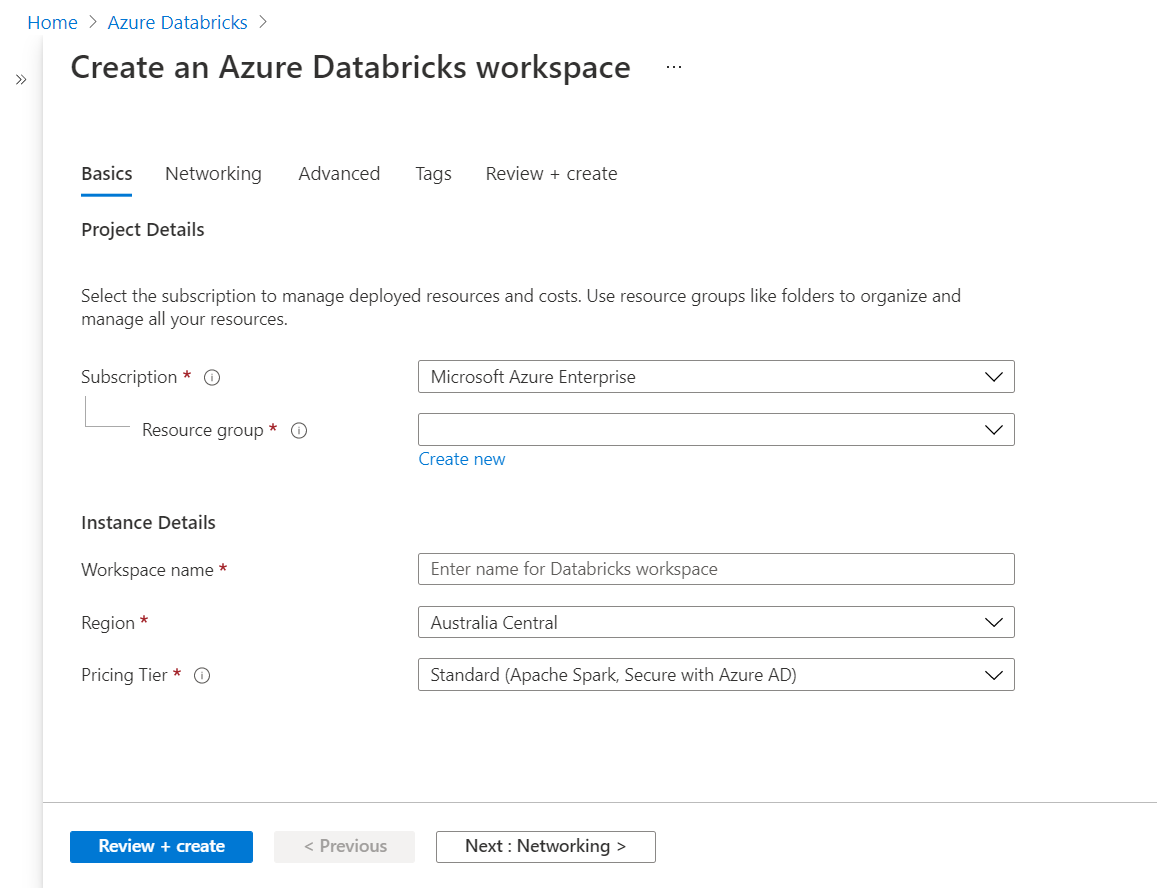
Navigate to the Azure portal, open the Azure Databricks service dashboard, and click on the Create button to start creating a new instance. Clicking on the button will invoke the wizard on a new page as shown below. In the first step, provide the basic details like subscription, resource group, workspace name and the region in which the instance will be created. There are three pricing tiers available – Standard, Premium and Free Trial. We will continue with the default tier i.e., the Standard tier which is sufficient for our use case.
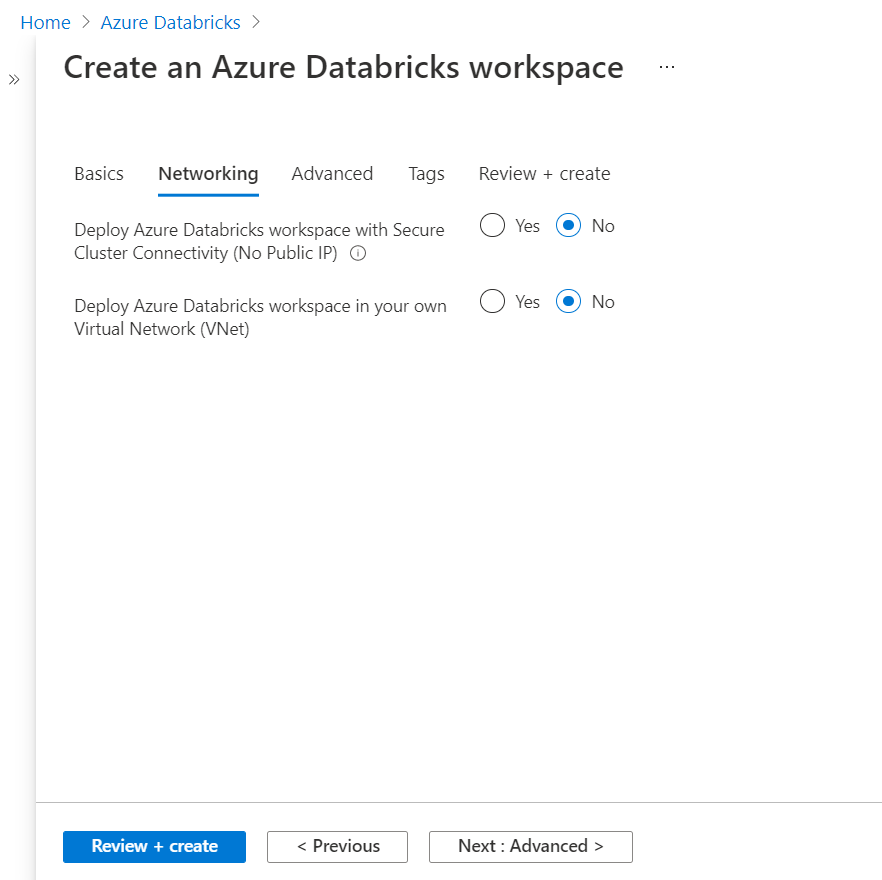
In the Networking options, we do not need the advanced options for now. These options are disabled by default, and we can continue with the same and move to the next step.
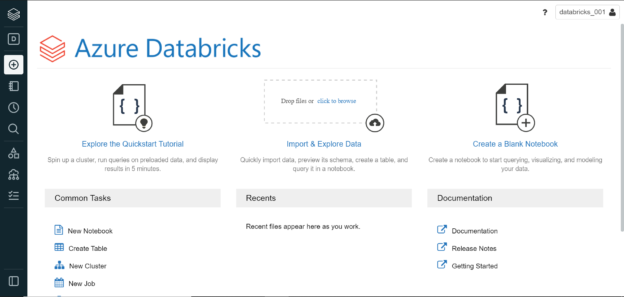
In the next step, we can directly move on to the Review + create option as we do not need to change any advanced settings or add any tags as these are optional steps. Review the details of the instance and click on the Create button to deploy the new instance. Once the Azure Databricks workspace is creating, click on the button to Launch the workspace. Once launched, it would open in a new window and the home page would look as shown below.

Now that we have the workspace ready, we need to create at least one table so that we can connect to the platform and use it in Azure Data Factory. Navigate to the menu on the left-hand side and click on the Data icon, and then click on the Create Table option from the same. It would open a new screen as shown below.
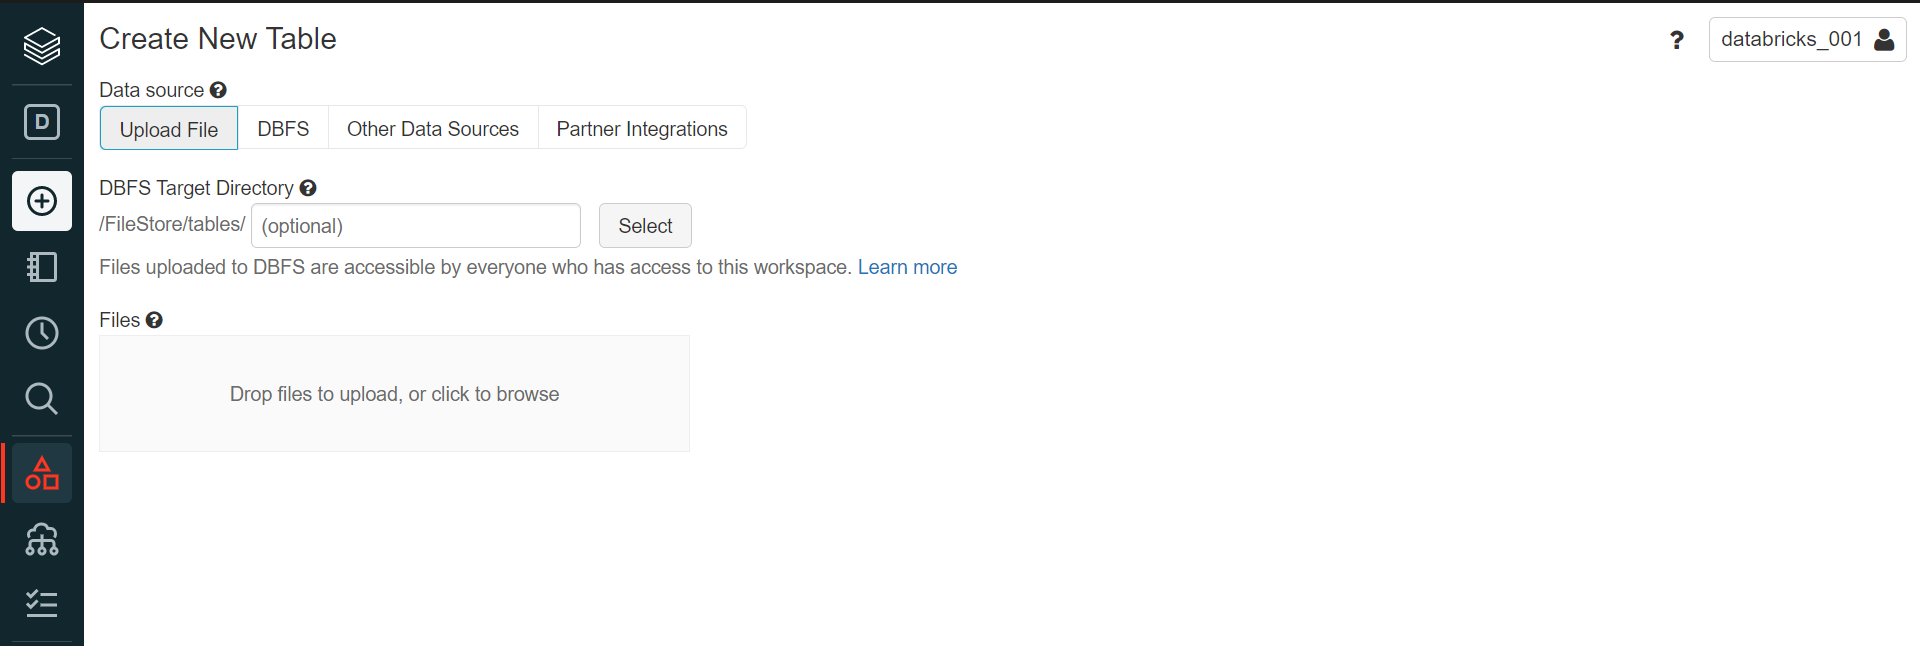
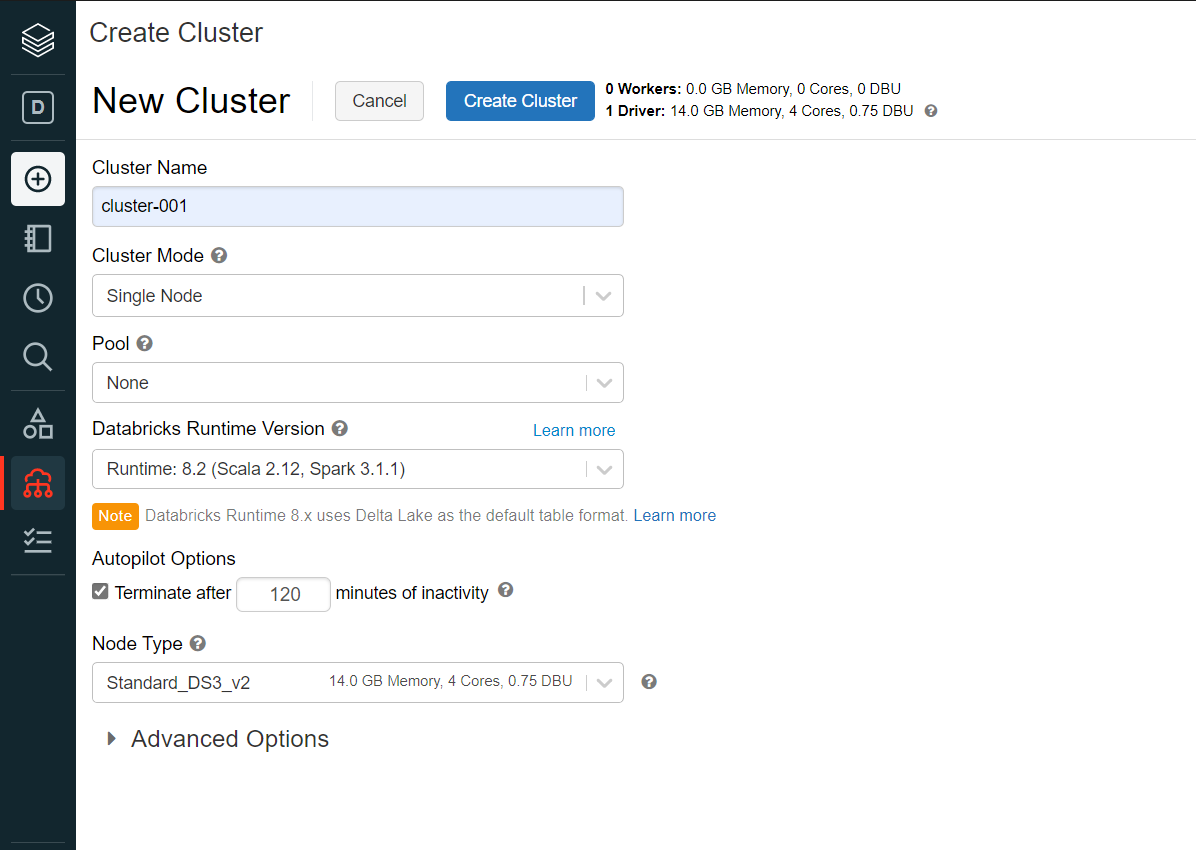
One can upload any file and create a new table here. The uploaded file would be stored in the DBFS filesystem which is Azure Data Brick’s native file system where the uploaded files would be stored. Once the file is uploaded, we would get the option to create a new table using the uploaded file with UI as well as with the Notebook. To create the tables using either of the options, we need to create a cluster first. Click on the Create menu option and select Cluster sub-menu item. It would open a new screen where we can provide details to create a Single-Node cluster as shown below. Provide the name and type of cluster and click on the Create Cluster button.
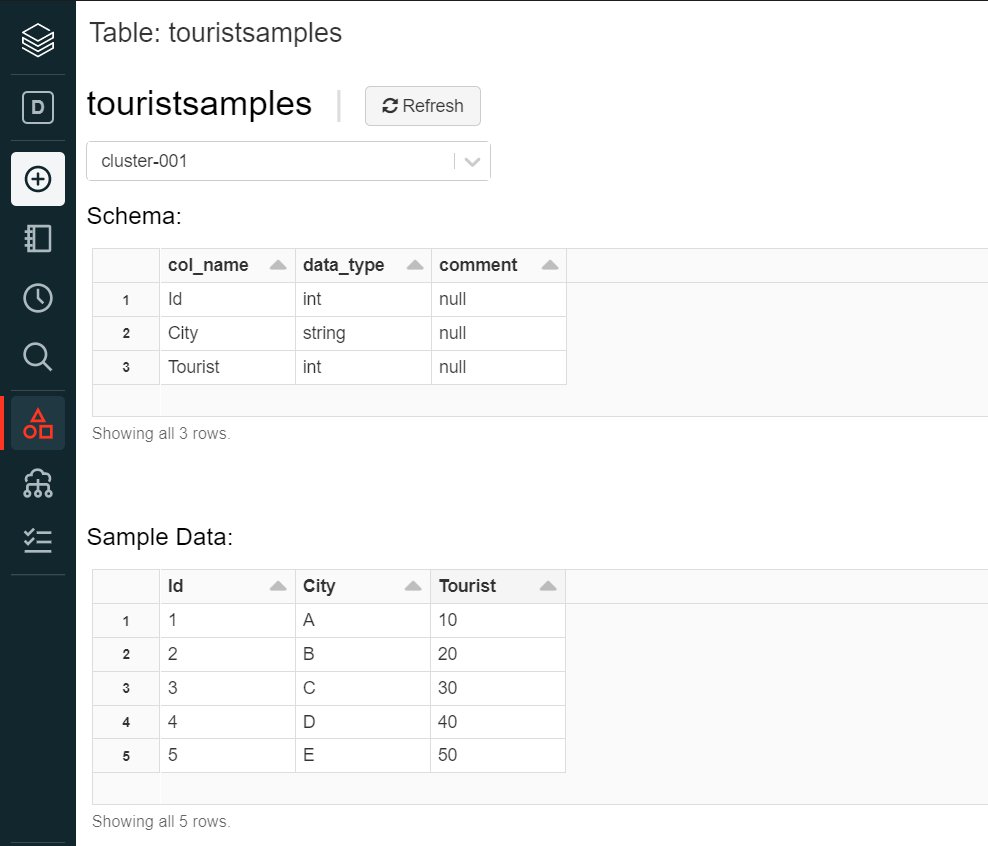
Once the cluster is created, using either of the options i.e., UI or Notebook, create a new table and once the table is created it would look as shown below.
Now that we have some sample table to test with Azure Data Factory, now it’s time to create an instance of Azure Data Factory so that we can connect it with Azure Databricks. Navigate to the Data Factories service and click on the Create button to create a new instance. Fill up the basic details and create a new instance. Once the instance is created, navigate to the dashboard of the instance, and click on the Author and Monitor link to open the Data Factory portal. Let’s say we intend to copy the data from the Azure Databricks table to some other data repository using Data Factory. For this purpose, we can click on the Copy data icon on the home page of the Data Factory portal. This would open a new screen as shown below.
Connecting Azure Databricks from Azure Data Factory
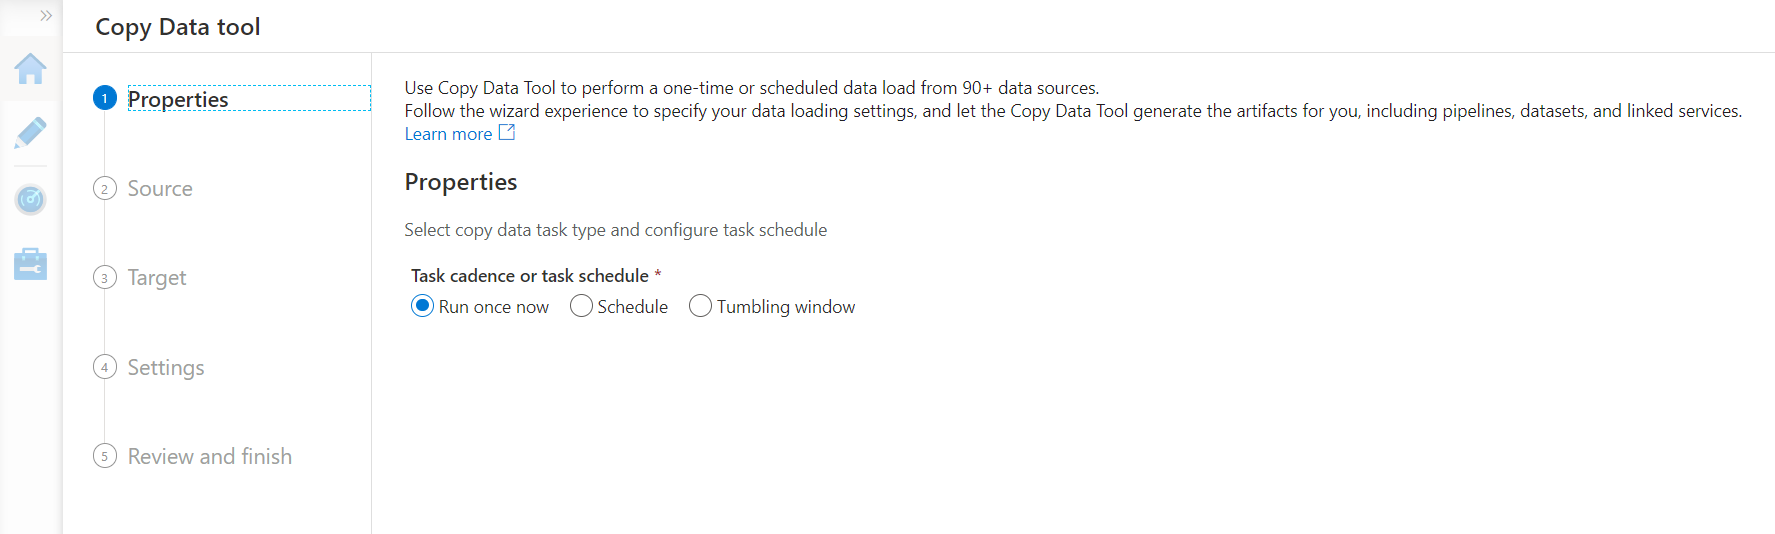
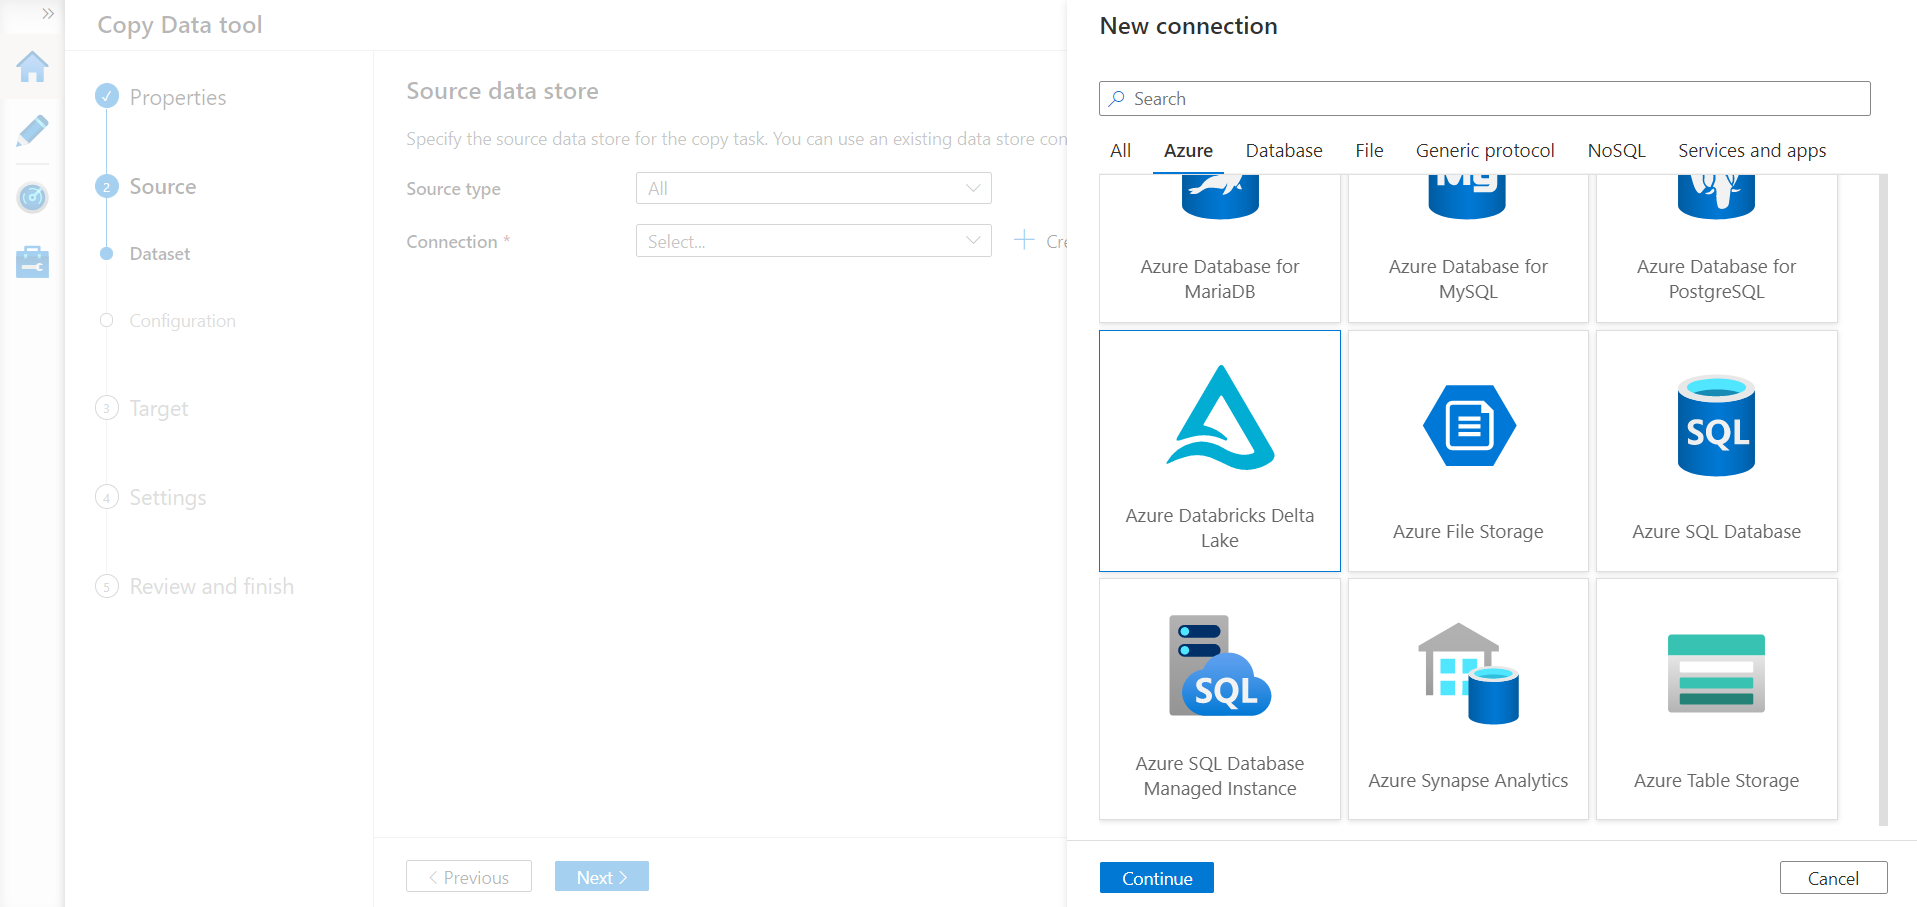
We can continue with the default schedule of Run once now and move to the next step where we need to select the Source. In this case, our source is going to be Azure Databricks. Click on the New connection button and it would show options to select the data source. Select the option Azure Databricks Delta Lake as shown below and click on the Continue button.
A new connection details screen would open where we need to provide the details regarding the instance of Azure Databricks that we created earlier. Select the subscription and resource group and it should automatically detect the only Databricks cluster in the resource group and populate the URL.
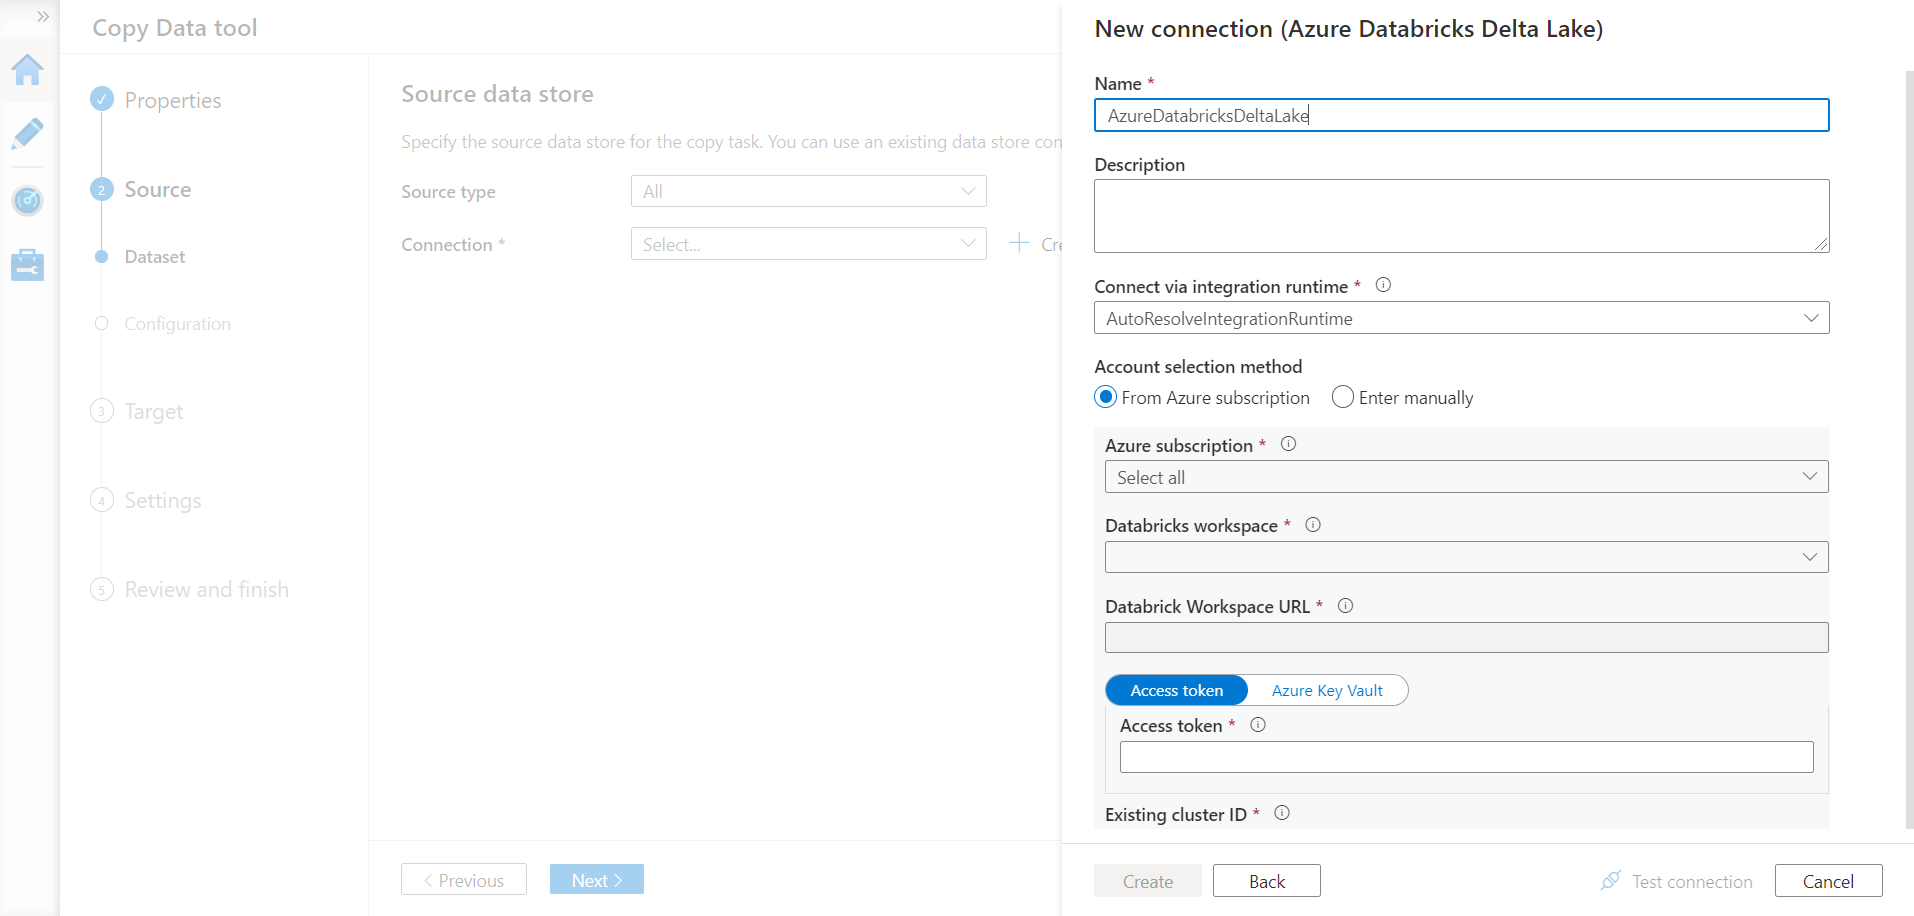
Now we need the access token to successfully connect Azure Data Factory to Azure Databricks. Navigate back to the Azure Databricks portal. From the top-right corner of the workspace page, click on the workspace name and then select User Settings. It would open a new page as shown below where we would find the option to create tokens.
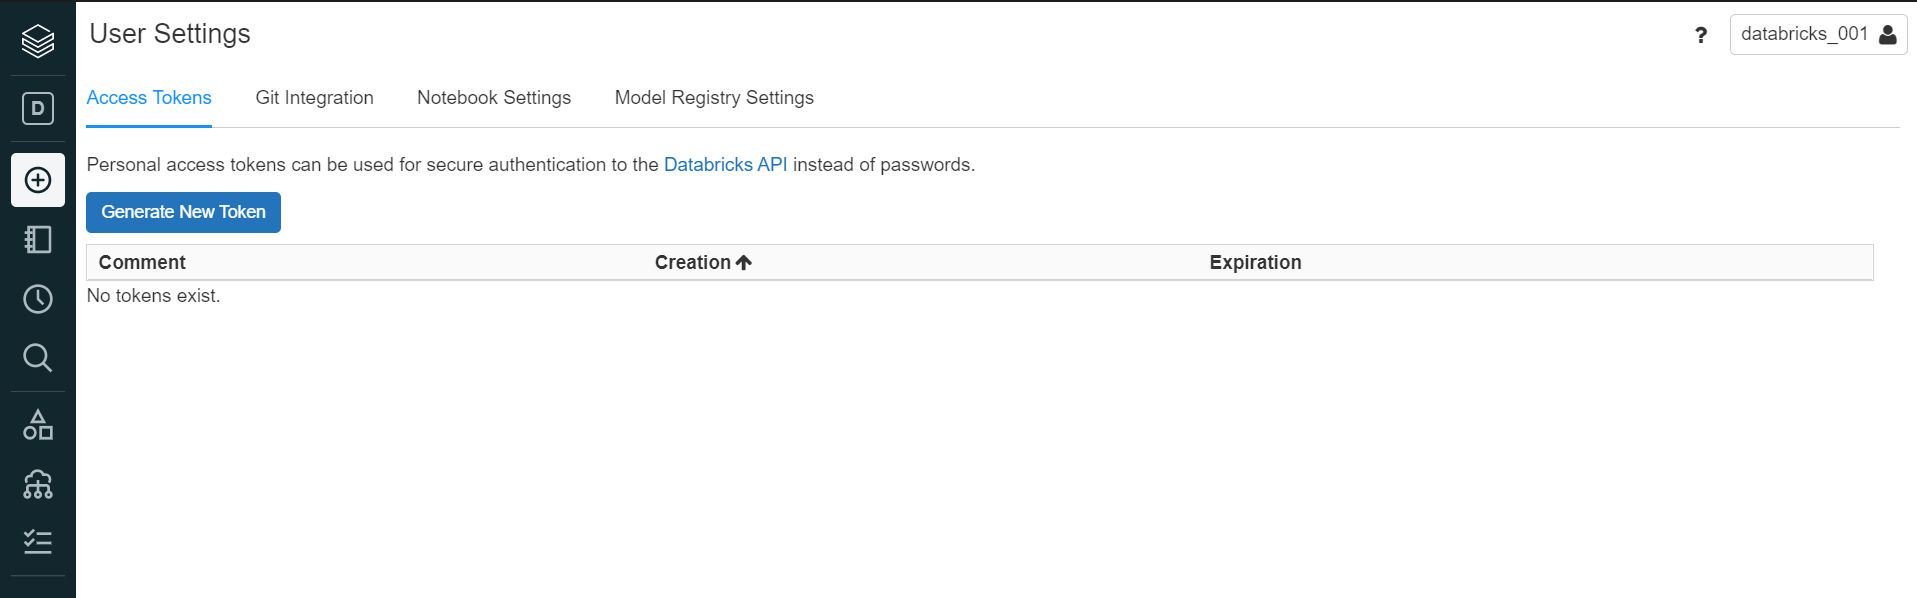
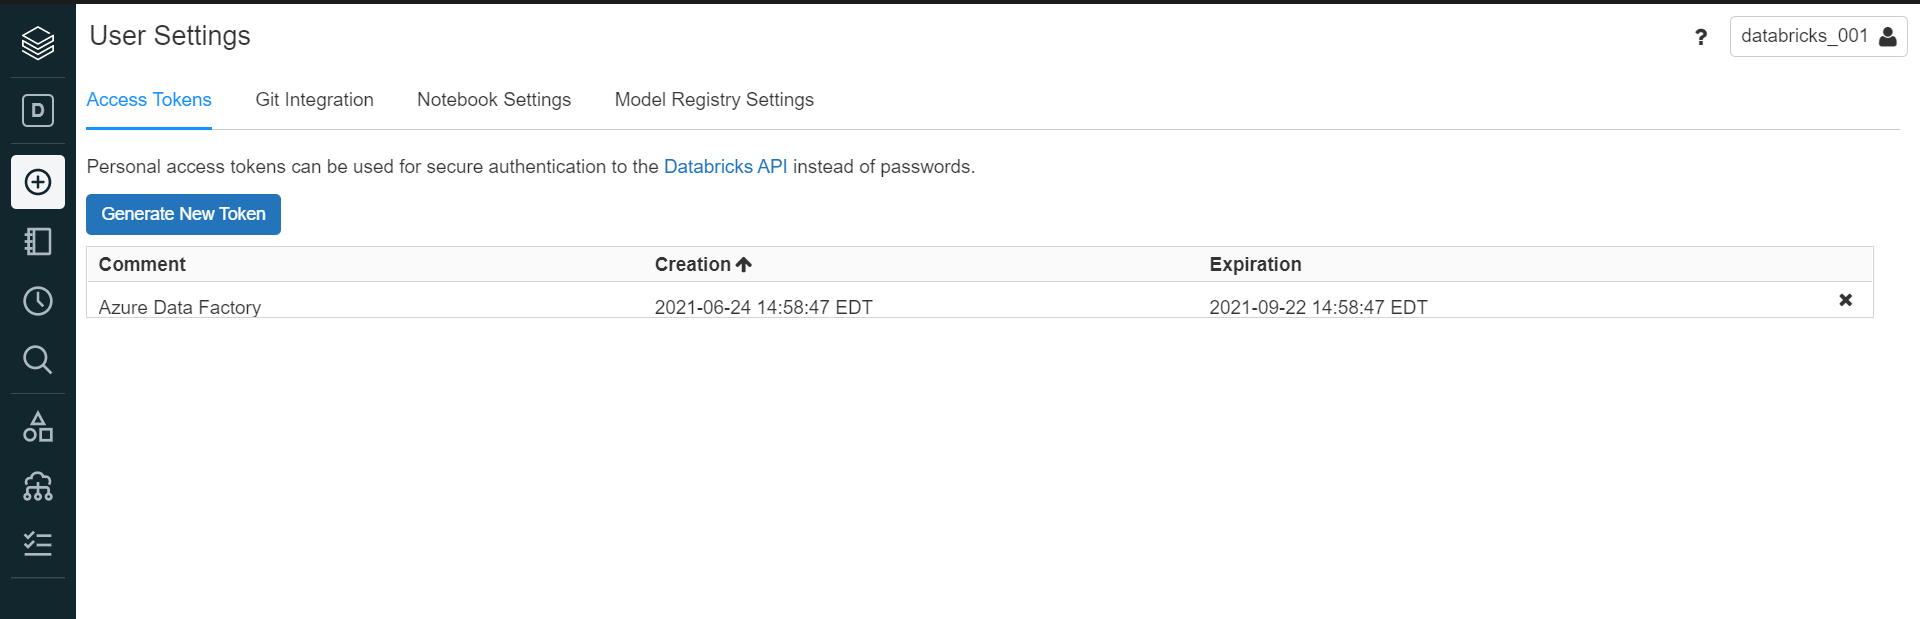
Click on the Generate New Token button to create a new token. It would pop-up a window that would ask for the purpose of the token and the lifetime validity of the token in the unit number of days. The default value would be 90. Provide relevant details and click on the Generate button. It would show the value of the token. We need to take note of the token and save it in a safe place, as this token would never be shown again by the system. Once the token is generated it would look as shown below.
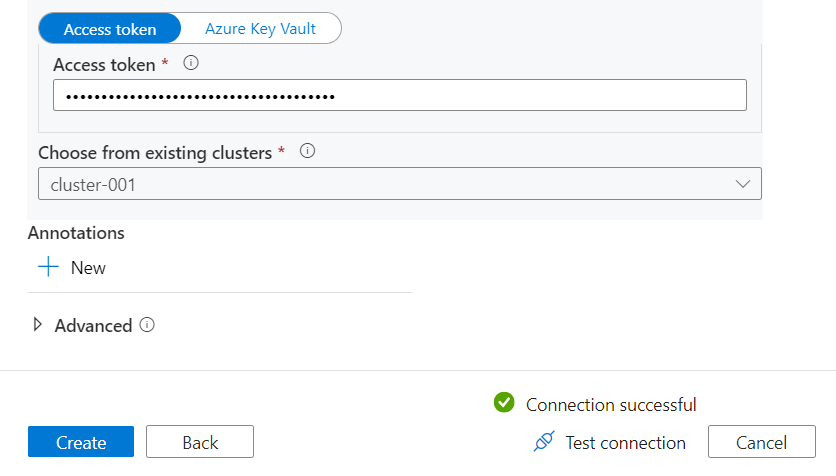
Paste the token in the Azure Data Factory connecting dialog where we need to provide the token. Once the token is populated it would provide the option to select the clusters available with this token, and we can select our cluster as shown below. Click on the Test connection button to test and connectivity, and if everything is in place the connectivity would be successful as shown below.
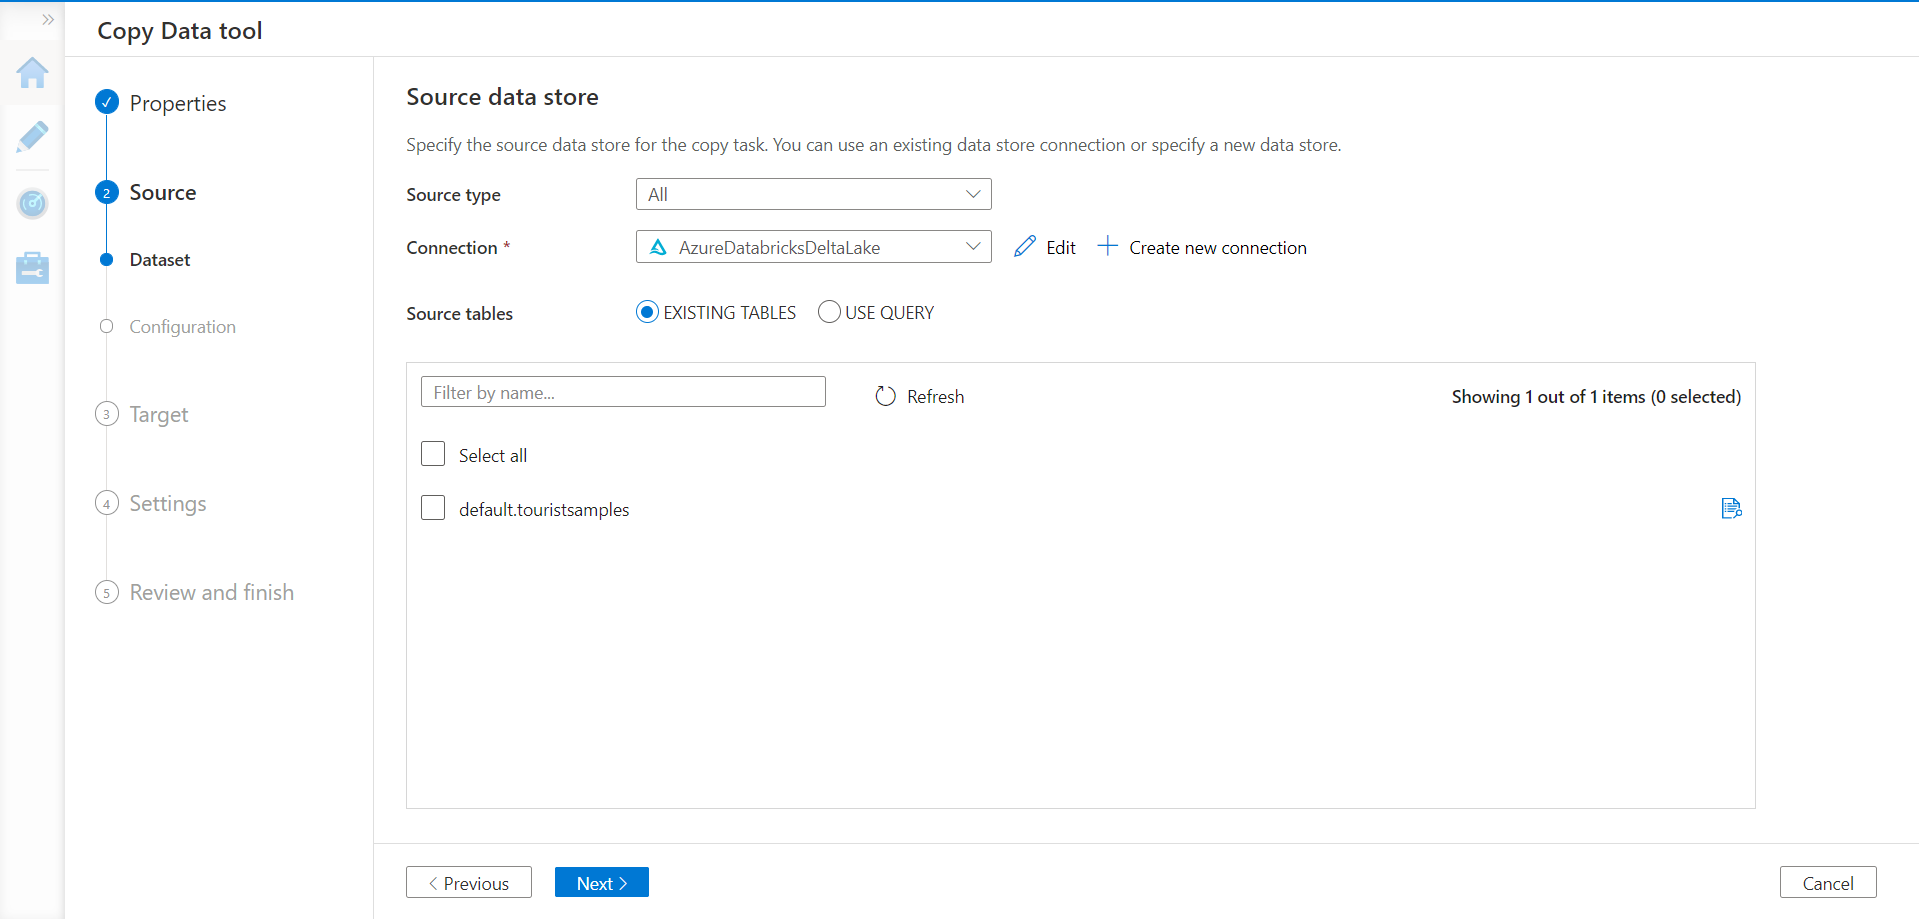
Click on the Create button and move to the next step where we need to select the dataset. In this step, we should be able to view the table that we created earlier in Azure Databricks as shown below.
In this way, we can integrate Azure Data Factory with Azure Databricks using the access token mechanism.
Conclusion
In this article, we created an instance of Azure Data Factory and Azure Databricks. We created a table in Azure Databricks, generated an access token and using the same, we connected Azure Data Factory by creating a new connection.

She has a deep experience in designing data and analytics solutions and ensuring its stability, reliability, and performance. She is also certified in SQL Server and have passed certifications like 70-463: Implementing Data Warehouses with Microsoft SQL Server.
View all posts by Gauri Mahajan
- Oracle Substring function overview with examples - June 19, 2024
- Introduction to the SQL Standard Deviation function - April 21, 2023
- A quick overview of MySQL foreign key with examples - February 7, 2023