As a Microsoft SQL Server Database Consultant, I have to visit multiple companies with variety of SQL Server versions and patch level. Generally speaking, we need to analyze the environment of these clients and get information about the infrastructure. To do so, we have to run multiple scripts and tools on almost all the machines at client. Though it’s a part of our job but at times it takes hours to get even the basic information about the SQL Server versions, patch level, configuration and small details which even client does not have.
Microsoft is really good at providing tools for the assistance of Database Administrators and Consultants. To make our job easy we use a tool known as “Microsoft Assessment and Planning” Toolkit, the MAP. This is really handy and does the job really well on getting the inventory information about the infrastructure of Windows Platform.
MAP is an agentless utility which automates getting the inventory for the Microsoft Platform. Though this utility does more than what I mentioned earlier but I will squarely focus on SQL Server related inventory information which this utility collects very easily.
I will explain the features and functions of MAP and how we can easily install, configure and collect the inventory information about any domain or workgroup. Though this can also assess an organization’s readiness of upgrading to new technologies like Office 365 or Cloud Technologies. MAP is also capable of providing you with data about the Hyper-V technologies and its utilization.
Mentioned below are some of the common utilities for which MAP is used (other than I mentioned above).
- Windows 10, 8.1 and Server 2012 R2 deployment with software and hardware related readiness capabilities.
- Detailed information about the On-Premise Office 2013 or the cloud based Office 365.
- Assess and Plan you upgradation and migration to Microsoft Azure VM.
- Detailed information about Microsoft Volume Licensing and compliance accordingly to your organization’s need.
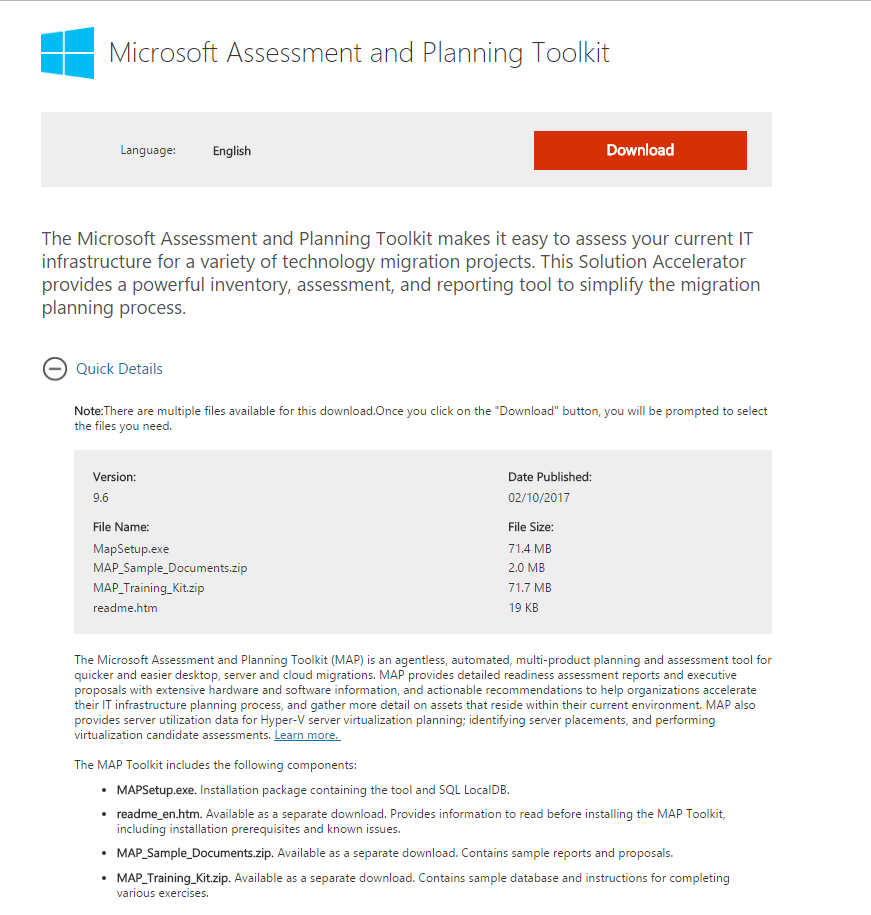
So enough said, let get started onto the technical details about the MAP. You can download the MAP from the link here. It’s a simple download like 150 MB file(s) with a pretty simple setup to install.
After the install, open then utility and you find the mentioned below screen:
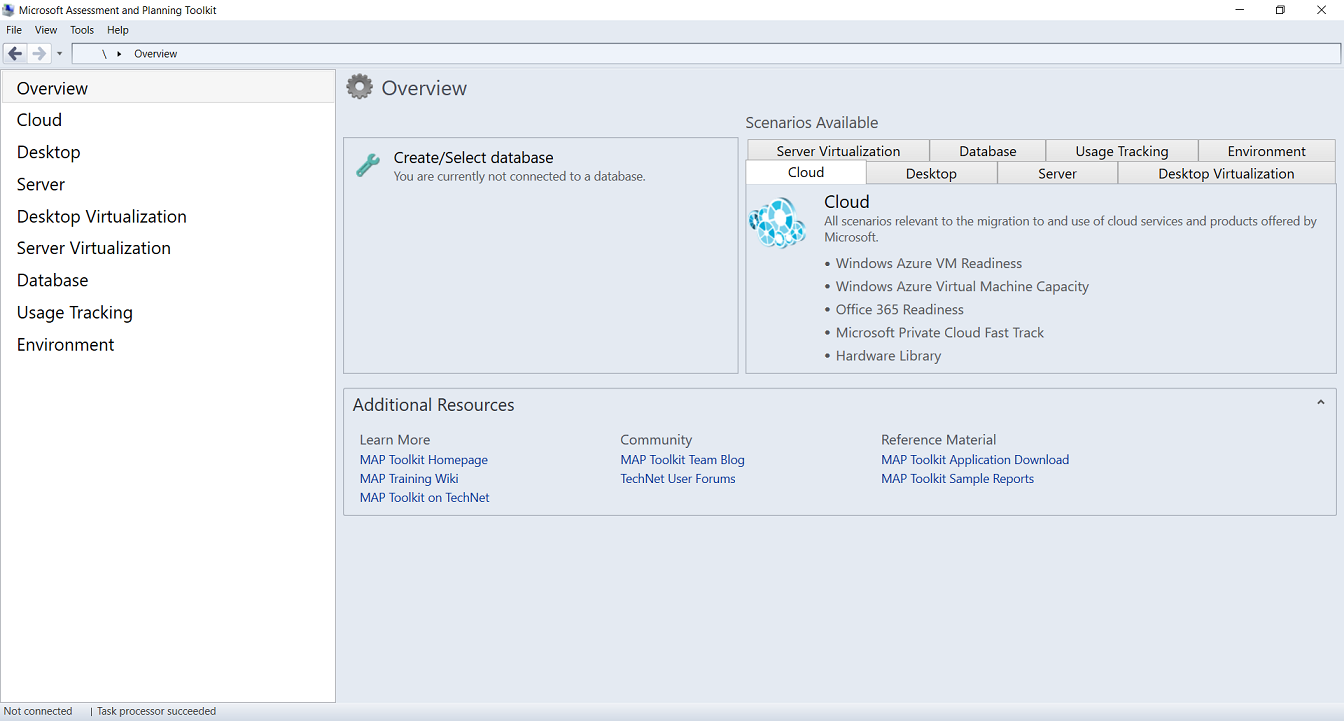
This screen is mostly self-explanatory but just to give an overview, the left hand side has all the platforms for which we may want to get assessment. And the right hand side are the tools (in general) which will allow us to actually perform assessment, view summary and generate reports.
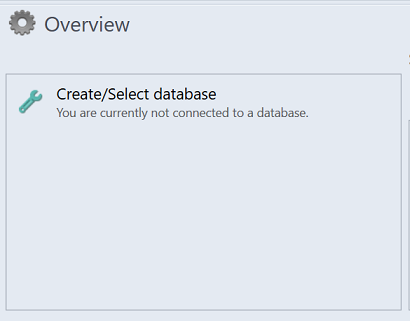
When you open the MAP for the first time, you will see the Overview window at the center of the screen. As the utility has to store data about your environment, it needs an Inventory Database to be created. So, you can go ahead and create it by Clicking on “Create/Select database” (as shown below) or go directly to “Database” section on the left hand side.
As we want to focus on the Database section only so I will take you to that screen and will discuss the options accordingly.
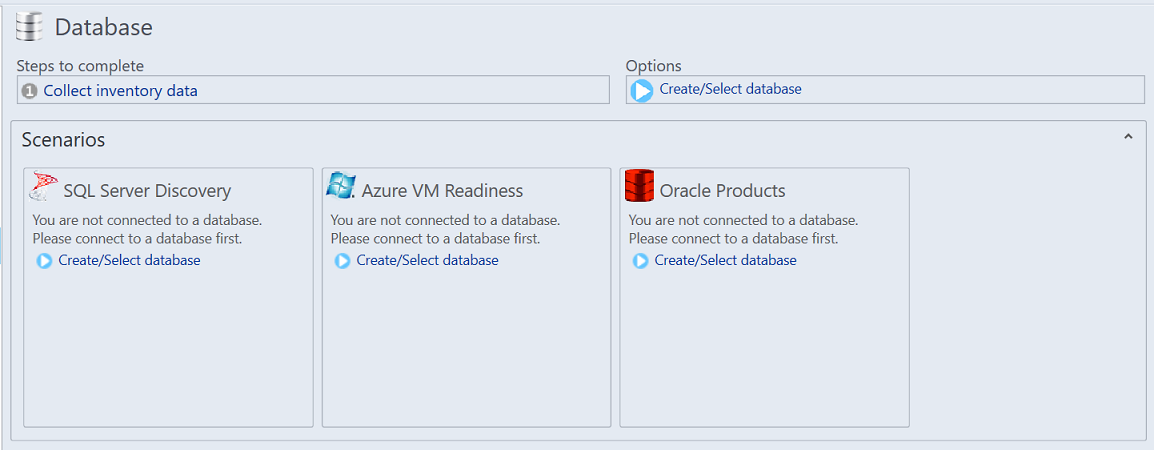
Once you click on the left hand side “Database” option, you will see the mentioned below Discovery options available at the right hand side window.
Here you can clearly see that the utility is capable of discovering SQL Server and Oracle Database products on the Desktop Machine or on the Network. Also it can create a report for Azure VM Readiness.
We will now create a Database for collecting Inventory of SQL Server Instances on the local machine.
So, click on the “Create/Select database” option right in the SQL Server Discovery section.
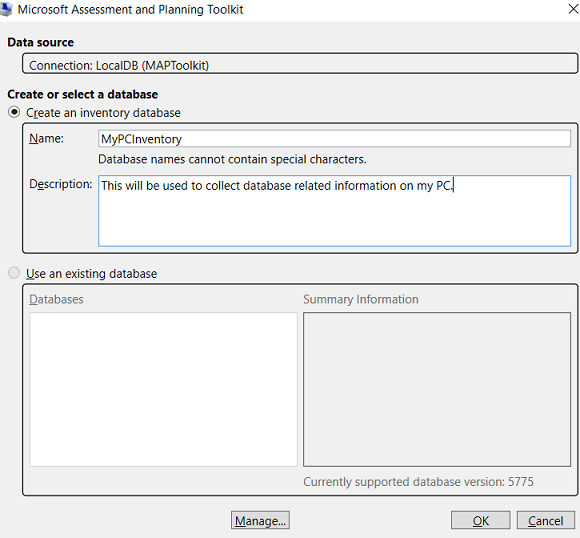
Next you will see the mentioned below screen where you can enter the name of Inventory Database and mention a short description about it and click “OK”.
Now you have an inventory database, next step will be to collect the data about SQL Servers. Now, you will have the mentioned below screen in the database section.
Now click on “Collect inventory data” and it will open a window which will allow you to choose options about what and how to discover.
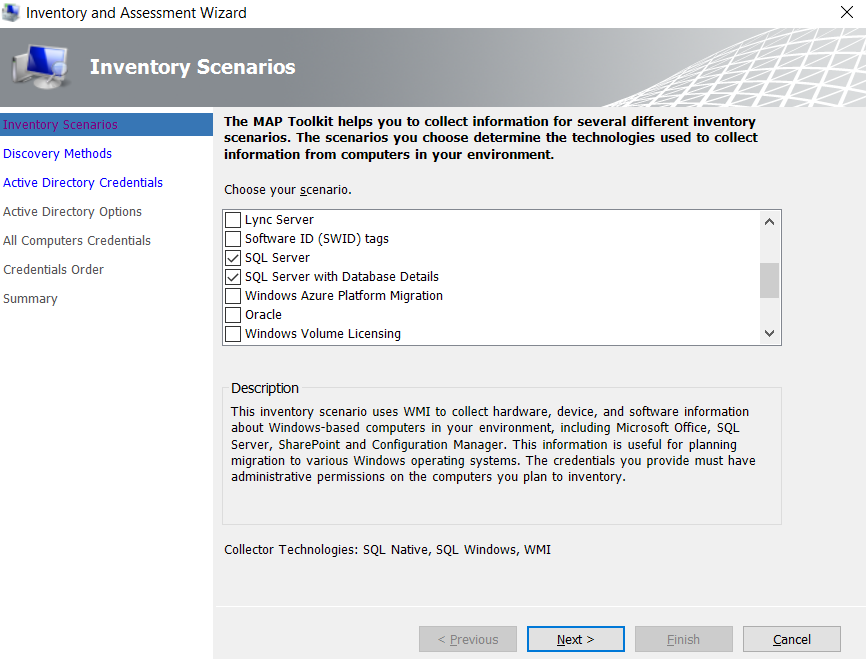
We will choose SQL Server and SQL Server with Database Details. This first option “SQL Server” will allow you to collect basic information about SQL Server, operating system and hardware information for assessment and planning. The second option “SQL Server with Database Details” will allow you to have much more detailed information about database sizes, growth rates, compatibility level and even configuration of each database. So, for initial analysis we will use both the options.
Click “Next” and you will see the discovery methods options. This will allow you to enter a method to search computers on which Microsoft Products are hosted. The methods will be like Active Directory Domain Services, Windows Network protocols, System Center Configuration Manager, IP Address Range, Manual computer names or system names in files.
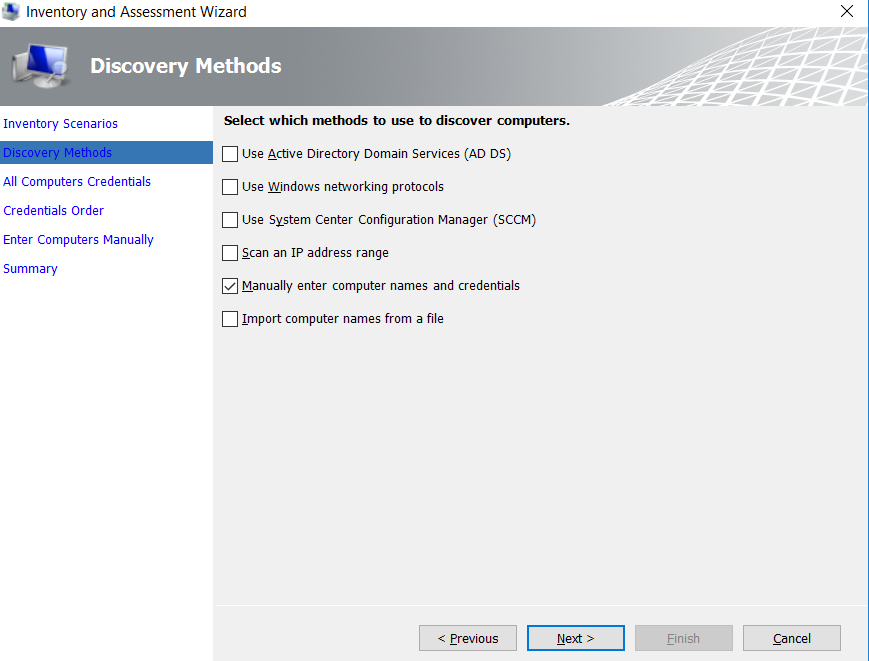
After you have chosen what is best suitable for you (I just wanted my own system so I choose to Manually enter computer names and credentials) you can go for entering the appropriate credentials for the utility to access the database systems.
On the next page you can choose to “Create” new credentials for the systems you want to explore.
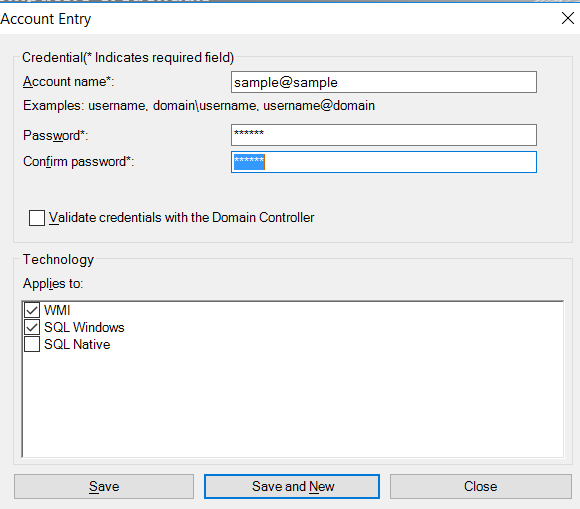
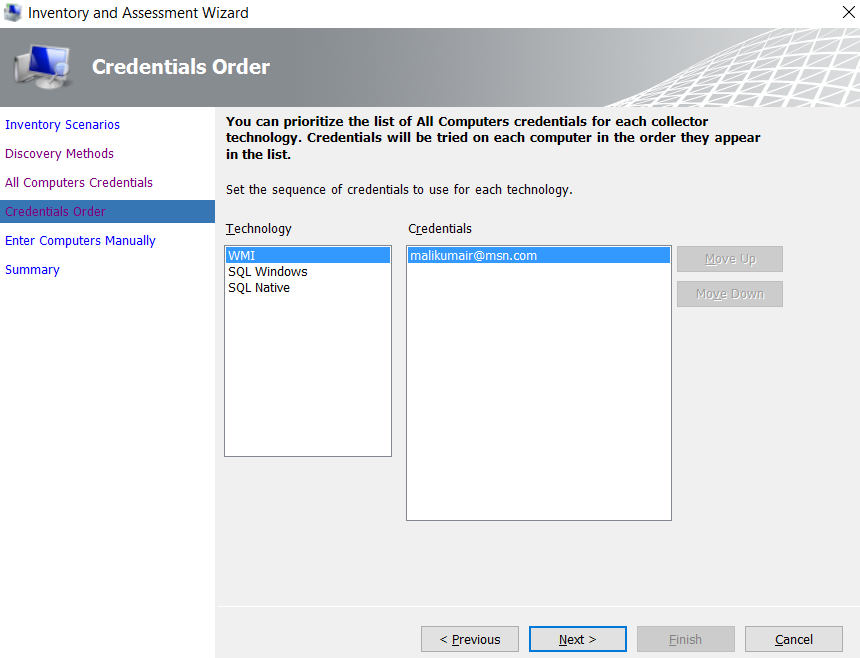
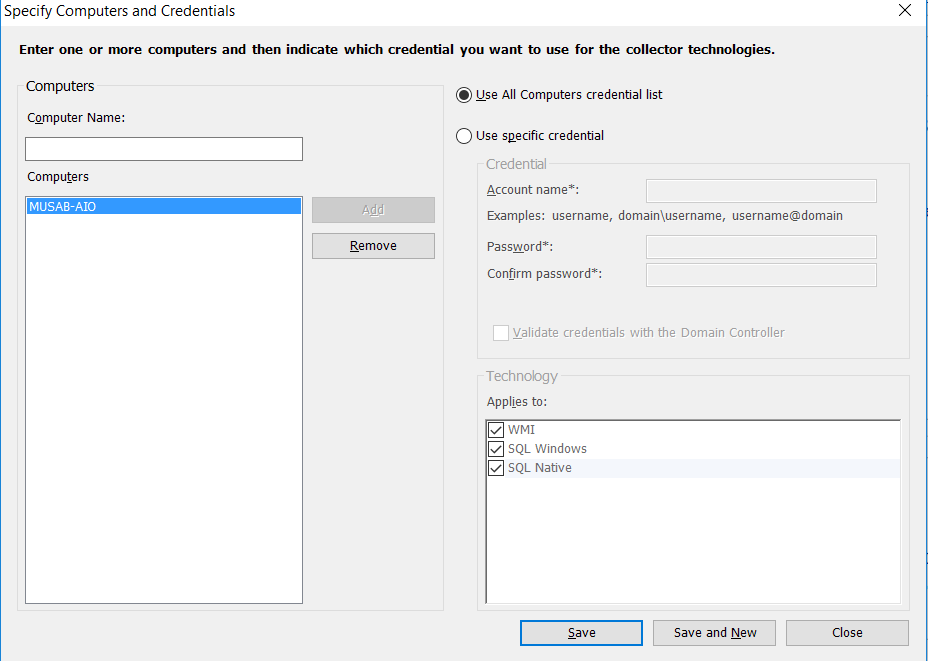
You can create multiple credentials for multiple services so that if one fails the utility will try to access the component with another credential in the order specified. To choose the order of the credentials click “Next” and you will be taken to the mentioned below screen.
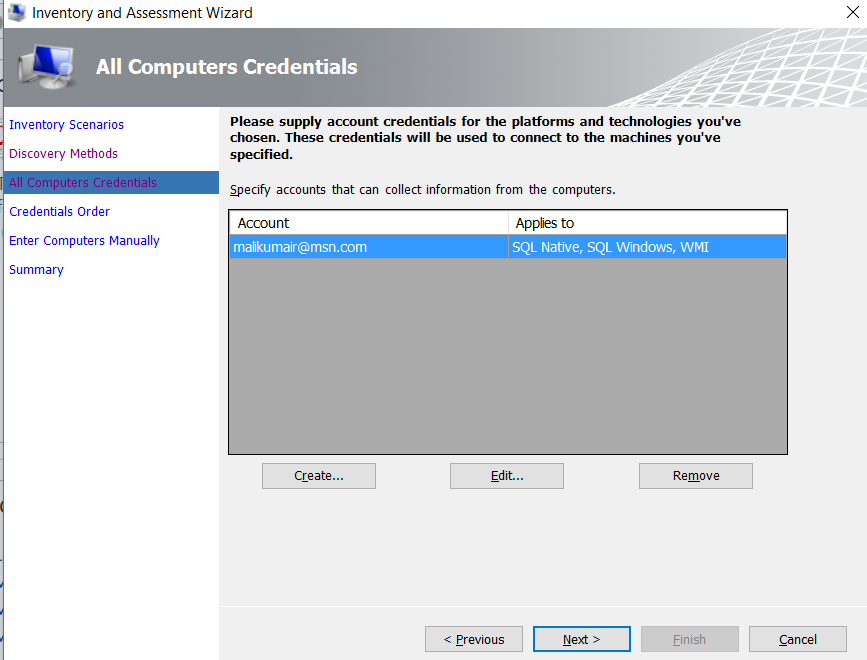
After setting the order of the credentials, you need to specify the credentials for each computer you want to discover. You can mention unique credentials for every computer/machine or can choose to use all computer credentials list. The screen on which all these options are available is shown below:
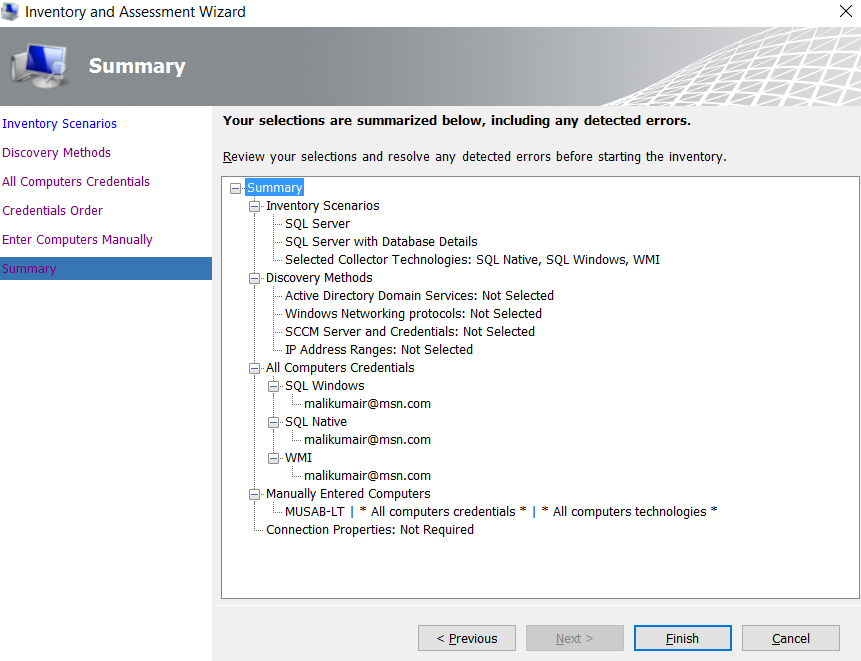
Click “Save” and then on “Next” to go to the Summary windows. Here you will see all the summary of options and methods you have chosen so far. So, verify all the settings and if everything looks good, click “Finish” to close the wizard and start the assessment process.
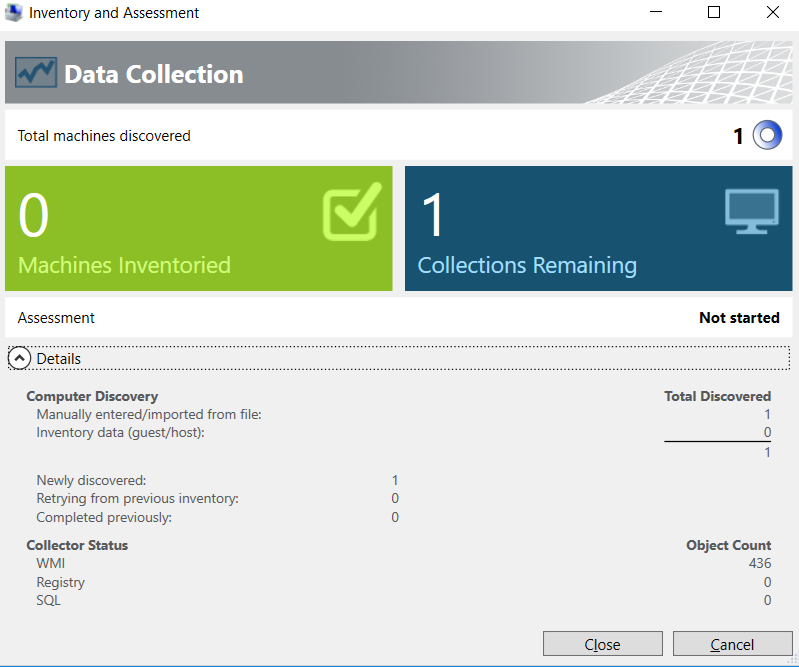
Now you will see a screen of the utility, trying to discover the machines and services running on them. This might take some times depending upon the number of machines and services you wanted to discover. On my machine which had 3 SQL Server instances, it took around 2-3 minutes. On production system, with like 20k plus machines it took around half an hour to discover 100s of instances of SQL Server. So be patient here.
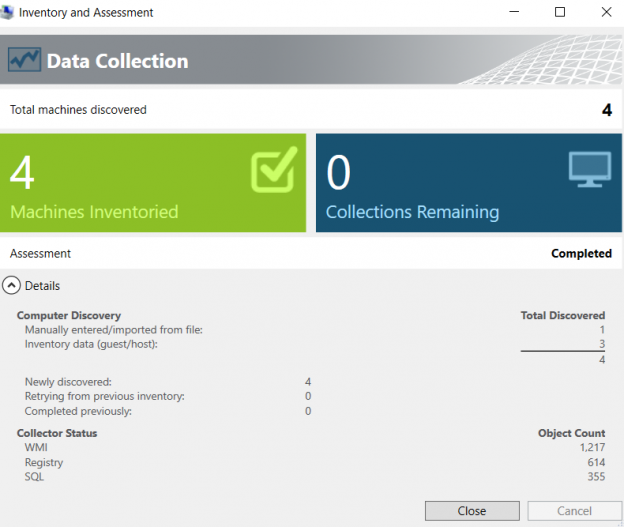
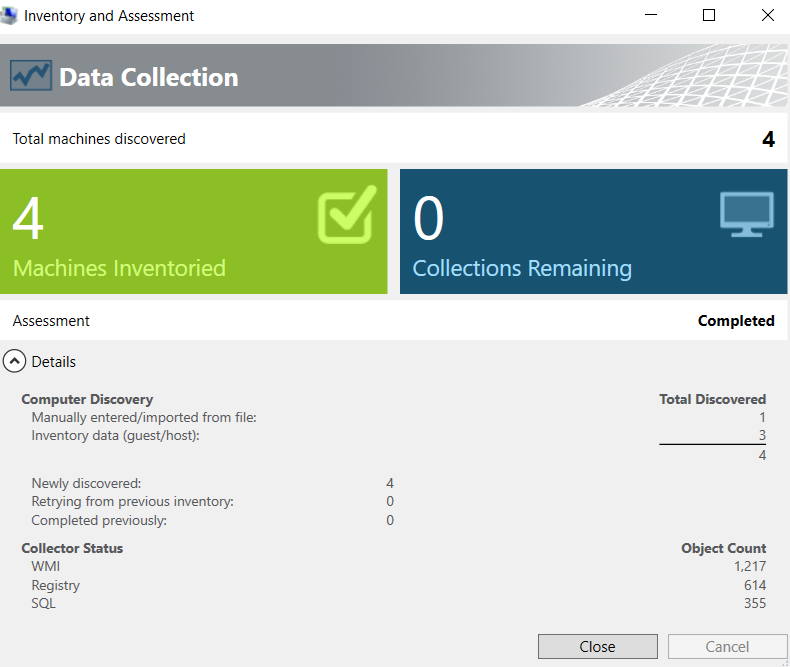
After the assessment is completed you will see a summary of the system and services discovered. This is really a good way to know how many machines you have in your network or how many objects are discovered in your system. The completed assessment screen is as follows:
After you click on “Close” you will be taken back to the Main window of the utility and you will see a summary of the Database Discovery done so far.
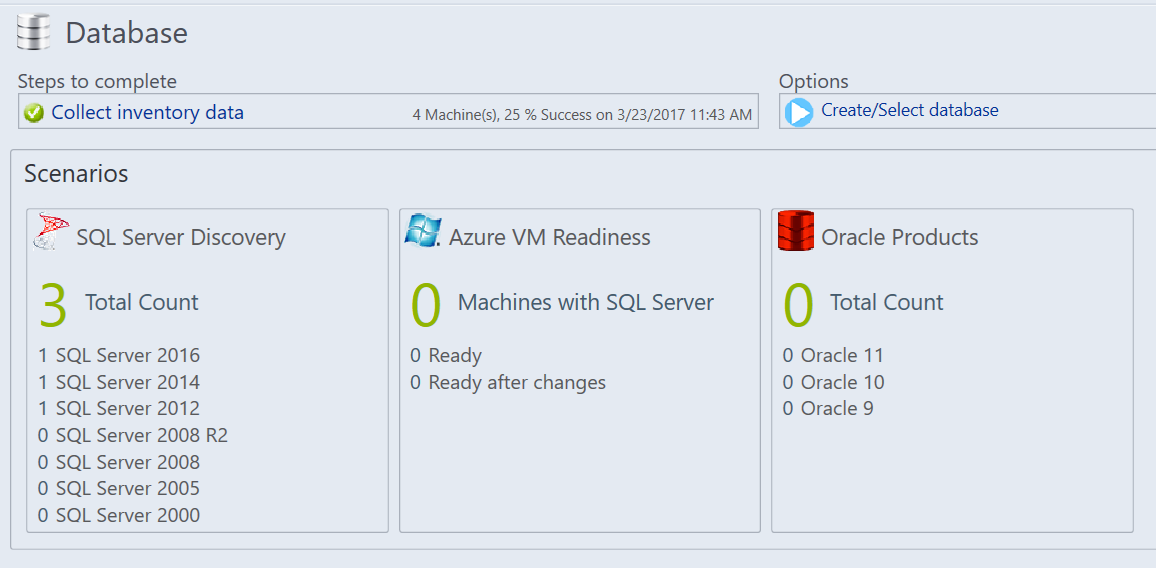
Here you will see that it has detected 3 instances on my machine with the version details. This is really good information. So, click on the “SQL Server Discovery” to see more details in graphical model about the SQL Server instances discovered. You will see some pie charts which will display really good and easy to read information about the SQL Server discovery. Screens are as follows:
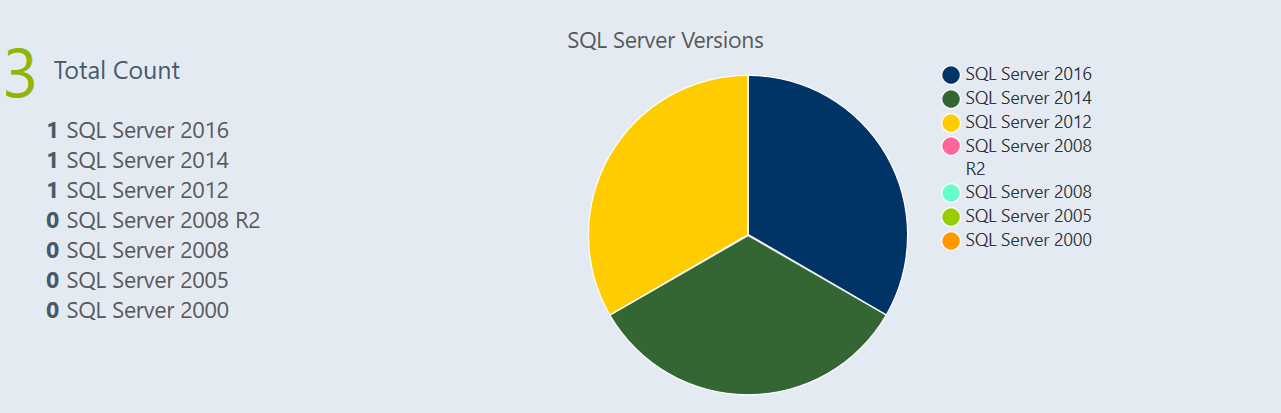 The mentioned below screen shows 3 SQL Server Instances with version details.
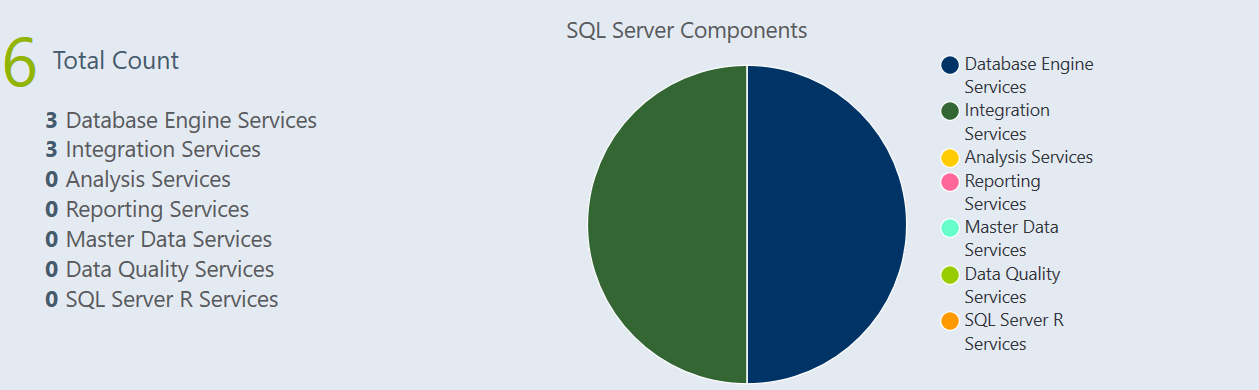
The screen below screen shows the installed components on the machines we did discovery on:
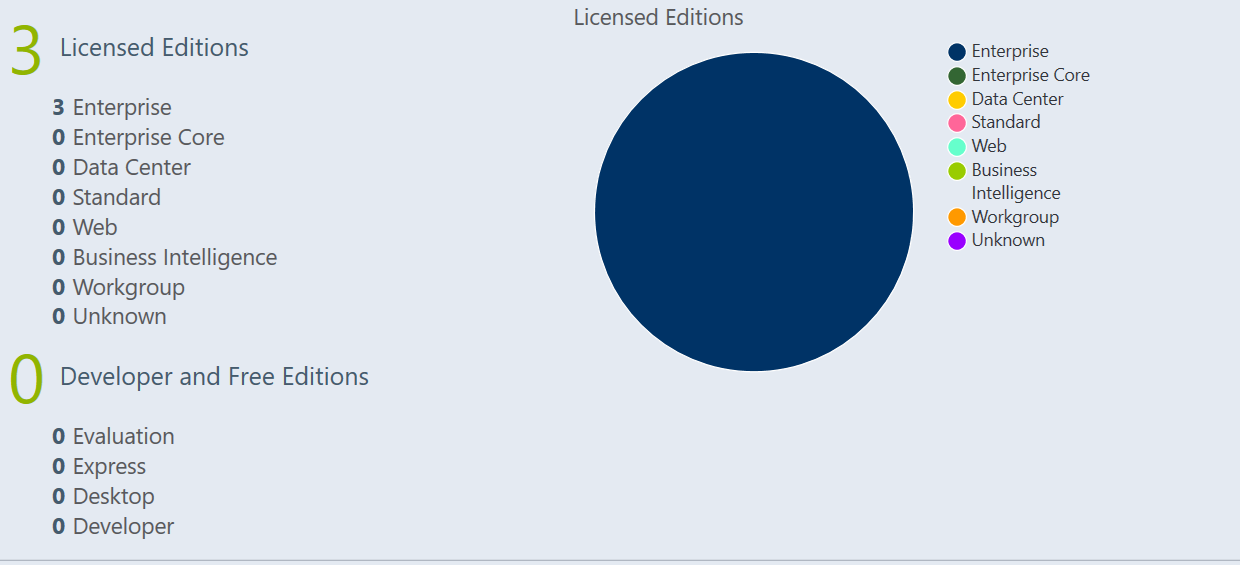
The third screen shows the database editions:
So far the discovery seems to be so amazing and it looks really good that we can get all this information in such a great way with just few clicks.
So, let’s go ahead and generate the actual Summary and Details reports which will give you a detailed insight about the discovery.
On top right corner of the utility you will have “Options” page and here you can generate report about the SQL Server Assessment and the Database Details.

Click on both (one by one) and it will generate report. This will take couple of seconds to few minutes depending upon the size of the inventory done from the discovery.
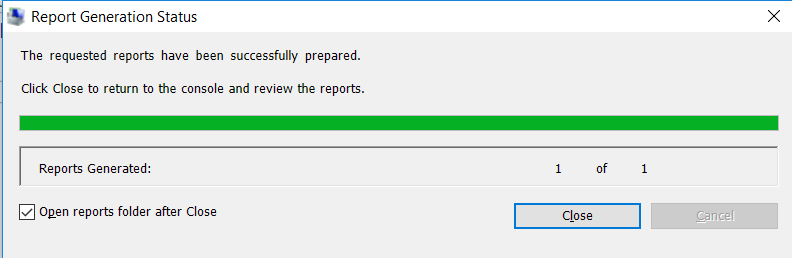
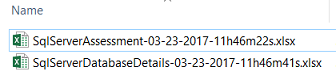
After reports are generated, the window will open automatically which will show files containing the Excel reports.
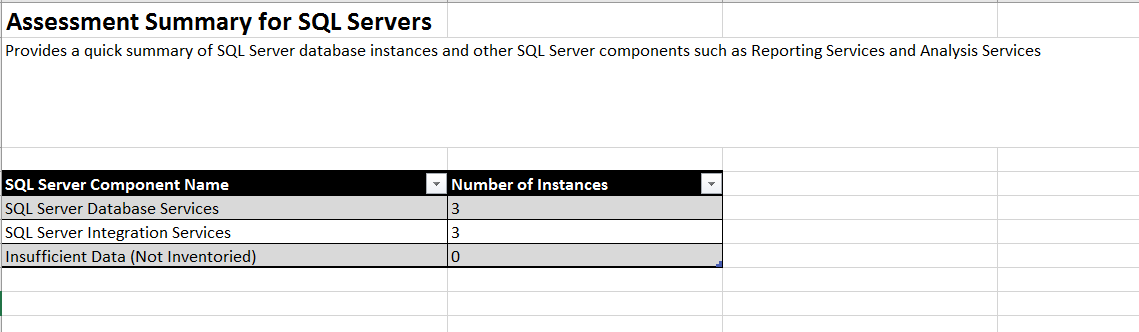
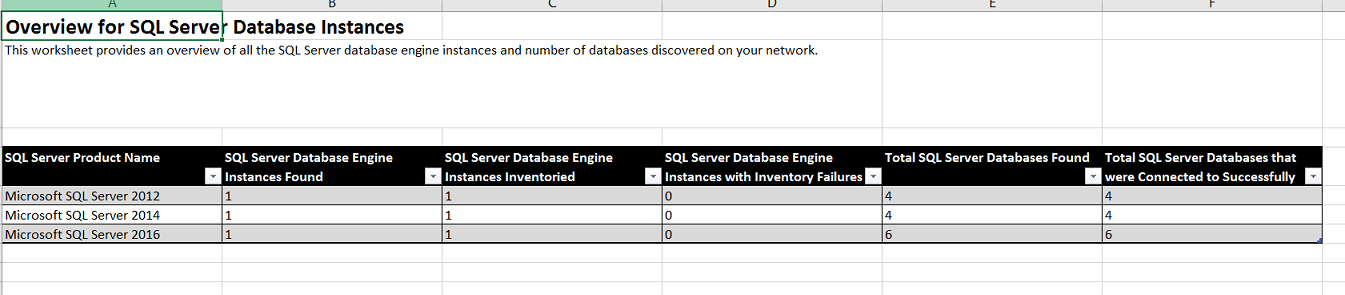
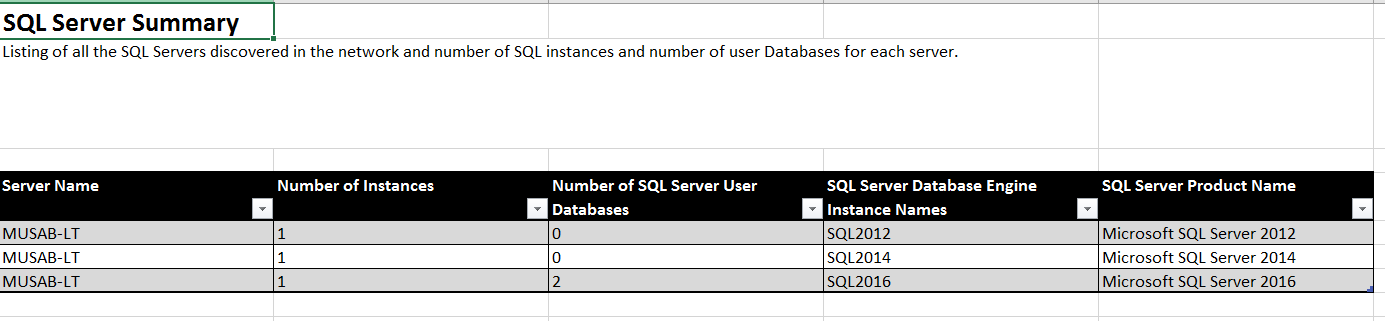
The first report will be a summary about the Instances and database components. This is the overview and high level summary.
Please see some of the sample screenshots as mentioned below:


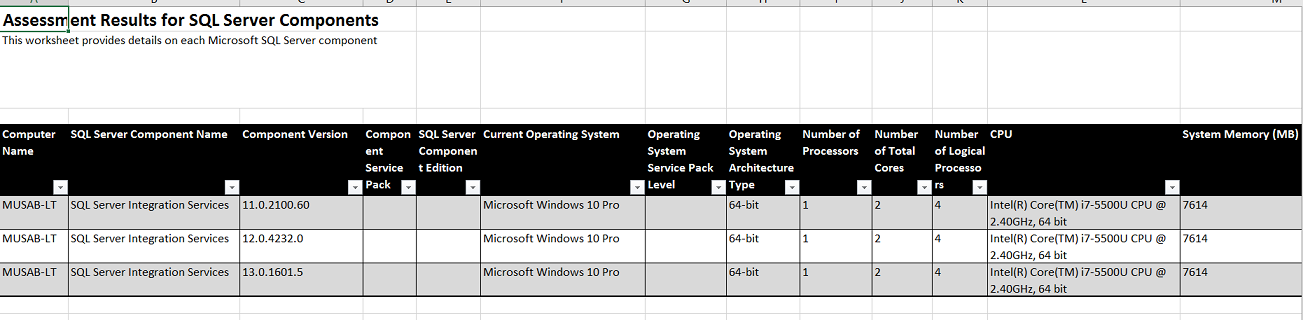
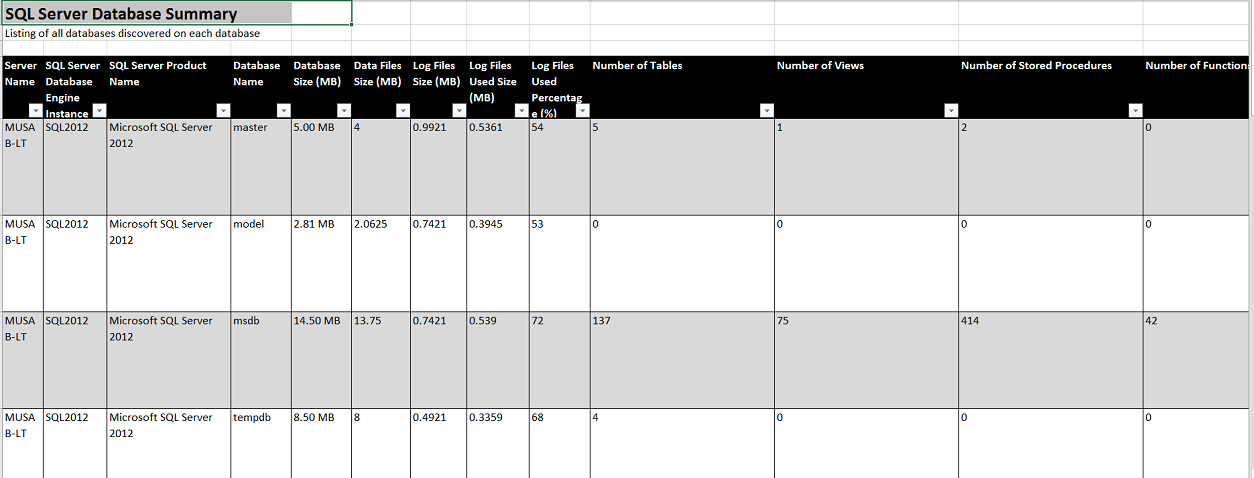
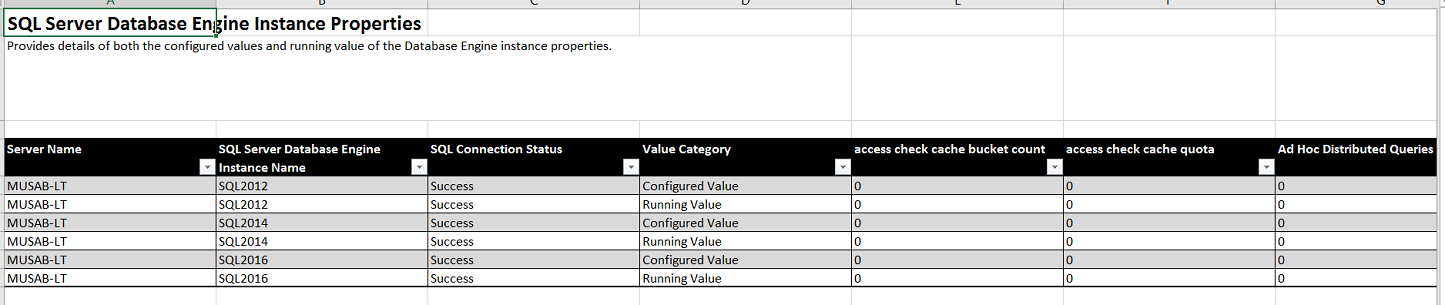
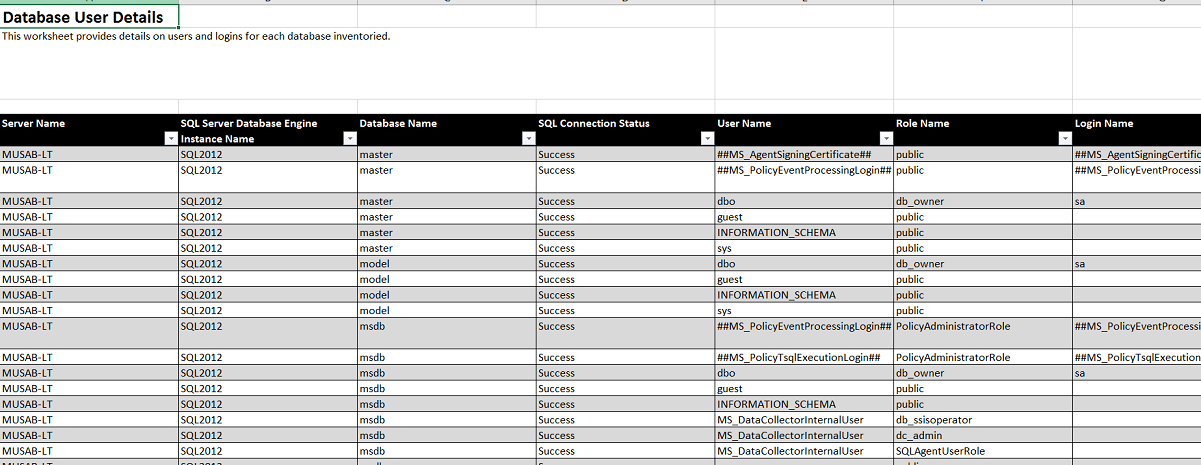
The second report is much more detailed and it will give you all the necessary information about instances, Databases, Users, Growth, Rights and configurations information.
Please see the sample screenshots mentioned below:


Summary
The MAP toolkit is really useful and does a lot more than just discovering the SQL Server instance names. So far we only looked at how to discover SQL Server on a system or on a network. This is a quick way to discover detailed information about your SQL Server environment.
He has 9+ Years of Database Development & Administration experience with Medical Billing, Startup & Financial Companies. He is a Microsoft Certified Expert for Data Platform (SQL Server 2012/2014).
Currently, performing duties as Senior SQL Server Consultant at multiple Saudi Private and Governmental Organizations.
View all posts by Musab Umair
- How to identify slow running queries in SQL Server - May 31, 2017
- Adaptive Query Processing in SQL Server 2017 - April 28, 2017
- What is the SQL Server Virtual Log file and how to monitor it - April 26, 2017