
Introduction
Today, it is a common practice to migrate our local data to Azure. Sometimes, we migrate files, sometimes databases and sometimes virtual machines. All the service in the cloud including Azure help a lot to simplify the administrative effort and reduce costs.
This time, we will teach how to export tables from MySQL to Azure SQL database. This article is oriented to professionals with experience in MySQL, but new in the Azure world. We will use the SSMA from MySQL first and then we will learn how to migrate data with SQL Server Integration Services.
Azure SQL database is a very simple Microsoft database stored in the cloud. It is similar to SQL Server, but it is simpler to install, create and maintain. In this example, we will create a blank database from 0 in less than 5 minutes and then we will migrate the data.
Requirements
- MySQL 5.7 installed with the world database installed (it comes with the installation by default)
- SSMA for MySQL Installed, version 7.3 or later
- An Azure subscription
- The .Net Framework versions 3.5 or later installed
- SSDT installed
- SSIS installed
Get started
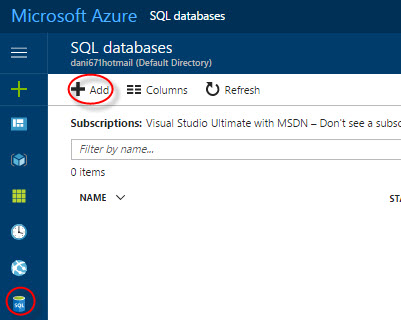
We will first create an Azure SQL Database (ASD). We will require an Azure SQL database Server, which can be created during the database creation. In the Azure Portal, click the SQL Database icon and then press the +Add icon:
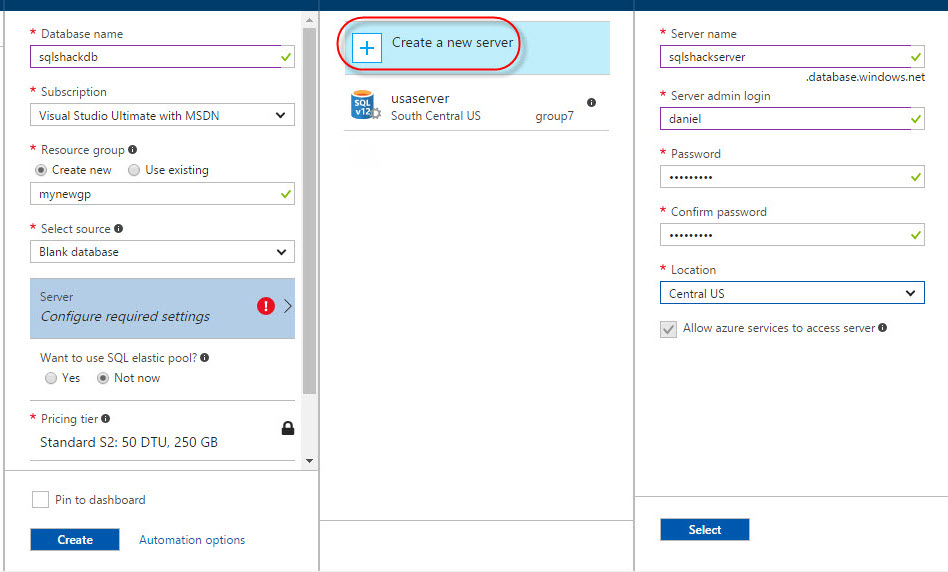
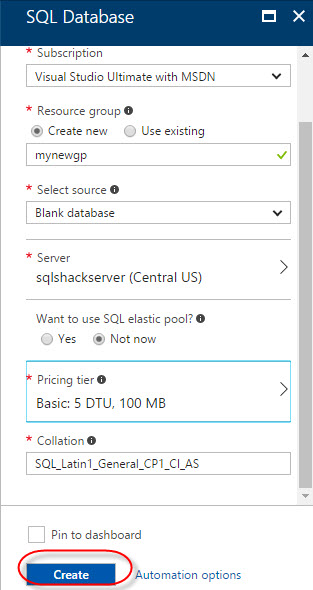
Enter the database name. The subscription is usually one and is selected by default. This option is important if you have multiple subscription, which is not common is you are just starting with Azure.
A Resource Group is used to group and administer different Azure Resources. If it is your first time in Azure, Create a new group. Select source allows creating a sample database with some tables with data already created. In this example, we will create a Blank database, because we only want to load the data from MySQL to Azure.
Server is used to create a New server or an existing one. If it is your first time in Azure and you do not have an Azure SQL database Server (ASS), create a new server. You will need to specify a login and a password. The location is used to specify the region where you want to store the information. Use the region closer to the persons that are going to use the database. If people from different regions are going to use the data, it is possible to replicate the database in multiple regions using geo-replication, but the secondary database is read-only.
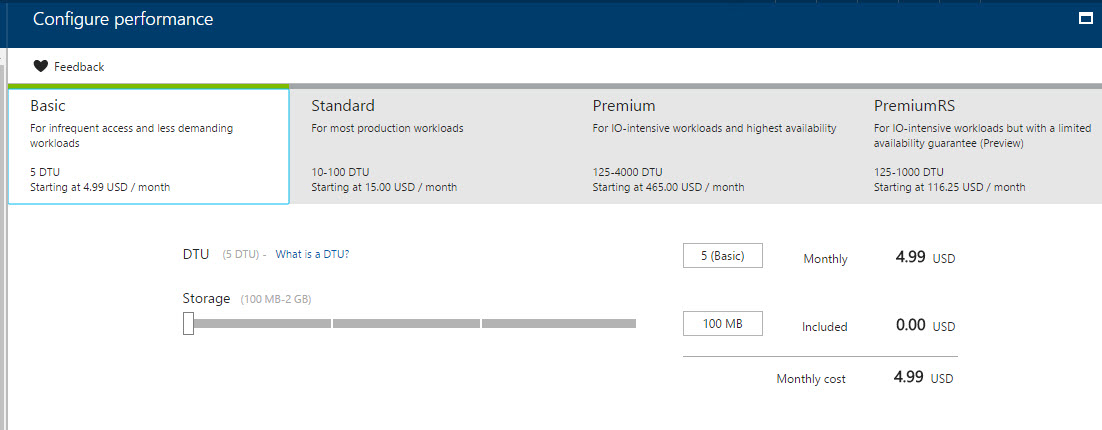
The Pricing tier is very important, because it is the price of the server. In Azure, you pay based on storage and the number of DTUs (a measure for performance) supported. The most expensive option is the Premium option; the maximum value configurable by the moment is 16,000 USD approx. per month. It supports 1 TB and 4000 DTUs:
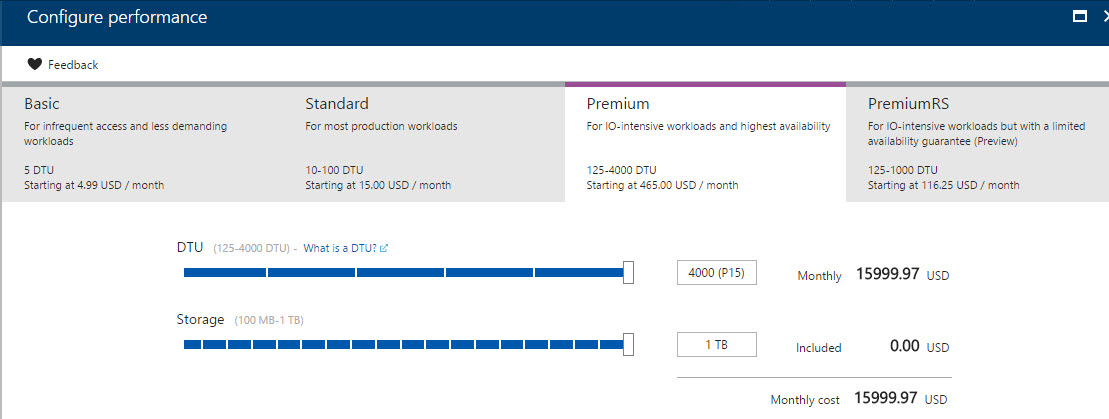
In this example, we are going to use the Basic option. It supports 5 DTUs and 100 MB of storage. The cost is 5 USD approx. per month:
Once that you have all the information, press the Create button:
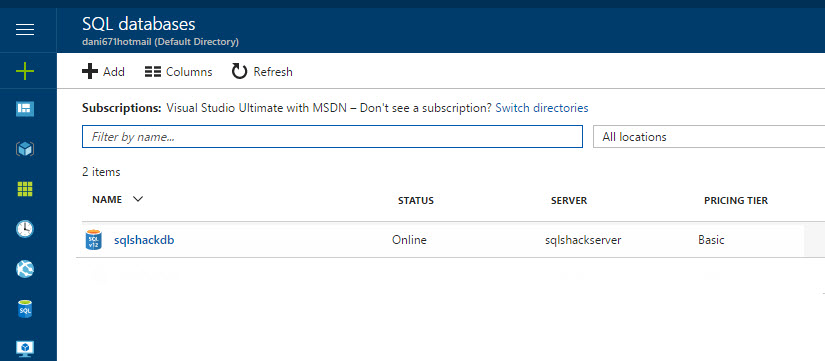
If you go to SQL databases again, the database created will be displayed:
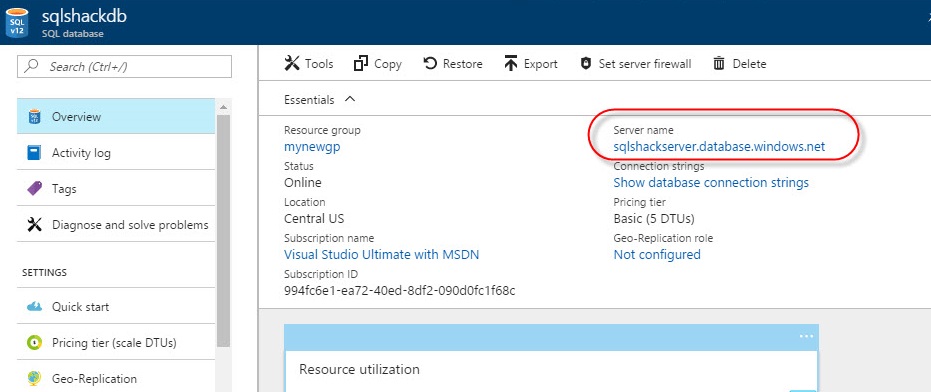
As you can see, creating a database is very simple. If you click the database and go to overview, you can see the Server name. This server name is very important and we will use later to connect to Azure:
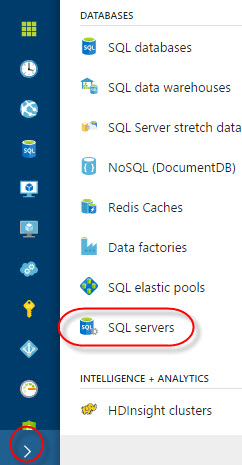
We will need to open a firewall rule to connect in our local machine to our Azure SQL Database. To do it, in the Portal, press the > icon and select SQL servers:
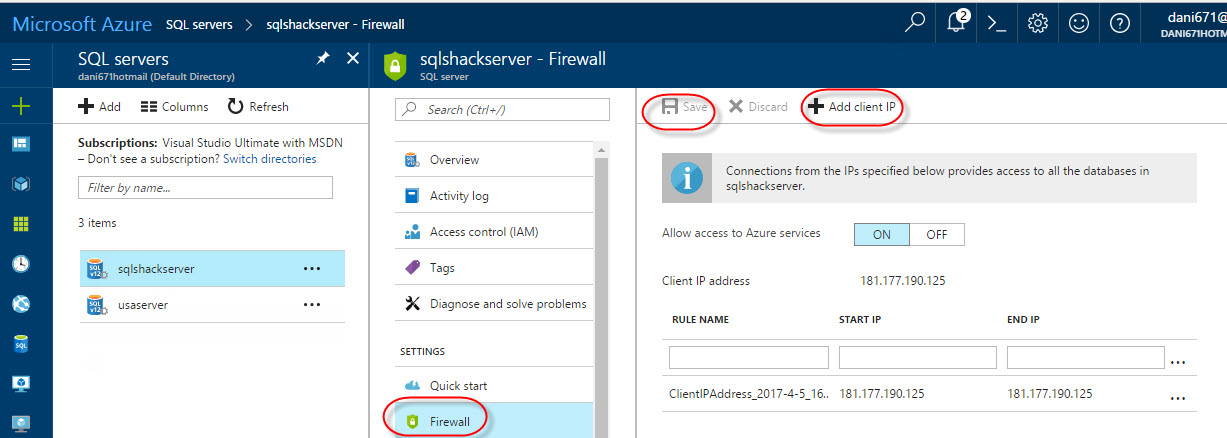
Select the database and click on Firewall. Click Add client IP to add the current local IP and then save the new configuration. This option is used to enable the local IP to access to our Azure SQL database Server:
Migrating the data with SSMA
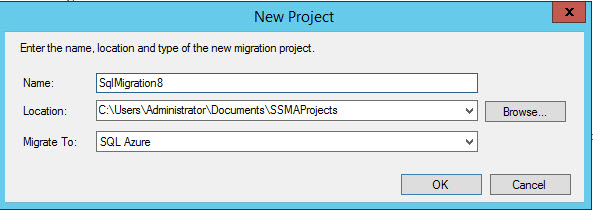
In your local machine open the SSMA (see the requirements). This Assistant migrates the information, from MySQL to Azure. In the SSMA, go to the Menu and select New>Project. Specify a name and a location for the project. In Migrate To, select SQL Azure:
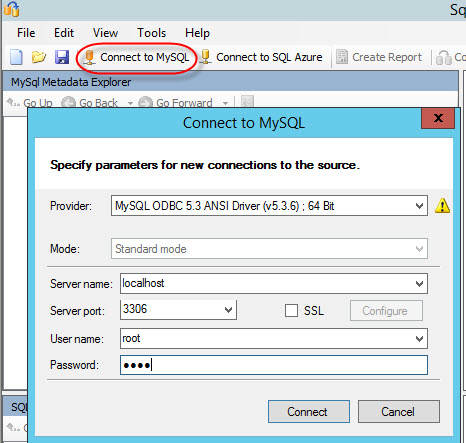
Press the Connect to MySQL option to connect to MySQL. The provider will help you to specify the MySQL version. The server name is the name of the MySQL Database. I am using in this case the local host. The port by default is the 3306. The root is the user created in the installation. I am assuming that you already have a MySQL Server installed:
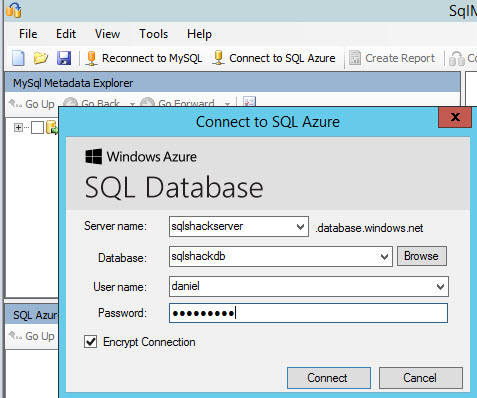
Press the icon Connect to SQL Azure option and specify the following information:
The server name is the name of the Azure SQL database Server. In the Azure portal we created a login and a password. Specify them. The Database name created in the Azure Portal was sqlshackdb.
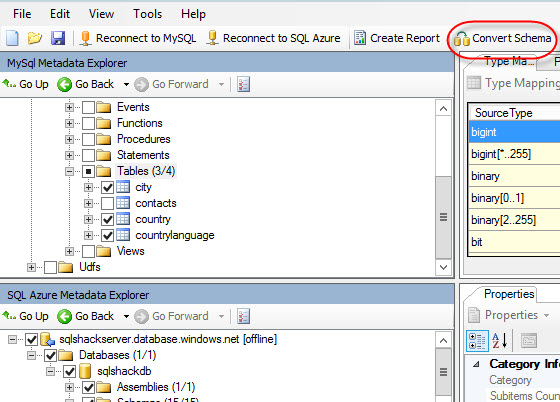
Select the MySql tables to export. In this example, we are using the database world (installed by default with the database) and select the tables city, country and also countrylanguage. In the Azure SQL database Server, select the sqlshackdb database. Once selected, press convert Schema. This option will create schemas for the destination database:

You will receive an error message for the tables countrylanguage and country table:
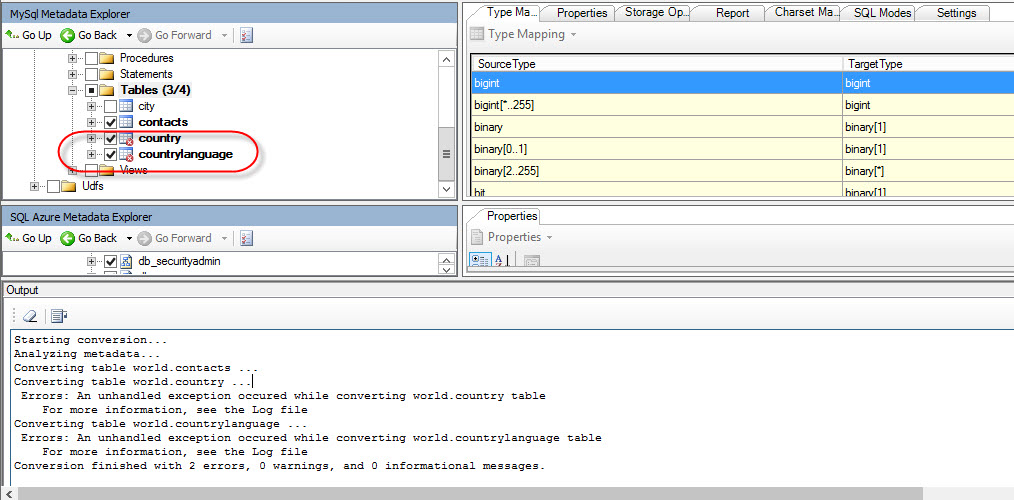
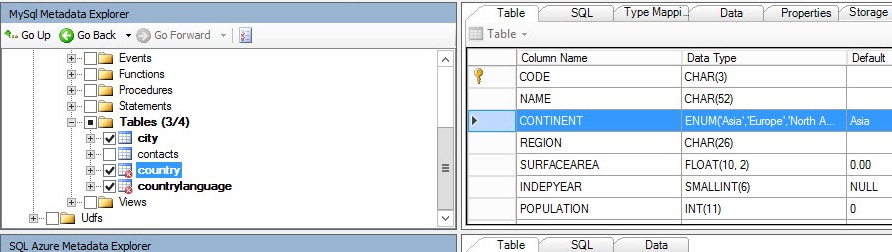
This error occurs because country and countrylanguage contain columns of ENUM data type. This data type cannot be converted to an Azure SQL database data type:
To import country and countrylanguage, it is necessary to use other tools like SSIS. For more information about importing data from MySQL using SSIS, please refer to our MySQL to SQL Server tutorial.
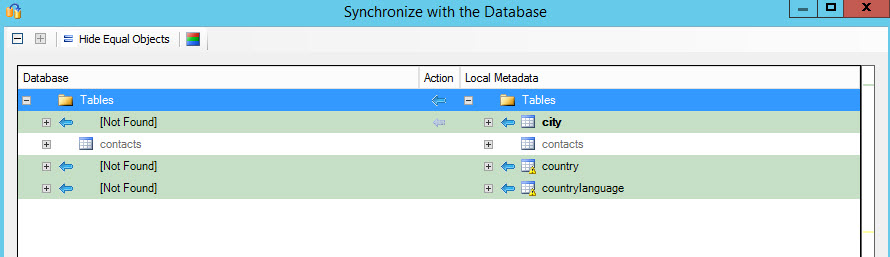
Select the SQL Azure tables and select Synchronize with Database:
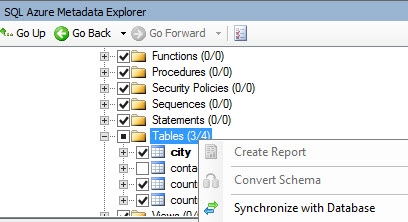
The metadata will be synchronized between the MySQL and the Azure SQL databases:
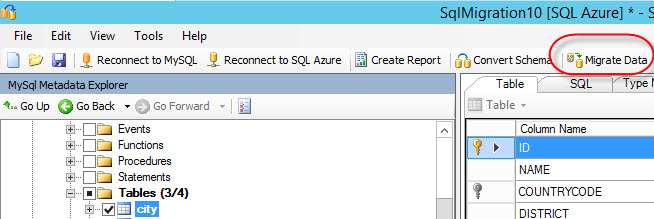
Select the table(s) that you want to migrate. In this example, the city table and press Migrate Data:
In the Output section you will receive the following messages:

If everything is fine, you successfully migrated the table city from MySQL to Azure SQL database.
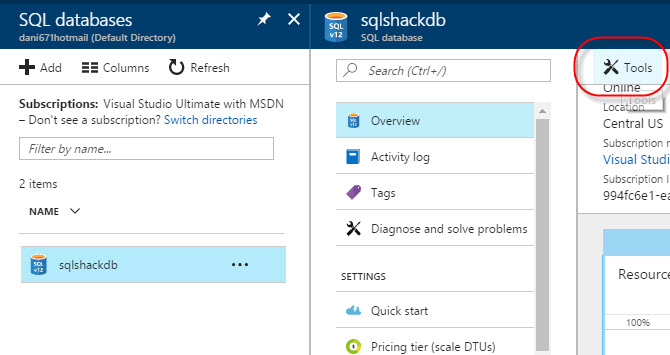
To verify, in the Azure Portal, go to databases, select the databases and press the Tools option:
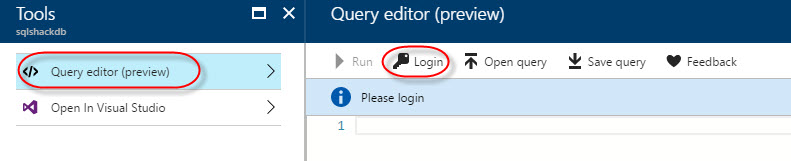
You can access to your database using SSMS, SSDT, Visual Studio or the Query editor. The query editor is my favorite option, because you do not need to install anything. Click on Query editor and Login. Specify your credentials:
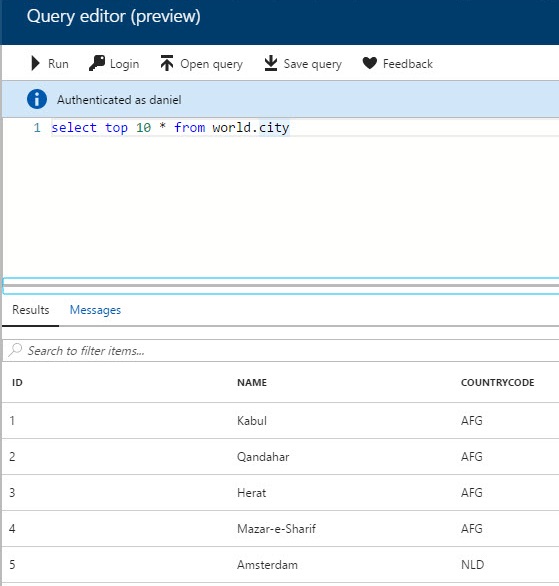
We will select the first 10 rows of the table city:
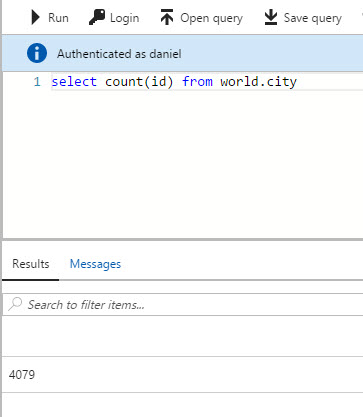
If you can see the data, it means that you could successfully migrate the data. Finally, we will count the number of rows. If there are 4079 rows, we are OK:
Working with SSIS
We failed to import the tables country and countrylanguage using the SSMA for MySQL. This is because the enum column was not compatible.
Now, we will exclude that column using SSIS and import the tables in Azure SQL database.
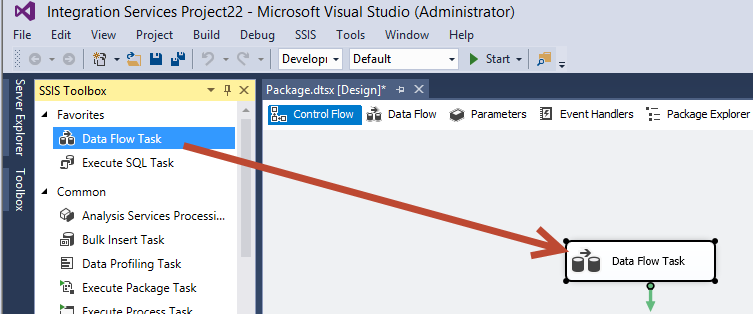
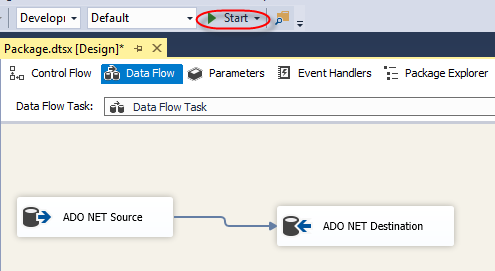
In the SSDT, create a SSIS Project, Drag and drop a Data Flow Task in the package design:
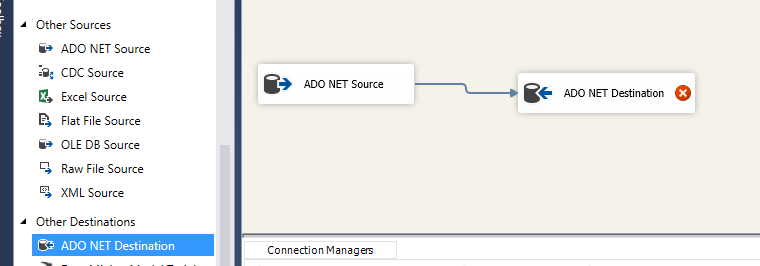
Double click on the Data Flow and drag and drop the task ADO NET Source and ADO NET Destination. Join the tasks. The Source will connect to MySQL and ADO NET Destination will connect to Azure SQL database:
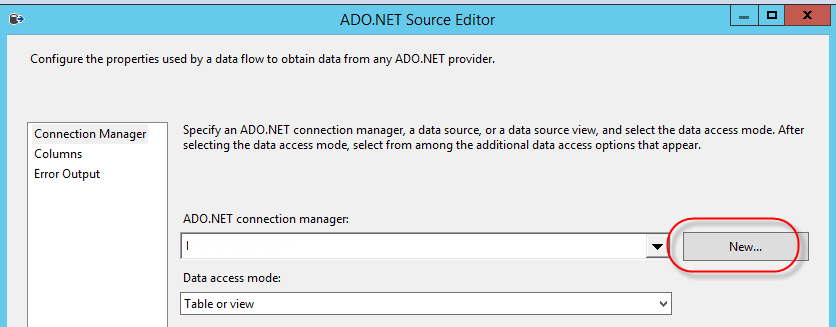
Double click the ADO.NET Source and press the button New to create a connection to MySQL:
Select the .Net Provider\MySQL. Specify the name of the MySQL Server, login and password. Also, specify the database name to connect:

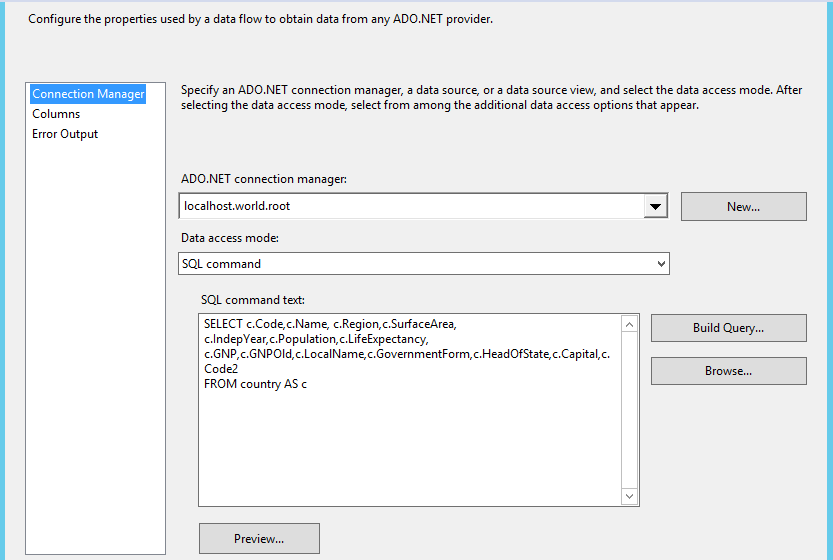
Select SQL command in Data access mode. In SQL command text, write a query excluding the column of data type ENUM (continent in figure 15):
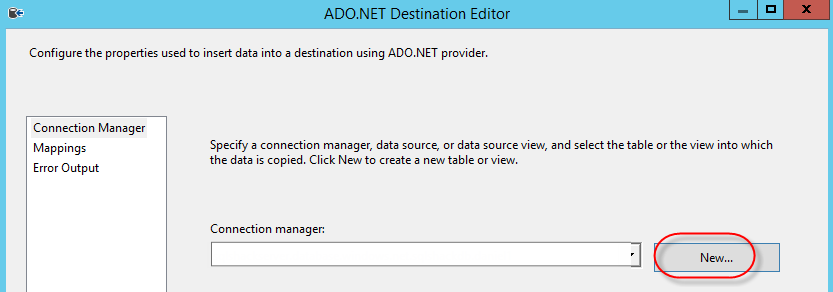
In the ADO.NET destination task, press New to connect to Azure SQL database:
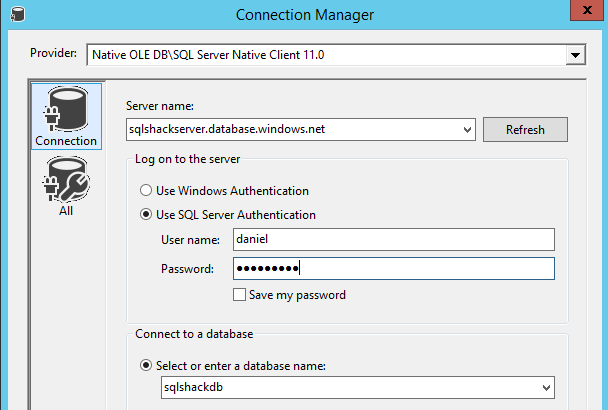
Specify the Azure Name of the SQL Server (from figure 7), the Azure SQL database login, password (from figure 2) and database name (from figure 2):
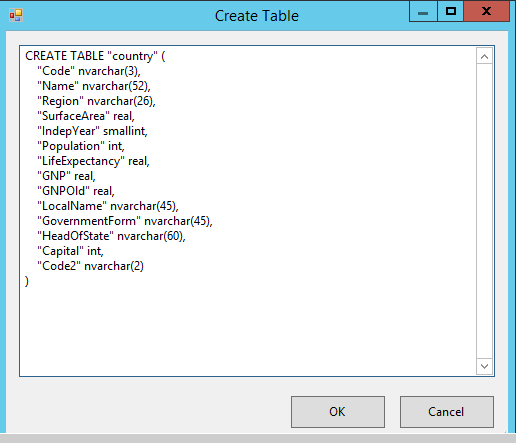
Press the button New to Use a table or view. This option will create a new table in Azure:

In create table, we will modify the code to create a table named country:
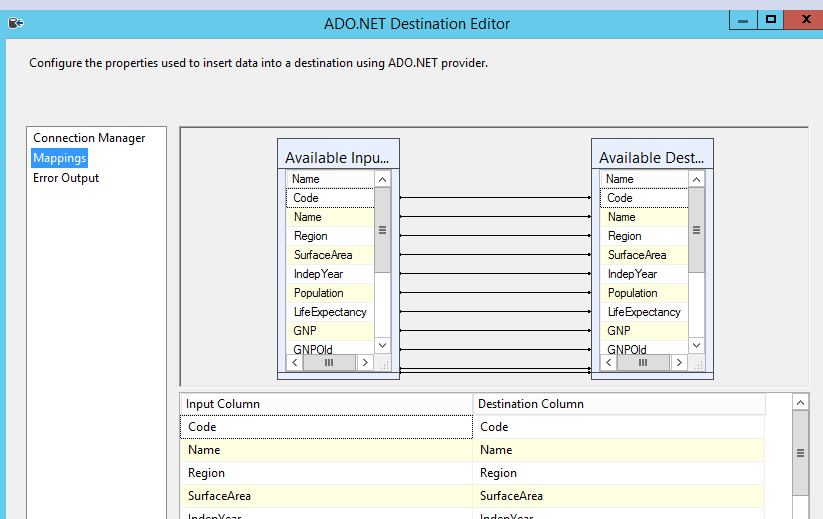
Press the Mappings page. This will map to source columns and destination columns:
Press Start to import the data in Azure SQL database:
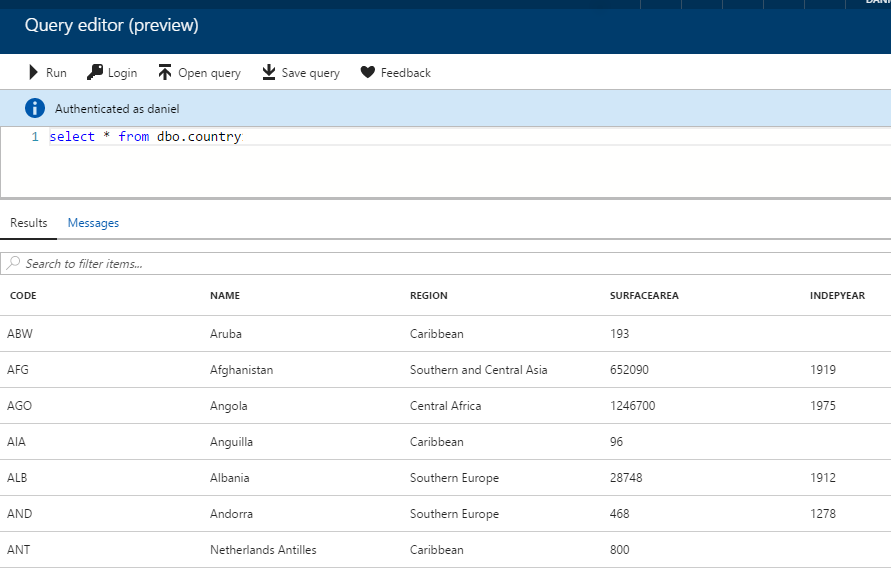
To verify that the table and rows were imported correctly, you can verify in the Azure Portal using the Query editor (as we did in figure 21-23). Note that the schema is ”dbo”. When we used SSMA, the schema was “world”:
Conclusions
In this example, we created an Azure SQL Database in few minutes and migrated the information from a local MySQL to Azure.
If SSMA cannot import all of the data, SSIS is a more sophisticated and customized tool that can help you. You can create a customized and automated solution with SSIS. It is definitely harder to learn, but it is a very powerful tool.
Next articles in this series:
- How to create an Azure SQL Database using the Cloud Shell
- How to copy an Azure SQL database using the Azure Portal, Cloud Shell and T-SQL
- Working with Azure Active Directory and Azure SQL Database
- How to automate Azure Active Directory (AAD) tasks using the Cloud Shell

He has worked for the government, oil companies, web sites, magazines and universities around the world. Daniel also regularly speaks at SQL Servers conferences and blogs. He writes SQL Server training materials for certification exams.
He also helps with translating SQLShack articles to Spanish
View all posts by Daniel Calbimonte
- PostgreSQL tutorial to create a user - November 12, 2023
- PostgreSQL Tutorial for beginners - April 6, 2023
- PSQL stored procedures overview and examples - February 14, 2023