

Overview
As a writer and content creator, I often use annotation and drawing markup tools to add value to the content I’m creating. You might not think of it as a big deal, but the human brain processes visuals 60,000 times faster than text. Is it true? Probably not. There’s no scientific evidence to back up this figure. However, it’s a fact that humans process visual data better. Therefore, I always try to deliver helpful, value-added content with a lot of visuals suitable for easy reading and understanding.
During my first college days, I was constantly struggling with labs that included creating documentation with screenshots. Making those using the Print Screen option in Windows (labeled PrtScr on the keyboard) was time-consuming. This option captures the entire screen and the screenshot is not saved as a file, but it is just copied to the clipboard. I had to open an image editing tool (such as Microsoft Paint), paste the screenshot in the editor and save the file from there, etc. You get the point.
Fortunately, I come across a tool that made my life much easier. I don’t remember how I got it, did someone recommended it to me, or something else but I’ve been using it since then and it has saved me a lot of time and effort.
Requirements/Software
The tool is called Snagit and it’s a screen capture software that has built-in advanced image editing and screen recording features. To get started, feel free to try the full version of Snagit for 15 days by downloading it from the following links:
- Download Windows – You can also download the 32-bit version
- Download Mac
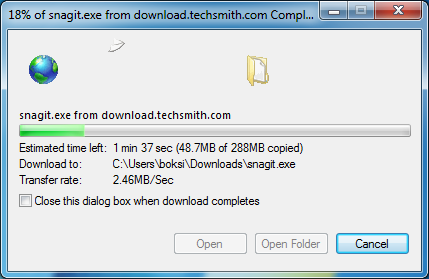
Once Snagit has been downloaded, locate the executable installation file (snagit.exe) and run it. The file is most likely located in the Downloads folder, so open File Explorer and browse to:
C:\Users\YOUR USERNAME\Downloads\
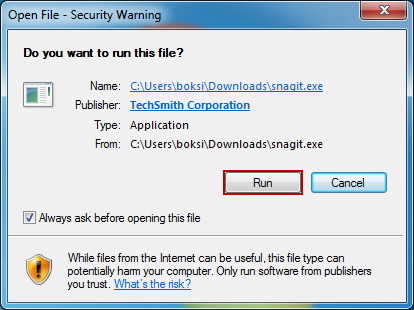
Once you locate the file, double-click it to begin installing Snagit. Depending on your User Account Control (UAC) settings you might be prompted to allow the application to make changes to the computer. Just click Yes to run the installation:
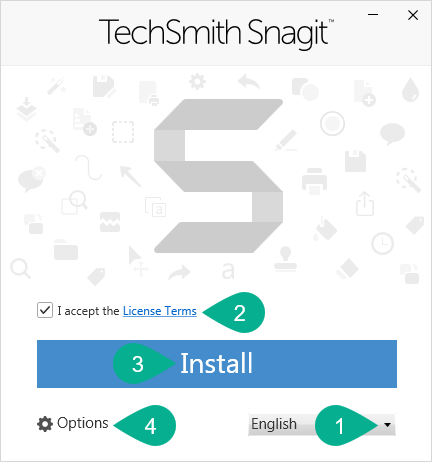
Choose the application desired language from the dropdown menu (1). Check the I accept the License Terms (2) checkbox and click Install (3). Or, click Options (4) to customize the settings:
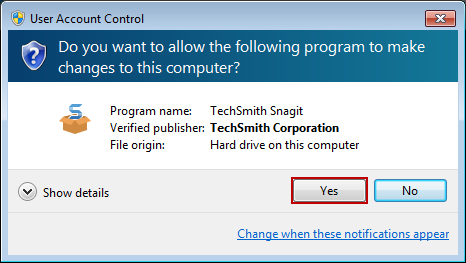
Once again, after the Install is clicked, you might be prompted to allow the application to make changes to the computer. Just click Yes to continue with the installation:
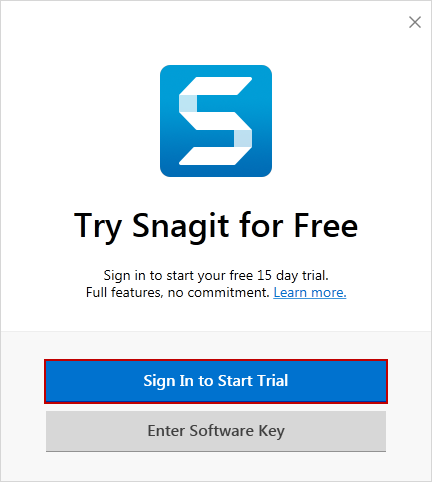
After a few minutes, you’ll be prompted to either start a free trial or enter product key. I’d suggest you try the application first and then if you like it, support the software developers and purchase a license. For now, let’s just choose the Sign In to Start Trial option:
Finish up the registration process and make sure to enter a valid email address because it will be used later for sending the activation key. When the process is finished, Snagit will start:
Once installed, Snagit will take over the PrtScr functionality on the system. The very first time, you’ll be introduced to applications features within the onscreen guide:
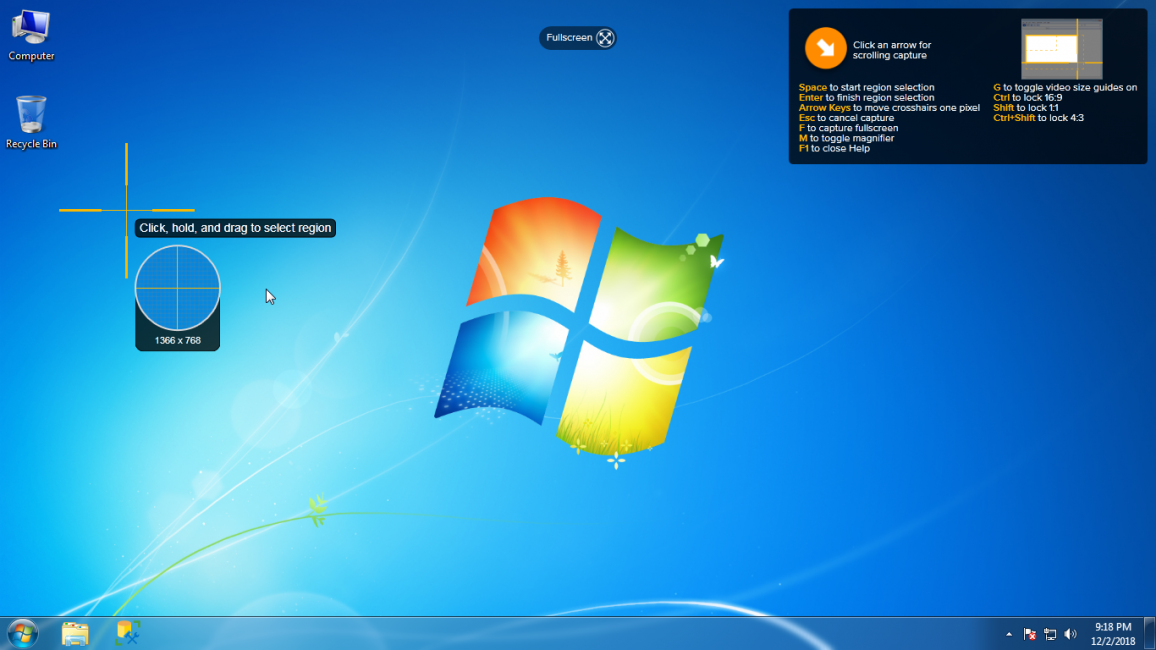
Here’s the list of default keyboard options/shortcuts shown during this step:
- Space to start region selection
- Enter to finish region selection
- Arrow Keys to move crosshairs one pixel
- Ecs to cancel capture
- F to capture fullscreen
- M to toggle magnifier
- F1 to close Help
- G to toggle video size guides on
- Ctrl to lock 16:9
- Shift to lock 1:1
- Ctrl+Shift to lock 4:3
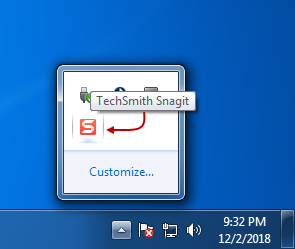
Close (x) Snagit to the notification area and you’ll still be able to use it every time the Print Screen key is used:
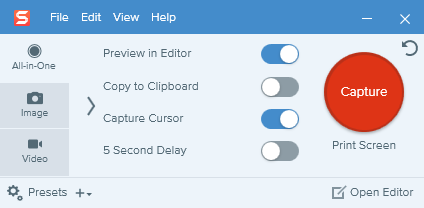
From now on, when in need to take a screenshot of anything just hit the Print Screen on your keyboard, click, hold and drag to select a region, window, or scrolling screen:

Unlike most of the capturing screen tools, Snagit does not only copies the screenshot to the clipboard but it will also open it (this is configurable) in its full suite of editing tools AKA Snagit Editor. From here, it’s up to you to build custom graphics with a few clicks without skill/knowledge of a designer.
I personally, always use the same settings and below I’d like to share with you some of my markup techniques that work best for me, best practices, tips, and tricks.
Colors
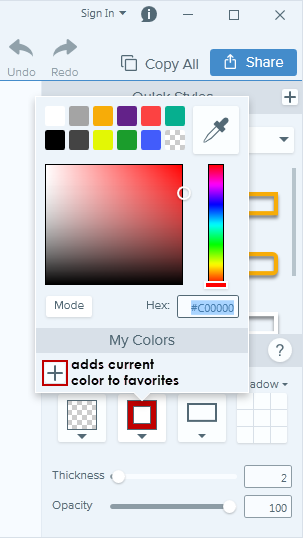
Color is off-red, not true red on bright backgrounds. The color that catches the human eye the most is simply red. Red is the color of power. It gets people’s attention and it holds it, which is why it’s the most popular color for markups. However, I never use the true/bloody red (Hex: #FF0000). Instead, I use a darker shade of red (Hex: #C00000) which is more of a cherry color shade. True red indicates an error, something that’s wrong, etc. but a darker shade is less robust and still clearly visible on light colors – most importantly it does not cause eye strain:
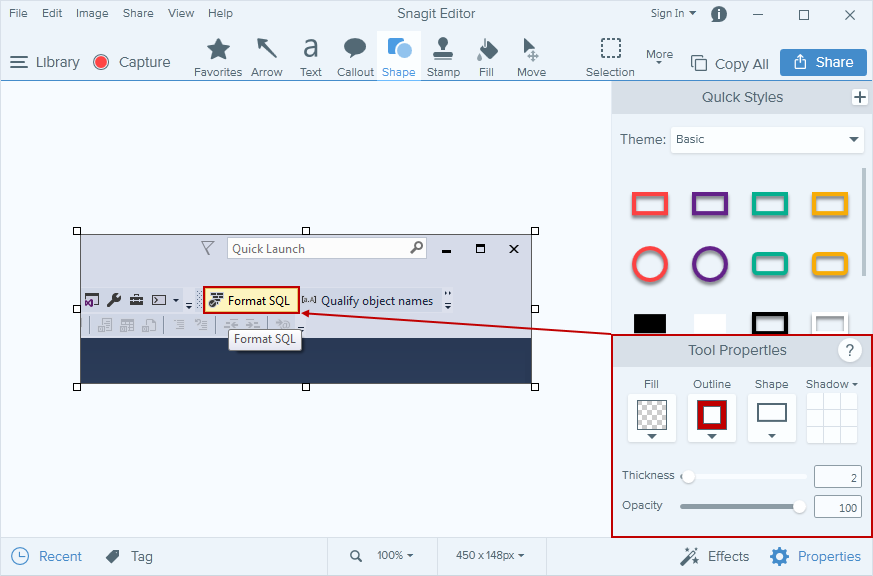
In Snagit, this can be defined for all tools. Simply select a tool from the toolbar, and then you’ll see its properties on the right pane where we can customize the look and feel of text and all other annotations. For the Shape tool, choose the following setting:
- Fill = transparent
- Outline = Hex: #C00000
- Shape = sharp-cornered stroked rectangles
- Shadow = no shadow (this applies for everything)
- Thickness = 2px, and Opacity = 100%
Straight vs curved
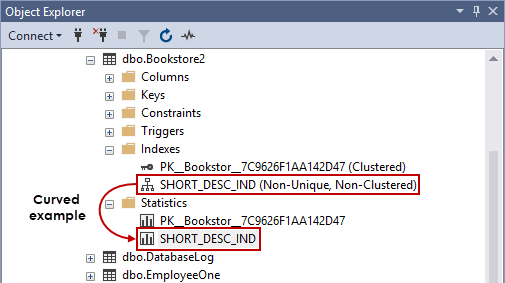
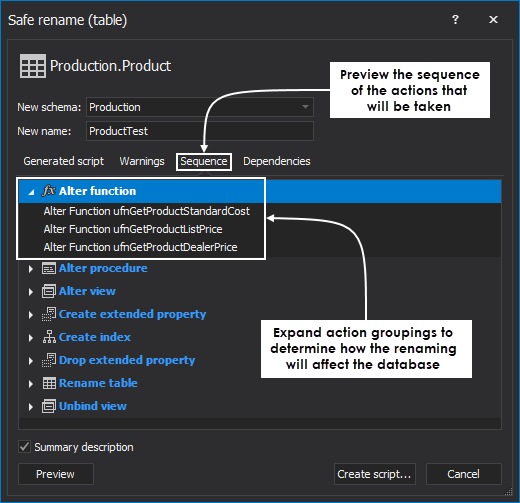
Often there are curved, vs straight lines – I only use straight lines when two objects are too close so there’s not enough space to make the bezier curve. I also try to avoid dead spaces. When working in SSMS/VS, I move panes around trying to bring elements closer and at the same time show up everything that is needed. There’s no need to take a shot of the whole screen just to show 1/4 of it. In most cases, I make the bezier curves symmetrical, from one side to another, trying to “avoid” elements on the actual shot and use the empty spaces as much as possible:
Arrows
For the Arrow tool, choose the following setting:
- Color = Hex: #C00000
- Width = 2px
- Opacity = 100%
- Start size = 4px
- End size = 4px
- Bezier Curve set to enabled for 99% cases
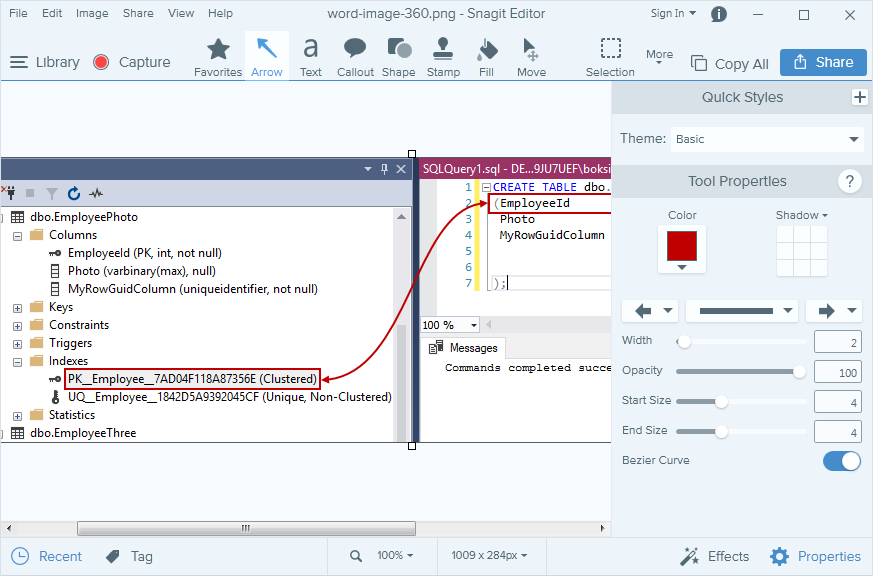
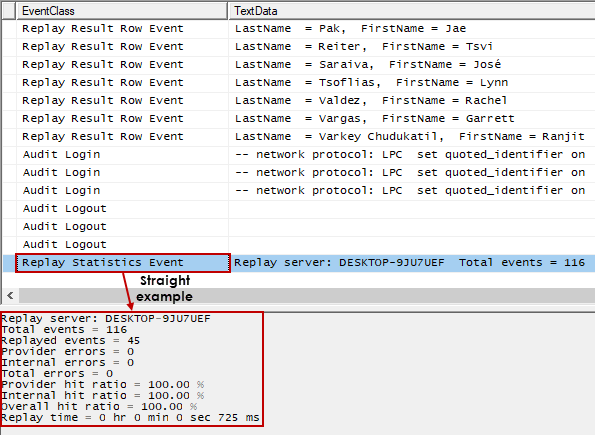
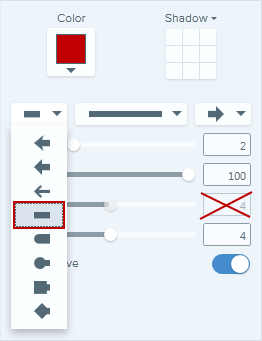
In the example above, I used arrow ending on both sides only because the elements are dependent on each other (one creates other). But in most cases, single side is preferable in which case you’d have to specify what end do you want. When you select any other than the arrow, the Start size option will be grayed out (not configurable):
In general, try to make better arrow tips – they need to be intuitive, showing connections, steps, etc.
Different background colors
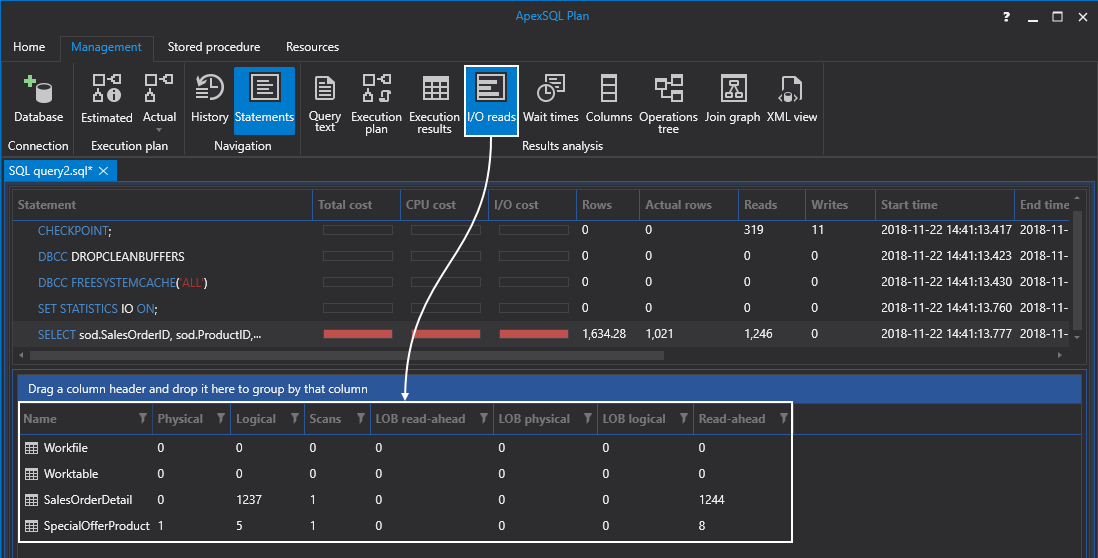
White color on dark theme – As it can be seen below, I use pure write (Hex: #FFFFFF) on the shot with a dark background because any red on the dark theme is just wrong. This applies to every shape, and it’s always preferable to use applications set to dark there if supported. Except for the color, all other settings are the same as described above:
Annotating text – box or not
If you have to add text to your shot to make it more intuitive, it’s advisable to put the text in the box:
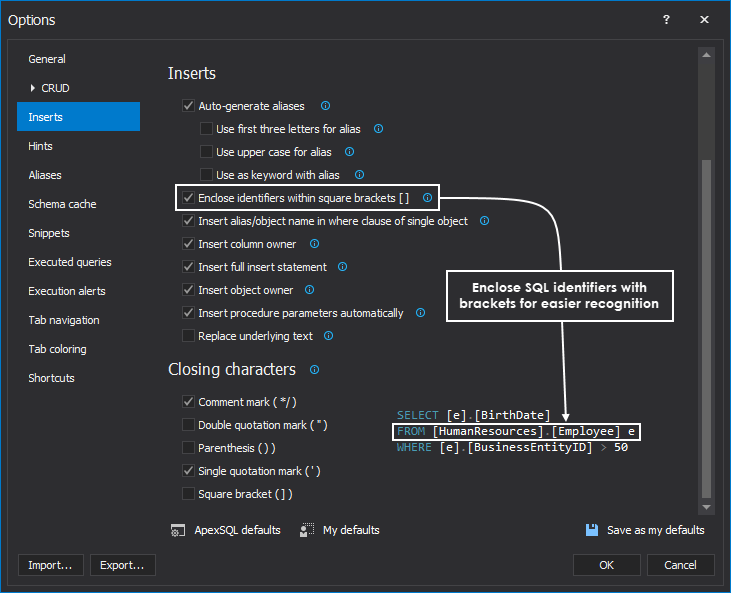
In some cases, you can fill the text box and change the text color to appropriate color. This is a personal choice/preference and feel free to use either of those:
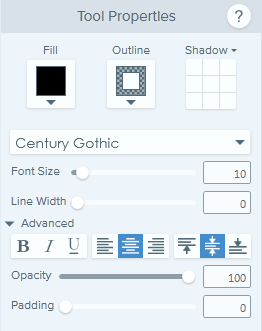
For the text in general, I use the following setting:
- Fill = pure white on dark backgrounds and pure black on white backgrounds
- Outline = none
- Shadow = none
- Font = Century Gothic
- Font Size = 10px
- Line Width = 0%
- Opacity = 100%
- Padding = 0%
Tips and Tricks
Use the Basic theme across all tools to avoid inconsistency:

If you don’t need to copy the screenshot to the clipboard for pasting into another program or location after capture, disable it (this option works independently from All-in-one and Image settings):

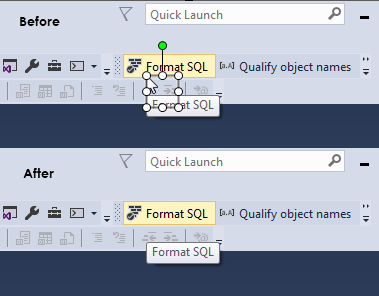
Try to avoid cursor when taking the screenshot. If you, however, take a screenshot with it, you can easily remove it by selecting the cursor in the Editor and hitting the delete key:
Below is a short description of the commonly used tools and what they do:
- Arrow – adds arrows to an image
- Text – adds plain text
- Callout – adds annotations with text
- Shape – adds shape
- Crop – removes unwanted areas from the edges of an image
- Cut Out – deletes a vertical or horizontal section of an image and join the two pieces together (great for eliminating dead spaces)
- Step – adds a series of numbers or letters in sequence
- Highlighter – highlights a rectangular area
I hope you found this article helpful. Happy capturing and markup of the screenshots!
Useful links:
- Introduction to Snagit
- System Requirements
- Uninstall on Windows or Mac
- License Agreement
- Privacy Policy
- Enter Your Software Key

He has written extensively on both the SQL Shack and the ApexSQL Solution Center, on topics ranging from client technologies like 4K resolution and theming, error handling to index strategies, and performance monitoring.
Bojan works at ApexSQL in Nis, Serbia as an integral part of the team focusing on designing, developing, and testing the next generation of database tools including MySQL and SQL Server, and both stand-alone tools and integrations into Visual Studio, SSMS, and VSCode.
See more about Bojan at LinkedIn
View all posts by Bojan Petrovic
- Visual Studio Code for MySQL and MariaDB development - August 13, 2020
- SQL UPDATE syntax explained - July 10, 2020
- CREATE VIEW SQL: Working with indexed views in SQL Server - March 24, 2020