

This article explains the process of configuring Error handling in SSIS package.
Introduction
In the last article, Overview of SSIS Package Logging, we explored a method to log error in the package execution for different destination providers such as SQL table, XML and text files. The SSIS packages also known as Extract Transform Load (ETL) packages. Usually, we get data from different sources, and we integrate those data on a daily basis in SQL tables.
Suppose we get a flat file from a third party daily and that file contains millions of records. We designed an SSIS package to import that data, and it is running fine. Occasionally, we get bad data (invalid character, special character, invalid length or data type) in the flat files and package execution fails. It is a complicated task to identify which particular row caused this issue. We want our SSIS package to take care of this and do the followings:
- The SSIS package should execute successfully if all data is in order
- In case of any bad data, SSIS package should process all useful data, and bad data should be sent in a separate file. We can open the file later and see what the bad records it contains. It would help us to process the rest of data and do not fail the package
Practical scenarios for error handling requirement
Let’s understand this with the following example. We have a CSV file that contains sales records products. If you look at the following image, in the [Total Amount] column, it should have numeric value but records, it contains text format.

Create SSIS package for error handling
Firstly, we create a package for error handling in SSIS package and see what happens if we execute the package directly.
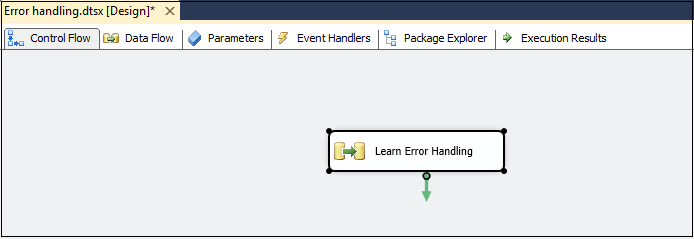
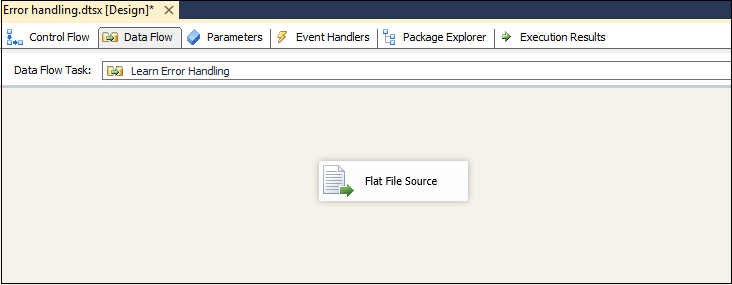
Let’s open the Visual Studio for data tools and create a new integration service project. In the control flow area, add a data flow task and rename it as [Learn Error Handling].
Right-click on [Learn Error Handling] task and edit. It moves to data flow configuration page. Add a Flat file destination.
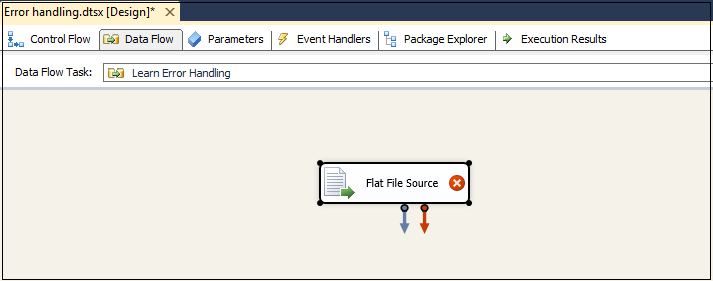
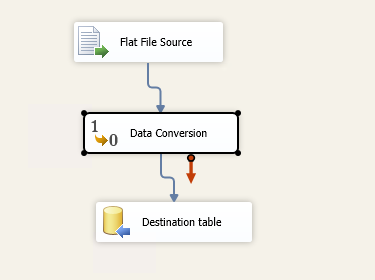
You can notice the three things in the below image:
- Blue color arrow
- Red color arrow
- Red cross on Excel source
Red Cross on Flat file source shows that we need to configure before using it. We use it for error handling in SSIS package.
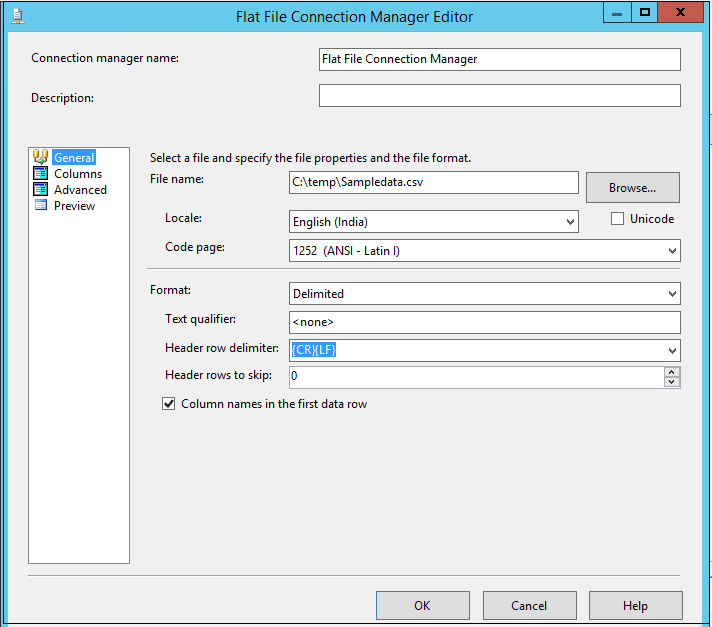
Double-click on flat file source and configure a new connection by providing the location of the source file.
It automatically takes the configuration such as text qualifier, header row delimiter, header rows to skip. Let’s go with the default values.
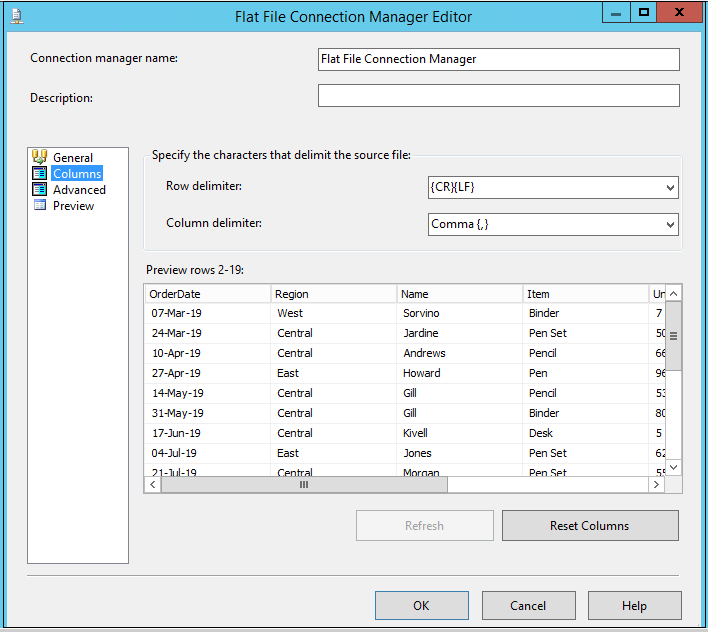
Click on a column to verify the data in the source text file and available columns.
In the Advanced page, we can change column properties such as column names, column delimiter, data type, output column width.
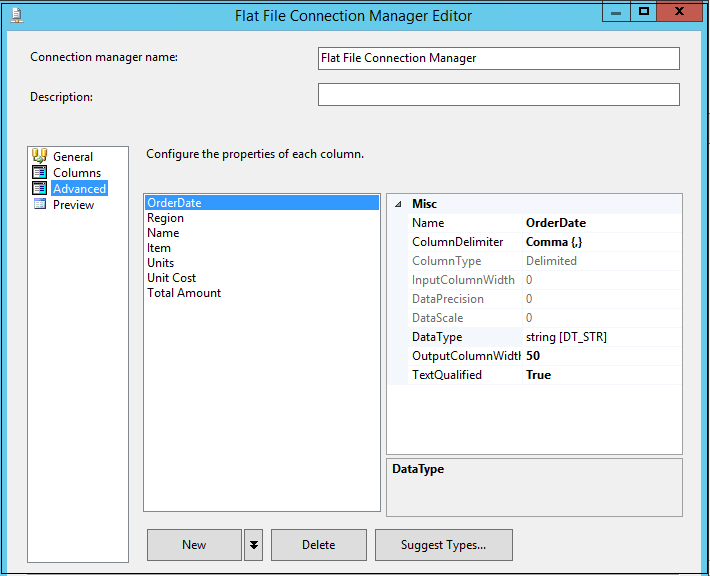
We do not want to change any values at this point. Click OK, and it moves to data flow page.
In the next step, add a data conversion task from the SSIS toolbox. We use a data conversion task to change the data type of the source column as per our requirements.
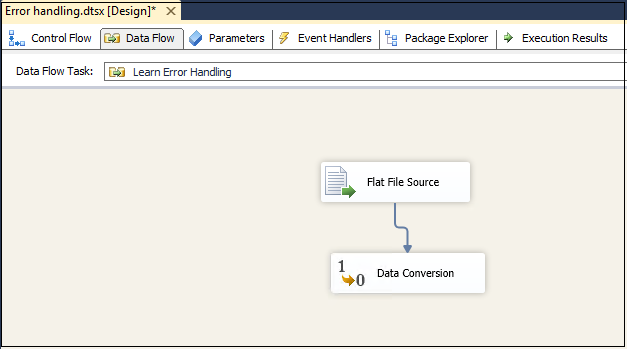
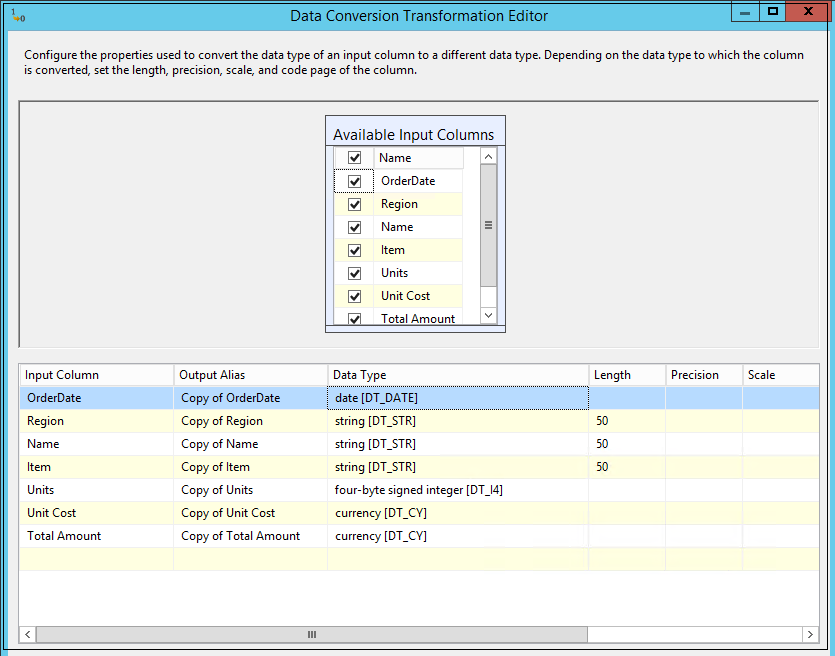
We do not see any red cross icon on the data conversion task, but still, it requires a configuration. Double-click on data conversion to open Data conversion transformation editor.
Select all source columns and change the data type as per the following list:
- [Orderdate] data type should be string date[DT_DATE]
- [Region],[Name],[items] data type should be string[DT_STR]
- [Units] data type should be four-byte signed integer [DT_I4]
- [Unit cost] and [Total amount] data type should be currency [DT_CY]
In the following screenshot, you can also see Output alias for each column. We can give a proper name for each column alias or ignore it.
In the next step, add an OLE DB destination. This OLE DB destination will contain the table name in which we want to insert data.
Double click on destination table, and it opens the OLE DB destination editor.
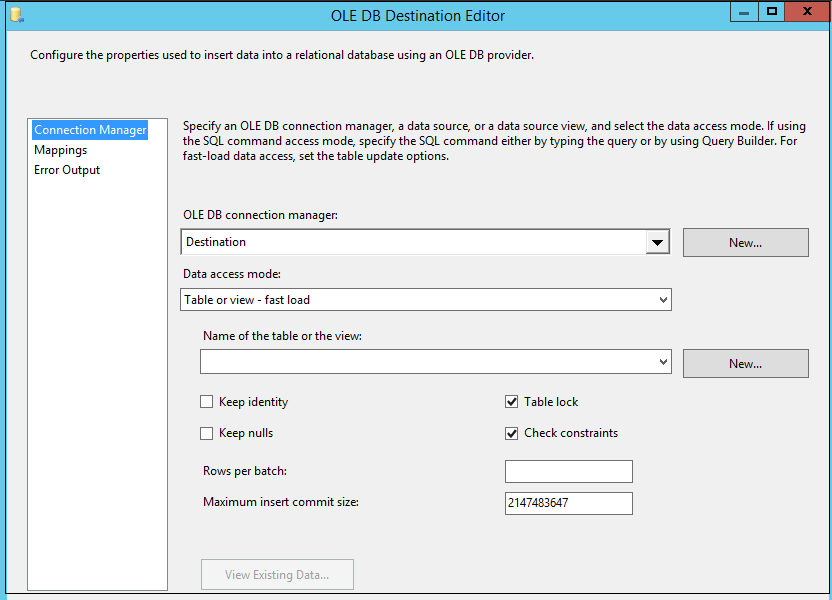
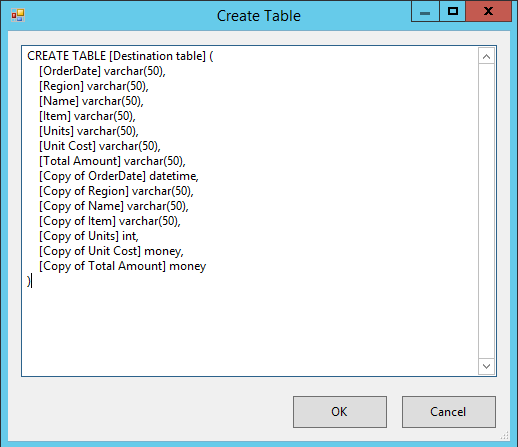
We do not have an existing table; therefore, click on New to create a new table. It automatically gives the script for creating a new table.
Look at the script carefully; we have the columns with their original name and alias name. Remove the original columns from the script, rename the alias columns and specify a valid name (table name should be unique in a database). We do not remove the alias column because these columns contain the correct data type we require in the SQL table.
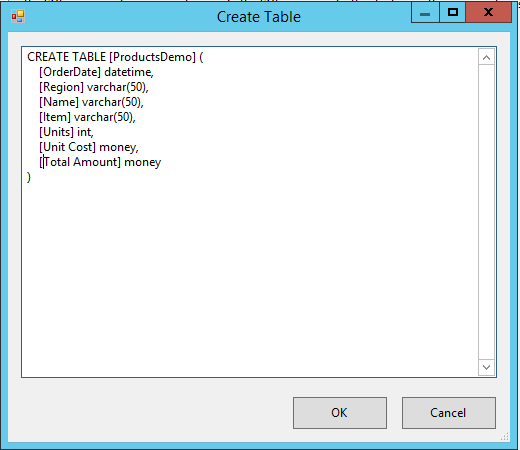
The updated script should look like the one below.
Click OK, and it returns to OLE DB destination editor. In this window, verify the mapping between source and destination table.
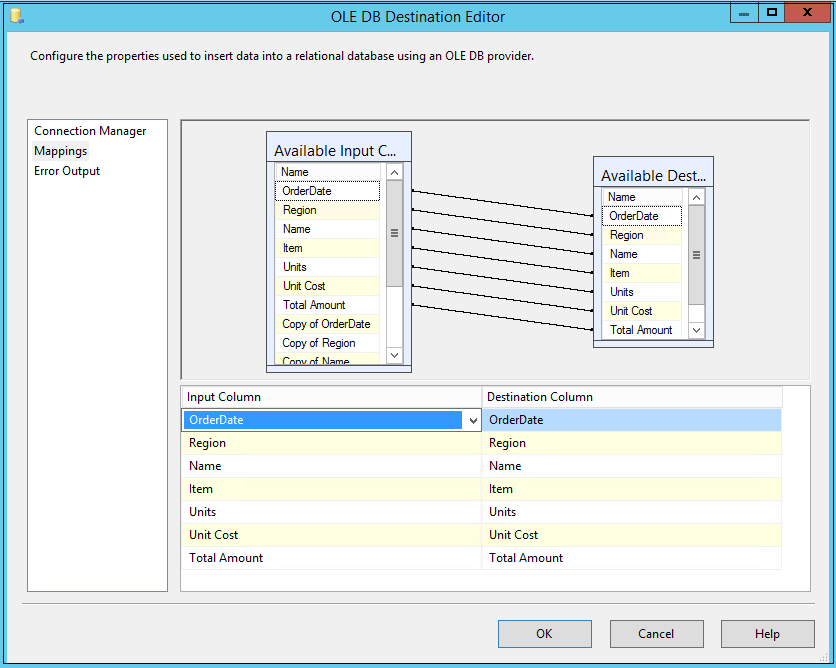
In the above image, you can see the input and destination columns. You might think that mapping is correct, but we need to change the mapping. We use the data conversion operator, and it gives output column names starting with Copy*. We require these copy columns as input columns.
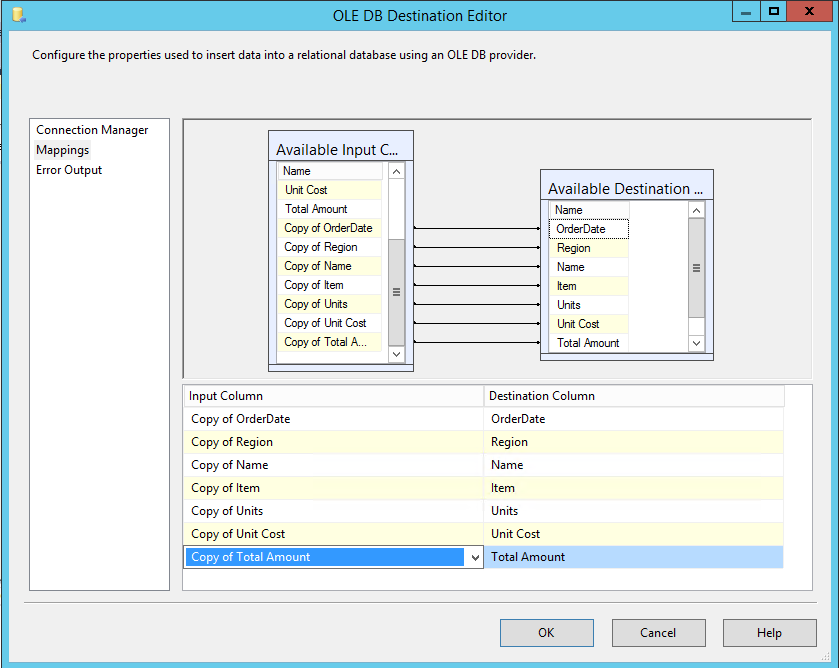
Select the columns from the drop-down list, and you see the following configuration.
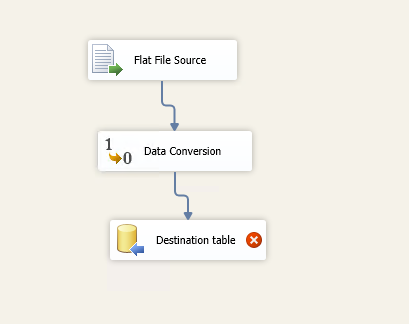
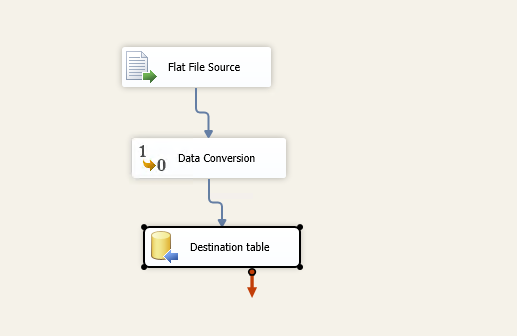
The overall SSIS package looks like the following image.
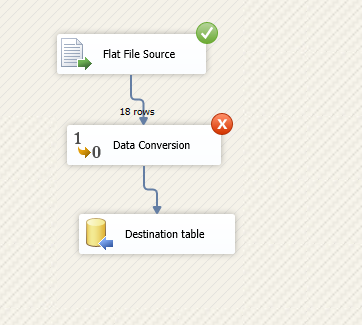
Press F5 to execute the package and it fails at data conversion. We have not configured error handling in SSIS package as of now.
Imagine a situation that the SSIS package failed in a SQL agent job and now you need to find out the reason. If you have a million records in the flat file, it is a complicated task to identify the problematic row and column. You might need to do a lot of manual tasks, in this case.
SSIS comes as a good friend in this case. We can configure an error output. For each task, we see two arrows, blue and red arrow:
- Blue arrow works for successful operation. If the task is executed successfully, it moves the data to the next step
- The red arrow is for the error handling in SSIS package, and we can redirect errors to required destinations
Drag a flat-file destination and join the red arrow with the flat file. It opens the following window to configure error output.
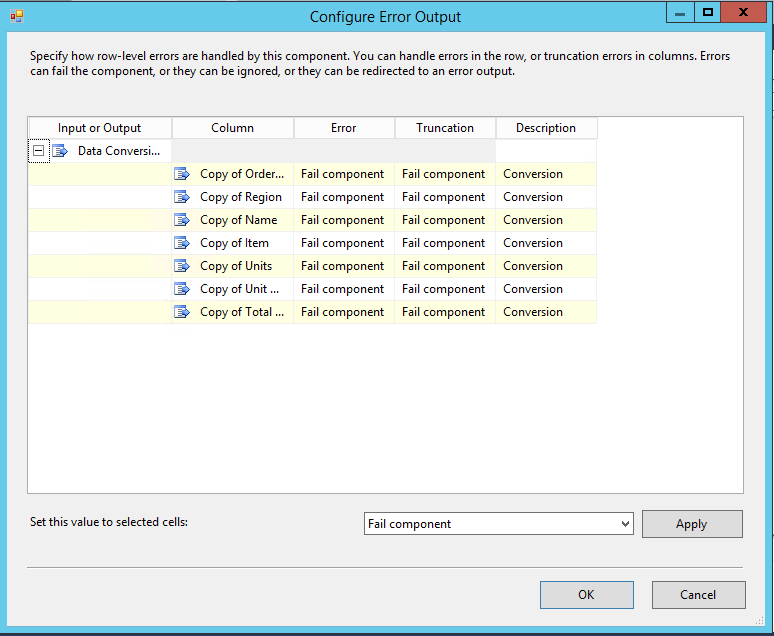
We can use all the columns list and error configurations for error handling in SSIS package. We have following configuration available.
Failed Component
If the data flow task fails, it fails the package. It is the default option.
Ignore failure
If we change the error mode to ignore failure, it ignores the error message and completes the execution. For example, in our case, it will ignore the rows with bad data and continue working with other rows. It does not throw any error message. We should not use it in the production environment.
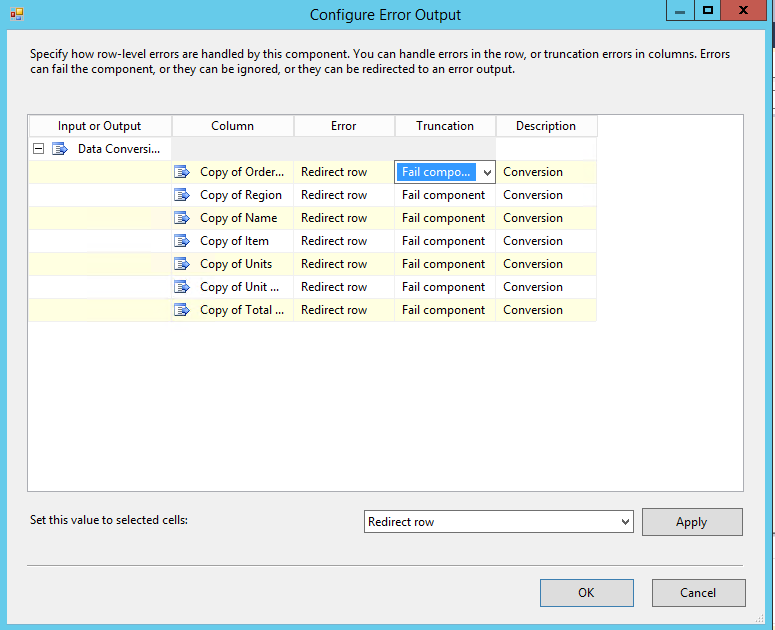
Redirect rows
It is a useful configuration for this article. We can redirect the failed rows to a configured destination and view the bad data rows in that file. We can configure it for the truncation or the error message.
For this article, we want to configure for the error message only. Make the changes as per the following screenshot.
Click OK and configure the flat file destination by specifying the file location. This file will get the data redirected by the error handling in SSIS package.
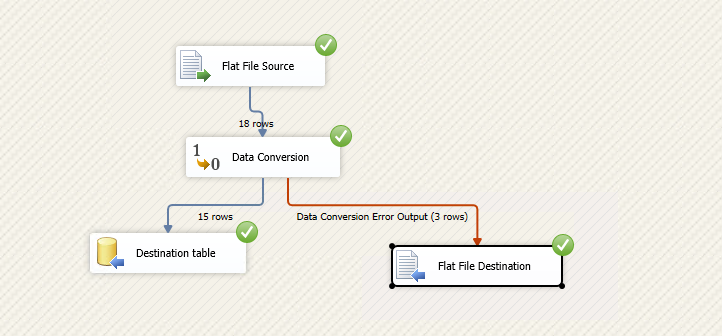
The package configuration is complete, and it looks like the one below.
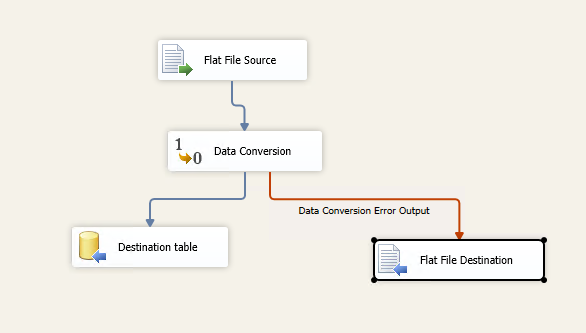
Execute the package now, and it shows successful now. In the following screenshot, you can note the following:
- Destination table output got 15 rows out of 18 rows available in the source file
- The flat file destination (error file) gets remaining three rows. The error handling in SSIS package redirects three rows to the flat file
In the sample data shown initially, we had three incorrect data rows. It matches with the output of error handling in SSIS package.
Let’s go to the flat file destination path and open the error file. We can see the bad data rows written into this file.
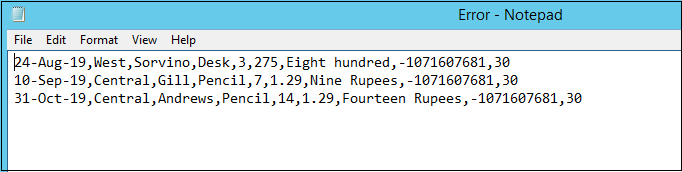
It is easy for us to look at these wrong data rows and fix them. We do not need to go through all rows containing both good and bad data rows. The SSIS package execution also does not hamper, and it executes successfully with the good data rows.
Conclusion
Error handling in SSIS package the life of a DBA and developer more accessible by diverting the failed or wrong data rows to a separate destination. We can quickly troubleshoot the issues in failed packages. You should have these error handlings in SSIS package.

I am the author of the book "DP-300 Administering Relational Database on Microsoft Azure". I published more than 650 technical articles on MSSQLTips, SQLShack, Quest, CodingSight, and SeveralNines.
I am the creator of one of the biggest free online collections of articles on a single topic, with his 50-part series on SQL Server Always On Availability Groups.
Based on my contribution to the SQL Server community, I have been recognized as the prestigious Best Author of the Year continuously in 2019, 2020, and 2021 (2nd Rank) at SQLShack and the MSSQLTIPS champions award in 2020.
Personal Blog: https://www.dbblogger.com
I am always interested in new challenges so if you need consulting help, reach me at rajendra.gupta16@gmail.com
View all posts by Rajendra Gupta
- Understanding PostgreSQL SUBSTRING function - September 21, 2024
- How to install PostgreSQL on Ubuntu - July 13, 2023
- How to use the CROSSTAB function in PostgreSQL - February 17, 2023