

In this article, I am going to explain how to install the SQL Server Express edition. We will download the SQL Server 2017 Express edition and perform the custom installation. Before we dive-in into the installation and configuration process, let me introduce you to the SQL Server Express edition.
SQL Server Express edition
SQL Server Express edition is the entry-level and the free-to-use edition of SQL Server. It can be used to deploy a small application or a website. You do not have to pay the license cost even though you’re using it in a production environment. It can be used to reduce the overall license cost as well; for example, you’re deploying a database mirroring. (Even though this feature is deprecated, a few organizations still using it). To configure High Safety with automatic failover, you must configure a witness server that keeps an eye on both servers. So, instead of paying for SQL Server standard edition just to monitor the mirror, we can use the Express edition of SQL Server. It will reduce the overall cost of database mirroring. You can review the limitations and list of supported features here.
Installation of SQL Server Express edition
The SQL Server 2017 Express edition comes in three variants:
- SQL Server 2017 Express edition. You can download it from here
- SQL Server 2017 Express edition with advanced series. You can download it from here
- SQL Server 2017 Express edition with localDB. You can download it from here
Once you download the installation file, run it by double-clicking on it. It starts another installer, which provides us three installation types to install the SQL Server.
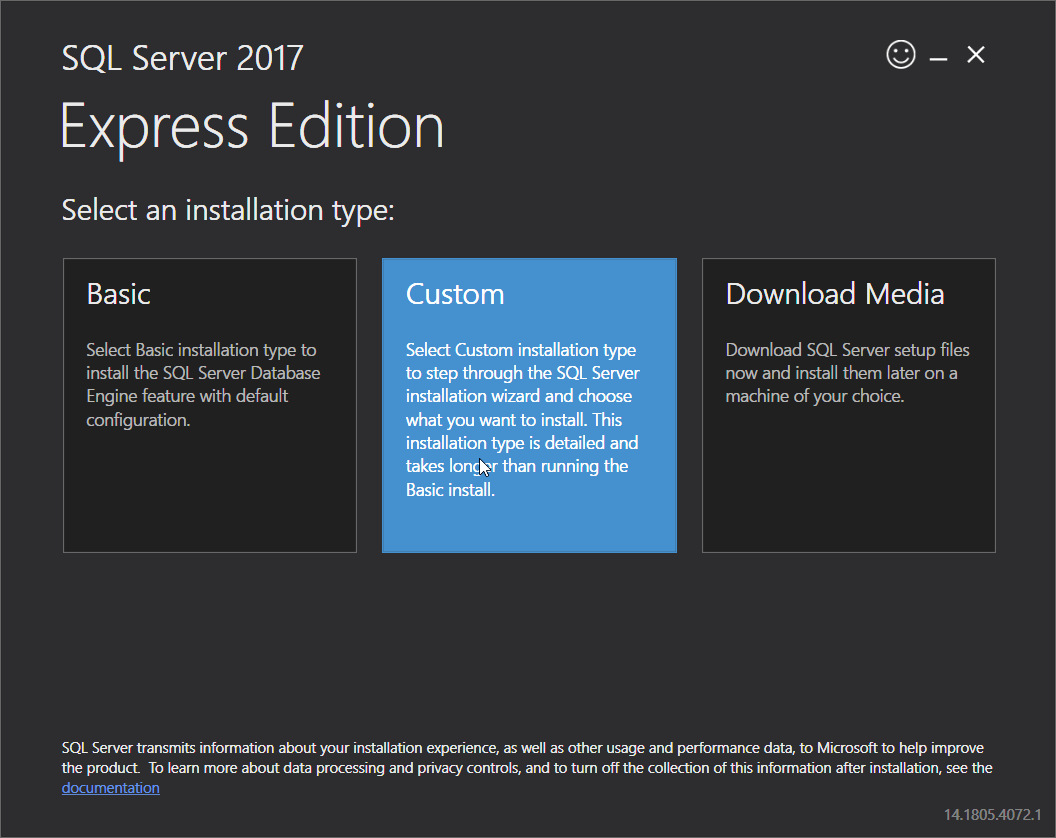
- Basic Installation: It installs the SQL Server with pre-defined basic configuration
- Custom Installation: This option can be used when you want to customize the database configurations. This option is used when we want to install specific components only
- Download media: This option will download the iso file of the SQL Server Express edition. We can install it later
We are going to perform a custom installation. To do that, click on the Custom type:
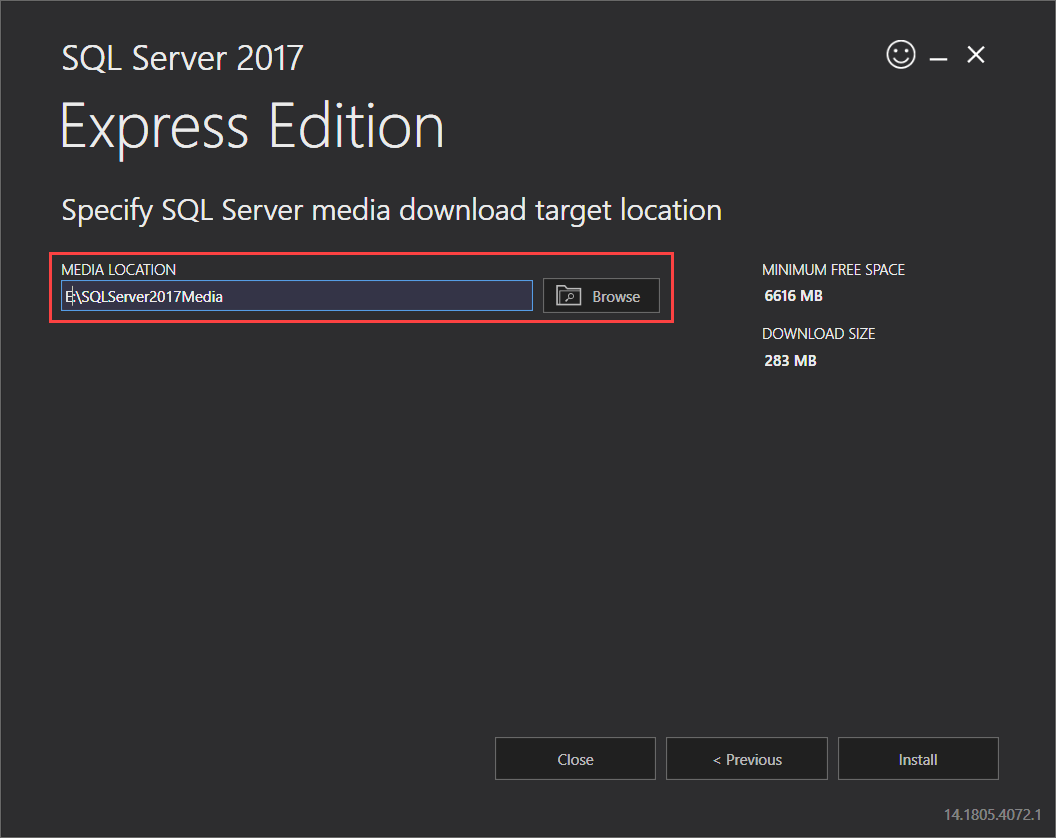
In the next step, we must specify the location where we want to download the SQL Server Express edition media files. Click on Browse to navigate to the desired location. Specify the desired location in the MEDIA LOCATION text box and click on Install:
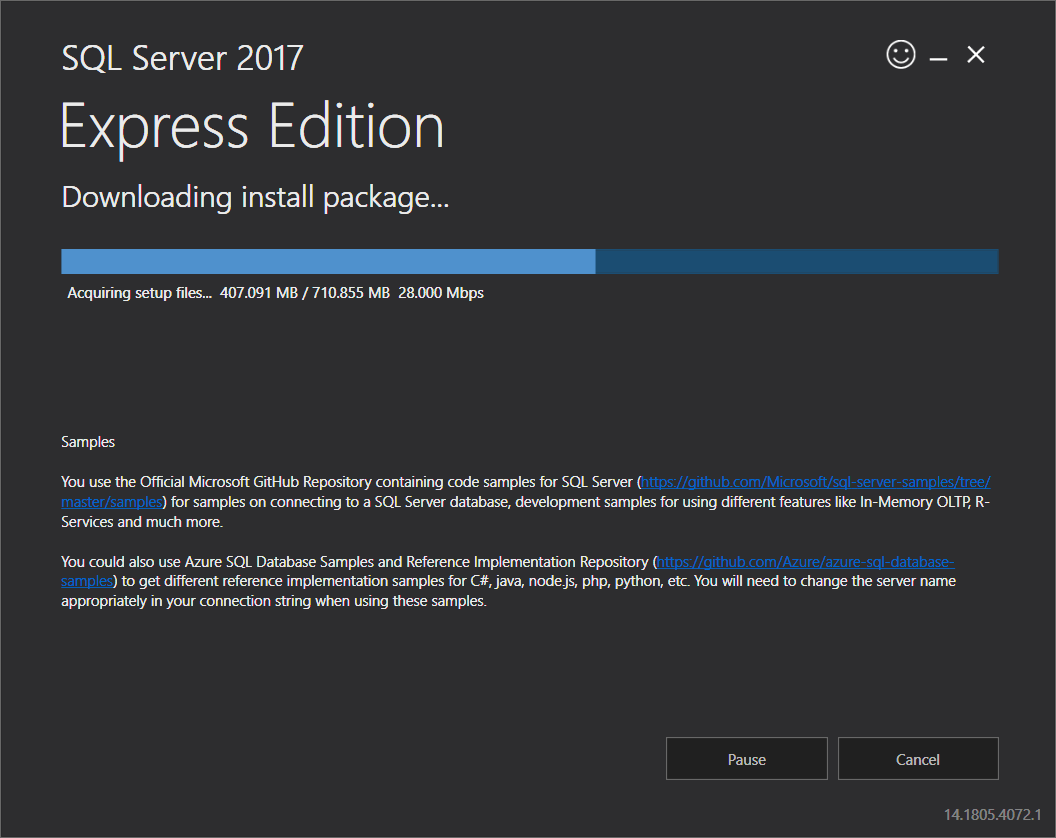
The installer will start the download process of the SQL Server install package:
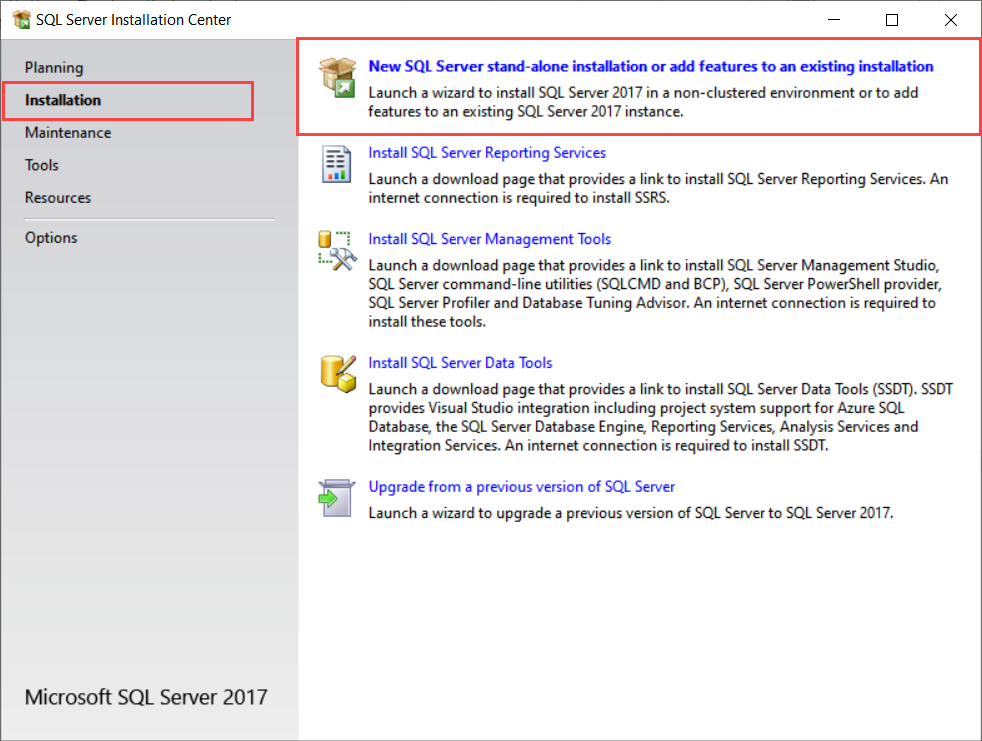
Once the install package is downloaded, the installer will extract it and begin the installation process. The installation is performed by the SQL Server Installation Center. On the installation screen, you can choose any of the following options:
- SQL Server standalone or add the feature to an existing installation
- Install SQL Server Reporting Services
- Install the SQL Server Management Studio
- Upgrade from old version to new version of SQL Server
We want to install SQL Server; hence, click on the New SQL Server stand-alone installation or add features to the existing installation option. See the following image:
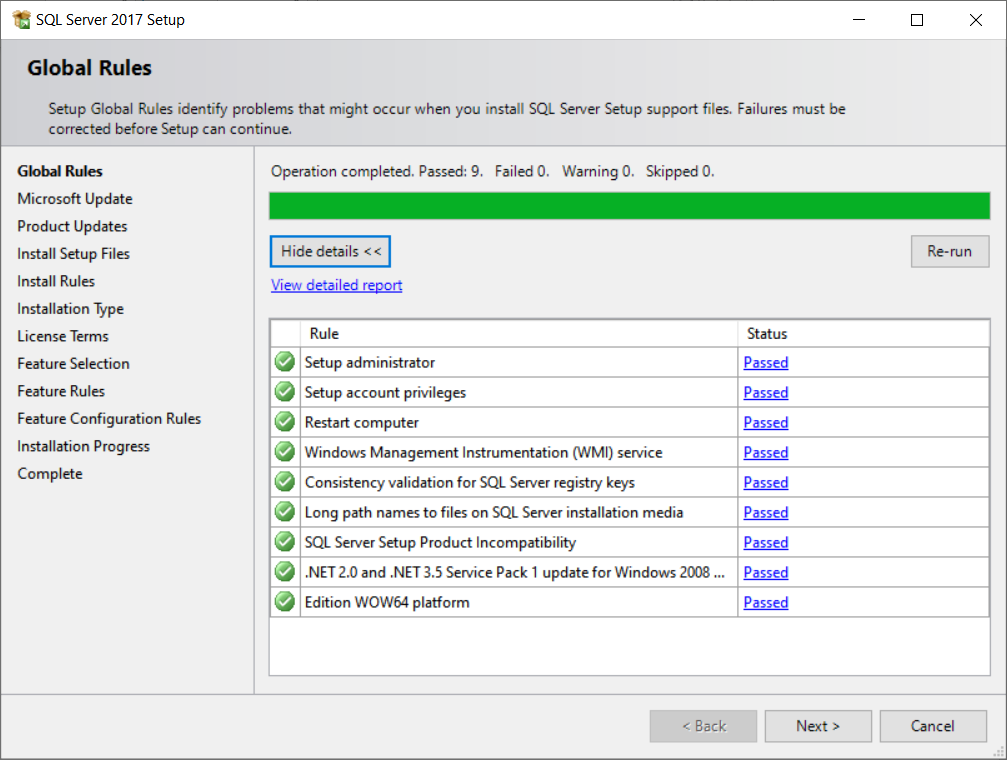
In the Global Rules step, the installer will verify that all the global rules are passed successfully. If any of the rules fail, we must fix the error to continue the installation process. See the following image:
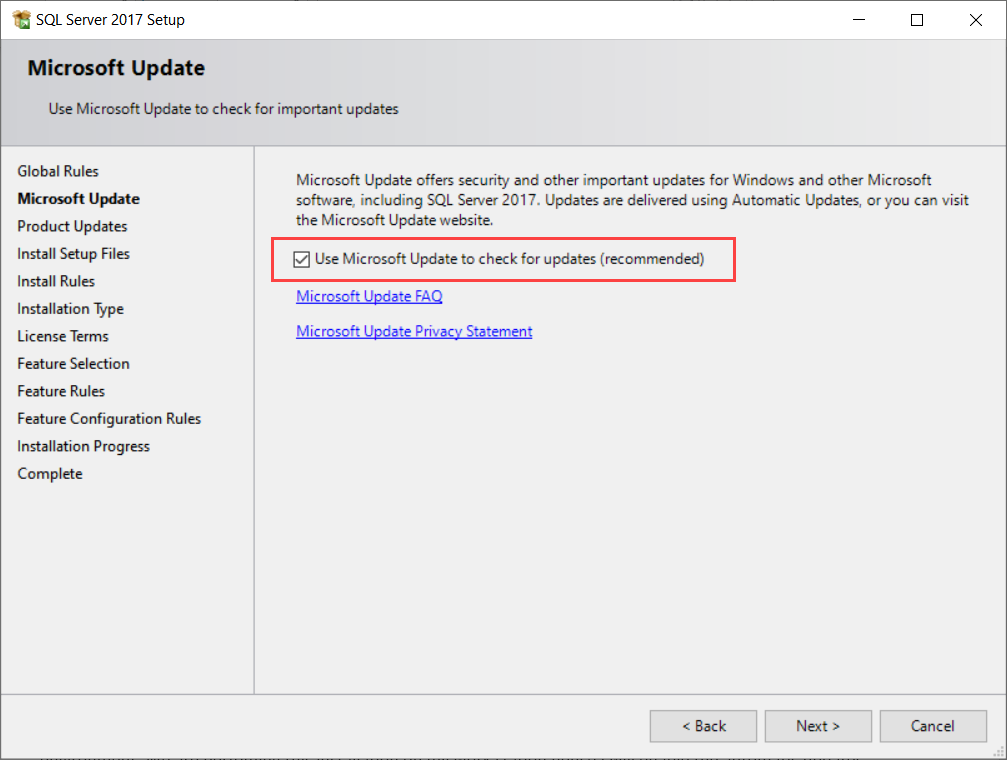
In the Microsoft Update step, you can decide whether to enable automatic updates or not. It is always recommended to not enable this option because all the security updates and patches must be tested thoroughly in a non-production environment. We are performing this installation on my work station; hence I will enable automatic updates:
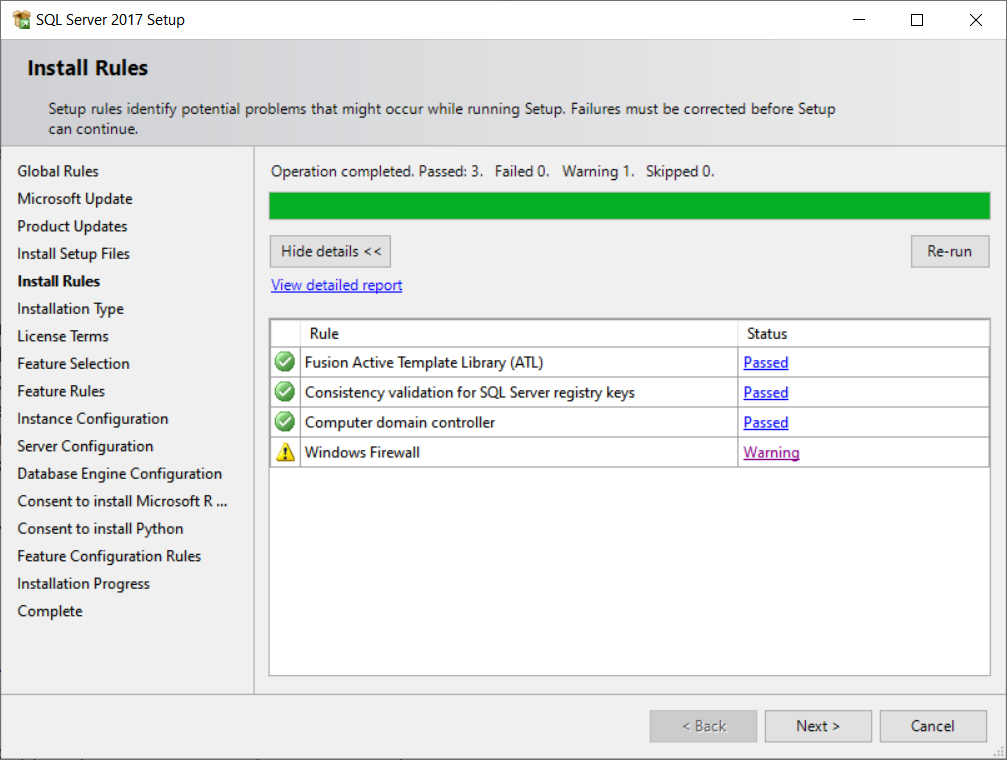
Now, in the Install Rules step, the SQL Server installer verifies that all the install rules must be passed successfully. If any of the rules failed, we must fix the error to continue the installation. See the following image:
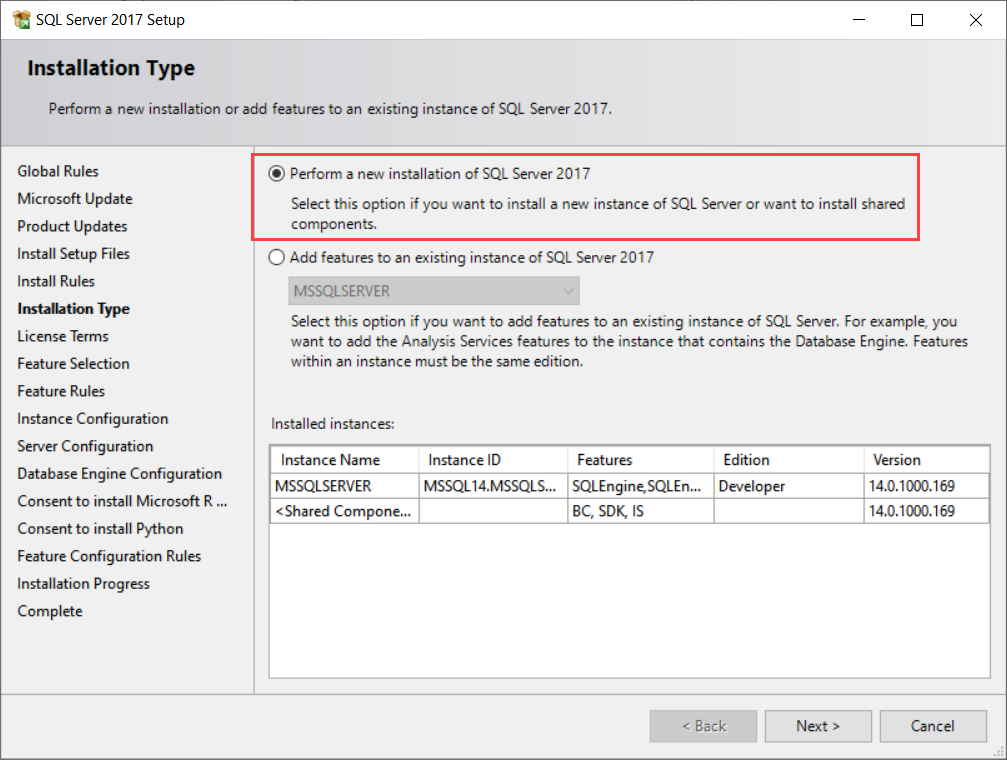
In the Installation Type step, you can perform any of the following operations:
- Install a new instance of the SQL Server 2017 Express edition
- Add new features to the existing installation
We are performing a new installation; hence select the Perform a new installation of SQL Server 2017 option. See the following image:
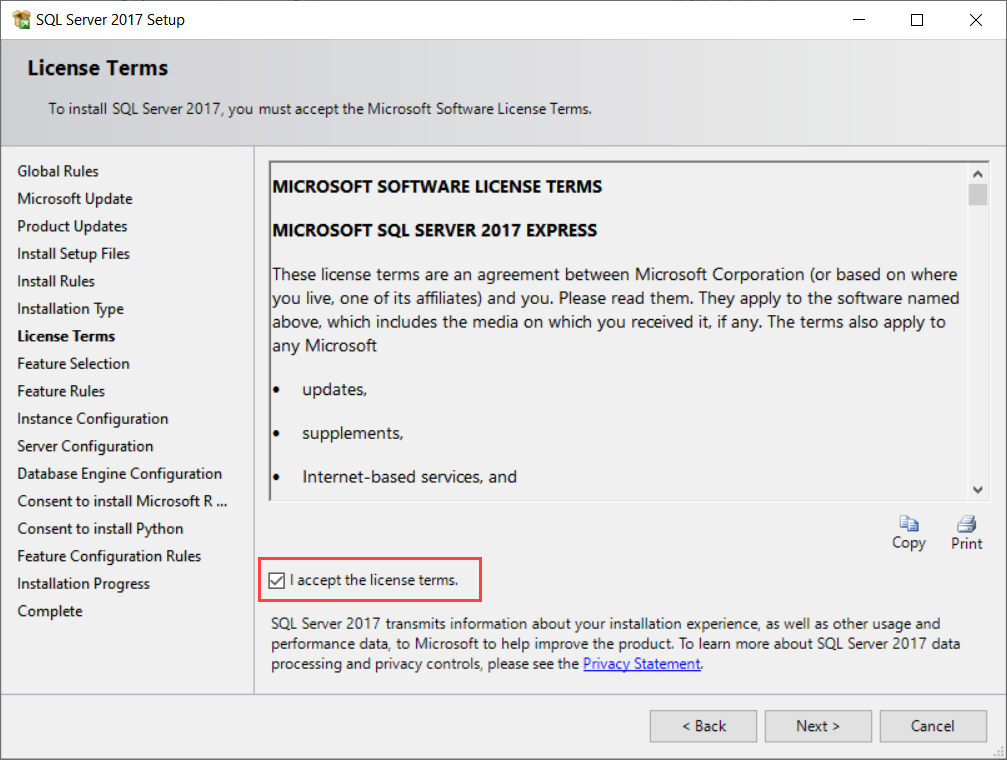
On license terms screen, read the Microsoft software license terms for SQL Server Express edition and select the I accept the license terms checkbox:
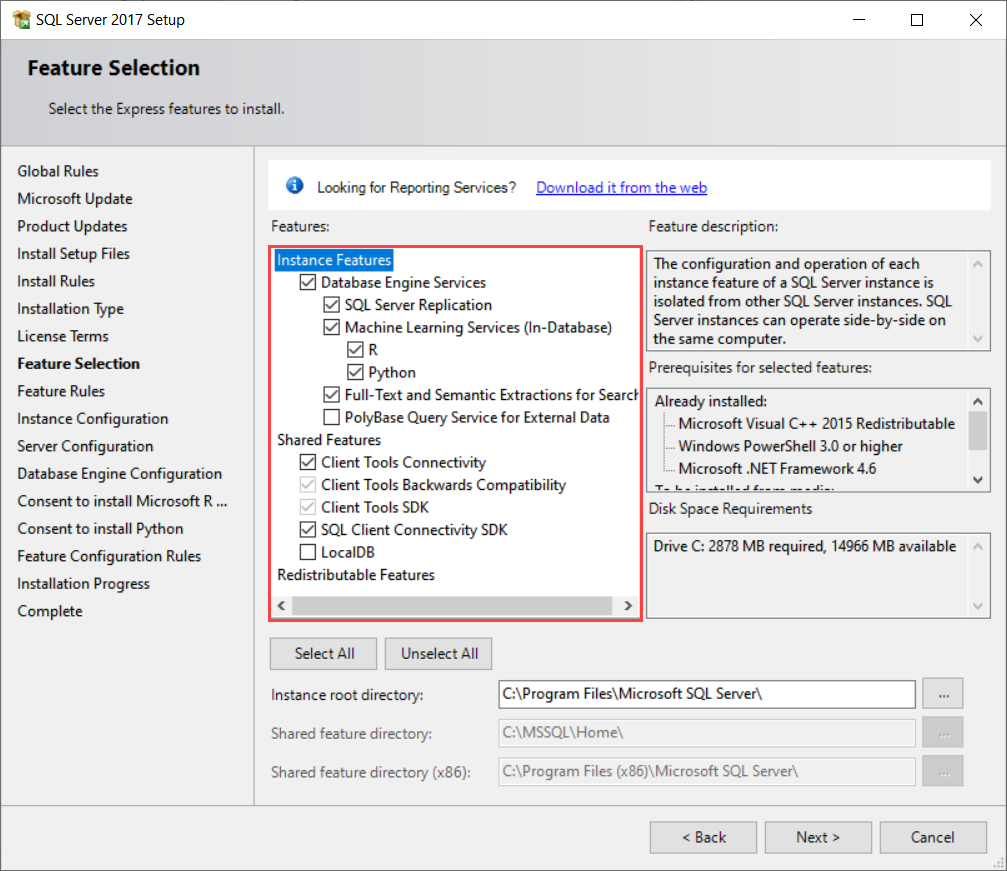
In the Feature Selection step, choose the features you want to install and click on Next. See below:
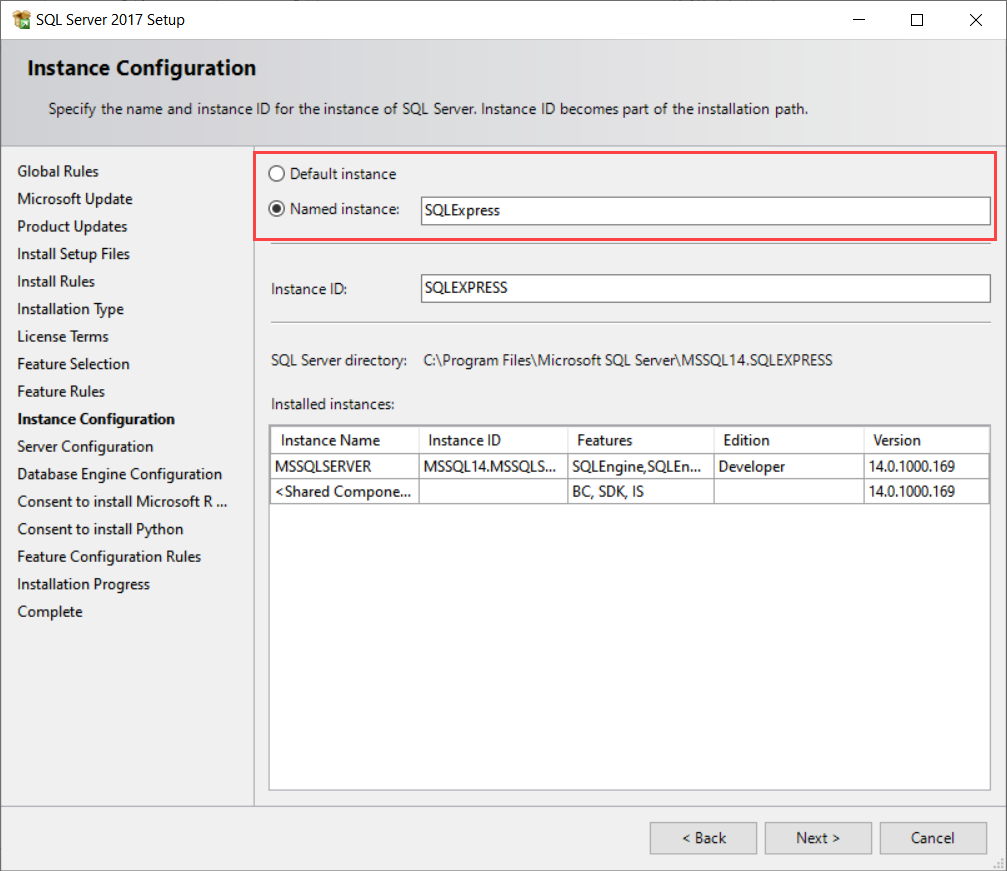
In the Instance Configuration step, you can choose to create a default instance or named instance. I have already installed a default instance on my workstation; hence, I will choose the named instance. See the following screenshot:
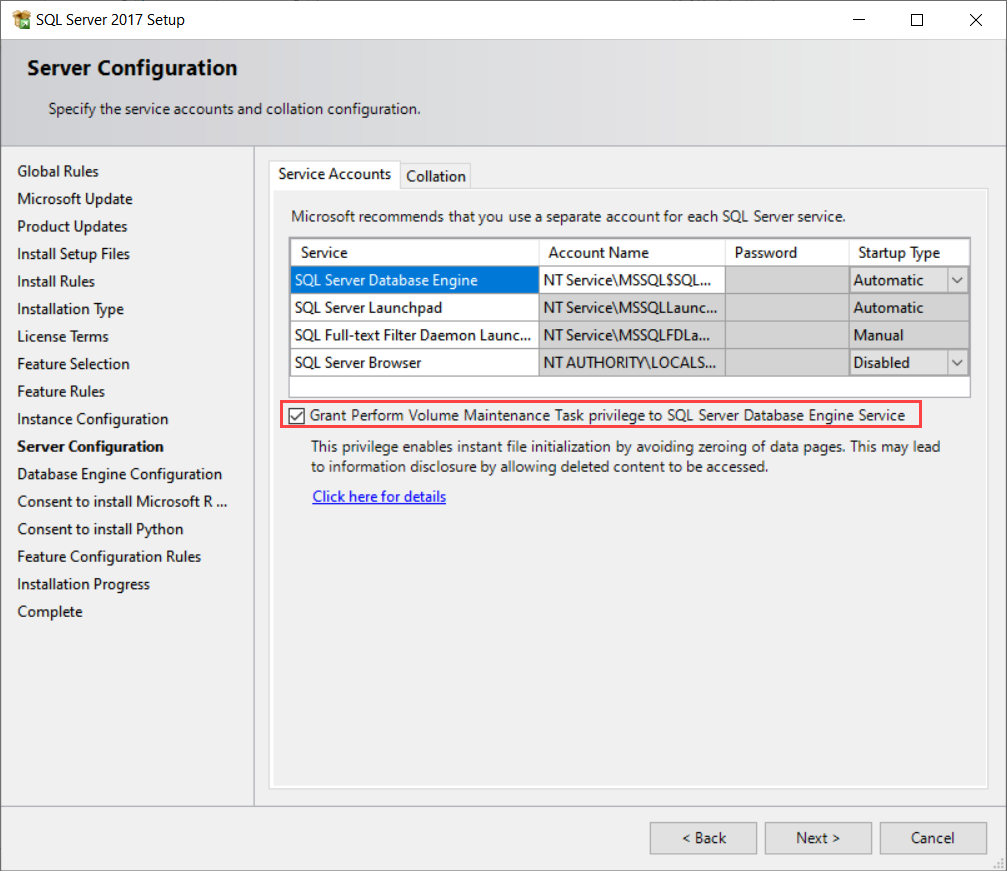
In the Server Configuration step, you can configure the SQL Server service accounts. It is recommended to use the domain account as a SQL Server service account. You can also enable instant file initialization. To do that, click on Grant perform volume maintenance task privileges to the SQL Server database engine service. I will not make any changes:
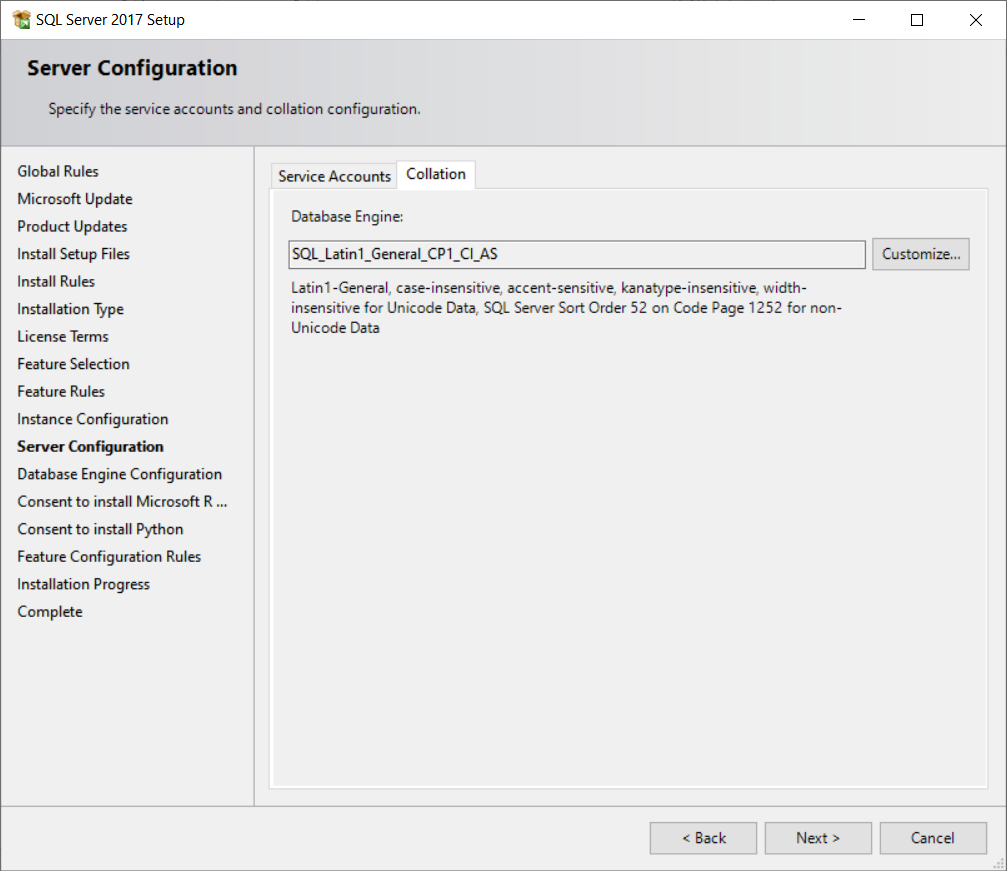
In the Collation tab, you can choose the default collation of SQL Server. I won’t change the default collation:
In the Database Engine Configuration step, you can perform the following tasks:
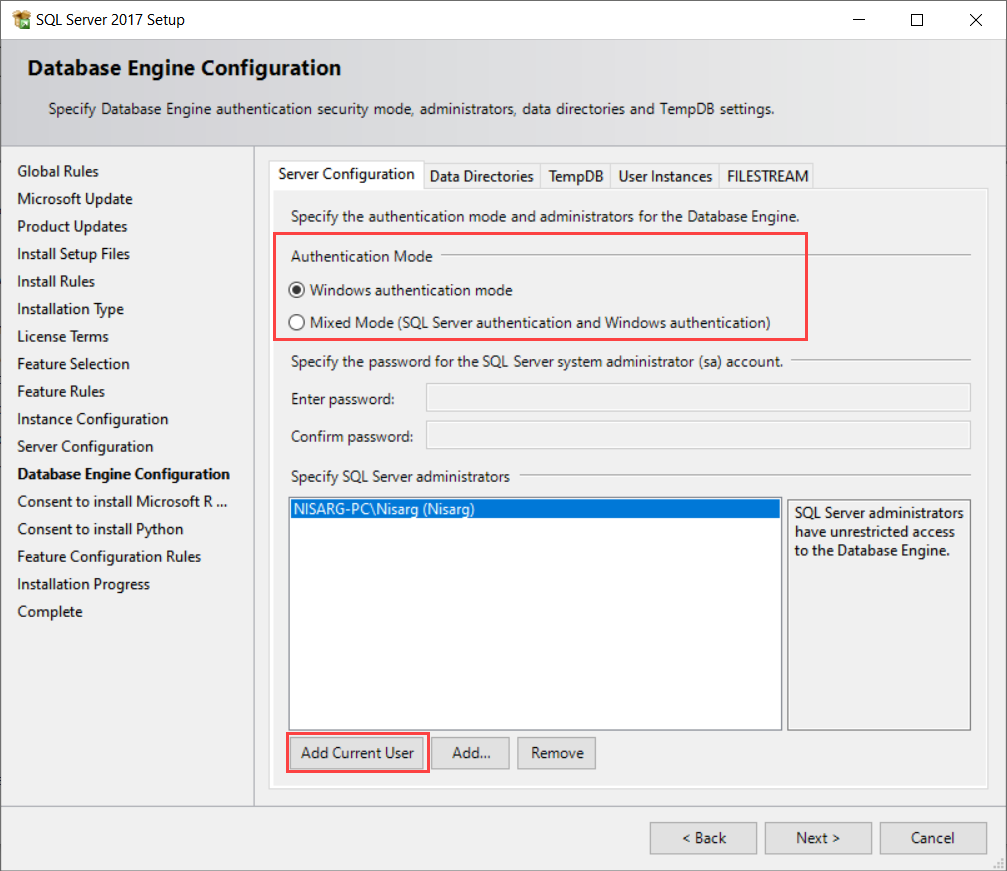
Configure the authentication mode and specify SQL Server administrators
On this screen, you can choose Windows authentication or SQL Server authentication. Also, you must add the default administrator account. To do that, click on the Add Current User button. See the following image:
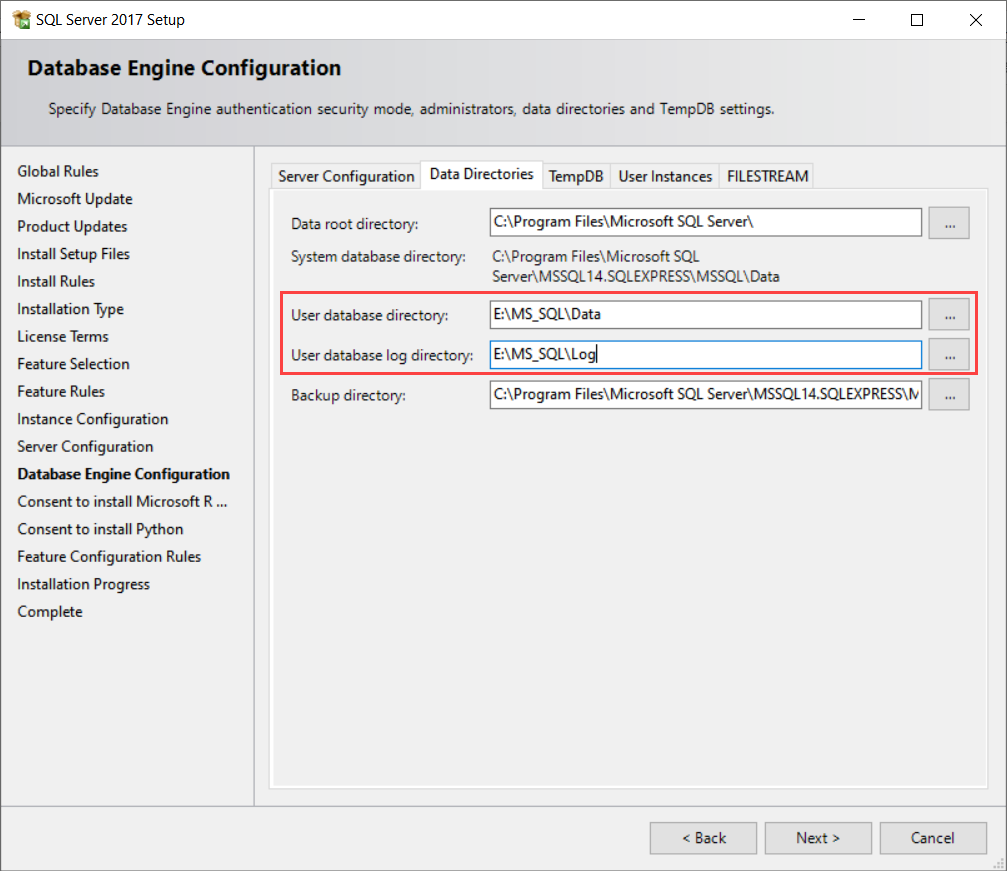
Configure database directories
On this screen, you can provide the locations of the User database Data files, User database Log files, Backup files, and instance root directory. I am going to change the default locations of the user database data files and log files. See the following image:
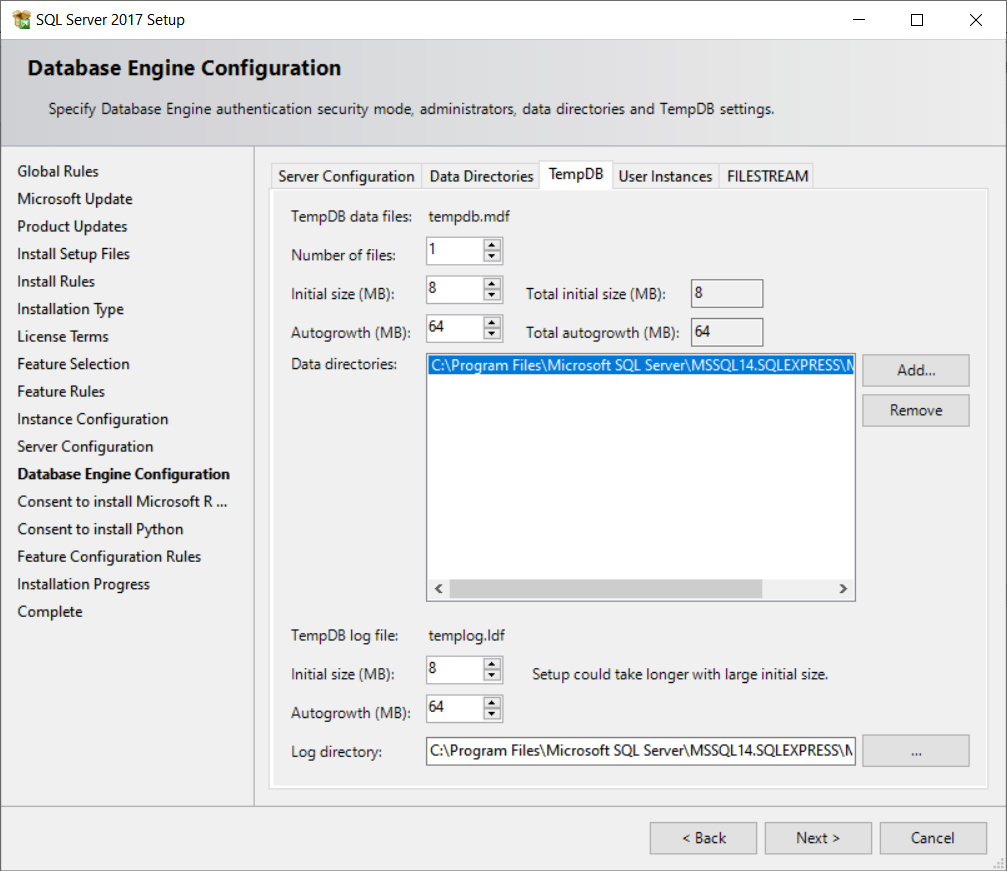
Configure tempDB
On the TempDB screen, you can configure the following parameters of the data files of the TempDB:
- The number of TempDB files
- The initial size and auto-growth of the TempDB data files
- Location of TempDB data files
Also, you can configure the following parameters of the Logfile of the TempDB:
- The initial size and the auto-growth of the TempDB log file
- The Location of the TempDB log file
I will not make any changes to the configuration:
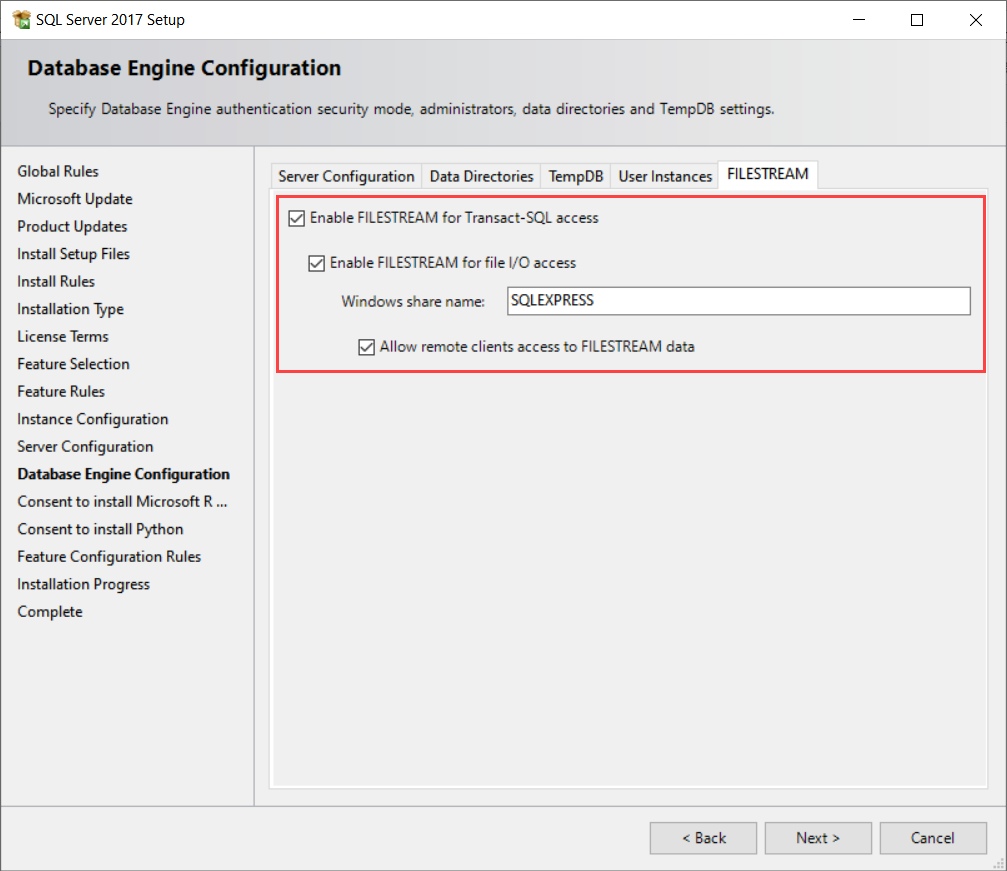
Configure the FILESTREAM
On the FILESTREAM screen, you can configure the FILESTREAM parameters. I am going to use the FILESTREAM feature hence:
- I have enabled FILESTREAM for T-SQL Access
- I have enabled FILESTREAM for the file I/O access
- I have provided the windows share name
- I have enabled remote access to the FILESTREAM data
See the following image:
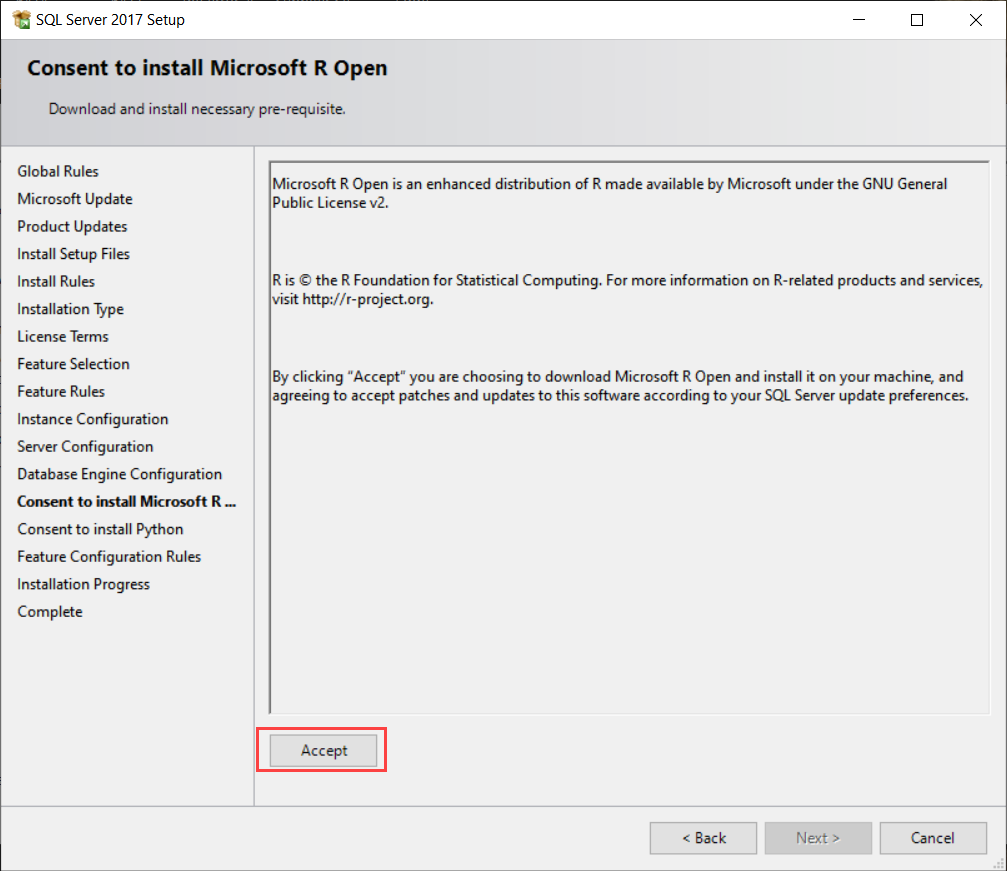
Once all the options are configured, click on Next to continue the setup process. In the Consent to Microsoft R Open step, click on the Accept button and click Next. See the following image:
Similarly, in the Consent to install Python step, click on Accept. See below:

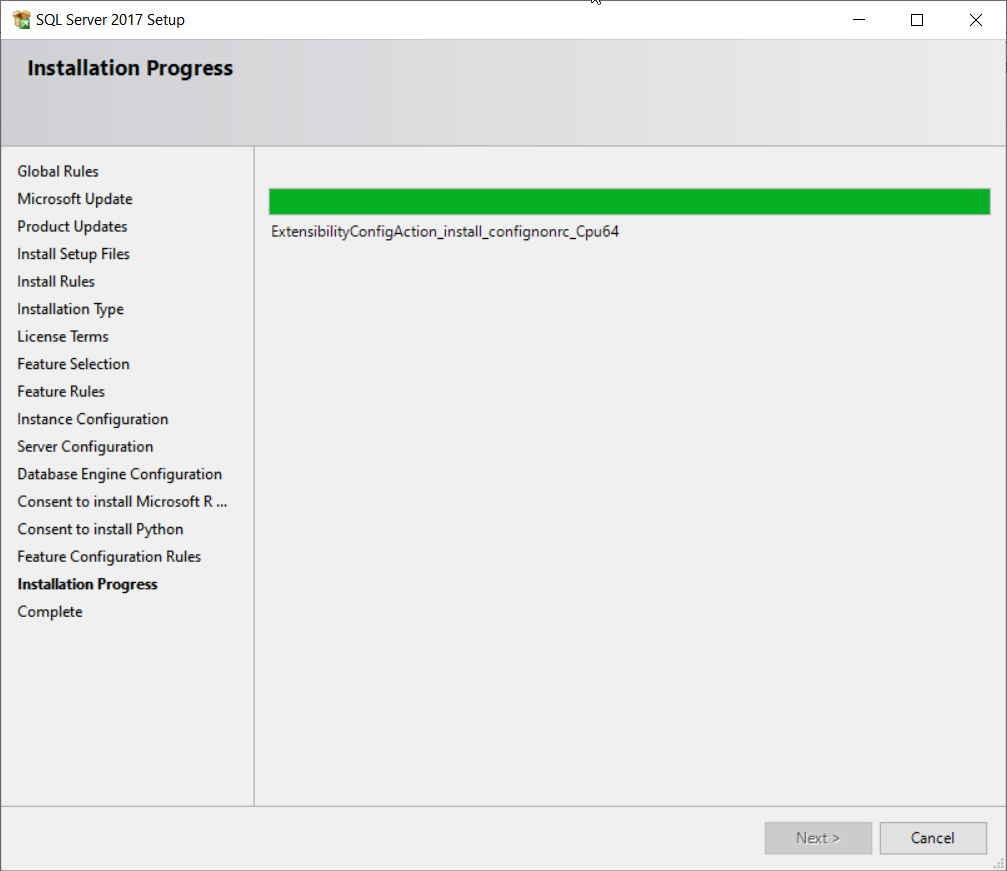
Once all parameters are configured, the SQL Server installer checks all the feature configuration rules. If all the rules are passed successfully, it will start installing the SQL Server Express edition on the computer:
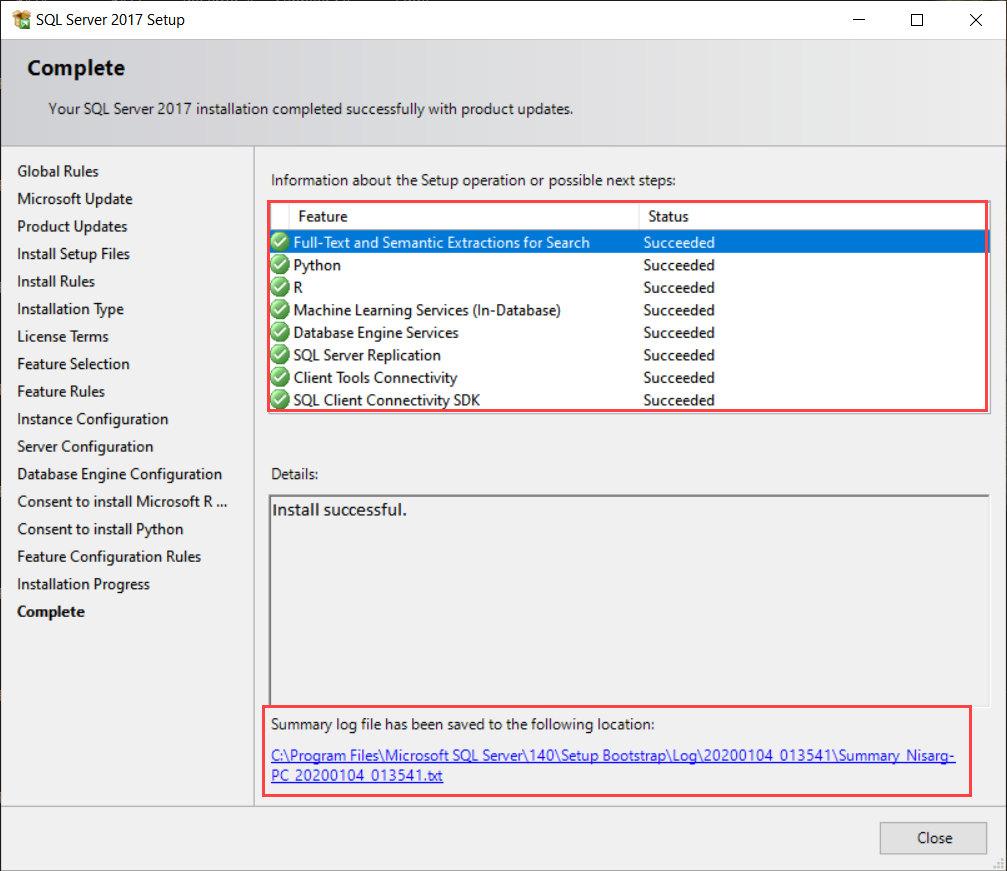
Once installation completes successfully, you can review the list of installed features and components. In case of any errors or warnings, you can review the installer logs as shown below:
You can connect to the SQL Server Express edition using SQL Server Management Studio. To do that, open SSMS and on the Connect to Server dialog box, provide the server name, choose the authentication type, and click on the Connect button:
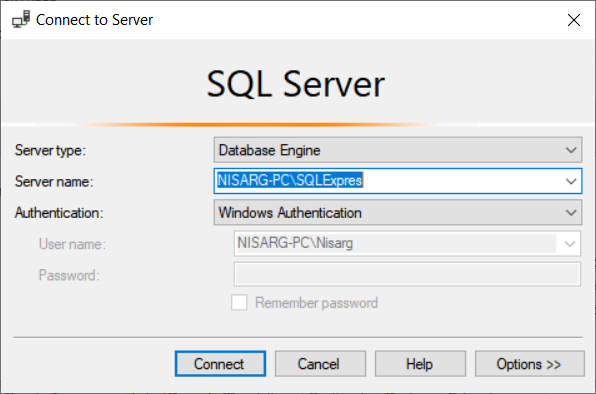
As I mentioned, I am installing a named instance; hence the server name is in <ServerName>\<InstanceName> format:
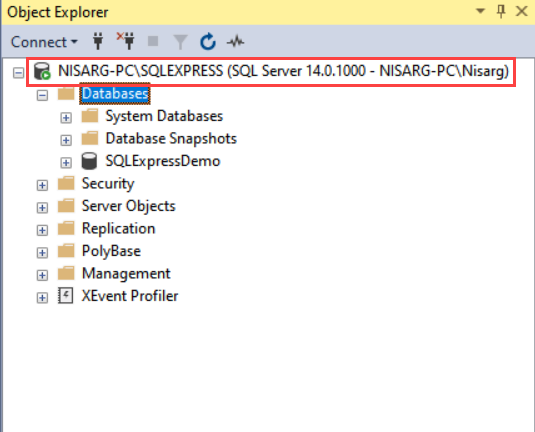
The installation of the SQL Server Express edition is completed successfully.
Summary
In this article, I have explained the step by step installation process of the SQL Server Express edition using the custom installation option.

He has expertise in database design, performance tuning, backup and recovery, HA and DR setup, database migrations and upgrades. He has completed the B.Tech from Ganpat University. He can be reached on nisargupadhyay87@outlook.com
- Different ways to identify and change compatibility levels in SQL Server - July 22, 2024
- Copy SQL Databases between Windows 10 and CentOS using SQL Server data tools - October 19, 2022
- Changing the location of FILESTREAM data files in SQL Database - October 14, 2022