

In this article, we are going to learn how we can install the SQL Server developer edition. We are installing the SQL Server 2017 developer edition on my workstation.
Before we begin the installation, we must download the web installer of SQL Server from here. This installation file allows us to download the iso file of the SQL Server 2017. Once the installer is downloaded, run it.
On the Select installation type screen, choose Download Media.

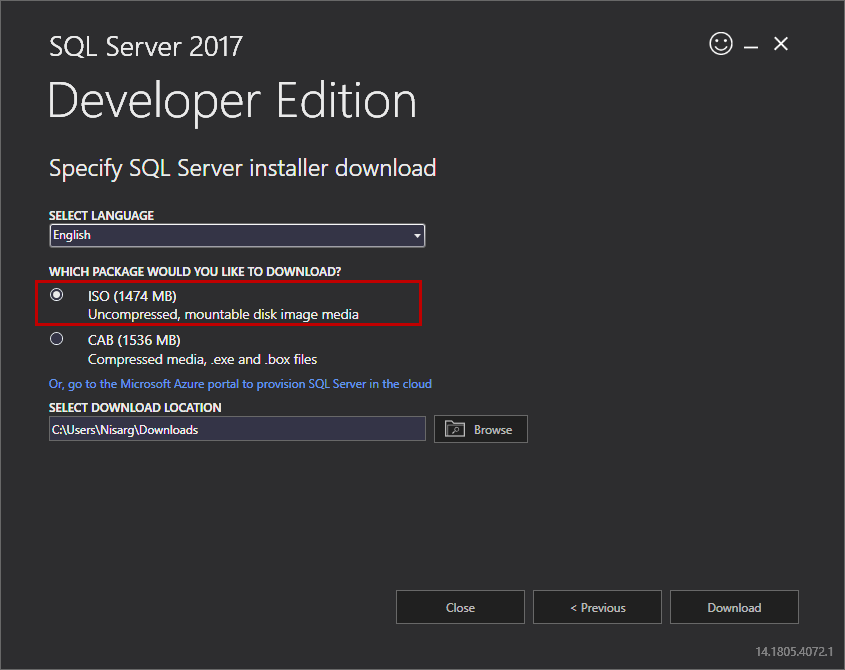
On the next screen, choose the language of the SQL Server software, the type of package that you want to download, and provide the download location.
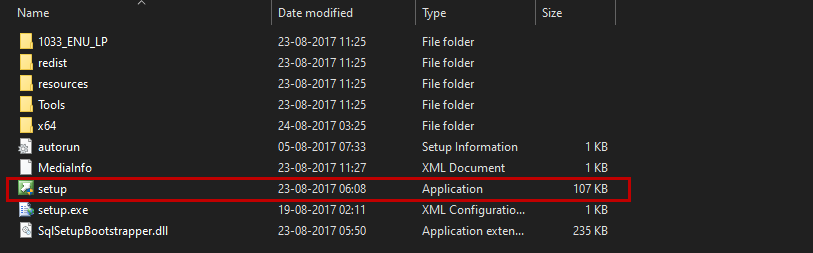
Once the download completes, open the iso file and run the setup.exe file.
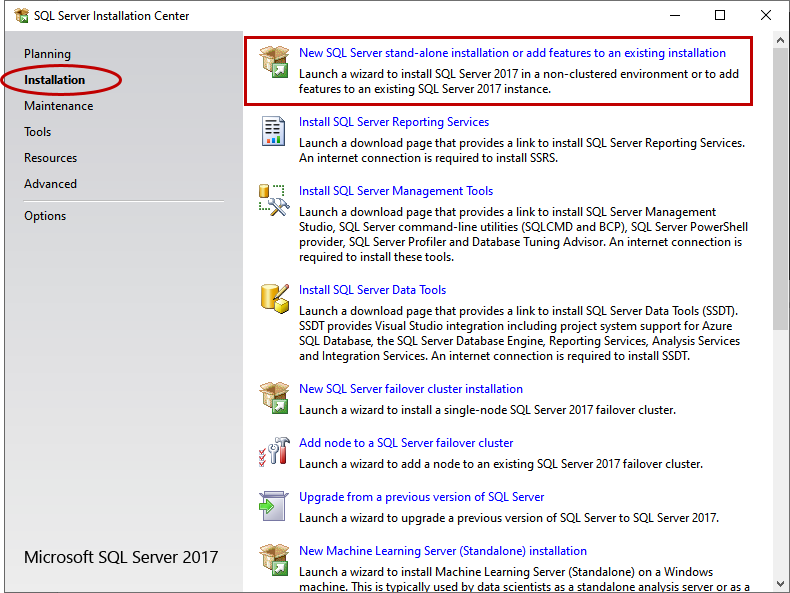
In the SQL Server installation wizard, click Installation and select the New SQL Server stand-alone installation link.
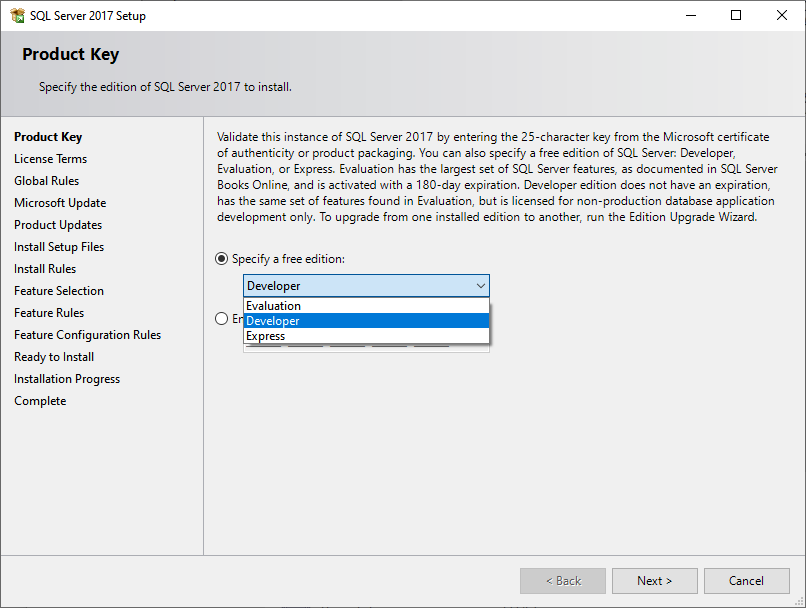
Using wizard, we can install any of the following free editions of the SQL Server 2017.
- Evaluation
- Developer
- Express
Choose Developer edition from the list of the SQL Server free editions.
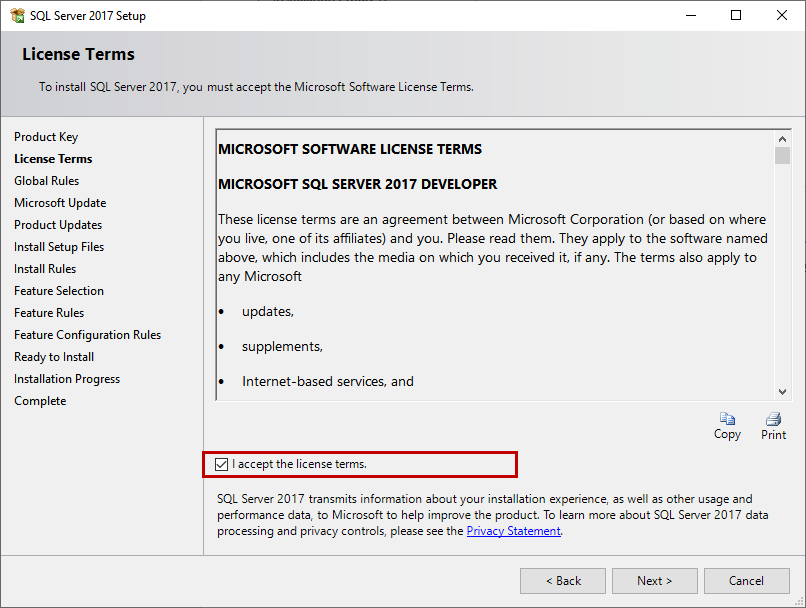
On the License term screen, review the license terms carefully and click on I Accept.
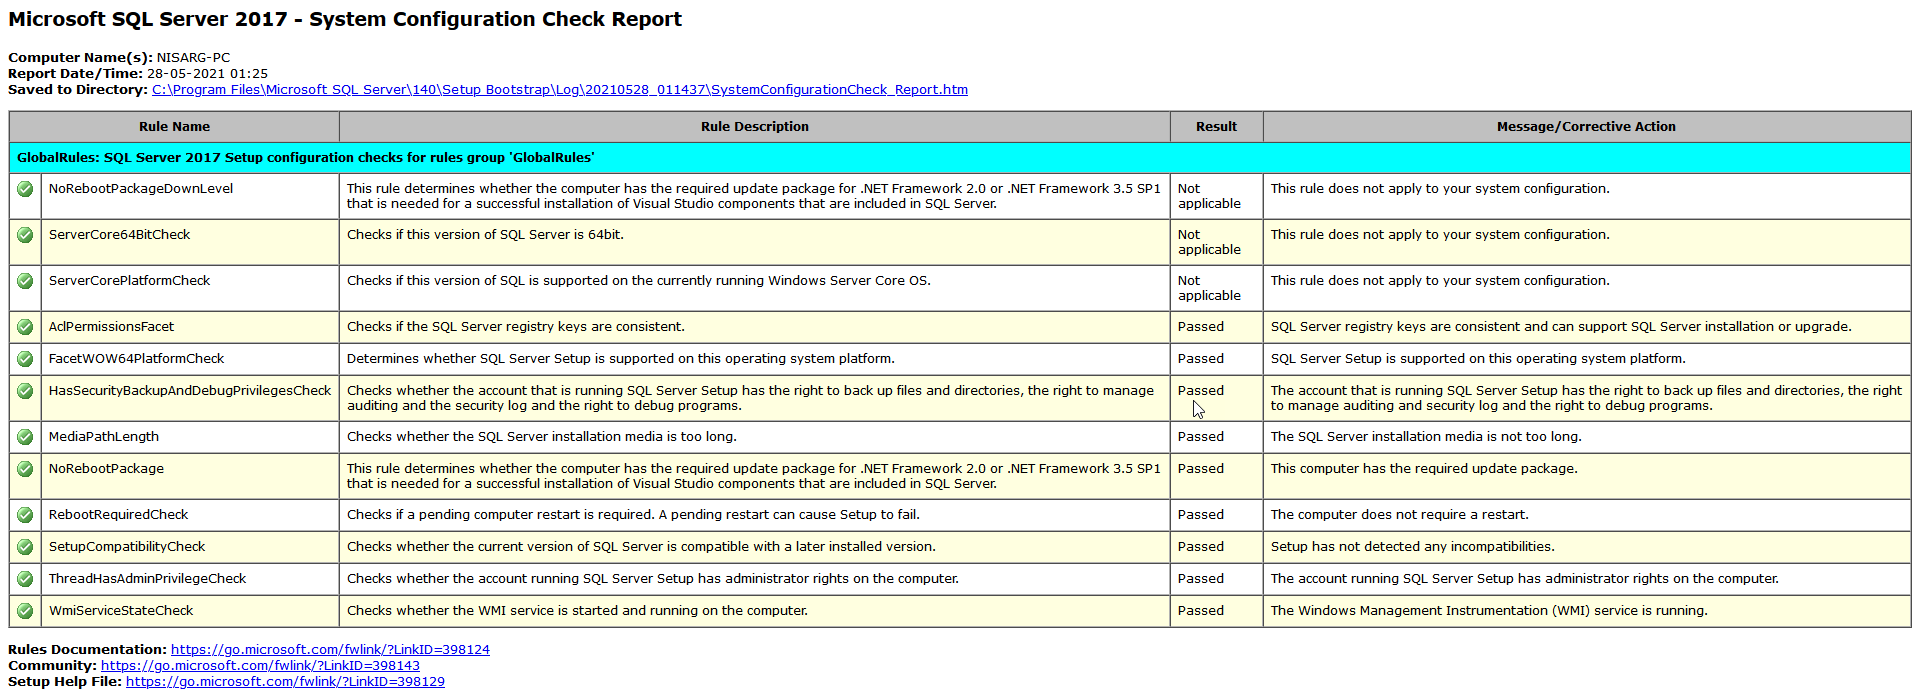
Now, SQL Server performs a setup configuration (Global Rules) check and generates a report. If any of the rules fail, the setup will not continue.
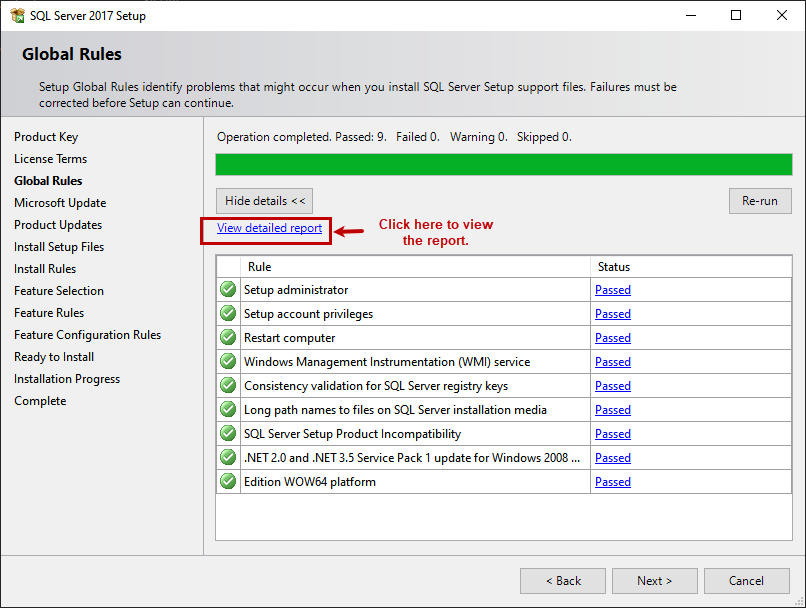
Screenshot of the configuration report generated on my workstation.
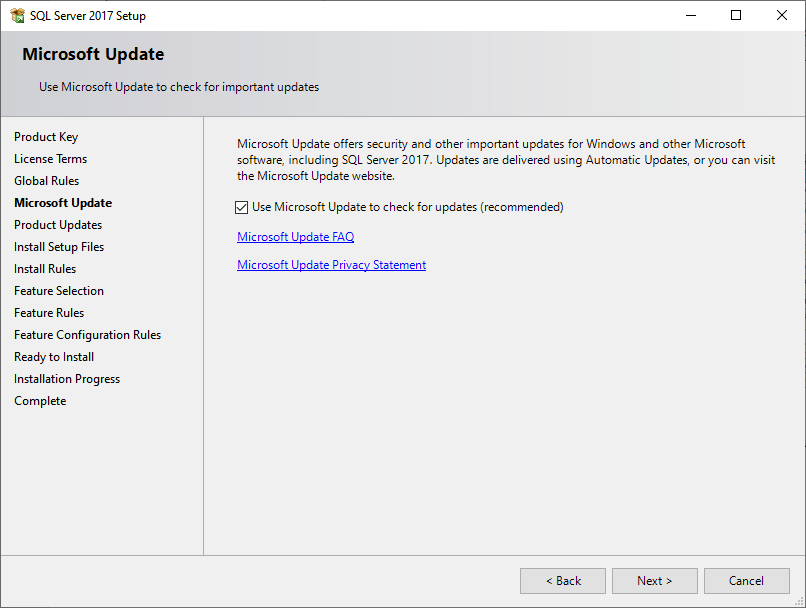
On the next screen, you can choose to run the SQL Server updates. Ideally, the cumulative updates must be check before applying to the SQL Server. I am installing the SQL Server on my workstation, so I have chosen an option to check for the latest updates of SQL Server.
Now, SQL Server performs an install configuration (Install Rules) check and generates a report. If any of the rules fail, the setup will not continue.
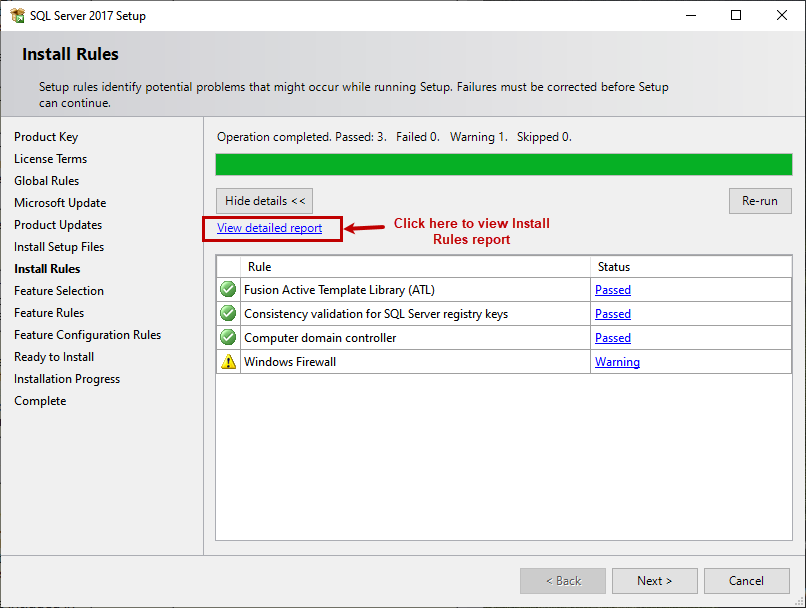
The report generated on my workstation is the following.

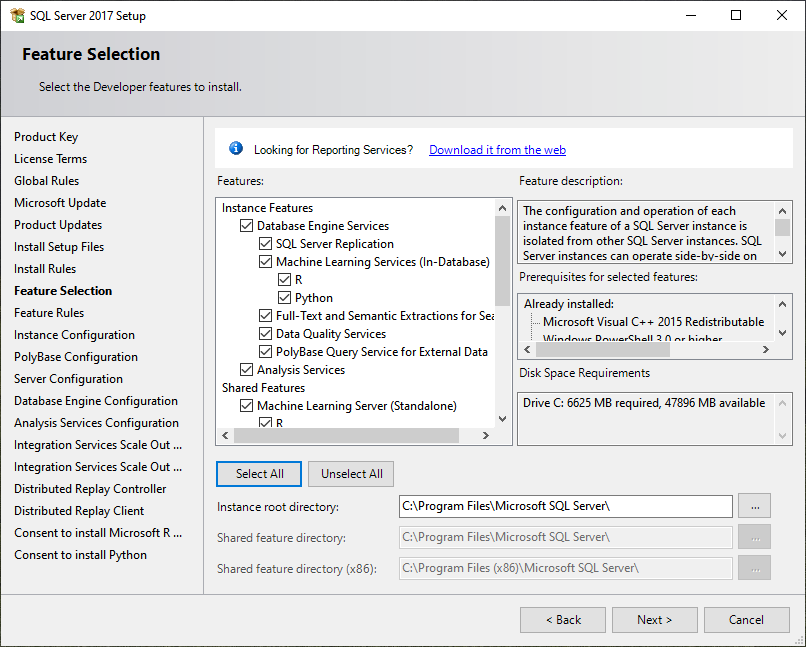
On the feature selection screen, you can perform the following tasks.
- Choose the components and SQL Server instance features
- Specify the SQL Server instance root directory, share feature directory, and shared feature directory for x86 based components
To install all features, click on Select All. The instance root directory and shared feature directories are unchanged.
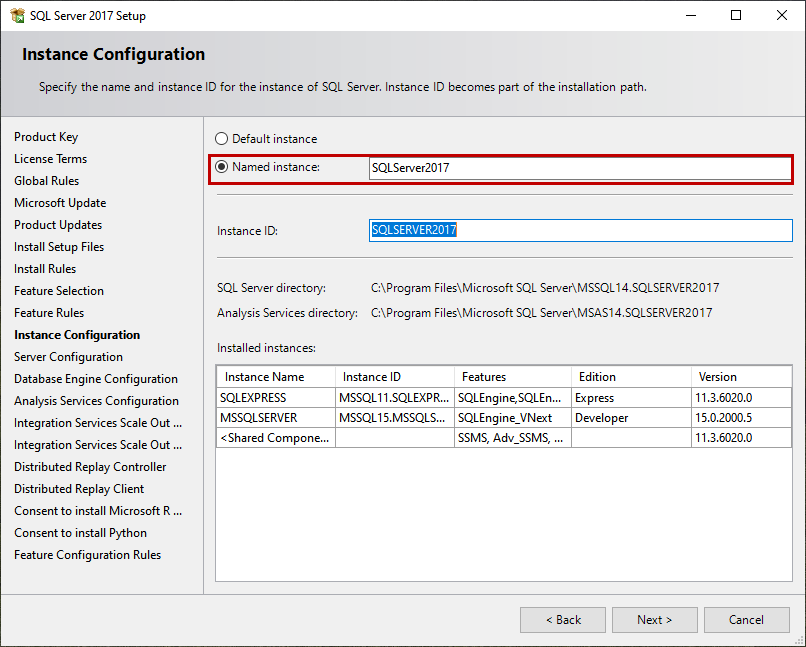
You can specify the instance type on the Instance Configuration screen. We can choose the default instance or named instance. I have already installed a default instance, so I am installing Named Instance.
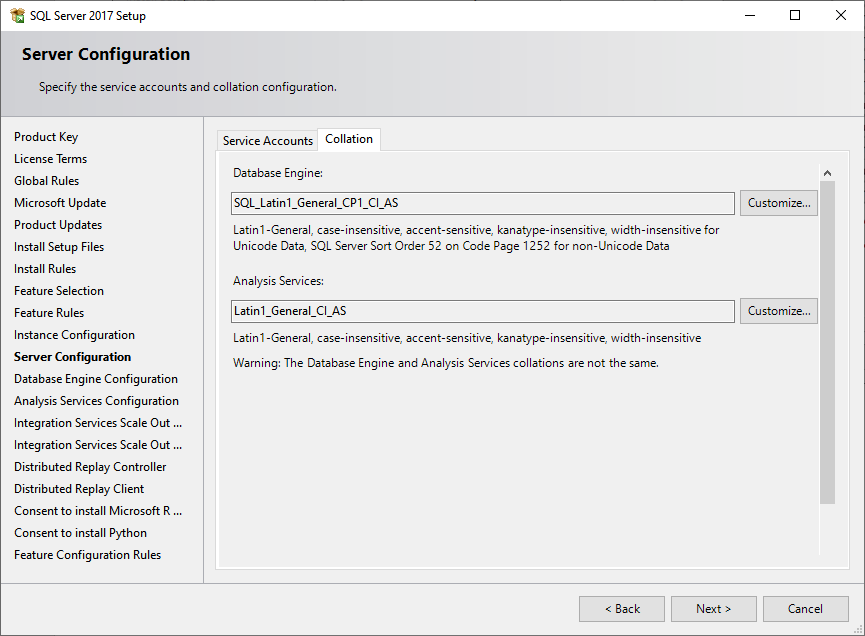
On the Server configuration screen, you can configure the following:
- Specify the service accounts for SQL Server services
- Select collation for the database engine and analysis service
- Enable instant data file initialization
In our case, I am not changing the default service accounts configured by SQL Server. I have enabled instant data file initialization.
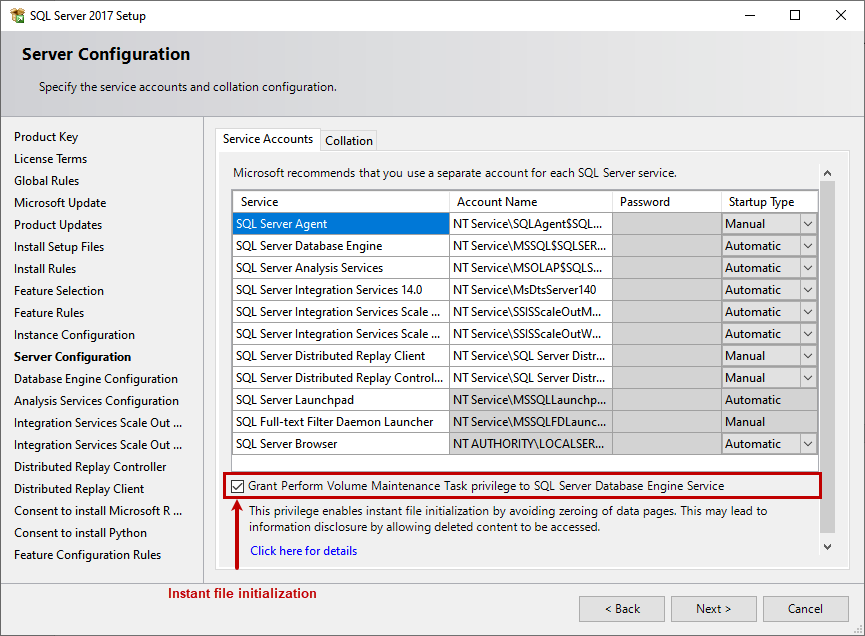
I have not changed the default collation of the database engine and analysis engine service.
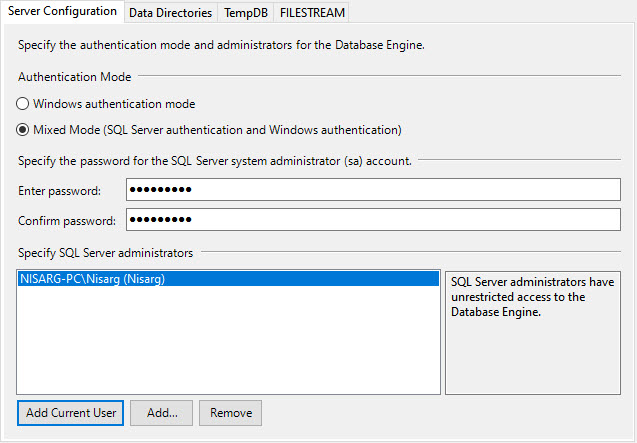
On the database engine configuration mode, we can configure the following:
- Choose authentication mode (Windows authentication mode and mixed mode) and specify the SQL Server administrator
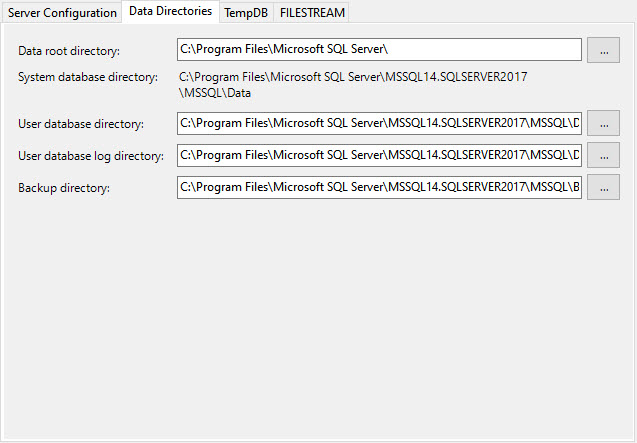
- Specify the data root directory, User database directory, and user database log directory
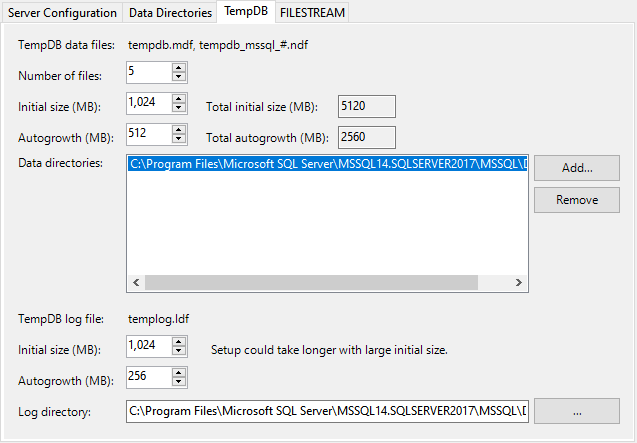
- Specify the following items for TempDB
- Initial size and Autogrowth value of TempDB data file and Log file
- Specify the total number of TempDB data files
- Location of TempDB data file and log file
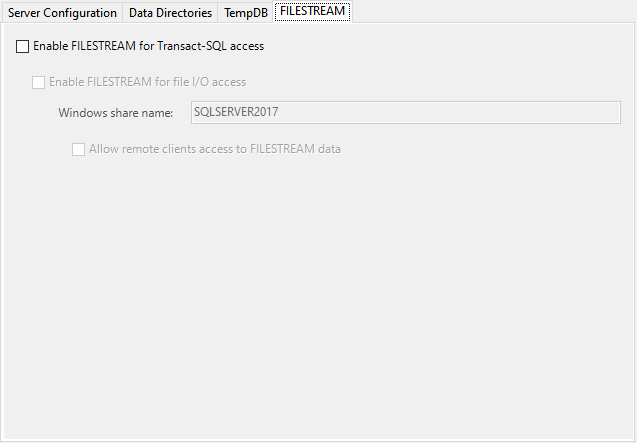
- Specify the FILESTREAM parameters
In our case, the Authentication mode is mixed, and I have added the current user as an SQL Server admin.
Data directories are not changed
Added five TempDB data files. The initial size of the TempDB data file is 1 GB, and the auto-growth value is 512 MB. The TempDB log file is 1 GB, and the Autogrowth value is 256 MB. The location of the TempDB database files is unchanged.
The FILESTREAM is not enabled.
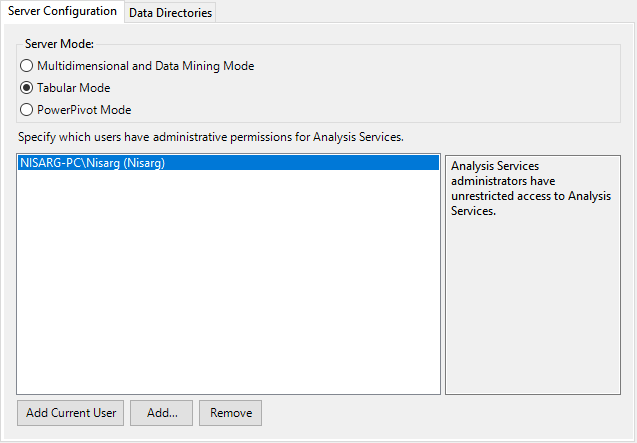
On the Analysis Service Configuration screen, you can perform the following tasks.
- Specify the Server Mode. You can choose any of the following:
- Specify the analysis services administrators
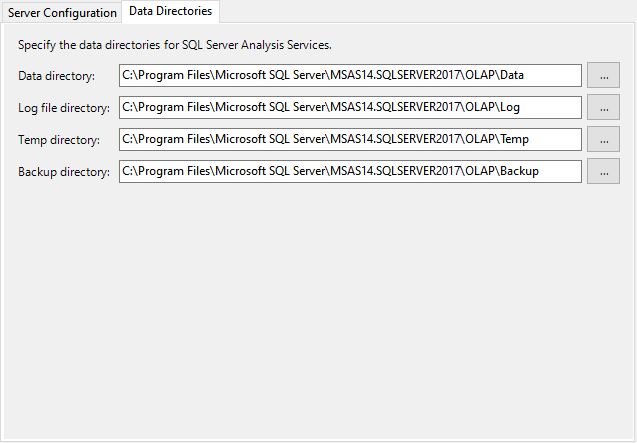
- Specify the data directories of the SQL Server analysis service
In our case, I have chosen Tabular mode in Server Mode and added the current user as an administrator of the analysis services.
I did not change the data directories of the analysis service.
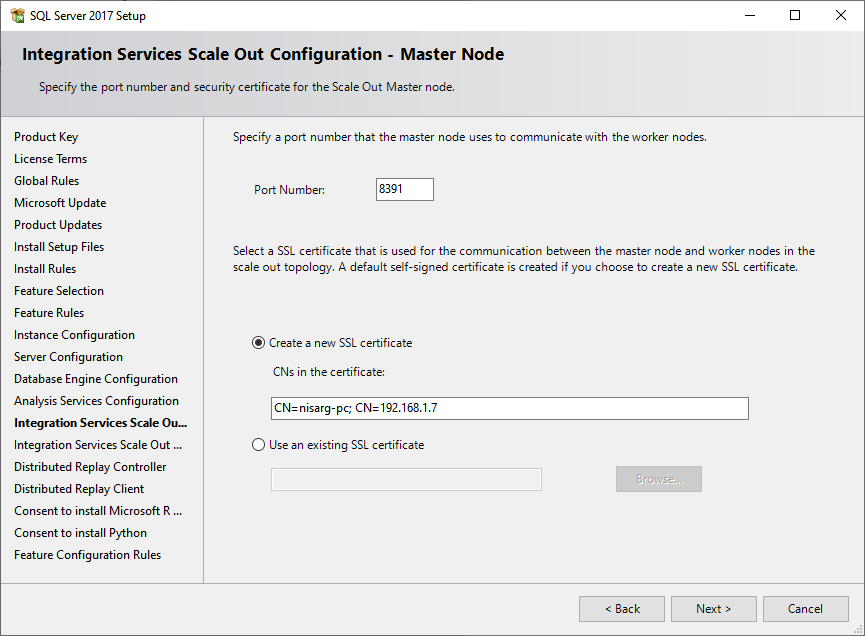
On the Integration Services Scale Out Configuration – Master Node screen, you can perform the following:
- Specify the Port number that can be used to communicate worker threads
- Create an SSL certificate for communication between the master node and worker node
In our case, I have not changed any values.
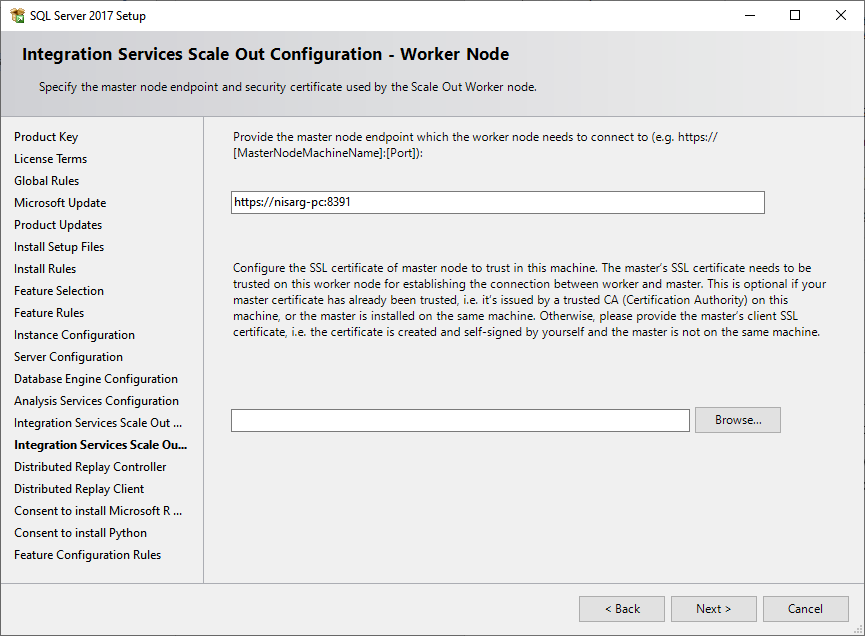
On the Integration Services Scale Out Configuration – Worker Node screen, you can perform the following tasks:
- Specify the end-point to communicate with the Master Node
- Specify the SSL certificate that is used to communicate with the Master node
In our case, I have not changed values.
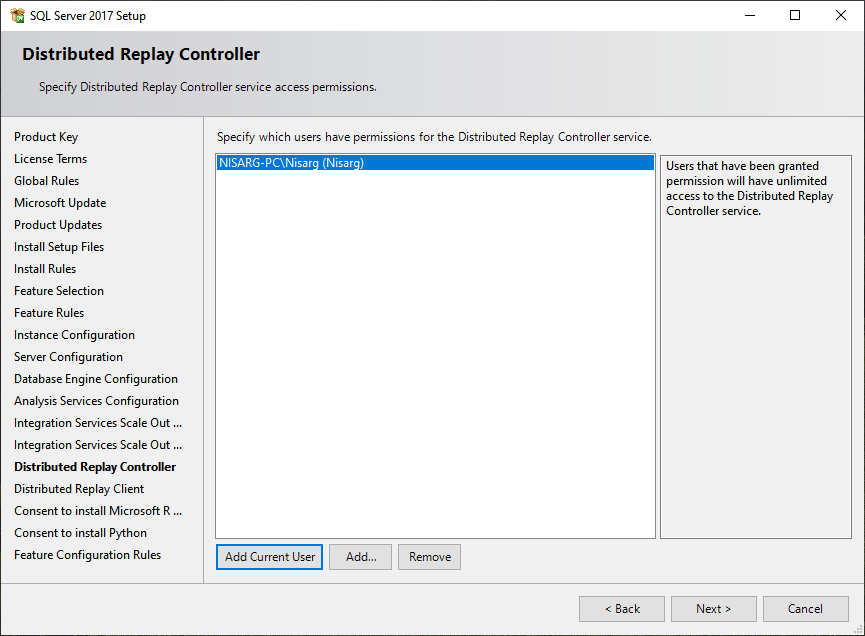
On the Distributed Reply Controller screen, you must specify the users who have administrative privileges on distributed reply controller service. I have added the current user as an administrator.
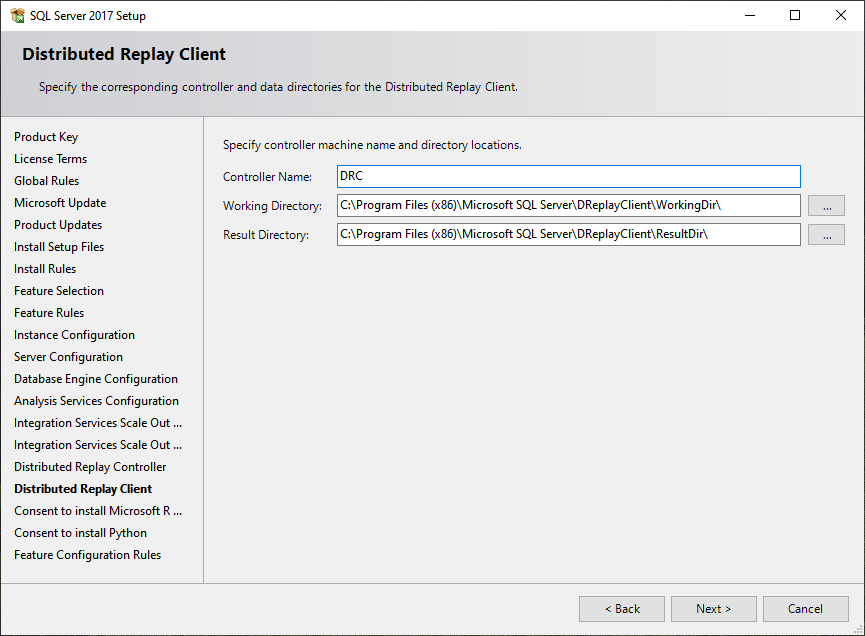
On Distributed Reply Client screen, you must specify
- Controller Name
- Working Directory
- Result Directory
I have provided the appropriate controller name and did not change Working Directory and Result Directory.
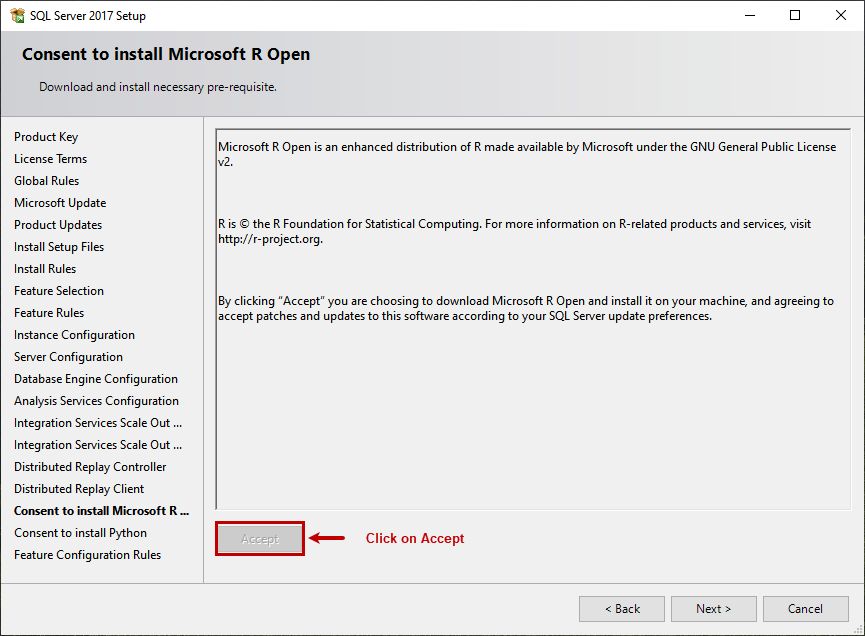
On Consent to install Microsoft R Open screen, click on Accept.
On the Consent to Install Python screen, click on Accept.

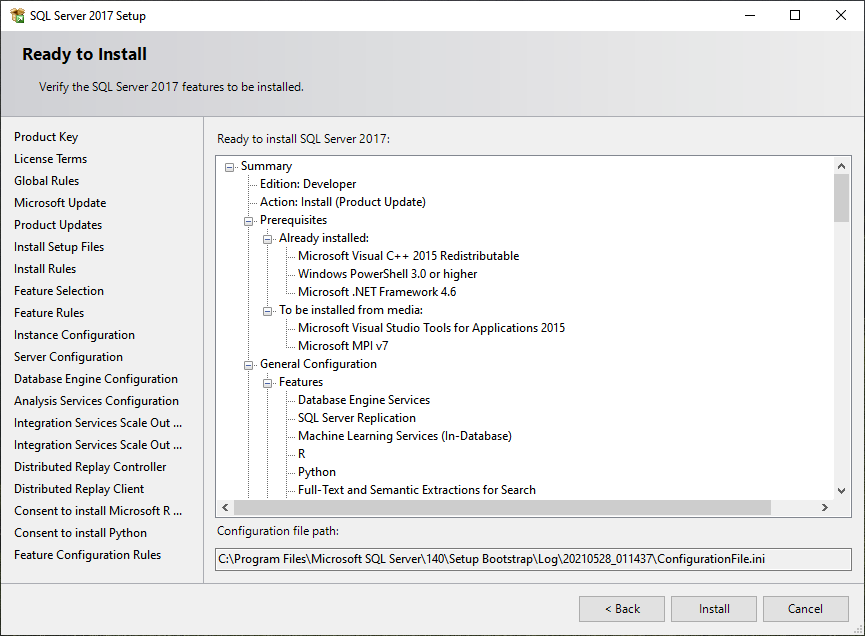
On the Ready to install screen, you can view the summary of the list of the components and features installed by the SQL Server installer. Review the list and click on Install.
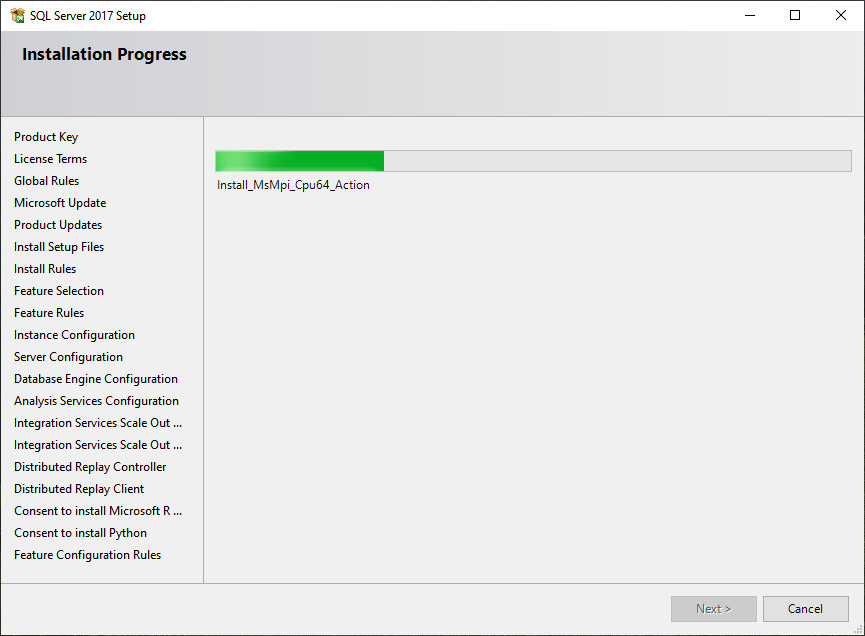
The SQL Server installation process begins.
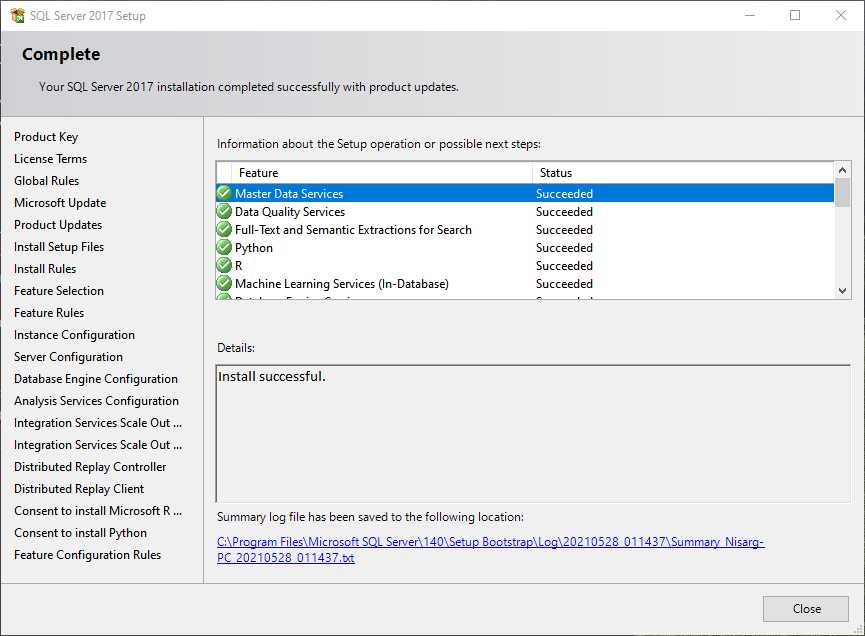
Once installation completes, you can view the list of SQL Server developer edition component that has been successfully installed.
Click on Close and Reboot the server/workstation.
Connect to the SQL Server instance
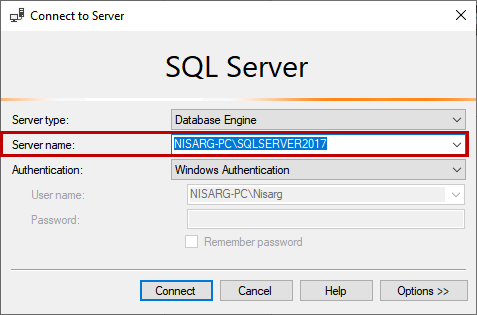
We can use SQLCMD, Powershell command lets, or SQL Server management studio to access the SQL Server databases. I am using SQL Server management studio to connect the SQL Server instance. As we have created a named instance, the server name should be in HostName/InstanceName format. The screenshot of the connect to server dialog box is the following.
Run the following query to view the edition of the SQL Server.
|
1 2 3 |
use master go Print @@VERSION |

Summary
In this article, I have explained the step-by-step installation process of the named instance of the SQL Server developer edition.

He has expertise in database design, performance tuning, backup and recovery, HA and DR setup, database migrations and upgrades. He has completed the B.Tech from Ganpat University. He can be reached on nisargupadhyay87@outlook.com
- Different ways to identify and change compatibility levels in SQL Server - July 22, 2024
- Copy SQL Databases between Windows 10 and CentOS using SQL Server data tools - October 19, 2022
- Changing the location of FILESTREAM data files in SQL Database - October 14, 2022