
Introduction
The Microsoft SQL Server Distributed Replay feature has been provided by Microsoft since SQL Server 2012 and it is used to replay captured traces against an upgraded test environment.
It is similar to SQL Server Profiler with the difference that it can replay a workload from multiple computers (up to 16) and better simulate a mission-critical workload (performance testing and capacity planning).
It can also be used for application compatibility testing by help upgrading databases from older SQL Server versions (MSSQL 2005 or higher versions) to the more recent one (MSSQL 2016 when this article has being written), based in a given workload that is previously captured from the source database and later replayed on the target SQL Server instances for comparison.
Installation
Prerequisites
The only prerequisite needed for Microsoft SQL Server Distributed Replay is to have 2 service accounts created in the Active Directory. One of the service accounts will be used for the Distributed Replay Controller service and the other will be used for the Distributed Replay Client services.
NOTE: You can still install and work with Microsoft SQL Server Distributed Replay by using local accounts only but this will not let you work with many computers to test the workload, i.e. you will need to use a single server as Distributed Replay Controller and Client.
Check further at the end of this chapter for the necessary configurations after installed the environment.
Server (Controller) installation
Microsoft SQL Server Distributed Replay is a feature that can be installed through the SQL Server setup media. Follow these to have it installed:
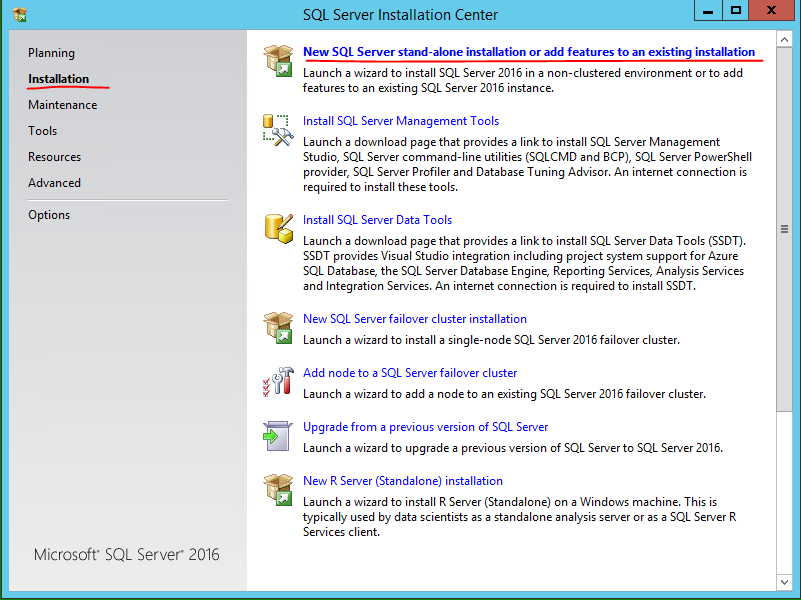
Run the setup.exe file that can be found in your SQL Server installation media. In the Installation Center screen click on Installation and then on New SQL Server stand-alone-installation or add features to an existing installation:

-
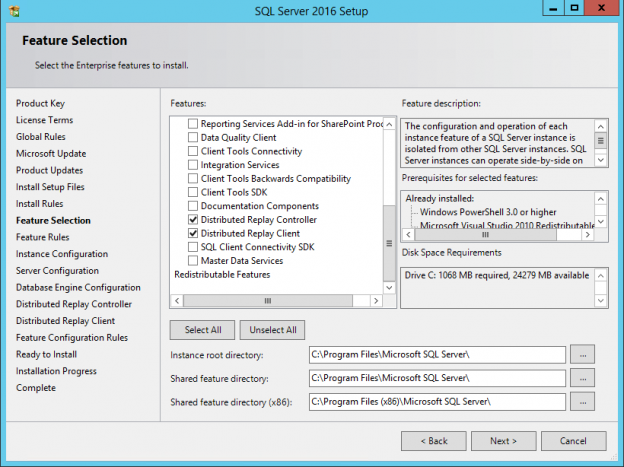
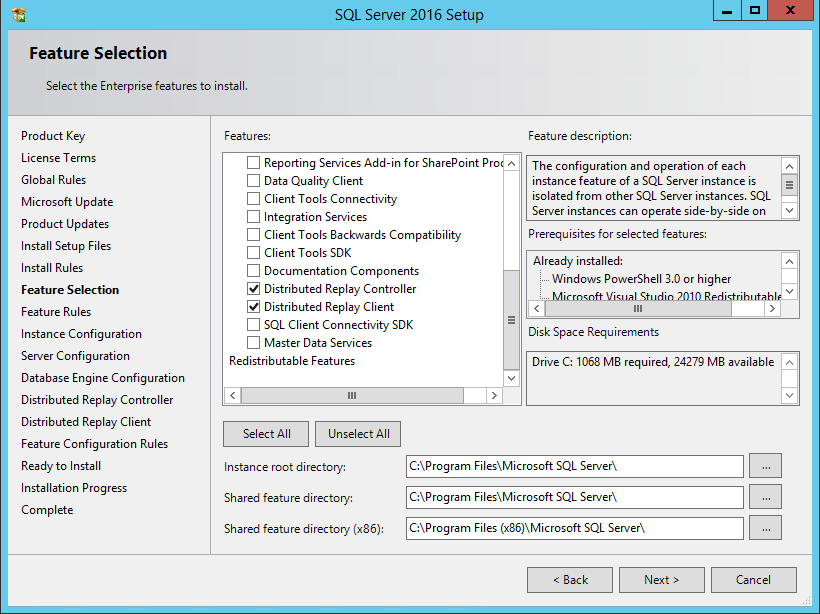
After providing the Product Key, accepting the License Terms and configuring the Microsoft Updates you will be facing the Feature Selection screen. In case of adding the feature to an existing installation you will only need to check the Distributed Replay Controller and Distributed Replay Client features (only install the Client in the Controller computer if you want that server to act as client as well) otherwise select all the features that you need plus these last two related to Distributed Replay feature:
-
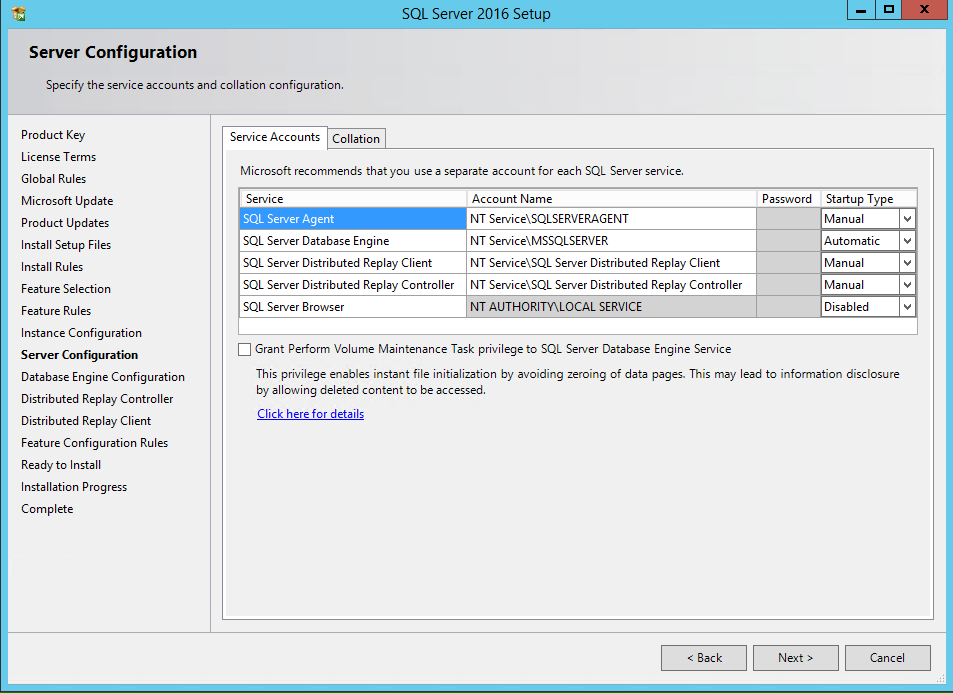
In the Server Configuration step you will see the services and the respective virtual server accounts that will be created (note: the services may differ depending on the features you choose to install):
-
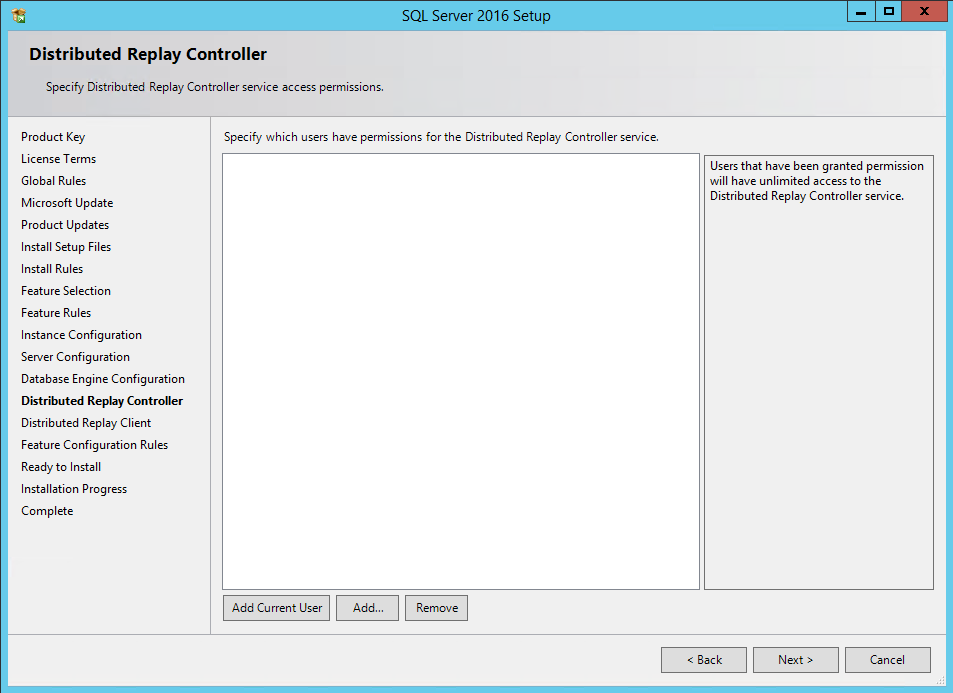
In the Distributed Replay Controller step, specify the users that should have permissions for the service. You will need to had the service accounts for the Distributed Replay Controller and Distributed Replay Client services mentioned in the Prerequisites section (you can also add your user by clicking on the “Add Current User” button):
-
In the Distributed Replay Client step you need to provide the Controller Name (the target SQL Server that will receive the workload) and the Working and Result directories (note: you can configure this later, after install it, by editing the Distributed Replay Client configuration file):
-
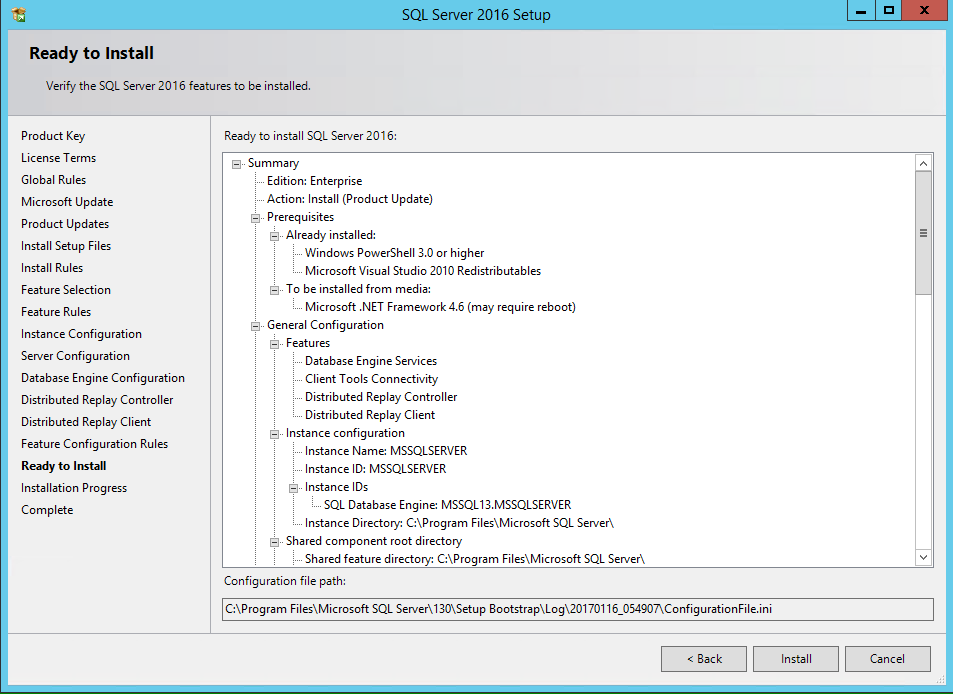
Review the installation information and if everything is correct click on Install button and wait until it is completed successfully:
-
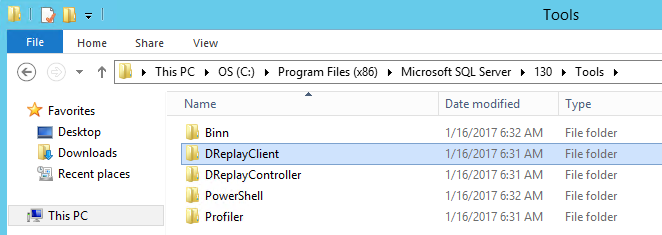
It can be confirmed with the Window Services that the features have been installed successfully and it can also be confirmed by checking if the directories (DReplay*) and files exists in the installation path:


With these we have done with the Distributed Replay installation in the Controller server. Now proceed with the installation of the Distributed Replay Client in each machine that was elected to run the traces against the Controller server, by running the SQL Server setup again in each of those machines and chose only the Distributed Replay Client to be installed.
Distributed Replay Configuration
After completely install the Controller and the Clients you should now configure your environment.
NOTE: For the following instructions I am assuming that no firewall exists between the servers or if it exists then I am assuming that all rules are configured in the firewall(s) to let pass the necessary traffic as explained in this post-installation steps article.
Log in into the server that has the Distributed Replay Controller installed and perform the following actions:
-
In the target SQL Server instance create the login for the Distributed Replay Client service account and give it the sysadmin server role:
1234567USE [master]GOCREATE LOGIN [DOMAIN\ReplayClient_service] FROM WINDOWS WITH DEFAULT_DATABASE=[master]GOALTER SERVER ROLE [sysadmin] ADD MEMBER [DOMAIN\ReplayClient_service] -
Have all Distributed Replay Client machines pointing to the correct Distributed Replay Controller. This should be done if you indicated the proper Distributed Replay Controller during the Distributed Replay Client installation. Otherwise edit the file DReplayClient.config located in C:\Program Files (x86)\Microsoft SQL Server\<MSSQL version>\Tools\DreplayClient (that is the Distributed Replay Clients default location) and provide the correct Distributed Replay Controller name:
<Controller>Controller Server Name</Controller>
-
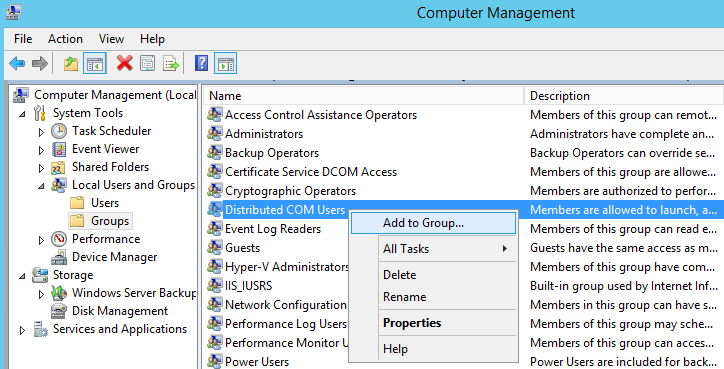
Open the Computer Management tool and in the left pane drill down to Computer Management (Local)\Local Users and Groups, click on Groups folder and in the detail pane right click on Distributed COM Users and chose the “Add to Group…” option and add the Distributed Replay Controller and Client service accounts:
-
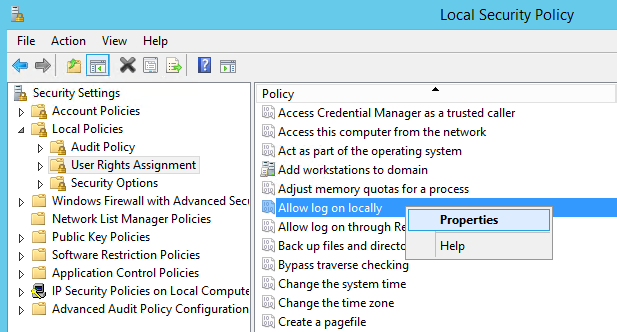
Go to Control Panel\System and Security\Administrative Tools and open the Local Security Policy tool. In the left pane, drill down to Security Settings\Local Policies\User Rights Assignment then on the right pane right click on “Allow log on locally” and choose Properties and add the Distributed Replay Controller and Client service accounts:
-
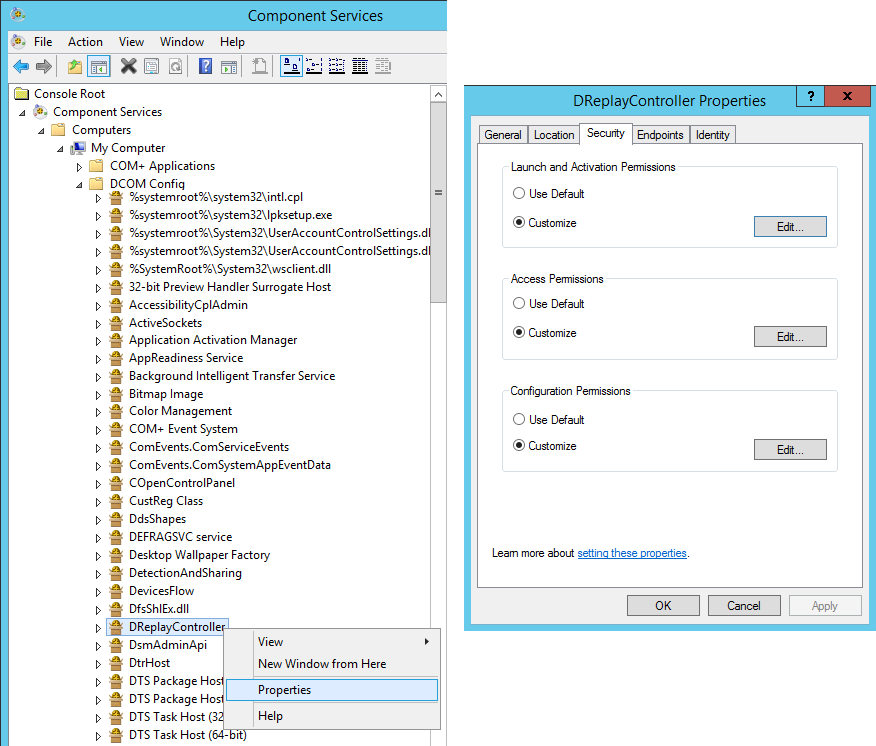
Go to Control Panel\System and Security\Administrative Tools and open the Component Services tool. In the left pane, drill down to Console Root\Component Services\Computers\My Computer\DCOM Config and right click on “DReplayController” and choose Properties. In the Properties window, go to Security tab and for each of the available permission options, click on Customize and Edit… button and then add Distributed Replay Controller and Client service accounts and check all available permissions for each one of them:
-
Start or Restart the Distributed Replay Controller service and do the same for each of the Distributed Replay Client service as well.
-
Test the environment with Dreplay.exe status by opening a command prompt window and position yourself in the folder where DReplay.exe is installed (default location is the same path for management tools – C:\Program Files (x86)\Microsoft SQL Server\<MSSQL version>\Tools\Binn) and run it with the status parameter. It should show all registered clients with status=READY (if not, check for errors in the log in DreplayController\Log subfolder and review the configurations if necessary):
NOTE: There are many other configurations that can be set but for the sake of this article I will continue with the default parameters. For more configurations items please refer to the proper MSDN article, Configure Distributed Replay.

Working with Distributed Replay
Setting the environment
The goal of the Microsoft SQL Server Distributed Replay feature is to perform an assessment for a database migration and/or workload so you can check about the reliability and expected performance before the migration occurs.
To replicate the environment you will need to take a backup of the database or databases that will be migrated and restore those in the target server where it will be tested (same server where Distributed Replay Controller is installed). Be aware that any necessary object it will also needed to be created in the target server (for example Linked Servers).
Capturing the workload
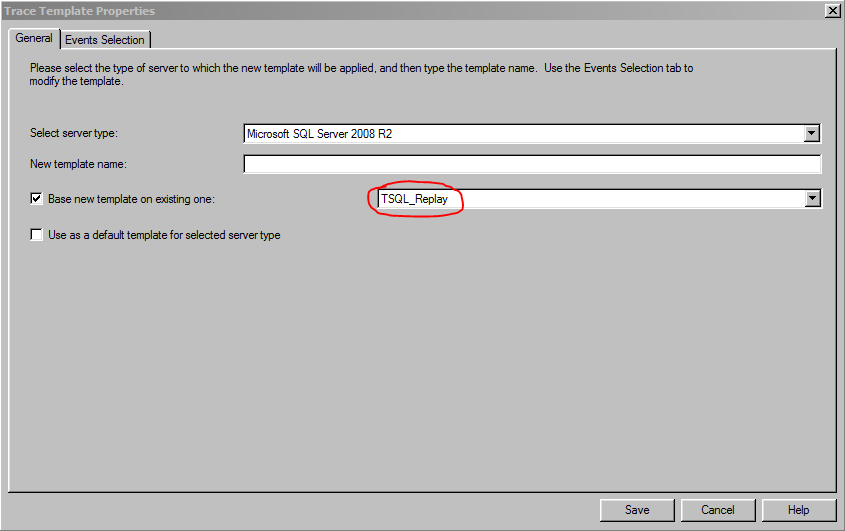
First step to be able to work with the Distributed Replay feature is to have at least a trace file created with the required events captured. To save time defining the trace you can use SQL Server Profiler since it has a template really prepared for Distributed Replay traces called TSQL_Replay:
Supported Input Trace and Target Server Combinations
The following table lists the supported versions of trace data for the source database and for each the supported versions of the target SQL Server that data can be replayed against.
| Version of Input Trace Data | Supported Versions of SQL Server for the Target Server Instance |
| SQL Server 2005/2008 | From SQL Server 2008 to SQL Server 2014 |
| SQL Server 2008 R2 | From SQL Server 2008 R2 to SQL Server 2014 |
| SQL Server 2012 | SQL Server 2012 and SQL Server 2014 |
| SQL Server 2014 | SQL Server 2014 |
| SQL Server 2016 | SQL Server 2016 |
In resume, the lowest SQL Server version that can be used as source database is MSSQL 2005 and the minimum version for the target database is SQL Server 2008. You cannot replay a trace to a lowest version from the source database and cannot either to replay traces into a SQL Server 2016 instance unless the trace was also created from a SQL Server 2016 instance.
Prepare the input Trace data
After captured a workload into a trace file or files, next step is to prepare the input trace data. This will process the trace data and generate an intermediate file that will be used in the Replay process.
Open a command prompt window and position yourself in the folder where DReplay.exe is installed (default location is the same path for management tools – C:\Program Files (x86)\Microsoft SQL Server\<MSSQL version>\Tools\Binn) and run it with the preprocess parameter and provide the trace file with the -i parameter and the path location for the generation of the intermediate file with the -d parameter.
NOTE: If you are running in a computer different from the one elected as Controller (where the Distributed Replay Controller service is running) you will need to provide also the Controller name with the -m parameter.
In the example below I have copied the trace file from the source server into the Controller server in the same folder where I will keep the intermediate file generated by DReplay:

Replay the Trace data
Now that we have the intermediate file created (from the previous step), we can now replay the trace data against the target SQL Server instance. For that and still in the command prompt (if you closed it, reopen it and go to the folder where DReplay.exe is) run DReplay.exe with the replay parameter and provide the path location where the intermediate file has been generated with the -d parameter. Also provide the –o parameter so the replay activity will be saved into a result trace file in each server that is acting as DReplay client and this will allow the analysis of those results. At last provide the DReplay clients with the –w parameter, separating the client server names with a comma:
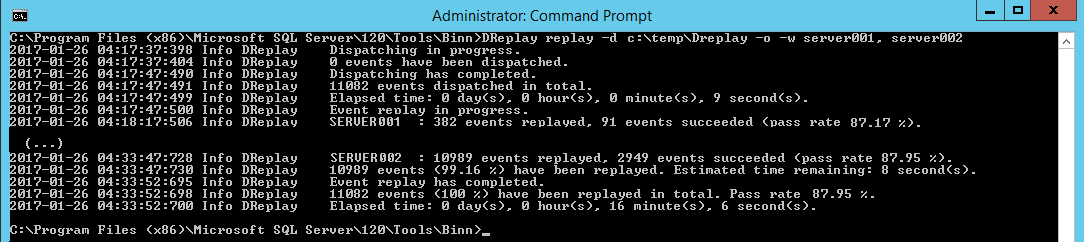
NOTE: If you are running in a computer different from the one elected as Controller (where the Distributed Replay Controller service is running) you will need to provide also the Controller name with the -m parameter.
Take attention to the Pass rate. This can show immediately the success rate of the Replay tasks and can give you an idea if you will have problems during the database migration.
Review the Replay Results
As mentioned in the previous step we ran the Replay with –o parameter so the outcome of the operation it is saved in a result trace file named ReplayResult.trc and located in each Distributed Replay Client. You can find the file in C:\Program Files (x86)\Microsoft SQL Server\<MSSQL version>\Tools\DReplayClient\ResultDir if you used the default path during the installation. Otherwise search in the path you provided for the Distributed Replay Client installation.
Open the ReplayResult.trc and analyze it. You should search for errors and performance issues (duration column for example) and try to solve any issue that is reported. The quantity of errors should match the Pass rate value returned during the Replay phase.
You have now important information to be used for your migration project. You can repeat this process how many times you want until you reach the desired results.
Removing Distributed Replay
Microsoft SQL Server Distributed Replay can be uninstalled by using Add or Remove Programs feature following these steps:
-
Go to Control Panel and open Add or Remove Programs.
-
Find the respective Microsoft SQL Server instance version and right-click on it and then click on Uninstall/Change:
-
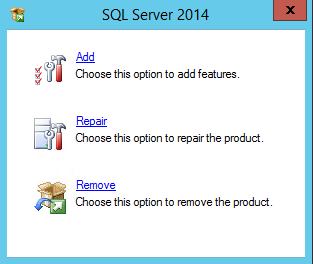
Chose Remove on the next pop-up window:
-
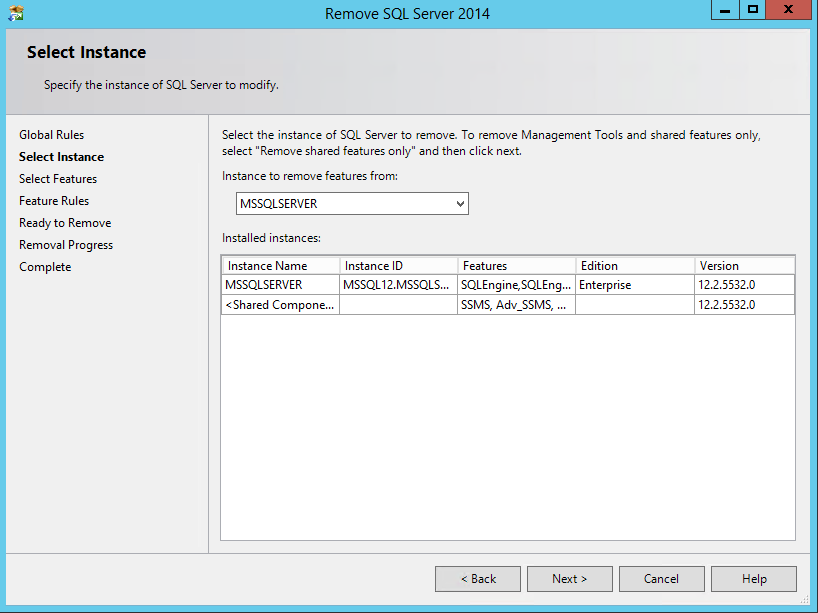
Select the desired SQL Server instance and click on Next >:
-
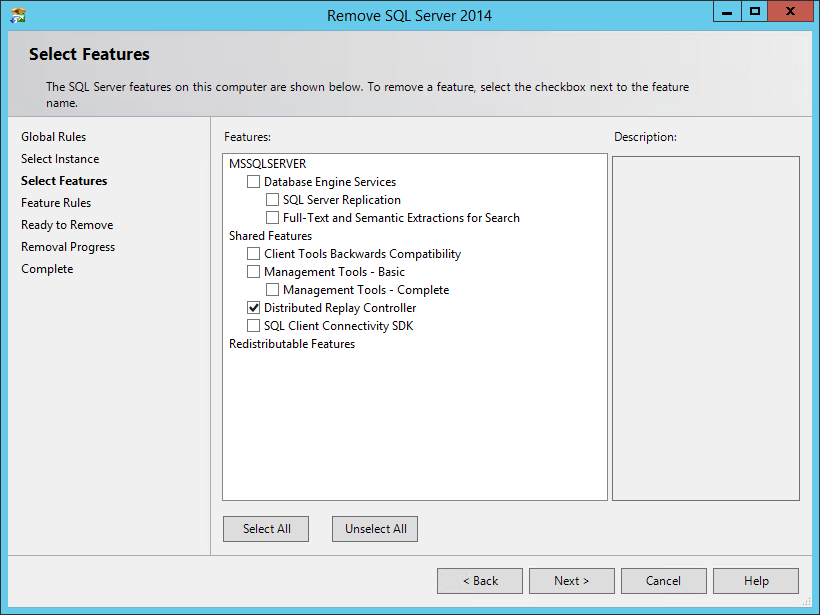
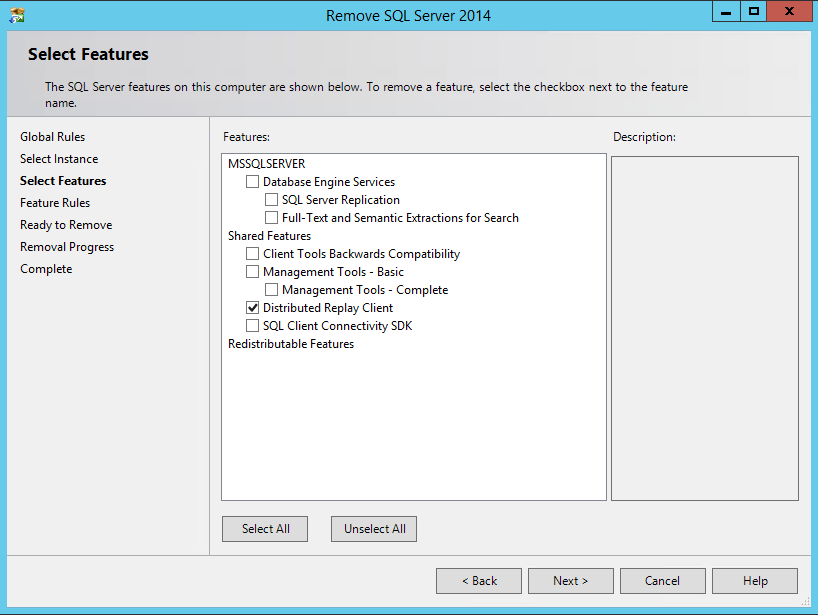
Check the Distributed Replay Controller option (if you have installed the Distributed Replay Client check this feature also) and click on Next >:
-
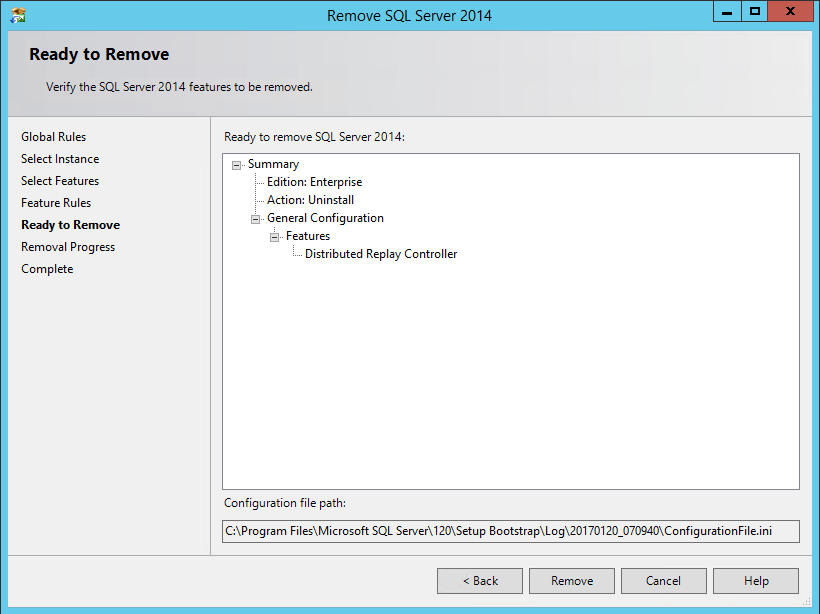
Review the features to be removed and press on Remove button to proceed with the removal:
-
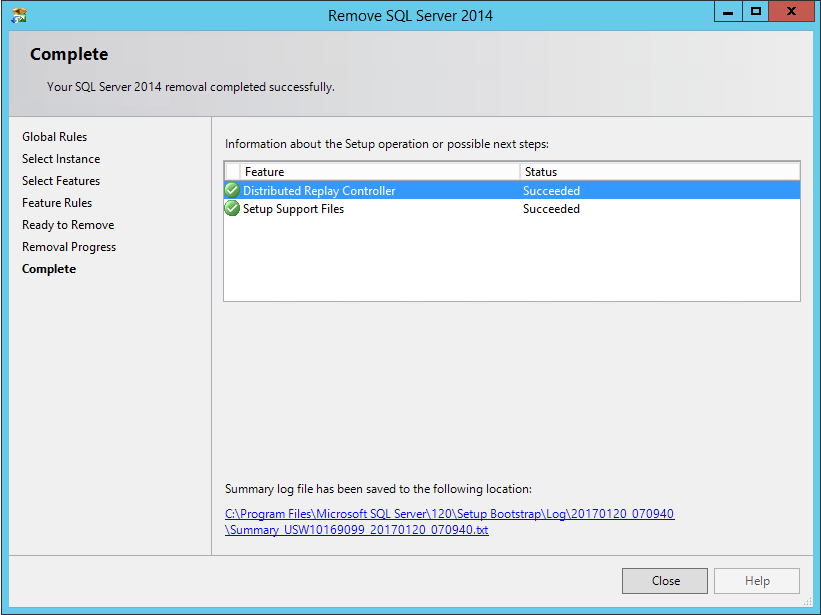
Let the process run and press Close when done:
-
Do the same for all clients if you also want to remove them. The only difference is that you will have only the Distributed Replay Client feature to remove::
-
Confirm in the servers that the Distributed Replay services were removed and the respective installation folders are empty. With that you just finished the uninstallation process.


He participates in some SQL Server forums, helping other professionals solving SQL Server issues and acting as their mentor whenever is possible.
Vitor also has a website with some useful information about SQL Server: https://f1-sqlserver.wixsite.com/f1-sqlserver
View all posts by Vitor Montalvão
- An introduction to sp_MSforeachtable; run commands iteratively through all tables in a database - August 18, 2017
- SQL Server system databases – the model database - August 9, 2017
- SQL Server system databases – the msdb database - July 14, 2017