

In this article, I am going to explain how we can configure the iSCSI initiator and use it to connect to the iSCSI virtual disk on the target server.
In my previous article, Installing and configuring the iSCSI target Server on Windows Server 2016, I have explained the following:
- Install iSCSI target role on windows server 2016
- Create a new iSCSI virtual disk and configure the access server
The iSCSI initiator (Internet small computer system interface) is used to connect to the iSCSI based external storage. Workstations and servers use it to mount the target-based volume as a local volume and can be managed accordingly. It uses an IP-based Ethernet network to communicate with the iSCSI target server.
In the previous article, I have already configured the iSCSI target server and created a virtual disk on “SAN.Dc.Local” server. We will configure the initiator on “Dc. Local” server and connect the virtual disk that is created on SAN.DC.Local. Following is the setup that I have created on my workstation.
Host Name | IP Address | Operating System | Role |
DC.Local | 192.168.0.100 | Windows Server 2016 | iSCSI initiator |
SAN.Dc.Local | 192.168.0.130 | Windows Server 2016 | iSCSI Target Server |
Enable the iSCSI initiator
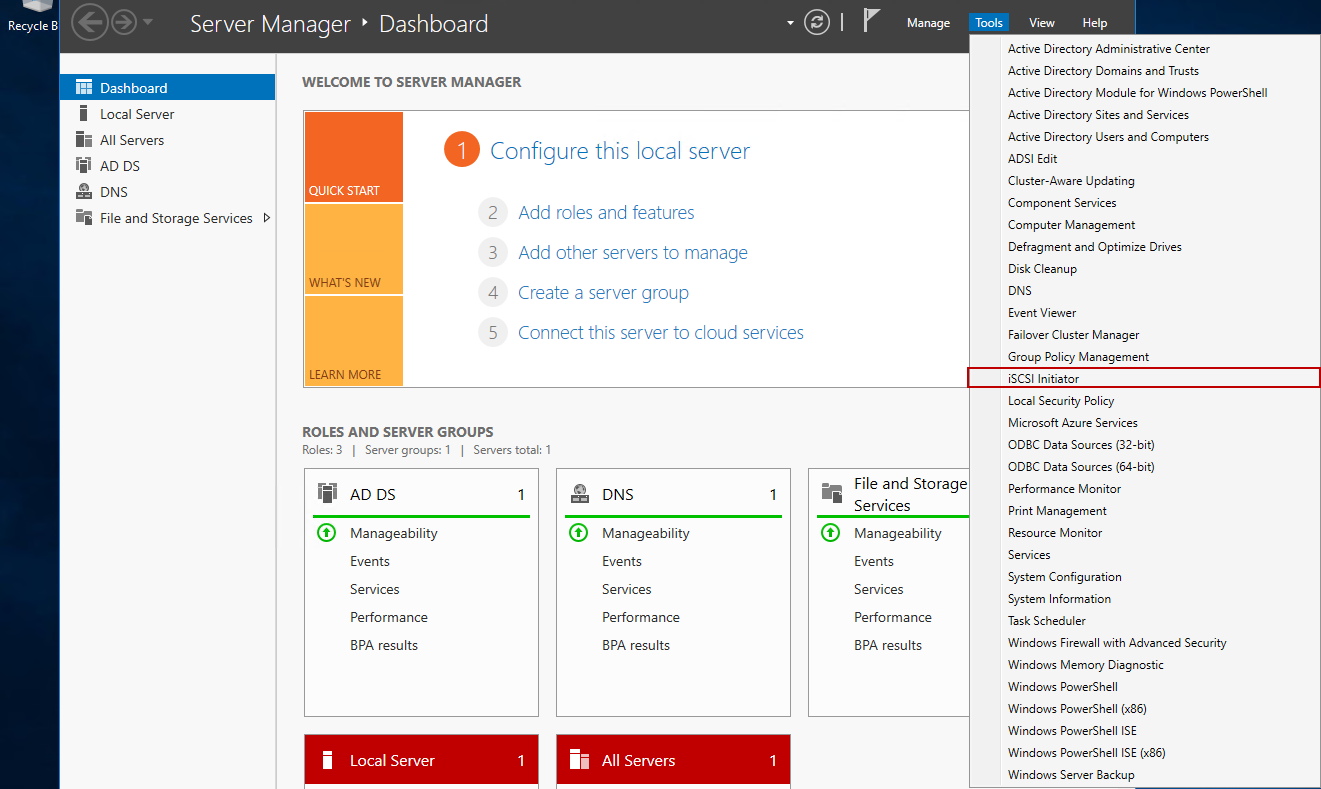
By default, the iSCSI service is stopped. To use it, we must start the service. To start the service, open “Server Manager” -> Click on “Tools” and select “iSCSI initiator”. See the following image:
A message box opens that says, we must start the services on the computer, and the service will be started automatically.” Click on Yes. See the following image:

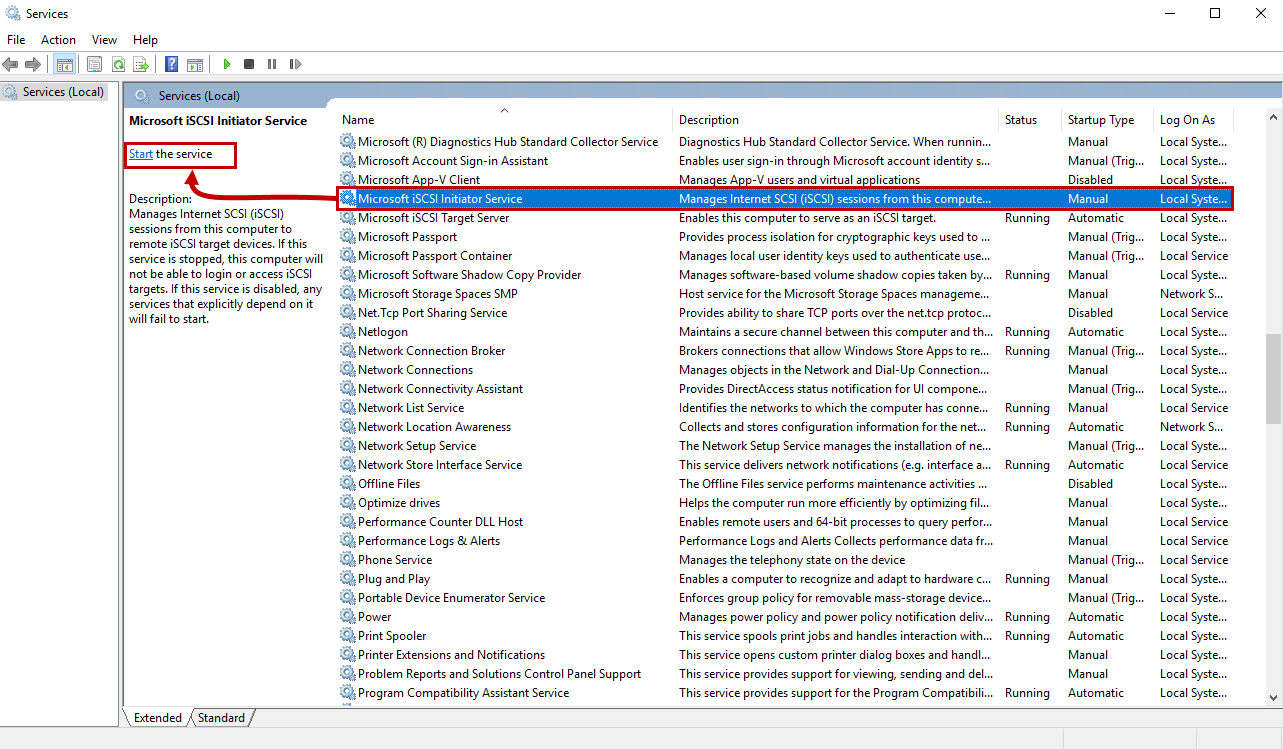
Alternatively, you can start the service from Administrative tools. Open Control Panel -> Administrative Tools -> open Services -> Find “Microsoft iSCSI Initiator Service” service. Right-click on it and click on Start. See the following image.
Configure iSCSI initiator
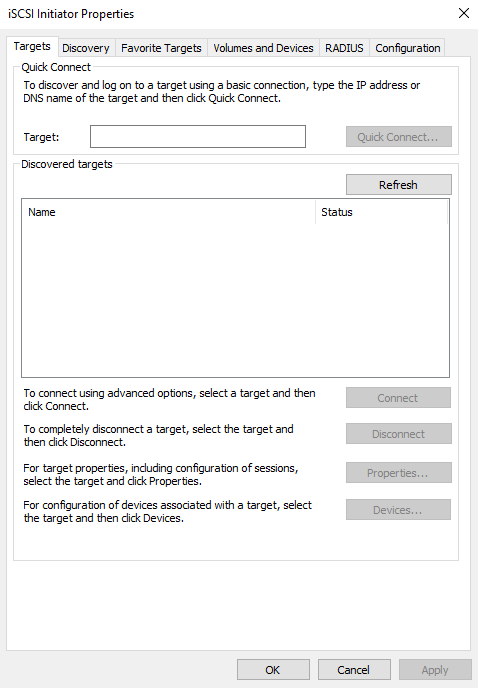
To configure the initiator, open the Server manager -> Click on tools and click on “iSCSI initiator”. A dialog box to configure it opens. Here you can specify the IP Address or DNS Name of the iSCSI target server OR iSCSI target portal. See the following image:
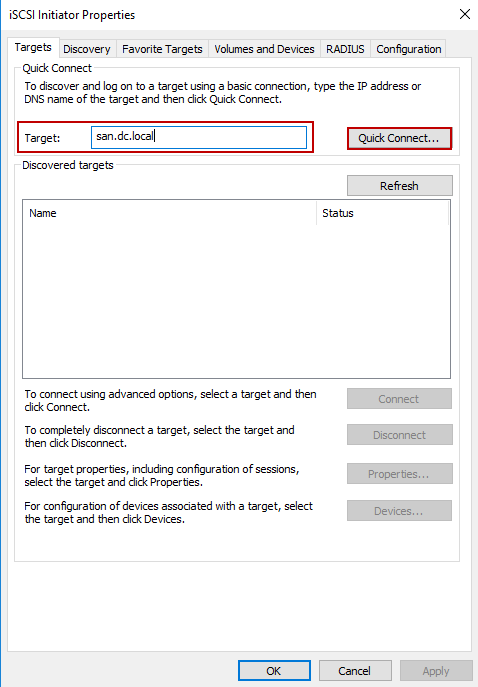
To connect to the iSCSI virtual disk, enter the DNS or IP Address of the iSCSI target server. We have configured the iSCSI target server on “SAN.DC.Local” hence, enter the DNS Name and click on “Quick Connect.” See the following image:
As you can see in the following image, the initiator has been connected to the iSCSI virtual disk.
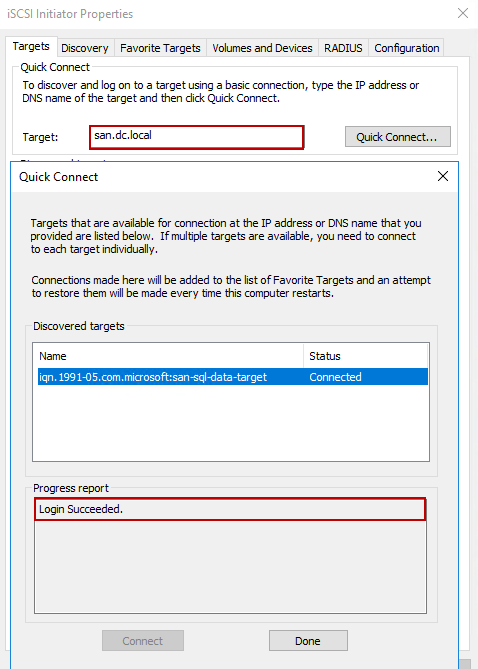
Click on Done to close the dialog box.
Now to use the iSCSI virtual disk, we must initialize it. To do that, open Control Panel -> Open Administrator Tools -> Computer Management ->Click on “Disk management,” which is on the left pan of Computer Management Snap-in. See the following image:
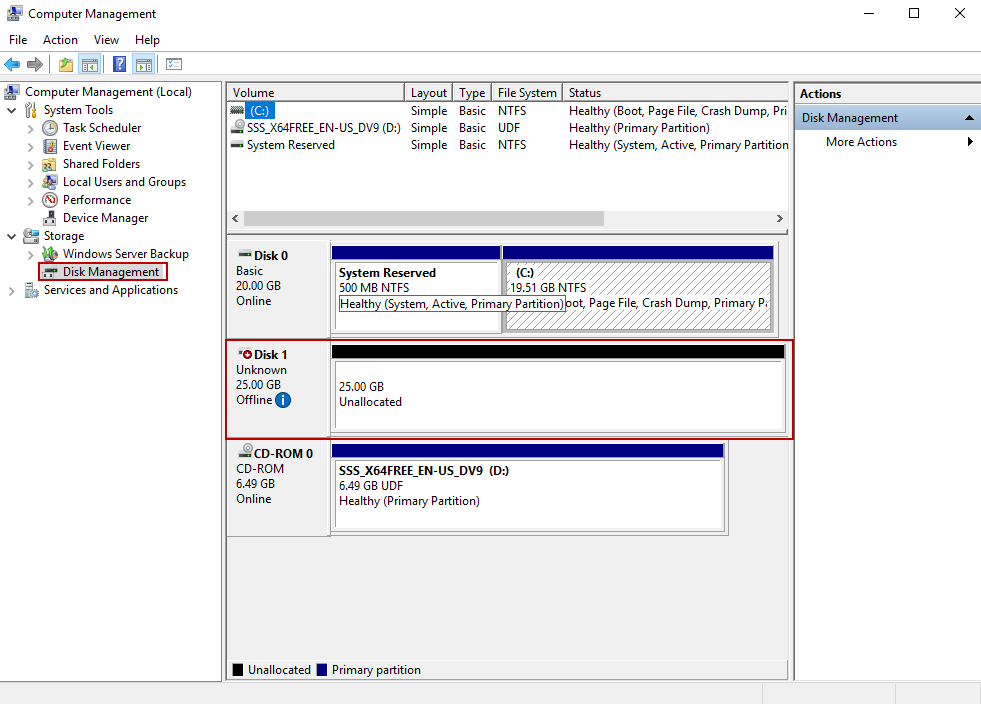
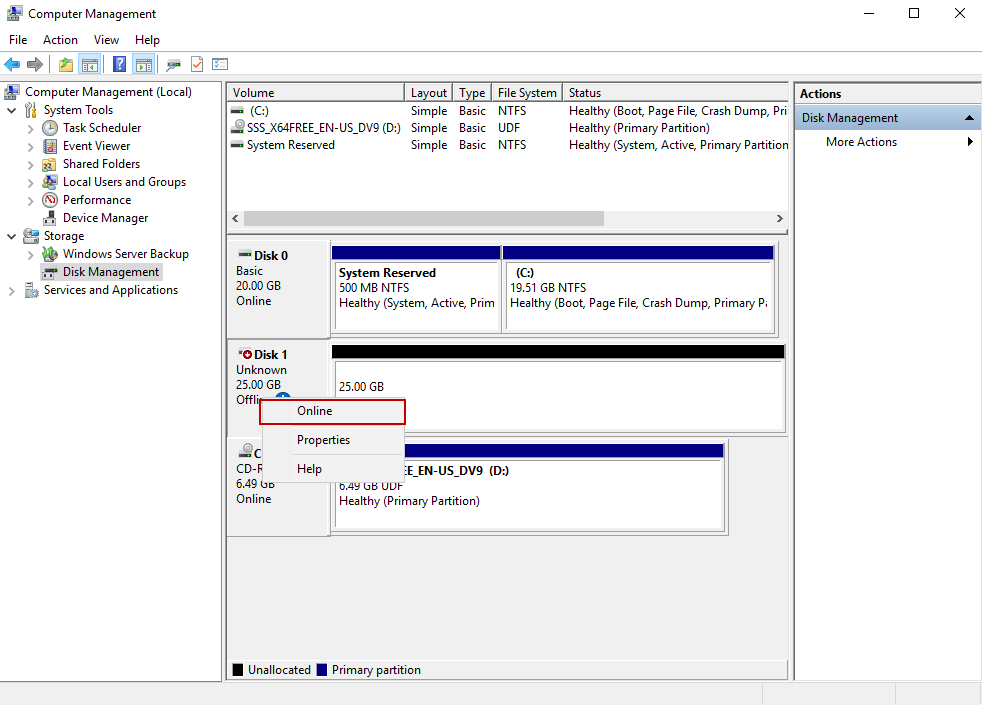
As you can see in the above image, an unallocated partition has been created. To use it first, we must bring it online. To do that, right-click on “Disk 1” and click on Online. See the following image:
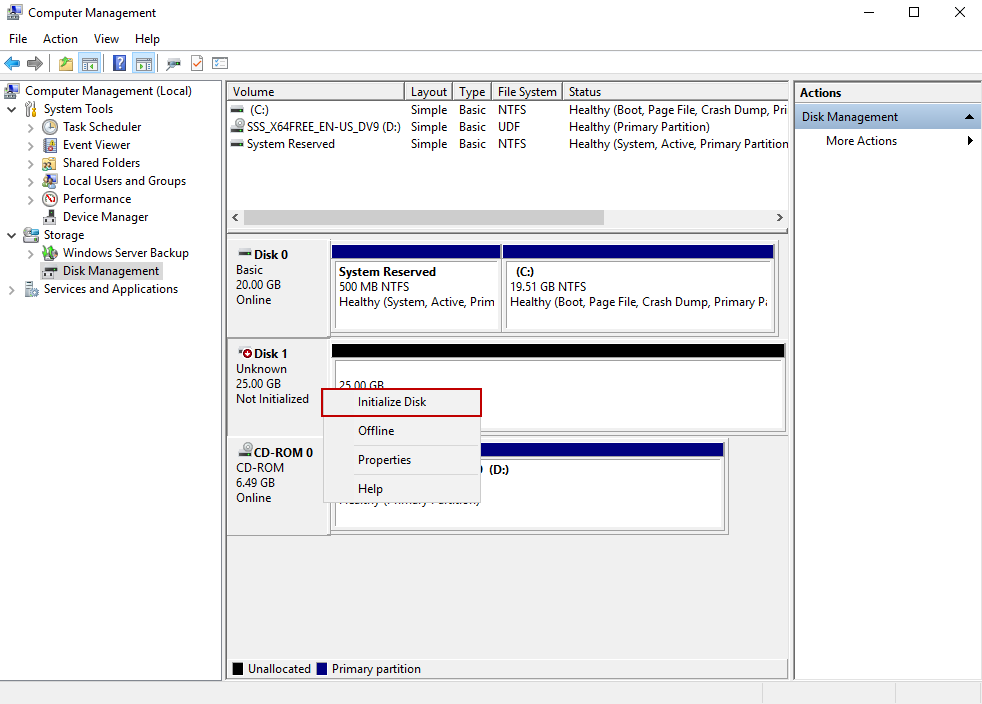
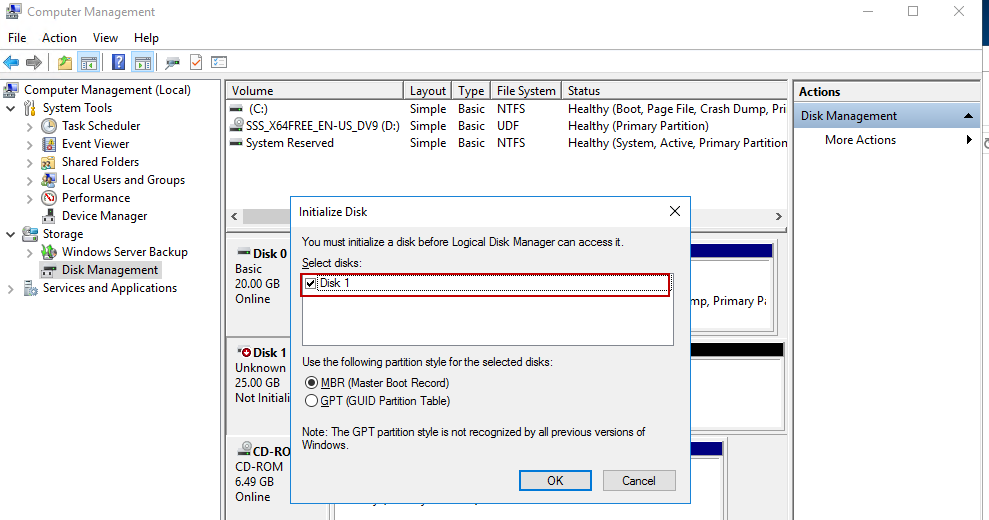
Once the disk is online, we must initialize it so that the logical disk manager can access it. To do that, right-click on “Disk 1” and click on “Initialize disk.” See the following image:
A dialog box “Initialize Disk” opens. Click on OK.
Once the disk is online, let us create a volume. To do that, right-click on “Disk 1” and click on “New Simple Volume.”

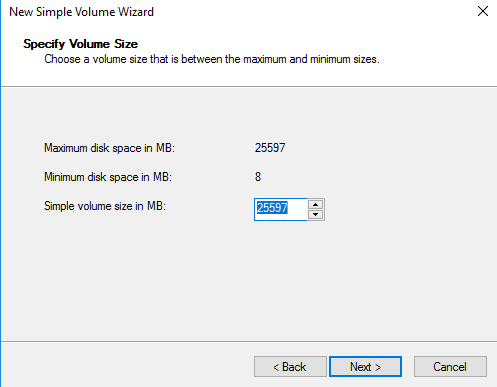
The New Simple Volume Wizard starts. The first screen shows details about the wizard. Click on Next. On Specify Volume Size screen, enter the desired size of the disk in text-box named, “Simple volume size in MB”. Click on Next. See the following image:
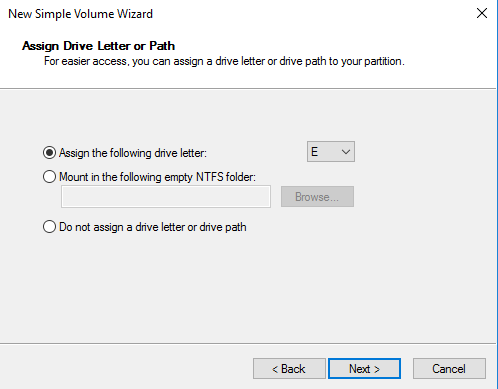
On the Assign Drive Letter or Path screen, you can specify the drive letter. Choose the desired drive letter from “Assign the following drive letter” drop-down box and click on Next. See the following image:
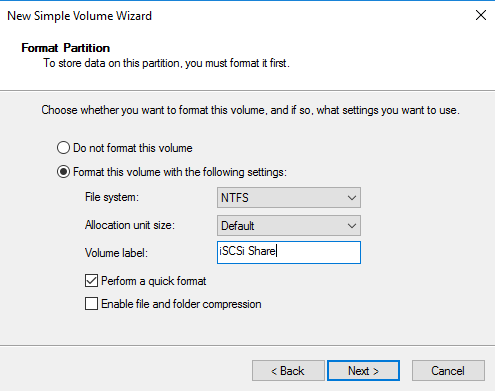
On the Format partition screen, you can specify the File system type, allocation unit size, and volume name. You can choose the FAT32 or NTFS file system type from the “File System” drop-down box. You can choose the size of the allocation unit from the “Allocation unit size” drop-down box and provide the desired volume name in the “Volume Label” text box. If you want to enable the file and folder compression, click on the “Enable file and folder compression” checkbox. Once all settings are configured, click on Next. See the following image:
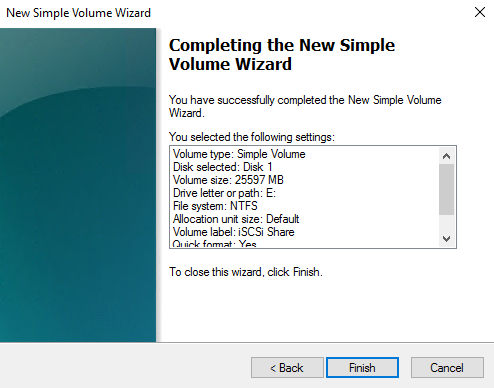
On “Completing the New Simple Volume Wizard”, review all the settings and click on Finish to create a new volume. See the following image
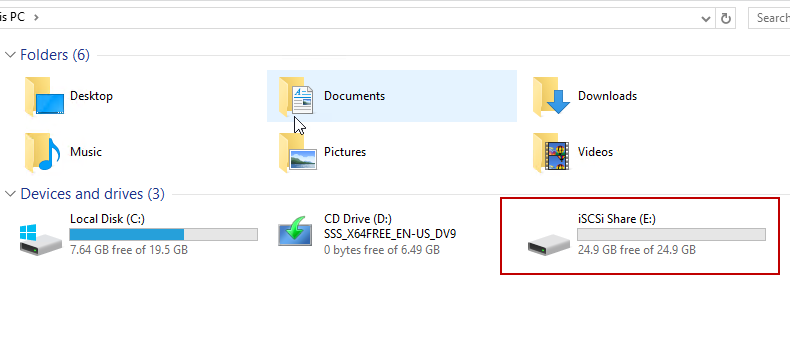
Once the volume has been created, you can access it from windows explorer, as you can see in the following image that the drive “iSCSI Share” has been created successfully.
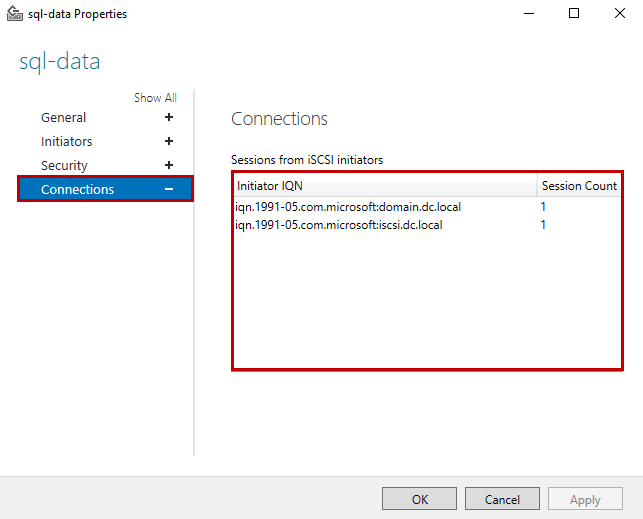
You can view the list of sessions connected to the iSCSI virtual disk using the server manager. To do that, log in to “SAN.DC.Local” and open Server Manager -> Click on “File and Storage Services” -> Click on iSCSI -> In iSCSI target section, you can see that the iSCSI target is connected. If you want more details of it, right-click on it and choose properties. See the following image:

In the properties dialog box, select “initiators” In the list box, you can view the IQN of the initiator and session count by each IQN. See the following image:
Summary
In this article, I have covered the following:
- Enable the iSCSI initiator service and use it to connect to the virtual disk that has been created on SAN.Dc.Local
- How to create an iSCSI volume using the “Create Simple Volume” wizard
- View the list of initiators connected to the iSCSI virtual disk

He has expertise in database design, performance tuning, backup and recovery, HA and DR setup, database migrations and upgrades. He has completed the B.Tech from Ganpat University. He can be reached on nisargupadhyay87@outlook.com
- Different ways to identify and change compatibility levels in SQL Server - July 22, 2024
- Copy SQL Databases between Windows 10 and CentOS using SQL Server data tools - October 19, 2022
- Changing the location of FILESTREAM data files in SQL Database - October 14, 2022