
Introduction
In this article we are going to show how to get started with the Azure SQL Database auditing using specific auditing techniques to configure audit specification and reconstruct audit data trail. Companies nowadays choose to migrate to the Azure cloud platform due to multiple reasons like:
- Simplifying IT infrastructure
- Reduce infrastructure costs
- Disaster recovery and high-availability programs
- Security, and more
Regardless of the choice on entirely migrating to the cloud, or aiming to have a hybrid IT infrastructure, retaining the procedures to meet compliance requirements is an important consideration in the migration process.
As a database professional, the most important obligation is to protect the data you operate, and as many regulation frameworks require, tracking who access and modify data as a core data protection aspect is a must.
Enable Azure SQL Database auditing
In general, auditing helps to comply with regulatory requirements, understand the database activities, and identify anomalies or security violations that can negatively affect organizations. Data auditing trail in Azure can be logged in Storage accounts, Log Analytics, or Event Hubs, and this article is about touching base on collecting audit data into storage accounts using Blob auditing.
To write this article, we have used a sample SQL database instance named “AuditTest”, located in the US East region. To quickly start with a fresh instance on your own and follow the steps from this guide, you can create a new instance as explained in this Create an Azure SQL Database article.
Audit specifications can be defined on both levels, SQL Server, or database instance while both exist side by side. When specifying a server-level audit policy, the same policy is applied for all existing and newly created databases.
In other words, when database audit policy is specified on top of the server audit specification, the database will be audited twice, once per each audit specification – which is a crucial implication to understand especially for highly transactional databases and when doubling the amount of audit data can rapidly grow in size.
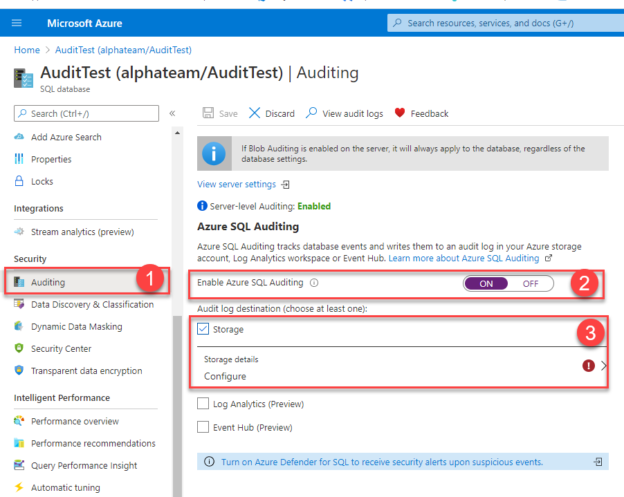
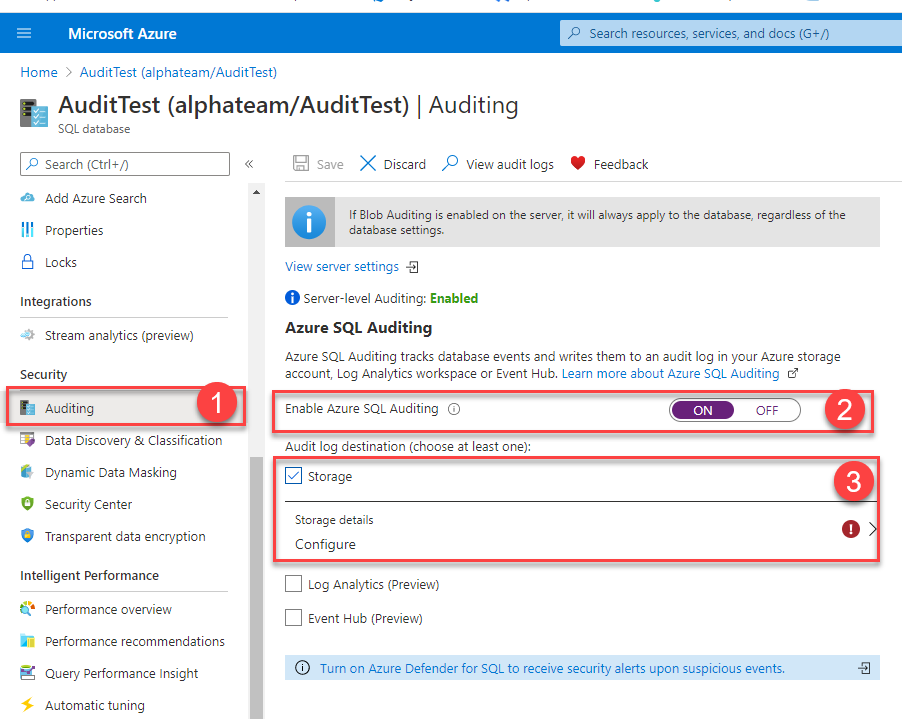
Auditing specification can be enabled and determined via the Azure portal or PowerShell, here is how to enable Azure SQL Database auditing using Blob storage via Azure portal:
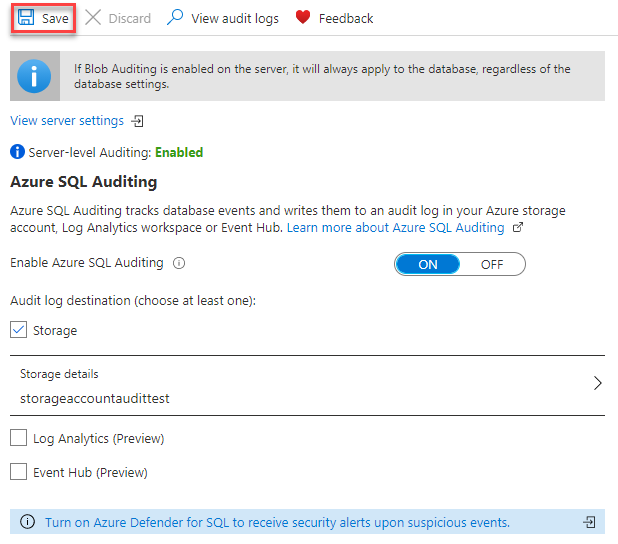
- Navigate to Auditing inside the Security heading on the SQL database navigation pane
- Switch the Auditing to “ON”
- Tickle the Storage for the audit log destination
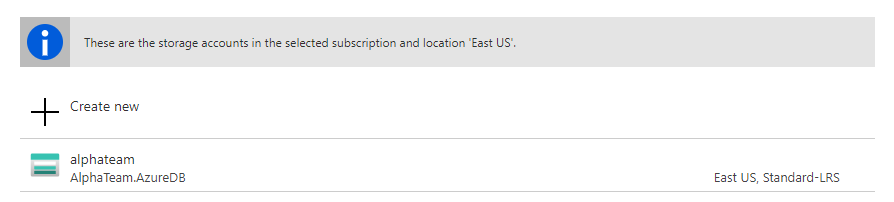
To enable writing to a storage account, the one has to be configured first. Storage accounts are containers used to store Azure Storage objects, including blobs, files, tables, etc, for the auditing needs, general-purpose standard storage accounts will support storing audit data trail, to learn more about storage accounts, please visit this Storage account overview article.
From this configuration step, you can easily associate Azure SQL Database auditing to an already existing or create a completely new storage account to collect audit data trail for the database audit specification.
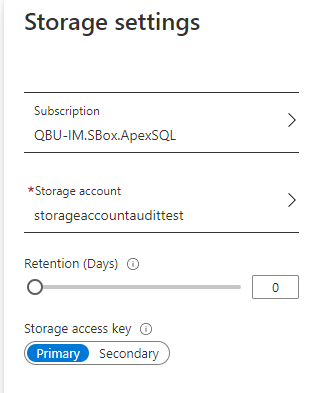
Creating a new storage account is quickly performed and requires a unique name for the input. By default settings, when the storage account is created, the retention data policy is set to 0, which is an indicator for unlimited retention, in other words, the audit data trail will be saved inside the storage container until it gets deleted on demand. However, the retention data can be set to a custom value and delete data older than the specified time value, up to 3285 days.
After the storage account is configured to collect auditing data, the Azure SQL Database auditing commence as soon as the Save changes are committed in the header control options.
With this approach, audited data is streamed in the flat-file format inside the storage container that is automatically generated when the auditing is enabled. The data is written in the auditing session files, in this case, files with the .xel extension that are associated with the Extended Events auditing mechanism. Later in this guide, we will introduce how to get into the context of audit session files to review the Azure SQL Database auditing trail.

In this configuration process, we’ve identified that there is no indicator of what exact operations being audited on the Azure SQL Database instance. So what’s being audited when auditing is enabled this way? The short answer would be – everything. By default, the following auditing action groups are specified in the audit policy:
- “BATCH_COMPLETED_GROUP”
- “SUCCESSFUL_DATABASE_AUTHENTICATION_GROUP”
- “FAILED_DATABASE_AUTHENTICATION_GROUP
This combination of audit action groups covers all queries and store procedure calls against the database also as successful and failed login events, meaning that all SQL Server operations are audited via these three groups.
Manage Azure SQL Database auditing specification using Azure cmdlets
Azure SQL database auditing specification can be modified to achieve better auditing precision and tighter auditing scope, which is a win-win scenario considering the amount of data being generated can rapidly grow in size and make it harder to review audit data logs. The auditing specification can be controlled by interacting with Azure via PowerShell, and in case you need the quick-start reference, we recommend visiting this guide on Getting started with Azure CLI.
Microsoft has recently introduced the new Azure PowerShell module, referenced as the Az PowerShell module, with improved stability, cross-platform support, and shorter commands library, and we will use it to check and update the Azure SQL Database auditing specification in this guide.
To validate the specification details, you can use the Get-AzSqlDatabaseAudit PowerShell command and pass the Resource group, SQL Server, and Database name to determine the database instance of choice:

Using alike CLI command, Set-AzSqlDatabaseAudit we passed the Resource group, SQL Server and Database name, Audit Action, and Audit Group to update the current auditing specification:

As a result, we have configured auditing to collect a specific set of SQL operations against a specific object, in this case, SELECT operation on employee table by dbo principal, also as a failed database authentication group.
Adjusting database auditing policy is a valuable consideration, although it’s structure is dependent on regulatory requirements and security needs, it is recommended to narrow down the auditing scope and keep the relevant audit information only so the review process runs smoother.
Review audit data trail
Preparing for the audit regular review process regularly refers to documenting audit data trail and have it accessible for both internal and external auditors. There are several ways to get into the context of audited data when opting to store audit logs into the Blob storage. Let us examine how to view audit data via:
Azure portal
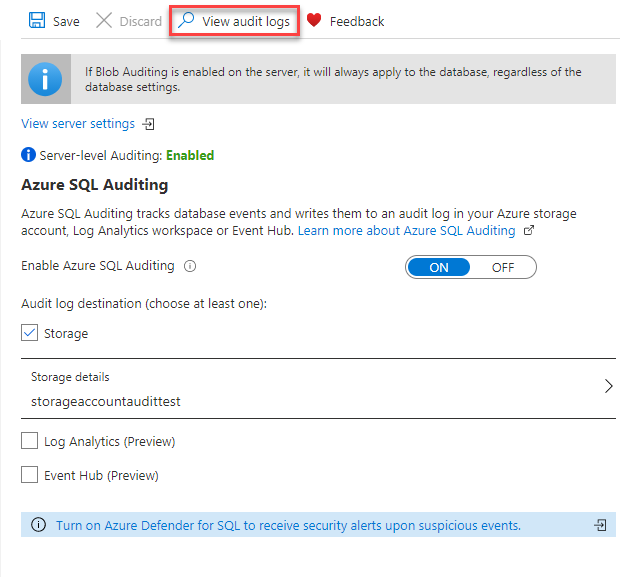
Open the SQL Database instance Auditing page and into the header controls opt to View audit logs:
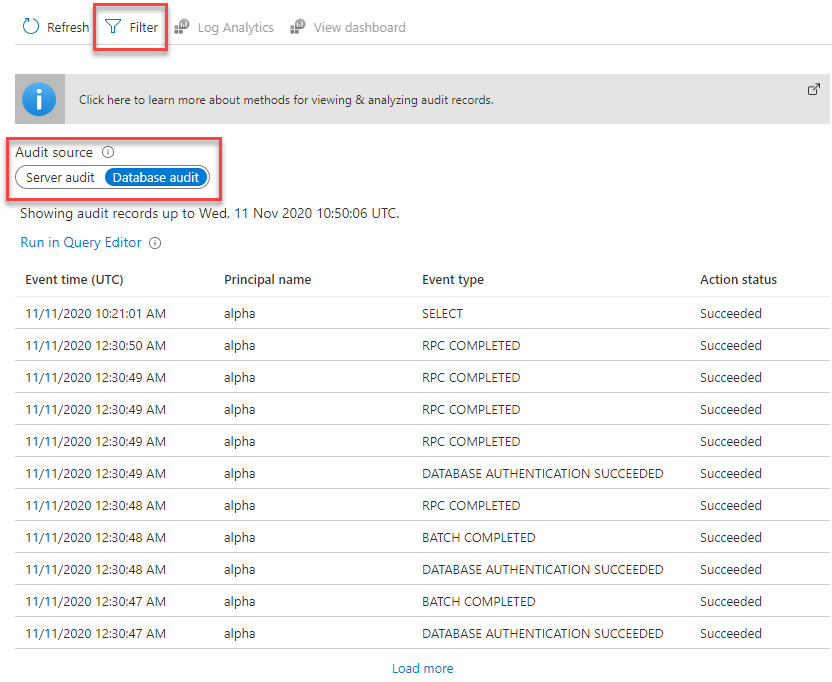
The new page with Audit logs will list the relevant audit records that are generated per the specified Azure SQL Database auditing policy. The data output can show trail from either server or database auditing specification, and filter data per customized time frame:
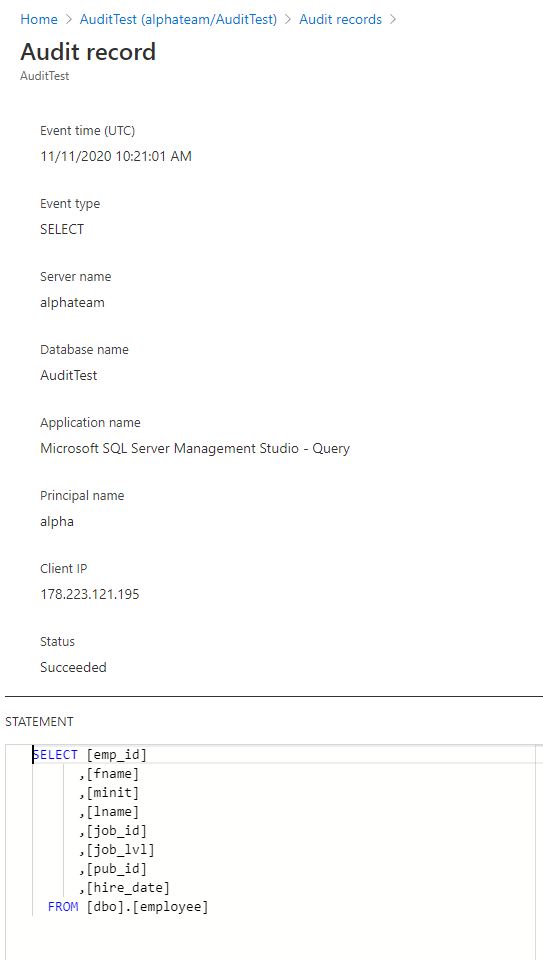
Each audit record shows detailed information on a record page such as event time, event type, server name, database name, application name, principal name, client IP, event status, and query statement:
Merge audit files in SQL Server Management Studio
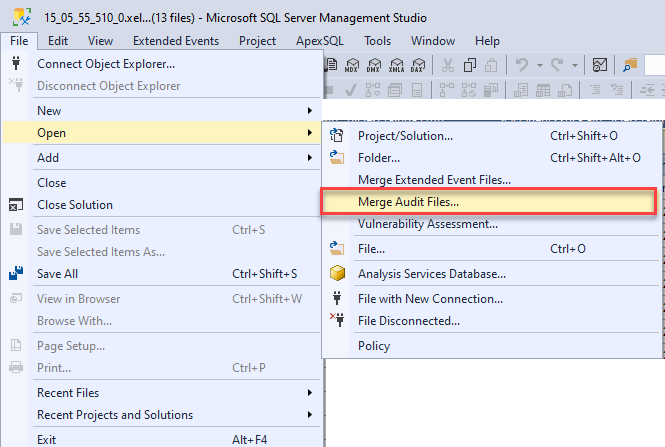
Run SQL Server Management Studio and from the menu choose File -> Open -> Merge Audit Files:
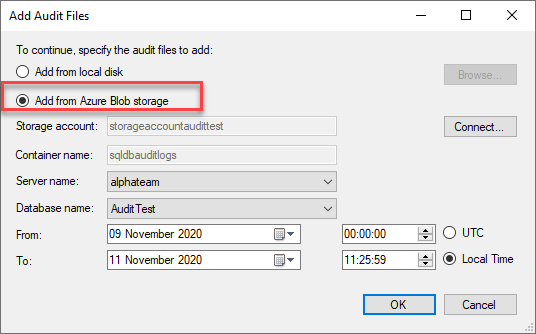
The next step will require to define the path from which we will be merging audit files, apart from the local disk option, we can opt to merge audit files directly from the Blob storage:
After the files are added from the Azure Blob storage, by clicking OK the merge operation completes and provide the audit data trail information on the new page:
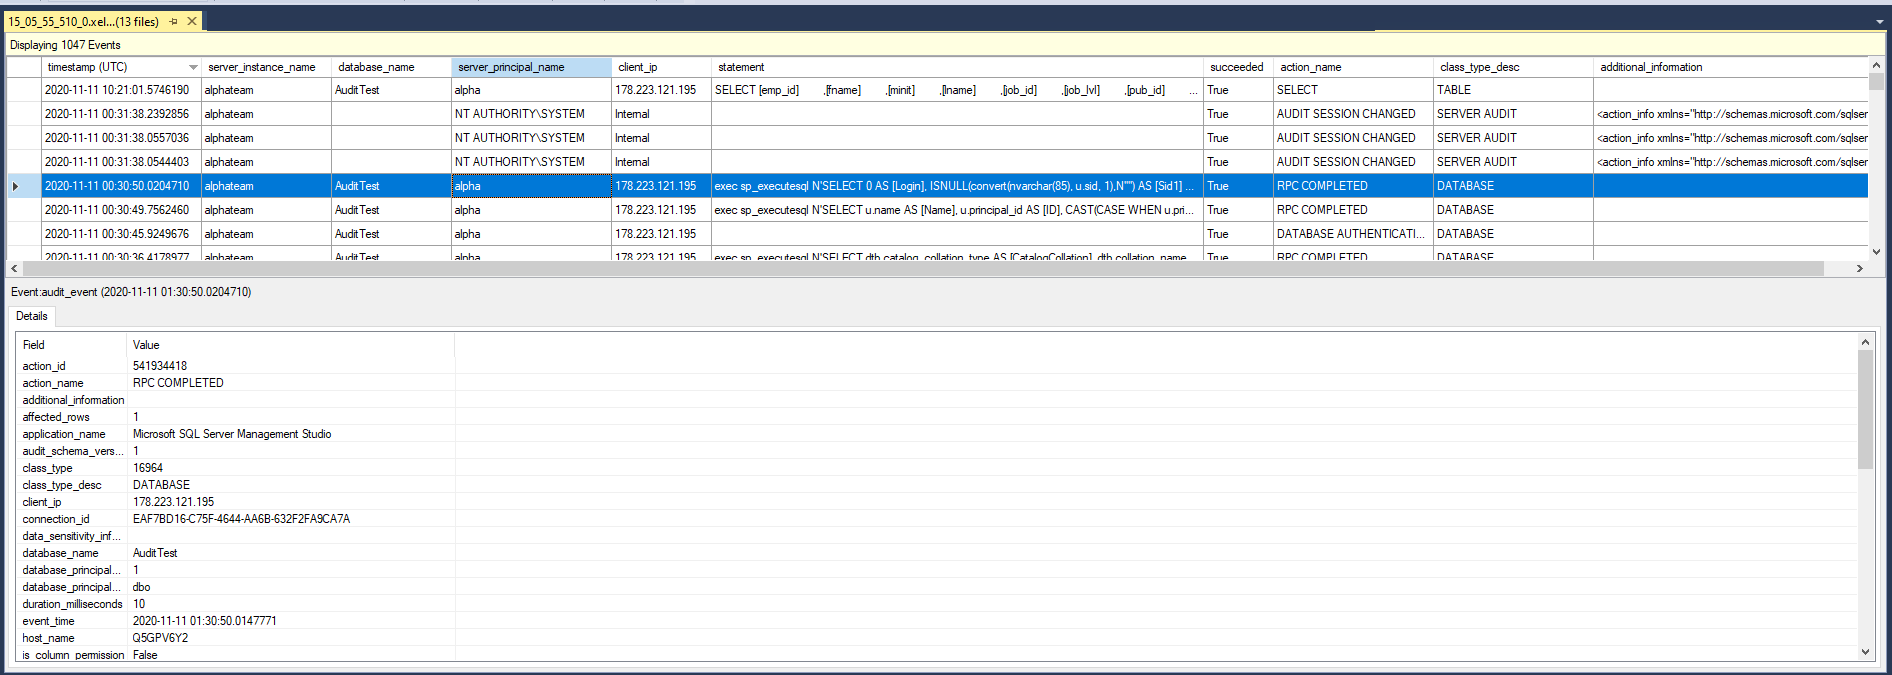
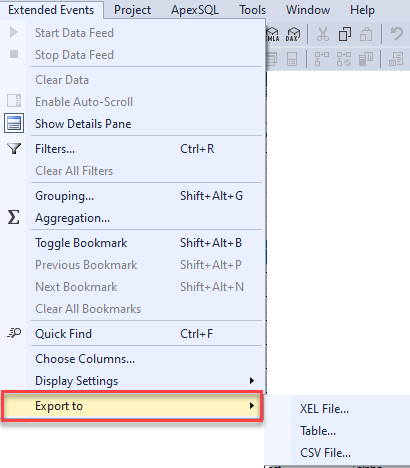
In the data overview above, each record list available audit information, and as such, it can be further exported to Excel, CSV, or table for further keeping and documenting. To export the data, choose Extended Events -> Export to:
Summary
In this article, we’ve shown how to easily get started and configure basic specifications for Azure SQL Database auditing using Blob storage, manage and update auditing policy using cmdlets, and ways of getting in touch with the audit data trail. Enabling, configuring, and disabling auditing can work equally for both Azure portal and PowerShell. Reviewing audit data is made easy via both Azure portal and using merge audit files options, however, the actual data changes are not logged.
Considering the fact that compliance regulations might require actual data changes and more specific data logging, the next steps to considers are understanding the available audit actions and audit groups and using available techniques to capture data changes.

As a young father of two, the spare time mostly spends with his family. He is a passionate and competitive gamer and basketball hobbyist.
View all posts by Rejhan Kuc
- How to track data changes on Azure SQL Database - December 21, 2020
- Getting started with Azure SQL Database auditing using Blob storage - November 16, 2020