This is the last article, but not least, in the SQL Server Audit series. In this series (see TOC at the bottom), we explained deeply the concept of the SQL Server Audit, why it becomes mandatory for each company to have a SQL Server Audit solution to track and log the different types of events at both the SQL Server instance and database levels. We also went through and compare the different methods that can be used to audit the SQL Server instances and databases.
In this article, we will discuss how to easily audit your SQL Server instances and databases using ApexSQL Audit tool. ApexSQL Audit is a SQL Server audit tool that uses extended events and profiler traces, depending on the SQL Server version to track and log audit changes
ApexSQL Audit Overview
SQL Server provides us with a number of features, that can be used to audit the different aspects of the SQL Server instance. Some of these features allow us to audit specific events at the database level and other methods allow us to audit events at both the SQL Server instance and the database levels. But as discussed deeply in the previous articles of this series, each one of these methods has specific limitations, that makes it harder to consider it as a complete SQL Server Audit solution.
ApexSQL Audit is a comprehensive SQL Server Audit solution that can be used to track and log the different types of actions performed at both the SQL Server instance and the database levels, in a way that overcomes all the limitations of the other features.
ApexSQL Audit can be easily installed to your server and automatically deployed to all machines that will be audited without the need for any manual installation from the user side. After installing it, ApexSQL Audit provides us with the ability to use the existing auditing templates to make sure that all your SQL Server instances and database meet these compliance standards. You can also customize the existing templates to meet your company requirements or simply create your own template and apply it to your SQL Servers and databases with a single click.

With a large number of customizable filters, ApexSQL Audit allows you to track only what you want to audit at the deepest possible level. You can track the actions performed by a specific SQL Server login on a specific database object from a specific host while running a specific application. Again, all these configurations can be performed in a minute, as we will see later in this article. You can track each user from the time he logged in to the SQL Server instance till he finished and logged out from the system, with the ability to audit the data changes from the insert, update and delete operations and compare the values changing.
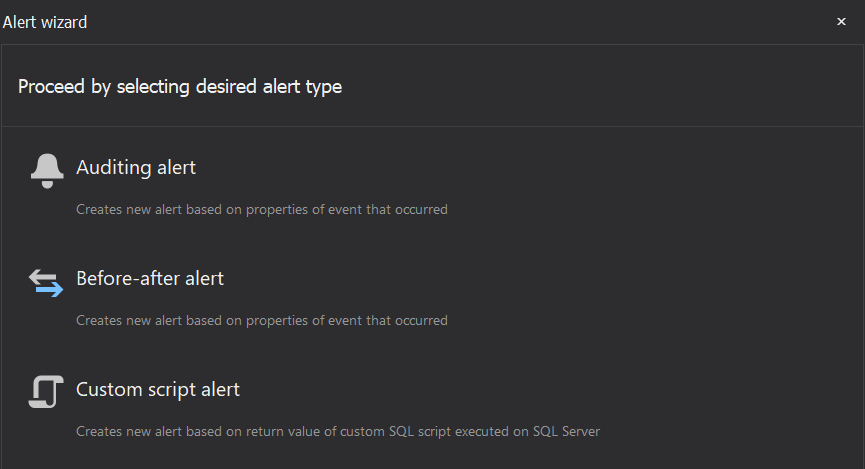
In order to review the captured information, ApexSQL Audit provides you with a library of built-in reports that you can run or create your own custom reports from these existing reports, with the ability to schedule these reports based on your requirements. All these auditing and reporting operations will be performed with the minimal impact on performance on the audited SQL Server instances and on the central repository server. You can also get notified, in real time, using existing alerts or your own custom alters, when an important event occurs on the audited SQL Servers, with the ability to log these alerts to the windows event log or send it via email.
- Note: Check ApexSQL Audit main features overview for more information.
ApexSQL Audit Installation
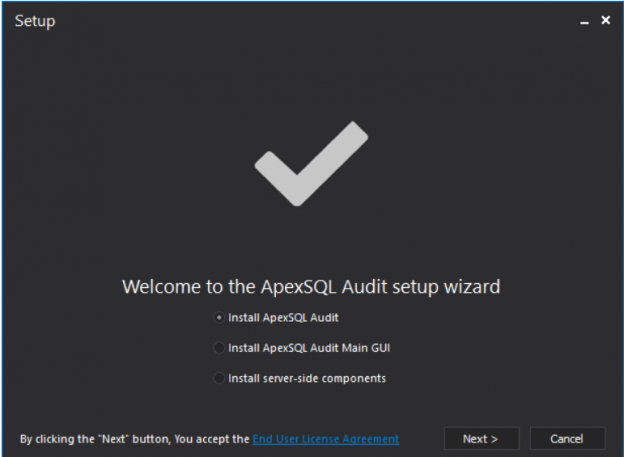
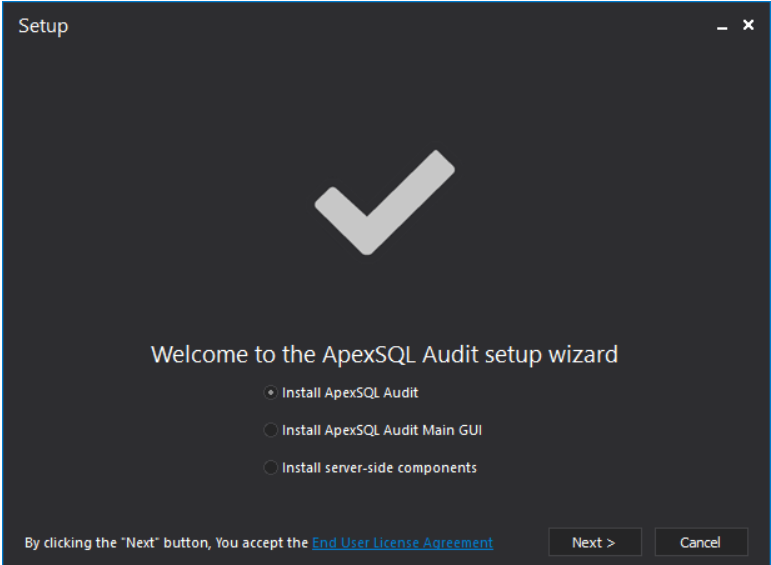
Before installing ApexSQL Audit to your server, you need to download it from the ApexSQL Download Center then run the installation media file on the server with administrator permissions. When the installation wizard initiated, you will be requested to choose from three main options:
- ApexSQL Audit Main Application: that includes installing both the GUI and the Central repository database for SQL Server Audit purposes
- ApexSQL Audit Main GUI: that is used to configure SQL Server instances auditing with the different auditing filters, create new alerts and manage existing ones, create and schedule reports, checking the auditing instances status information, and performing the different maintenance tasks
- Server-side Components: A Windows service that allows auditing of SQL Server instances remotely via the ApexSQL Audit main application. See how to Audit remote instance
Choosing to install the first option, you will be prompted to specify where the central repository database will be hosted, administrative username and password to connect to the selected SQL Server instance and a temporary files location for the repository files, as shown below:
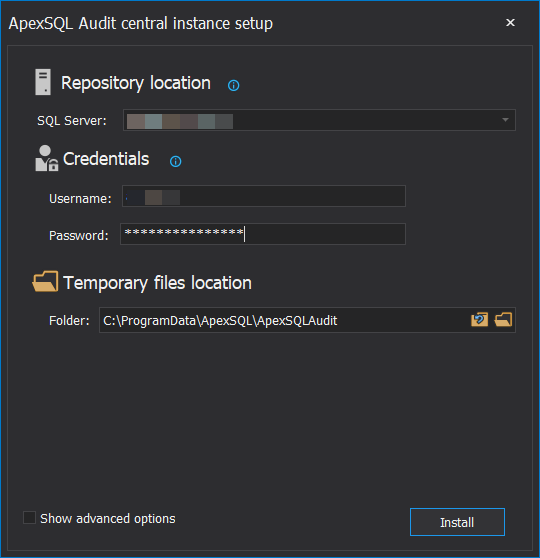
The central repository database is used by ApexSQL Audit to keep all configuration information and audited data for all audited SQL Server instances, both local and remote, with the ability to archive the repository database at any point, by creating an archived database to be used also as data source for the reports, to preserve the disk space or for safe keeping. For security purposes, the SQL Server Audit repository database will be protected using a tamper-evident design that provides complete insight into any potential tampering with both configuration and auditing information stored in that database.
- Note: Check the ApexSQL Audit installation terms, definitions, and network topography for more information.
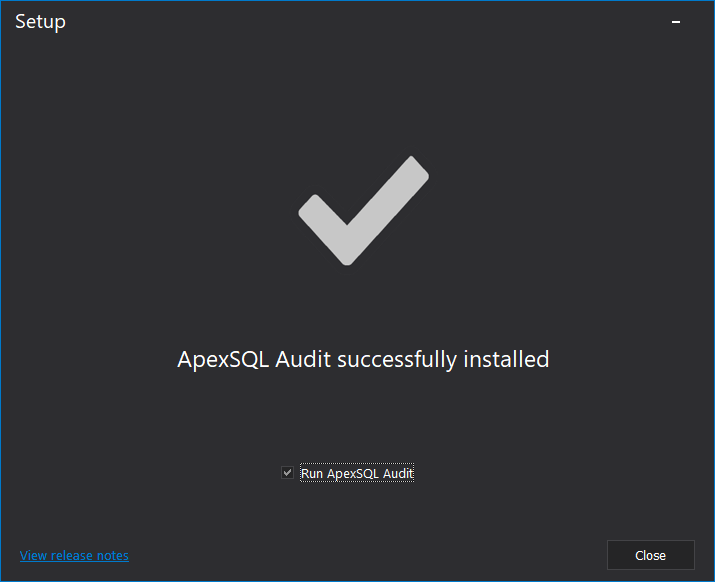
After completing the installation process successfully, ApexSQL Audit installation wizard will notify you and provide you with an option to run the tool directly, as shown below:
Add New Server
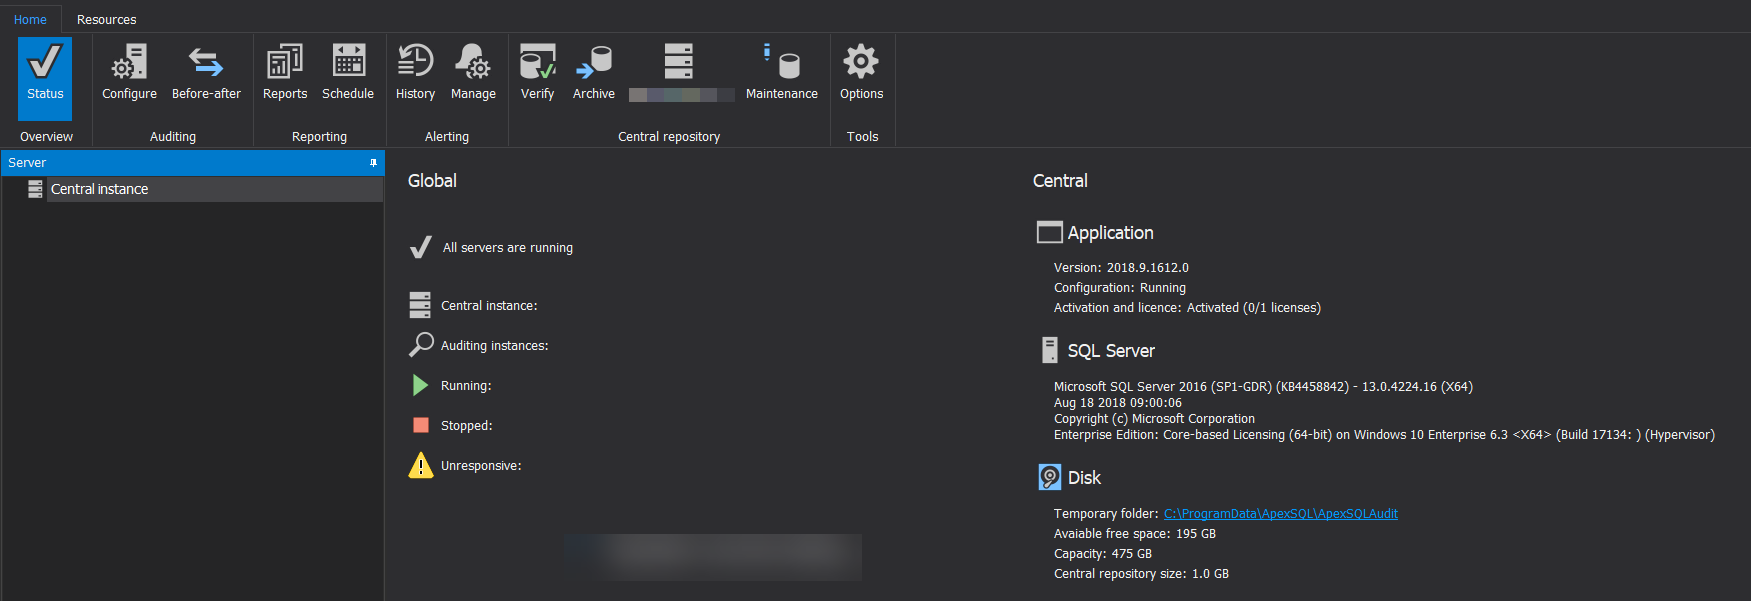
The first window that will be shown when you run ApexSQL Audit is the Status page, that summarizes the general status for the ApexSQL Audit components and the server where these components installed:
In order to track the SQL Server Audit actions that are performed on a specific SQL Server instance, the required ApexSQL Audit components should be installed to that server. To install the ApexSQL Audit components on the SQL Server to be audited, click on the Configure button under the Home functions menu, as shown below:

From the Server Explorer, click on the Add Server button and provide the name of the SQL Server instance, as below:
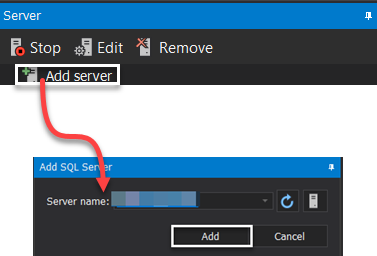
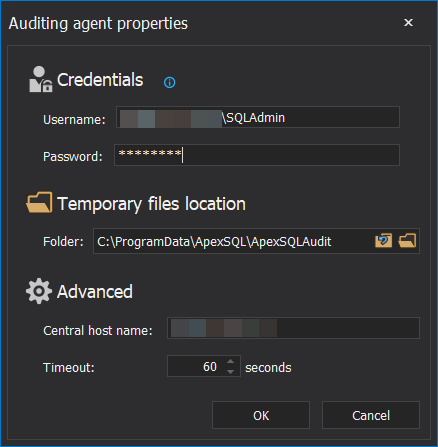
When clicking on the Add button, you will be asked to provide administrator credentials to connect to the SQL Server instance to be tracked and install all required components. You will be also asked to specify the location for the ApexSQL Audit temporary files and the timeout settings when connecting to the SQL Server instance, as shown below:
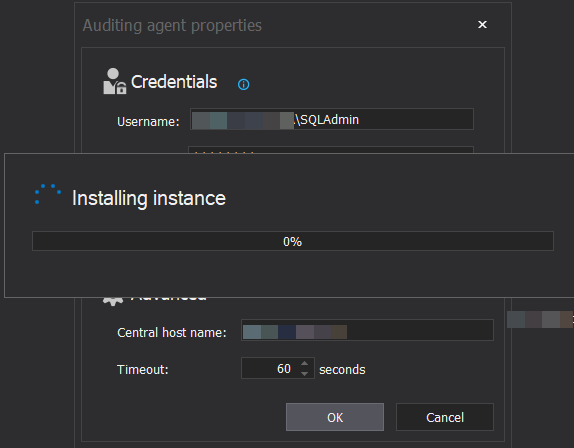
If the provided credentials and information are valid, the ApexSQL Audit agent components will be installed to the added SQL Server, with a progress bar showing the agent installation status, as follows:
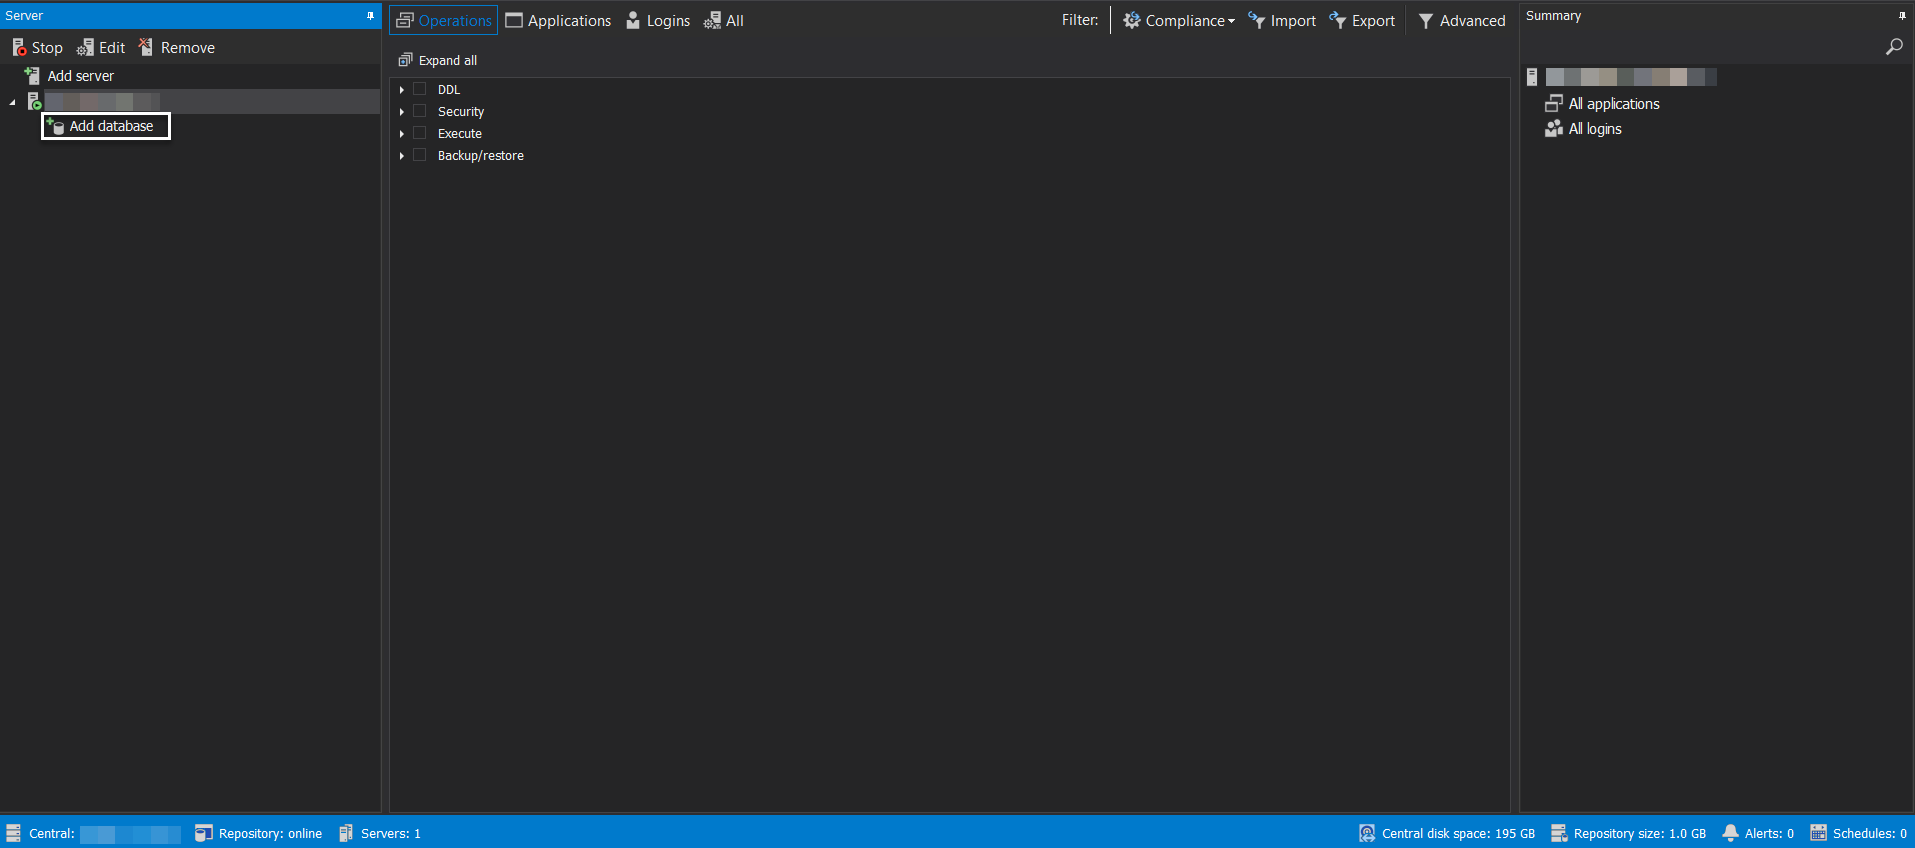
Once the ApexSQL Audit agent components installed successfully to the SQL Server, the server name will be shown in the SQL Server instances list under the Server Explorer, as below:
Add Databases
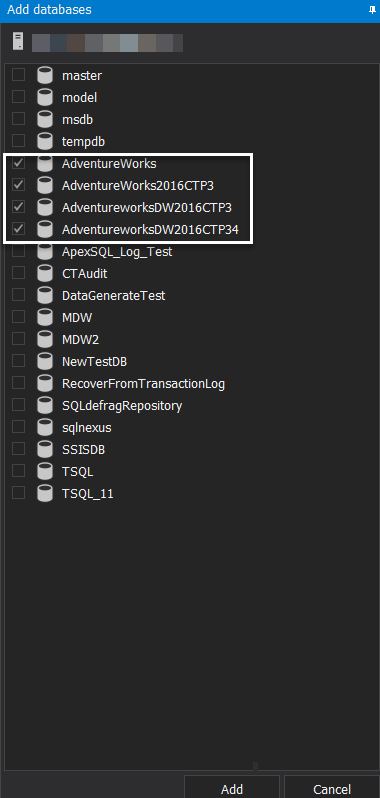
After adding a new SQL Server instance, an option to add databases for auditing purposes under that server will be displayed. If you click on the Add Database option under the Server Explorer, a list of all databases available under the selected instance will be displayed. Select the databases that you plan to perform a SQL Server Audit on it then click on the Add button, as shown below:
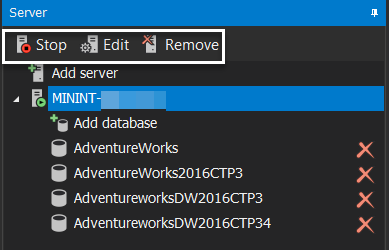
And the selected databases will be shown as a list under the SQL Server name, with the ability to add more databases or remove the database from the same Server explorer. You can also stop auditing the selected SQL Server, edit the SQL Server information or completely remove that SQL Server from the audit list, as shown below:
Audit SQL Server Instance Level Actions
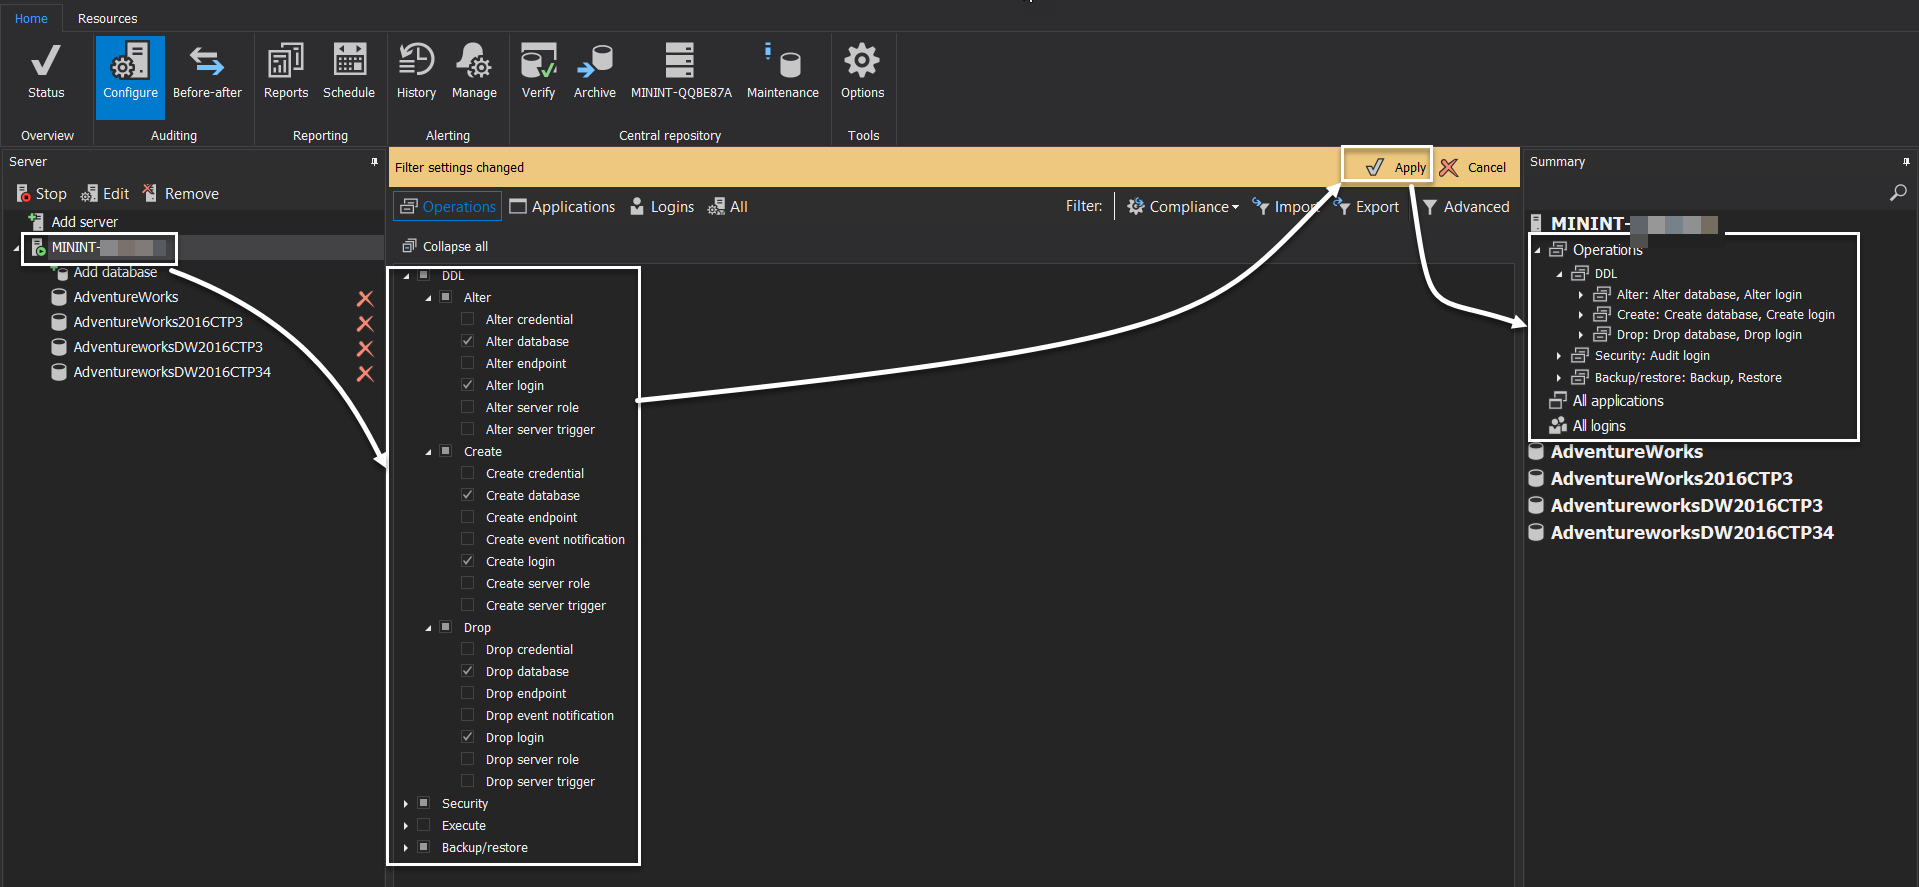
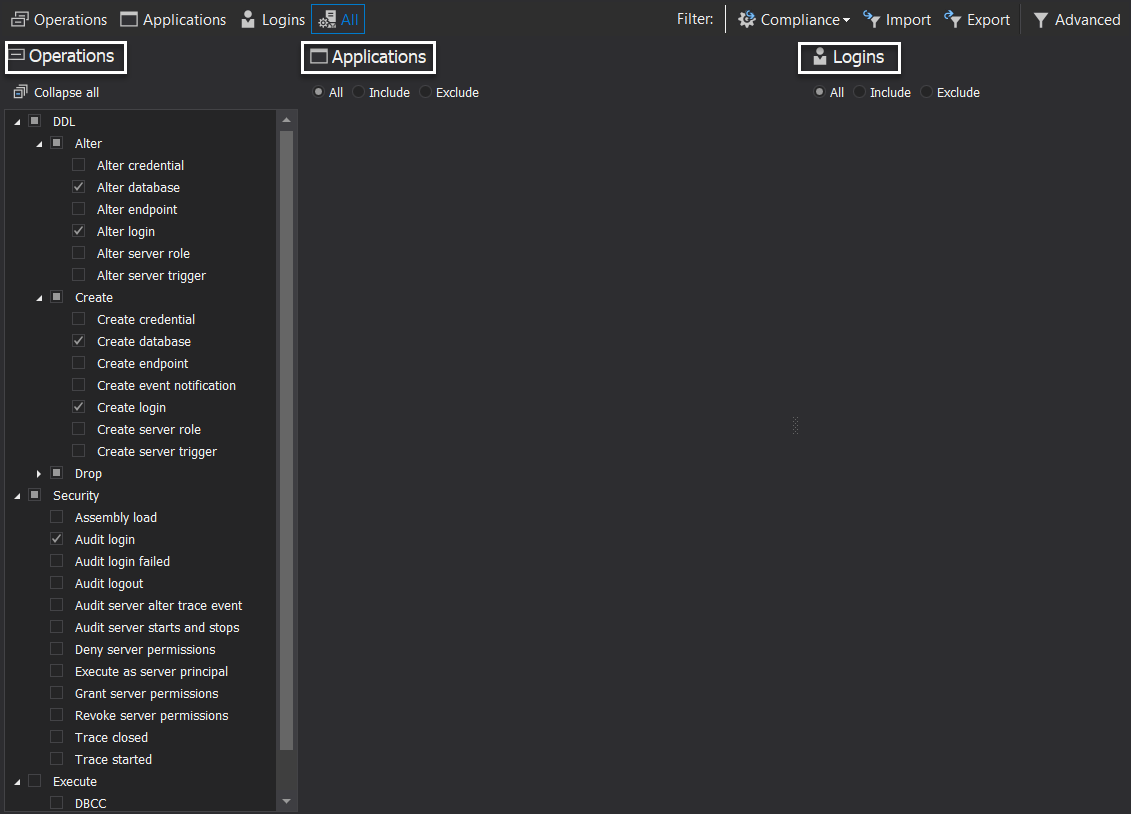
ApexSQL Audit provides us with a wide range of actions that can be tracked at the SQL Server instance level. To achieve that, select the SQL Server that you manage to audit, click on the Configure button, under the Home menu, and a list of all types of server-level actions will be displayed. You need to select the group of actions that you are interested to audit and optionally the list of applications and logins to be audited. After customizing your SQL Server Audit solution, click on the Apply button to save these changes then review the selected SQL Server Audit actions in the action’s summary window, as shown below:
To check if there are actioned captured by the ApexSQL Audit from that server, go back to the Status window and you will see the number of actions that are performed and captured on the selected SQL Server instance, under the Operations Overview below:
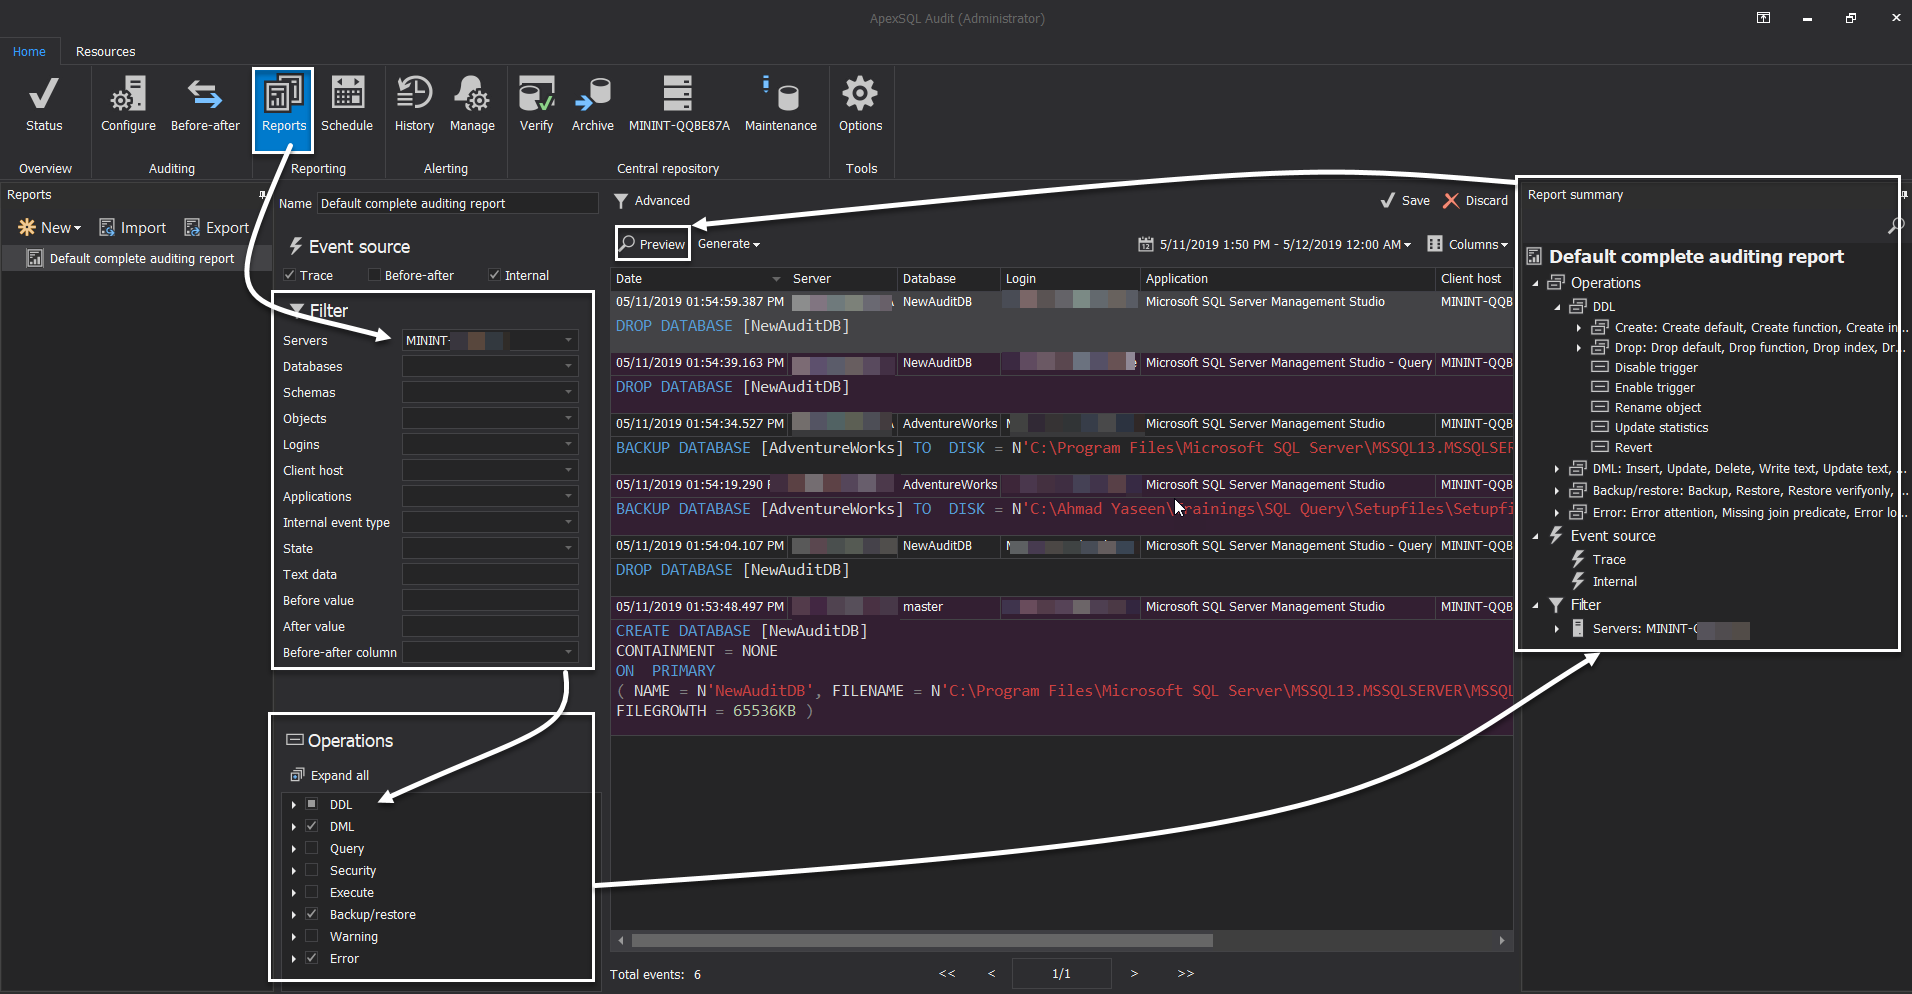
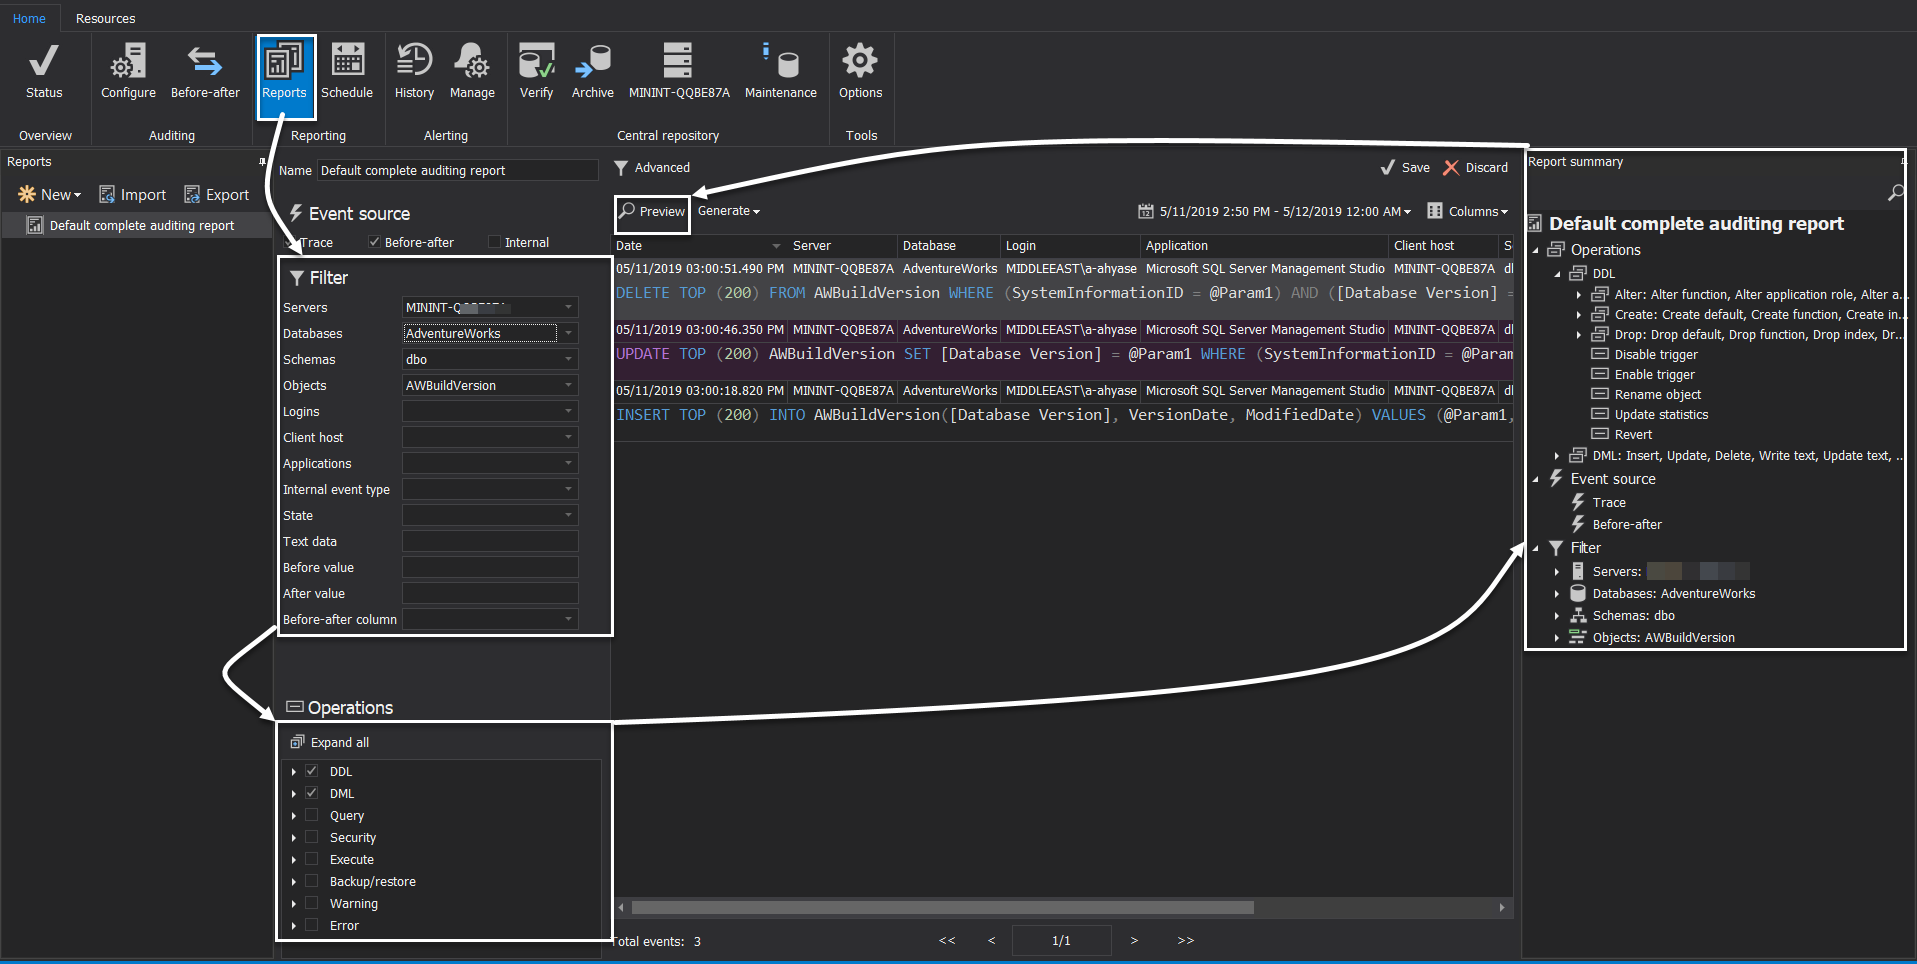
To review the captured actions, click on the Reports button, under the Home menu. From the displayed report configuration window, draw your report by specifying the source, criteria and types of the captured information that you are interested in, includes, the source server, database, login, action type…etc, with the ability to specify the list of columns that you need to view and the time range for that report as below:
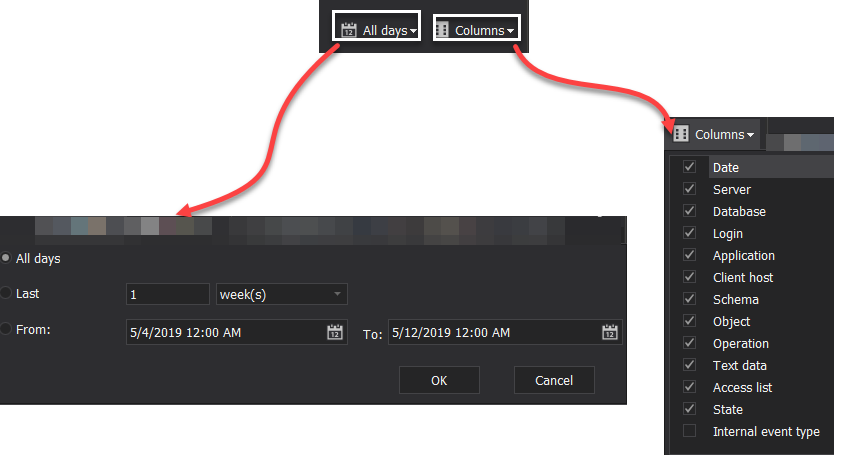
After drawing your criteria, review your SQL Server Audit filter selections from the Report Summary window then click Preview button to display the capture information, based on your filtration or Save button to keep the selected criteria for future use:
Audit SQL Server Database Level Actions
ApexSQL Audit provides us also with a wide range of actions that can be tracked and audited at the SQL Server database level. To audit a specific SQL Server database, choose that database from the databases list under the Server Explorer, click on the Configure button, select the group of actions that you are interested in auditing, includes DML, DDL, Execute and SELECT operations, review your choices in the Summary section then click on the Apply button to save the changes, as shown below:
You can also expand your selection by specifying the group of SQL Server Audit actions to be audited per each table. Select your database, click on the All button, then under the Objects section, click Include to specify the list of tables to audit or Exclude to specify the list of tables not to audit. After specifying the tables list, review the choices under the Summary section then click on the Apply button to save your changes, as below:
To review the actions that are captured by ApexSQL Audit based on the configured Audit criteria, click on the Reports button, under the Home menu. From the displayed report configuration window, configure your report by specifying the criteria of the captured information that you are interested to display, includes, the source server, database, login, action type…etc, with the ability to specify the list of columns that you need to view and the time range for that report. After configuring the report selection, review your choices under the Report Summary section then click Preview to display the data or Save to keep the report for future use, as shown below:
Export Audit Result
ApexSQL Audit allows us also to export the audit data to different files formats, including PDF, Word, Excel and CSV formats. To achieve that, configure a new report or open an existing report then click on the Generate button and choose from the available files’ formats. In a few seconds, you will see that the generated file will be saved automatically to the ApexSQL Audit folder, and a link to open that file directly will be provided, as shown below:
We reached the last article in the SQL Server Audit series. Hope you enjoyed it. Stay tuned for my next articles series ?
Table of contents
- Azure Data Factory Interview Questions and Answers - February 11, 2021
- How to monitor Azure Data Factory - January 15, 2021
- Using Source Control in Azure Data Factory - January 12, 2021

