
In this article, we will learn how to use the ERD Project feature of pgAdmin to work with an instance of Azure Database for PostgreSQL for data modeling.
Introduction
Data modeling is the process of figuring out the organization of entities and the relationships between those entities. Functional subject matter experts first identify the business entities that make up the ecosystem within the scope of business being considered, for which the database is expected to host data. Then the relationship between these entities is identified. When this detail is represented in any form, it becomes a conceptual data model. This is the first phase in the data modeling process. The next phase is the modeling process is creating the logical data model where data attributes and related details like normalization, cardinality, etc. are figured out. Arguably, the entire conceptual and logical model can be represented in the form of a diagram which is famously known as the Entity-Relationship Diagram a.k.a., ERD. There are many industry-leading tools available commercially for ER modeling. Azure offers Azure Database for PostgreSQL service as its offering for hosting PostgreSQL database on Azure cloud, and pgAdmin is one of the most popular tools used for working with Postgres database. It offers many other tools and utilities as a part of its suite of tools. One of the tools offered by pgAdmin is to create ERD projects which facilitate the creation of logical data models in the ER diagram fashion. While it’s not as sophisticated and feature-rich as compared to the commercially available industry-leading tools, it still serves as a very handy feature for those who want to use pgAdmin as their primary administration and development console as well as keep the costs of licenses in check
ER Modeling with pgAdmin
It is assumed that an instance of Azure Database for PostgreSQL is already in place with some database object. It is also assumed that an instance of pgAdmin is already installed, configured and connected to an instance of Azure Database for PostgreSQL. We won’t be diving into the exercise of starting with figuring out the conceptual data model and then taking it to the logical modeling using the ER modeling. Our intention is to understand the way ER modeling features works in the pgAdmin tool. So, we would keep our focus in this exercise on exploring the features provided by the pgAdmin tool for ER modeling by the way of attempting to create two entities in the form of two tables and creating a relationship between them, which in data modeling terms is called cardinality.
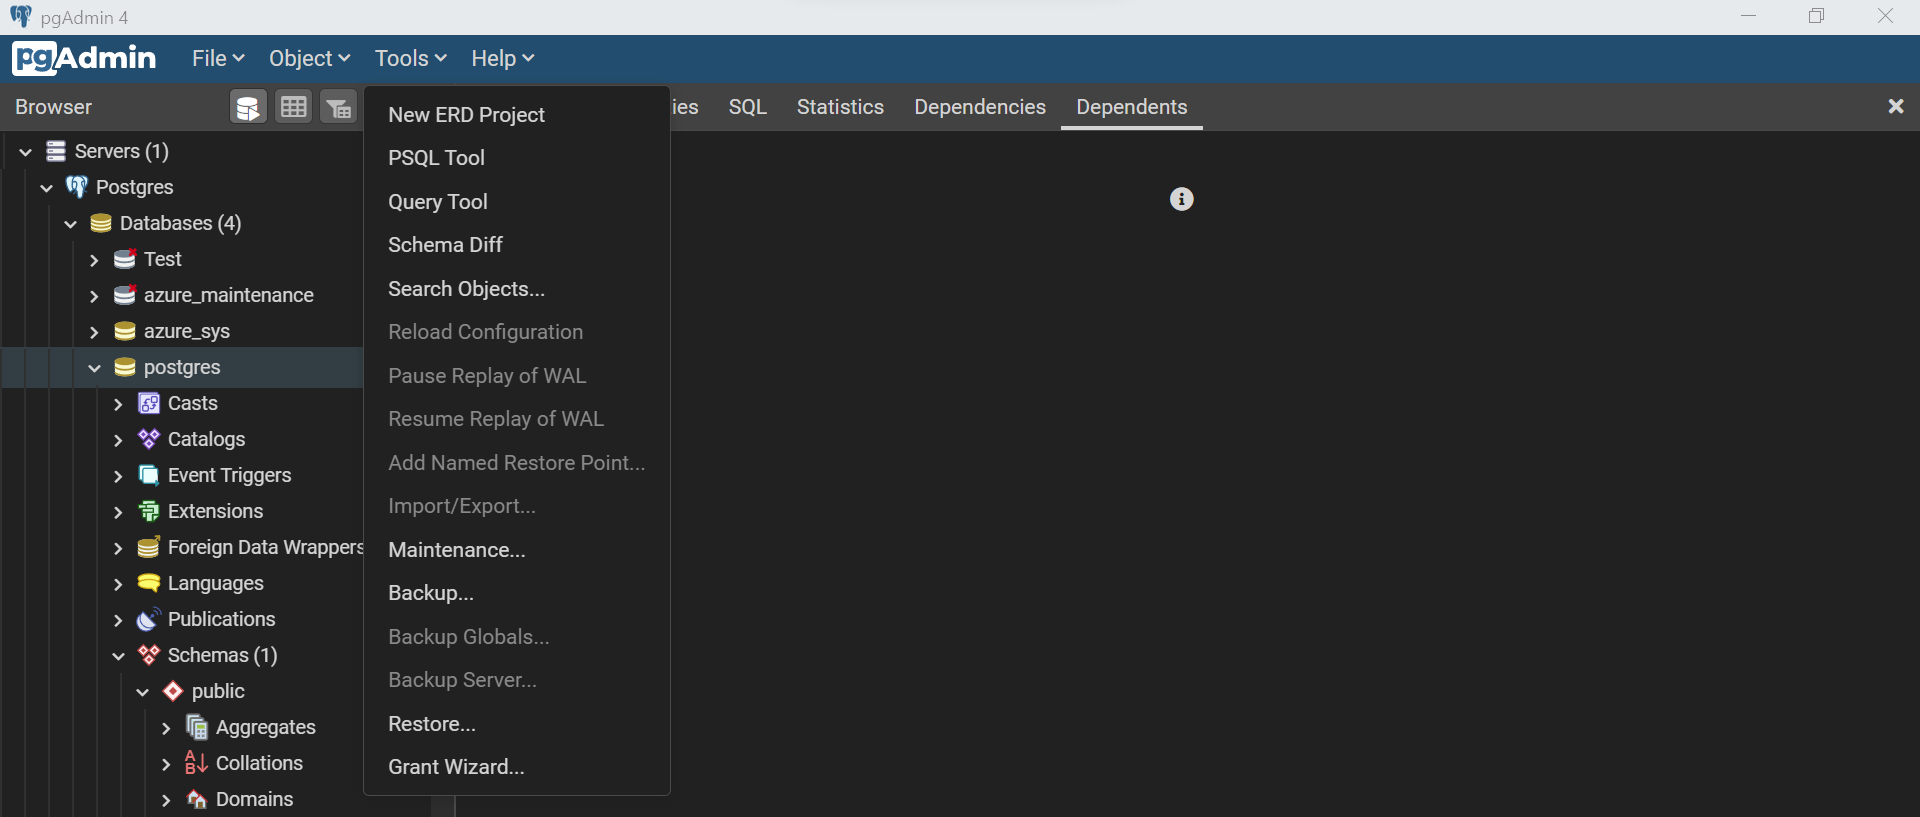
Assuming that the pgAdmin is already open on the local machine and connected to the database instance, click on the Tools menu and click on the menu item “New ERD Project” as shown below.
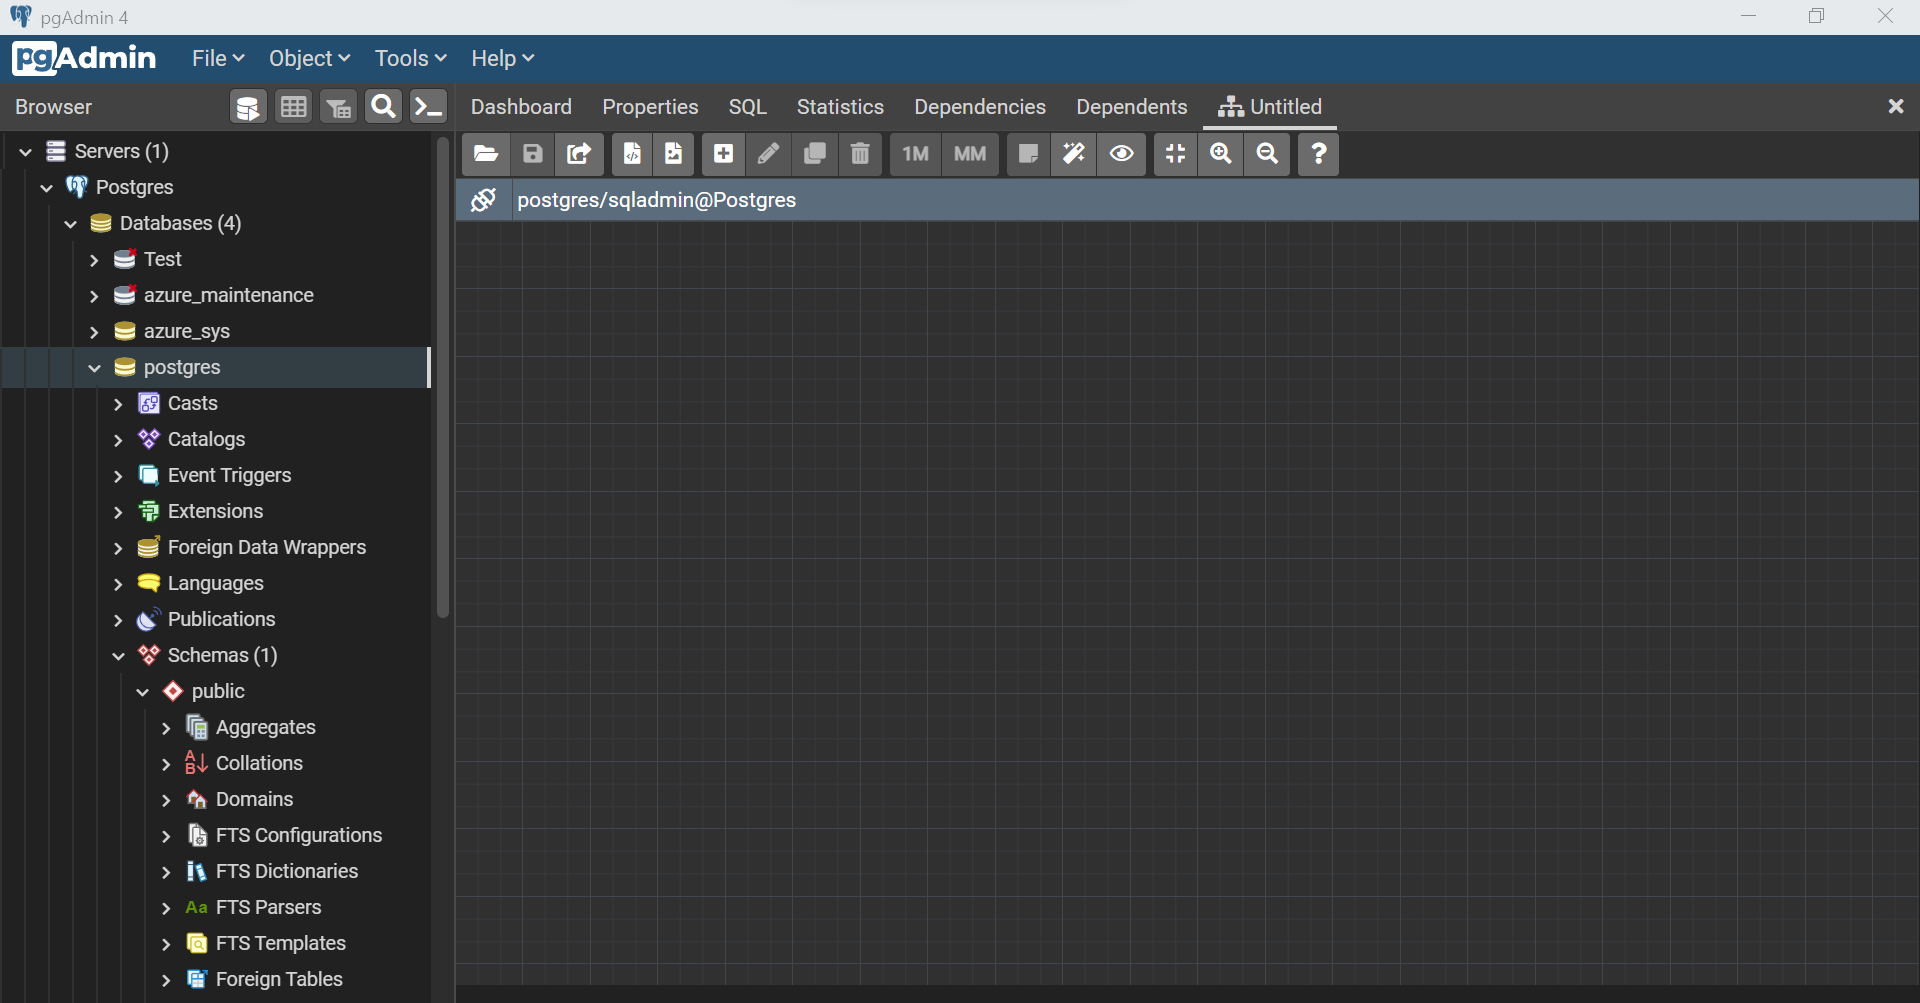
This would open a new screen as shown below. This is the ER designer window from where one can design ER models using the features provided here.
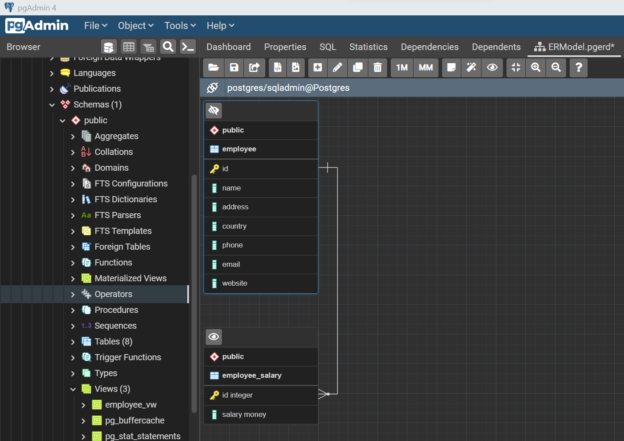
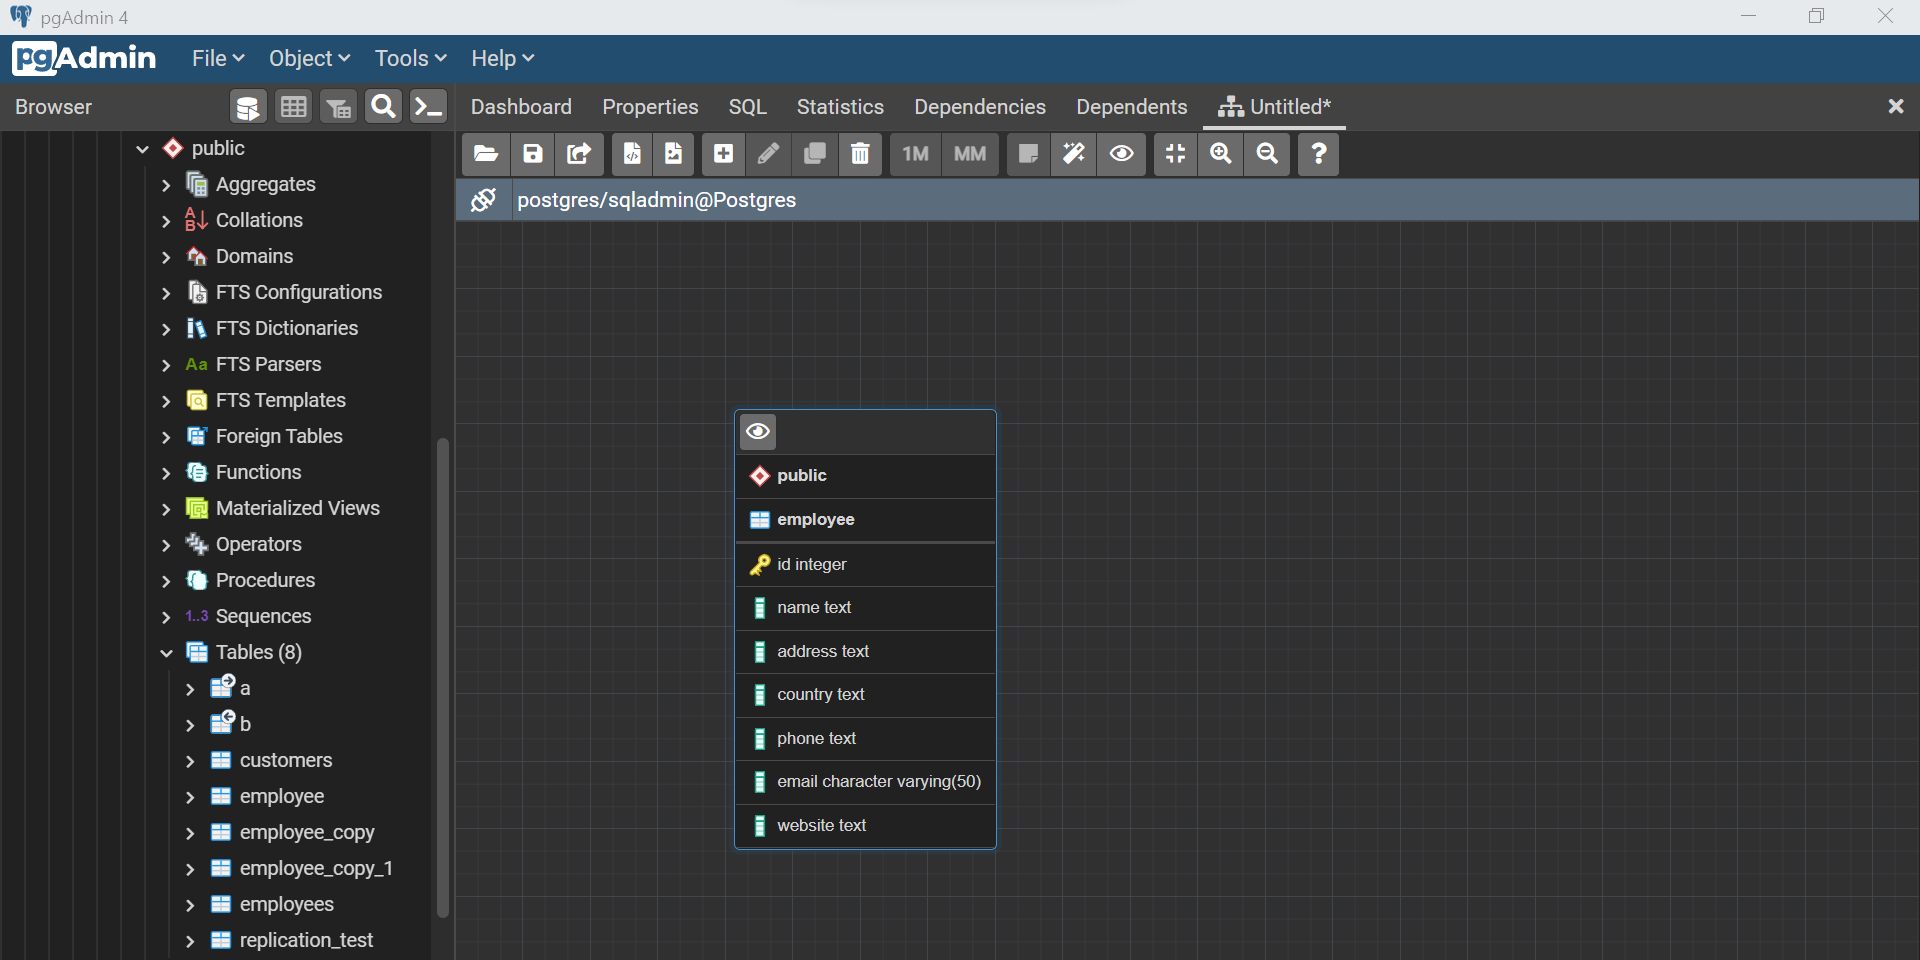
Ideally, in theory, data modeling should be done before implementing the model by creating physical database objects. But in practice, it does not always happen that way. At times, development teams may start implementing a draft version of the anticipated data model while the data model is in the process of being evolved. We would assume that scenario and to simulate that scenario we have an existing table in the database that we intend to import in the designer window. Just drag and drop the table in the designer window and it would look as shown below. We would be able to see the schema, fields, data types and constraints of the added table as shown below.
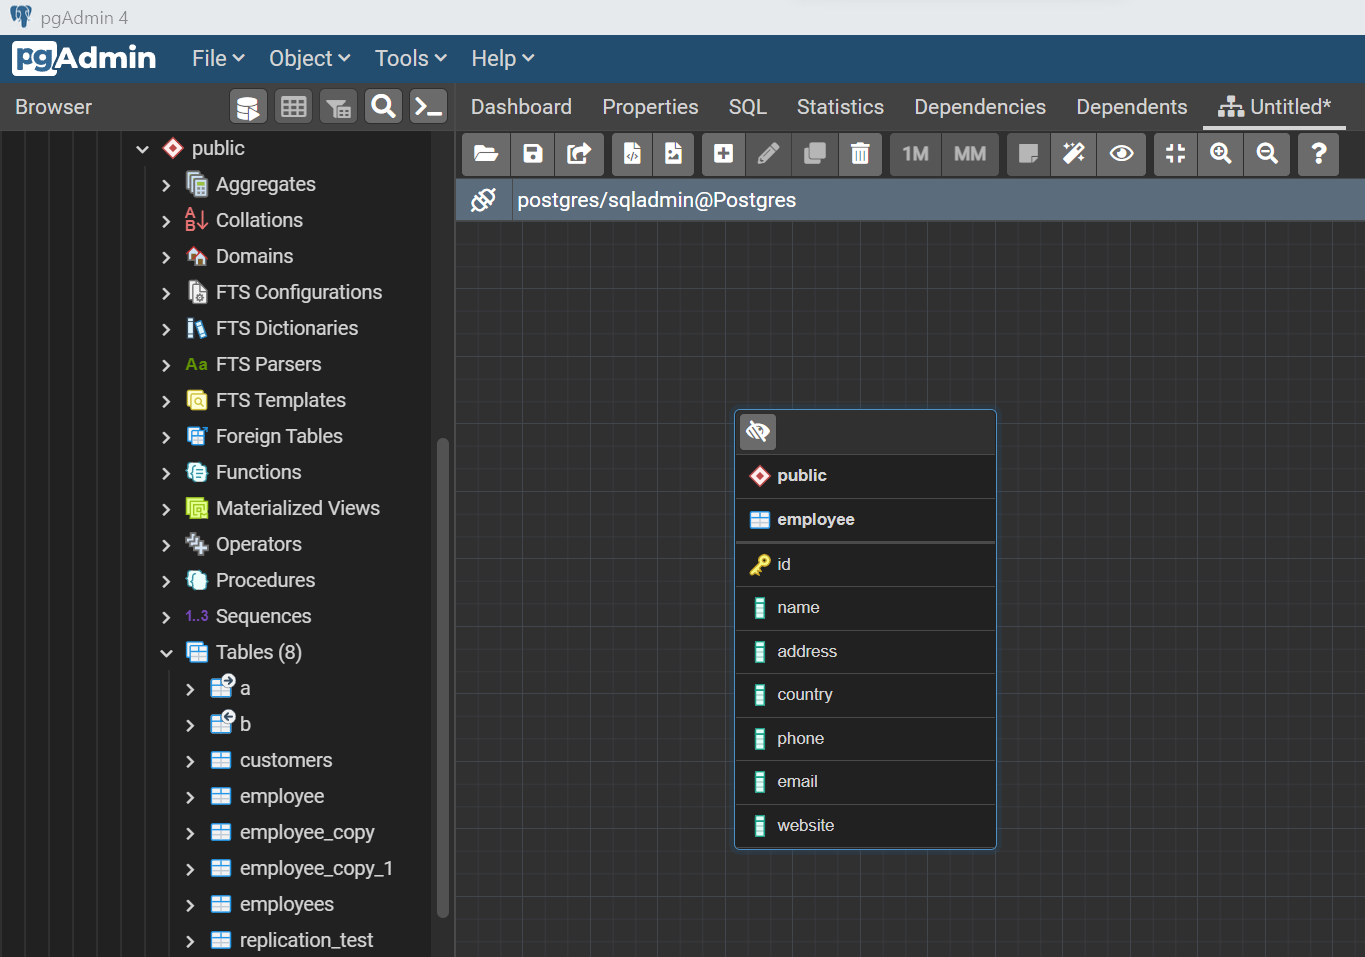
At times, when tens to hundreds of database objects are added to the designer window, it becomes too populated. From a modeling perspective, the focus is on entities, attributes and relationships and at times the data types of these attributes may not be of upfront importance. One can click on the icon at the top left of the table to hide the details like the datatype of the attributes as shown below.
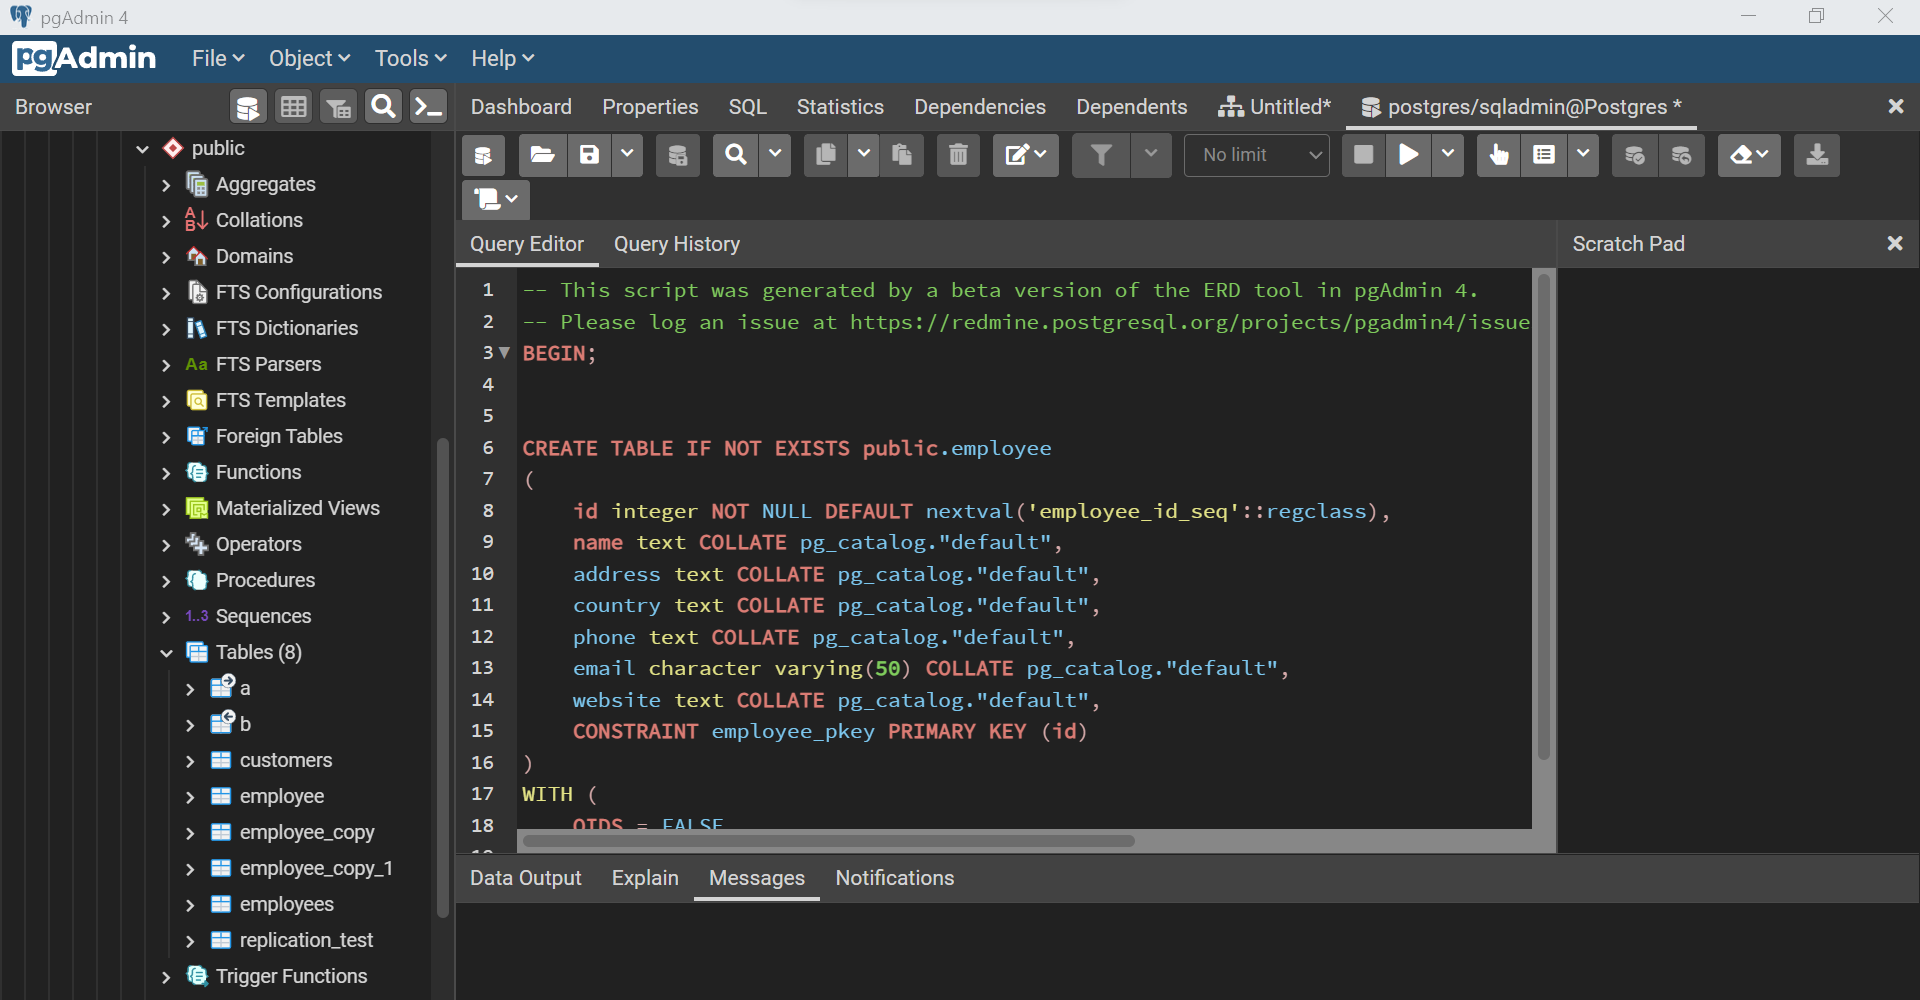
We can right-click on the table and select the option to generate SQL statement based on the definition of the table added to the designer window. The SQL would open in a new pop-up window as shown below. We can execute the SQL to deploy the database object as and when required.
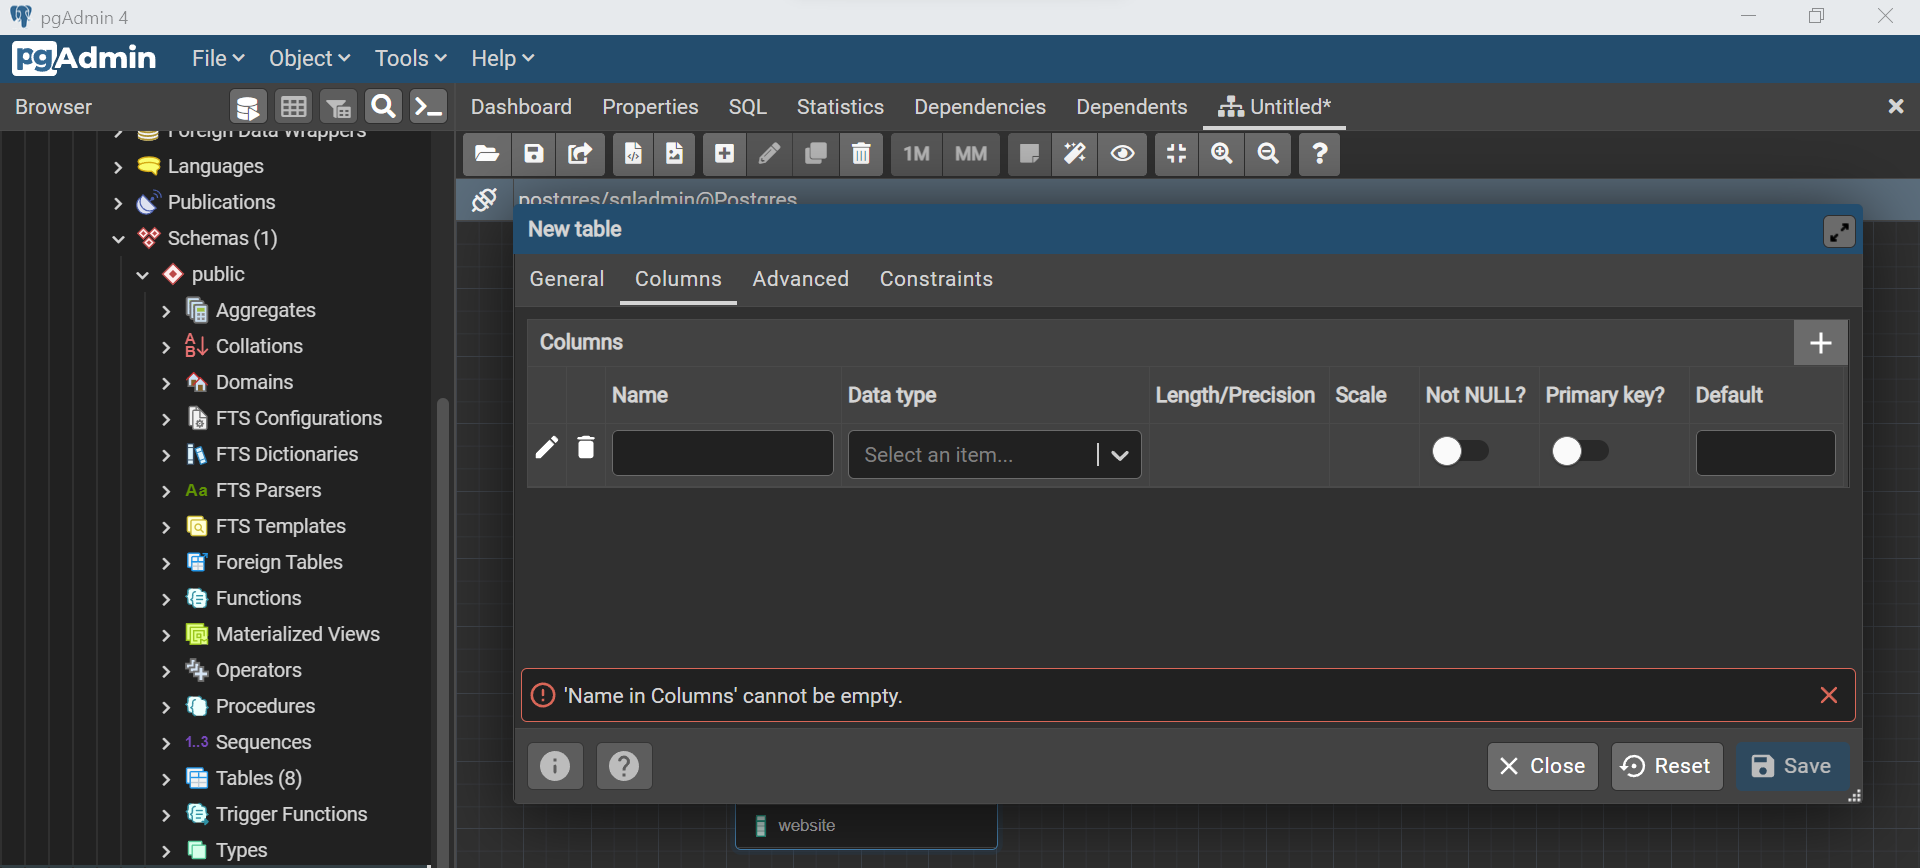
In this case, we have an Employee table, and let’s say that as part of the data modeling process, we intend to add a sub-entity named Salary to the Employee, and the idea is to model it as a table. We can right-click on the designer window and select the option to create a new table. It would pop-up a designer window as shown below. Key in the details of the new table such as the name of the table, the schema in which it needs to be created, and an optional description.

Click on the Columns tab and click on the plus button as shown below. Add columns step by step and configure the details of the columns like data type, constraints, etc.
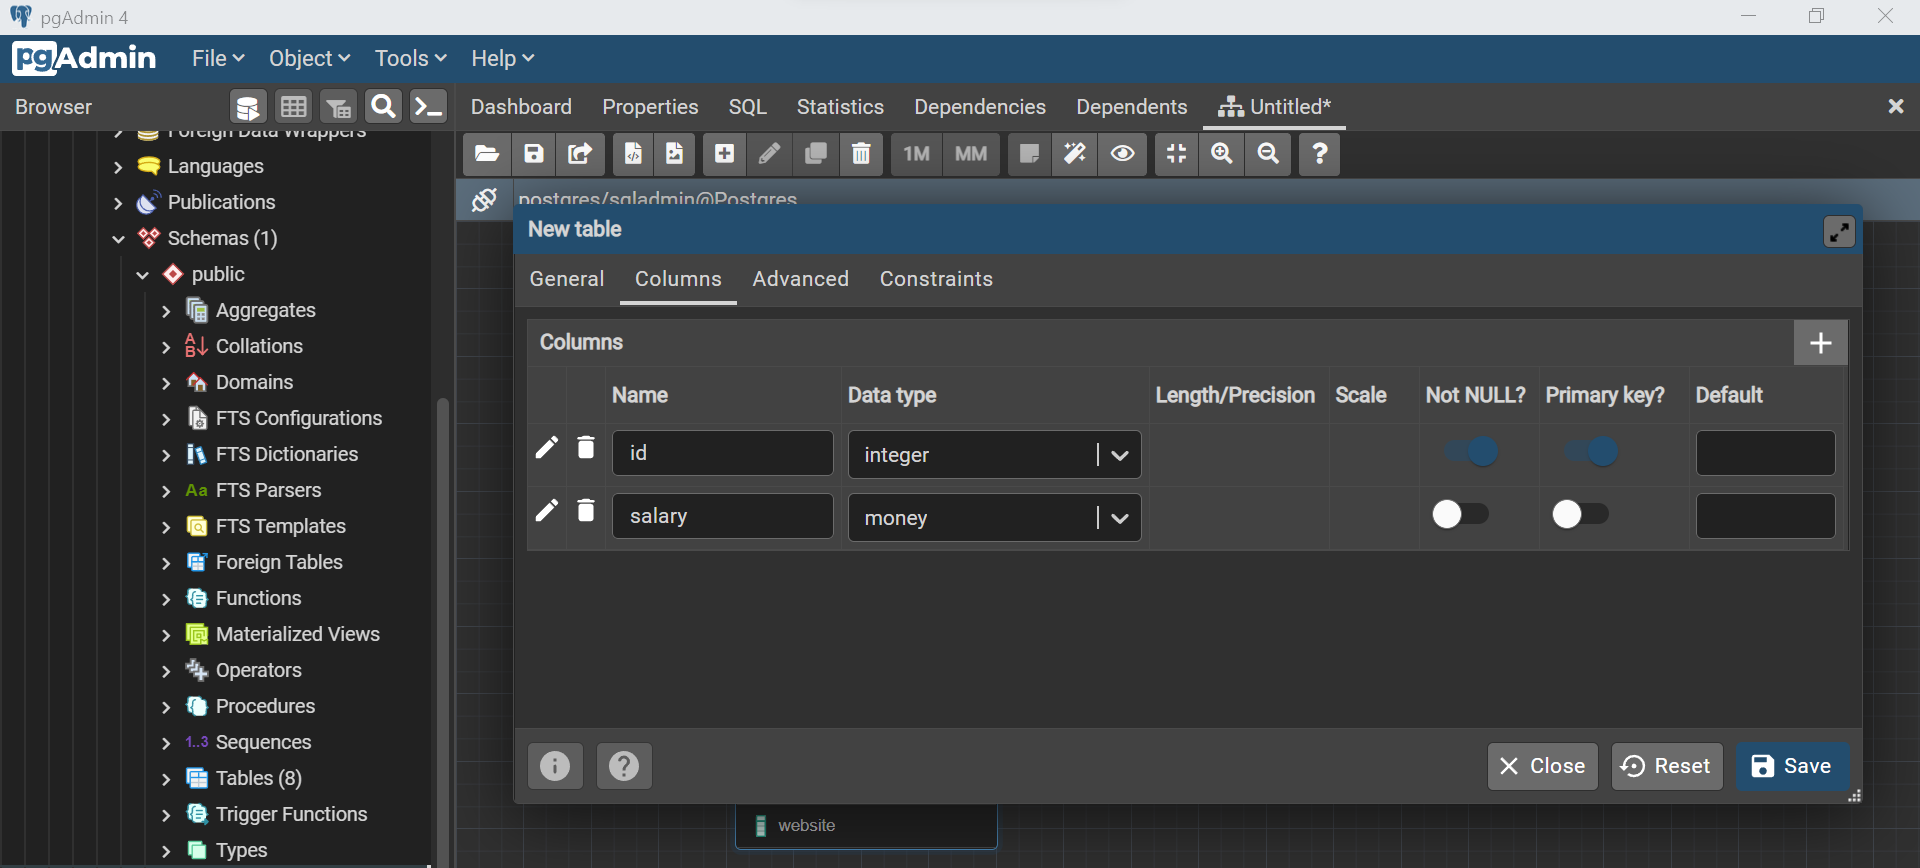
Once the fields are added, it would look as shown below. We have added two fields here – id and salary, where id is the employee id which is the same as the id field in the employee table. This field is the primary key and not nullable.
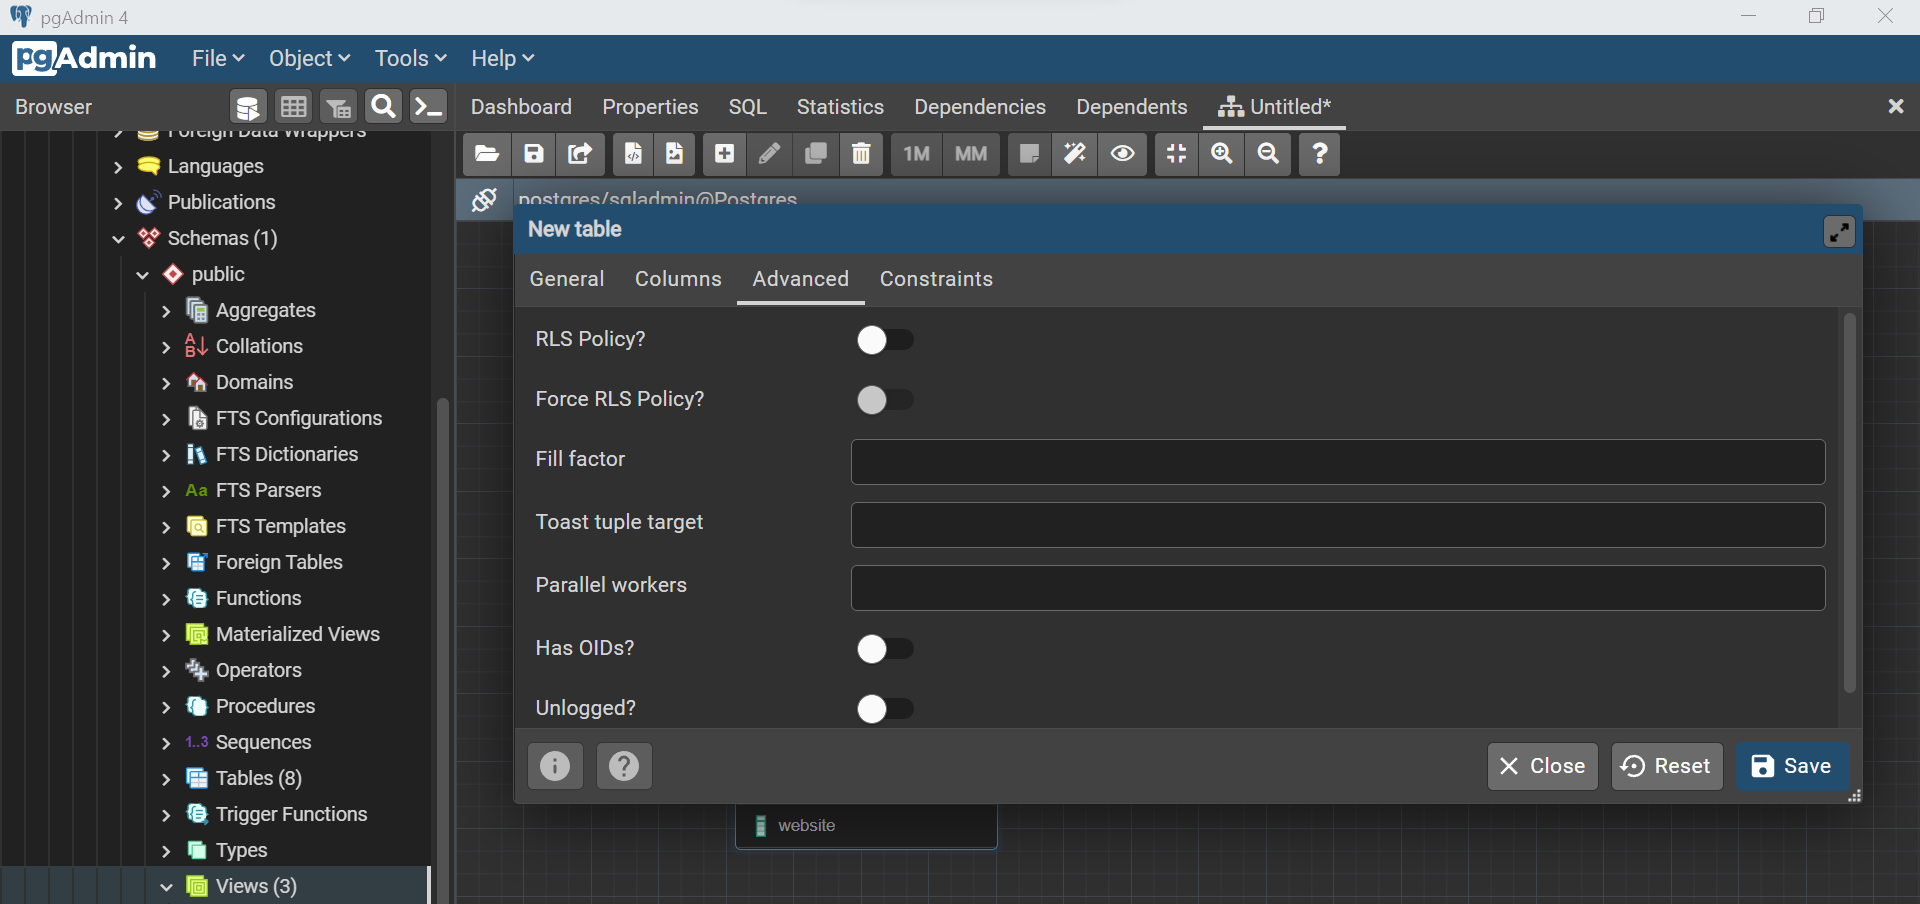
The Advanced tab will provide several options related to row-level security, fill factor, parallel workers, OIDs etc. These are optional settings ad we can continue with the default options.
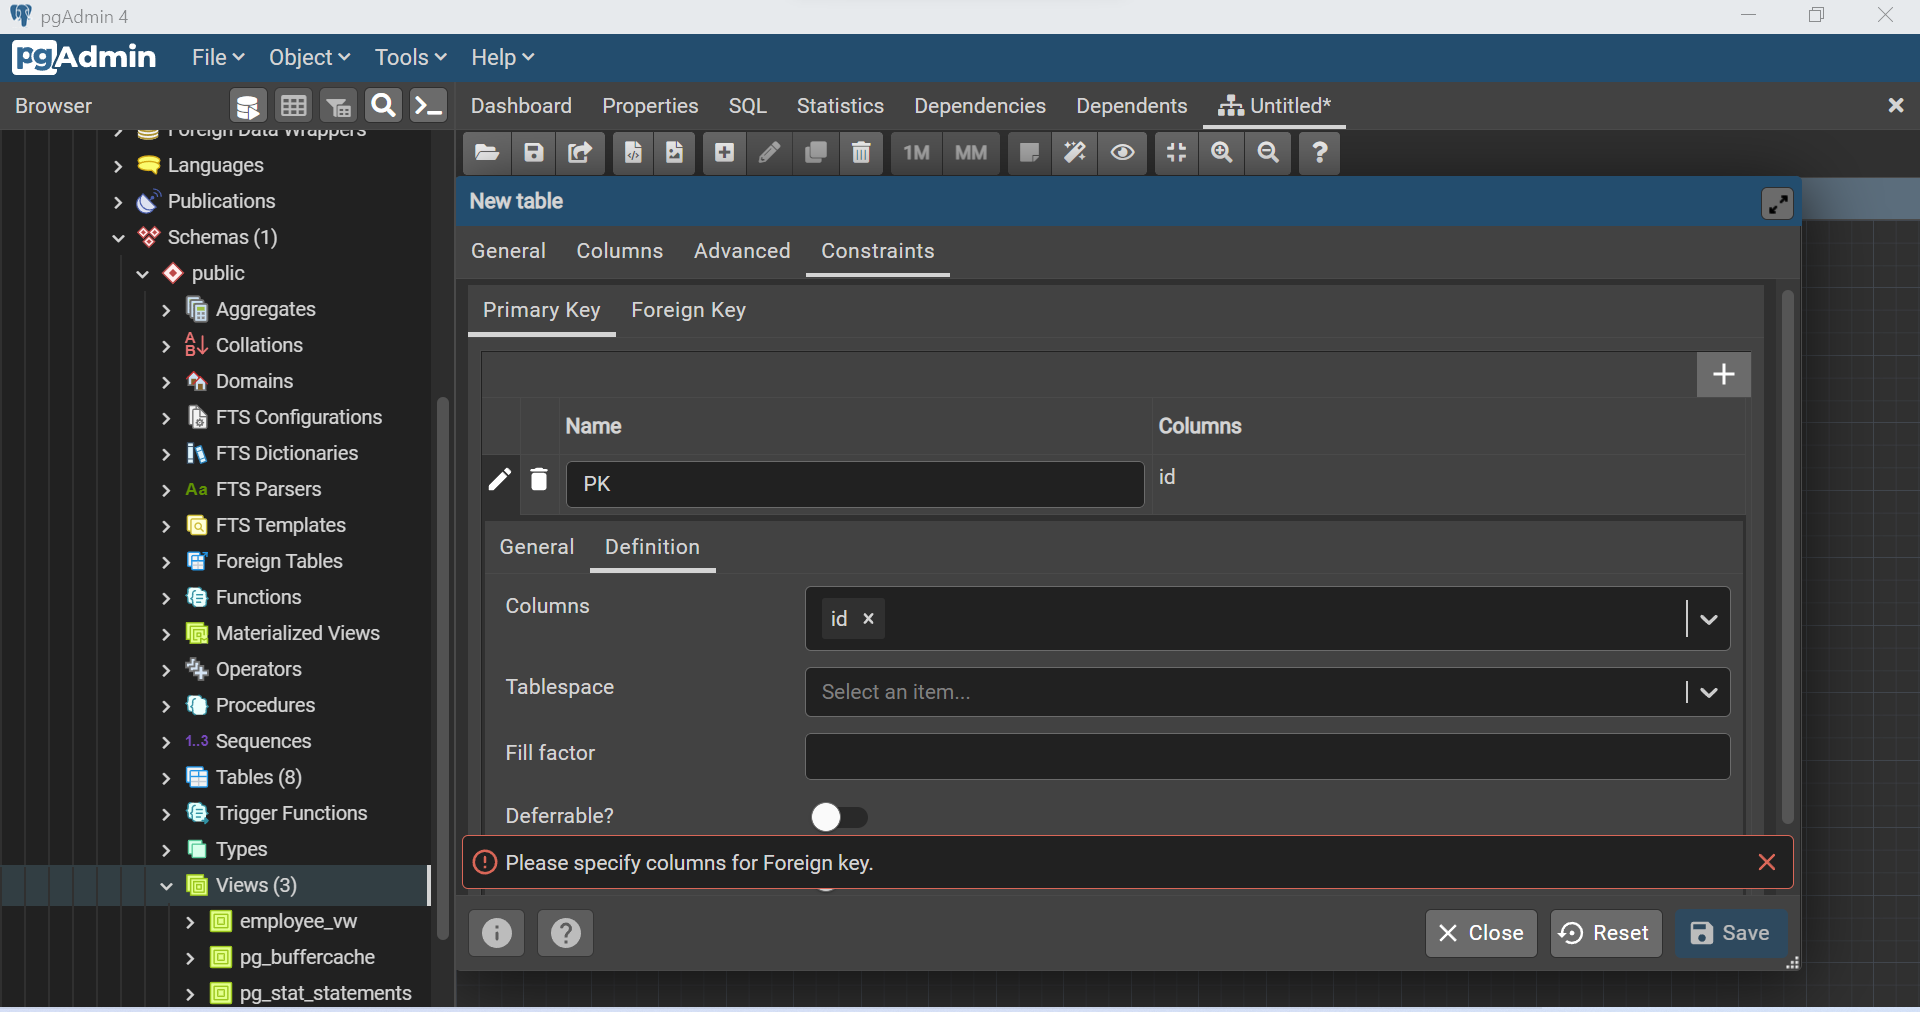
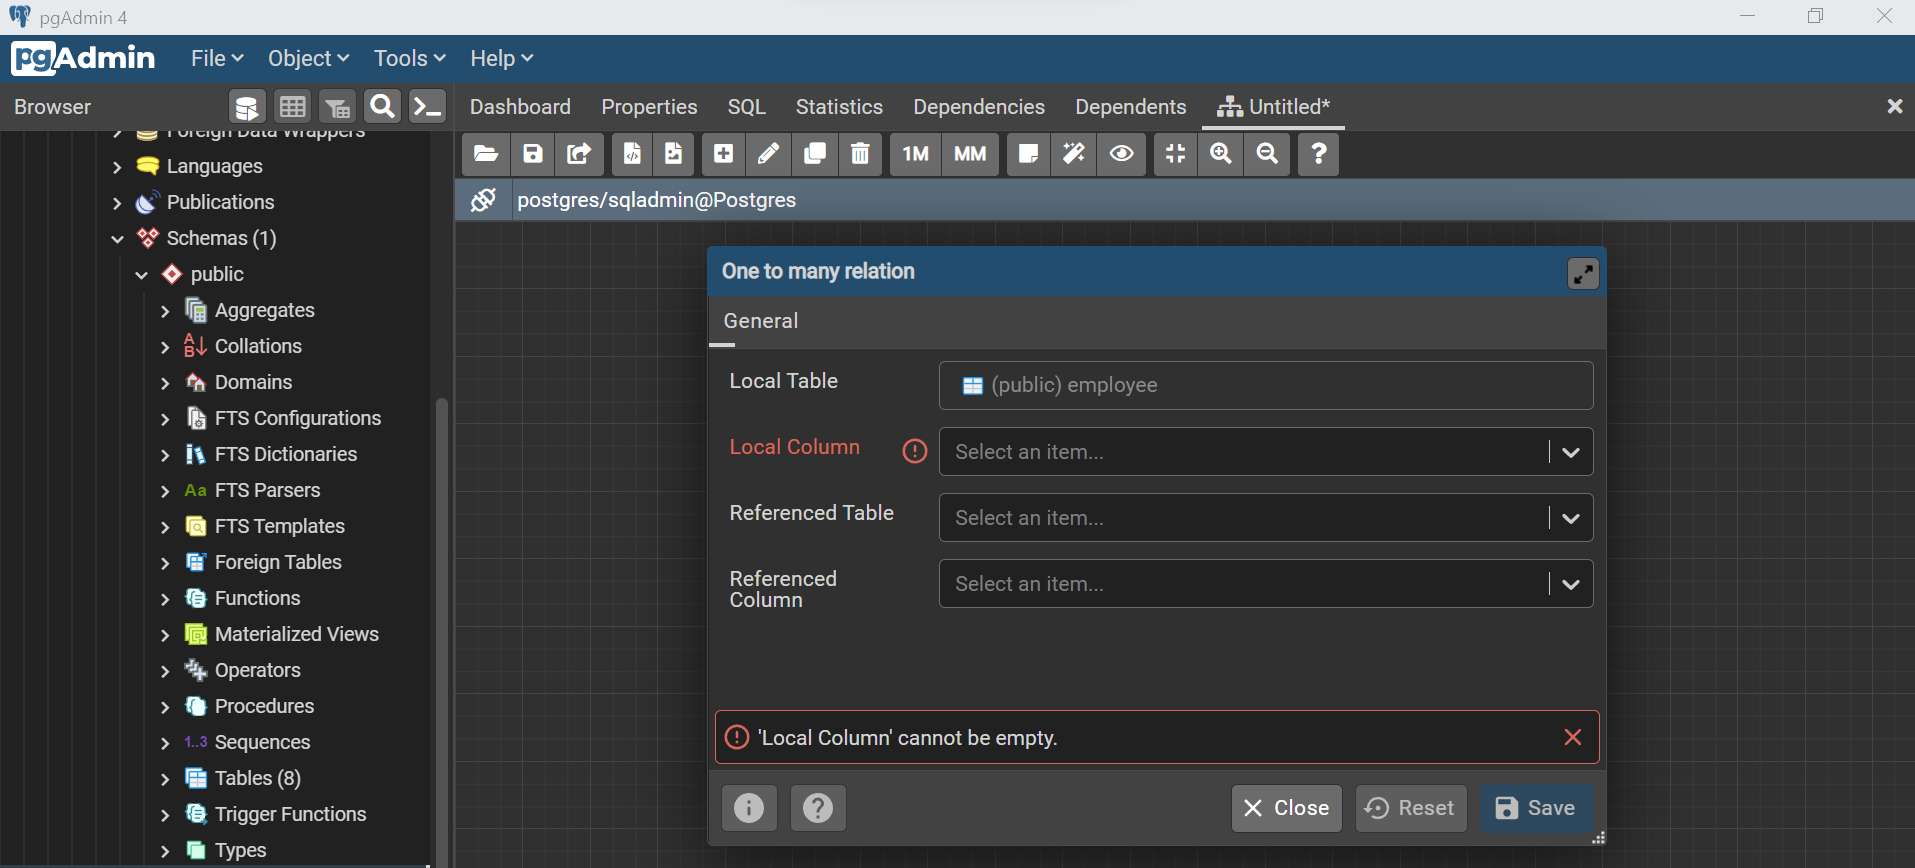
Finally, in the Constraints tab, we can add primary key as well as foreign key constraints. We intend to relate the employee table with this employee salary table. Here the employee id is the primary key for the employee salary table, and this field is also the foreign key that is derived from the employee id field from the employee table. Add the primary key and select the id field as shown below.
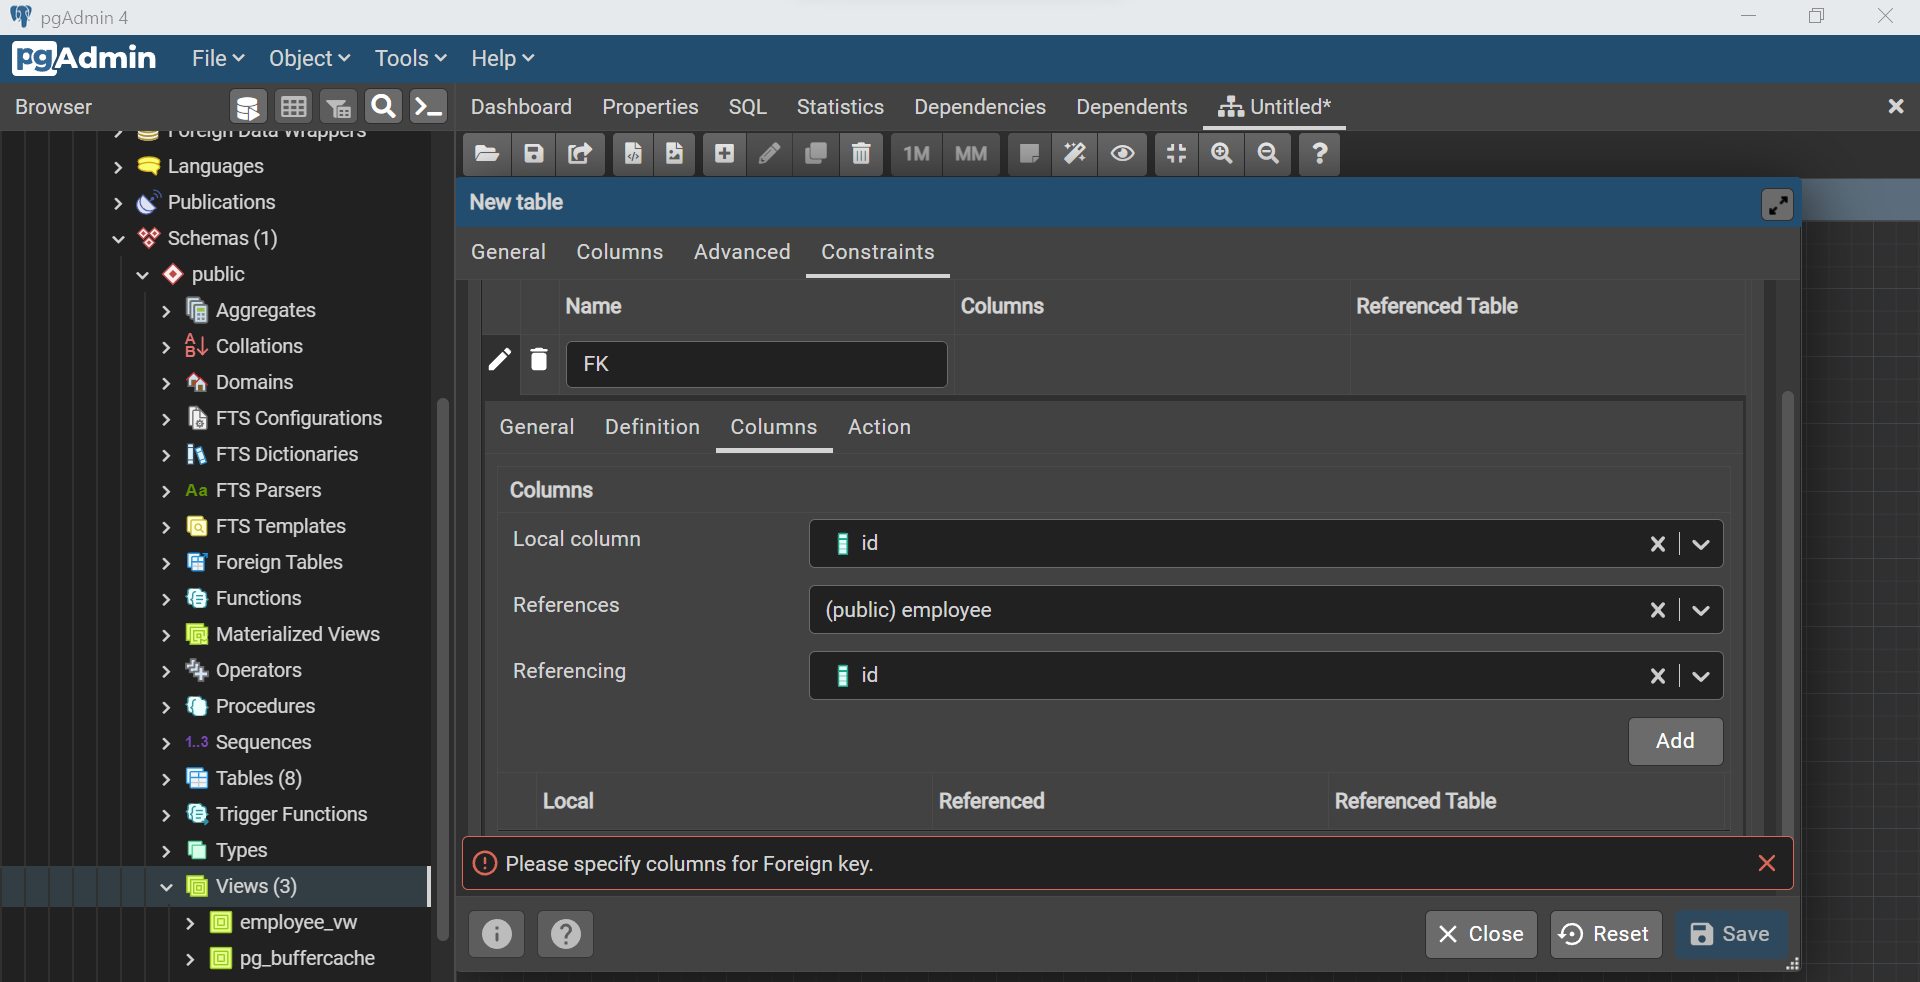
In the next sub-tab, select the foreign key constraint tab and select the fields from the referenced or the master table as shown below. We can also select from the other options shown below. Click on the edit field and add the fields and click on the Save button to create the relationship between two tables. This is the way we create cardinality between two tables i.e., entities.
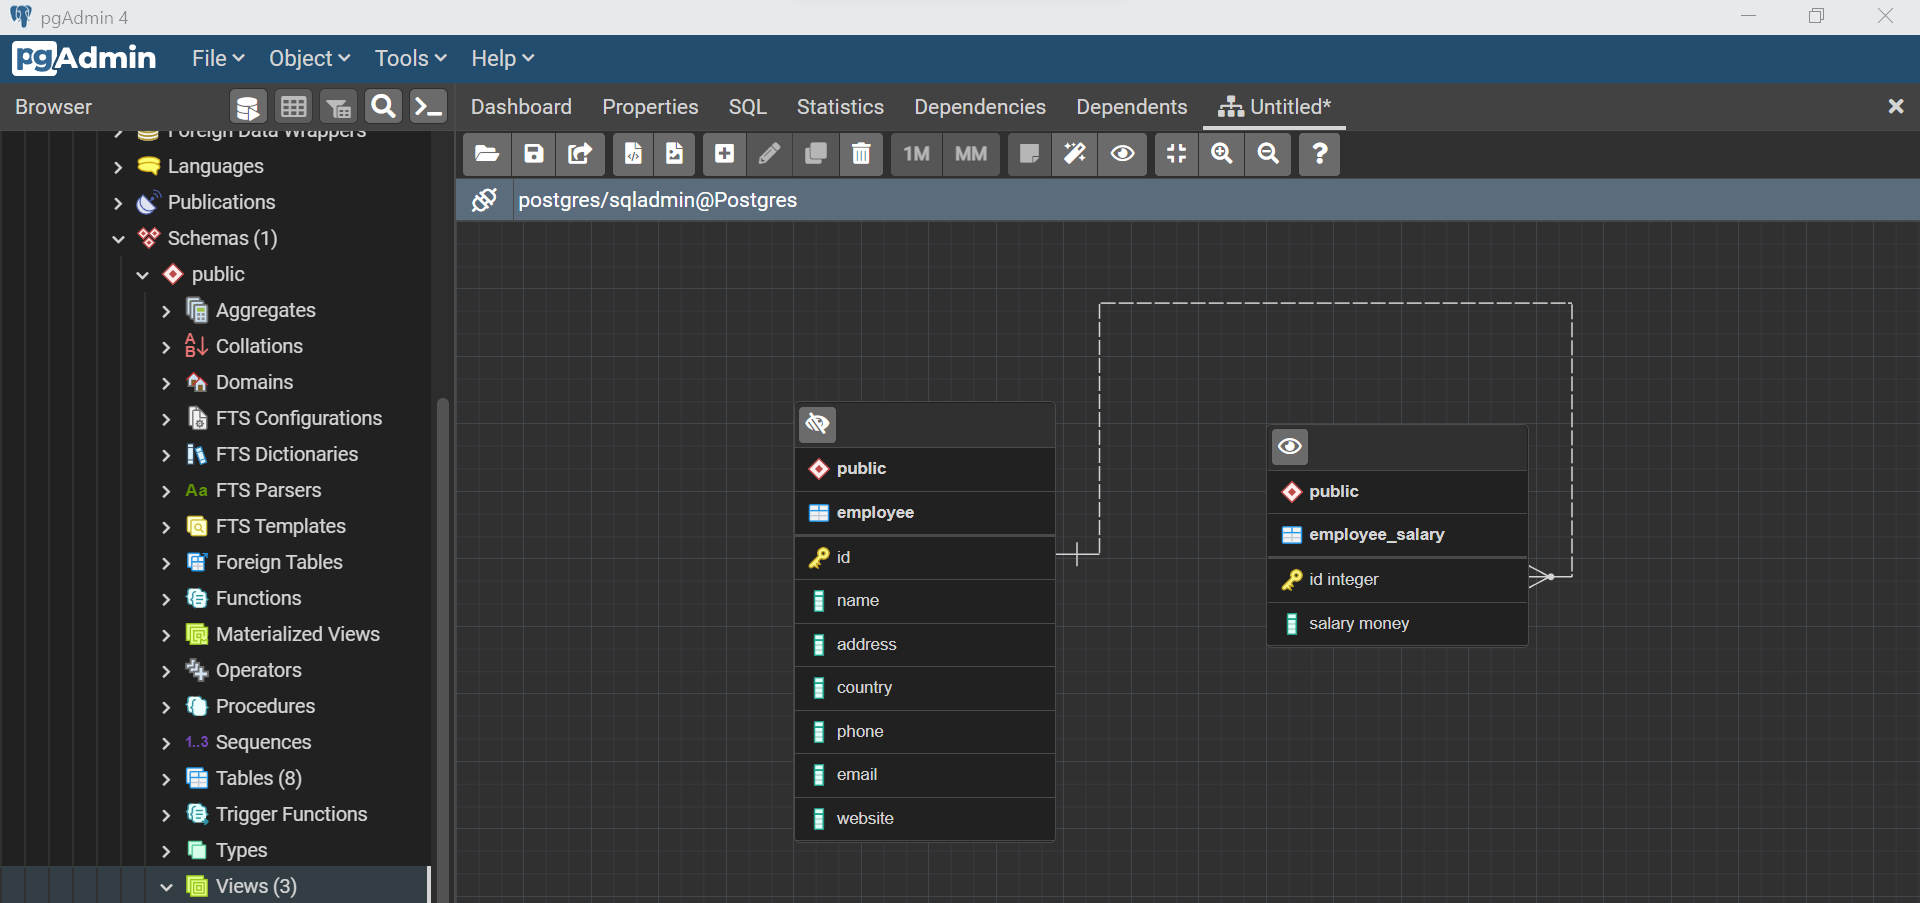
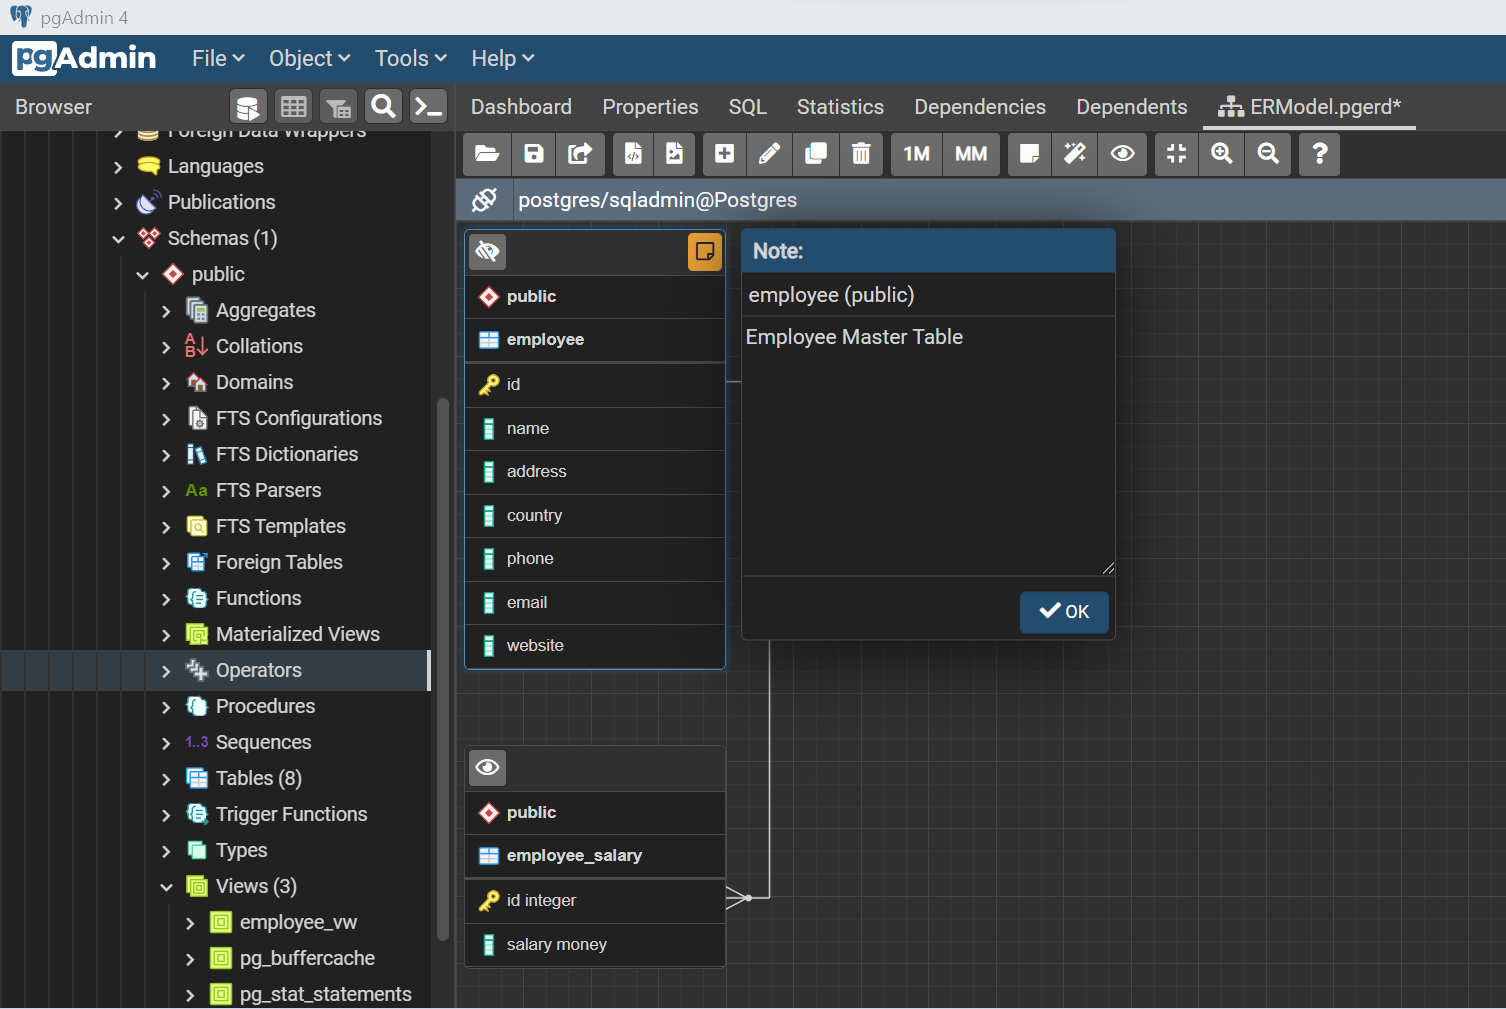
Once the relationship is created, we can see the connecting lines between the two tables as shown below. Here the cardinatlity is one to many.
We can select the relationship and change the cardinality by selecting the 1M or MM button which signified one to many relationships as well as many to many relationships. Shown below is the dialog to edit the relationship between the two tables.
From a usability perspective, it can be the case that objects may look unaligned. One easy way to align all the objects in the designer window is by clicking the auto align button and it would look as shown below.

Data Modeling is an iterative exercise, so adding annotations is very important to develop the data model iteratively. We can click on the add note button by clicking the icon at the top of the table name as shown below, which would help in the iterative evolution of the data model.
In this way, we can use the ERD features in the pgAdmin tool to design a data model using the entity- relationship modeling method.
Conclusion
In this article, we learned to use the ERD features of the pgAdmin tool to design a data model. We used an instance of Azure Database for PostgreSQL to host the database objects and use existing objects in the data model as well as create new ones.

She has a deep experience in designing data and analytics solutions and ensuring its stability, reliability, and performance. She is also certified in SQL Server and have passed certifications like 70-463: Implementing Data Warehouses with Microsoft SQL Server.
View all posts by Gauri Mahajan
- Oracle Substring function overview with examples - June 19, 2024
- Introduction to the SQL Standard Deviation function - April 21, 2023
- A quick overview of MySQL foreign key with examples - February 7, 2023