

This article will show how to manage the lifecycle of data using the features available in the Azure Blob Storage account.
Introduction
Data grows with time in terms of volume, variety and velocity as the data landscape matures. Also, the scale of data consumers grows with time as a wide variety of data becomes available in large volumes at a faster speed. One of the paradoxes of having large volumes of data accessible on demand is that a large portion of that data may not be used over time or may quickly become candidates for archival. For example, one may not need to access logs after a couple of weeks or months. Data accumulated from sensors in a typical IoT architecture would become very less relevant or may lose value after a few hours or days. While financial transactions may be preserved for decades for compliance purposes, but they may be hardly accessed except in situations like a financial audit. Depending on the nature of data, the need to access any type of data may be infrequent and in certain situations, the data may be a candidate for purging or archival. As data constantly get accumulated, there is a constant need to manage the lifecycle of the data and take corresponding actions to manage the cost as well as the organization of data. Azure Blob Storage account is the primary mechanism of hosting blobs on Azure.
Configure Data Lifecycle Management Rules
We need to have an Azure account with the required privileges to administer Azure Blob Storage accounts before we start this exercise. It is assumed that one such account is already in place, and we have already logged on to the Azure portal. Azure storage account provides different means of storing data in objects like containers, file shares, tables, and queues. We typically use containers to store blobs. We need at least one container with some data already uploaded in it to see the effect of the lifecycle management rules that we will put in place. While it’s not mandatory to have data or blobs to create lifecycle management rules, but if we create rules with any data in any containers, we may not be able to realize the effect of these rules until any blobs in containers meet the rule conditions. Assuming the container and data are in place, we can now focus on lifecycle management rules. On the Azure Blob Storage account home page, click on the Lifecycle management and we would be able to see a screen as shown below.
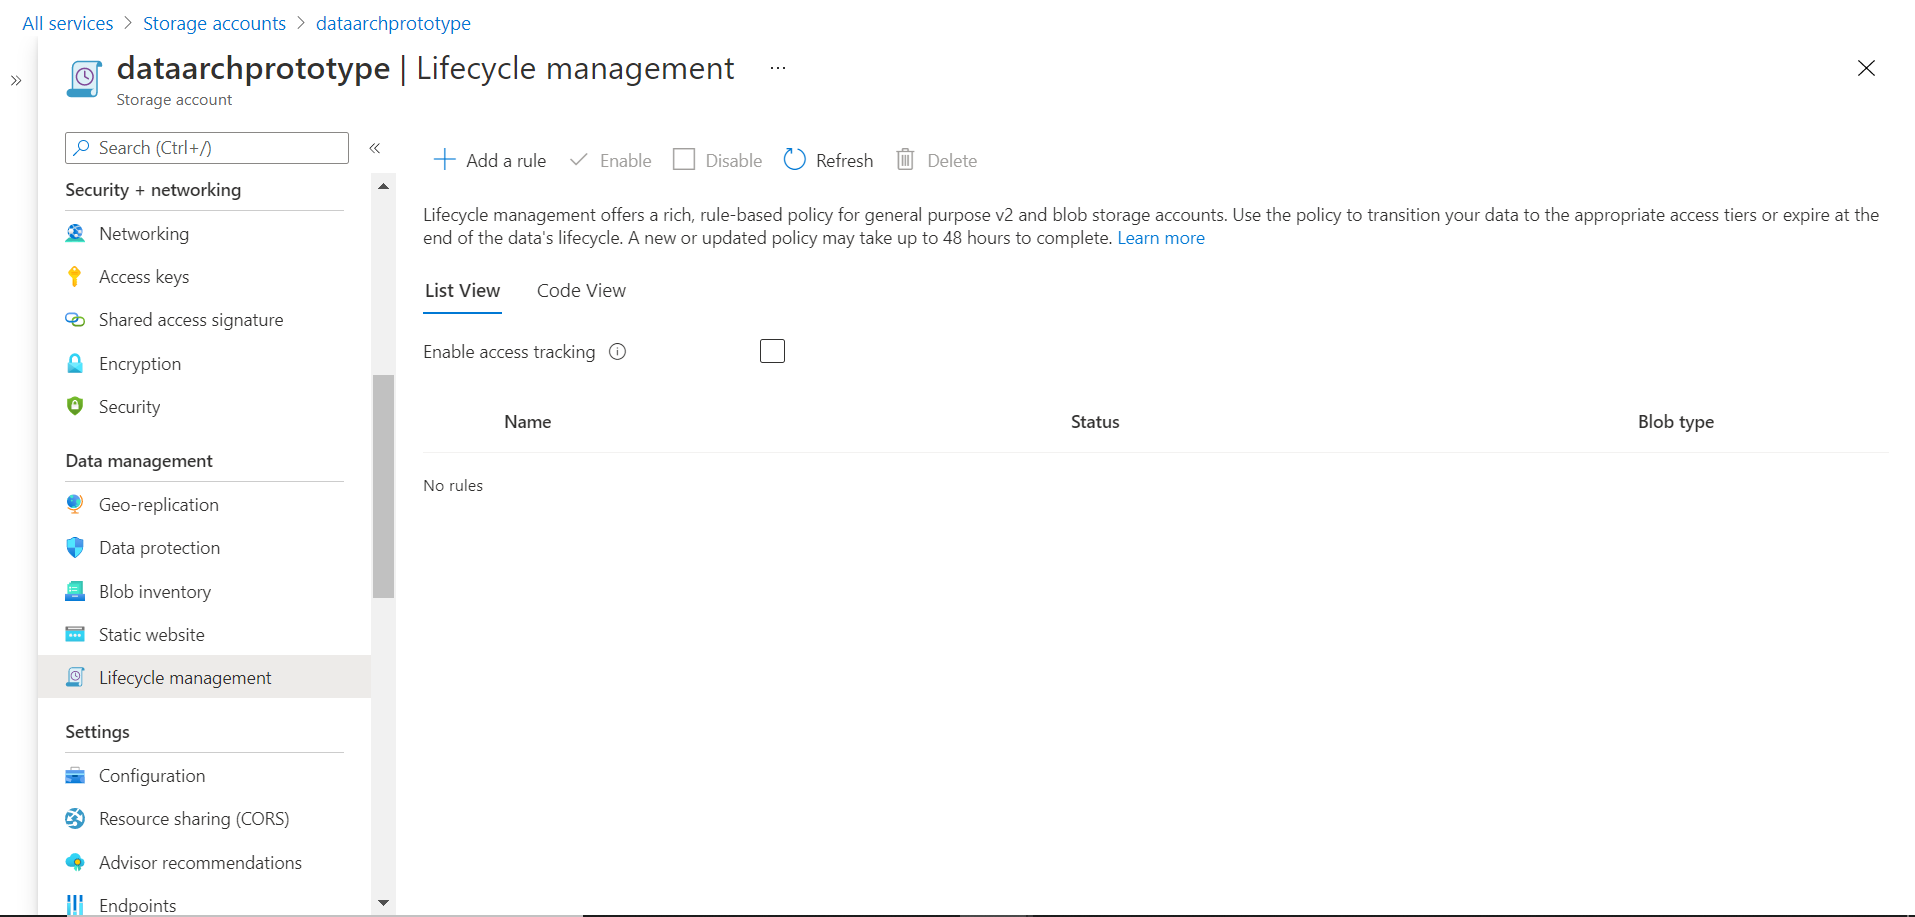
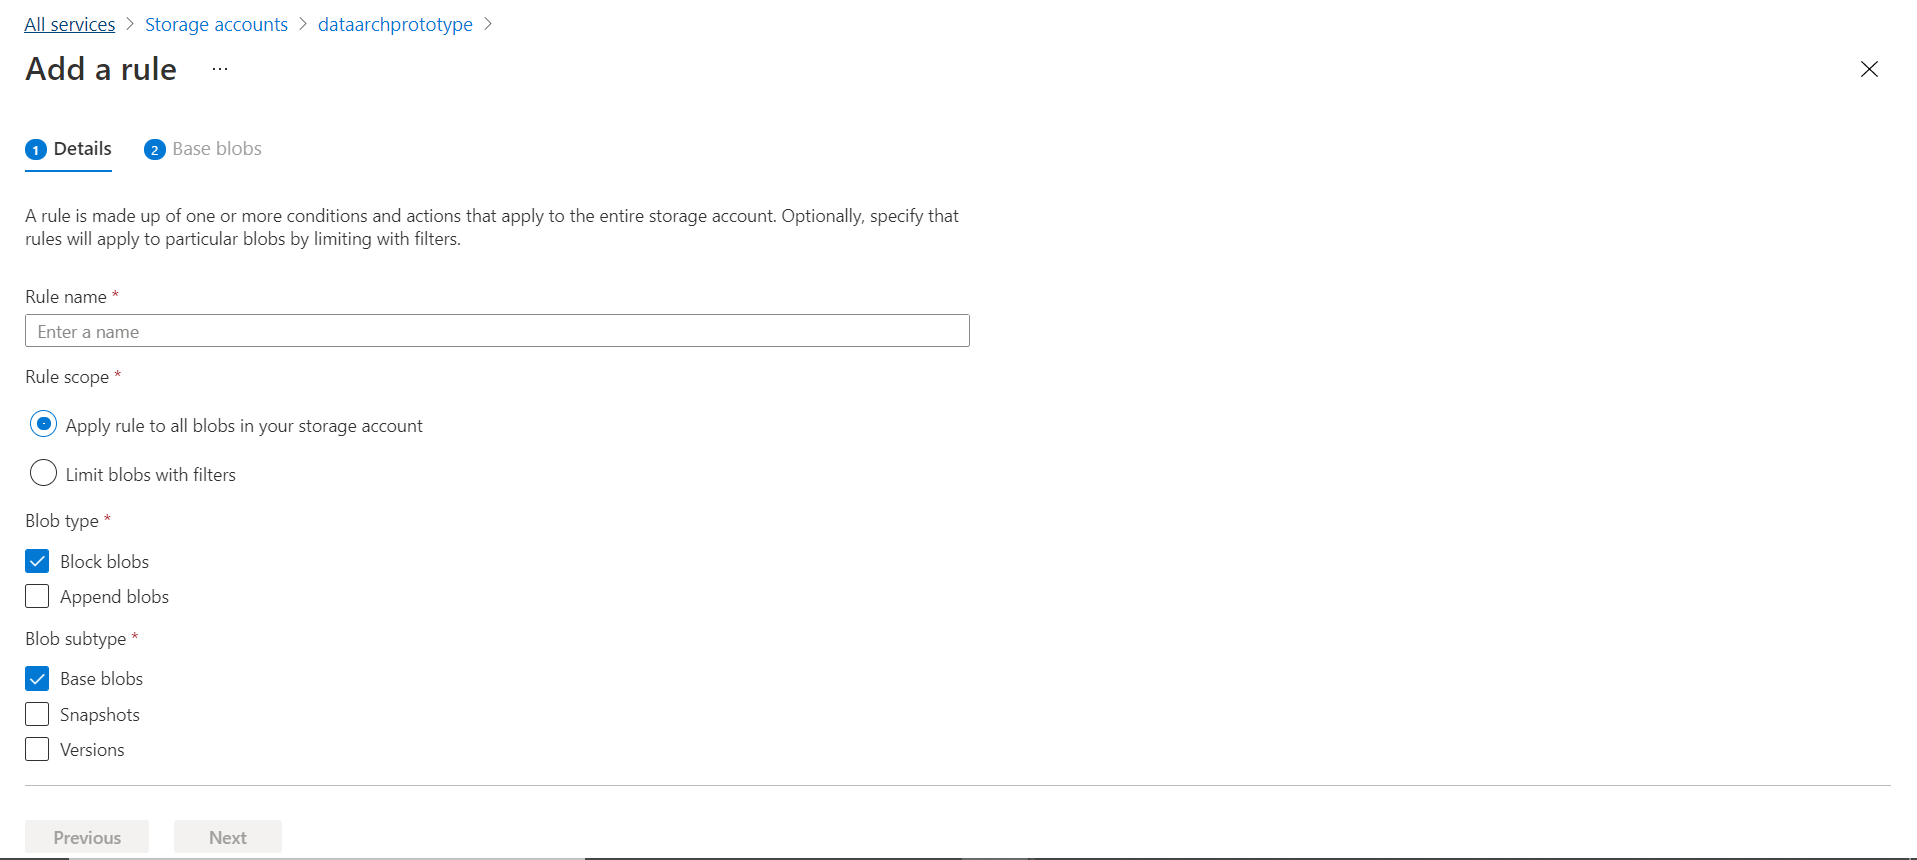
By default, the rule list would be empty. We can start to create a new rule by clicking on the Add a rule button. Clicking this button would invoke a new rule wizard as shown below. Depending on the options that we select we need to configure the rule in two or three steps. The first step is to provide basic details like the name of the rule. Then we need to define the scope of the rule – whether it will apply to all the blob types or only certain types of blobs stored in Azure Blob Storage. By default, block blobs are selected as shown below. Then depending on the selection of blob type, we can select the subtype. Base blobs are selected by default as shown below. We may want to select snapshots and versions as well in case the Azure Blob Storage account will host those kinds of blobs as well.
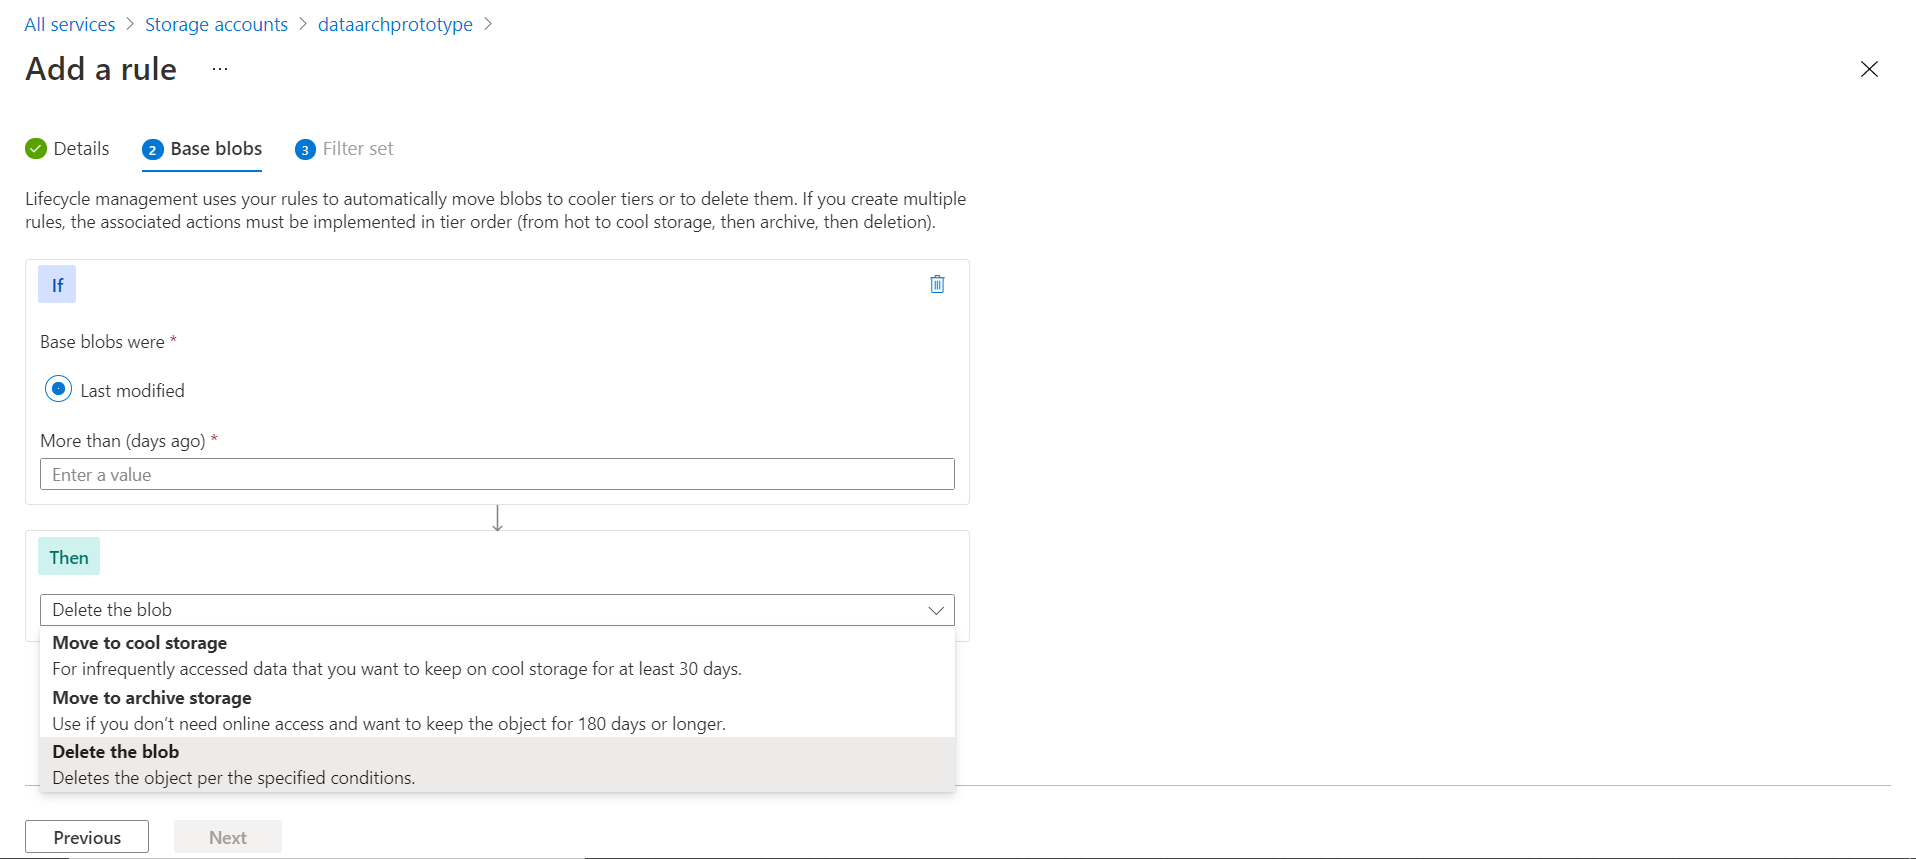
In the scope options shown above, if we select the scope option to limit blobs with filters, then a third step would be added to the wizard as shown below. In Step 2, we would be given the option to set the criteria for the rule as well as the actions to perform when the condition is met by the blobs in scope. In our case, the only condition we can configure here is based on the last modified data. We can provide the value in terms of the number of days since the blob was last modified. The value must be anything but zero. In the action’s dropdown, we can see the standard list of actions that can be performed as shown below. We can move the files to cool storage i.e., move the blog to infrequent data storage, move to archival storage or delete the blob as shown below using one of the supported actions. We can add more than one step in the rule composition if required.
In the last step, we have the option to specify the container on which the rules should be applied, as well as the prefix that filters the scope of data on which the rule would be applied. We can granularly define the scope of the filter by using the key and value combination as shown below.

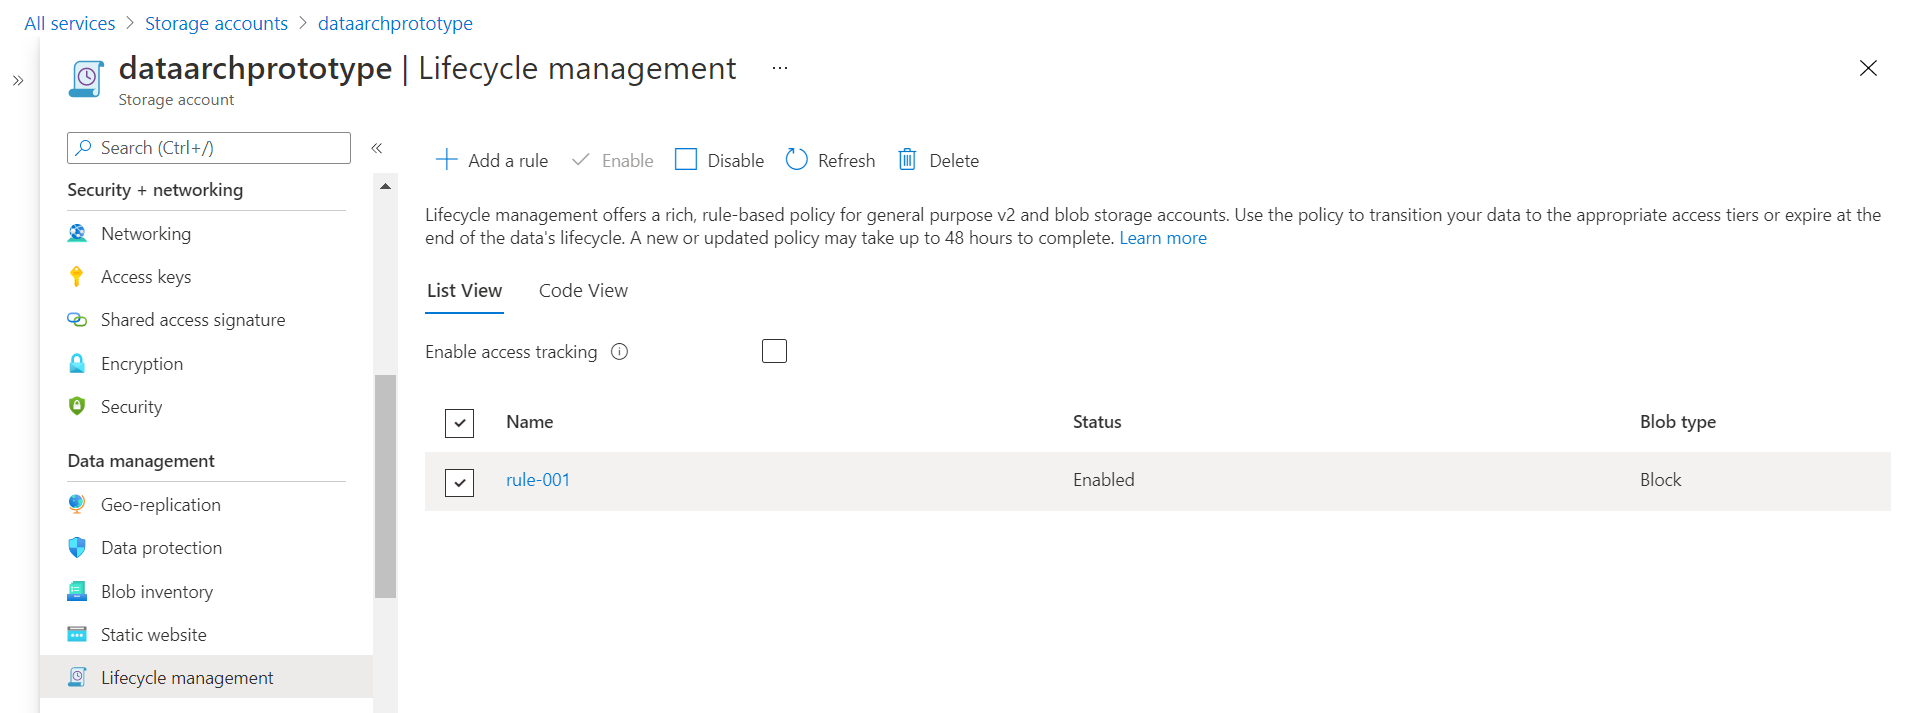
Once the configuration is done, we can click on the Add button and it would start creating the rule. Once the rule is created, it would get listed as shown below. By default, the rule would be in enabled status. We can though disable it as and when it’s required.
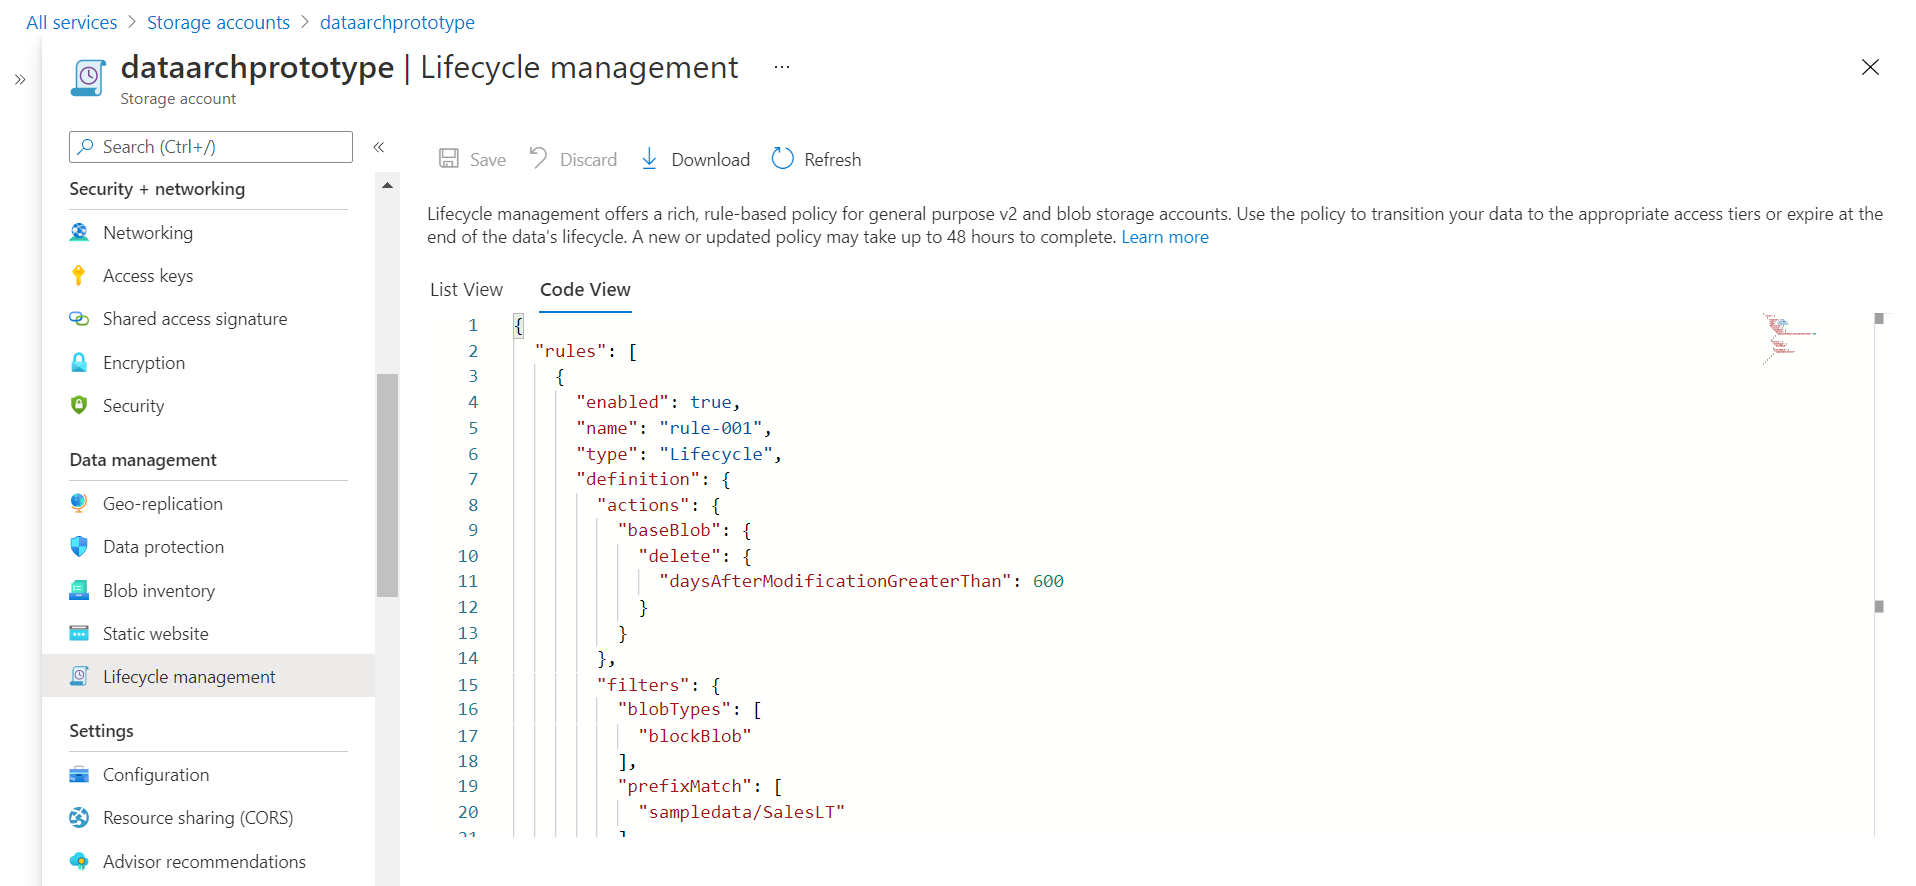
We can explore the details of the rule configuration in simple JSON format by using the code view as shown below.
Once the rule is created and in enabled status, it will keep getting applied to blobs as and when they meet the criteria defined in the lifecycle management rules. In this way, we can create lifecycle management rules in Azure Blob Storage to manage the lifecycle of data on Azure Blob Storage accounts.
Conclusion
In this article, we learned about the need for data lifecycle management and how to implement the same in the Azure Data Storage account.

She has a deep experience in designing data and analytics solutions and ensuring its stability, reliability, and performance. She is also certified in SQL Server and have passed certifications like 70-463: Implementing Data Warehouses with Microsoft SQL Server.
View all posts by Gauri Mahajan
- Oracle Substring function overview with examples - June 19, 2024
- Introduction to the SQL Standard Deviation function - April 21, 2023
- A quick overview of MySQL foreign key with examples - February 7, 2023