

In this article, we understand how to create a new database in Oracle 19c using a database configuration assistant. The database configuration assistant allows us to create a new database using a pre-defined template or create a database with various configuration options. In this article, we are going to learn both methods.
The database configuration assistant is used to perform any of the following tasks:
- Create a new database
- Configure the existing database
- Delete database
- Manage database templates
- Manage pluggable databases
- Oracle RAC database instance management
We are going to use the database configuration assistant to create a new database. You can open it by running dbca.exe from the command prompt.
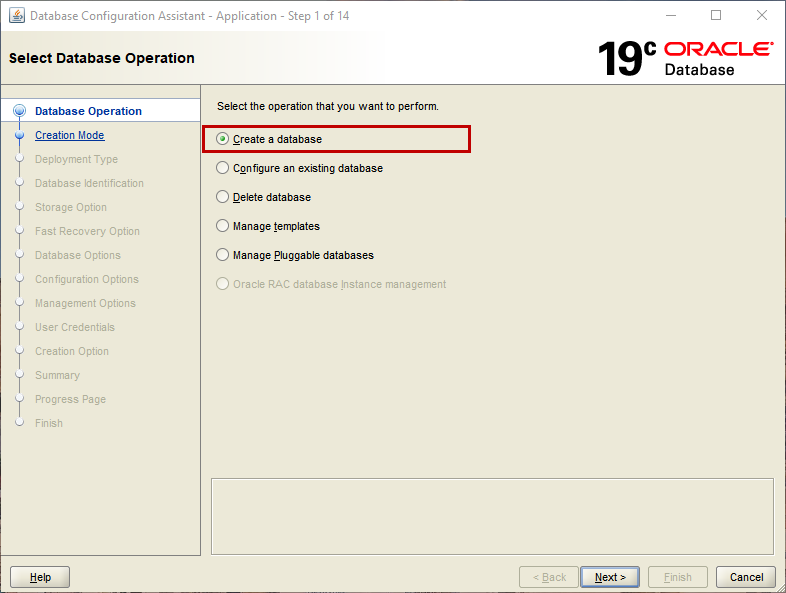
On the Select Database Operation screen, you can choose the operation that you want to perform. You can create, manage, and drop the pluggable and regular database. In our case, we want to create a new database; therefore, select Create a database option.
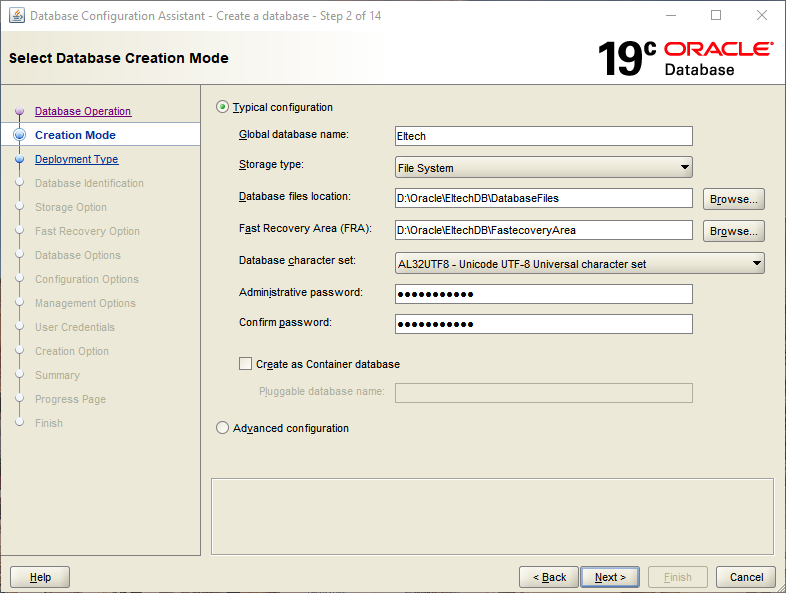
You can choose to configure the database with typical settings or with advanced settings on the Select Database Creation Mode screen.
If you want to create a database using the typical configuration, you can specify the following configuration parameters, and DBCA will create a database for you.
Typical Settings
- Global Database Name: Specify the global database name. This name is used to identify the database. In our case, I have provided Eltech as a global database name
- Storage Type: Specify the storage type that you want to use the Oracle database files. You can choose:
- Automatic Storage Management (ASM)
- File system
I have chosen the file system as the storage type
- Database files location: Specify the location where you want to store the database files. If we do not specify the location, the database configuration assistant will save the files {ORACLE_BASE}\oradata\{DB_UNIQUE_NAME} location. To save the database files, I have created a separate directory on my workstation so our database file location will be D:\Oracle\EltechDB\DatabaseFiles
- Fast recovery area: When we enable the fast recovery area, the Oracle will store the RMAN backups, archive logs, and control file backups to the location specified in the Fast recovery area. I have created a separate directory that is used as the fast recovery area, so in our case, the location will be D:\Oracle\EltechDB\FastecoveryArea
- Database character set: Specify the database character set
- Administrative password: Specify the administrative password to access the database
- Create as a container database: Select this option if you want to create a database that can function as a multi-tenant container database. You can read Multitenant : Overview of Container Databases (CDB) and Pluggable Databases (PDB) to learn more about the container database. In our case, the database is a non-CDB database; hence, I have disabled the option
The database configuration screen looks like the following screenshot.
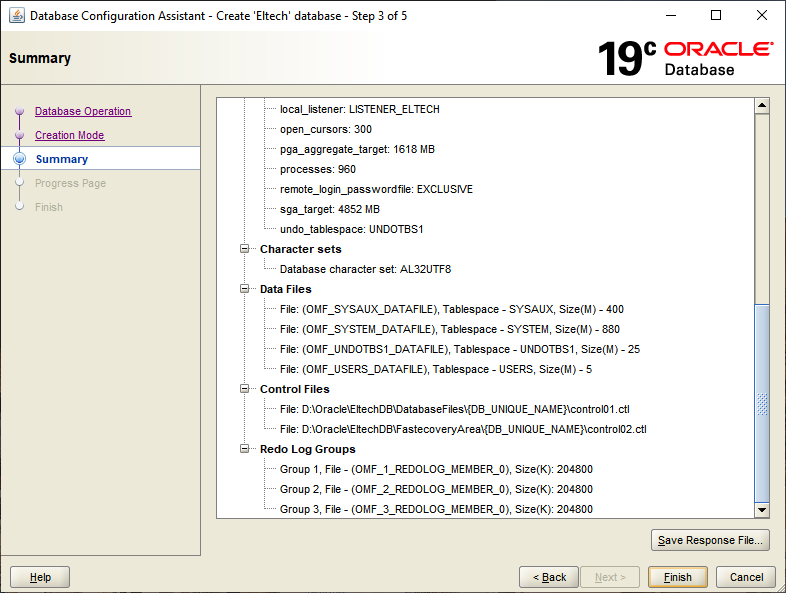
On the Summary screen, you can view the details of database configuration and click on Finish to set up a database named Eltech.
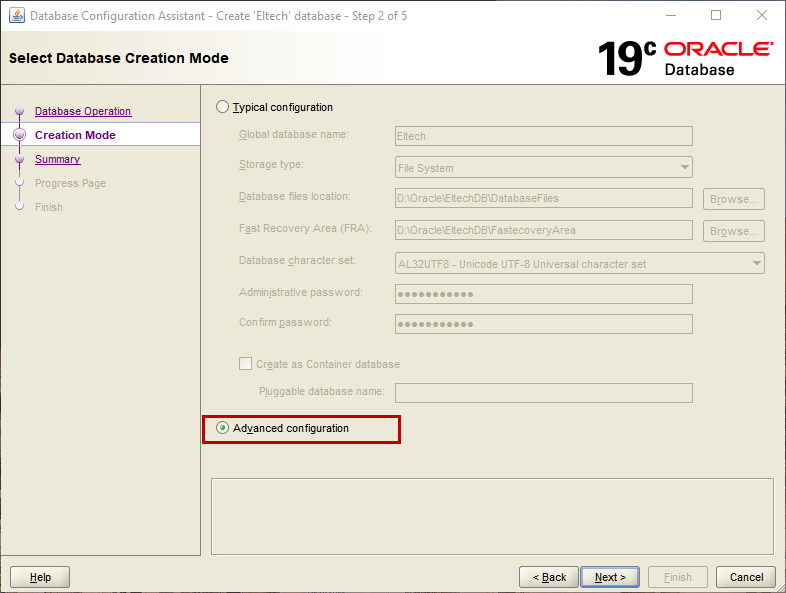
Now, let us see how we can configure various parameters by using an advanced setup. To use the advance option, select Advanced configuration on the Creation mode screen.
Advanced configuration
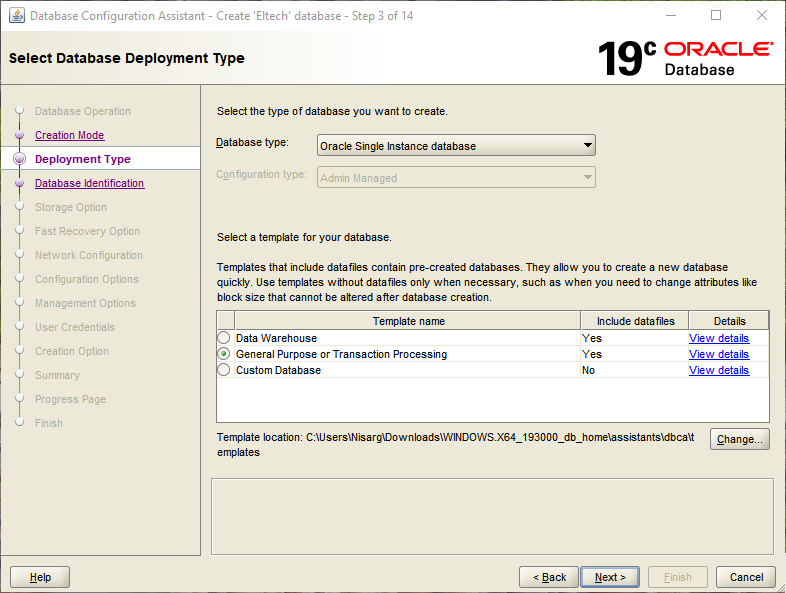
On the deployment type screen, we can choose the database type. The values can be any of the following:
- Oracle Single instance database
- Oracle real application cluster (RAC) database
- Oracle RAC one node database
Secondly, based on the requirement, you can choose the pre-configured template to create the new database. I have selected Oracle Single instance database as database type and chosen General Purpose or transactional processing as a database template.
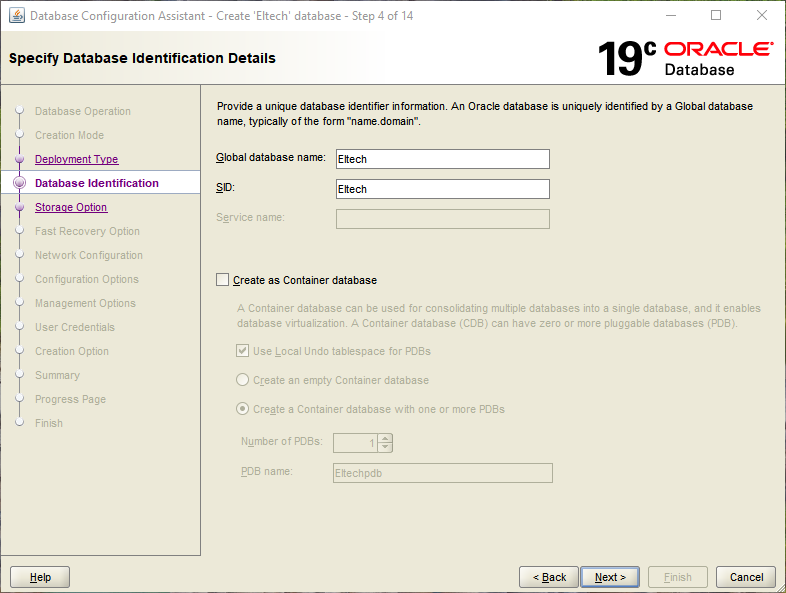
You can specify the global database name and SID to identify the database on Specify database identification screen. Moreover, if you want to use the multi-tenant architecture for the database, you can select the Create as Container database option. In our setup, I have used Eltech as a global database name and SID.
On the database storage option screen, we can configure the storage option. You can choose any of the following options.
- Use template file: The installer will use the storage type and database file location from the pre-configured template
- Specify the storage type and database file location: you can select the storage type from the Database files storage type drop-down box and specify the database files location in the database file location textbox. I have selected File system as a storage type and D:\Oracle\EltechDB\DatabaseFiles\{DB_UNIQUE_NAME}\ as a database file location
- Use Oracle-Managed Files: If you want Oracle to determine the best way to store the database files, you can select Use Oracle-Managed files (OMF) option

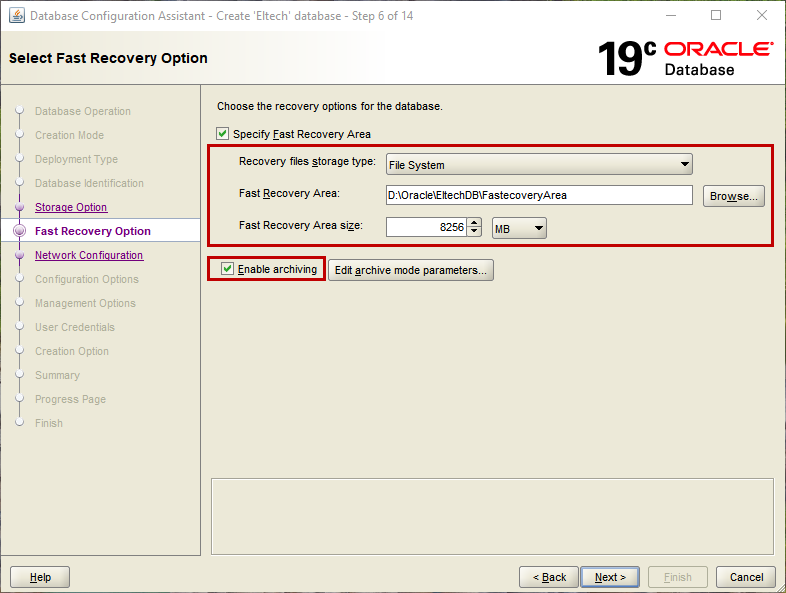
On the Select Fast Recovery Option screen, you can provide the location and size of the recovery area used to store the recovery files. Moreover, you can enable archiving. I have chosen file system as storage type, D:\Oracle\EltechDB\FastecoveryArea as a recovery area, and allocated 8256 MB to store the recovery files. I have also enabled archiving.
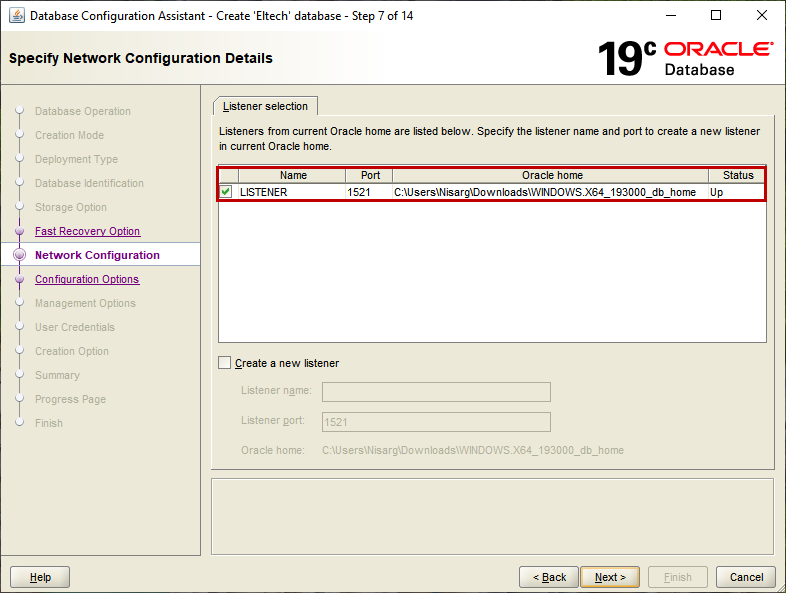
On the Specify Network Configuration Details screen, you can specify the LISTENER details of the Oracle database. The LISTENER is an important component of the database. It accepts the incoming client connection and redirects them to their respective database. We can create multiple LISTENER for their respective database or use the existing listener to connect to the database. I have chosen the pre-configured listener. You can read Configuring and Administering Oracle Net Listener to learn more about the Oracle listeners.
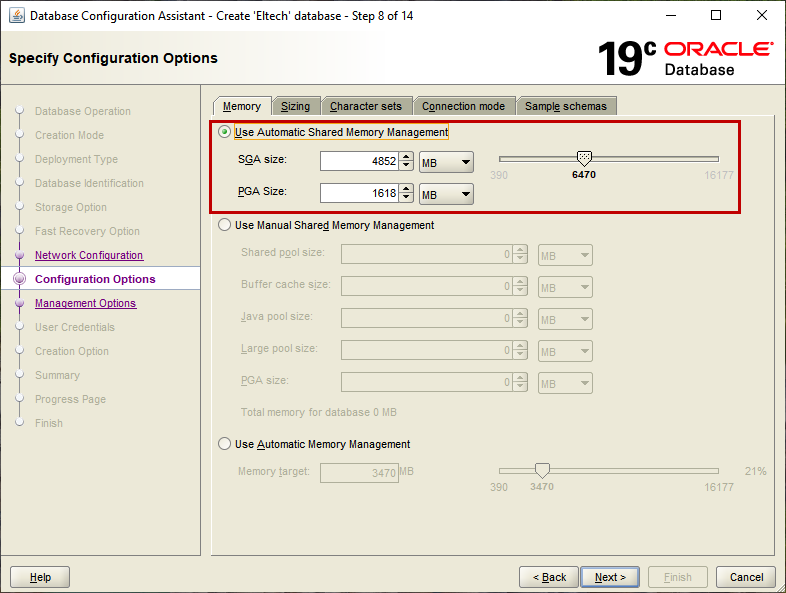
On Specify configuration options screen, you can configure the following options.
Memory Management
You can manage the memory component of the database. Here you can allocate the memory to the individual component. You can choose any of the following options:
- Automatic memory management: You can allocate the memory to the SGA and PGA. The memory unit will be in MB
- Use Manual shared Memory Management: You can allocate the memory to the various component of memory. You can specify the memory for:
- Shared Pool
- Buffer cache
- Java pool
- Large Pool
- PGA Size
- Use Automatic Memory management: You can use this option when you want Oracle to manage the memory allocation. In this option, all you have to do is provide the total memory size you want to allocate to the Oracle database.
I have chosen the Use Automatic Shared Memory management option.
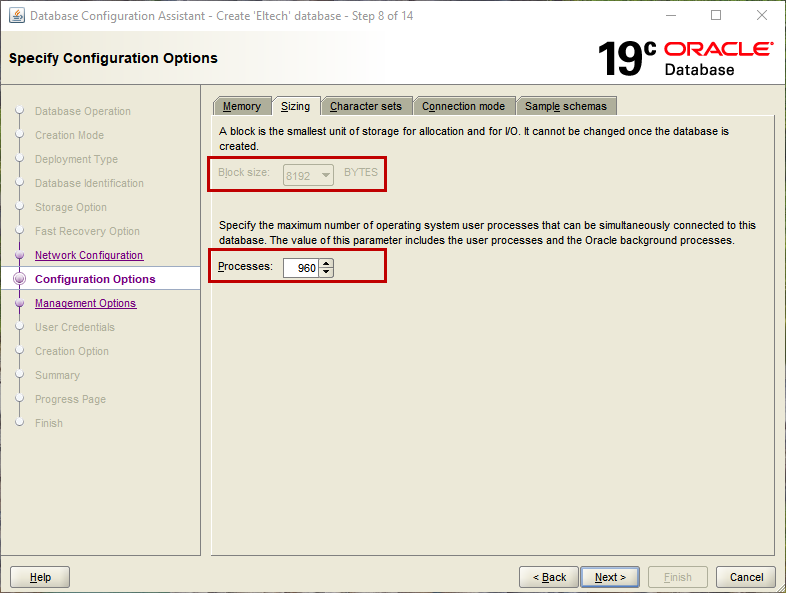
Sizing
In the Sizing tab, we can specify:
- The block size of storage that is used in the Oracle database
- Specify the number of the user process that can be connected to the Oracle database. The value entered in this parameter includes the user processes and operating system background processes
I have used the default values.
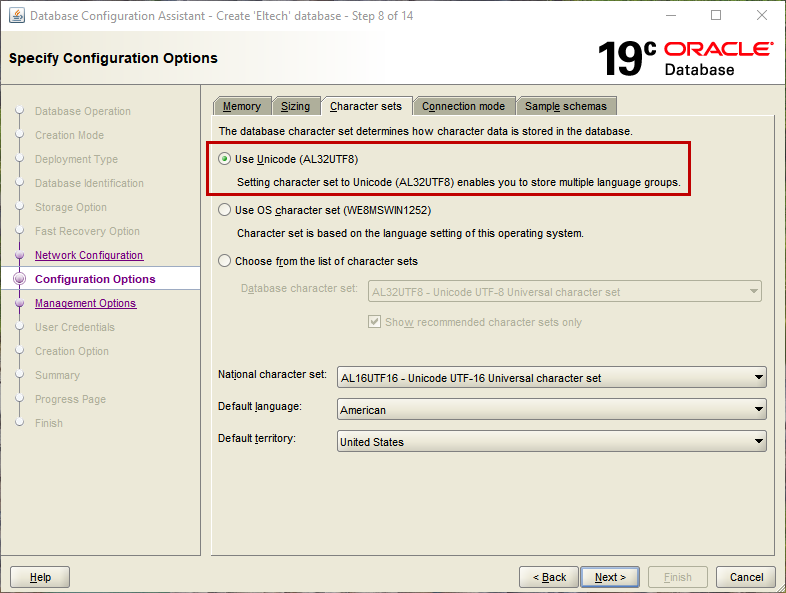
Character Set
Under the character set tab, you can specify the character set you want to use to store the database. The valid options are
- Unicode
- Use OS character set
- Select a specific character set from the list
I have selected the Unicode character set.
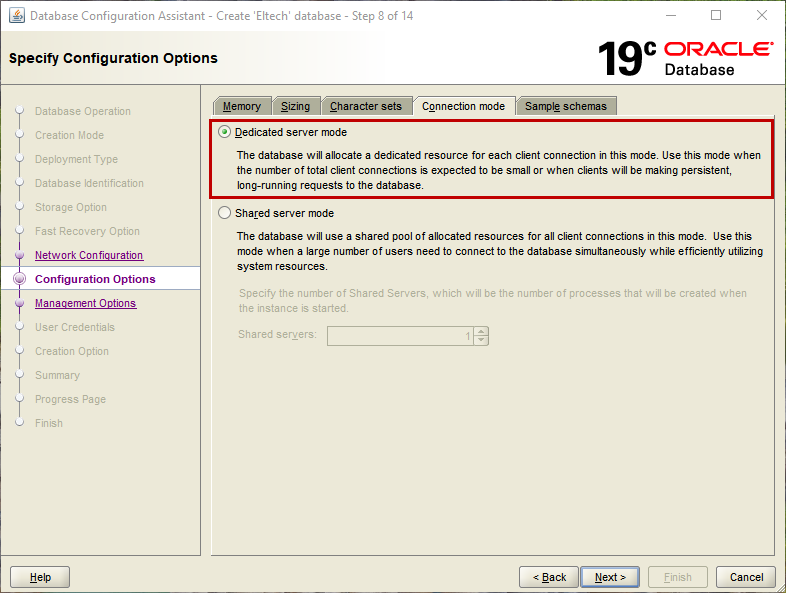
Connection Mode
Under the connection mode tab, you can choose any of the following options.
- Dedicated Server Mode: When we select this option, the Oracle will allocate the dedicated resources to the user connection. This option is efficient when the number of user connections is less
- Shared Server Mode: When we select this option, the Oracle will use a shared pool to allocate the resources to the user connections. This option is efficient when a number of user connection are high
I have selected the default option, which is dedicated server mode.
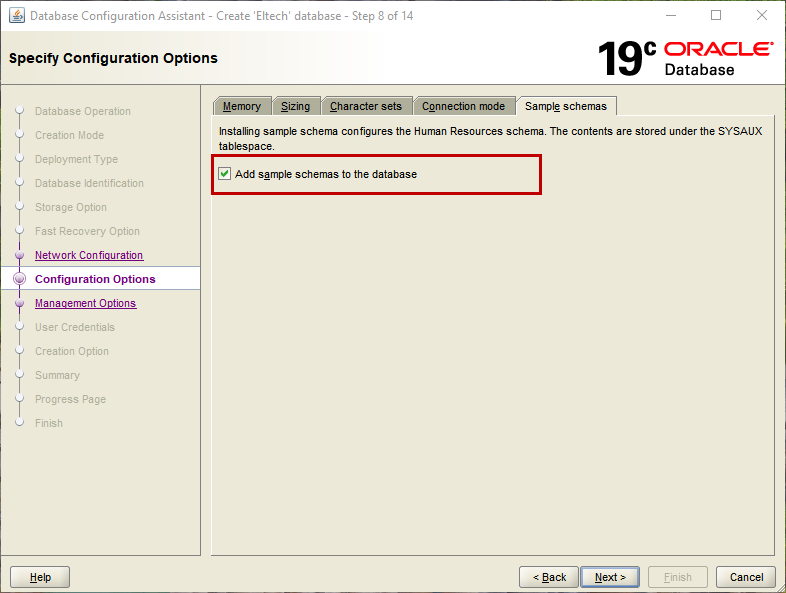
Sample Schemas
Under the sample schema tab, you can choose to install the same schema in the database. We want to install the sample schema, so I have selected Add sample schemas to the database options.
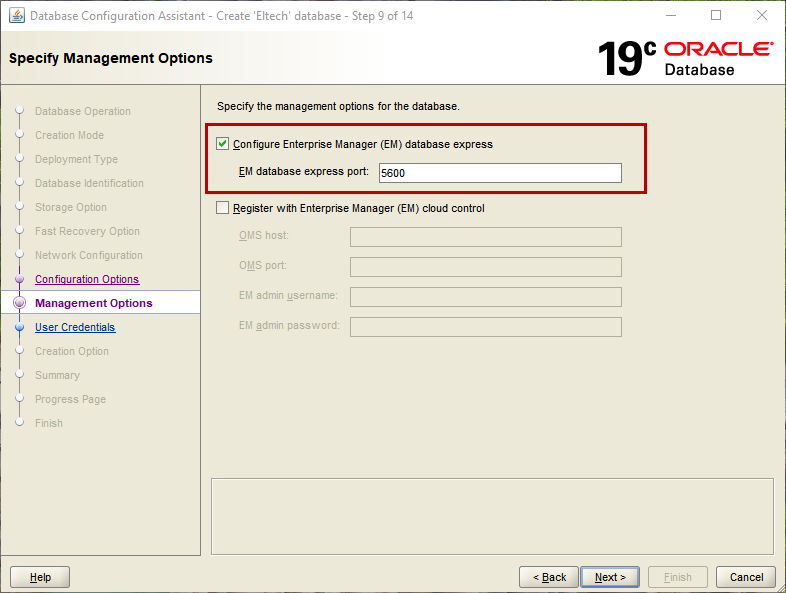
In Specify Management Options screen, you can enable the Enterprise Management database express tool. It’s a GUI web console that is used to manage the Oracle database and server. You can specify the port that is used to connect to the URL of the enterprise manager.
In our case, I have changed the EM database express port to 5600.
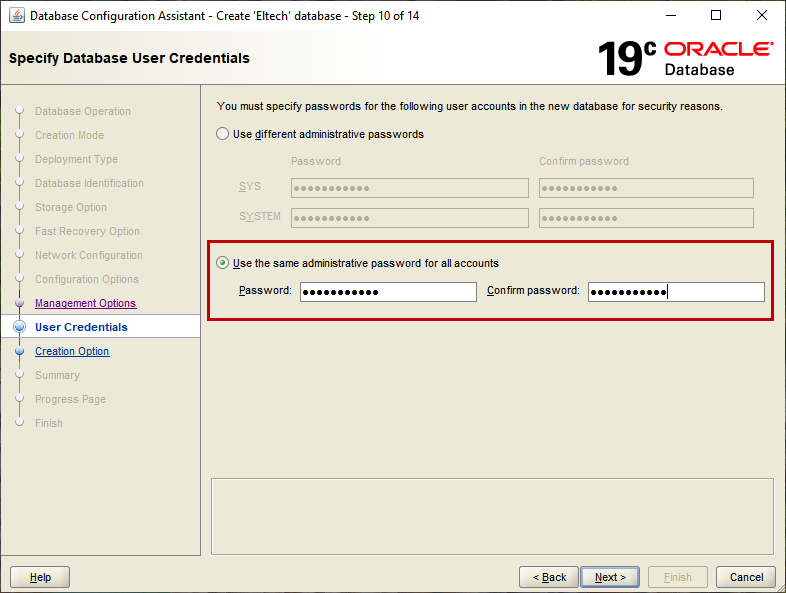
In Specify Database User Credential screen, you can specify the password for SYS and SYSTEM users. If you do not want to specify the different passwords for SYS and SYSTEM users, you can create a common password for all accounts.
I have created a common password for both users.
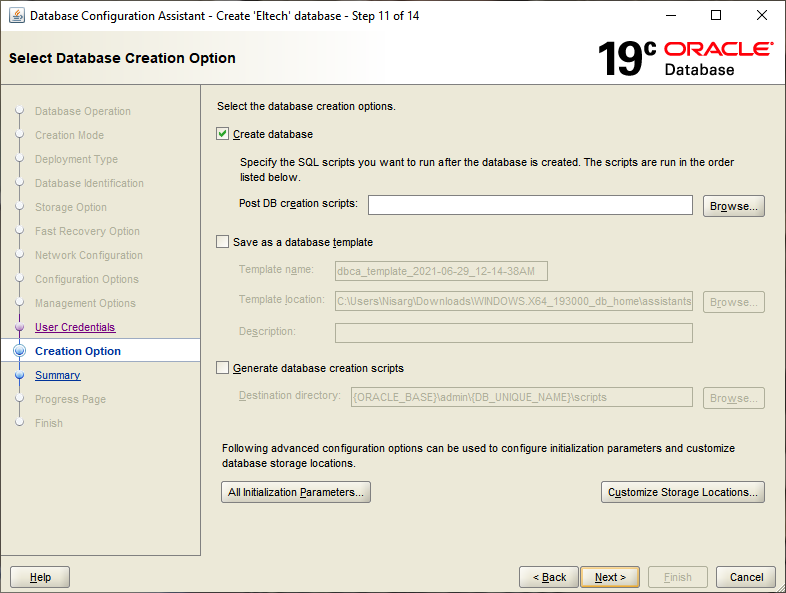
In select the database creation options, you can perform any of the following tasks.
- Create a database and run the post DB creation script
- Save the configuration as a template. We can use the template to create another database
- Generate the database creation script
I have used the default options.
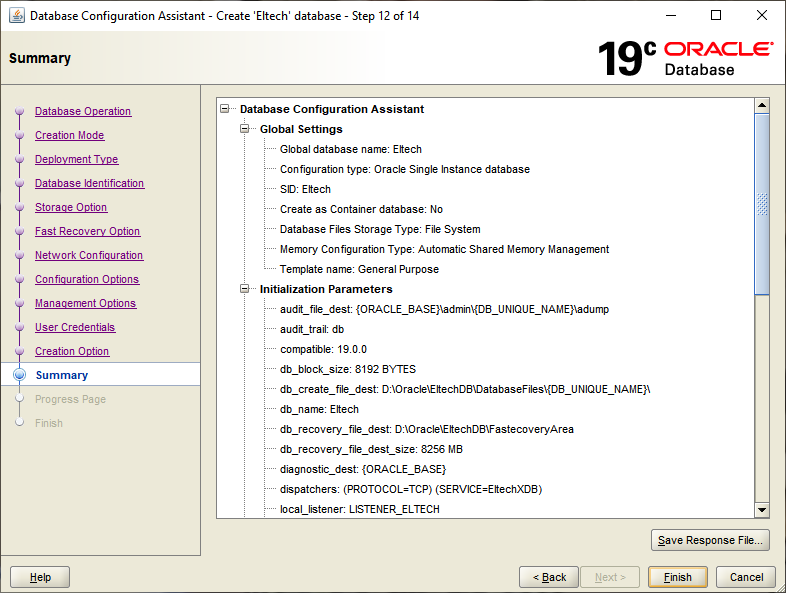
On the summary screen, you can view all configured options. Review the configurations and click on Finish to begin the database creation process.
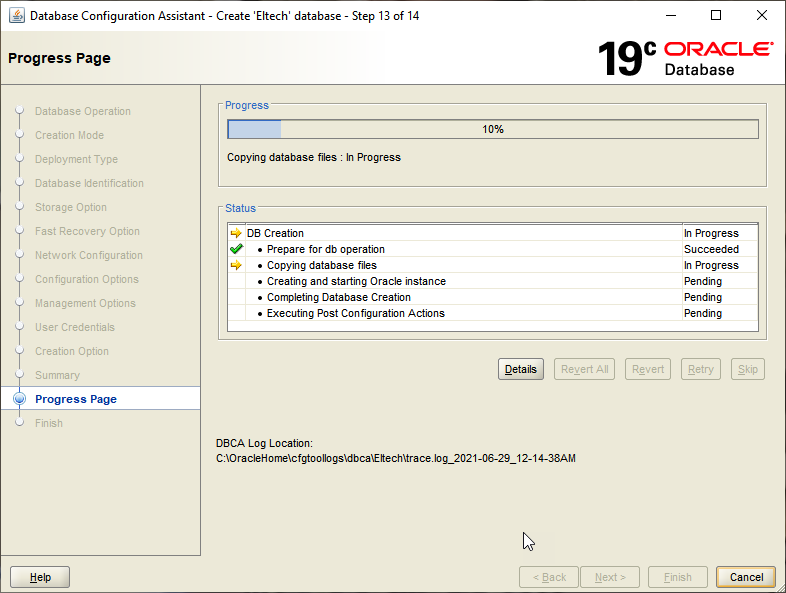
The database creation process begins. You can view the progress in progress page.
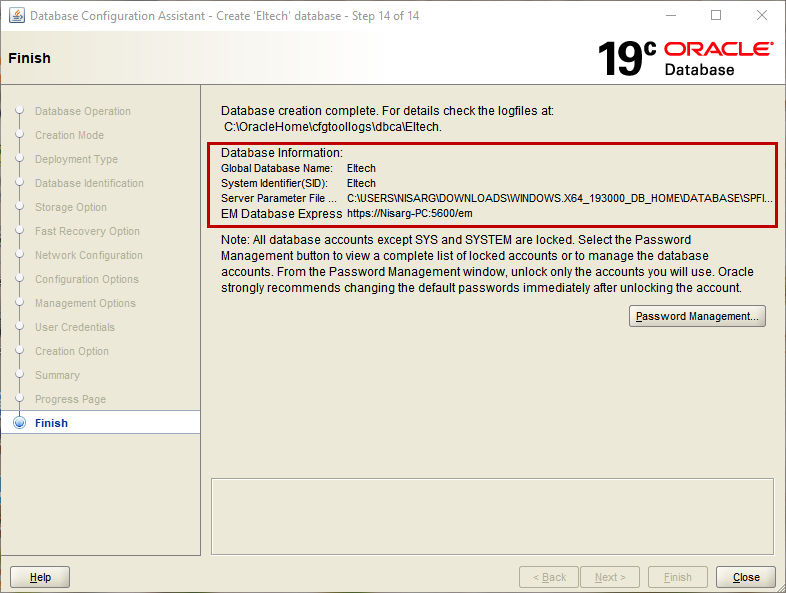
Once the database has been created, the database configuration assistant provides the details of it.
As you can see, the Eltech database has been created. Now, let us connect it by using SQL*Plus utility. To connect, launch SQL*Plus and connect to the database by using sys user.
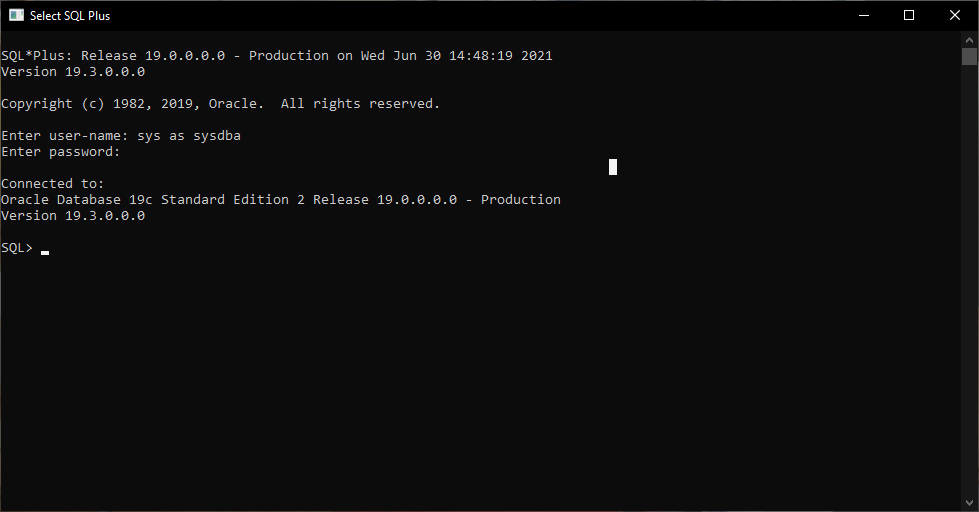
Once connected, run the following query to view the details of the database.
SQL> select dbid,name,created from v$database;
Output:
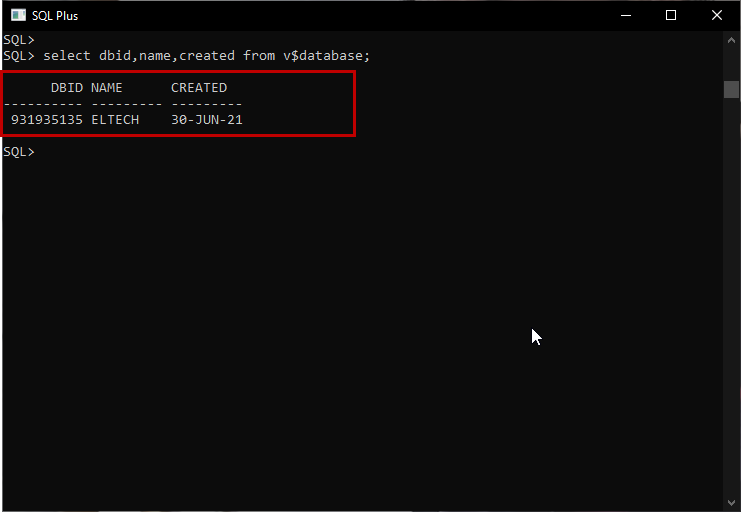
As you can see, the ELTECH database has been created.
Summary
In this article, we learned how we can create an Oracle 19c database by using the database configuration assistant.

He has expertise in database design, performance tuning, backup and recovery, HA and DR setup, database migrations and upgrades. He has completed the B.Tech from Ganpat University. He can be reached on nisargupadhyay87@outlook.com
- Different ways to identify and change compatibility levels in SQL Server - July 22, 2024
- Copy SQL Databases between Windows 10 and CentOS using SQL Server data tools - October 19, 2022
- Changing the location of FILESTREAM data files in SQL Database - October 14, 2022