
This article explains the transfer database task in SSDT 2017. After reading this article, you will be able to transfer the databases between the same server or different servers.
Environment Setup and use case
I have created two different named instances of SQL Server 2019 on my workstation. The SQL01 instance is the source instance because we are going to copy the database which is created on SQL01. The SQL02 is a destination instance. I have restored a database named StackOverFlow2010 on SQL01. We are copying it from Source Server to Destination Server. The database copy process will be offline.
Configure integration service package
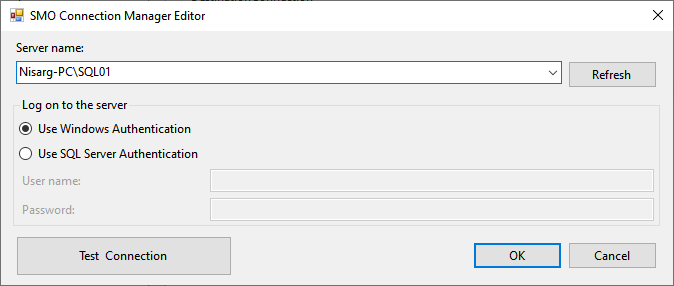
I have downloaded SSDT 2017 (SQL Server data tools for visual studio 2017) on my workstation. I have written a separate article that explains the installation process of SSDT 2017. SQL Server data tools have various integration service tools that can be used to perform various tasks. We can configure the SSIS packages to perform the ETL process and database maintenance activities.
First, let us create an SSIS package. Launch SSDT 2017 and create a new integration service project. The project name is CopyStackOverflow2010.
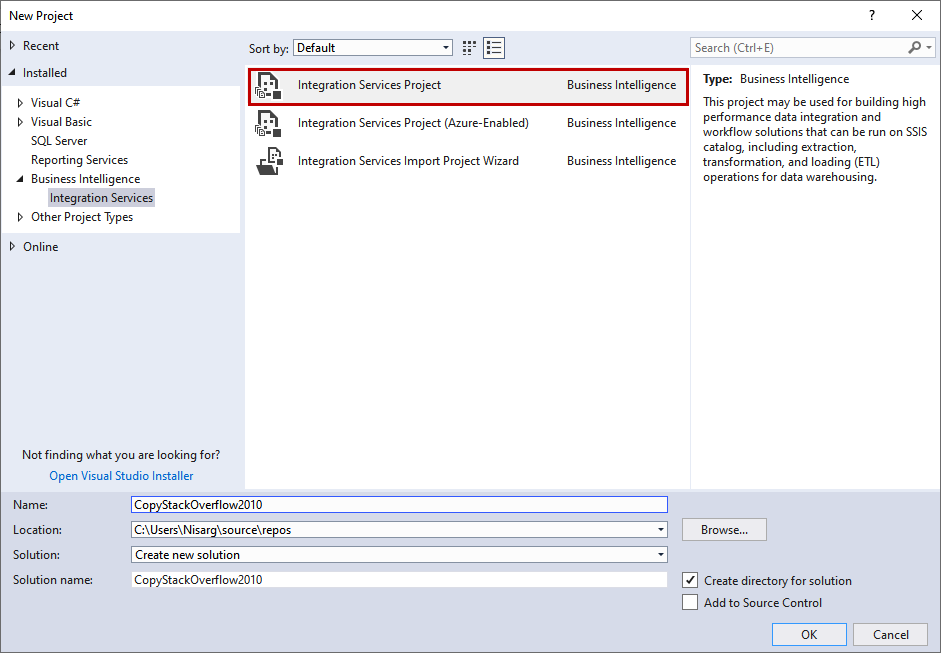
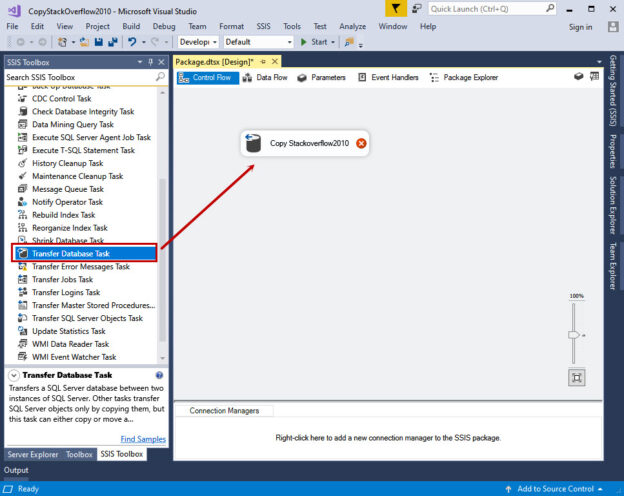
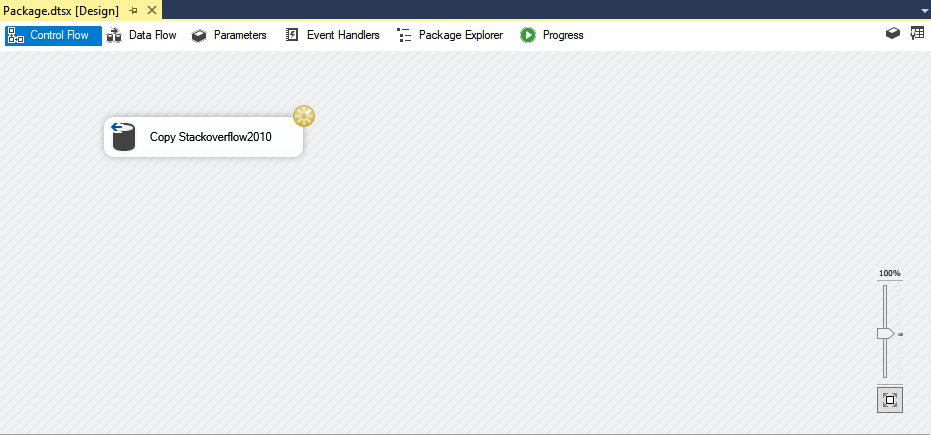
On the SSIS package designer, drag the transfer database task and drop it on Control Flow designer and rename it to Copy Stackoverflow2010.
Configure Transfer Database Task
We have added the transfer database task named Copy StackOverFlow2010 on Control Flow designer. Double-click to configure it. We can configure the parameters in the Database page on the task editor, so select it. In the Databases page, configure the parameters as following:
Source Connection:
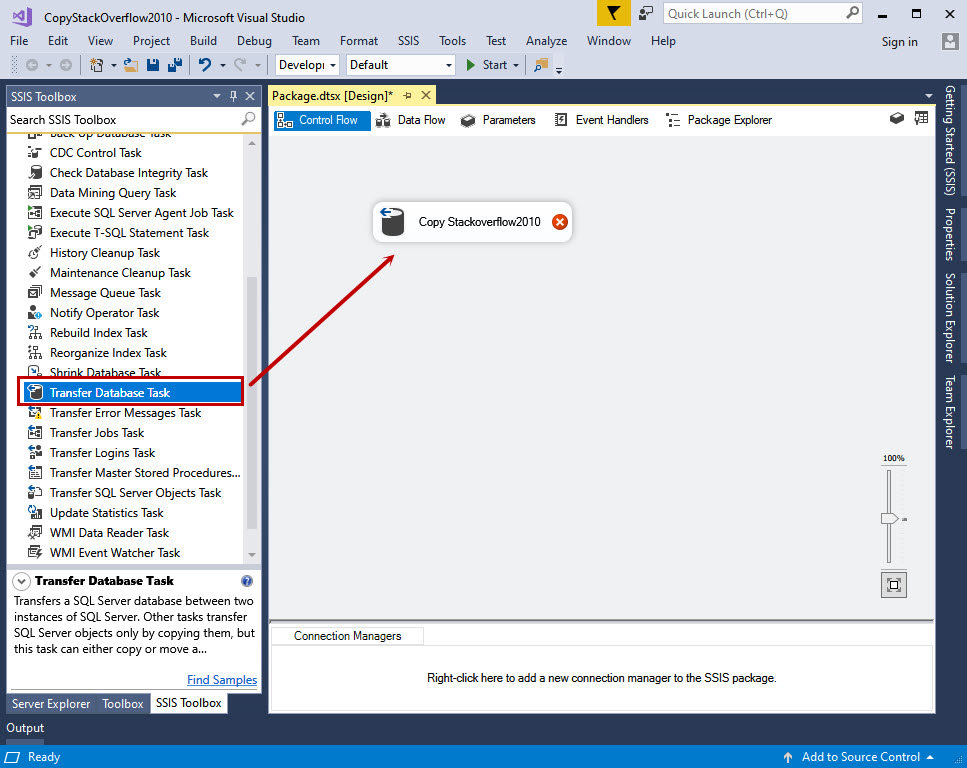
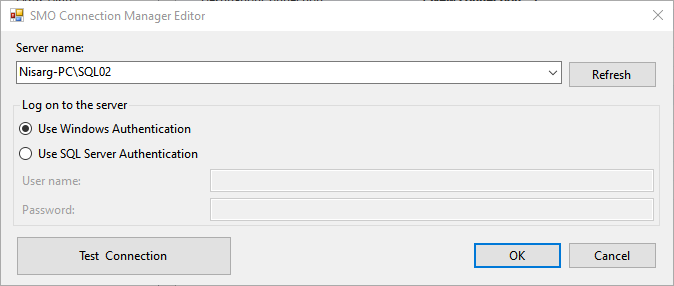
To configure the source connection, Click SourceConnection drop-down box and select New Connection. An SMO connection manager editor opens. In the Server name text box, specify the hostname of the source server, which is Nisarg-PC\SQL01. Select Windows Authentication as a logon method.
Action
Select the action that you want to perform using the transfer database task. We can move or copy the database using the transfer database task. In our demo, we are copying the Stackoverflow database; hence select Copy.
Method
Select the method which you want to use while transferring the database. If you want to transfer the database while it is online, then select the DatabaseOnline option. If you want to copy/move the database by setting it offline, select DatabaseOffline. We want to transfer the database with the DatabaseOffline method, so select DatabaseOffline.
Source Database Name
Specify the source database name. In this demo, the source database is Stackoverflow2010.
Source Database File
Specify the source database file. We can populate the list of source database files by clicking on the balloon icon (…). When you click on it, another dialog box opens with a list of files and their path. In the Network File Share, provide the path where the data files of the source database are located.
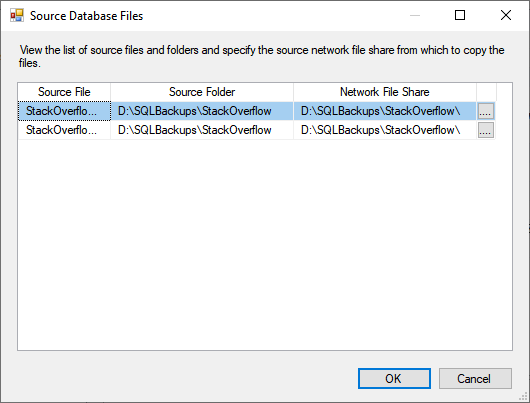
Click OK to load the file list in the source database file textbox.
Destination Database Name
Specify the name of the destination database name. In this demo, the destination database is Stackoverflow2010_Copy.
Destination Connection
To configure the destination connection, Click DestinationConnection drop-down box and select New Connection. An SMO connection manager editor opens. In the Server name text box, specify the hostname of the destination server, which is Nisarg-PC\SQL02. Select Windows Authentication as a logon method.
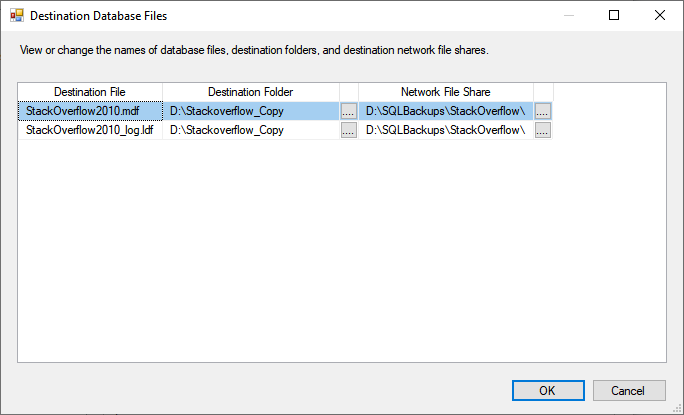
Destination Database File
Specify the file name of the destination database. This option is enabled when the source database files are configured. Once the source is configured, click on the balloon icon. A dialog box opens. We are copying the files to the D:\Stackoverflow_Copy directory; therefore, specify it in the Destination folder. Make sure the source file name and destination file name are the same.
Detonation Overwrite
This option is used when the database already exists on the destination server. If you want to overwrite the data of the destination database, set the value as True; else set the value as False. In this demo, the destination database does not exist, so I have selected False.
Reattach Source Database
This option is used when the task is failed to execute. When you set the option as True, the task will re-attach the database files. In our demo, select True.
The Database configuration looks like the following screenshot.
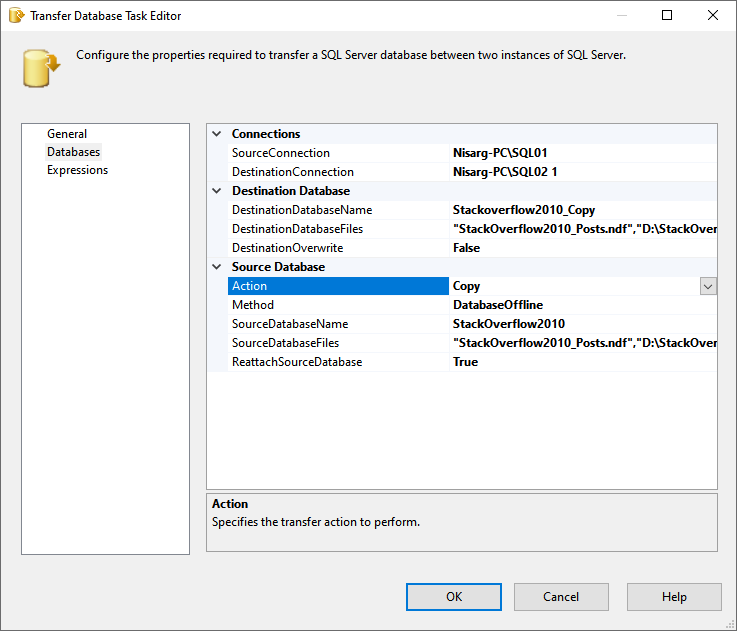
Click OK to save the configuration and close the Task editor.
Execute the package
The package has been created; it is time to test the transfer database task. To do that, click on Execute button, which is in the menu bar.

The package execution begins.
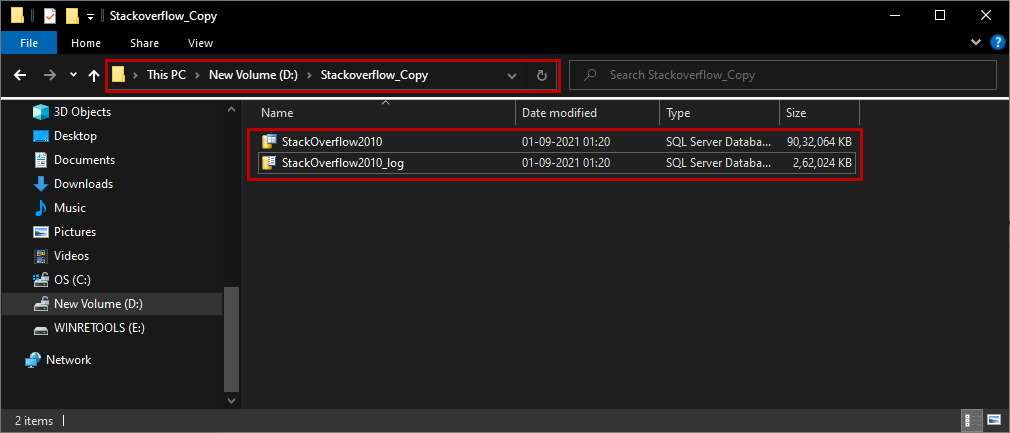
Once the package executes successfully, you can view the database files in the D:\Stackoverflow_Copy location.
Also, you can verify that database named Stackoverflow2010_new has been created using the database files that are copied to the SQL02 server. To review the database files, connect to SQL02 instance and run the following query.
|
1 2 3 |
use Stackoverflow2010_Copy go select name,type_desc,physical_name,state_desc from sys.database_files |
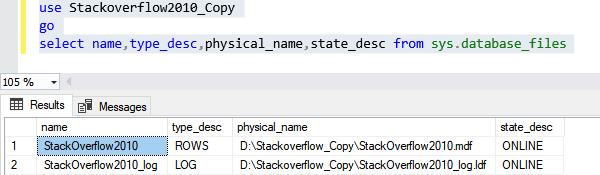
As you can see, the database stackoverflow2010_new has been created.
Summary
In this article, we learned how we can use the transfer database task to copy the entire database between two SQL Server instances. In the next article, we will learn how we can copy the specific objects between two databases. Stay tuned.

He has expertise in database design, performance tuning, backup and recovery, HA and DR setup, database migrations and upgrades. He has completed the B.Tech from Ganpat University. He can be reached on nisargupadhyay87@outlook.com
- Different ways to identify and change compatibility levels in SQL Server - July 22, 2024
- Copy SQL Databases between Windows 10 and CentOS using SQL Server data tools - October 19, 2022
- Changing the location of FILESTREAM data files in SQL Database - October 14, 2022