
Introduction
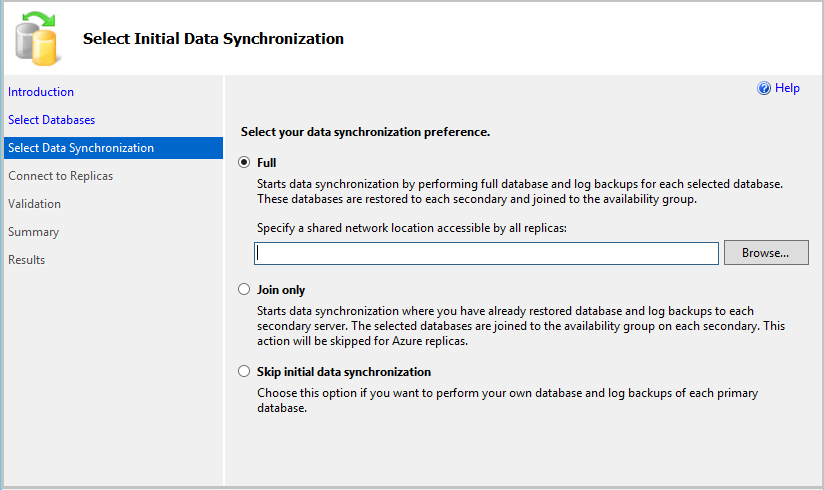
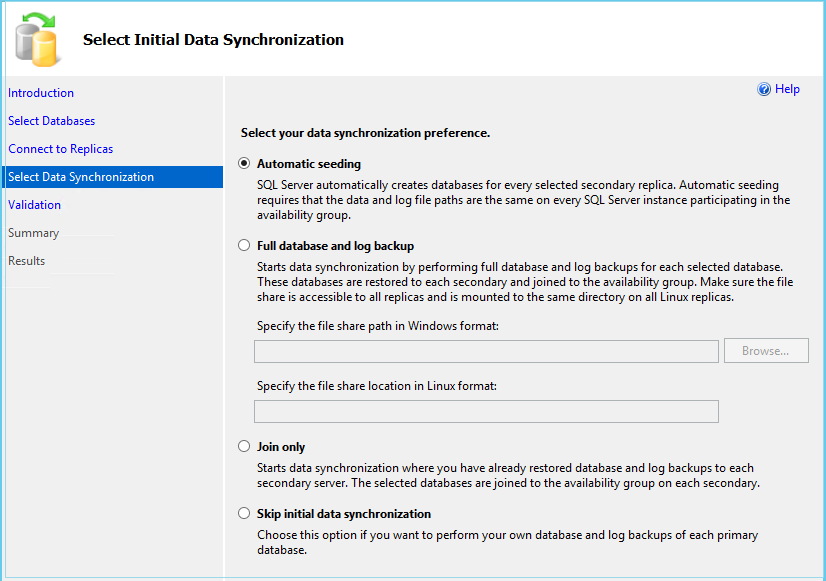
In SQL Server Always On Availability Groups, we can add a database into an existing availability group using different methods. We get the following option in the Initial Data Synchronization wizard in SSMS.
- Full Database and Log backup: It starts data synchronization by taking full and log backup for the availability group database. It restores these backups into each secondary replica and joins them to the availability group
- Join Only: If we have taken manual backups and restored them on the secondary server, we can use the Join Only method to add a database into an availability group
- Skip Initial data synchronization: If we want to perform all database backup manually, restore them on each secondary replica, and join them manually on the secondary replica, we can select this option
Usually, DBA follows up the method Join Only after restoring the backups manually on each secondary replica. This approach is suitable for large databases as well.
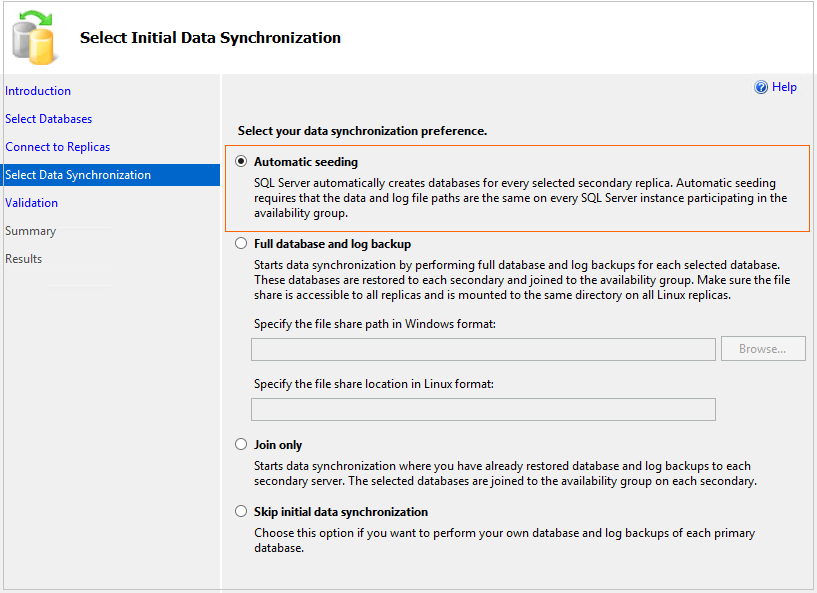
SQL Server 2016 introduces a new data synchronization method for databases in Always On Availability Groups – Automatic Seeding or direct seeding
You need to connect SQL Server 2016 or later with SQL Server Management Studio 17.4 or later to see this option. You can still use this feature with the old SSMS version but not with the GUI method. I would recommend installing the latest SSMS version.
In the previous article, SQL Server 2016 Always On Availability Group with Direct Seeding you can take an overview of automatic seeding configuration in Always On Availability Groups using t-SQL scripts. In this article, we will look at a few more aspects along with the GUI method of adding a database into AG.
Environment prerequisites:
- SQL Server 2016 or latest version
- SSMS 17.4 or later
- A database should have a full database backup to meet prerequisites at the database level. If you created a new database, take a full back up before proceeding for the next step
Enable Trace Flag for compression in Automatic Seeding for Always On Availability Groups
By default, compression is not enabled for the automatic seeding streaming. We can leverage trace flag 9657 to enable the compression. It is essentially good for large databases. You might notice an increase in the CPU of the primary replica.
We can enable this trace flag either as a startup parameter or using DBCC TRACEON command. Execute the following command to enable the trace flag at a global level.
DBCC TRACEON (9567,-1)
If you want to add as a startup parameter, go to SQL Server Configuration Manager and open SQL Server Service properties. In the properties windows, go to startup parameter and add the trace flag
Steps to add a database in AG using automatic seeding for Always On Availability Groups
We can use the following steps to add a database in SQL Server Always On using Automatic Seeding.
Connect to primary replica and Right click on the availability group and click on Add database. It launches a wizard to add the database into an availability group.
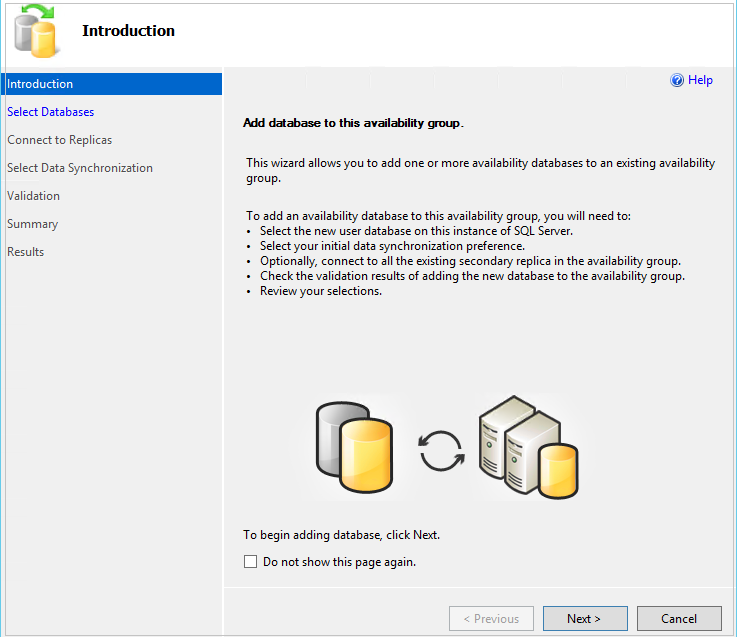
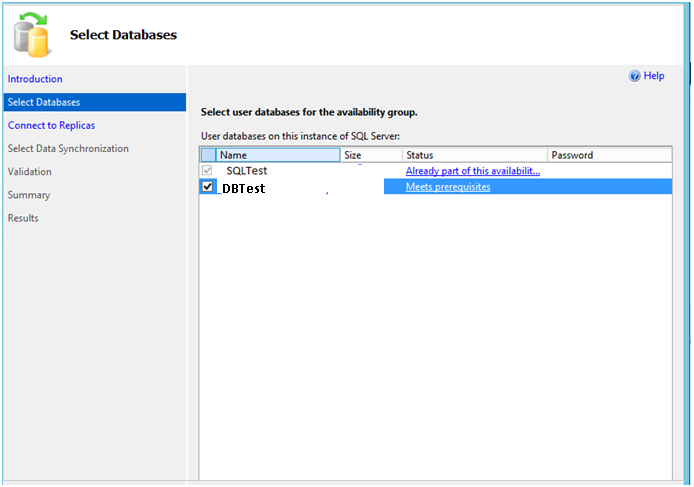
Click on Next and select a database to add to the existing availability group. This database should have a full backup to meet the prerequisite for the Always On Availability Groups.
Connect to your secondary replicas in the next screen and specify Initial Data Synchronization as Automatic Seeding.
You should have similar directories at both the primary and all secondary replicas. If there is any mismatch or directory that does not exist in secondary replicas, you get the following error message.
The following required directories do not exist on replica DBTest : D:\DBTest,D:\DBTest. (Microsoft.SqlServer.Management.HadrModel)
You should have sufficient free space in the secondary replica as well for database copy similar to the primary replica of Always On Availability Groups.
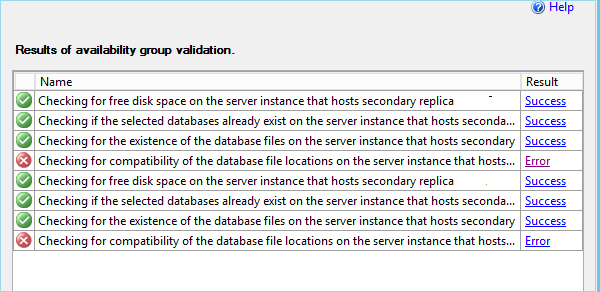
If you have any issues in the secondary replica, you get an Error message. You should fix it and rerun validations.
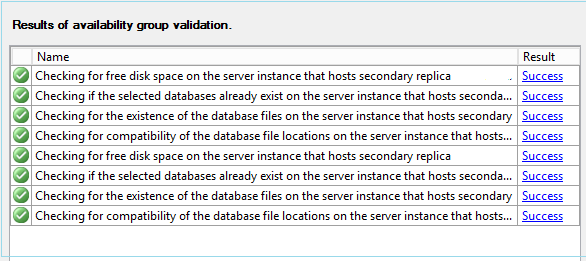
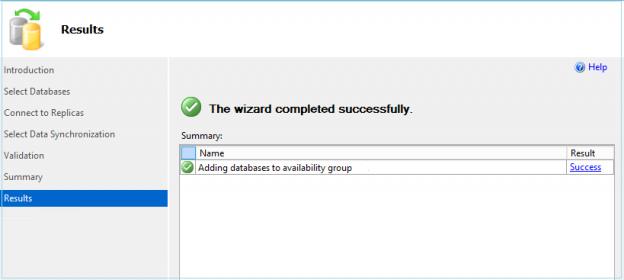
Once all the validations are successful for each secondary replica, click Next and it adds a database to the availability group. You get the following message.

The synchronization might take time depending upon the database size, network bandwidth, disk speed etc. You should monitor the status of automatic seeding, especially for the large databases.
Internal of Automatic Seeding and Monitoring in Always On Availability Groups
SQL Server performs the following steps to add a database using Automatic Seeding.
- SQL Server performs a full database backup using Microsoft SQL Server Virtual Device Interface (VDI) full database
- This VDI database backup is streamed through the network to all available secondary replicas
- Secondary replica restores this streamed backup
- Once the database restoration is complete, it is added into the availability group
Usually, we check the database backup status using the DMV sys.dm_exec_requests. If you run this command on primary replica and check for command specific to backup, you did not get any output for the backup.
As it executes a VDI backup, you need to run the following command on Primary replica to check the status of backup
|
1 2 3 4 5 6 7 8 9 |
SELECT r.session_id, r.status, r.command, r.wait_type , r.percent_complete, r.estimated_completion_time FROM sys.dm_exec_requests r JOIN sys.dm_exec_sessions s ON r.session_id = s.session_id WHERE r.session_id <> @@SPID AND s.is_user_process = 0 AND r.command like 'VDI%' and wait_type ='BACKUPTHREAD' |
In the following screenshot, you can see VDI_Client_WORKER command is executing backup and you can track the backup percentage completion.

On the secondary replica of Always On Availability Groups, you can run the following command to check the status of REDO operation.
|
1 2 3 4 5 6 7 8 9 |
SELECT r.session_id, r.status, r.command, r.wait_type , r.percent_complete, r.estimated_completion_time FROM sys.dm_exec_requests r JOIN sys.dm_exec_sessions s ON r.session_id = s.session_id WHERE r.session_id <> @@SPID AND s.is_user_process = 0 AND r.command like 'REDO%' and wait_type ='BACKUPTHREAD' |
Let’s view a few other methods to monitor the Automatic Seeding.
Using Dynamic Management Views
We can monitor the progress of Automatic Seeding for Always On Availability Groups using the following dynamic management views.
- Sys .dm_hard_automatic_seeding: We can use this DMV as a summary for all successful, fail automatic seed information for each database and replica. If there are multiple attempts, it counts the retry. We can also see the related error and failure codes in case the automatic seeding failed
- Sys .dm_hard_physical_seeding_stats: This DMV is useful to get the current state of automatic seeding including the transfer rate, estimated completion time, database size, compression enabled or not
Let’s execute the DMV to check the seeding status from the primary replica.
|
1 2 3 4 5 |
select local_database_name , remote_machine_name,role_desc ,internal_state_desc ,transfer_rate_bytes_per_second/1024/1024 as transfer_rate_MB_per_second ,transferred_size_bytes/1024/1024 as transferred_size_MB ,database_size_bytes/1024/1024/1024/1024 as Database_Size_TB, is_compression_enabled from sys.dm_hadr_physical_seeding_stats |
In the following screenshot, you can see two rows returned. I have three nodes Always On Availability Groups in my environment. SQL server transfers the streaming backup to both the secondary replicas. We can see is_compress_enabled is set to 1 that shows trace flag 9567 is enabled for compression.

Using Windows Performance Monitor
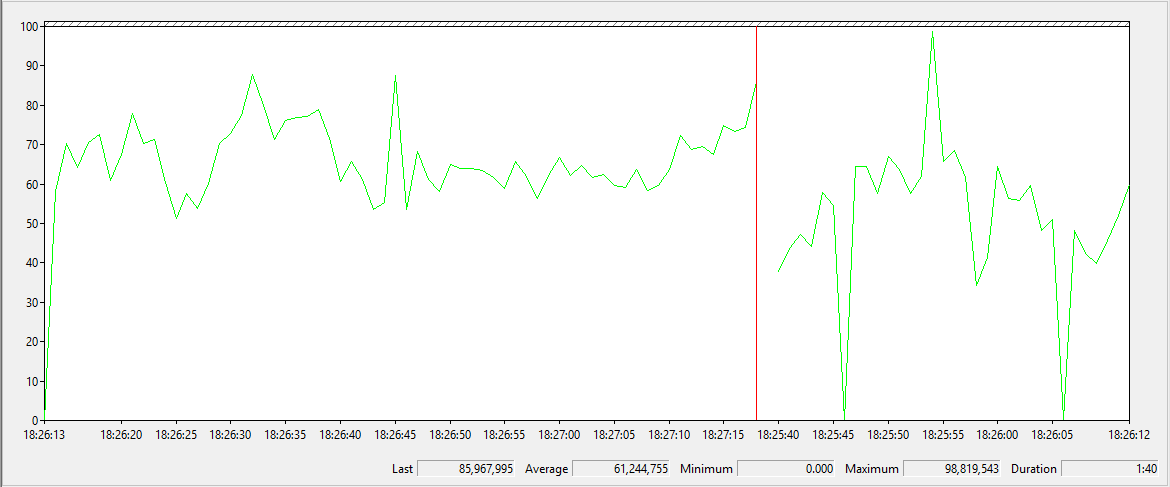
You can also use performance monitor to get the information about the network speed during the automatic seeding. On the primary replica, use Bytes sent per the second parameter to check network speed.
Byte Sent per Second on primary Replica
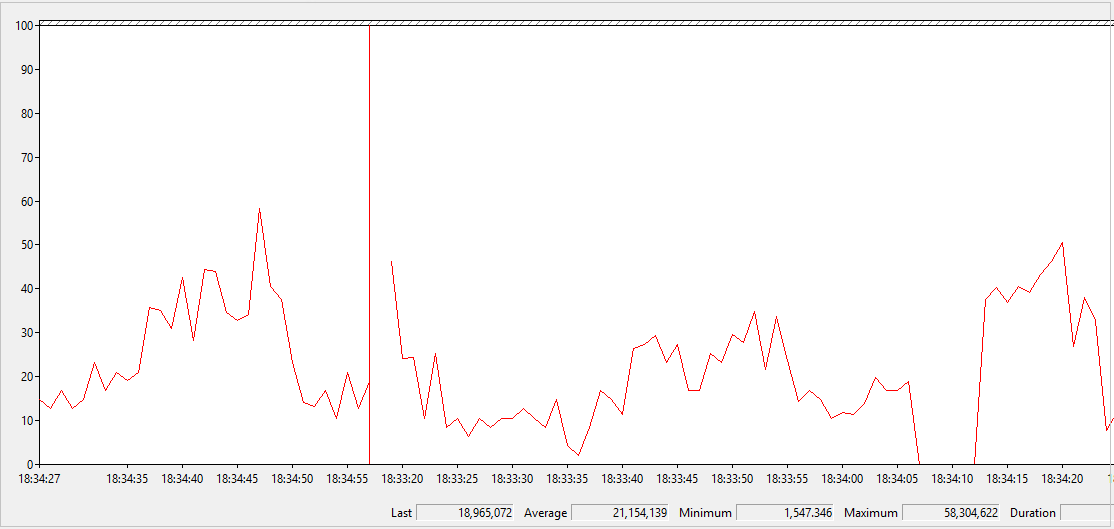
Similarly, for a secondary replica in Always On Availability Groups, we can use bytes received per second performance parameter to check the network speed at the secondary replica end.
Byte Received per Second on Secondary Replica
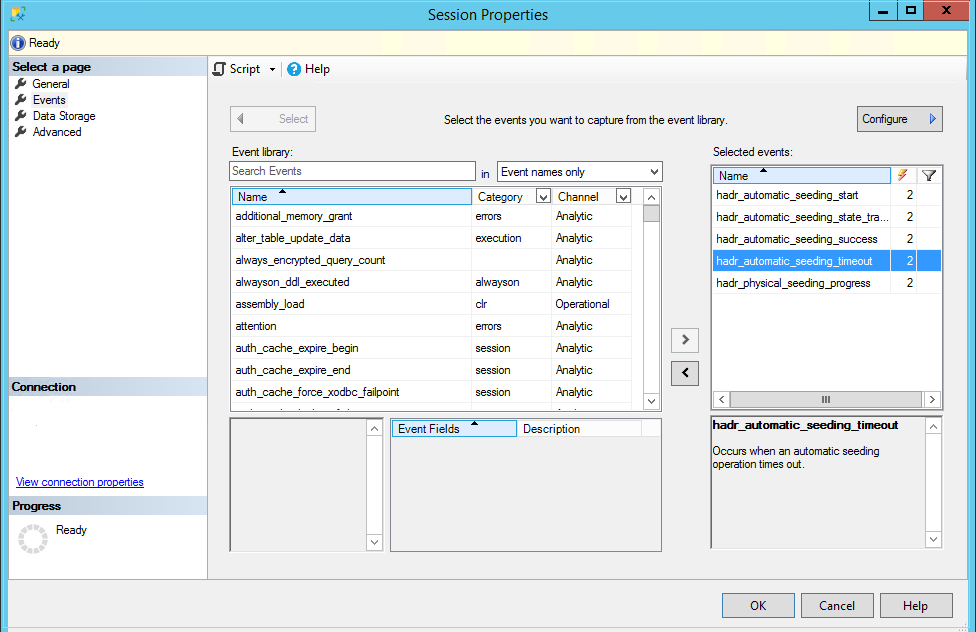
Using Extended Events
We can configure useful extended event session to monitor automatic seeding progress in Always On Availability Groups with the following events
- hard_automatic_seeding_start: It captures the start of an automatic seeding operation
- hadr_automatic_seeding_state_transition: It occurs when an automatic seeding operation changes state
- hadr_automatic_seeding_success: It occurs when an automatic seeding operation succeeds
- hadr_automatic_seeding_timeout: It occurs when an automatic seeding operation times out
- hard_physical_seeding_progress: It shows the physical Seeding Progress
In the extended event session, you get useful information about the progress, transfer size, disk IO waits, network waits etc. You can also use SQL logs to monitor the progress of automatic seeding.

Important Points about Automatic Seeding in Always On Availability Groups
- You can still use other initial data synchronization method in SQL Server Always On. You should decide which feature is most suitable for your environment
- You cannot truncate the transaction log during the automatic seeding. It might result in significant transaction log growth during the progress of automatic seeding. You should consider this factor while planning for Always On Availability Groups synchronization using Automatic Seeding
- The database and log file path must be the same on primary and all secondary replicas
- If the secondary replicas are at a remote site with limited network bandwidth, you should not use this feature
- You should also consider database size, load and transaction log growth on Primary replica to consider this method of initial synchronization
Conclusion
Automatic Seeding in Initial Data Synchronization is a useful feature. It might save a lot of DBA time by handling database backup, copy and restore automatically. You should explore this feature in your Always On Availability Groups environment.

I am the author of the book "DP-300 Administering Relational Database on Microsoft Azure". I published more than 650 technical articles on MSSQLTips, SQLShack, Quest, CodingSight, and SeveralNines.
I am the creator of one of the biggest free online collections of articles on a single topic, with his 50-part series on SQL Server Always On Availability Groups.
Based on my contribution to the SQL Server community, I have been recognized as the prestigious Best Author of the Year continuously in 2019, 2020, and 2021 (2nd Rank) at SQLShack and the MSSQLTIPS champions award in 2020.
Personal Blog: https://www.dbblogger.com
I am always interested in new challenges so if you need consulting help, reach me at rajendra.gupta16@gmail.com
View all posts by Rajendra Gupta
- Understanding PostgreSQL SUBSTRING function - September 21, 2024
- How to install PostgreSQL on Ubuntu - July 13, 2023
- How to use the CROSSTAB function in PostgreSQL - February 17, 2023