
This article explores an SSIS Pivot transformation and SSIS Unpivot transformation for creating Pivot and Unpivot data tables.
Introduction
Pivot tables are an accessible and useful feature for data analytics purposes in Microsoft Excel. It is a reporting tool in the Excel sheets to calculate, analyze and summarize data. You also get data comparisons, trends of source data.
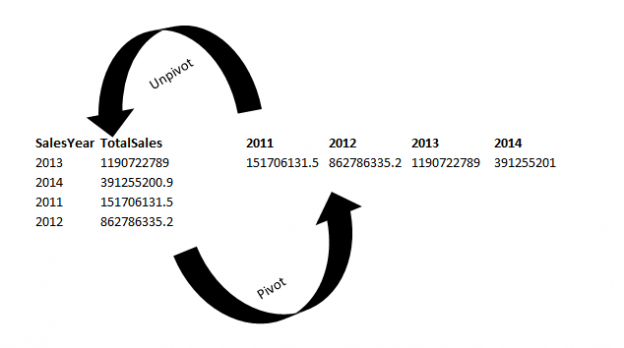
In the following image, we can see Pivot and Unpivot data conversions:

- Pivot – It converts individual row data into separate column data
- Unpivot – It performs reverse data conversion of Pivot data. We get the actual data after Unpivot
SQL Server provides SQL PIVOT and SQL UNPIVOT functions in T-SQL. You can read more about these functions in Static and Dynamic SQL Pivot and Unpivot relational operator overview.
As explained in previous SSIS articles on SQLShack, SSIS is a friendly component that you can use in performing complex transformations with few steps. It does not require extensive programming knowledge. In this article, we will learn Pivot and Unpivot transformations using the SSIS package.
Pre-requisite for SSIS Pivot Transformation
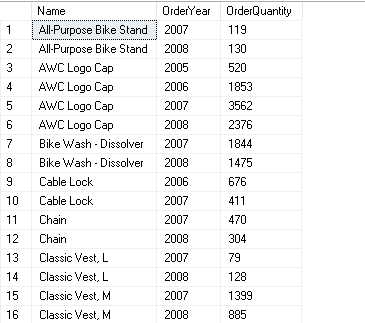
Sample Database – AdventureWorks
For this article, I am using following AdventureWorks sample database.
|
1 2 3 4 5 6 7 8 9 10 11 |
SELECT PROD.Name, YEAR(OrdHead.OrderDate) AS OrderYear, SUM(Details.OrderQty) AS OrderQuantity FROM Sales.SalesOrderDetail AS Details INNER JOIN Production.Product AS PROD ON Details.ProductID = PROD.ProductID INNER JOIN Sales.SalesOrderHeader AS OrdHead ON Details.SalesOrderID = OrdHead.SalesOrderID GROUP BY PROD.ProductID, PROD.Name, YEAR(OrdHead.OrderDate) ORDER BY PROD.Name, YEAR(OrdHead.OrderDate); |
Visual Studio 2019
In this article, I am using SQL Server Data Tools in Visual Studio 2019. It is a new version of Visual Studio and undergone many changes. You can refer to Microsoft docs for changes in SSDT and downloading the installer.
Visual Studio 2019 configuration for Integration Service projects

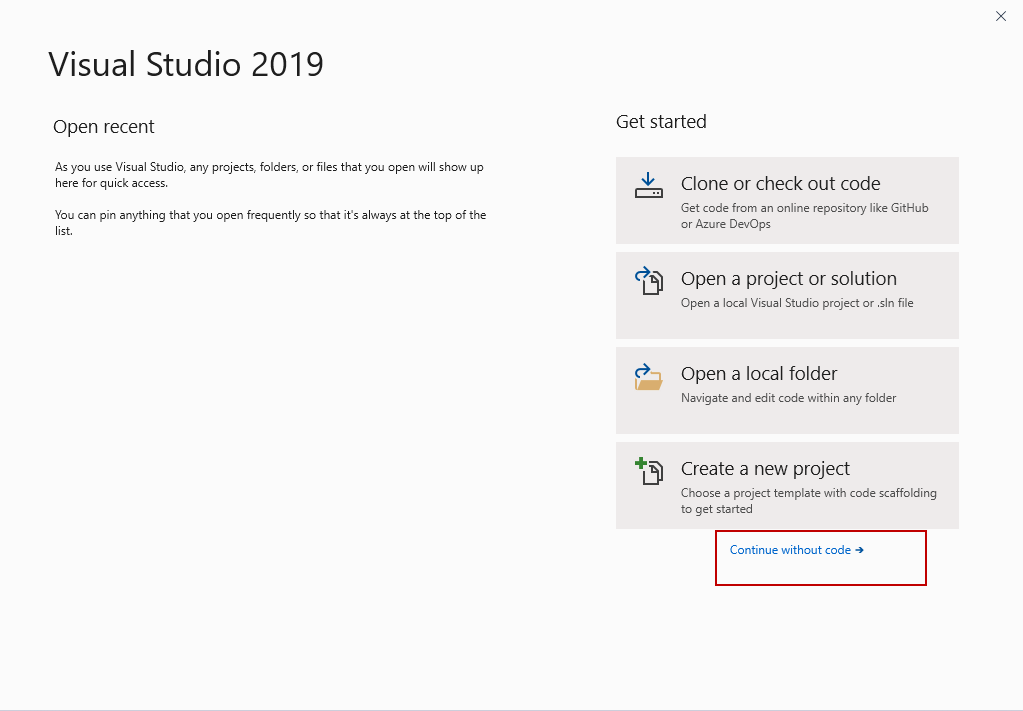
Let’s have a quick summary of creating an SSIS package in Visual Studio 2019. Click on Continue without code:
It launches the Microsoft Visual Studio. Click on Extensions followed by Manage Extensions:

Search for Integration Services, and it shows available extensions:
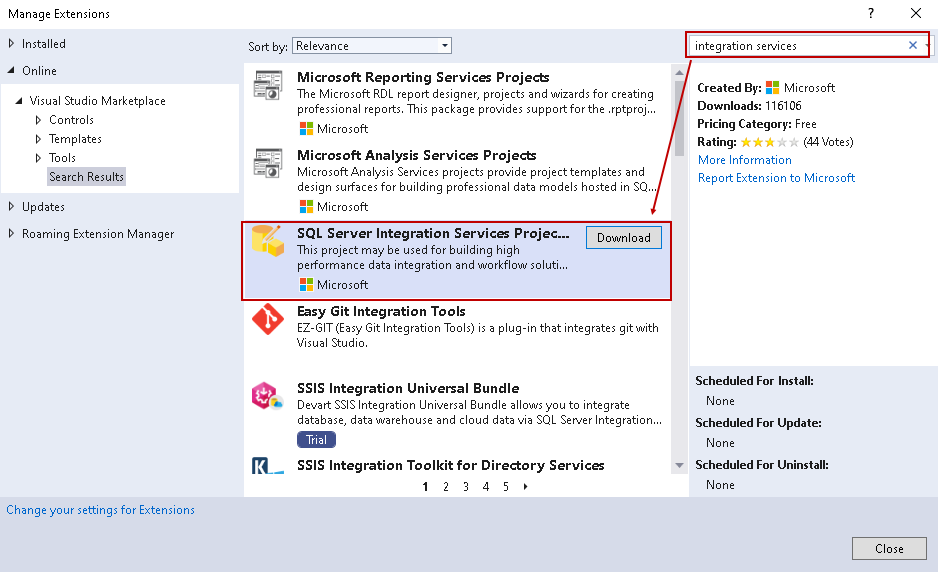
Click on Download in front of SQL Server Integration Services Projects. It starts downloading required packages in the default web browser:

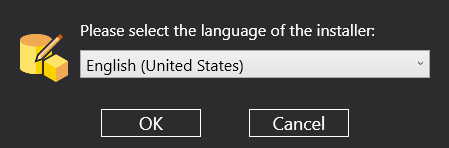
Run the executable installer and it starts the configuration of SSDT for Visual Studio. Select the language of the installer:
Click OK and select the Visual Studio version. If you have multiple versions of Visual Studio installed, select the appropriate version:

Click on Install, and it completes the SQL Server Integration Service projects within a few minutes depending on machine specs. A system restart is required after a successful installation.
Configure an SSIS package for SSIS Pivot Transformation
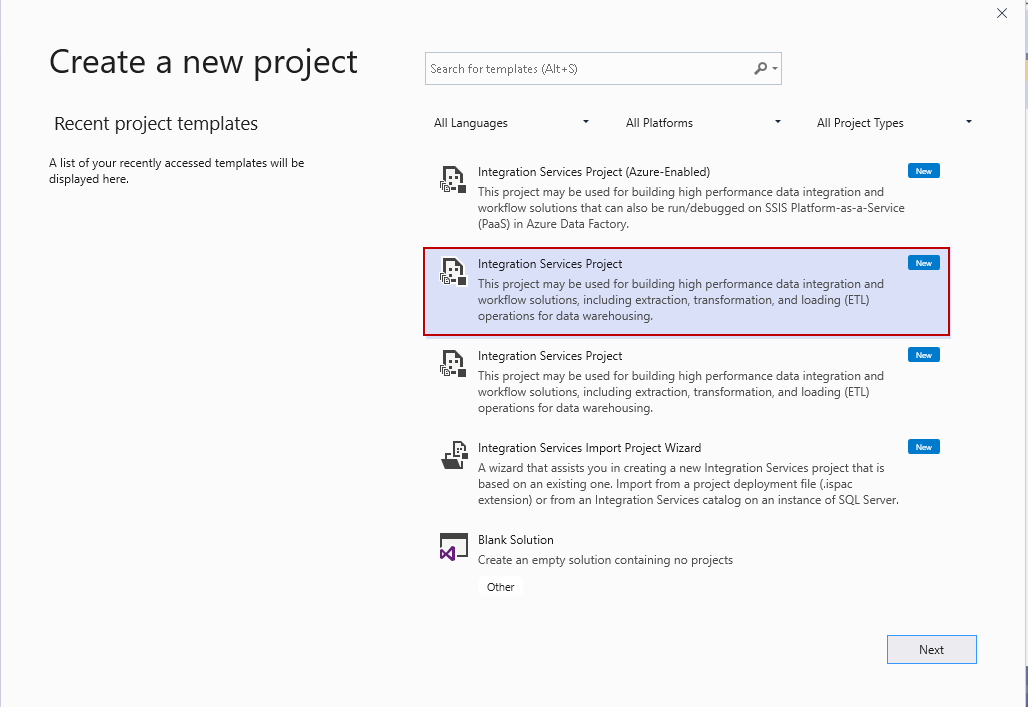
Launch Visual Studio 2019 and click on File > New > Project on the menu bar or by clicking the New Project button on the toolbar. It opens project templates. Click on Integration Service Project:
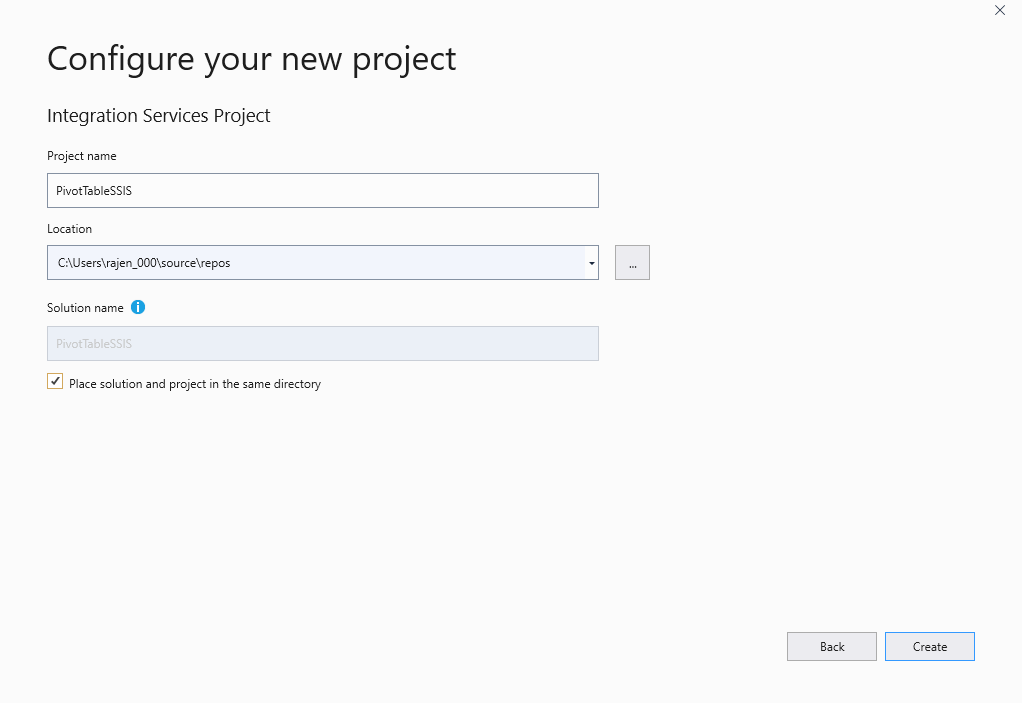
Specify the project name and storage location. Click on checkbox Place solution and project in the same directory and Create:
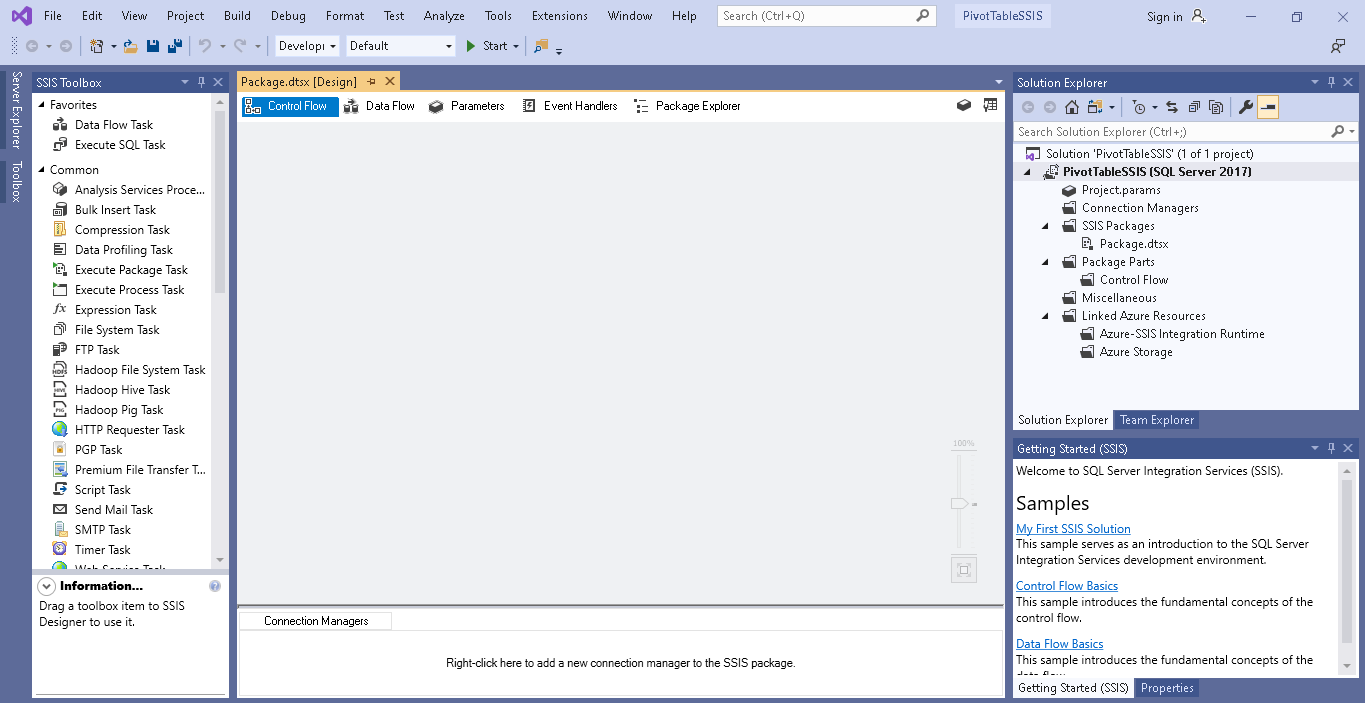
It creates the project solution for SSIS Pivot Transformation and launches the default page of Visual Studio 2019:
Drag and drop Data Flow Task from SSIS toolbox, as shown below:
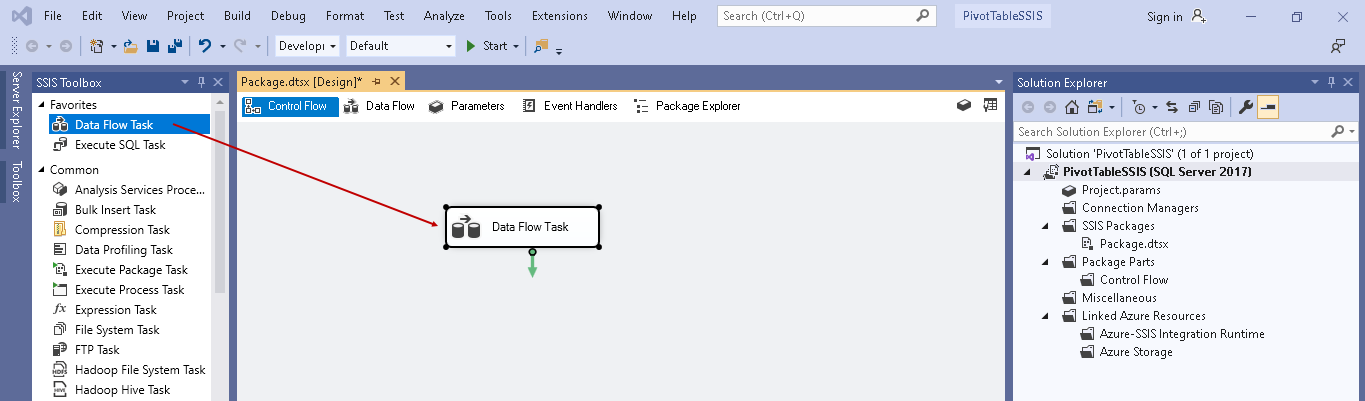
Right-click on Data Flow Task and rename it to PIVOT Transformations:

Double-click on it, and it opens the data flow tab.
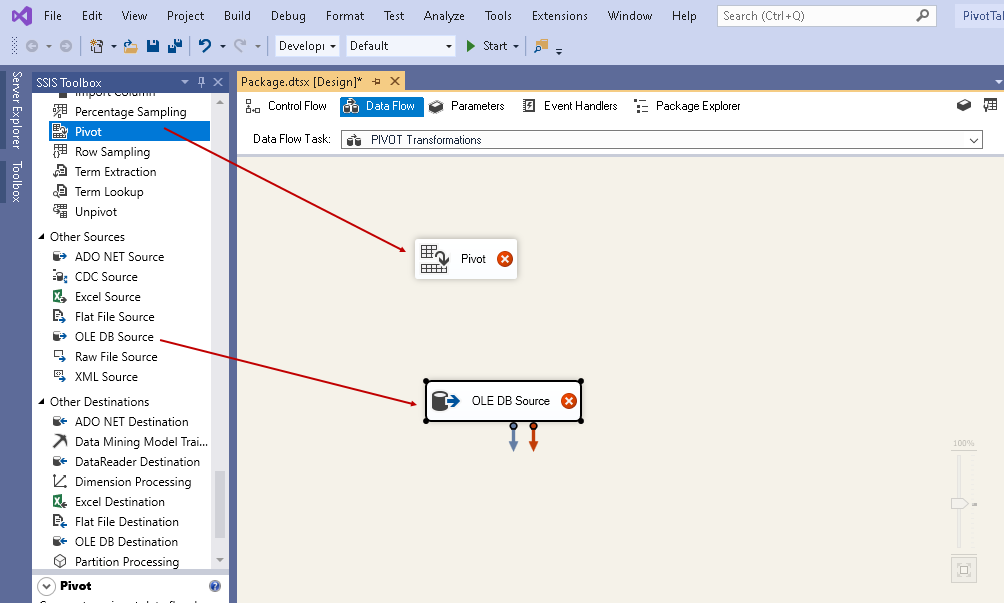
Drag and drop the following components from SSIS toolbox in the data flow area:
- OLE DB Source
- Pivot Transformation
Double-click on OLE DB Source and in the editor window, do following configurations:
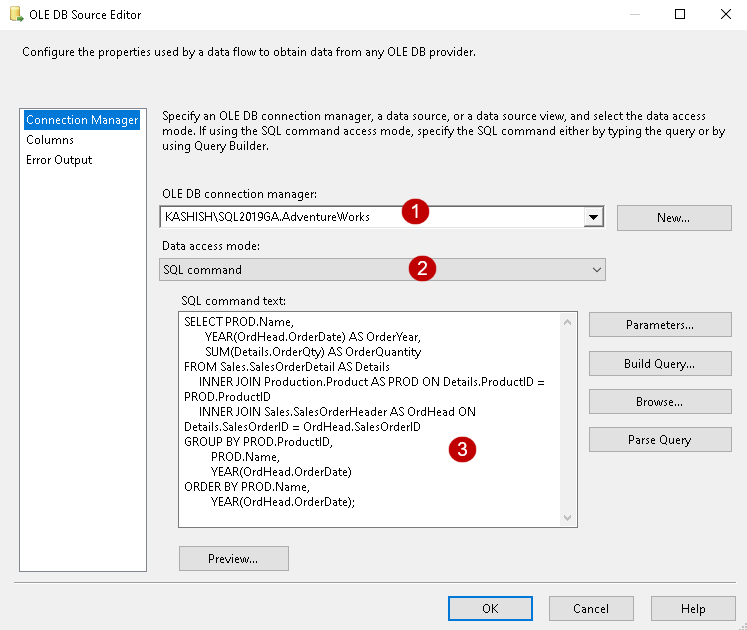
- OLE DB connection managers: Specify a new connection or select from existing connection to SQL instance
- Data access mode: Select the data access mode as SQL command as we will use the select statement specified previously
- SQL command text: Specify the select statement for retrieving the records. We will use the output from this query in Pivot operation
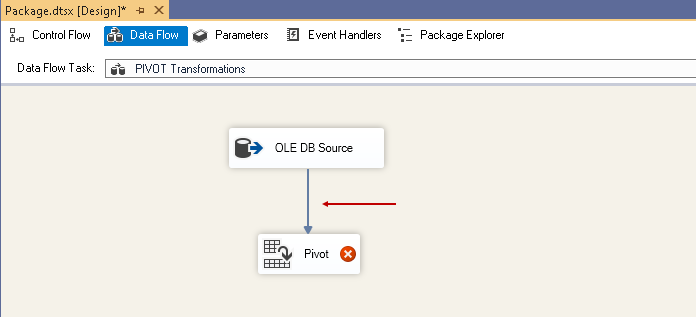
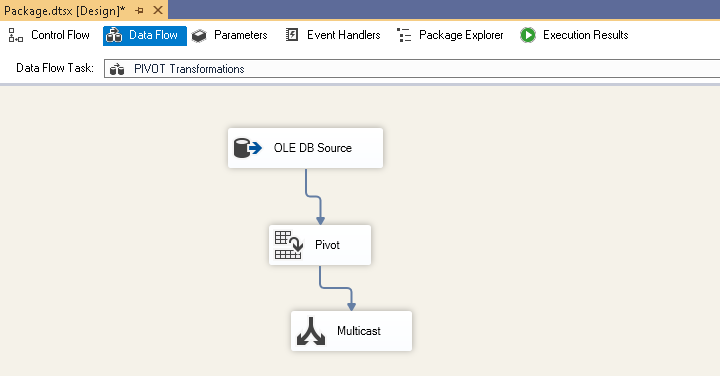
Now, drag the arrow from the OLE DB Source to the SSIS Pivot Transformation:
Double-click on Pivot and it opens the edit the pivot transformation editor:
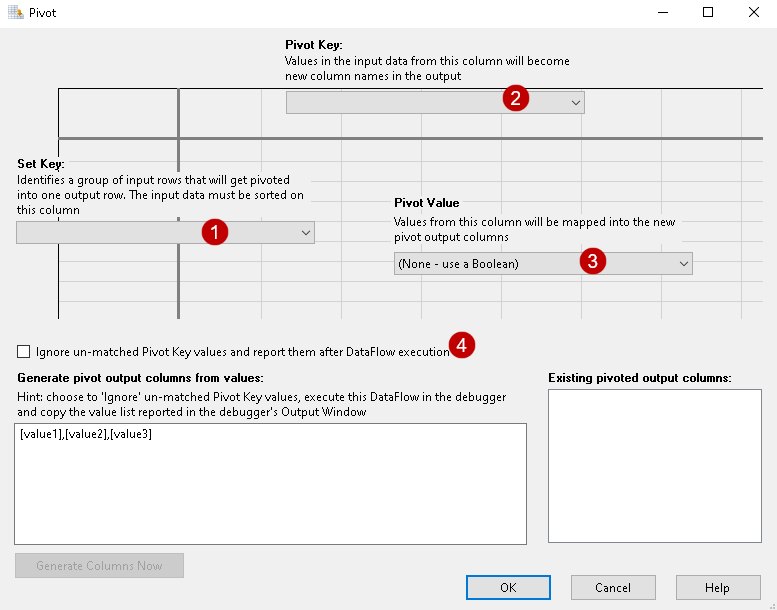
Note: You might get a slightly different pivot transformation in a different version of SSIS. I always prefer to use the latest version
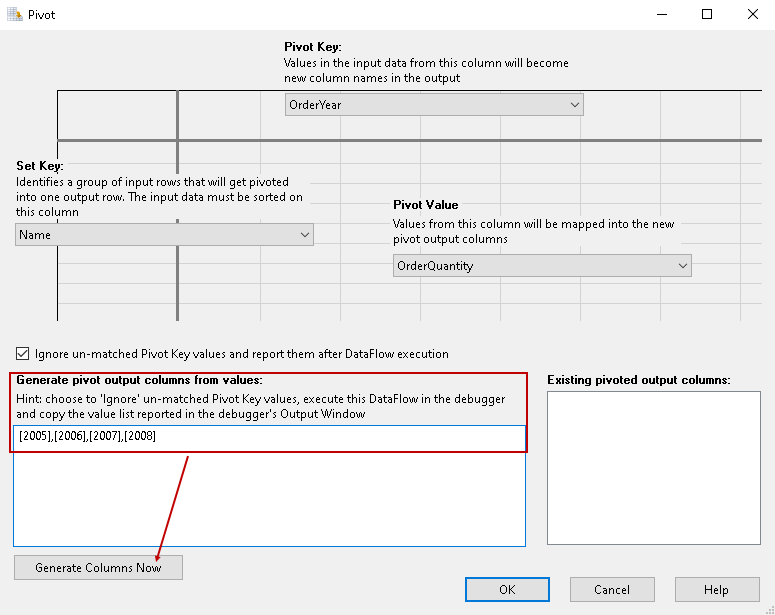
- Set key: In this section, we specify the column for left column values. Use [Name] column in the sort key from our sample data
- Pivot key: It specifies the column that we use for the header row in the Pivot table. We use [OrderYear] column in the Pivotkey
- Pivot Value : It specifies the column for table values apart from the header and left the column. Use [OrderQuantity] column in the Pivot value
- Ignore un-matched Pivot Key values and report them after DataFlow execution: We can use this option for ignoring un-matched pivot key values. It reports all such pivot key values in the logs
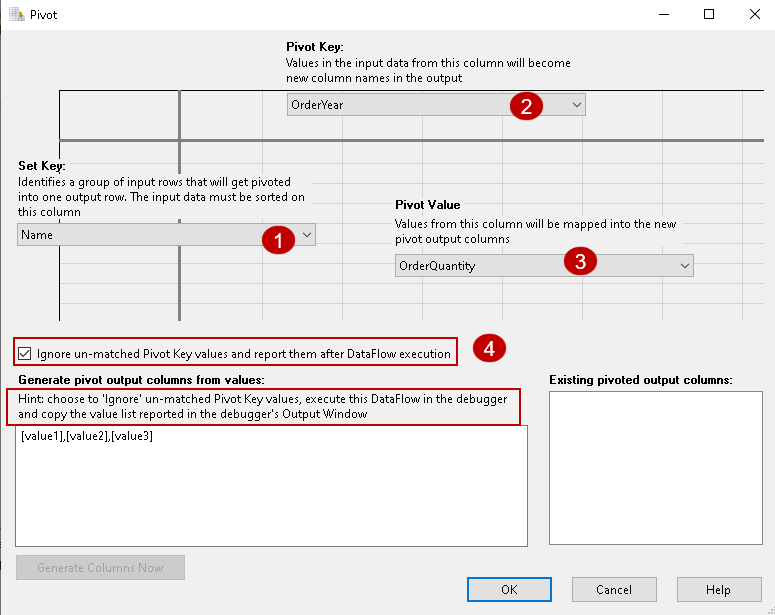
As highlighted in the above screenshot, it provides a hint to execute the data flow in the debugger and copy the values in this window.
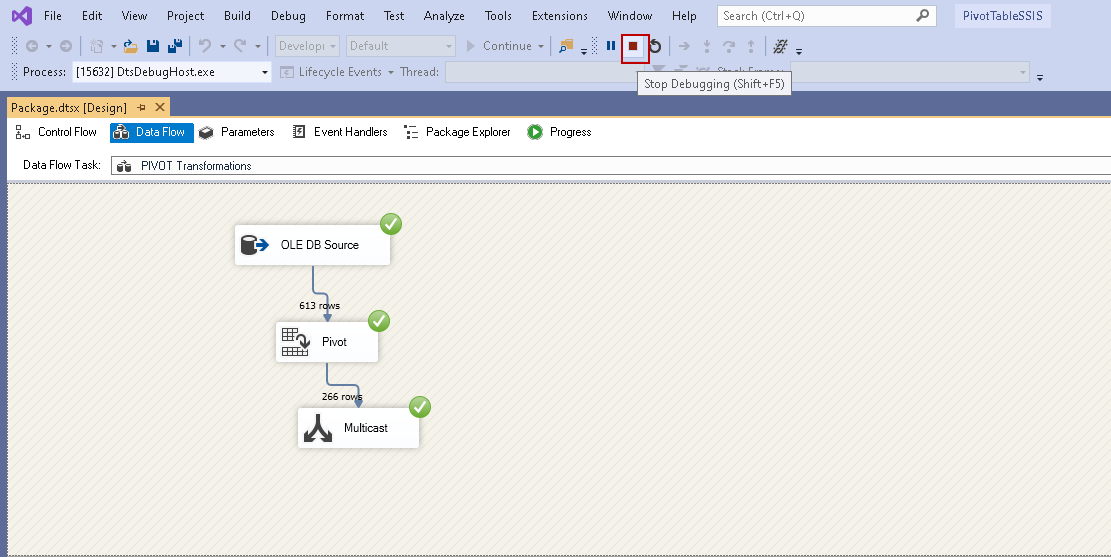
Click OK and add an SSIS multicast operator. We can add an OLE DB destination as well, but for this demonstration, we will add a multicast operator and view the Pivot data:
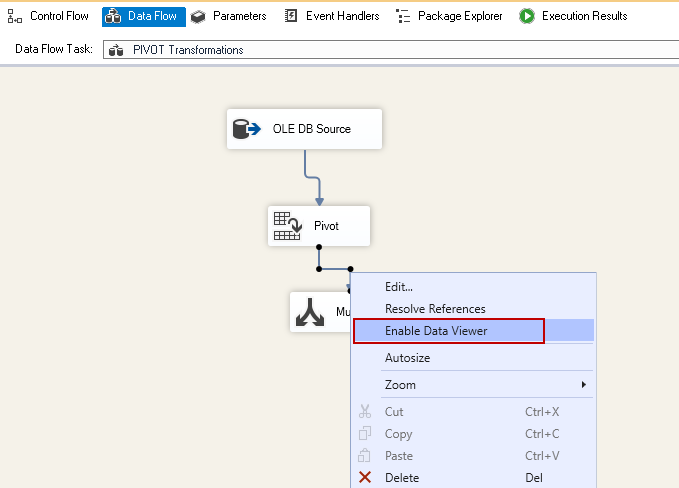
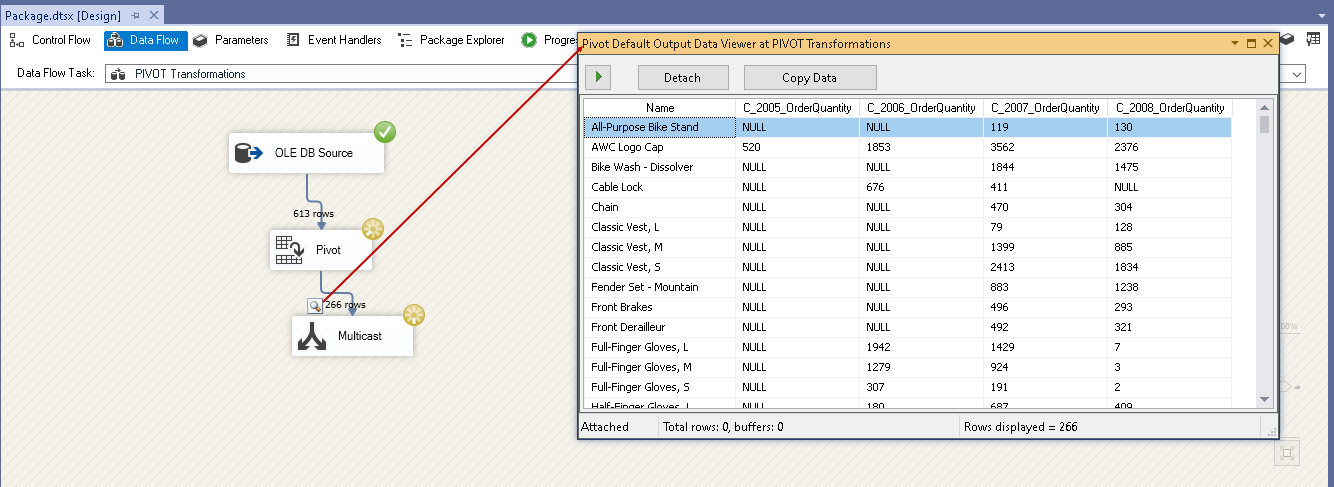
Right-click on the connector between Pivot and Multicast operator. Click on Enable Data Viewer so that we can view the Pivot data:
Execute the SSIS Pivot Transformation package. In the progress bar, you can see Pivot values [2005],[2006],[2007],[2008] as shown below:
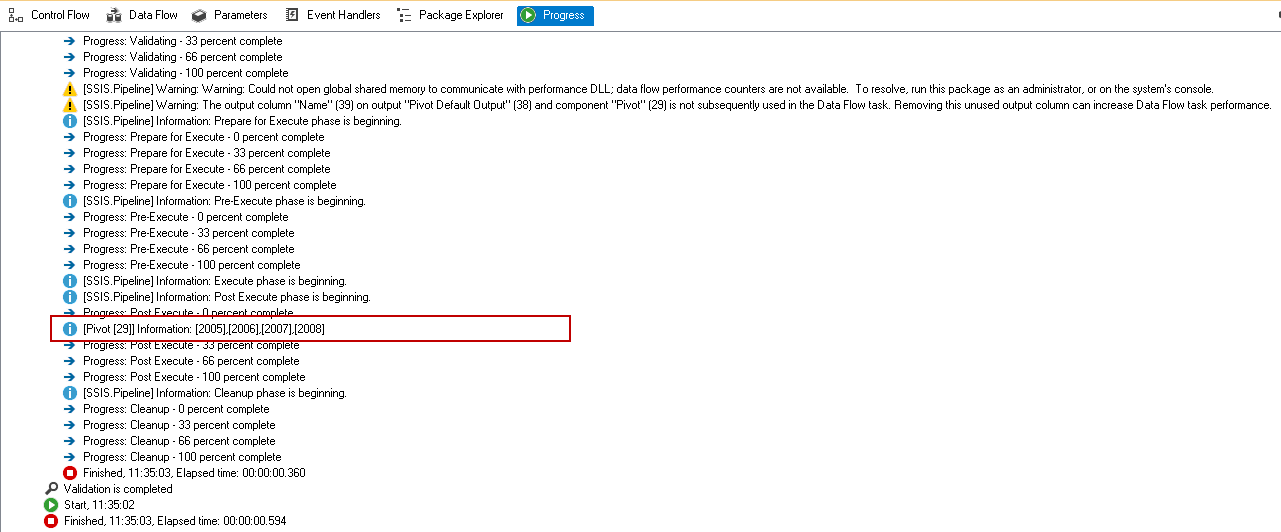
Right-click on this line and copy message:

Stop package debugging (Shift+F5):
Paste the message values in the highlighted section. We can also type in this box, but if we have a large number of values, it is a good idea to copy them from the progress bar. It saves manual efforts and time as well:
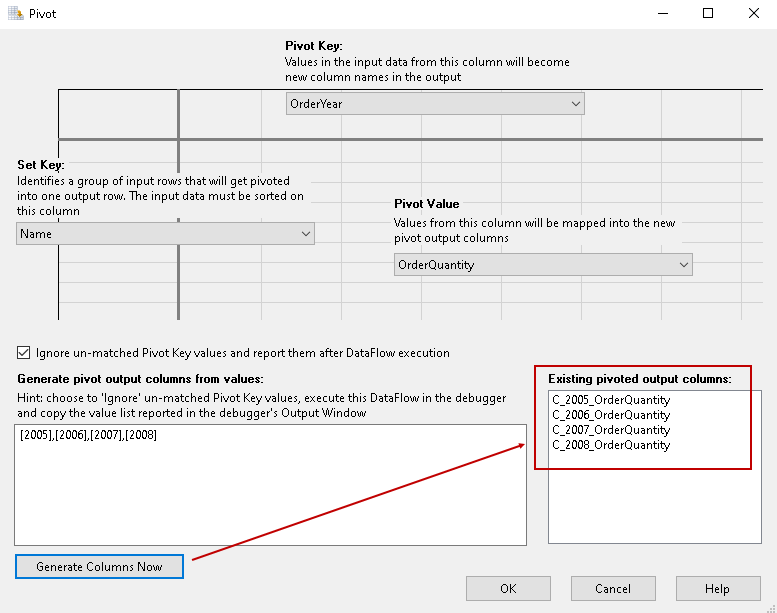
Click on Generate Columns Now, and it gives following message about the output column results:

Click OK, and you can see these columns in the existing pivoted output columns as shown below:
Execute the package, and you can see Pivot data from the data viewer window:
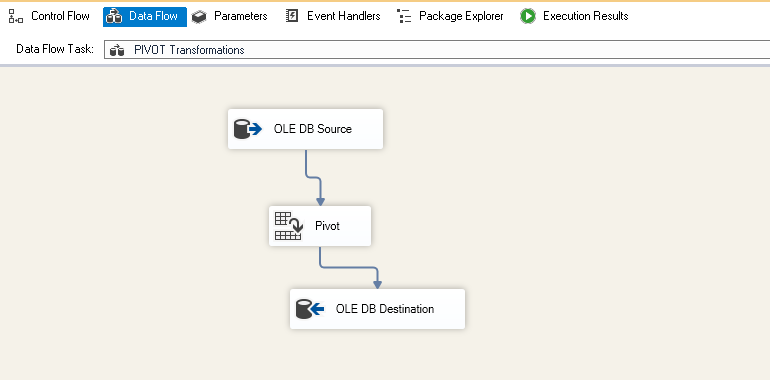
In the next section, we will use SSIS Unpivot transformation as well. Let’s use an OLE DB destination and add the Pivot data in a SQL table.
Drag OLE DB Destination from SSIS toolbox:
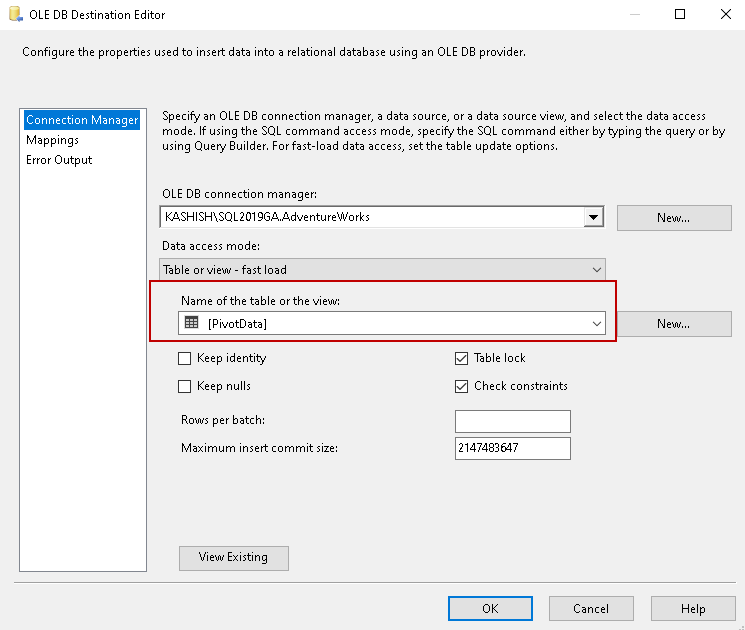
In the destination, specify the table name for Pivot data along with SQL instance connection:
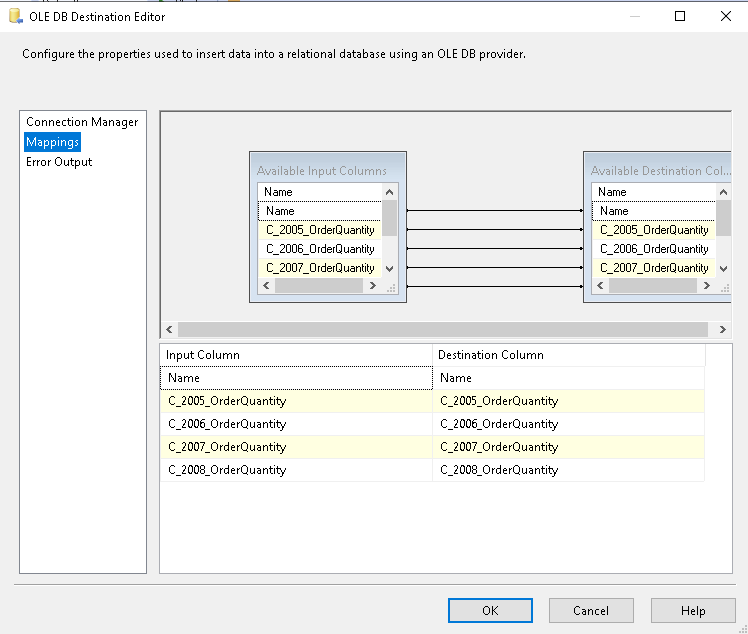
Click on Mappings and verify mapping between source and destination columns:
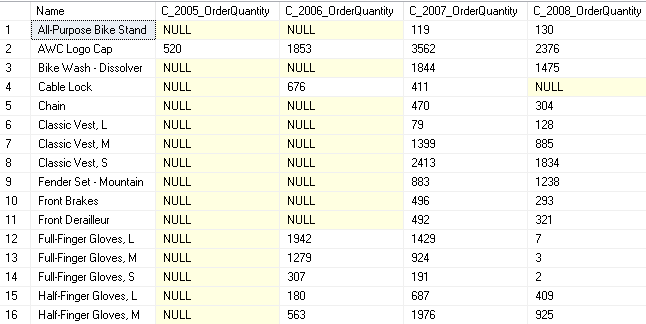
Click OK and execute the package. Verify the Pivot data in the SQL table:
|
1 2 3 4 5 6 |
SELECT [Name], [C_2005_OrderQuantity], [C_2006_OrderQuantity], [C_2007_OrderQuantity], [C_2008_OrderQuantity] FROM [AdventureWorks].[dbo].[PivotData]; |
SSIS Unpivot Transformation
Sometimes we get Pivot data, and we require to get the original data. We require performing reverse Pivot transformation. We also call it an Unpivot transformation.
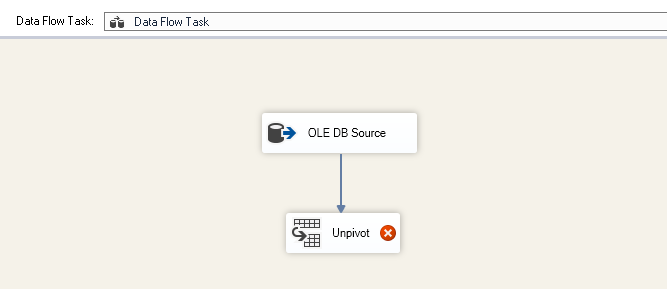
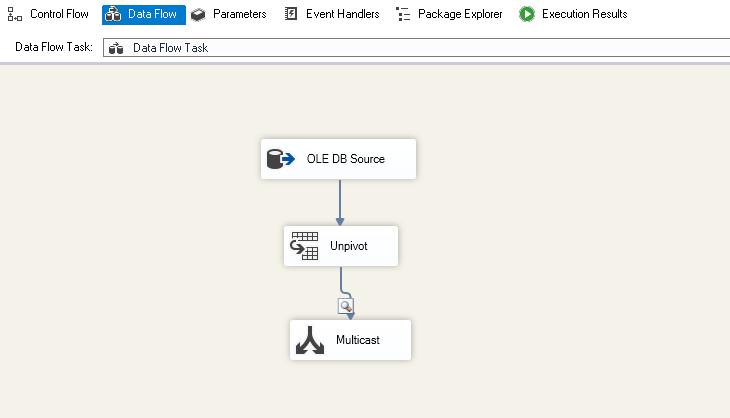
In the new SSIS package, drag OLE DB Source and Unpivot transformation.
Configure the OLE DB source for the SQL table in which we inserted Pivot data in the above section:
Double-click on Unpivot and configure it:
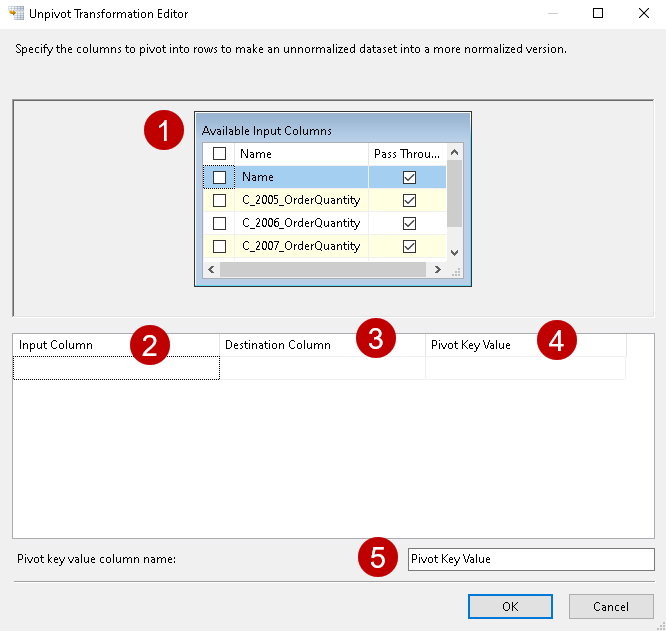
Available Input columns: In this column, we select the columns to Unpivot. You can also notice a column Pass-Through. Click on Pass-Through for remaining columns. If we do not click on the checkbox for Pass-through, that column will not be available in the destination.
In this example, we select the C_2005_OrderQuantity, C_2006_OrderQuantity, C_2007_OrderQuantity, C_2008_OrderQuantity as available input columns, and Name as a pass-through column
- Input Column: Once we select any column in the available input columns, it automatically appears as an input column
- Destination Column: Specify the destination column that will store the values
- Pivot Key Value: Here, we specify the Pivot key value. It should be similar to the Pivot key we used in the Pivot transformation. By default, it takes a similar value of input and pivot key columns
- Pivot Key-value column name: We can specify the column name for the pivot key as per our requirement
In the following screenshot, we can see input and pivot key-value columns:
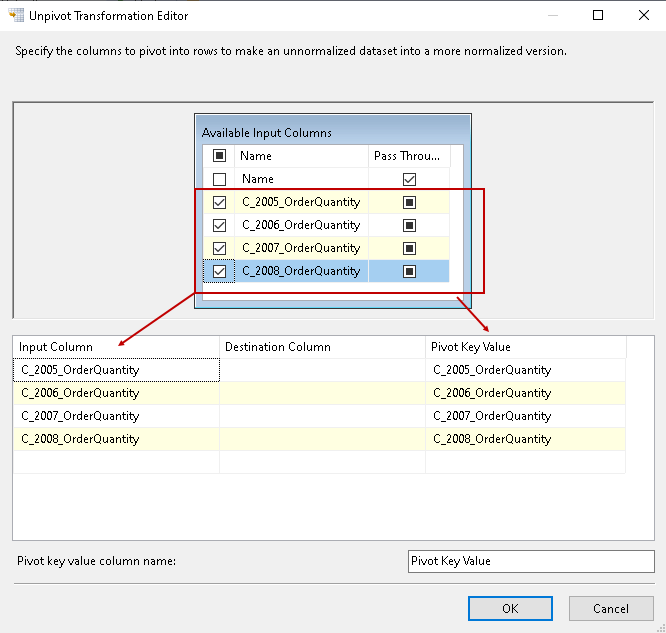
Make the changes as per the following screenshot:
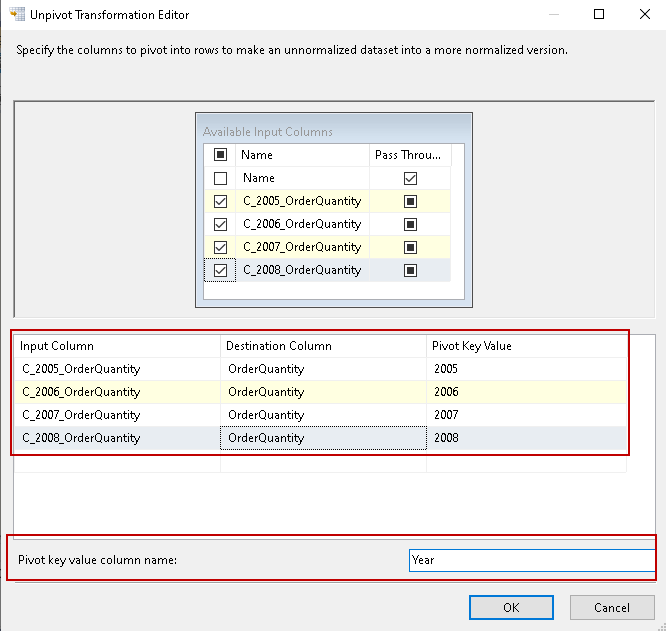
Pivot key value column name: In our original data, it should appear as the year, therefore, changes it to the respective year. For example, change c_2005_OrderQuantity to 2005.
Add an SSIS multicast transformation and enable data viewer between Unpivot and multicast connection. SSIS Upivot transformation SSIS package looks like the following screenshot:
Execute the SSIS package and verify the data. We can see the original data (Unpivot) in the data viewer:
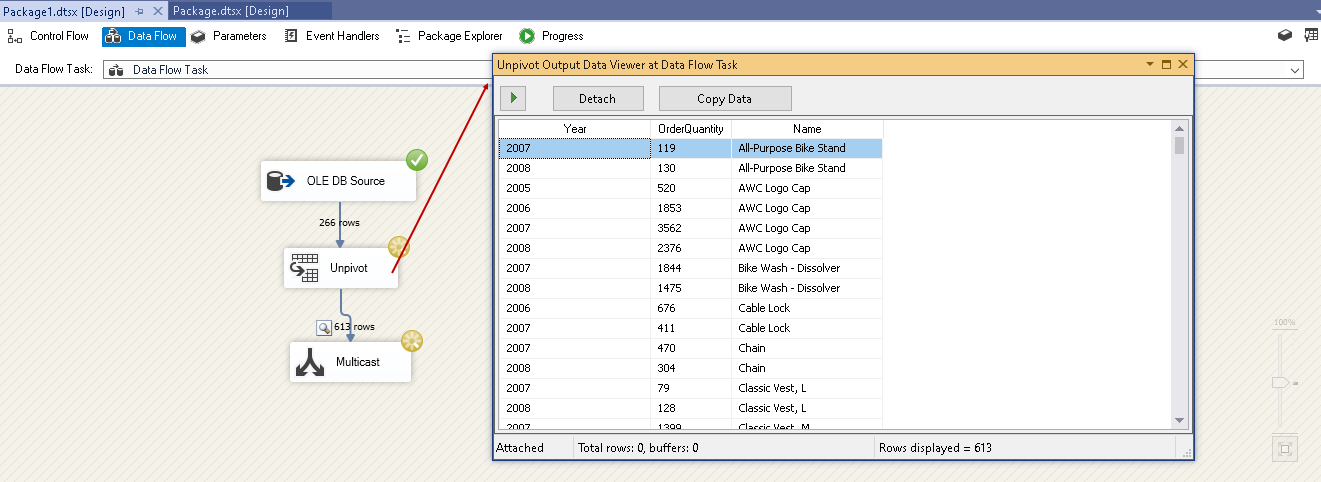
You can notice the Unpivot converts 266 rows to 613 rows. It is opposite to the pivot transformation in which we saw 613 rows conversion into 266 rows.
Conclusion
In this article, we explored SSIS Pivot transformation and SSIS Unpivot transformations for preparing Pivot and Unpivot data. We can easily use these transformations without any complex T-SQL knowledge.

I am the author of the book "DP-300 Administering Relational Database on Microsoft Azure". I published more than 650 technical articles on MSSQLTips, SQLShack, Quest, CodingSight, and SeveralNines.
I am the creator of one of the biggest free online collections of articles on a single topic, with his 50-part series on SQL Server Always On Availability Groups.
Based on my contribution to the SQL Server community, I have been recognized as the prestigious Best Author of the Year continuously in 2019, 2020, and 2021 (2nd Rank) at SQLShack and the MSSQLTIPS champions award in 2020.
Personal Blog: https://www.dbblogger.com
I am always interested in new challenges so if you need consulting help, reach me at rajendra.gupta16@gmail.com
View all posts by Rajendra Gupta
- Understanding PostgreSQL SUBSTRING function - September 21, 2024
- How to install PostgreSQL on Ubuntu - July 13, 2023
- How to use the CROSSTAB function in PostgreSQL - February 17, 2023