
In this article, we will learn how to create an Azure Blob Storage account and understand all the different configuration options and their impact on the blobs stored in the account.
Introduction
Cloud offers many types of storage for hosting a variety of data like files, streams, relational and non-relational data, graph data, time-series data, etc. Of all these different types of data, the most basic and fundamental type of data storage is Blob Storage. This form of storage is typically used to store unstructured data in form of files. Azure cloud provides Azure Blob Storage as a service. To use Blob Storage, one typically starts by creating an account. This storage account would consist of different forms of storage like files, tables, queues, and containers. A container can host blobs which are typically files. Blobs can be of three types in Azure – Block blobs, Appends blobs and Page blobs. The configuration of the Blob Storage account would determine how the blobs stored in the account and container would be stored, versioned, archived, replicated, etc. Over time, the Blob Storage account has evolved with many new features that provide sophisticated options to control the way blobs are managed in the Blob Storage account.
Configuring Azure Blob Storage account
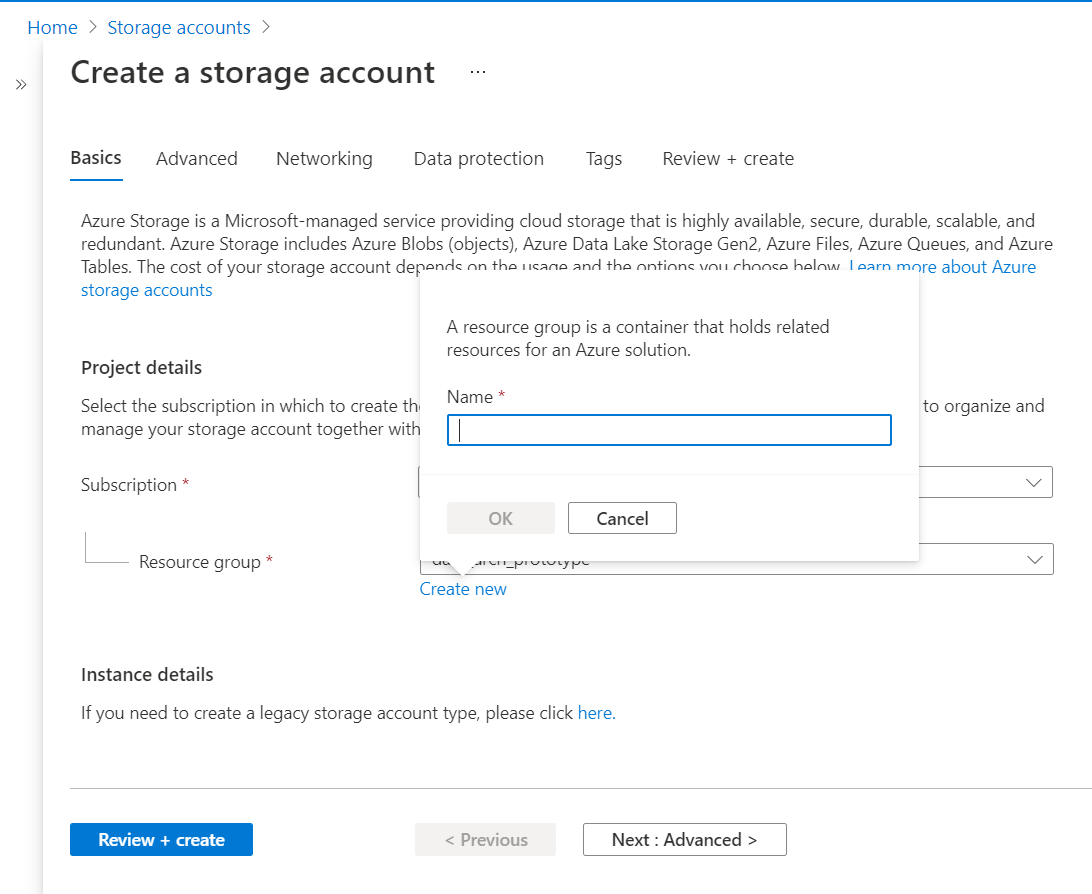
To follow the exercise shown below, we would need an Azure account with sufficient privileges to administer Storage Accounts. It is assumed that one already has access to such an account and setup. With this assumption, navigate to the Azure portal, search for Storage accounts, and open the service home page. On the dashboard of this service, click on the Create button to invoke the new account creation wizard as shown below. It is assumed that one already has a resource group in place. If not, one can create a new resource group from this wizard itself as shown below. We need to select a subscription and a resource group.
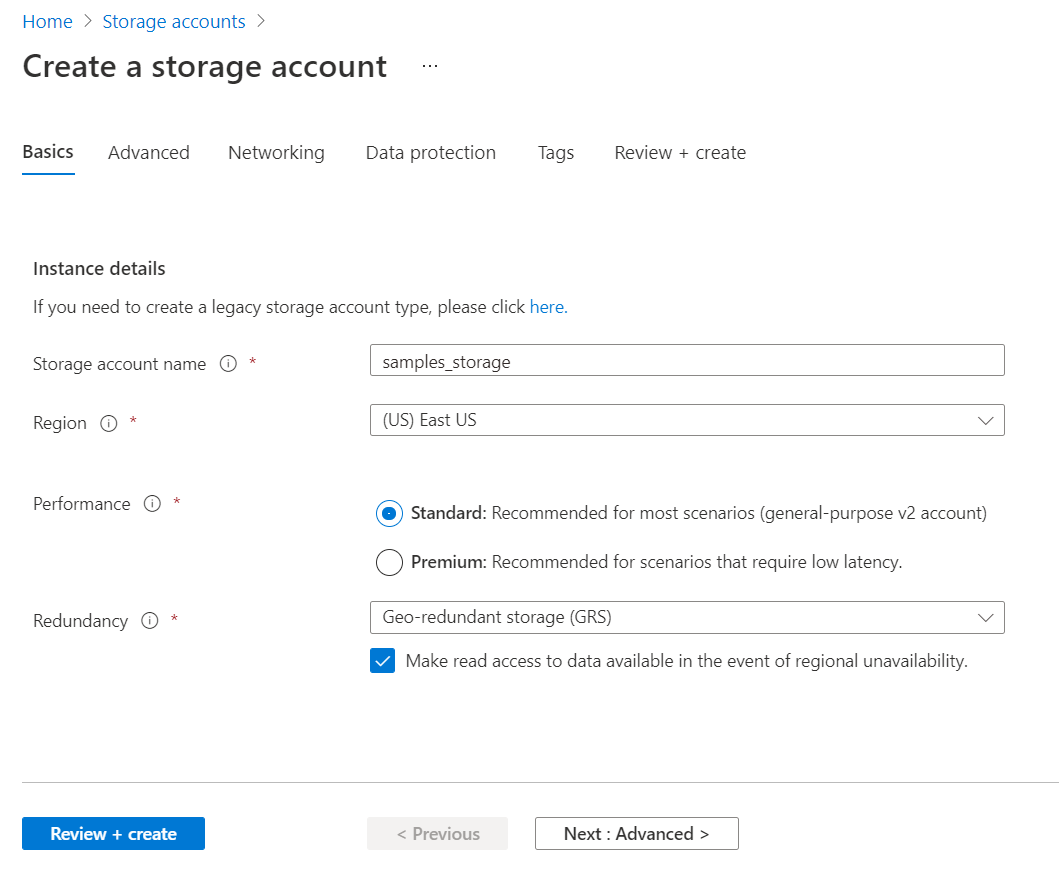
Scroll down on the same page, and you would be able to find the rest of the details. We need to provide the name of the storage account, the region in which the account would be hosted, performance tier, and geo-redundancy. While these options have default values and these options look pretty basic, these are some of the most important options as this configuration will determine where the blob will be physically stored, how quickly these files can be accessed and the protection against loss or corruption of data. The small checkbox at the bottom provides an option to enable read access to the data when the region is unavailable by making the data available from a different region.
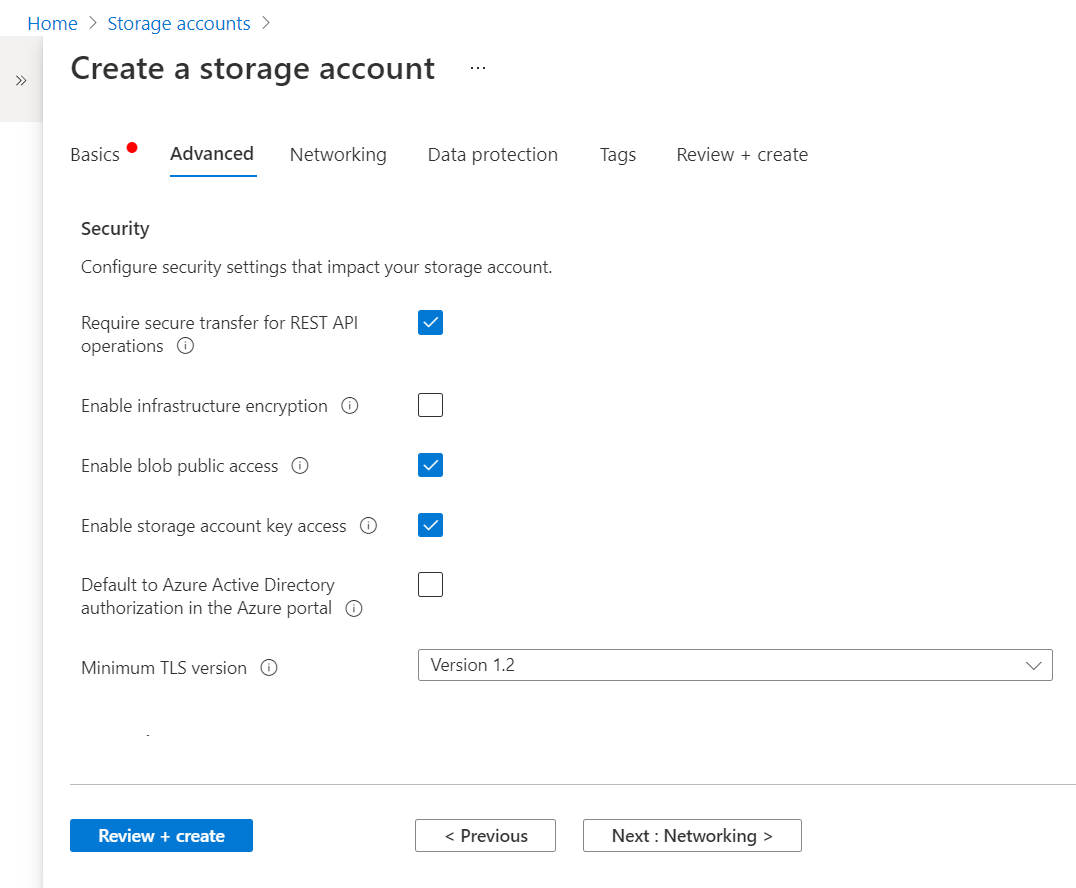
In the next step, we need to configure advanced security settings for the Azure Blob Storage account. By default, the options shown below would be checked. These options mean that secure data transfer is required when the blobs files are accessed with a REST API, the blob files would be publicly accessible, and can be accessed programmatically or through an application using an account key as well. Earlier the minimum TLS version used to be 1.0 which is now 1.2 as of the draft of this article.
Azure Data Lake Storage Gen2 is Azure’s Big Data storage solution that supports storing massive amounts of data in a hierarchical manner. Enabling a hierarchical namespace would enable more powerful options to organize data into a nested hierarchy of containers. Many services in Azure would require this setting enabled, else the account would not be usable with some of the services. So, this option is a very important one. Depending on the frequency of access, one can select the Hot or Cold tier which will have a direct impact on the cost of storage as well as the speed of accessing the blob files. Blobs can range from a few KBs to GBs in size. The option at the bottom can be used to enable sharing of large files which can reduce replication of large files across multiple users.
In the networking section, the connectivity method will determine the type of endpoint being created. In production environments, one would typically prefer a private endpoint, while in lower environments public endpoint is used as a starting point.
The data protection options in the Azure Blob Storage account were limited when this service was launched. Over time, more sophisticated options have been added to control the behavior of the blobs stored in the account. By default, point-in-time restore for the Blob Storage account is not enabled, but it’s an extremely useful here. In case, if the blobs are deleted, replaced, or corrupted on the account in an undesirable manner, point in time restore would provide an option to restore the account to an earlier state in time and recover the data. One can enable soft delete for blobs, files as well as containers where after deletion, the object is retained for a specified number of days and can be recovered till the retention period if desired.
Tracking changes to blobs and files is a very important and frequently used aspect of the Azure Blob Storage account. They maintain multiple versions of the files as well as raise an event feed that can be processed by the subscribers. By default, these options are not enabled, so if one wants to track data right from the start, one should ensure that these settings are checked before the start of actual storage on the account.
![]()
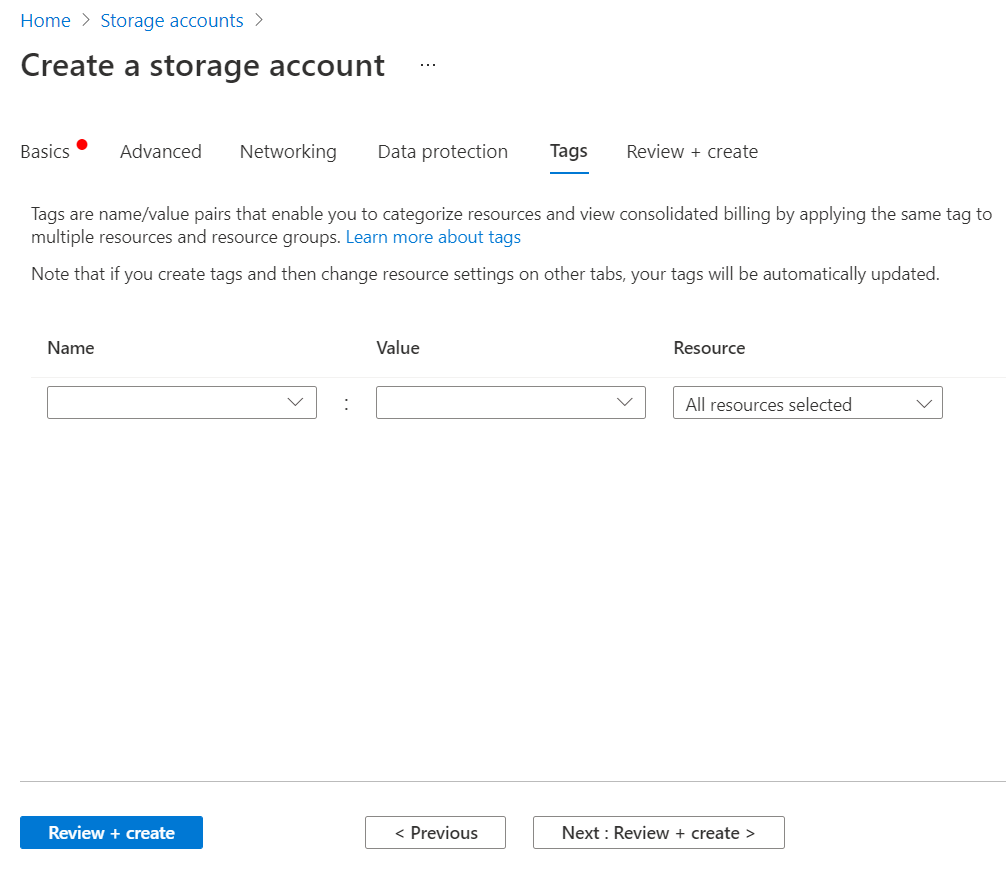
One can optionally add tags to specify the specific configuration or purpose for which these configurations have been made on the Azure Blob Storage account so that one can easily understand what behavior should be expected from the account.
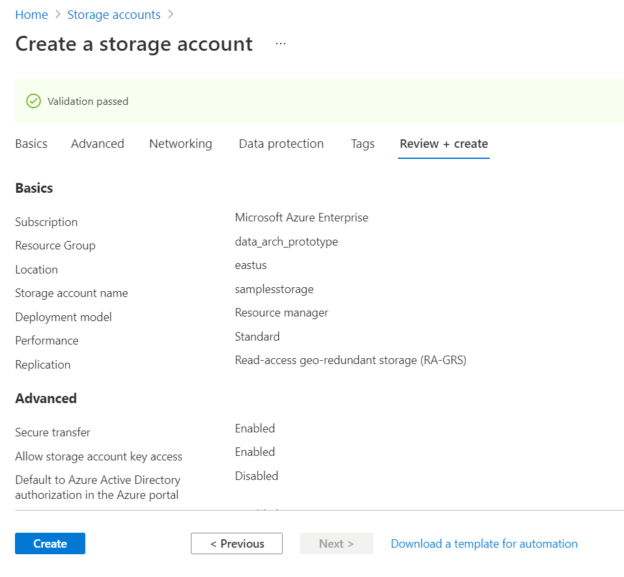
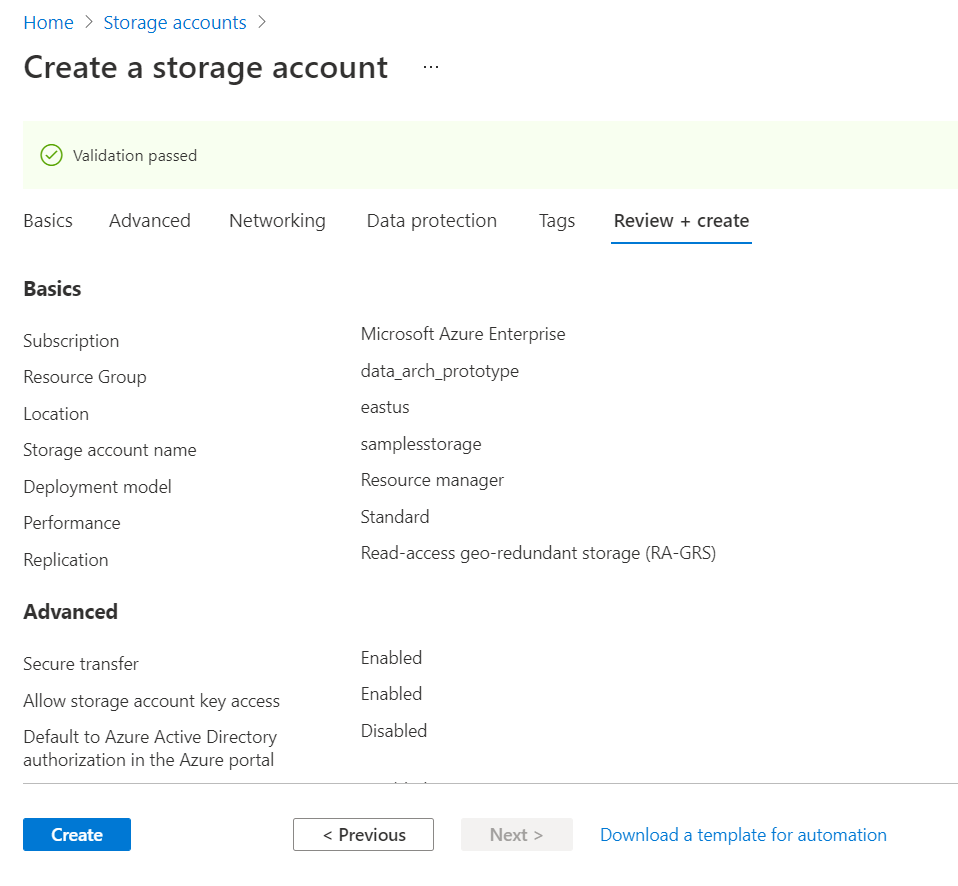
Finally, review the account configuration that we have set so far and click on the Create button to create the account.
In this way, one can configure various options to control each and every aspect of blobs in the Azure Blob Storage Account.
Conclusion
In this article, we learned different settings related to the Azure Blob Storage account, some of which have been recently introduced. We also learned the significance of different settings in different use-cases and understood when to select these settings.

She has a deep experience in designing data and analytics solutions and ensuring its stability, reliability, and performance. She is also certified in SQL Server and have passed certifications like 70-463: Implementing Data Warehouses with Microsoft SQL Server.
View all posts by Gauri Mahajan
- Oracle Substring function overview with examples - June 19, 2024
- Introduction to the SQL Standard Deviation function - April 21, 2023
- A quick overview of MySQL foreign key with examples - February 7, 2023