
In this article, we will learn how to add a SQL database to an existing Alwayson availability group. Alwayson availability group is high availability and disaster recovery solution of Microsoft SQL Server. The database must meet the following prerequisites to be a part of an availability group.
Prerequisites to adding a SQL database in an availability group
- The database must be a user database.
- Auto-Close must be disabled.
- The database must be in multi-user and read-write mode.
- The database must be in the FULL recovery model.
- The database must have a full database backup.
Environment setup
I have created three virtual machines on my workstation to demonstrate the process. The details are following:
Hostname | Role |
DC.Local | I have installed the Active directory role in the server and created a domain controller named DC.Local in it. |
SQL01.dc.local | A primary replica of an availability group. |
SQL02.dc.local | The secondary replica of an availability group. |
I have created an availability group named SQLCluster using the above virtual machines, restored the stackoverflow2010 database on the Primary replica. We are adding it to the SQLCluster.
Add SQL database using SQL Server management studio
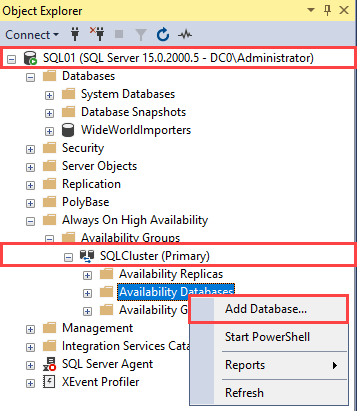
Launch SQL Server management studio on SQL01 🡪 Connect to the database engine 🡪 Expand Always On High availability 🡪 Expand Availability Groups 🡪 Expand SQLCluster 🡪 Right-click on Availability Databases 🡪 Select Add Database.
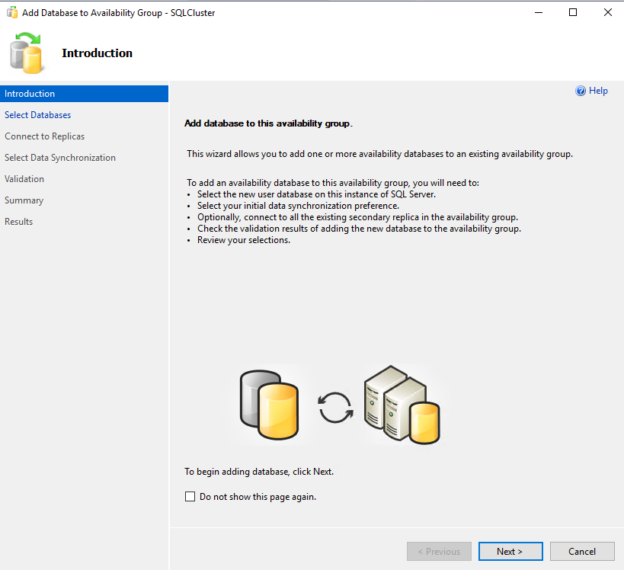
The Add Database… to Availability Group wizard starts. You can view the details and list of tasks performed by the wizard. Click Next.

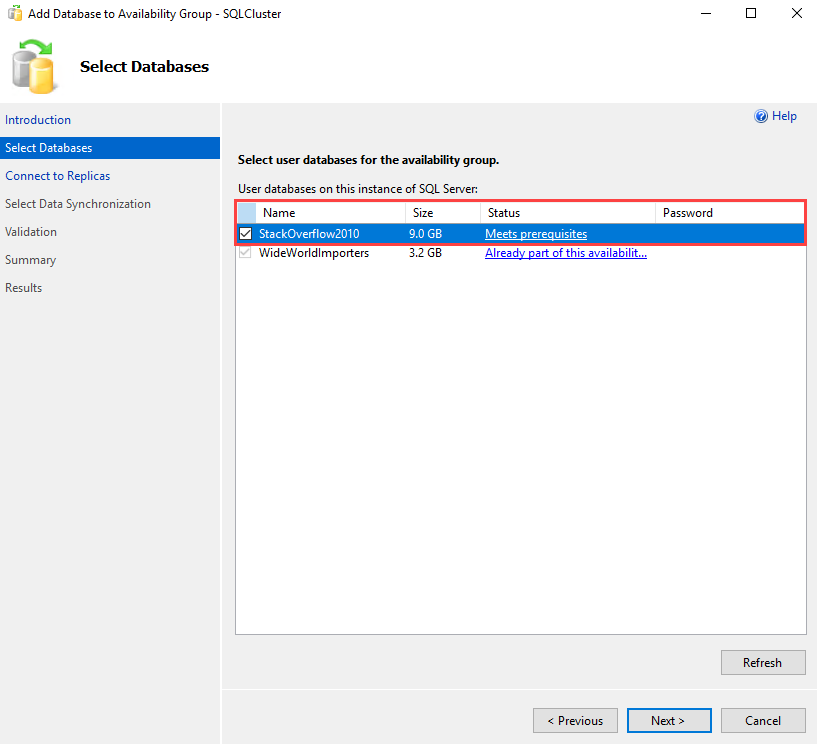
You can choose the database you want to add to the existing availability group. The list of databases is shown in the grid view with its status. You can select one or multiple databases from the list. In this demo, we are adding the StackOverFlow2010 database in SQLCluster, so tick StackOverFlow2010 from the list. Click Next.
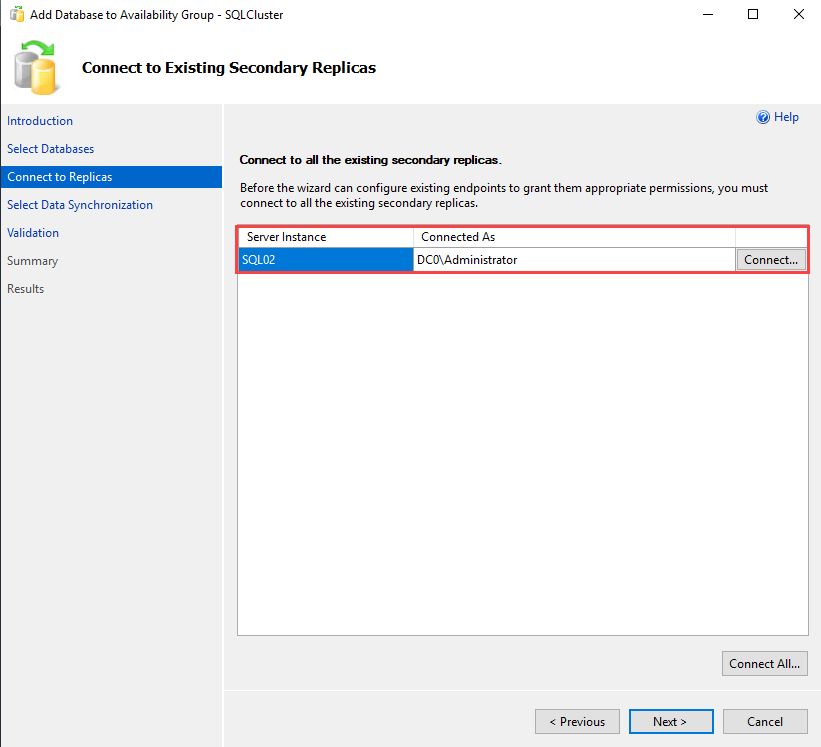
On the Connect to Existing Secondary Replicas screen, you can view the list of replicas used to create the availability group. The SQL02 is in the list of secondary replicas. To grant the appropriate permission to the existing endpoints, we must connect to the secondary replicas. To do that, click on Connect.
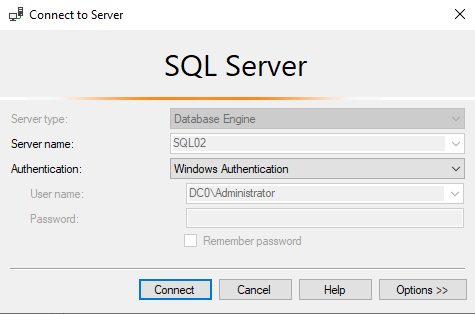
A Connect to Server dialog box opens. You can select the appropriate authentication method. We use Windows Authentication, so select Windows Authentication from the drop-down box.
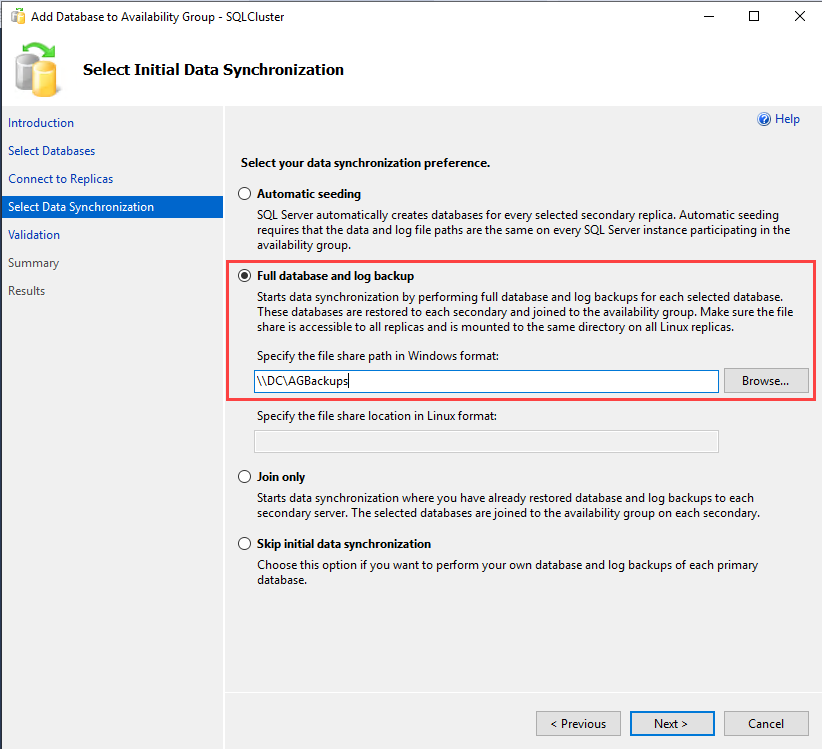
We can select the data synchronization preference on the Select Initial Data Synchronization screen. You can select any of the following methods.
- Automatic seeding: SQL Server automatically creates the database and starts the seeding in this method. To use this method, the directory structure (data file path and log file path) on all participating replicas must be the same.
- Full database and Log backup: The wizard will start the data synchronization by generating a full backup and log backup of the database. The backups will be restored on the secondary replicas and join the availability group. We must create a network share to keep full and log backups in this method. Make sure that it is accessible from all secondary replicas and has required permissions.
- Join Only: This method is used when you have restored the backup of the database on secondary replicas. The wizard will start the data synchronization by joining the databases in an availability group.
- Skip initial data synchronization: If you want to manually generate the full and log backup of the database.
In the demo, we are using the Full database Log backup method; therefore, select Full database and Log backup. The network shares to keep full, and log backups are \\DC\AGBackups therefore, specify it in the file share path. Click Next.
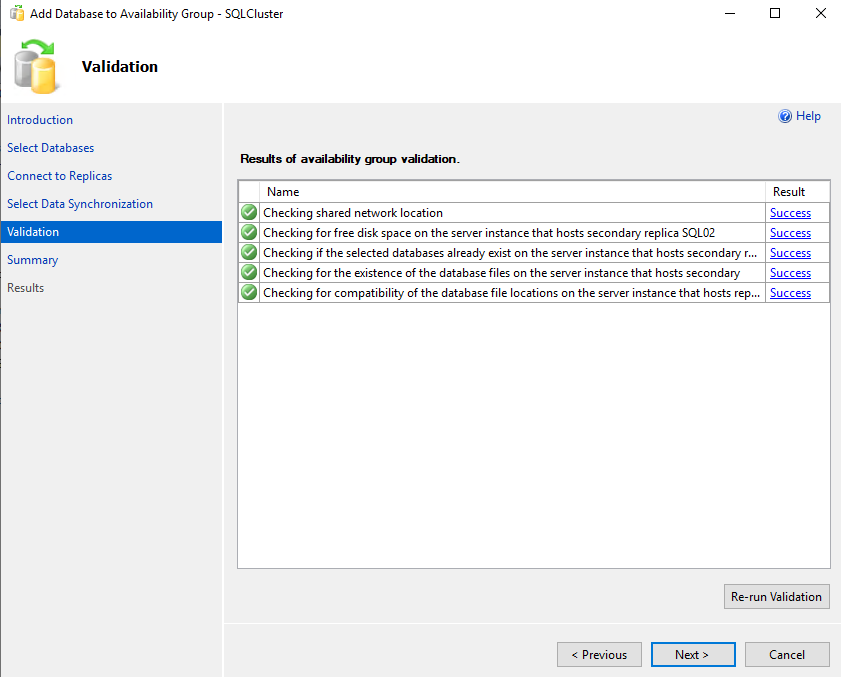
The wizard will run an availability group validation test. It checks the following parameters:
- Shared Network location
- Free disk space on secondary replicas
- Checks whether the selected database exists on the SQL02 replica
- Compatibility of the data file locations on the SQL02 replica
The wizard will not continue until all validation tests are completed successfully. In our demo, the validation test was completed successfully.
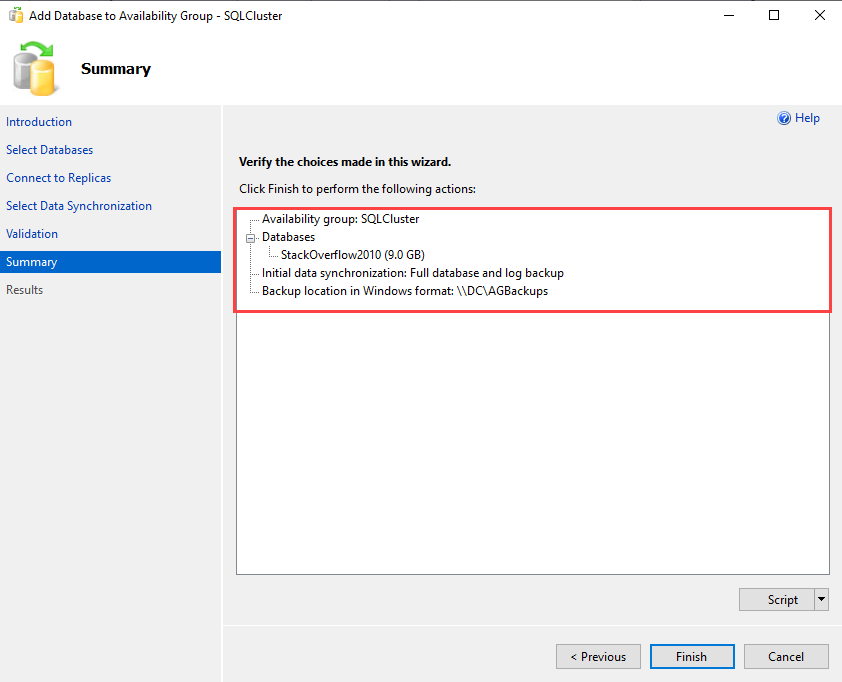
You can verify the configuration and settings we have selected in the wizard on the summary screen. Click on the script to generate the script of the task performed by the availability group wizard. Click on Finish.
The wizard begins the process to add the Stackoverflow2010 database in the SQLCluster availability group.
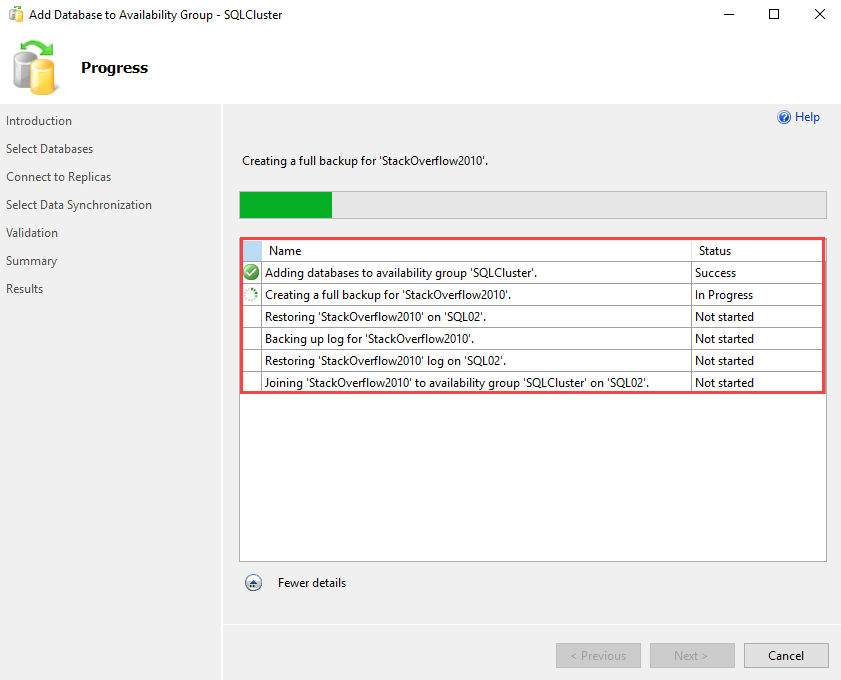
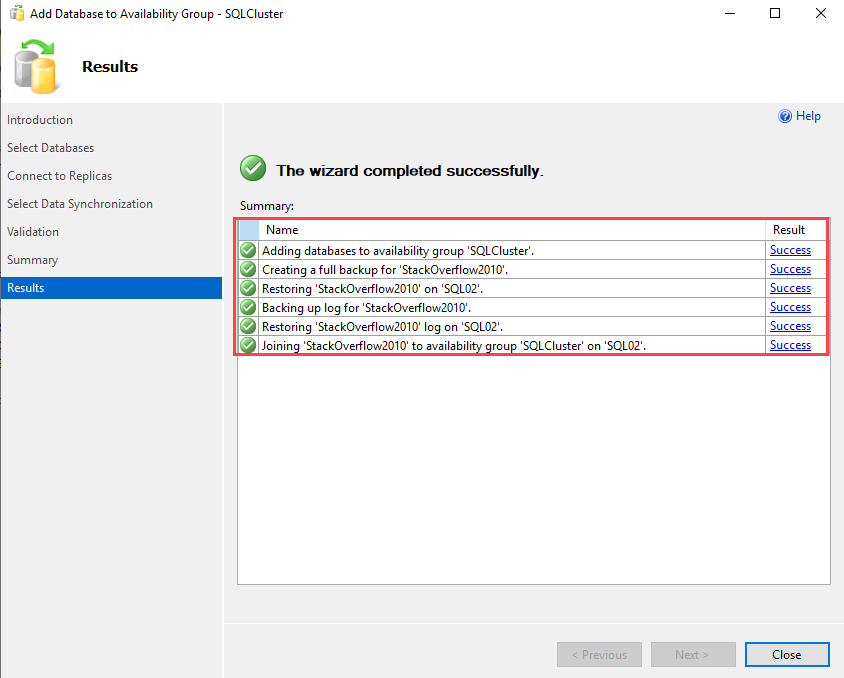
The time taken by the wizard depends on the time taken by the backup and restore process of the database. You can view the list of tasks completed by the wizard on the Results screen.
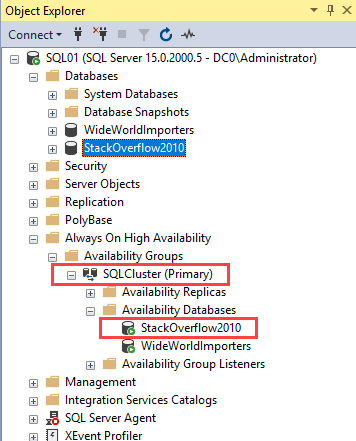
Once the database is added successfully, you can see it under the Availability Database node.
You can view it in the availability group dashboard. To open the availability group dashboard, Expand SQLCluster 🡪 Right-click on Availability Databases and select Show Dashboard.
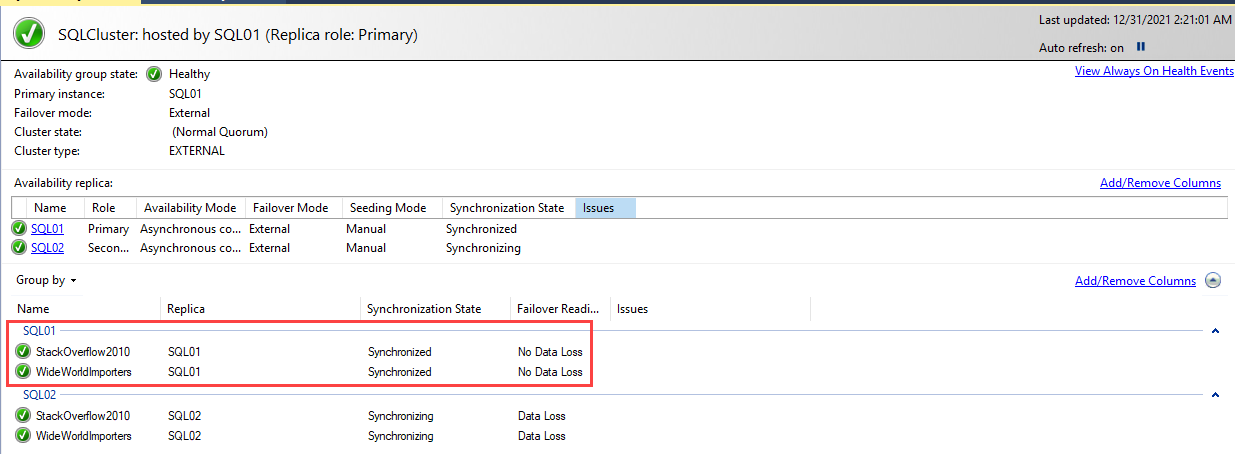
As you can see in the above image, the Stackoverflow2010 database has been added.
Alternatively, you can run the following query to view the list of availability databases in the SQLCluster availability group.
|
1 2 3 4 5 6 7 8 9 10 11 12 13 14 15 16 17 18 19 20 21 22 23 24 25 |
SELECT DISTINCT ag.NAME, agstates.primary_replica, agstates.primary_recovery_health_desc, [ClusterStat].database_name AS [DatabaseName] FROM master.sys.availability_groups AS AG LEFT OUTER JOIN master.sys.dm_hadr_availability_group_states AS agstates ON AG.group_id = agstates.group_id INNER JOIN master.sys.availability_replicas AS AR ON AG.group_id = AR.group_id INNER JOIN master.sys.dm_hadr_availability_replica_states AS [ReplicaStats] ON AR.replica_id = [ReplicaStats].replica_id AND [ReplicaStats].is_local = 1 INNER JOIN master.sys.dm_hadr_database_replica_cluster_states AS [ClusterStat] ON [ReplicaStats].replica_id = [ClusterStat].replica_id LEFT OUTER JOIN master.sys.dm_hadr_database_replica_states AS [ReplicaDBStats] ON [ClusterStat].replica_id = [ReplicaStats].replica_id AND [ClusterStat].group_database_id = [ReplicaDBStats].group_database_id WHERE Isnull([ClusterStat].is_database_joined, 0) = 1 ORDER BY [ClusterStat].database_name |
Output
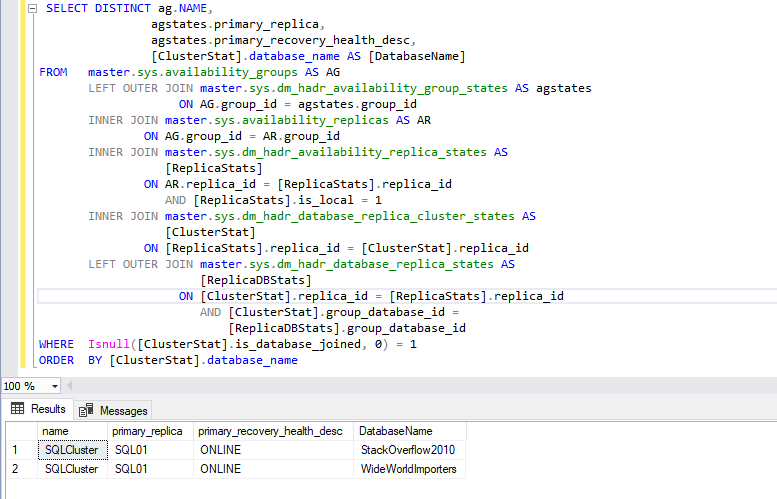
As you can see, Stackoverflow2010 has been added to SQLCluster.
Summary
We learned how to add a SQL database in an existing Alwayson availability group in this article.

He has expertise in database design, performance tuning, backup and recovery, HA and DR setup, database migrations and upgrades. He has completed the B.Tech from Ganpat University. He can be reached on nisargupadhyay87@outlook.com
- Different ways to identify and change compatibility levels in SQL Server - July 22, 2024
- Copy SQL Databases between Windows 10 and CentOS using SQL Server data tools - October 19, 2022
- Changing the location of FILESTREAM data files in SQL Database - October 14, 2022