
In this article, I have explained the step by step process of migrating data from SQL Server to Azure Cosmos database. To perform database migration, we will proceed in the following manner:
- Restore the wideworldimporters database in SQL Server 2016
- Azure Cosmos DB emulator: The Azure Cosmos DB emulator provides a local environment that can be used for development purposes. It simulates cosmos DB services. Using the Azure Cosmos DB emulator, you can develop and test your application locally. You can download it from here
- Azure Cosmos database migration toolkit: Using this tool, we can import data from JSON files, SQL, CSV files, MongoDB, Amazon DynamoDB, etc. You can download the migration tool source code from this repository of the GITHUB and compile it locally, or you can download the pre-compiled library from here
Note: To learn more about the database migration, please read Different Stakeholders, Different Views: Why Database Management Requires a Systematic Approach article.
To understand the data migration process, I have explained it into multiple steps.
Step 1: Identify the data that we want to export
We are going to export the data of the [Purchasing].[Suppliers] table of wideworldimporters database. Execute the following query to populate the data from the [Purchasing].[Suppliers] table:
|
1 2 3 4 5 6 7 8 9 10 11 |
SELECT supplierid as [Supplier.SupplierID], suppliername as [Supplier.suppliername], bankaccountname as [Supplier.bankaccountname], bankaccountcode as [Supplier.bankaccountcode], bankaccountnumber as [Supplier.bankaccountnumber], Ltrim(Isnull(deliveryaddressline1, '')) + ' , ' + deliveryaddressline2 AS [Supplier.Address], cityname as [Supplier.cityname] FROM wideworldimporters.purchasing.suppliers suppliers INNER JOIN wideworldimporters.application.cities cities ON suppliers.deliverycityid = cities.cityid |
Output:
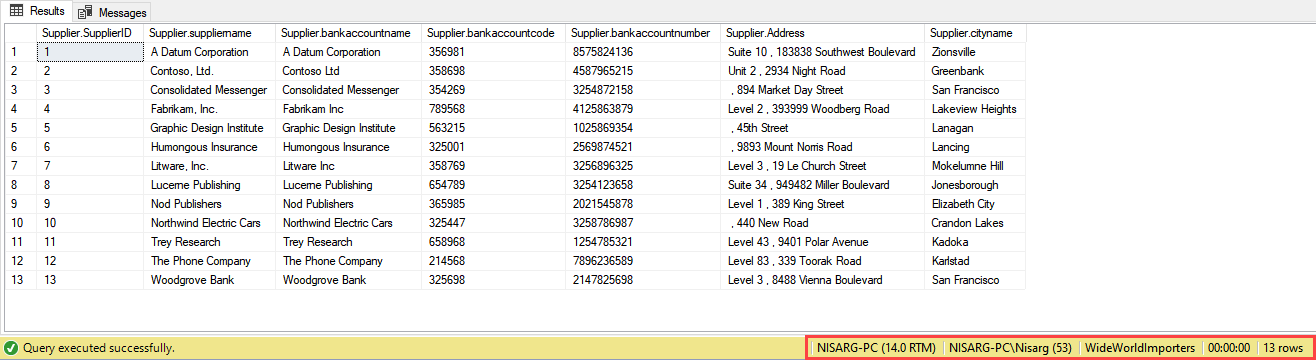
As we can see, the query returns 13 rows.
Step 2: Install Azure Cosmos DB emulator
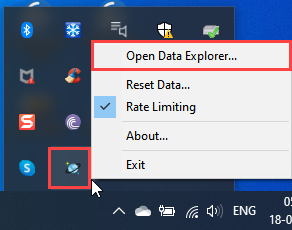
Download and Install the Cosmos DB emulator. The installation process is simple. Once installation completes, open the Data Explorer. Click on the taskbar, right-click on Cosmos DB emulator and select “Open Data explorer”. See the following image:
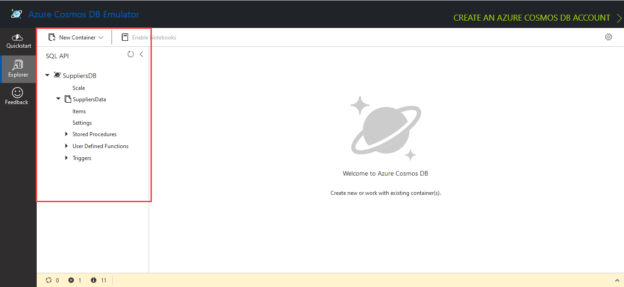
The data explorer should look like the following image:
Step 3: Perform Data migration
Once the migration tool is downloaded, extract the files, and run any of the following:
- Dtui.exe: If you want to run the graphical user interface version
- Dt.exe: If you want to run the command-line version of the tool
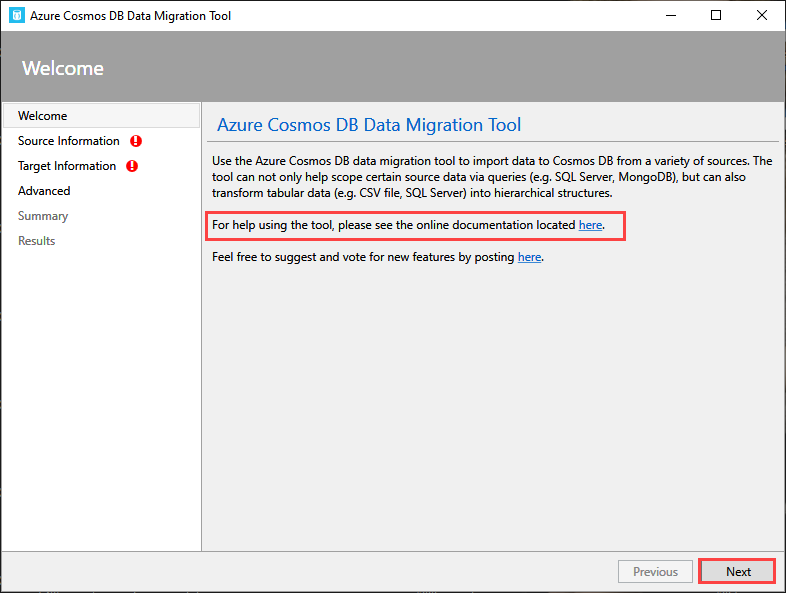
We are going to use the GUI version of the data migration toolkit hence run the “Dtui.exe.” On the welcome screen, we can see the information about the tools. Also, the link to the online documentation. See the following image. Click on Next:
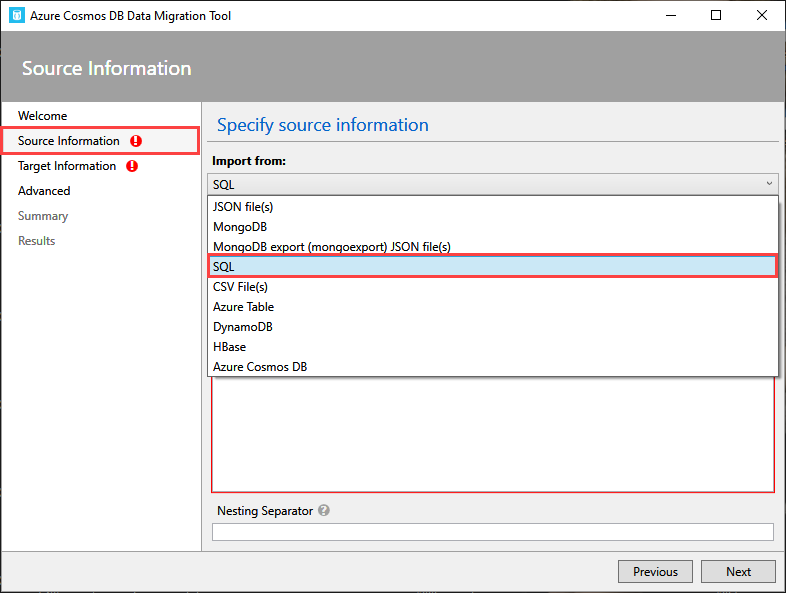
We want to import data from SQL Server to Azure Cosmos DB; hence on ‘Specify source information’ screen, choose “SQL” from the import from the drop-down box:
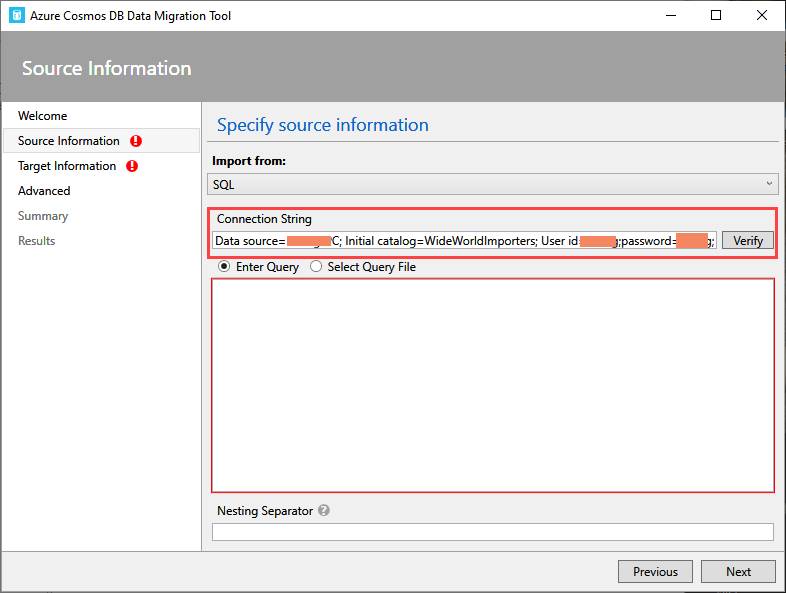
In connection string text box, specify the connection string which is going to be used to connect to the wideworldimporters database. The format of the SQL connection string is the standard connection string format.
To connect to the wideworldimporters database, enter the following connection string in the “connection string” dialog box.
“Data source=<SQL Server name>; Initial catalog=wideworldimporters; User id= <Your Username>;password=<Your Password>;”
You can verify the connection string by clicking on the “Verify” button. See the following image:
To populate the data from the SQL database, you can provide the T-SQL Query or the choose the T-SQL Script. We are going to use T-SQL Query hence choose the “Enter Query” option and enter the following query in the text box:
|
1 2 3 4 5 6 7 8 9 10 11 |
SELECT supplierid as [Supplier.SupplierID], suppliername as [Supplier.suppliername], bankaccountname as [Supplier.bankaccountname], bankaccountcode as [Supplier.bankaccountcode], bankaccountnumber as [Supplier.bankaccountnumber], Ltrim(Isnull(deliveryaddressline1, '')) + ' , ' + deliveryaddressline2 AS [Supplier.Address], cityname as [Supplier.cityname] FROM wideworldimporters.purchasing.suppliers suppliers INNER JOIN wideworldimporters.application.cities cities ON suppliers.deliverycityid = cities.cityid |
See the following image:
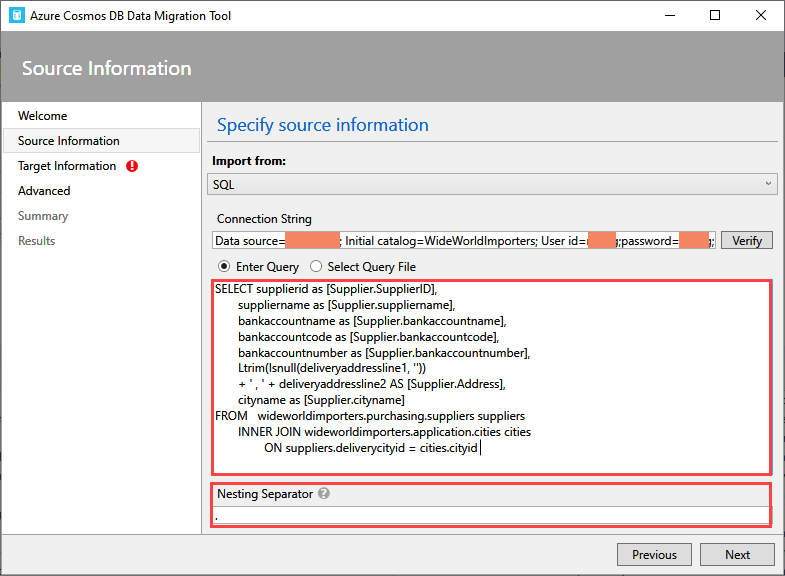
The documents in the Cosmos DB are structured and represented in JSON; hence we must format the query so that it returns the valid JSON output. To represent the hierarchical relationship, we will use a period (.) as a nesting separator.
Click on “Next” to configure the target.
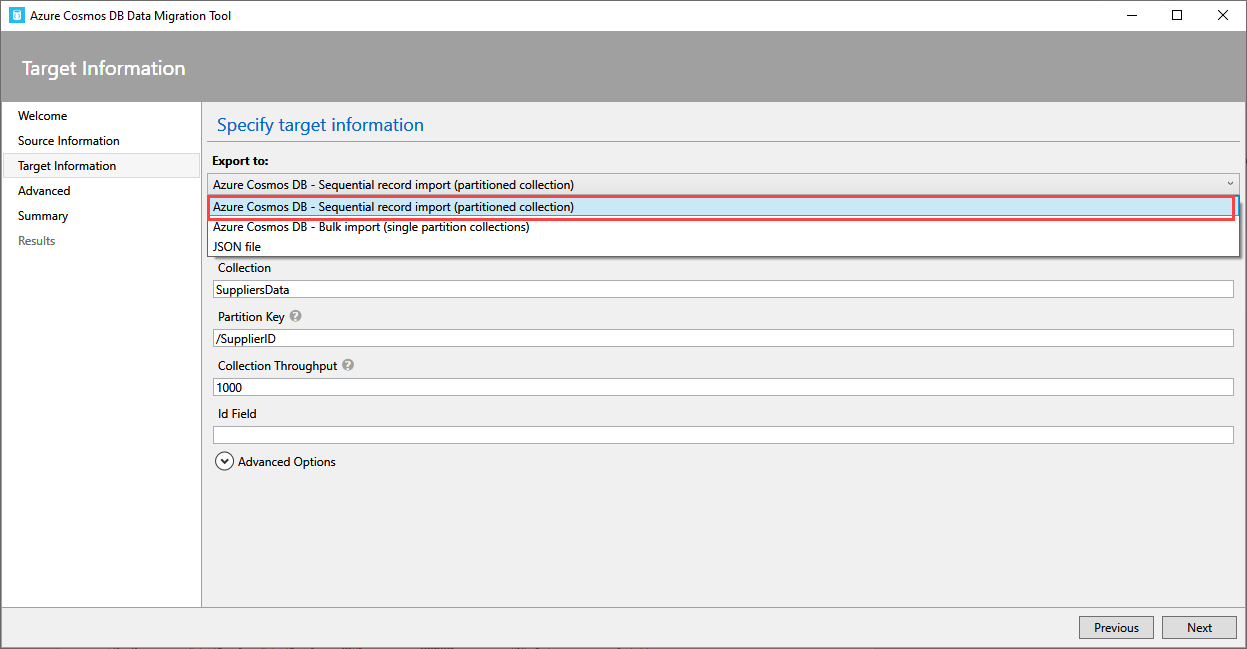
On the ‘Specify target information’ screen, choose “Azure Cosmos DB – Sequential record import (partitioned collection)” from the ‘Export to’ drop-down box. See the following image:
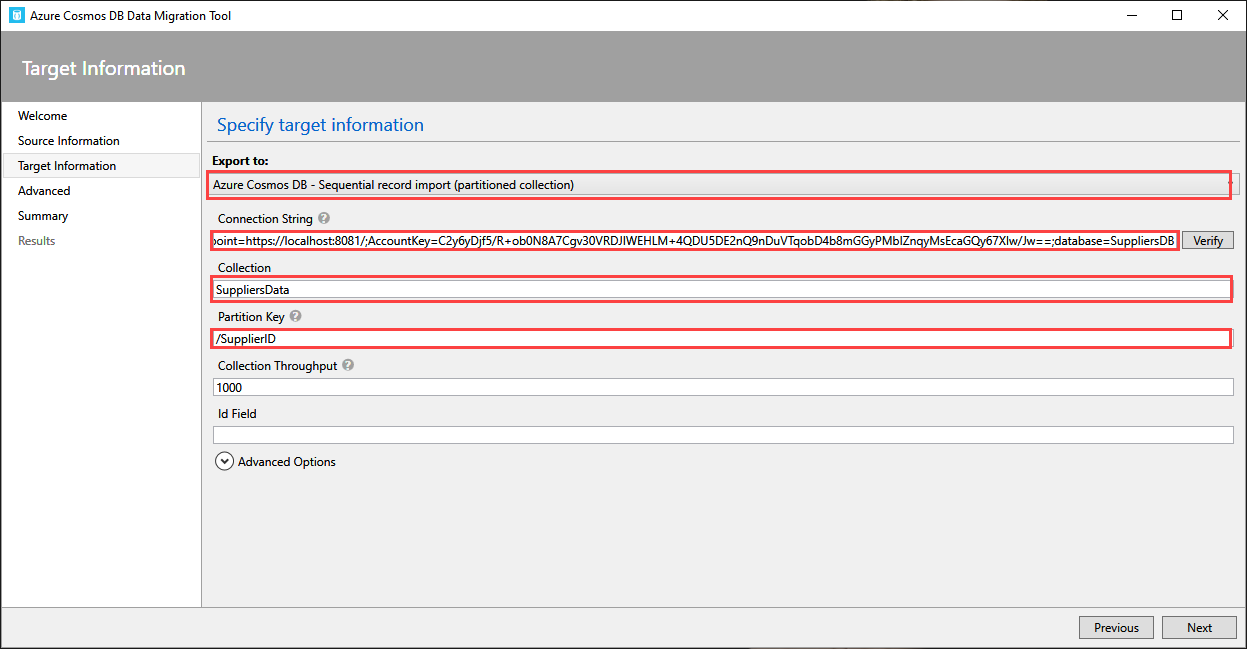
In connection string text box, we must provide the connection string to connect the Cosmos DB. The format of the connection string must be as the following:
AccountEndPoint=<URLEndPoint>;AccountKey=<Account Key>; Database=<Name of the cosmosdb>
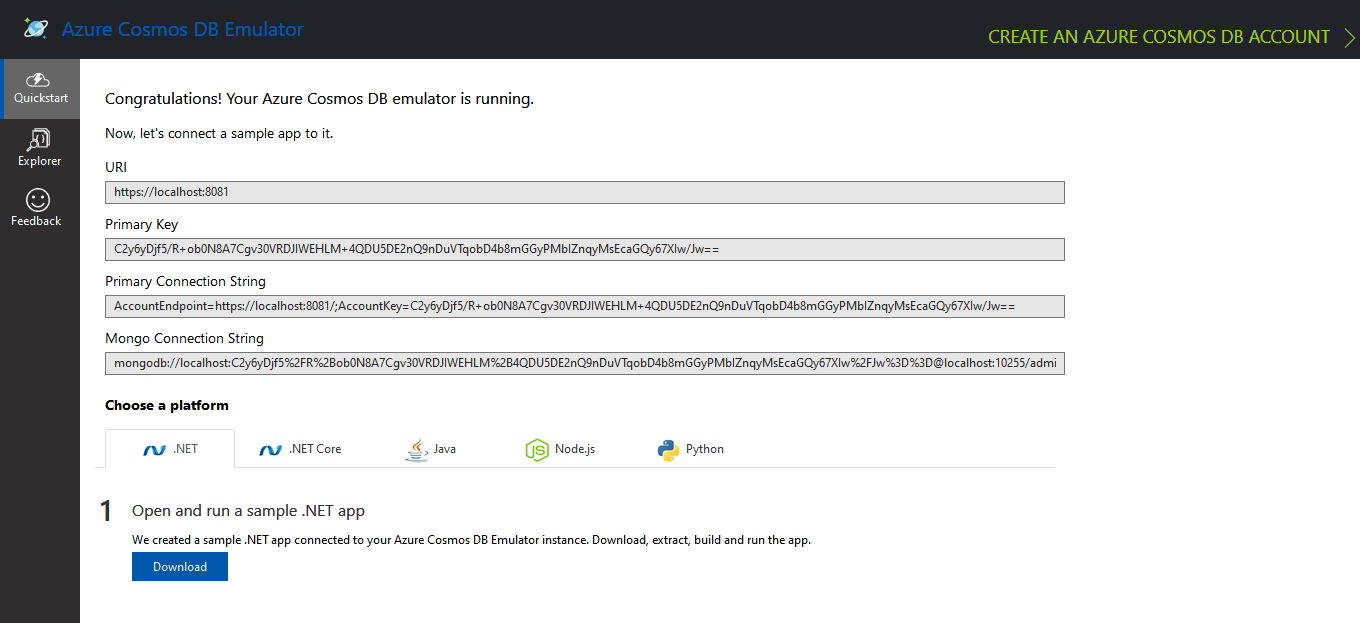
The value of the primary connection string is located on the quick start page of the Azure Cosmos DB emulator. The primary connection string does not have the database name; hence we must append the name of the Cosmos DB at the end of the connection string.
In the collection name text box, enter “SuppliersData”. In partition key, enter “/SupplierID” and keep the ID field blank and keep other fields unchanged. Click on Next. The following is the screenshot:
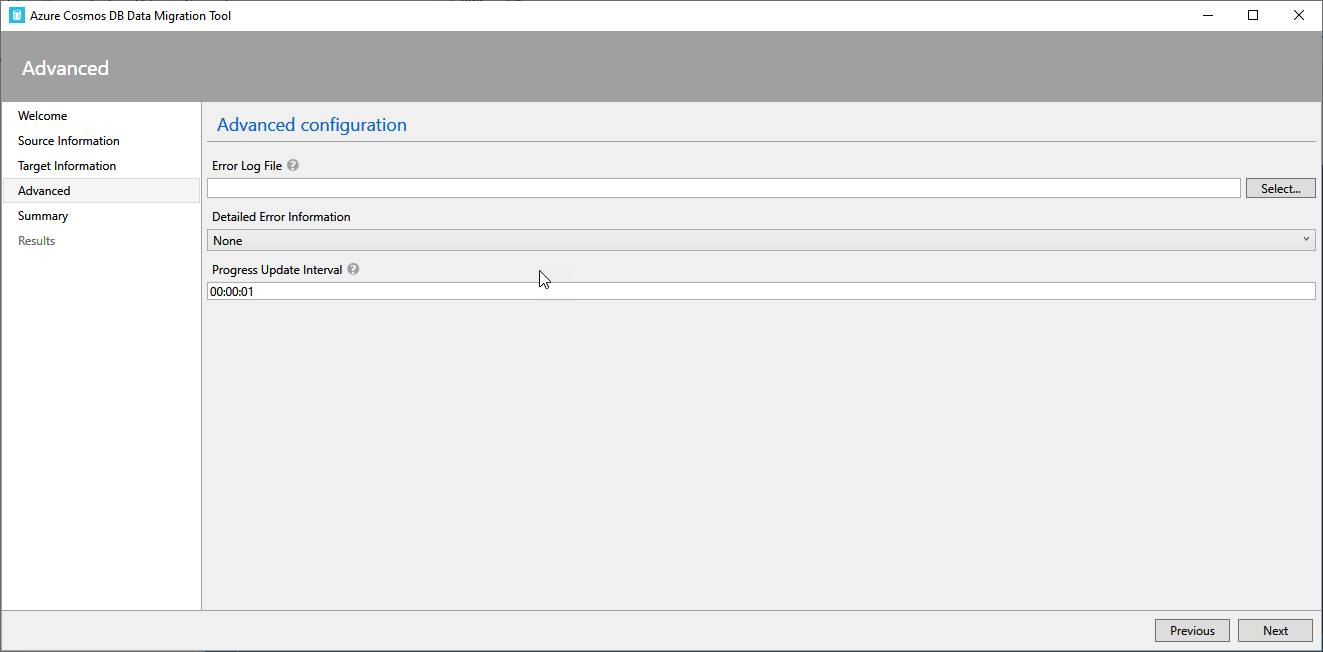
On the advanced configuration screen, we can configure the error log. Skip this step and click on next:
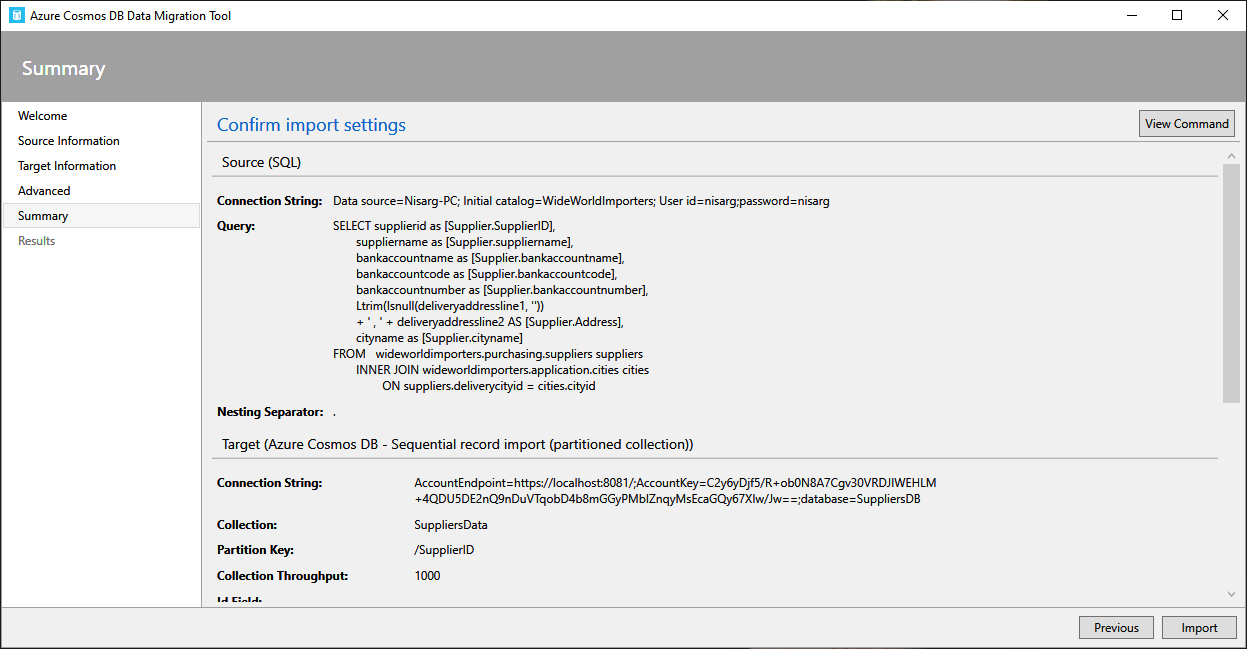
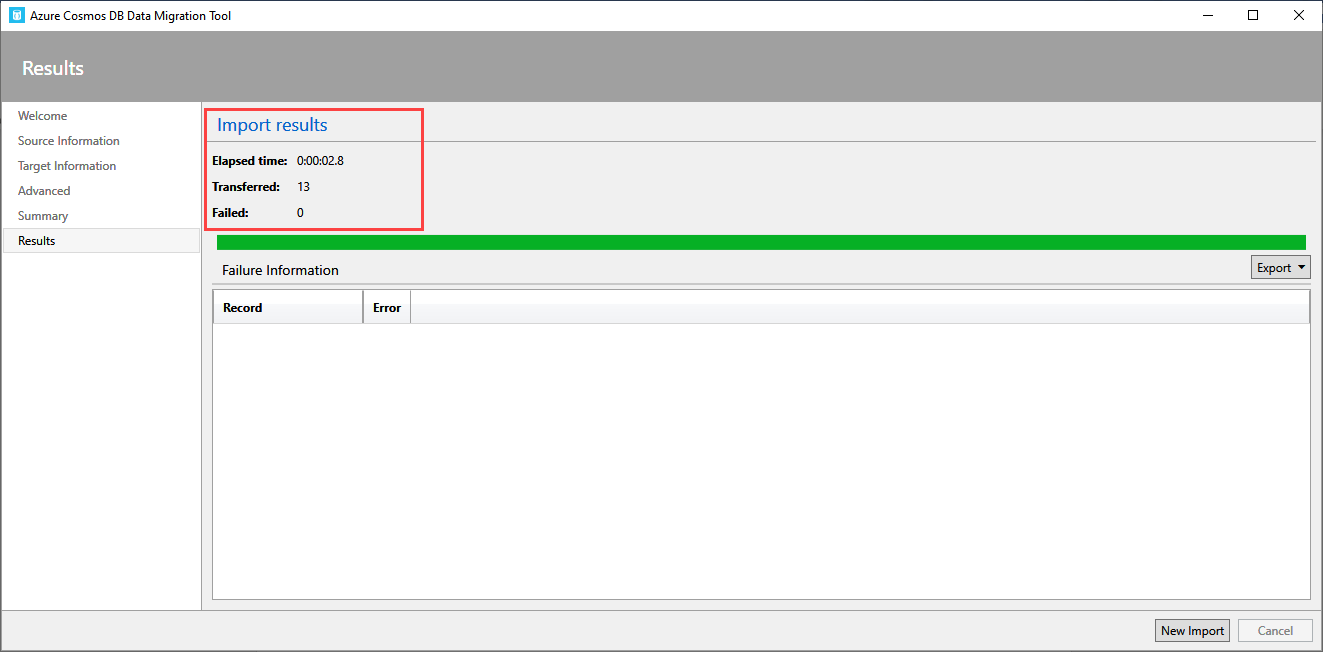
On the summary screen, you can review the import settings and click on the Import button. The following is the screenshot:
Once the import completes, we can see that 13 records have been migrated to the “SuppliersDB” database:
Step 4: View data in Cosmos DB
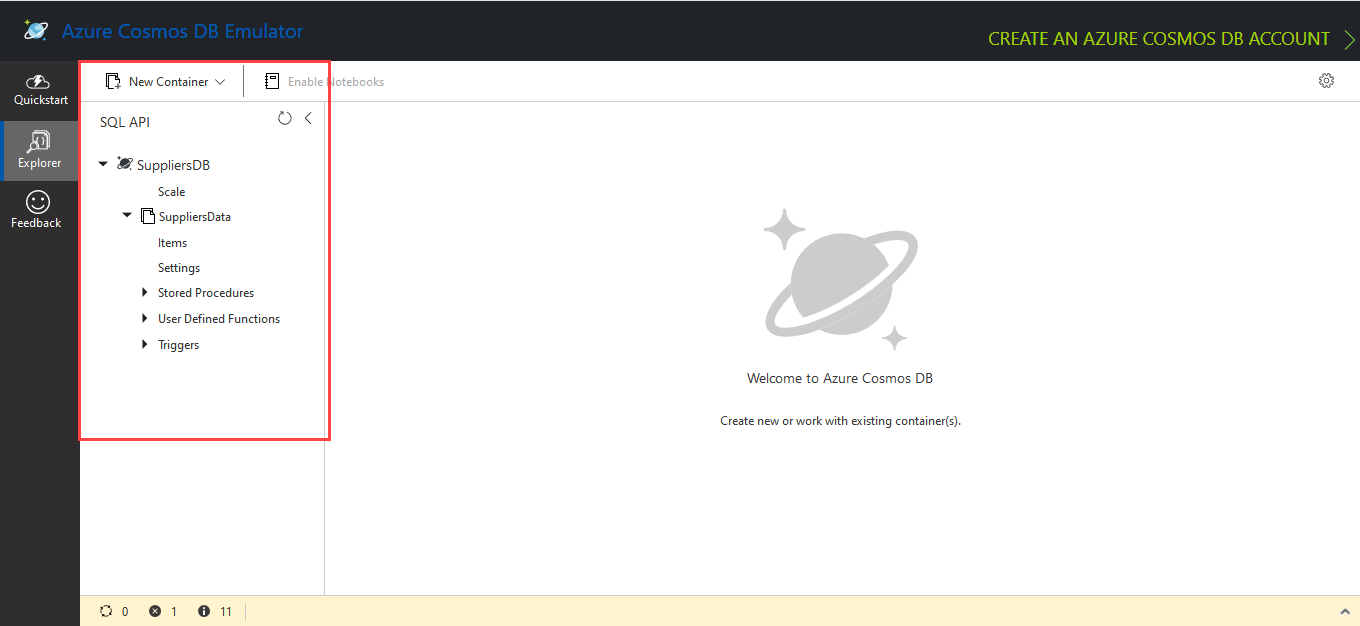
Now, to view database and documents, open Azure Cosmos DB emulator and click on explorer on the left pane of the screen. See the following screenshot.
To view the data, we will execute any of the following queries in the data explorer:
|
1 2 3 |
Select * from c OR Select * from SupplierData |
In the query, “c” is the name of the collection. The following is the output:
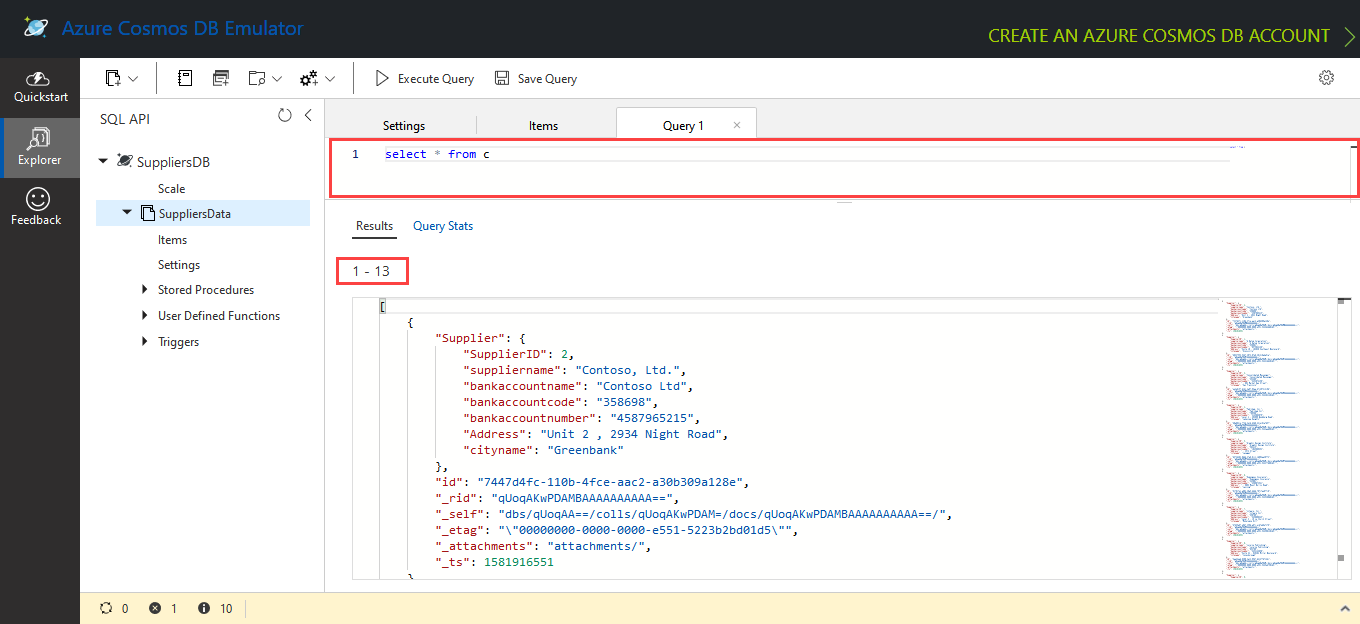
As we can see, 13 records have been returned, which indicates that the data has been migrated successfully.
Summary
In this article, I have explained the step by step process of migrating data from the SQL Server database to Azure Cosmos database using Azure Cosmos DB data migration toolkit.

He has expertise in database design, performance tuning, backup and recovery, HA and DR setup, database migrations and upgrades. He has completed the B.Tech from Ganpat University. He can be reached on nisargupadhyay87@outlook.com
- Different ways to identify and change compatibility levels in SQL Server - July 22, 2024
- Copy SQL Databases between Windows 10 and CentOS using SQL Server data tools - October 19, 2022
- Changing the location of FILESTREAM data files in SQL Database - October 14, 2022