

In the first article of the series on SQL Server 2019 and Ubuntu, we prepared the virtual machine environment and installed Ubuntu 18.10 in it. In this part of the article, we will install the latest SQL Server 2019 Preview CTP 2.1.
We can install SQL Server on Ubuntu by two methods.
- Directly install SQL Server on Ubuntu
- Install SQL Server using Docker container on Ubuntu
In this article, we will install SQL Server 2019 using the Docker container. Docker is basically an application package which contains all dependencies in the package itself. We can just call the Docker container and provide the configuration parameter to start using the application.
Before we install SQL Server 2019 on the virtual machine let us do a few checks and necessary pre-requisites.
Launch the virtual machine if it is not already running using the ID and password we configured during installation wizard.
>
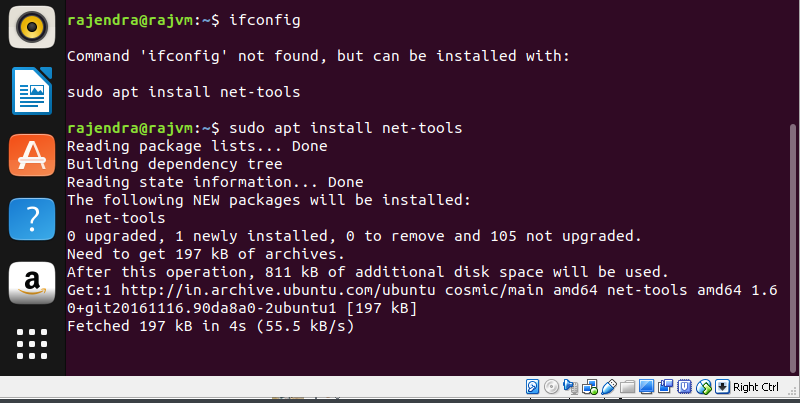
Find out the IP address of the virtual machine
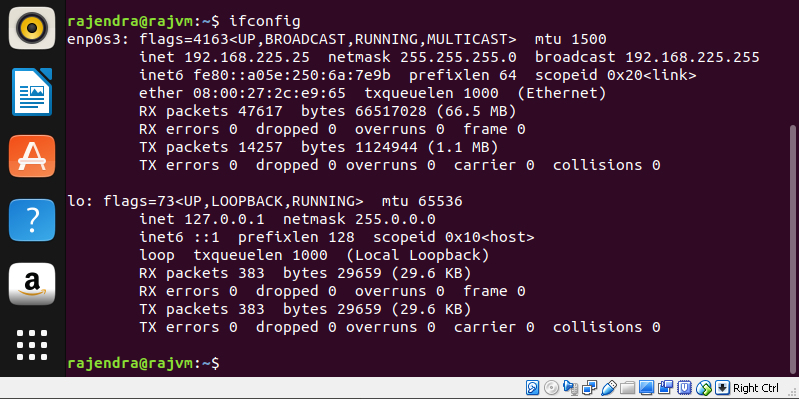
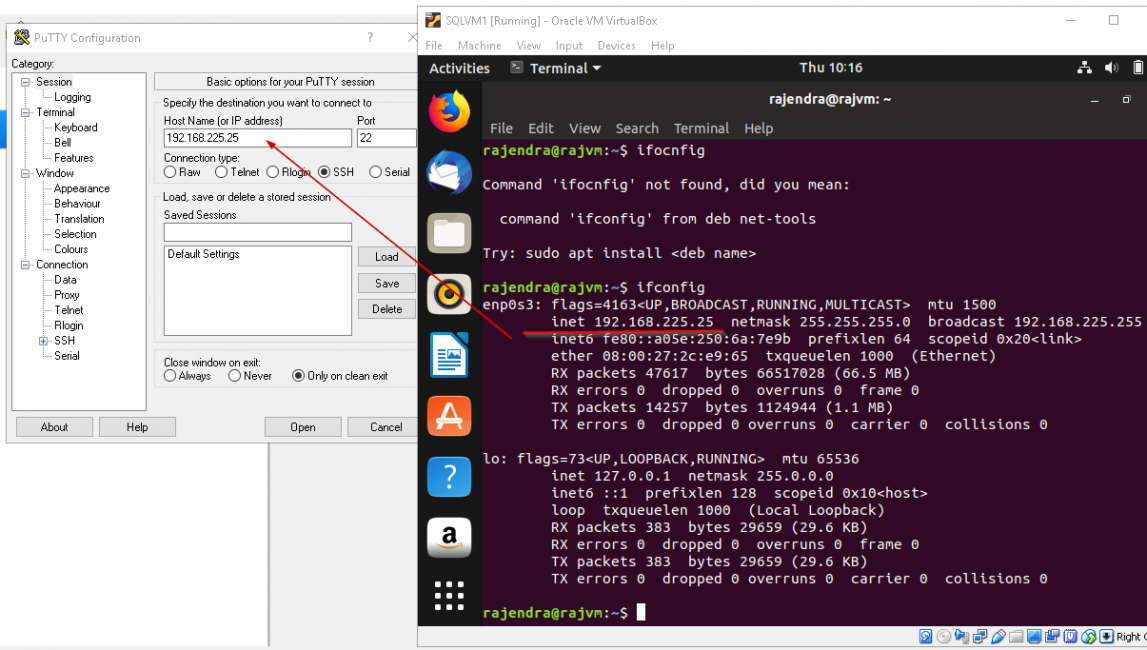
In Ubuntu, we can check the IP address using the ‘ifconfig’ command. But as you can see here, it shows an error that command ‘ifconfig’ not found. By default, it is not installed on Ubuntu so we need to install net tools to use this command.
We can install ‘ifconfig’ using the command below:
- sudo apt install net-tools
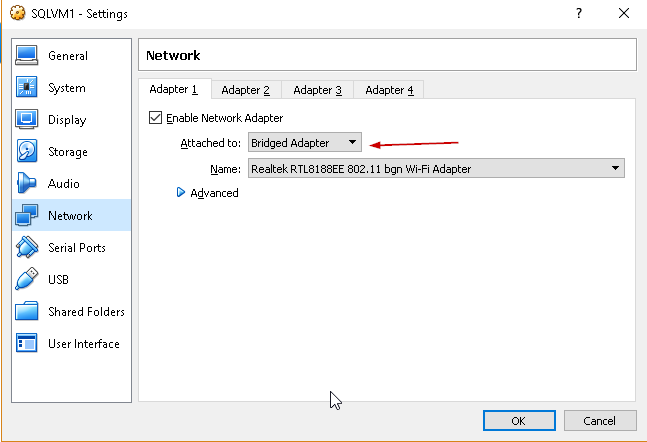
We will connect the virtual machine from outside to perform the installation. To do so, we need to configure the network at the VM level. Right click on the VM, go to Settings and then click on the Network.
Below is the default configuration for the VM:
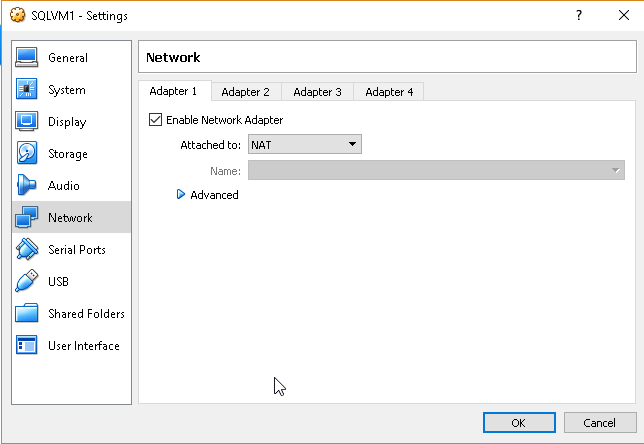
As you see above by default, the network adapter is ‘NAT’. The virtual machine does not contain any IP address in ‘NAT’ configuration, therefore, you cannot connect externally to this virtual machine.
Modify this to ‘Bridged Adapter’ from the drop-down list. In bridged networking, we connect a virtual machine by the network adapter on the host system. Therefore, when you configure to ‘Bridged Adapter’ you can see the host network name as shown here.
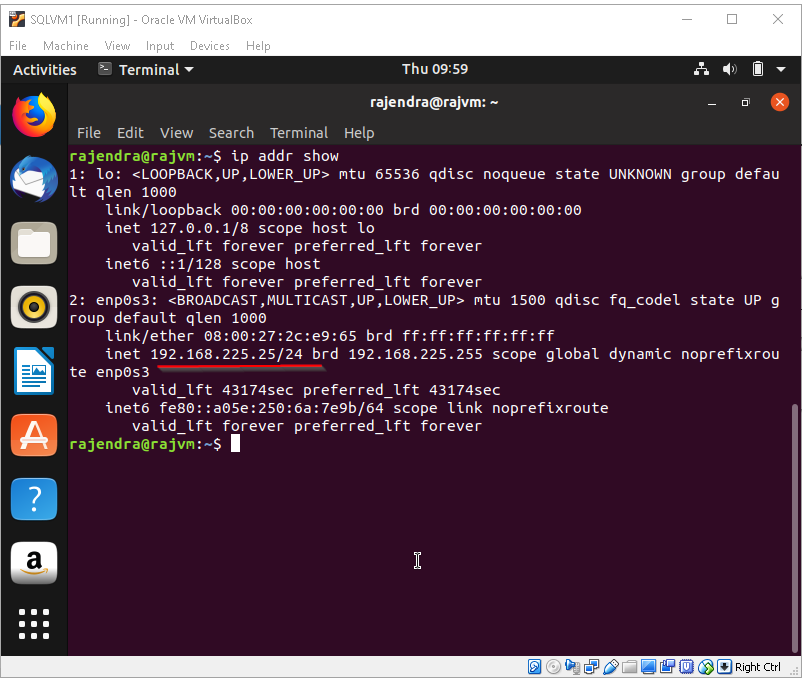
Click OK to save this setting. This takes little time to get the setting effective. Now, we can run the ‘ifconfig’ command and check the IP address.
Alternatively, we can also run the command ‘IP addr show’ to check the IP address. You can see the IP address from the screenshot ‘192.168.225.25’.
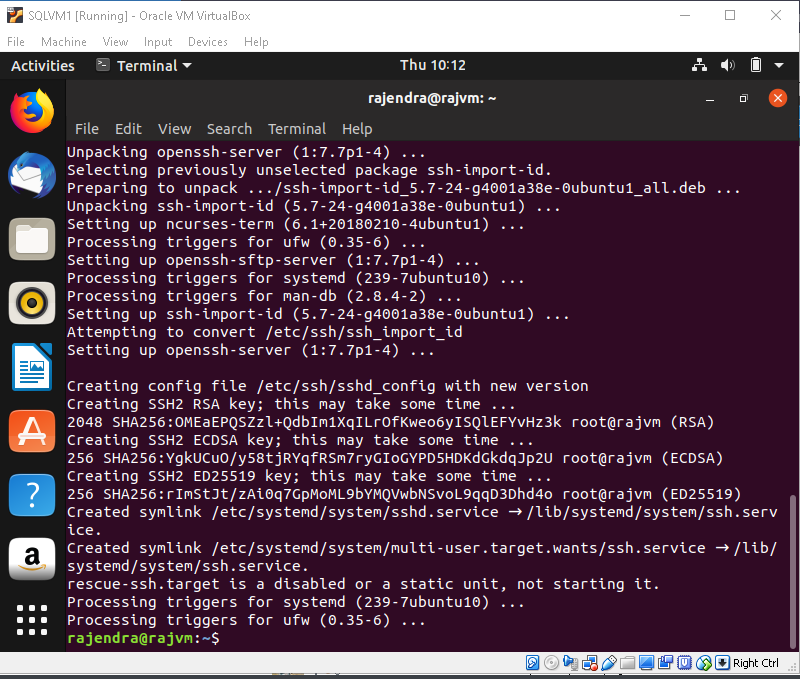
Install Open SSH server: Ubuntu does not come with the installation of OpenSSH Server. We can install ‘OpenSSH-server’ using the below command on Ubuntu at a terminal prompt:
- sudo apt-get install OpenSSH-server
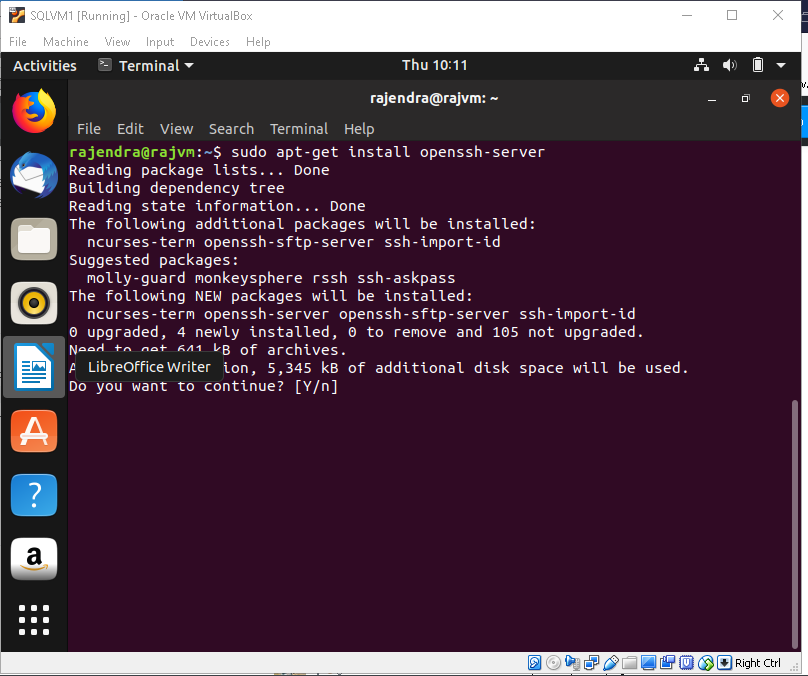
Provide the input as ‘Y’ and press ‘Enter’ to proceed.
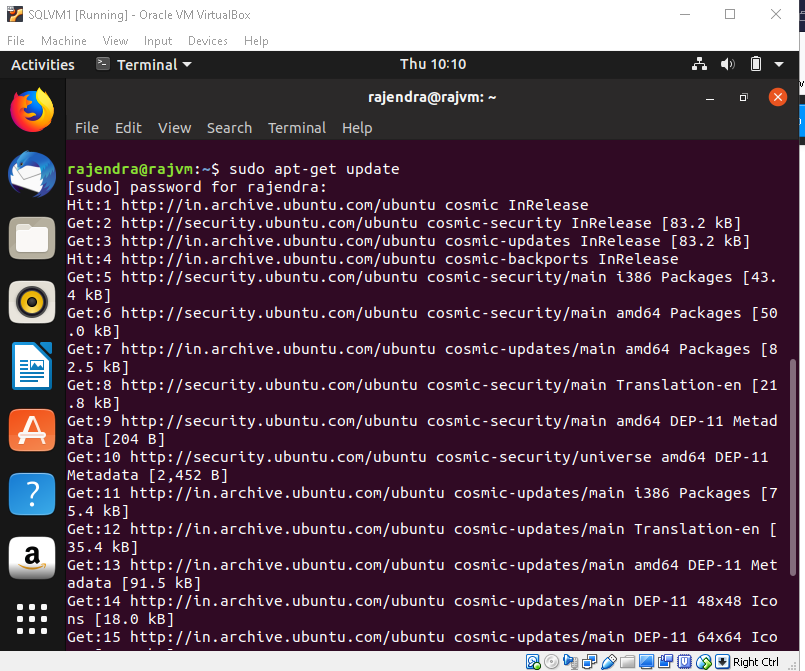
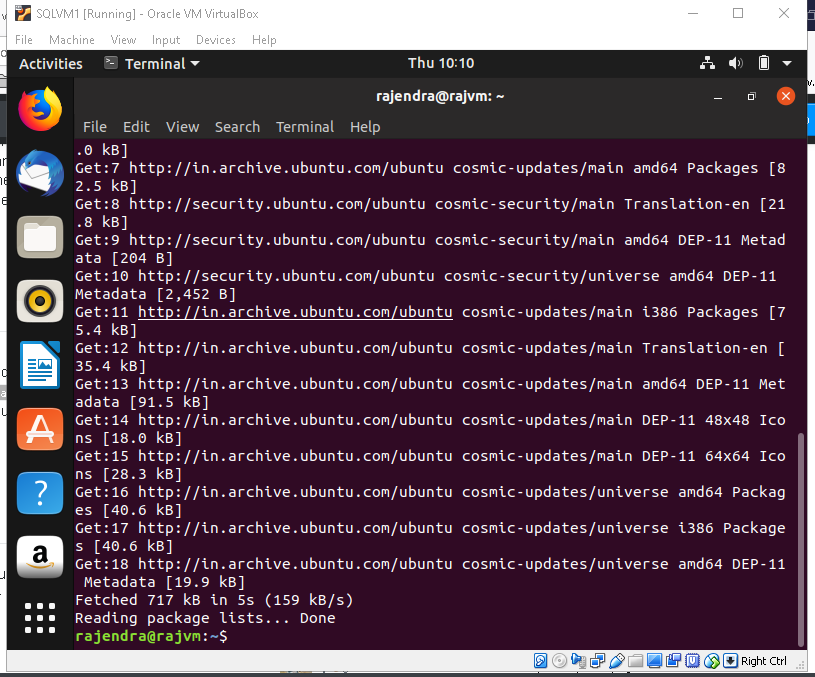
Apt-get update: This command will download the package list and update them from the repository. Run the command in the terminal on Ubuntu with sudo access.
- sudo apt-get update
Install Putty: We will use this tool to connect the VM and run the queries. You can install PuTTY (SSH and Telnet client) in the Windows Server outside the VM. Installation is quite simple – launch the setup and follow the installation wizard.

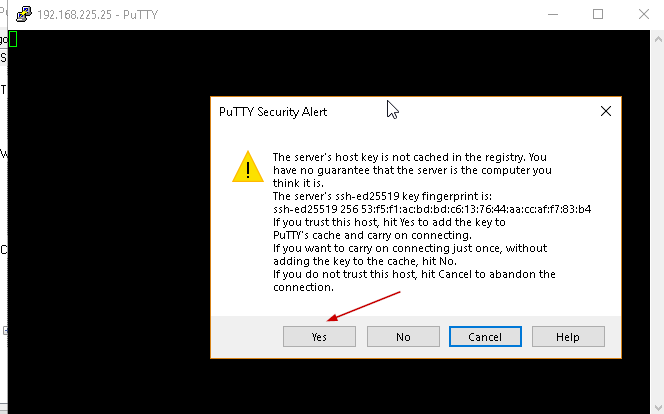
After installation, launch the ‘PuTTY ‘outside the VM and enter the IP address ‘192.168.225.25’ as shown here and press ‘Enter’.
Click on ‘Yes’ to add server host key in the ‘PuTTY’ cache. If we click on ‘Yes’ it does not ask this again if we reconnect to the VM. Else, click on ‘No’ to connect without adding the key to the cache.
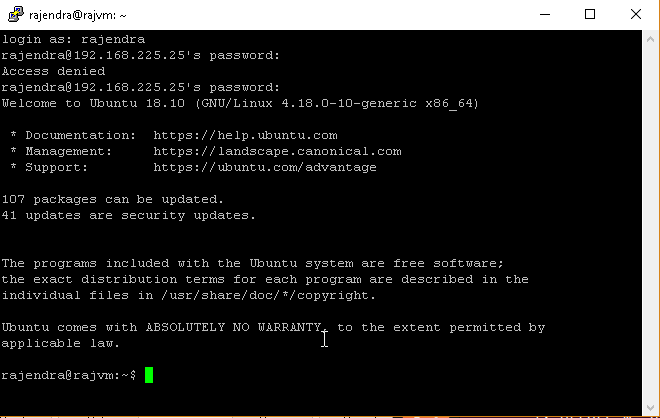
Provide the username and password to authenticate. If we provide wrong information, we get error message ‘Access denied’.
Once connected we can see a message along with OS version ‘ Welcome to Ubuntu 18.10’
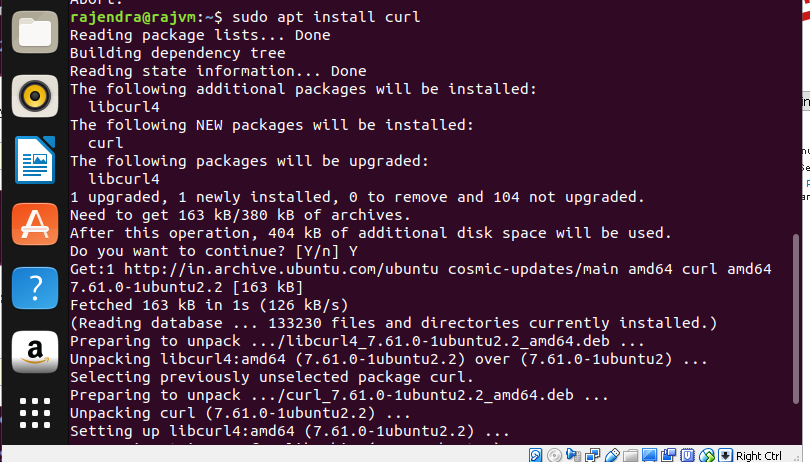
Install curl utility: curl utility in Linux is used to transfer file using different supported protocols.
- $ sudo apt install curl
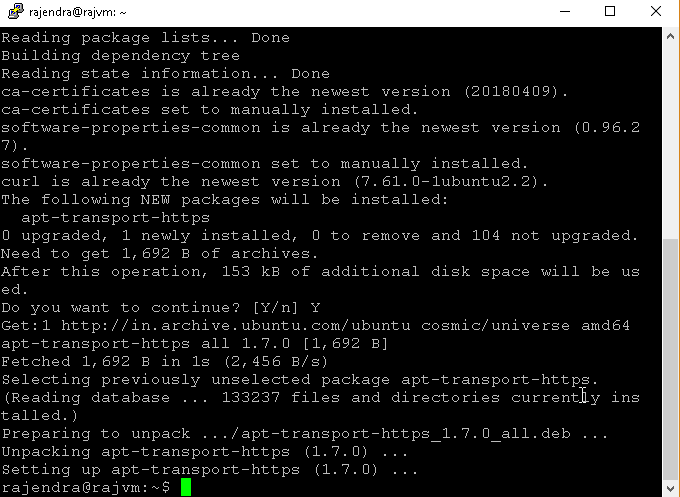
Install Docker: Use below command to install packages over HTTPS from the repository over:
- $ sudo apt-get install apt-transport-https ca-certificates curl software-properties-common

We need to add GPG key using the below curl command:
- $ curl -fsSL https://download.docker.com/linux/ubuntu/gpg | sudo apt-key add –

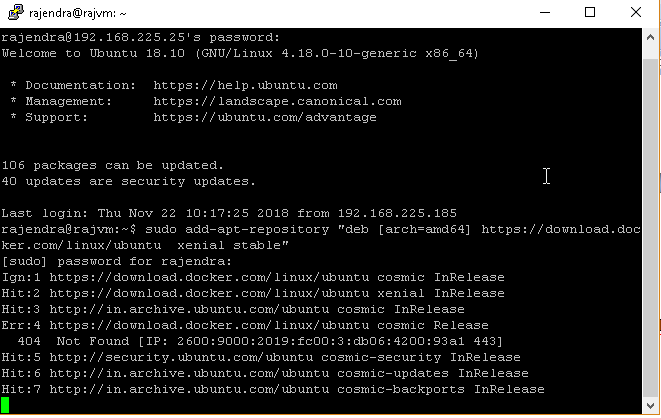
Set up the repository using below command:
- $ sudo add-apt-repository “deb [arch=amd64] https://download.docker.com/linux/ubuntu xenial stable”
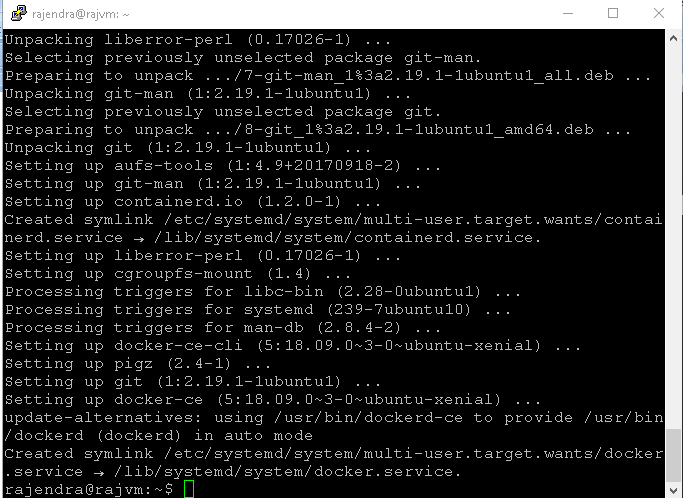
Install Docker community edition which is suitable for the individuals. Run the below commands:
- $ sudo apt-get update
- $ sudo apt-get install docker-ce
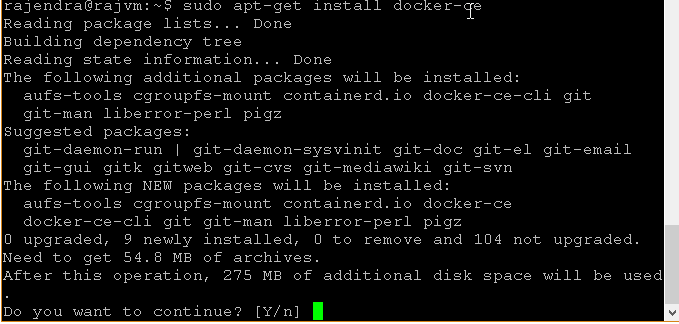
We get a message that this operation will take 275 MB of additional disk space. If we want to continue, type ‘Y’ and then press ‘Enter’
We can test the docker container using the ‘hello-world’ which verifies that the Docker is working fine or not.
- $ sudo docker run hello-world
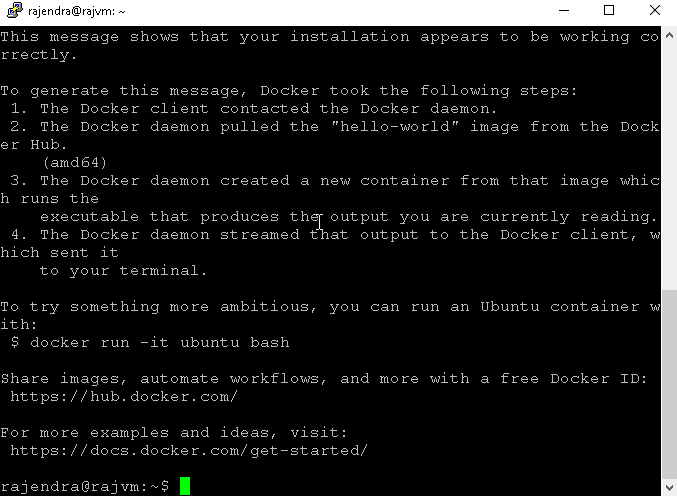
As you see that, it shows the message ‘ This message shows that your installation appears to be working correctly’. At this stage, we are ready to install SQL Server 2019 CTP 2.1 on Ubuntu.
Install SQL Server 2019 on Ubuntu Docker
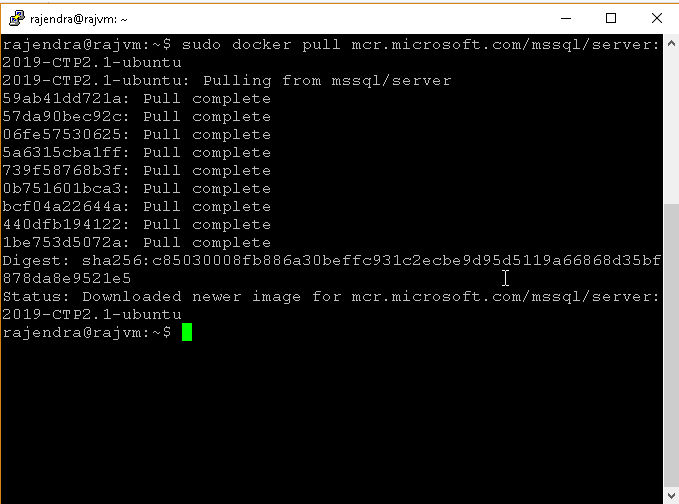
In the first step, we will pull the SQL Server 2019 container image from the Microsoft syndicates container catalog (mcr.microsfoft.com)
- sudo docker pull mcr.microsoft.com/mssql/server:2019-CTP2.1-ubuntu
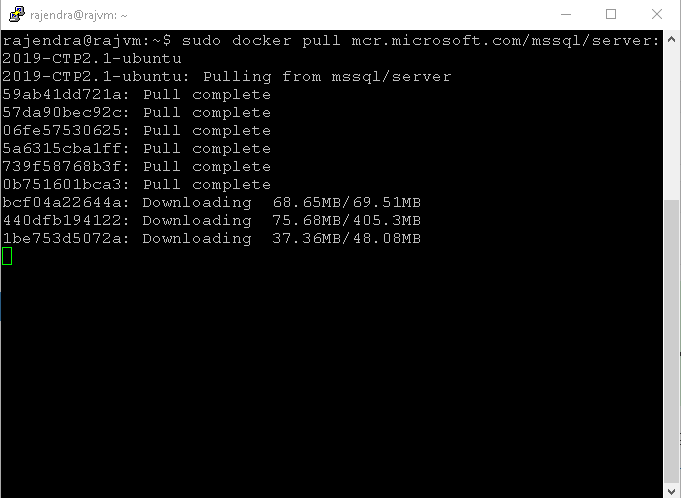
You can see here that it downloads the image and extract it. Once it is completed, we can notice the status message ‘Downloaded newer image for mcr.microsoft.com/mssql/server:2019-CP2.1-ubuntu’
Run the below command with some configuration options:
- sudo docker run -e ‘ACCEPT_EULA=Y’ -e ‘SA_PASSWORD=mssql-pass1’ -p 1433:1433 –name sql19 -v /home/labuser/dockervolumes/lab01:/var/opt/mssql -d mcr.microsoft.com/mssql/server:2019-CTP2.1-ubuntu
We can modify the following input as per our requirements
- -e ‘SA_PASSWORD : Specify the sa password
- -p: Specify the port address in the format of 1433:1433 which means TCP 1433 port on both the container and the host
- –name: name for the container
- –V: mount a volume for the installation

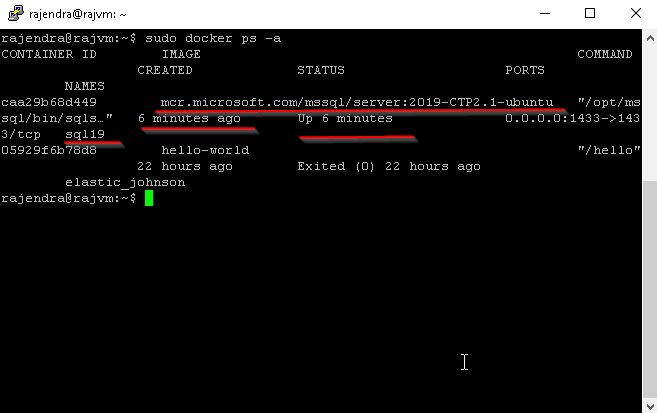
We can verify the active containers using below command
- sudo docker ps -a
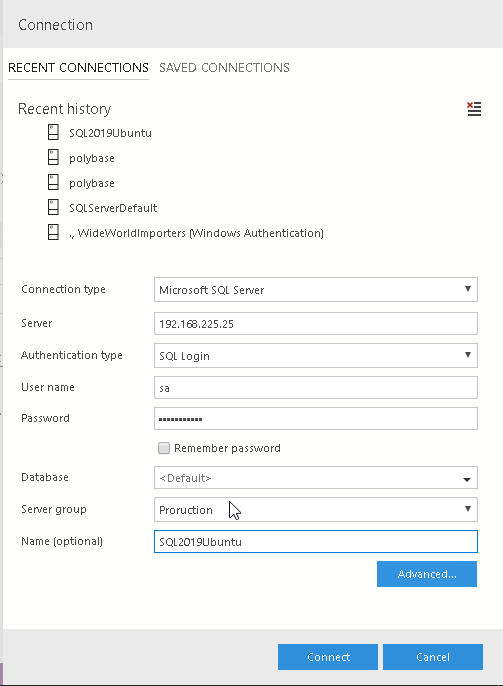
Let us connect using the Azure Data Studio from outside the virtual machine. In Azure Data Studio, provide the connections details as shown here and connect.
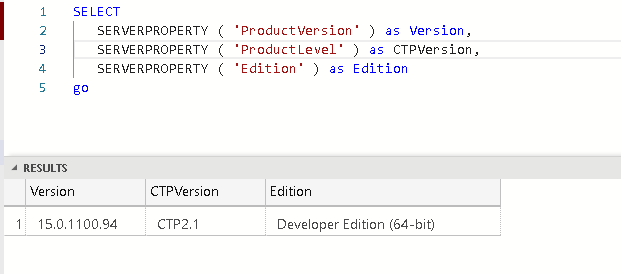
Verify the SQL Server version and edition details using below query:
|
1 2 3 4 5 |
SELECT SERVERPROPERTY ( 'ProductVersion' ) as Version, SERVERPROPERTY ( 'ProductLevel' ) as CTPVersion, SERVERPROPERTY ( 'Edition' ) as Edition go |
We will explore more on SQL Server 2019 features using this docker container in my further articles.
Removing the docker container:
If we do not want our docker container, then we can drop it with simple steps.
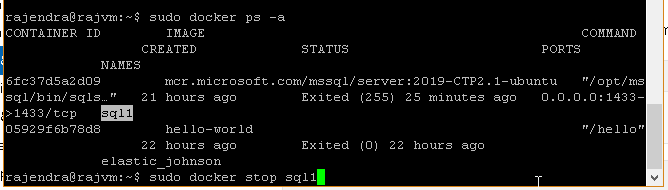
- Check the active Docker using the command. This command lists out all the active container with their status:
- $ Sudo docker ps -a
From here, suppose we want to remove the container ‘sql1’, so first, we need to stop running it with below command:
- sudo docker stop sql1
It returns the container name stopped as you can see in below image. We can now remove the container using below command:
- sudo docker rm sql1
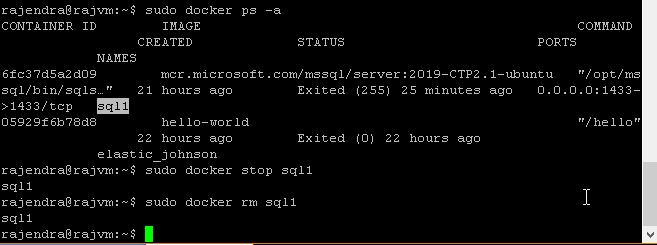
We can see now the container is removed quickly.
Note: If we remove a container, it also deletes all the databases and all data in that particular container, so you should take a note of this before removing the container. You can take backup of your data if required for future use.
Conclusion
In this article, we explored pre-requisite for installation of SQL Server using the Docker containers in Ubuntu. We also learned to install SQL Server with Docker container and connect to it using Azure Data Studio externally. In the next article, we will take a look over the tools which we can use to connect to SQL Server.
Table of contents

I am the author of the book "DP-300 Administering Relational Database on Microsoft Azure". I published more than 650 technical articles on MSSQLTips, SQLShack, Quest, CodingSight, and SeveralNines.
I am the creator of one of the biggest free online collections of articles on a single topic, with his 50-part series on SQL Server Always On Availability Groups.
Based on my contribution to the SQL Server community, I have been recognized as the prestigious Best Author of the Year continuously in 2019, 2020, and 2021 (2nd Rank) at SQLShack and the MSSQLTIPS champions award in 2020.
Personal Blog: https://www.dbblogger.com
I am always interested in new challenges so if you need consulting help, reach me at rajendra.gupta16@gmail.com
View all posts by Rajendra Gupta
- Understanding PostgreSQL SUBSTRING function - September 21, 2024
- How to install PostgreSQL on Ubuntu - July 13, 2023
- How to use the CROSSTAB function in PostgreSQL - February 17, 2023