
In the previous articles of this series on using SQL Server 2019 on Ubuntu, we have explored the following
- Configure a virtual machine and install Ubuntu 18.10 on it
- Perform configuration steps and install SQL Server 2019 version on it
Previously, in part 2 of this series, we connected SQL Server 2019 from outside the virtual machine. Now, let us see how we can install SQL Server from inside the virtual machine running Ubuntu operating system.
SQL Server now installs on both the Windows and the Linux platforms. Normally, we used to connect to SQL Server with SQL Server Management Studio. We can connect to SQL Server on Linux using SQL Server Management Studio, but it cannot be installed on the Linux operating system directly. Further, in the article, we will install following cross-platform tools which can be installed on both Windows and Linux operating systems.
- Azure Data Studio
- SQLCMD
- mssql-cli
Azure Data Studio installation on Ubuntu 18.10
Azure Data Studio is a cross-platform database tool, which works on both the Windows as well as on the Linux operating system. In September 2018, Microsoft released the general availability release of Azure Data Studio. Previously, it was running with the name SQL Operations Studio. In the previous article, we connected SQL Server running on Ubuntu 18.0 through Azure Data Studio installed on the Windows operating system.
We can install Azure Data Studio on Ubuntu 18.10 using both the GUI and command line mode as well. Let us install the tool using the GUI mode. To do so, open the browser (by default Mozilla is installed on Ubuntu OS) and go to this URL.
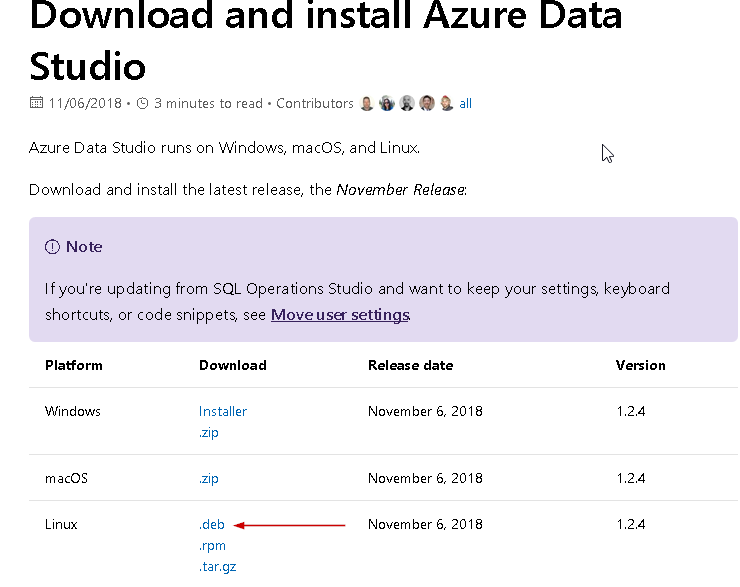
In Linux, we can see a different kind of download available
- Deb (Debian software repository)
- Rpm: Package in .rpm format
- Tar.gz: Files in a compressed format
In this example, we will perform the Debian installation for the Azure Data Studio. It is a graphical method to perform the installation on Ubuntu. Download the .deb file and save it in the desired location.
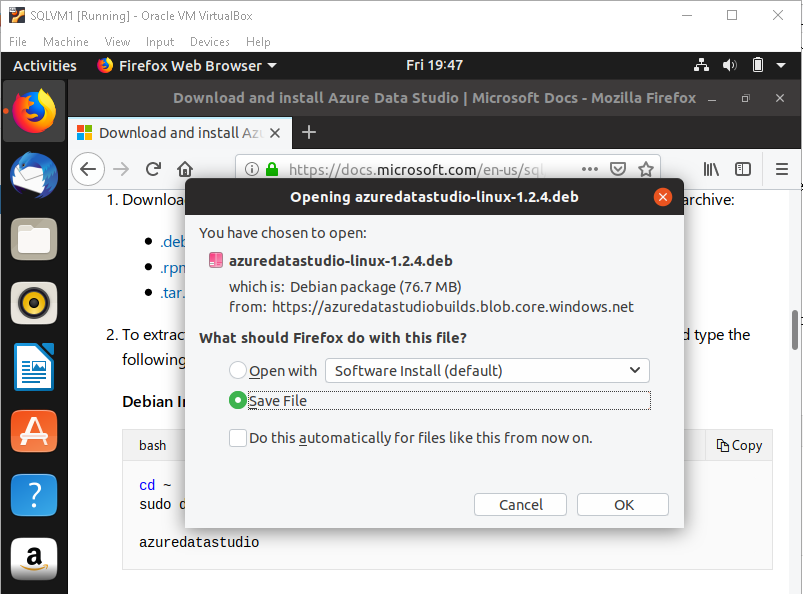
Once Debian package (azuredatastudio-Linux-1.2.4.deb) download is successful, double-click on the file to launch the installation as shown below.
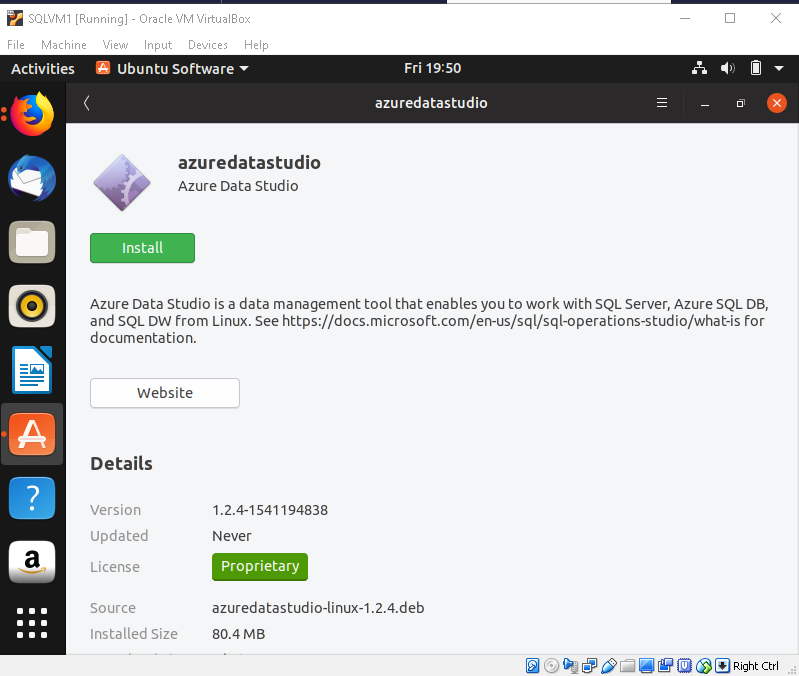
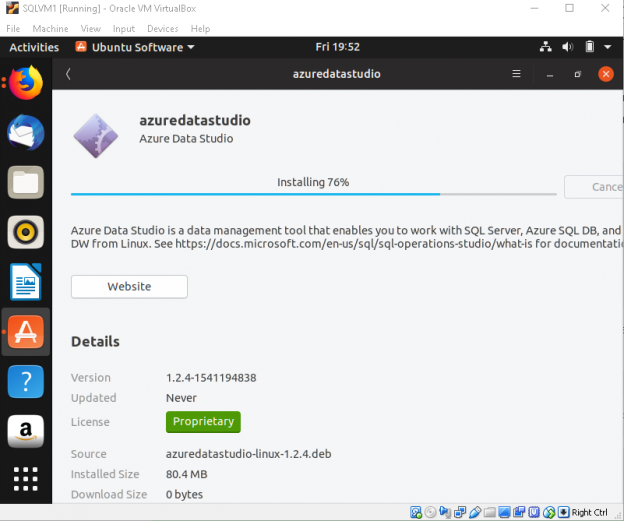
We get the summary of the product description along with the version, size, source, and the license information. Click on ‘Install’ box in the top showing in the green colored box.
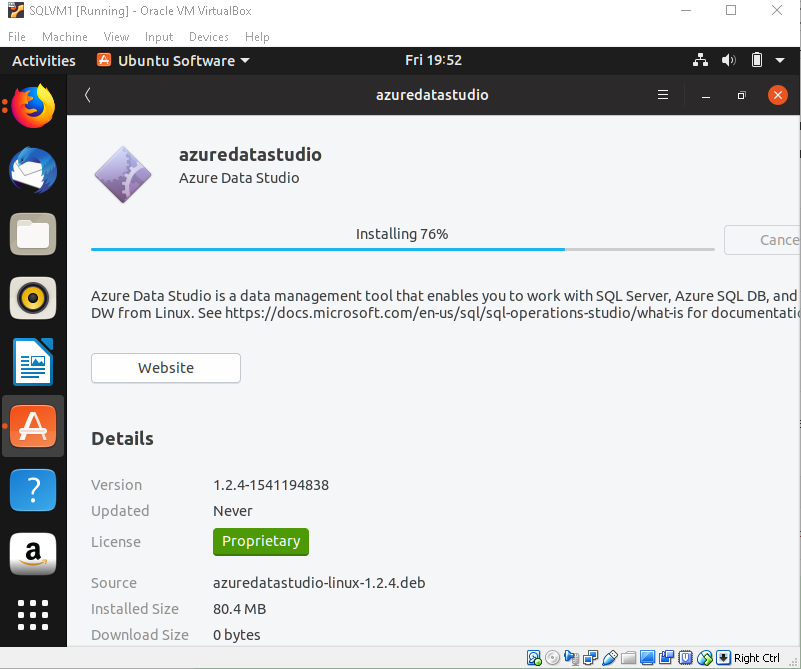
Before installation, authentication is required for this. Enter the administrator user id and password we created while installing Ubuntu 18.10.

It begins the installation and you can see the progress of the installation.
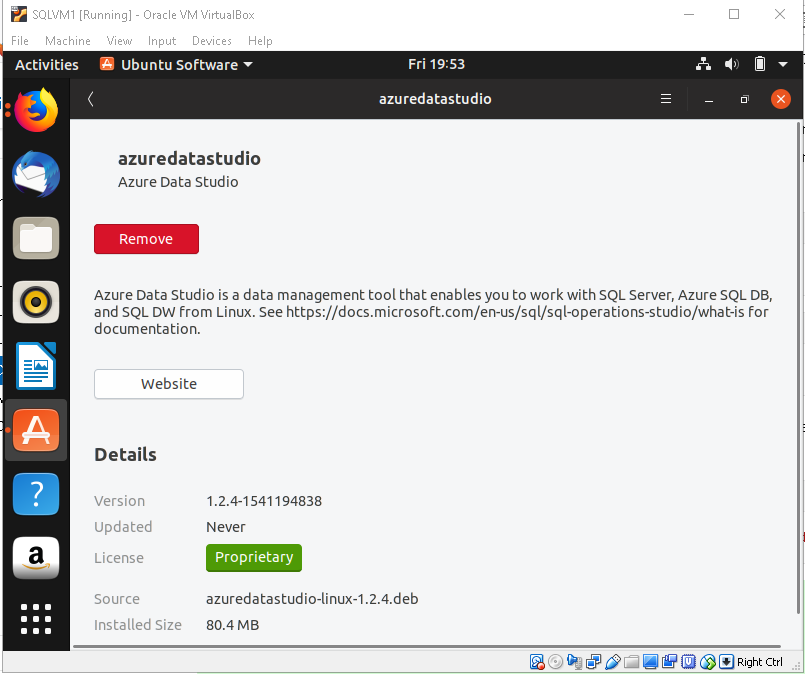
Once the installation is complete, you did not get any completion or successful installation message here. Instead, you can see the ‘Remove’ box in red color. It shows that we have installed Azure Data Studio successfully.
In the Ubuntu application, you can verify the Azure Data Studio is present.
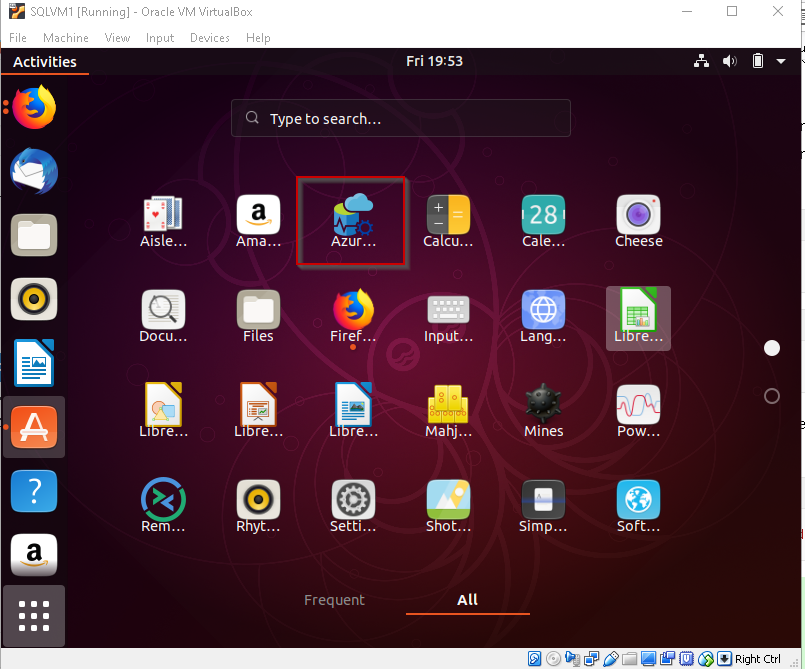
Double click on it to launch the Azure Data Studio initial screen.
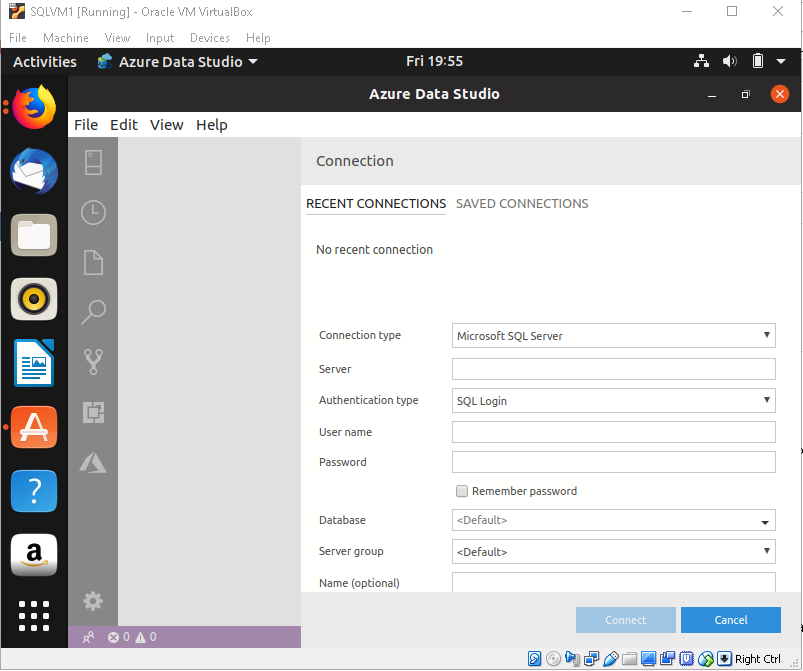
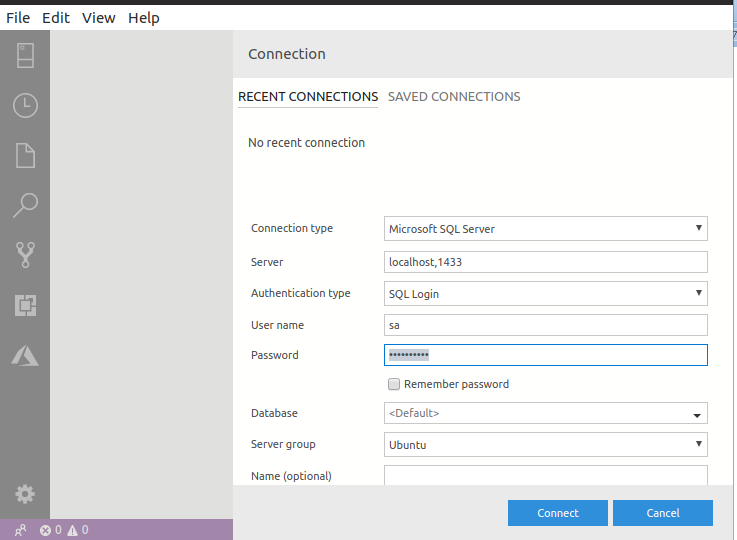
Enter the connection details like instance name, authentication method (SQL authentication), database name (if we want to connect to the specific database) and the server group.
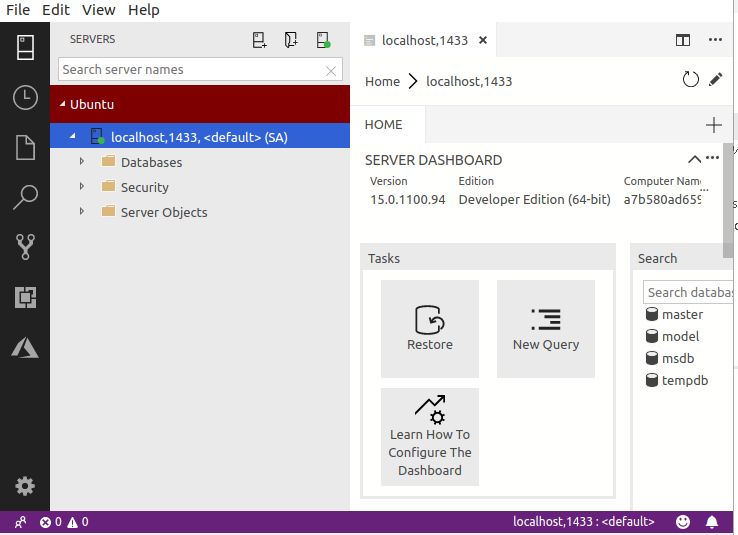
And we are connected to the SQL Server preview version from inside the virtual machine hosting Ubuntu 18.10. You can verify the server instance version, edition, computer name from the server dashboard launched after connecting to the SQL Server.
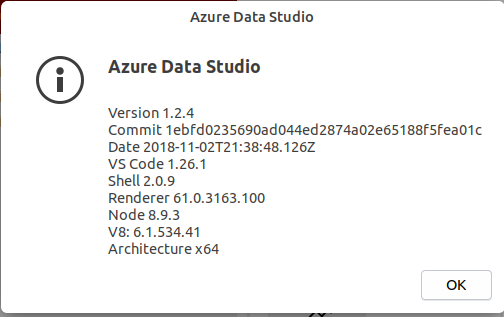
Go to ‘Help -> About’ to get details about Azure Data Studio version.
Now, we can use the Azure Data Studio to connect to SQL Server and run queries in Linux.
SQLCMD on the Ubuntu
SQLCMD is the default command line tool to connect with SQL Server on the command line mode. In Ubuntu, to connect SQL Server first start an interactive session and then connect to SQL Server with the credentials.
- sudo docker exec -it sql1 “bash”
- /opt/mssql-tools/bin/sqlcmd -S localhost -U SA -P ‘password’
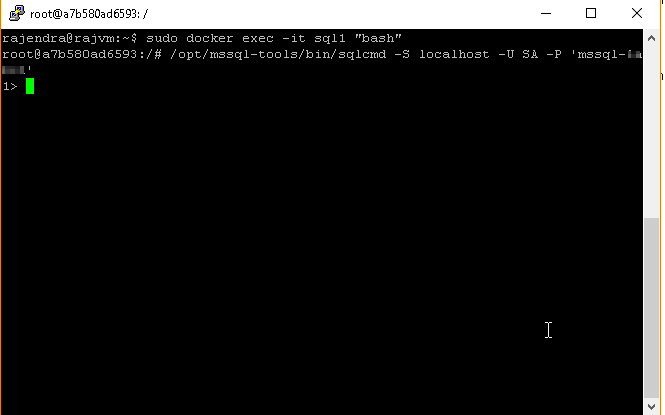
It connects to SQL Server and we get the next line prompt as ‘>’
Let check basis SQL query to check the version of SQL Server. Therefore, run the below query.
1>select @@version
2>go
You can see the output in the below image.
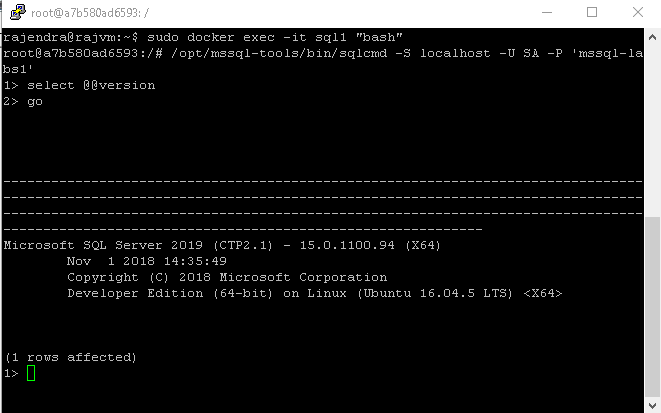
SQLCMD works in the Linux operating system similar to the windows version.
MSSQL-CLI on Ubuntu
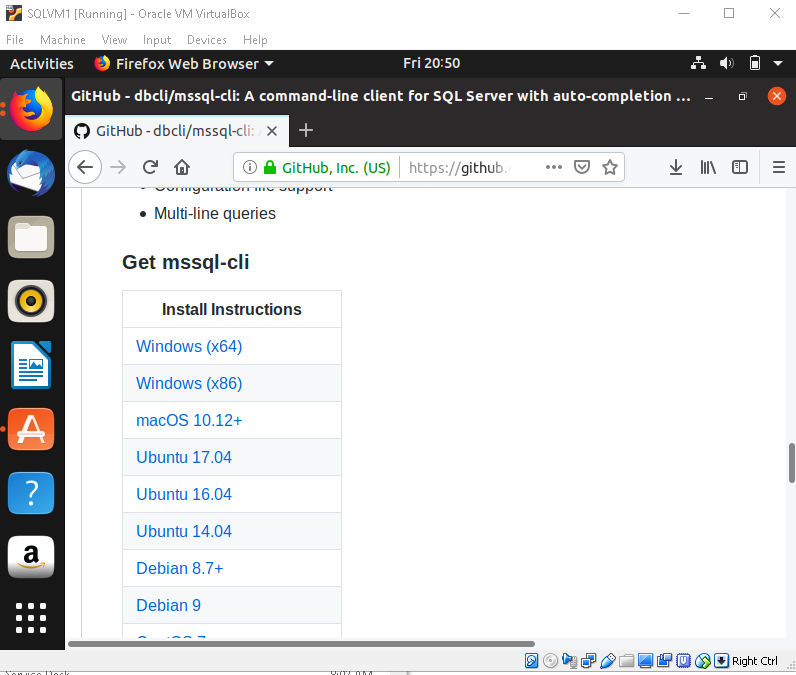
Instead of using SQLCMD, we can use an interactive command line tool ‘mssql-cli’. It is an open -source (BSD 3 license) tool based on the python. We can install ‘mssq-cli’ on the windows, Linux and the Mac OS. The source code for this tool is on GitHub.
Open the link in the Mozilla browser inside the virtual machine. Here you see, mssql-cli version for different operating systems.
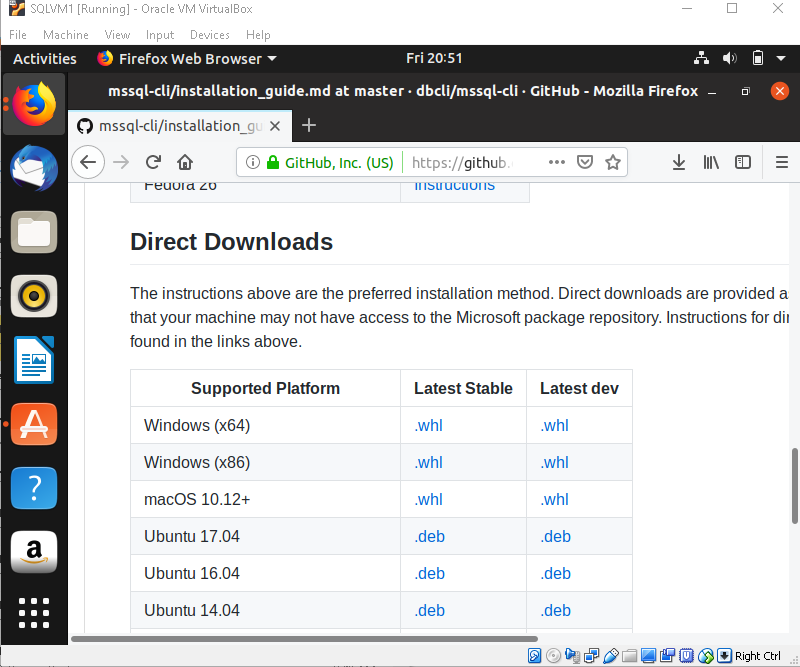
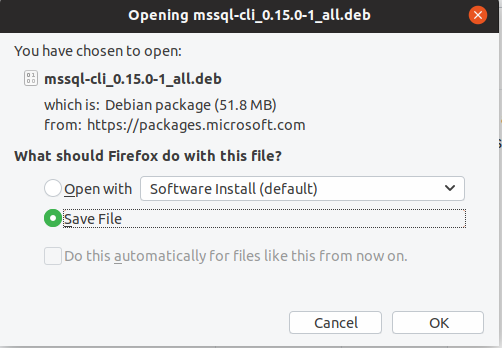
Click on the ‘Direct downloads’ in the bottom side of the page and download the .deb version of the tool mssql-cli.
Save the file on the desired location.
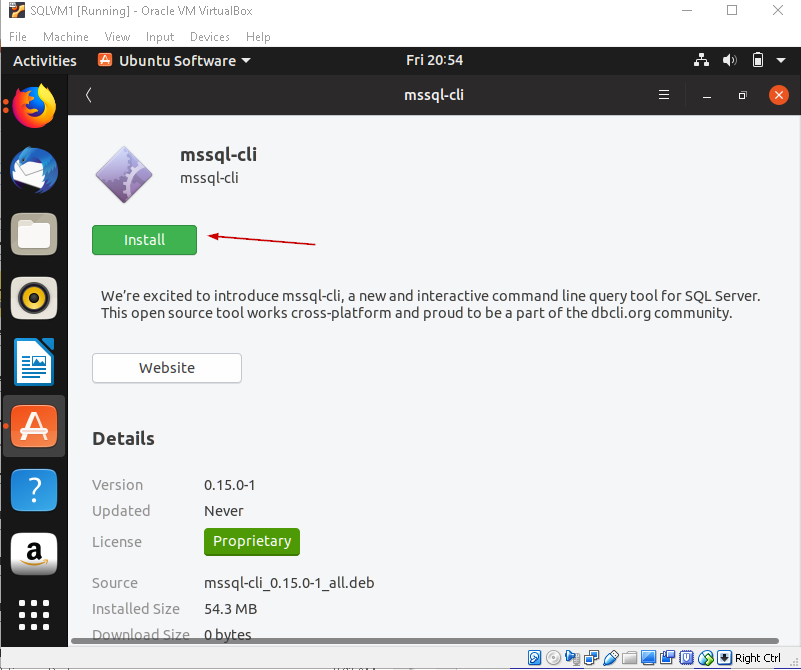
Go the download folder and double click on the file to launch it. It opens the below screen, click on ‘Install’.
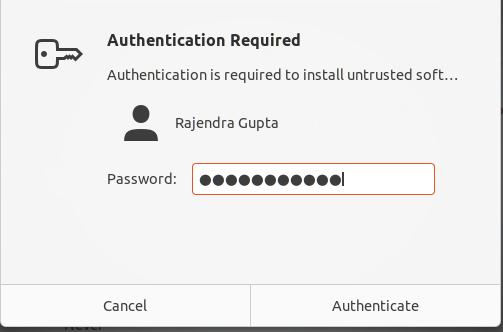
Enter the credentials for the authentication.
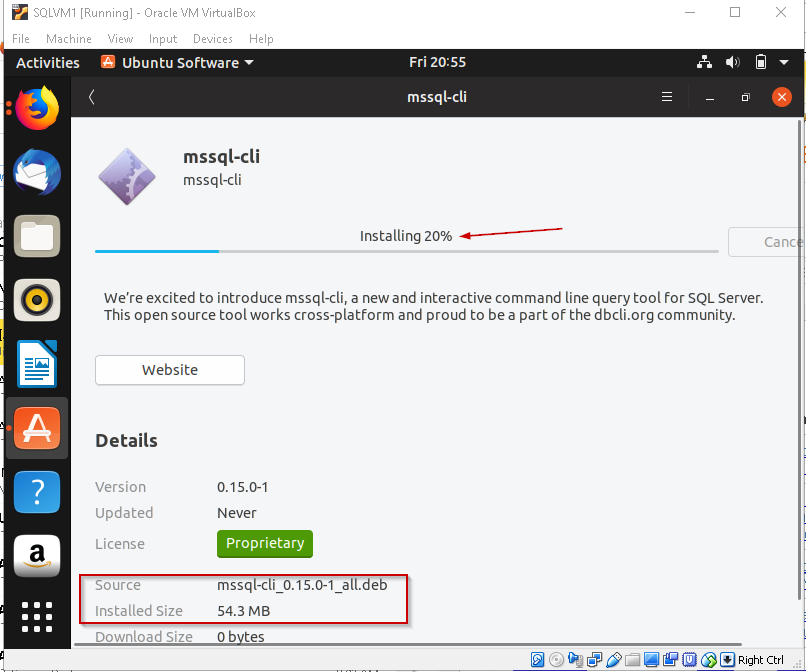
Track the progress of the ‘mssql-cli’ installation.
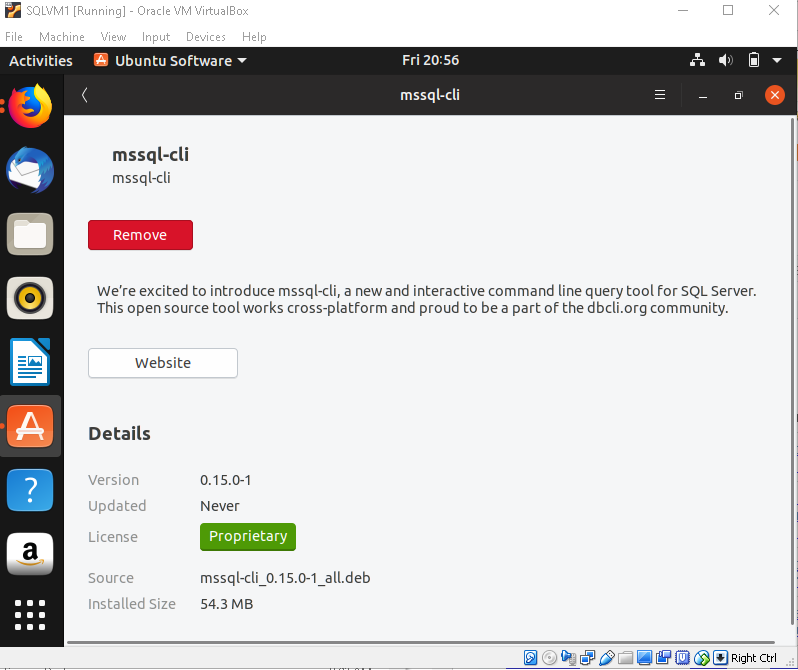
Similar to the Azure Data Studio, we can see that the after product installation we do not get any messages.
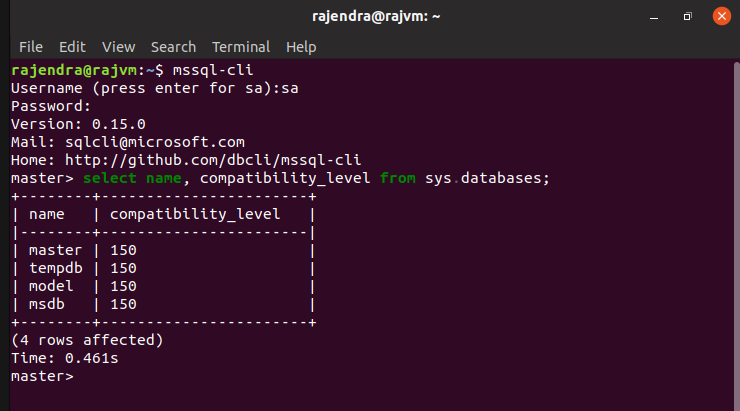
Open terminal inside the virtual machine and type ‘mssql-cli’
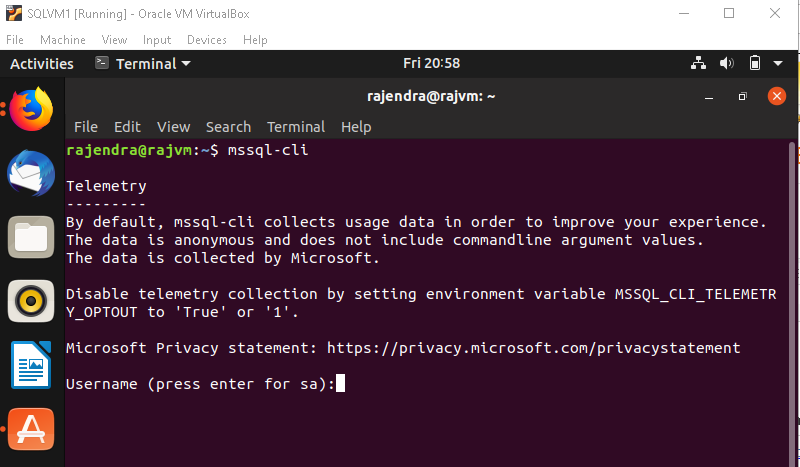
Provide the username and the password. By default, it takes the username ‘sa’.
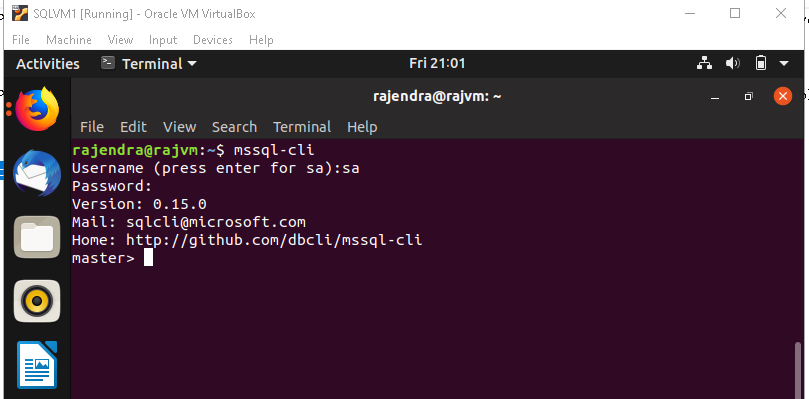
Enter the password and we can see basic details about this tool.
- Version: 0.15.0
- Mail:sqlcli@microsoft.com
- Home: http://github.com/dbcli/mssql-cli
If connected to the SQL instance and by default show prompt for the ‘master’ database.
Master>
You can start writing query interactively here i.e. you get inline suggestions as soon you go forward with writing a query.
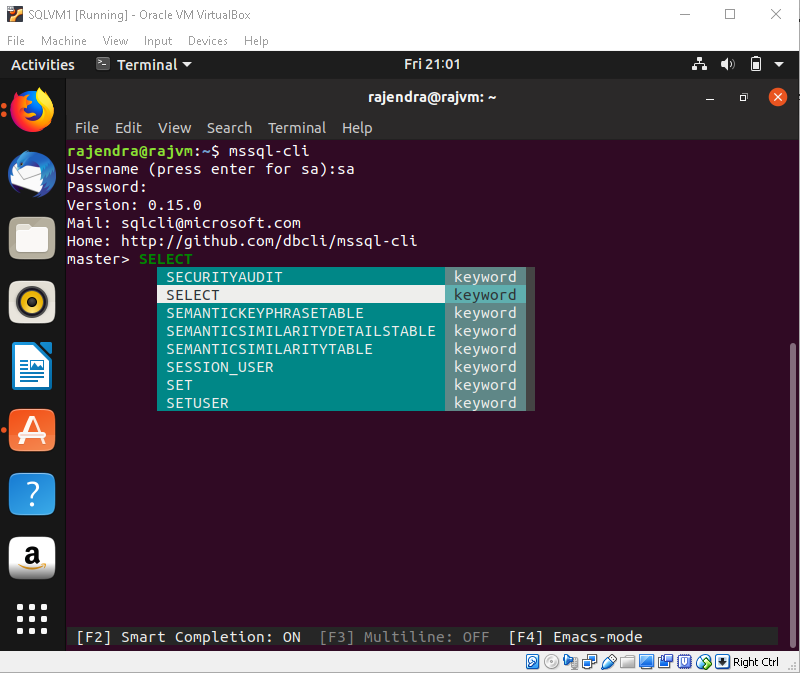
We get query output also in the proper format as compared to the sqlcmd tool.
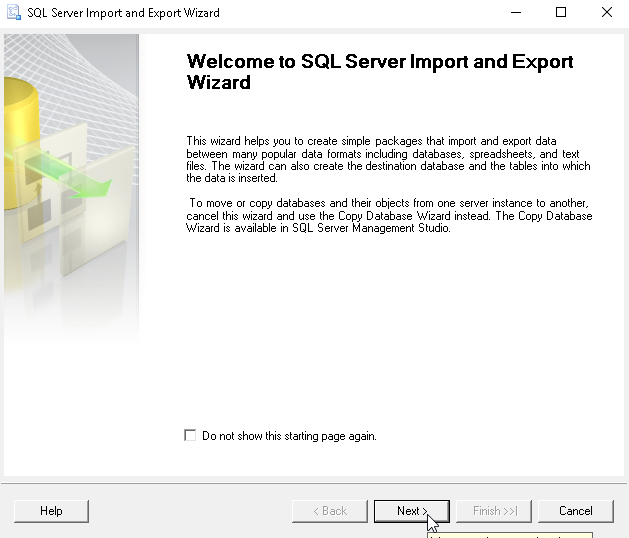
We have explored the cross-platform tools to connect to SQL Server. Now let us export the data from the SQL Server running on windows to SQL Server on Linux using the Import and Export wizard.
Launch the Import and Export wizard as shown here.
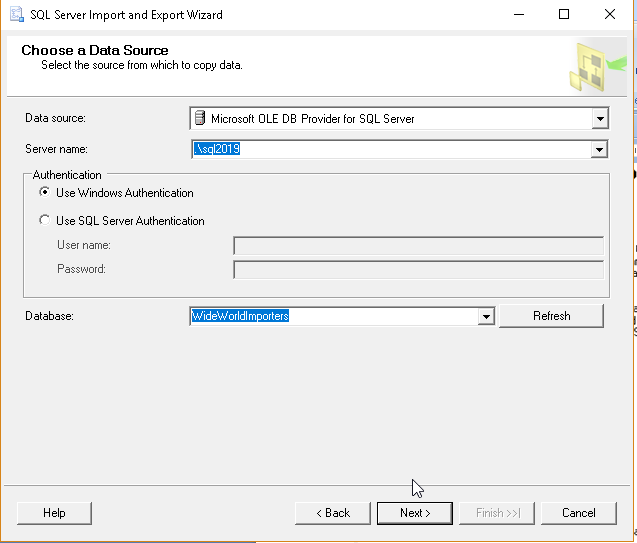
In the next step, choose a data source. For our example, the data source is SQL Server 2019 running on Windows OS and the database WideWorldmporters.
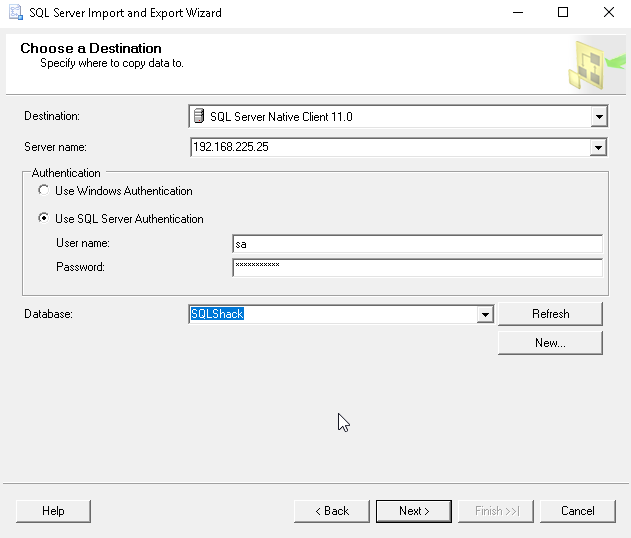
Click on ‘Next’ and in the destination give the SQL Server instance on the Ubuntu which we created in this part.
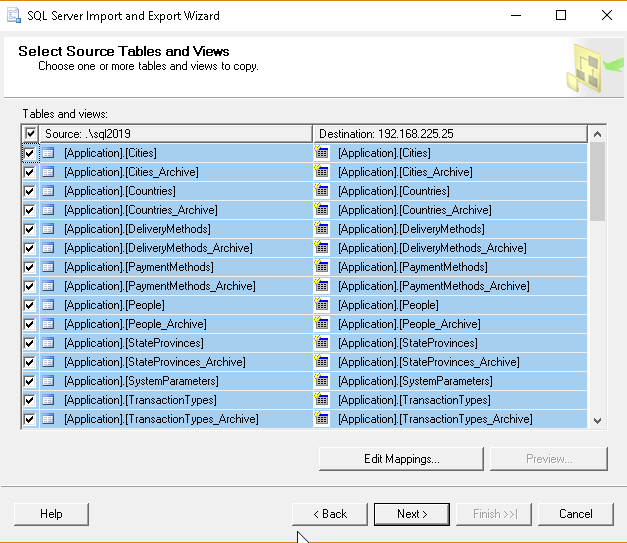
Select the tables and the views, let us select all objects in the list and click Next.
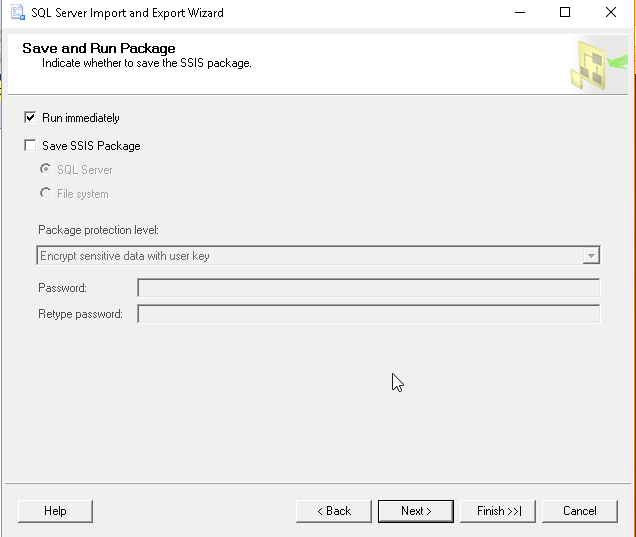
We can either run the package or save it for later work.
Review the actions so far.
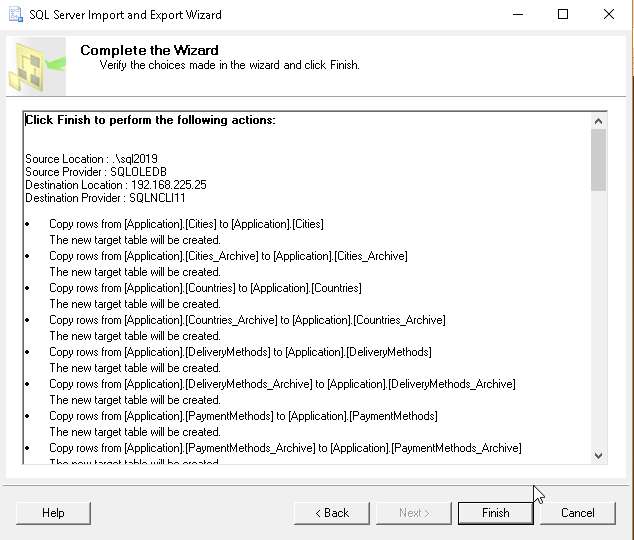
Click on ‘Finish’ to start data export to SQL Server on Ubuntu. You can see the progress of the individual tables export data.
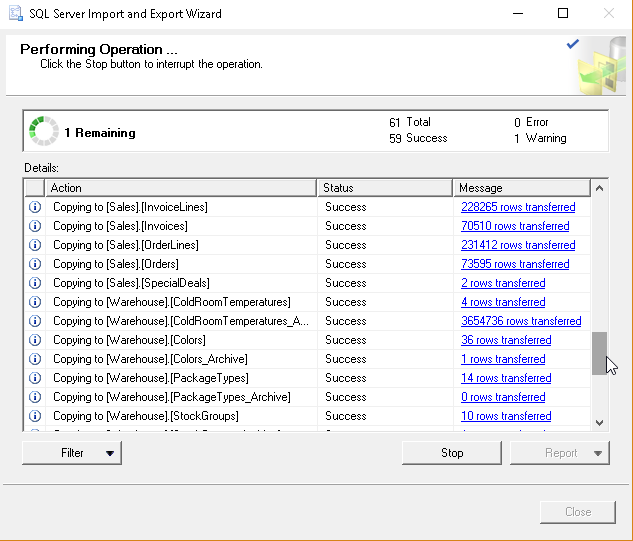
Once completed, we can see the ‘Success’ message along with the number of rows transferred for each table.
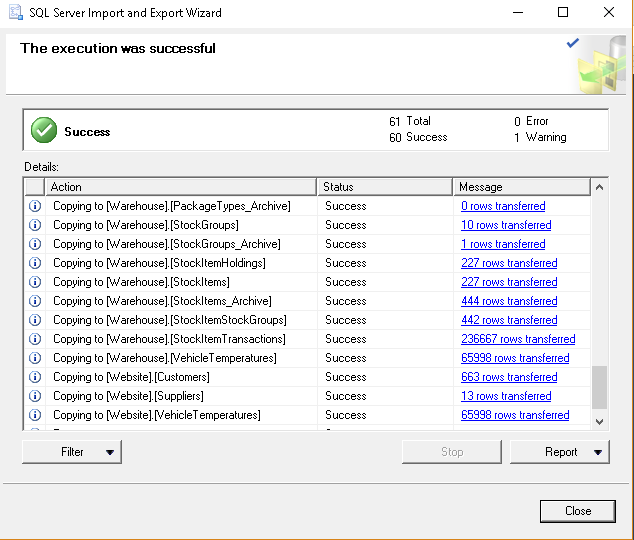
We can see here that we can access the SQL Server on Linux similar to Windows version and data can be transferred easily.
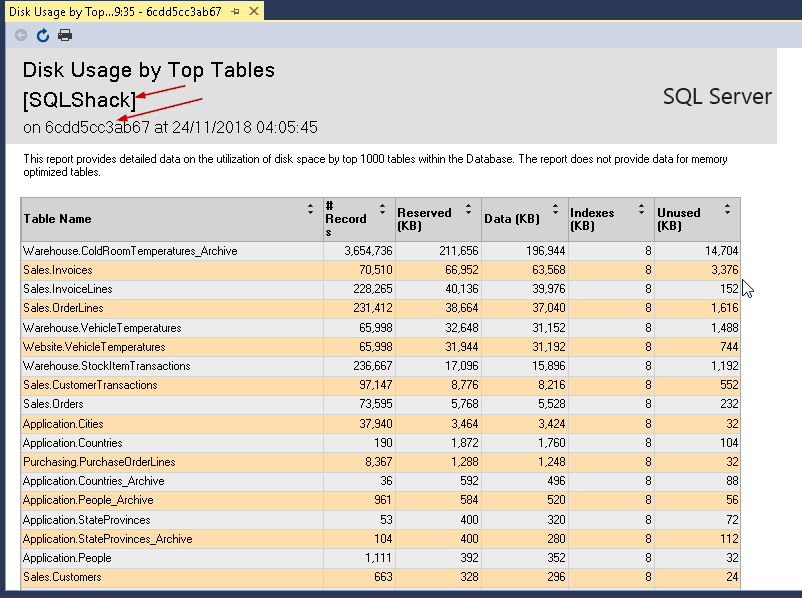
As stated above, SQL Server Management Studio can be used to connect to SQL Server on Linux from outside the Ubuntu operating system and verify the top tables which we imported from the WideWorldmporters database.
Conclusion
In this article, we have installed SQL Server on Ubuntu and explored various tools to connect to SQL Server.
Table of contents

I am the author of the book "DP-300 Administering Relational Database on Microsoft Azure". I published more than 650 technical articles on MSSQLTips, SQLShack, Quest, CodingSight, and SeveralNines.
I am the creator of one of the biggest free online collections of articles on a single topic, with his 50-part series on SQL Server Always On Availability Groups.
Based on my contribution to the SQL Server community, I have been recognized as the prestigious Best Author of the Year continuously in 2019, 2020, and 2021 (2nd Rank) at SQLShack and the MSSQLTIPS champions award in 2020.
Personal Blog: https://www.dbblogger.com
I am always interested in new challenges so if you need consulting help, reach me at rajendra.gupta16@gmail.com
View all posts by Rajendra Gupta
- Understanding PostgreSQL SUBSTRING function - September 21, 2024
- How to install PostgreSQL on Ubuntu - July 13, 2023
- How to use the CROSSTAB function in PostgreSQL - February 17, 2023