

Introduction
In this article, we will demonstrate how to migrate MySQL tables to SQL Server using the SQL Server Migration Assistant (SSMA) and SSIS. We will give a brief introduction to MySQL and create a table. If you do not have any experience in MySQL, this tutorial will teach you your first steps. After that, we will migrate the created table and existing tables. We will also mention common problems when we migrate tables.
Finally, we will migrate data from MySQL to SQL Server using SSIS
Requirements
- SQL Server 2016 (or earlier versions).
- MySQL 5.7 installed
- SQL Server Management Studio (SSMS)
- SSMA 7.3 for MySQL
- Make sure that the SQL Server Agent Service is started
- SSIS and SSDT installed
For SSMA, you need to have the .NET framework installed. In Windows Server, go to Server Manager, and select the Add roles and features:

Run the wizard until the Features section and make sure that the .NET Framework Features are installed:

Getting started
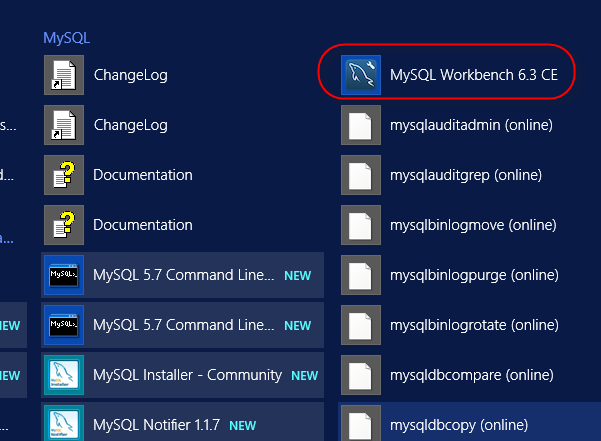
Once MySQL is installed, we will run MySQL Workbench which comes with the installer. This is like the SQL Server Management Studio in MySQL:
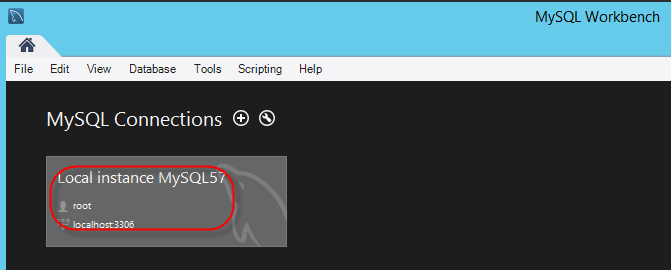
Click on Local Instance MySQL57:
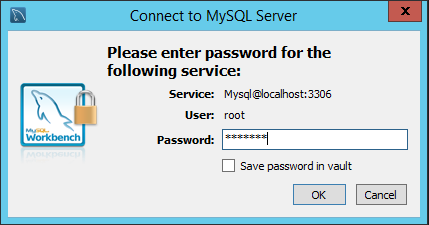
Specify your password. This is created when you install MySQL:
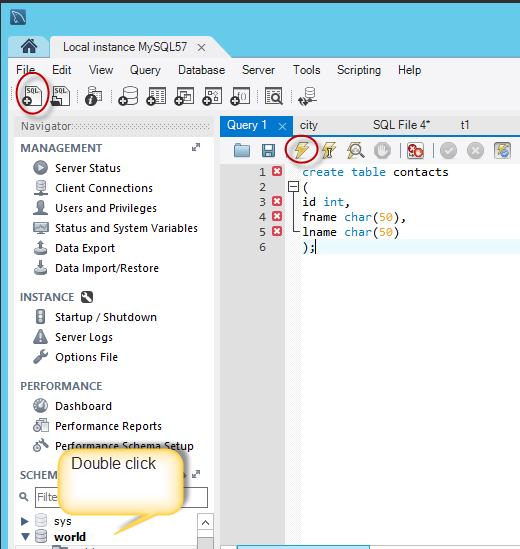
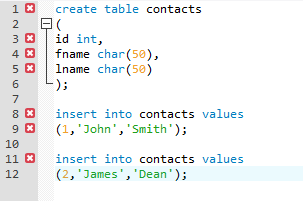
Double click on World database that includes sample data, tables for our tests, to convert it to the default database. It is. Press the SQL icon to create a new query and add the following SQL code to create a new table named Contacts.
|
1 2 3 4 5 6 7 8 |
create table contacts ( id int, fname char(50), lname char(50) ); |
Finally, press the execute icon.
Now, insert data into the new contacts table and execute the code:
|
1 2 3 4 5 6 7 |
insert into contacts values (1,'John','Smith'); insert into contacts values (2,'James','Dean'); |
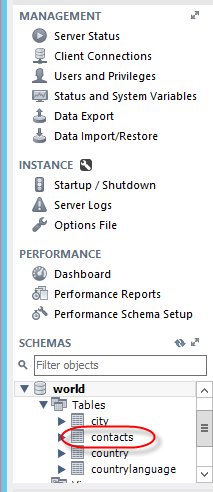
If you refresh the world schema, you will be able to see the new contacts table created:
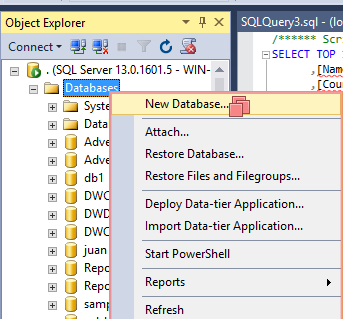
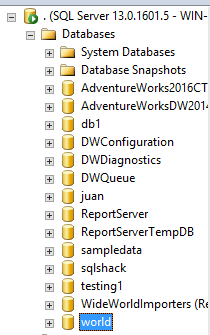
We will create a new database named world in SQL Server. Open the SSMS and right click on databases and select New Database:
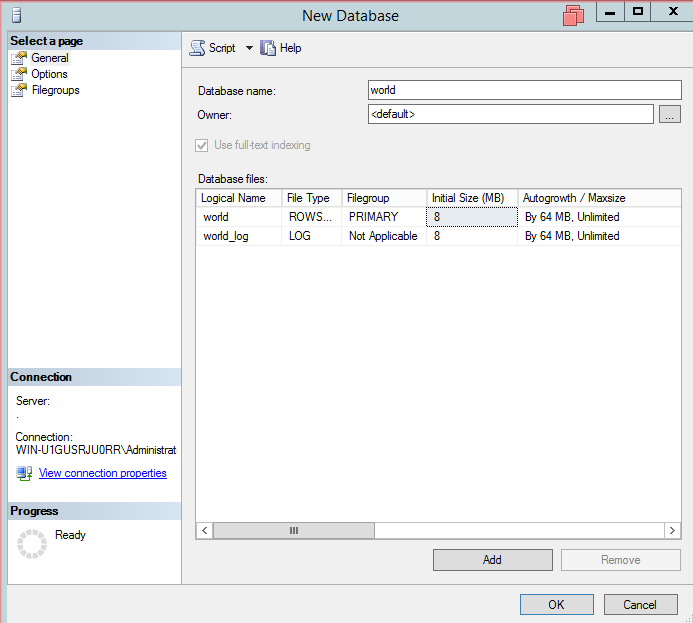
Specify a name for the database:
If you refresh the SSMS, you will be able to see the new database created:
SSMA for MySQL
We have a database in MySQL and we will try to migrate 3 existing tables and the new table named contacts just created in MySQL to SQL Server using the SQL Server Migration Assistant for MySQL, the software that will be used to migrate data.
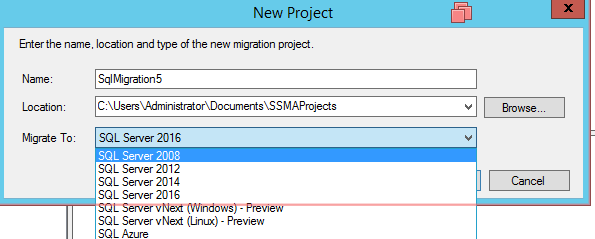
Open the SSMA and select the option New Project:

You can migrate from MySQL to SQL server 2008, 2012, 2014, 2016 and you can even migrate to Azure. This time we will migrate to SQL Server 2016:
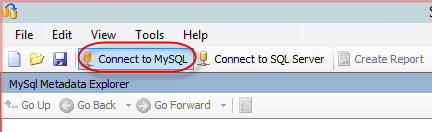
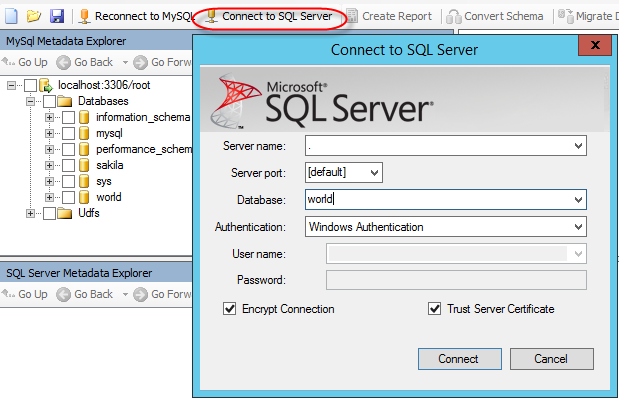
We will connect to MySQL:
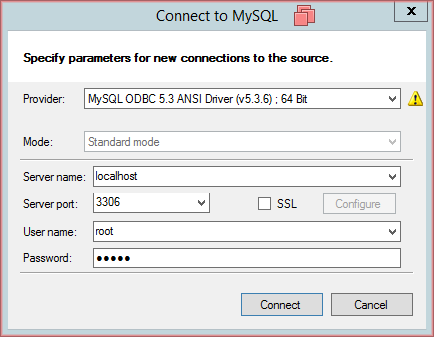
Specify the server name, user name, password, port and press connect:
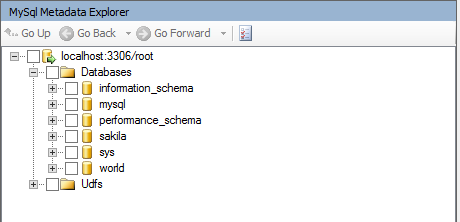
If everything is OK, you will have access to the Databases:
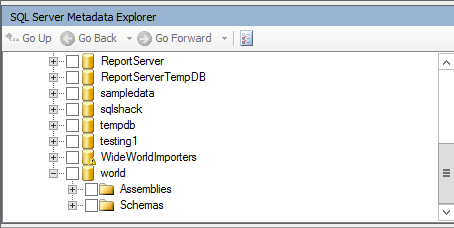
Connect to SQL Server to the world database just created:
If everything is OK, you will be able to see the SQL Server databases:
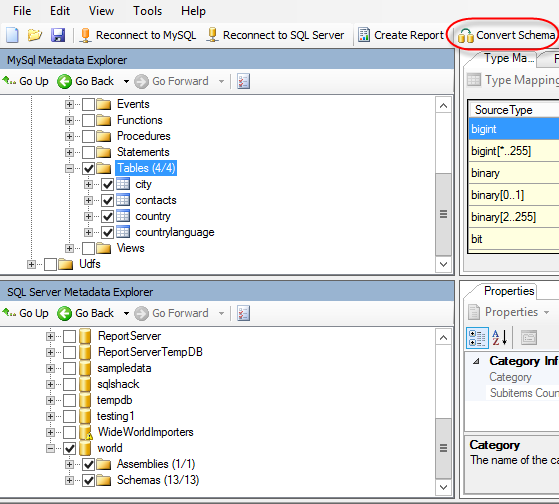
In MySql Metadata Explorer pane, select the tables that you want to export and press the convert schema icon:
Notice that country and countrylanguage tables have a problem:

If you check the output in SSMA, you will notice that some unhandled exceptions occurred:
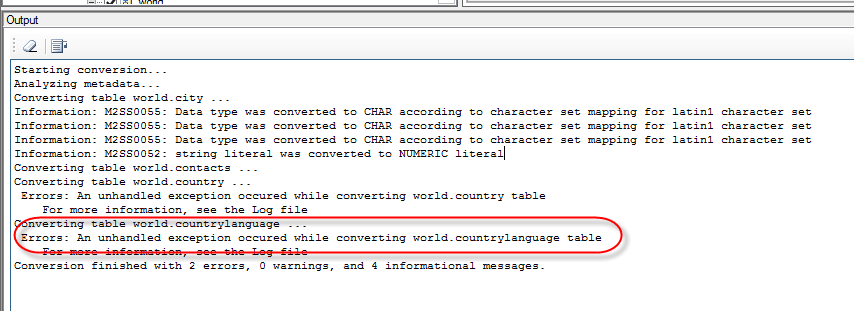
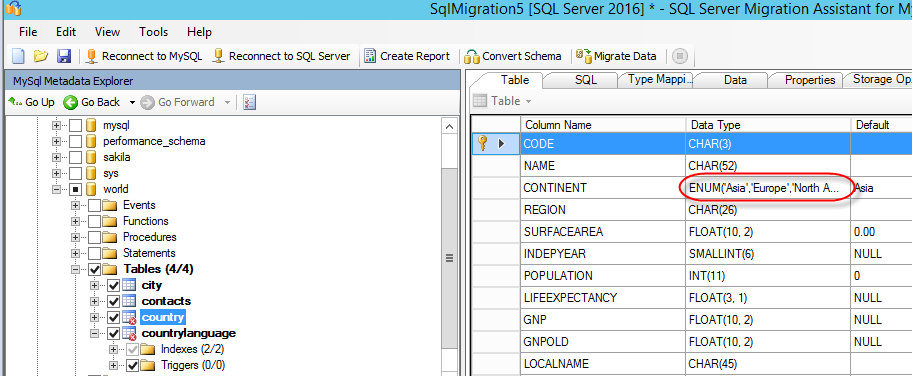
If we take a look to the table country, we will notice that there is a column named continent with the Data Type ENUM. Enum is a string object and is not compatible with SQL Server for migration:
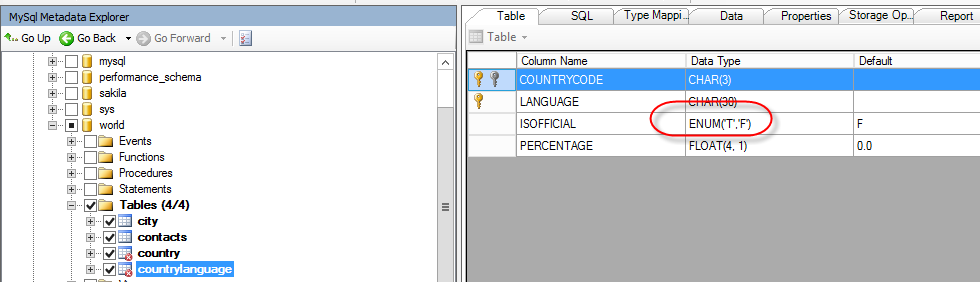
We have a similar problem with the table countrylanguages:
We can solve this problem using SSIS. We will explain later how to do it.
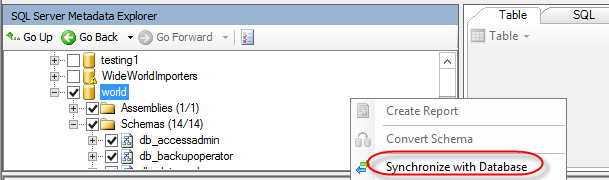
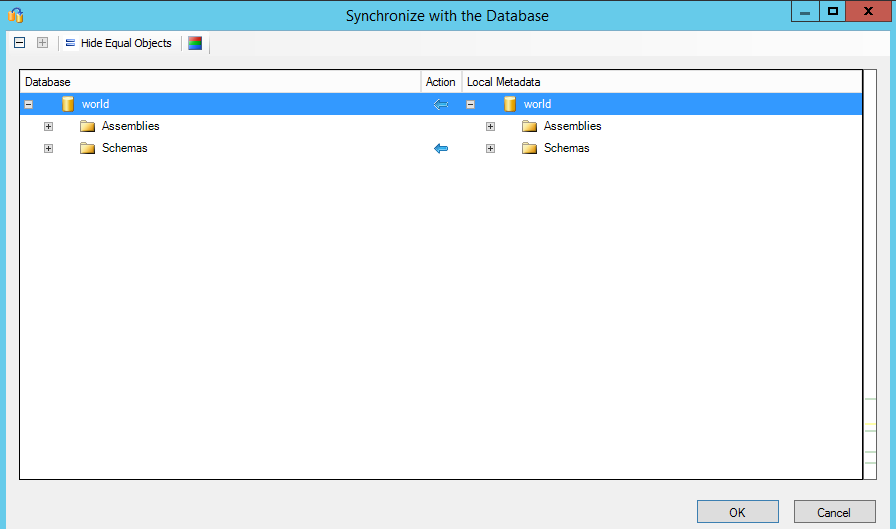
We will migrate just the City and Contacts tables using SSMA. To do that, in SQL Server Metadata, select the Synchronize with database option:
A new windows will be displayed. Press OK:
Finally, select the tables in MySQL metadata, and press the Migrate Data icon:
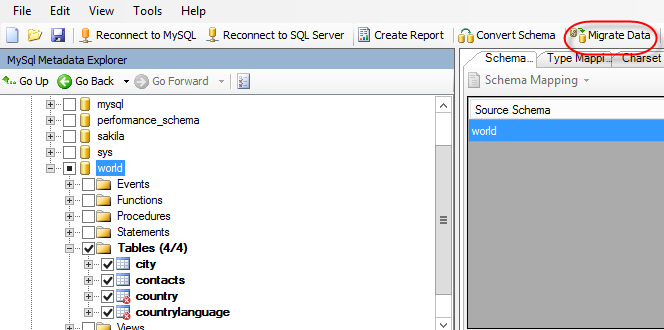
If everything is OK, it will show the total rows and the number of migrated rows. In this example, only the tables city and contacts were successfully migrated. The other 2 tables had some problems with incompatible columns:

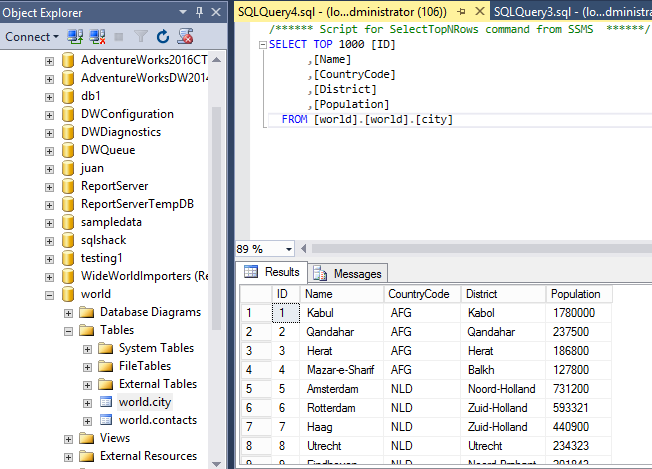
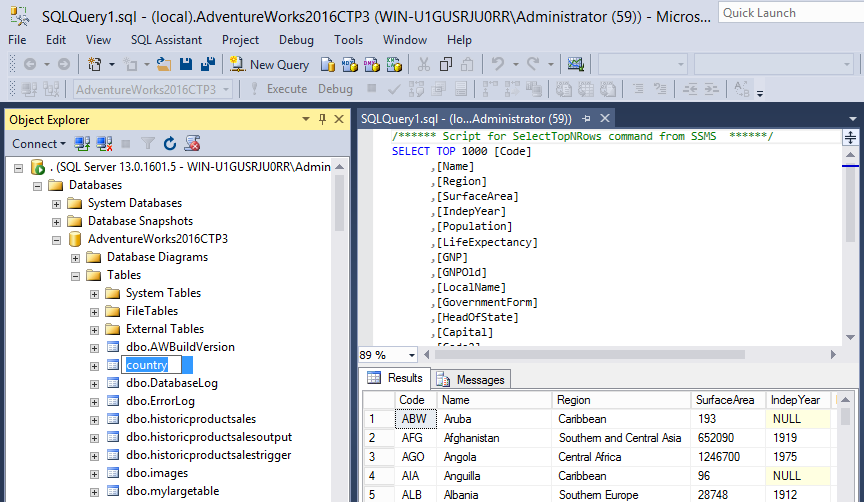
To verify the results, you can open the SSMS, and do a select in the world database to verify that the city table was successfully imported:
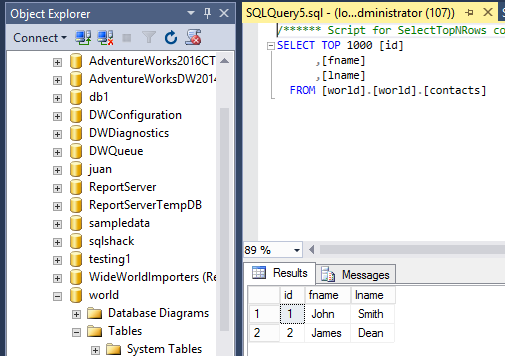
You can also verify that the table contacts was imported successfully:
Importing data from MySQL to SQL Server using SSIS
SSMA had some problems to import data from the country and countrylanguage tables. This time we will try to import the data of these 2 missing tables using SSIS.
In SSDT, go to File>New Project and create a new SQL Server Integration Project.
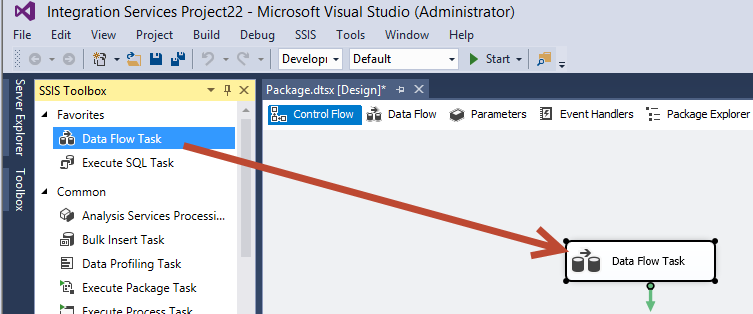
In the SSIS project, drag and drop the Data Flow Task to the design pane:
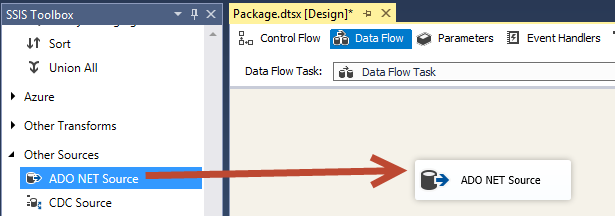
Double click the Data Flow task and in the Data Flow pane, drag and drop the ADO NET Source. This Source will be used to get the MySQL information:
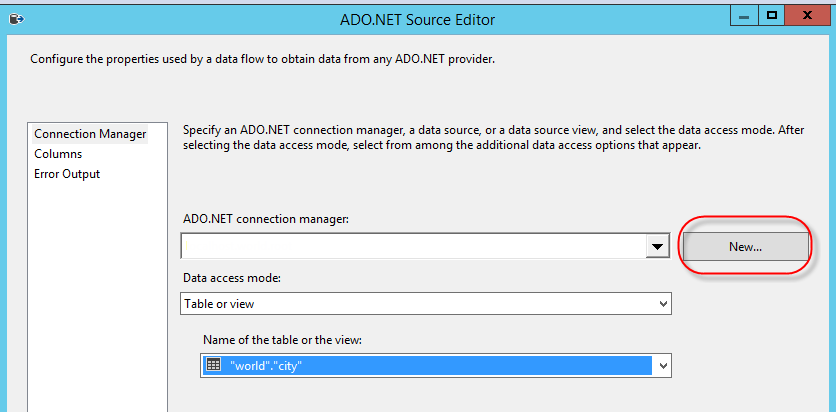
Press New to create a new ADO.NET connection:
In the Configure ADO.NET Connection Manager, press the New button:

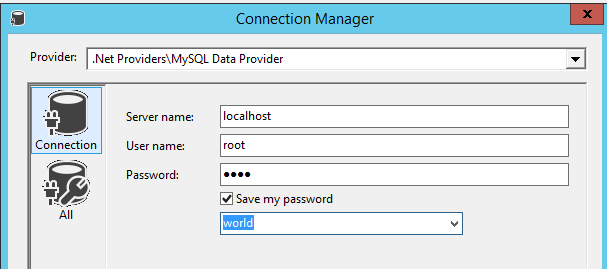
In Provider, select .Net Providers\MySQL Data Provider. This Provider comes with the Database Installer. You can also download the provider using the following link:
In server name, specify the name of the MySQL Server. In this case, the database is in the localhost. In addition, you can use a database user name and password. The root user and password are created when you install MySQL, but you can create other users. The option Save my password must be checked to create the connection. The combobox is used to connect to the database. In this example, the database is world:
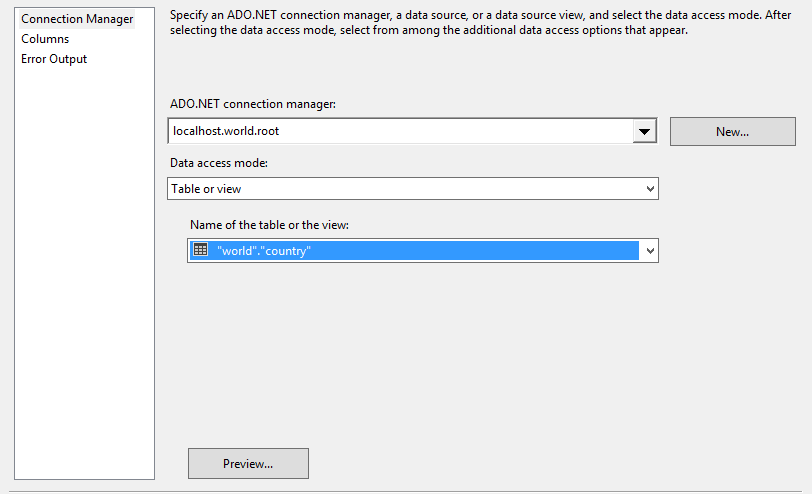
In Data access mode, select Table or view. In name of the table or view, select “world”.”country” and press the Preview button:
You will receive an error similar to the following:
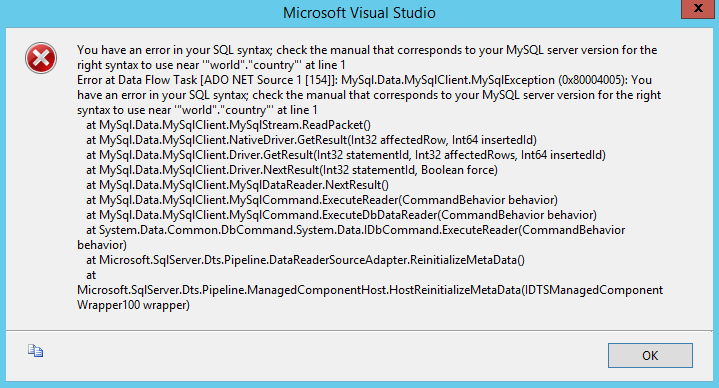
The error is related to the column Continent because the data type is enum and it is a data type that is not compatible with SQL Server. To solve this problem, we will run a query that excludes the Continent column. In Data access mode, select SQL command in the ADO.NET provider.
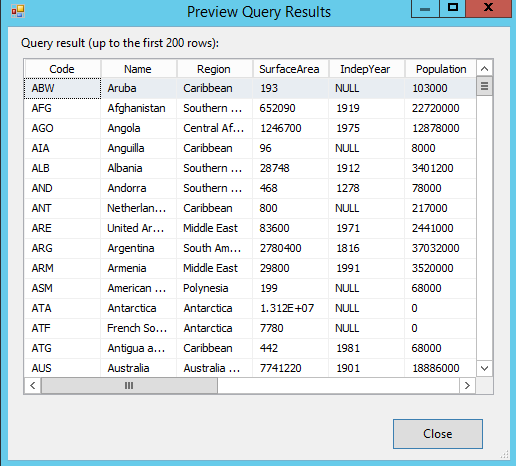
In SQL command text write a query excluding the Continent column and press the Preview button:

When you press Preview, you can now see the data. Now you can export it to SQL Server:
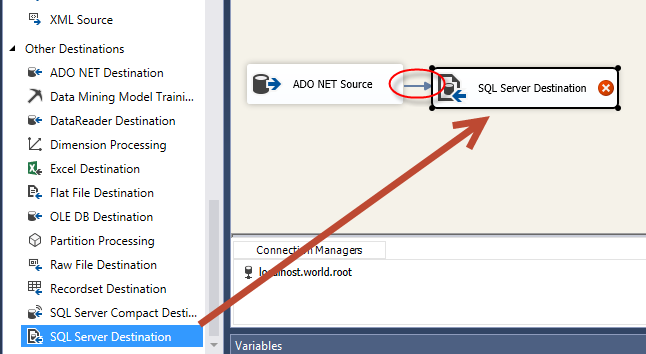
Drag and drop the SQL Server Destination task to the design pane and join the ADO NET Source to SQL Server Destination:
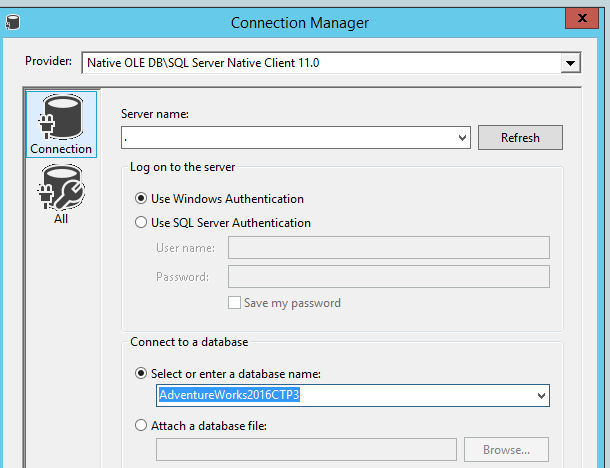
Double click SQL Destination and press the New button to create a new connection:
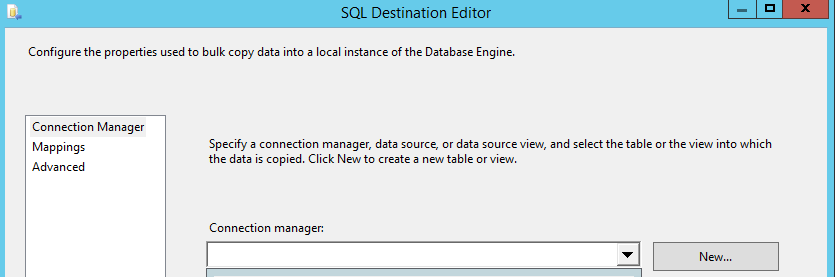
In provider, select the Native OLE DB\SQL Server Native Client. In Server name, specify the SQL Server name. In select or enter a database, select the database where you want to import the table:
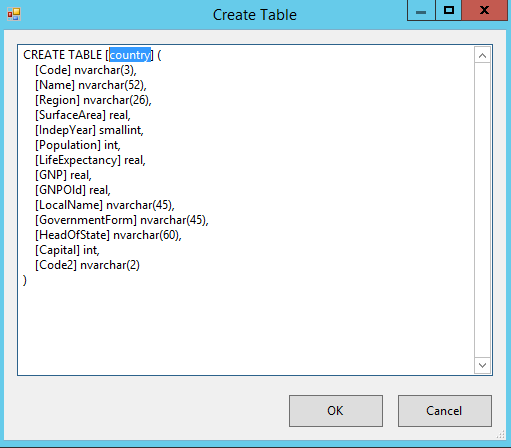
Press the New button to create a new table:

We will rename the table to country. You can also modify the column names here:
Click on the Mappings page to map the source and destination columns:
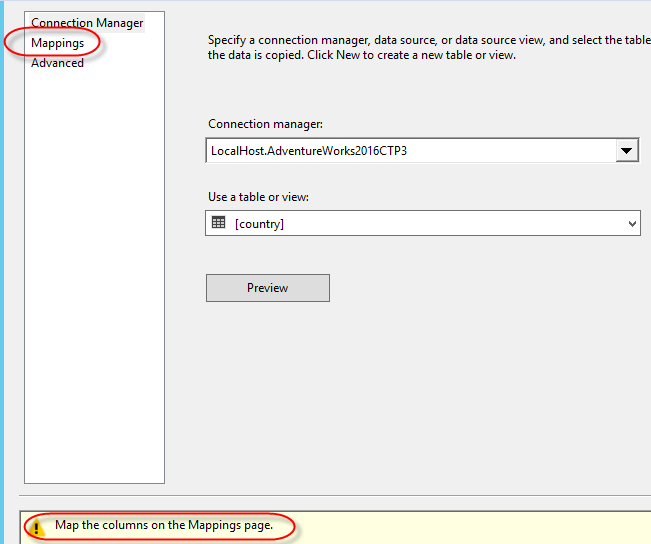
If the source and destination columns have the same names, the matching will be created automatically. Otherwise, you will need to match the columns manually:

Run the start button to start importing data:
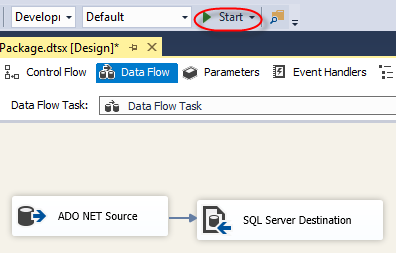
If everything is OK, you can verify the data with SSMS. The new table named Country will be created and the data will be populated successfully.
Conclusions
SSMA is a great tool to import data from different data sources. In this example, we used SSMA for MySQL to export MySQL data to SQL Server, but SSMA works for Oracle, DB2, Access and Sybase as well.
However, as you could see, there are some limitations and there are some scenarios where it is not possible to migrate all the tables. In such cases, you can use SSIS or other tools of your preference to complete the migration of the non-compatible tables.
SSMA is an intuitive tool to export multiple tables from MySQL to SQL Server and it is the first choice to export. If it fails to export some tables, you can use other tools like SSIS.
References
For more information, refer to these links:

He has worked for the government, oil companies, web sites, magazines and universities around the world. Daniel also regularly speaks at SQL Servers conferences and blogs. He writes SQL Server training materials for certification exams.
He also helps with translating SQLShack articles to Spanish
View all posts by Daniel Calbimonte
- PostgreSQL tutorial to create a user - November 12, 2023
- PostgreSQL Tutorial for beginners - April 6, 2023
- PSQL stored procedures overview and examples - February 14, 2023